More Low-Fi S-10 Episodes
Music City Trucks Featured Projects
Music City Trucks Builds
Want more content like this?
Join the PowerNation Email NewsletterEpisode Transcript
(Marc)>> You're watching Powernation!
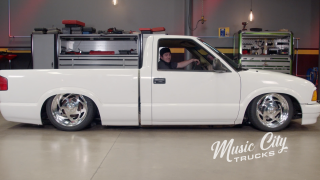
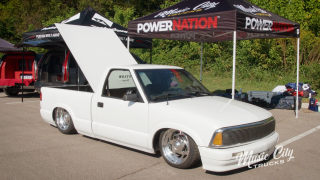
(Eric)>> Today on Music City Trucks we get started on transforming our '95 Chevy S-10 into a real mini truck by tearing it down and making it a half a truck? Plus, we get a crash course on a new machine that'll make finishing this project a breeze. [ Music ]
(Marc)>> This has got to be the most iconic design. [ Music ]
(Eric)>> Welcome to Music City Trucks. I'm Eric Smart.
(Marc)>> And I'm Marc Christ, and in case you didn't know it we've got ourselves and S-10. I think that's good right there. If you didn't see what we did to it last time, we've got some big plans for this truck.
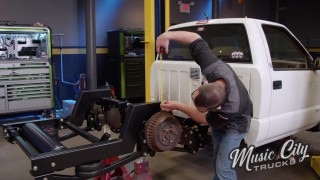
(Eric)>> We're starting with this S-10 in completely stock form, with coil spring independent front suspension and a leaf spring rear. Today we're gonna be ditching the leaf spring setup in favor of a full back half bolt on five link kit. Then we're gonna make room for the new frame by sectioning the bed, allowing the notch and axle to tuck up inside the inner wheel tubs. Then we're gonna box it all in.
(Marc)>> Well obviously we've got our work cut out for our S-10 mini truck here. I'm really looking forward to it because I think this is gonna be a really cool build. It's gonna be a lot of fun to do, and a lot of fun when it's done. But as you can see, the leaf spring setup that's on this truck from the factory is not gonna cut it. Actually, I think this truck's been lowered a little bit in the front and the rear, but back here it already has a flip kit done on it from the factory. The axle sits above the leaf. So, unless you put some blocks in there you're really not gonna get any more out of this. Besides if you do, you'll have to notch the frame. Static drop's probably not the best way to go on this. Air suspension is gonna be an obvious choice, and in order to get where we need to be we're gonna have to make some major changes back here. Let me show you what I'm talking about. You folks probably remember Ben Osborne with Buddy's Garage. He was our mini truck expert when we got ready to launch this project. Well, he had everything that you see here on the floor. Now keep in mind, he's been in business since 1995. So, he's got some new-old stock stuff laying around from way back in the day, and that's exactly what this is. This kit's not available anymore. It is a complete bolt in back half five link suspension for our S-10. It comes with everything you need to get it installed. You just have to cut the frame off. That's the tricky part, but after that when you go to reinstall all of this it's actually pretty simple. This is more of a d-i-y kit. You could piece all of these things together on your own with a notch. Of course you'll have to piece that in and weld it in, where this one bolts in. Same thing with the control arms, and the bag mounts, and things like that. So this is all complete. Gonna go right in the truck nice and easy. Now when we get to the front that's gonna be a little more in depth. It's gonna be a little more techy, but we'll get to that later on. For now, we just want to focus on this. Very excited about getting this installed, but before we can get any of this on the truck we need to do some tear down.
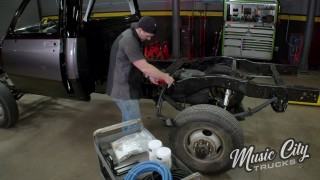
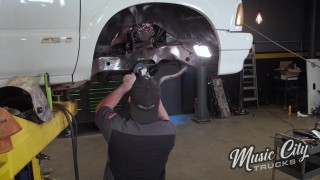
(Eric)>> We're gonna start with getting the bed unbolted so we can pull that off. Then we'll move on to the fuel system and the rear suspension so that we can get all of that out of the way. [ Music ] Now that we got our bed unbolted from the truck we're gonna hook up our bed lift to the crane and pull this thing the easy way.
(Marc)>> This poor truck doesn't know what it's in for.
(Eric)>> No, I don't think it does. Now that the bed's off of there it'll be a lot easier to get this fuel tank out of the way. With the truck back in the air we can now pull our drive shaft and fuel tank.
(Marc)>> Stinky, let's get this thing outside! [ air driver humming ]
(Eric)>> Last but not least, we remove the rear end and all the suspension components.
(Marc)>> Hey Gabby, how's it going?
(Gabby)>> How you doing Marc.
(Marc)>> You folks probably remember Gabby from Forney, and she always brings us cool tools, and I can see here you have a really compact new machine here. What is this thing?
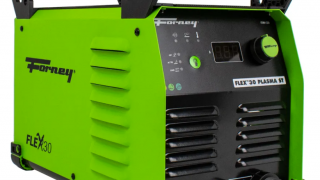
(Gabby)>> This is our Flex-30. This is actually Forney's first machine that we've put a plasma cutter and a welder together. It's a stick/tig/plasma machine. It's a 30-amp plasma, and 160-amp stick/tig machine. It will cut up to three-eighths as well as weld up to three-eighths.
(Marc)>> That's really cool!
(Gabby)>> Another cool feature on this machine is it is dual voltage. So, you can run it on 240 or 120 volts.
(Marc)>> It just so happens we've got some cutting that needs to be done.
(Gabby)>> Let's go ahead and do it.
(Marc)>> Eric I'd like for you to meet Gabby. Gabby this is Eric.
(Eric)>> Nice to meet you.
(Marc)>> And I trust that the truck's in good hands.
(Eric)>> So what do we got here?
(Gabby)>> This is our Forney Flex-30. We're just gonna worry about the plasma right now. Are we just gonna cut a couple of brackets or something?
(Eric)>> No, this whole frame right here, that's got to get on the ground.
(Gabby)>> Alright, let's do it. Have you ever plasma cut before?
(Eric)>> It's been quite a while.
(Gabby)>> Cool, I'll teach you how to use ours. You have a safety here. So, you have to be underneath that safety, and then you have this little ring. That's just a guide so it'll help you go along, but with this plasma you are going to make contact with the tip. So we'll start the arc off the side and then we'll run it over here. [ plasma torch hissing ]
(Gabby)>> Think you can handle it?
(Eric)>> Oh yeah!
(Gabby)>> Here you go. Are you sure about this?
(Eric)>> No! [ plasma torch hissing ] [ Music ]
(Marc)>> So the flex part of this means that it does other functions. Can you maybe show us some of those as well?
(Gabby)>> You don't want me to cut another frame since that's all I ever do here?
(Marc)>> I think we've cut enough on that one.
(Eric)>> Coming up next, Marc brushes up with a set of skills that he hasn't used in years.
(Marc)>> It's been a while since I've stick welded.
(Gabby)>> How long?
(Marc)>> Probably 20 years.
(Marc)>> Gabby, we saw what this machine can do on the plasma cutting setting, which it does really well on its own, but let's talk about some of the other features.
(Gabby)>> So we'll do a little bit of stick and tig welding. I'll go ahead and set the machine up for stick to start with. So, we still have our plasma torch hooked up, which is fine. We'll go ahead and turn the machine on. We don't have to remove the plasma, but we'll go ahead and remove its ground, and we'll put this to the negative. Then we'll go ahead and tack our electrode holder here and we'll plug it into the positive side. Then on our selector switch here we're gonna go to stick. So it's gonna illuminate next to stick, and let's weld at 95, 96 amps. That'll work for us. We're not welding in anything fancy, but I figure we could go ahead and use this piece just to show you what it can do.
(Marc)>> It's been a while since I've stick welded.
(Gabby)>> How long?
(Marc)>> Probably 20 years.
(Gabby)>> Almost older than me.
(Marc)>> I walked right into that.
(Gabby)>> We'll reteach you then. We're using our 70-14. This is a contact rod. So you will be able to run it really close or be able to touch the material with it. So, you don't have to have any kind of stick out. I'll run this for you and then I'll let you run the other side.
(Marc)>> I can hear my dad saying, scratch it! There you go!
(Gabby)>> That pipe's a little dirty. So it doesn't want to start right away.
(Marc)>> That's beautiful! [ welder crackling ]
(Marc)>> Wow!
(Gabby)>> So you keep that rod right in there and then just give it a tiny bit of motion just to pull it between those two pieces. Then you can come in here and just give it a little bang and go ahead and scrape that flux off the top, and then you have a nice, clean weld right there on the bottom. Once we got through that grease after that arc finally started it burned right through that.
(Marc)>> That looks nicer than it should for a stick weld, especially on that dirty material. I've got to do it!
(Gabby)>> 70-14 lays in really nice.
(Marc)>> I'm a lefty. So, this is perfect. Here we go. It's already wanting to light up!
(Gabby)>> And you can even put a little bit less motion in it too. There you go! [ welder crackling ]
(Gabby)>> So stick isn't the cleanest welding process, but it does come in handy if you have dirty, greasy material. It burns through that really nice, and you don't have to do a whole lot of clean up to start with.
(Marc)>> Save some time! How'd I do?
(Gabby)>> Not bad, looks good! The angle could be down just a little bit more, but that's when you were starting with those big movements. Once you narrowed that down it went in a little better.
(Marc)>> I'm a lot more confident with that. Where I normally wouldn't pick up a stick welder, I might actually use it now.
(Gabby)>> This machine makes stick welding really easy.
(Marc)>> I'm actually impressed.
(Gabby)>> Well that's the stick feature. So, let's go ahead and we'll move on to tig, and we'll weld a little bit of this exhaust. So, gas on, always remember, gas on. It's easy to forget. [ Music ]
(Marc)>> That looks nice.
(Gabby)>> The hard part with welding without a pedal and all that good jazz is that once you get to the end of the weld you do have to break your arc, which also pulls your gas away. So, your gas coverage isn't as pretty but it does still work when you need it.
(Marc)>> Let's give it a try. That's actually really easy.
(Gabby)>> It starts off really nice. Move in a little closer.
(Marc)>> I pulled it away too fast. It started off a little rough, but I got it right there at the end. That's how I burn my gloves all the time. I'm really happy with that.
(Gabby)>> It's a little harder to get the hang of because you don't have complete control of the output, but it works just as well.
(Marc)>> So if you've got all three of those functions that the machine does really well into such a small design that's really all you can ask for.
(Gabby)>> This machine is super lightweight, super easy to handle, move around, take with ya. It'd be a great machine to offer to an offroad person. They can go ahead and hook that up, stick weld or whatever they need to do, cut something off.
(Marc)>> It kinda does a little bit of everything. You're gonna leave it here, right?
(Gabby)>> I guess it can be your new toy.
(Marc)>> I'll play with it, and you're gonna leave this too, right?
(Gabby)>> Yes, you get some new helmets as well.
(Marc)>> Perfect, let's get you out of here. Thank you again! Always a pleasure.
(Gabby)>> Thank you!
(Marc)>> Well we've got ourselves a mini truck to build.
(Eric)>> Next up, we finish our tear down in the rear. Then reassemble our frame.
(Eric)>> So now that we've got half of our frame cut off we've got to put it back together, but before we can do that there's some parts that still have to get removed, and those parts were riveted in from the factory. So we've got to get those rivets out to be able to put our new stuff in. Now there's a lot of different ways to remove rivets, but we're gonna show you two ways that we like to use around here to try and make it just a little bit easier. Let's get to it. All you're gonna do here is take this cutoff wheel and grind that head right off of there. [ grinder buzzing ]
(Eric)>> Once you've got your head ground off you're gonna stick your punch right there, and then just give it a few good hits. So our next method we're gonna use a die grinder to cut an "X" into the head of this rivet, and then we're gonna take our air hammer and hammer it off of there that way. [ grinder buzzing ] [ air hammer vibrating ] [ Music ]
(Eric)>> So now that we've got the frame stripped down with everything removed, before we install our new kit we're gonna go ahead and clean this all off. That way we can put fresh corrosion protection down to make sure we're not gonna get any rust on the original frame rails and the pieces that we're adding on. [ grinder buzzing ] [ Music ]
(Eric)>> Well now that the frame is nice and clean and I'm sufficiently dirty we're gonna go ahead and spray some undercoating on there before we get those frame members on. [ aerosol can hissing ]
(Eric)>> It's important to make sure to do this so you don't have any rust form on the original frame underneath the new pieces. So before we roll this axle back underneath our truck we need to get it cleaned up some, and there's also some stuff that needs to come off of it because we're definitely not reusing these leaf springs. [ drill humming ] [ metal clanging ] [ Music ]
(Eric)>> In order to get this axle ready to go back under the truck later we're spraying it down with a liberal amount of degreaser, followed by some serious pressure washing. [ Music ] So, with the frame cleaned up and recoated, before we can put those new frame members on we have to drill out a couple of holes so that we can get a few bolts in and line everything else up to drill the rest of the holes. This step bit makes quick work of boring out these holes. [ drill humming ] [ Music ]
(Eric)>> Now that we have our alignment holes done Marc and I are lining up the new frame rail that we got from Ben. [ hammer banging ]
(Eric)>> That's the one right there. With a little persuasion the frame rail is on. So we can snug it down and drill the rest of our holes. We're using C-clamps to make sure the rail can't shift while we do the rest of our drilling. [ drill humming ] [ Music ] [ drill humming ]
(Eric)>> With everything drilled out it's time to bolt this together permanently. [ Music ] [ ratchet clicking ] [ Music ]
(Eric)>> This might look like overkill, but you want to make sure this will handle all the motion from our air suspension as well as anything the road might throw at it. [ Music ] Now that both of the frame rails are bolted down we can move on to installing the rest of this kit. [ Music ] And with that the truck has a full frame again. Coming up... You know what an S-10 driver's favorite kind of music is? Rocks! ...we sling some sparks to get this bed prepped for our new notched frame.
(Eric)>> Well now that we've got our frame reassembled this thing's ready for the axle to get back underneath it.
(Marc)>> Before we can get this axle installed there's a couple of things we need to get installed onto it first. Eric did a really good job getting it all cleaned up, leaves are out of the way. Now we just need to get these brackets installed. This is actually gonna bolt where the leaf spring originally bolted. It's got the center ring pin here, and it's gonna install using the original U-bolts, which is really convenient. Then the control arms and shocks will actually bolt to these brackets. So just need to get these bolted in and we'll get this into the truck. [ Music ] [ drill humming ]
(Marc)>> Dare I say it's ready to go in the truck.
(Eric)>> There we go! [ Music ]
(Marc)>> Now it seems a little weird but because of the style of this suspension the bags are actually gonna go back here. Just need to compress them a little bit and get them in there. [ drill humming ]
(Eric)>> Looking pretty good! I think it's time to see how low she can go.
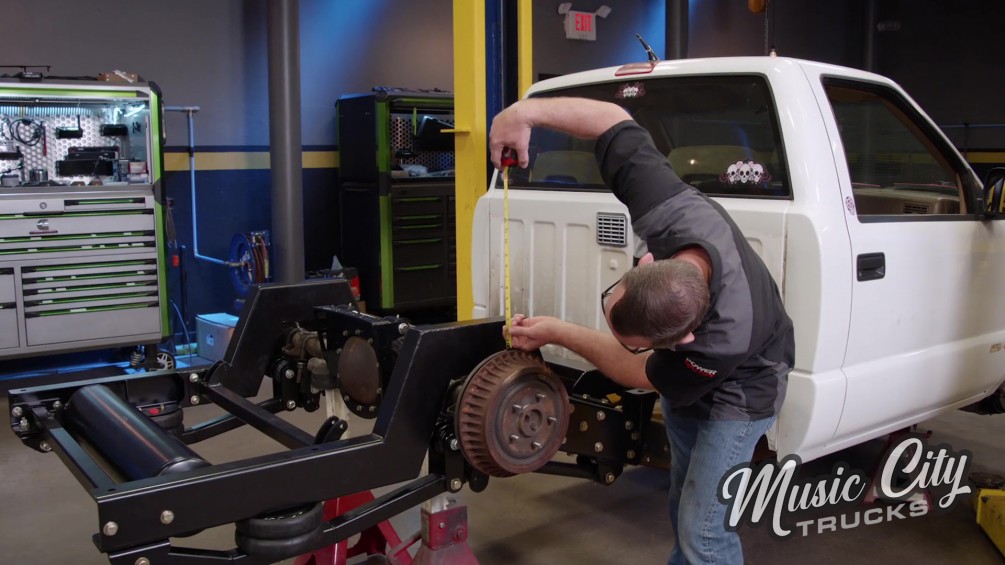
(Marc)>> Go on up with it and I'll get the jack stands under there. That is at two inches now. Well, we made some adjustments and now we've got this thing at full compression, and it looks pretty wild sitting in here. When it was at full droop there was sixteen and a quarter inches from the top of the backing plate to the top of the frame rail. So that's fourteen and a quarter inches of travel.
(Eric)>> That's way more than we're ever gonna actually use with this thing because that frame's gonna hit the ground far before we get to here. Also we'd have some clearance issues with the drive shaft, and that's a lot more work that we're not getting into with this one. But we're gonna be able to do exactly what we want, being able to lay that frame on the ground.
(Marc)>> Now we do need to start working on getting the fuel system back in. It needs shocks and things like that, but we'll get to all that later. For now, I want to try to get this bed fit. I think it's gonna need some adjustments. [ saw buzzing ] [ Music ]
(Eric)>> Don't even need to.
(Marc)>> Hey, can you see me through there. Oh!
(Eric)>> I'd say that fits pretty good now.
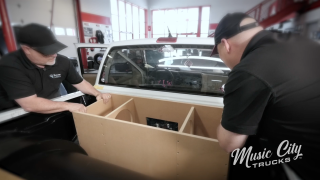
(Marc)>> We've got to figure out what we're gonna do about filling this all in. We've got to accomplish two things. One, we've got to have enough room for all of our suspension, frame rails, and wheels and tires to fit. And then also we've got to seal it off against weather because we're gonna be putting our sub box and all of our air ride controls back here. We could just make one big sheet that goes all the way across, but that might be a little cumbersome. I think we've got a better idea.
(Eric)>> And that better idea is that we got these wheel tubs from Summit. They are universal. They will fit anything, but we do have a pretty small truck with a pretty small bed. So, we are gonna have to trim a little bit to make them fit right, but we think we can handle that.
(Marc)>> 34 and a half is our number. [ metal scraping ]
(Eric)>> Close this corner up. [ Music ] The worst part of this is definitely getting it started. [ hammer tapping metal ] [ Music ]
(Marc)>> Well there's a lot of hacking going on here. I got this outer wheel tub all cut out. Drilled out all the spot welds. Did it the hard way. I think in hindsight I'd probably just cut that whole lip off. Probably what I'll do on the other side.
(Eric)>> You about ready to get this thing test fitted?
(Marc)>> Now that's a wheel tub. Let's try it. [ Music ]
(Eric)>> We're definitely gonna have to cut a little bit out back here.
(Marc)>> We'll have to notch it up here, but a little trimming and we'll be in business.
(Eric)>> And I think we're in pretty good shape now.
(Marc)>> That's gonna look nice. I'll move on to that other side. Look at that!
(Eric)>> Get it tacked in, throw some sealer on there, and call it a day.
(Marc)>> Little more bed liner. Our mini truck's coming along!
(Eric)>> We're not quite done yet though.
(Marc)>> Still got the front to do. We'll do that next time.
Show Full Transcript
(Eric)>> Today on Music City Trucks we get started on transforming our '95 Chevy S-10 into a real mini truck by tearing it down and making it a half a truck? Plus, we get a crash course on a new machine that'll make finishing this project a breeze. [ Music ]
(Marc)>> This has got to be the most iconic design. [ Music ]
(Eric)>> Welcome to Music City Trucks. I'm Eric Smart.
(Marc)>> And I'm Marc Christ, and in case you didn't know it we've got ourselves and S-10. I think that's good right there. If you didn't see what we did to it last time, we've got some big plans for this truck.
(Eric)>> We're starting with this S-10 in completely stock form, with coil spring independent front suspension and a leaf spring rear. Today we're gonna be ditching the leaf spring setup in favor of a full back half bolt on five link kit. Then we're gonna make room for the new frame by sectioning the bed, allowing the notch and axle to tuck up inside the inner wheel tubs. Then we're gonna box it all in.
(Marc)>> Well obviously we've got our work cut out for our S-10 mini truck here. I'm really looking forward to it because I think this is gonna be a really cool build. It's gonna be a lot of fun to do, and a lot of fun when it's done. But as you can see, the leaf spring setup that's on this truck from the factory is not gonna cut it. Actually, I think this truck's been lowered a little bit in the front and the rear, but back here it already has a flip kit done on it from the factory. The axle sits above the leaf. So, unless you put some blocks in there you're really not gonna get any more out of this. Besides if you do, you'll have to notch the frame. Static drop's probably not the best way to go on this. Air suspension is gonna be an obvious choice, and in order to get where we need to be we're gonna have to make some major changes back here. Let me show you what I'm talking about. You folks probably remember Ben Osborne with Buddy's Garage. He was our mini truck expert when we got ready to launch this project. Well, he had everything that you see here on the floor. Now keep in mind, he's been in business since 1995. So, he's got some new-old stock stuff laying around from way back in the day, and that's exactly what this is. This kit's not available anymore. It is a complete bolt in back half five link suspension for our S-10. It comes with everything you need to get it installed. You just have to cut the frame off. That's the tricky part, but after that when you go to reinstall all of this it's actually pretty simple. This is more of a d-i-y kit. You could piece all of these things together on your own with a notch. Of course you'll have to piece that in and weld it in, where this one bolts in. Same thing with the control arms, and the bag mounts, and things like that. So this is all complete. Gonna go right in the truck nice and easy. Now when we get to the front that's gonna be a little more in depth. It's gonna be a little more techy, but we'll get to that later on. For now, we just want to focus on this. Very excited about getting this installed, but before we can get any of this on the truck we need to do some tear down.
(Eric)>> We're gonna start with getting the bed unbolted so we can pull that off. Then we'll move on to the fuel system and the rear suspension so that we can get all of that out of the way. [ Music ] Now that we got our bed unbolted from the truck we're gonna hook up our bed lift to the crane and pull this thing the easy way.
(Marc)>> This poor truck doesn't know what it's in for.
(Eric)>> No, I don't think it does. Now that the bed's off of there it'll be a lot easier to get this fuel tank out of the way. With the truck back in the air we can now pull our drive shaft and fuel tank.
(Marc)>> Stinky, let's get this thing outside! [ air driver humming ]
(Eric)>> Last but not least, we remove the rear end and all the suspension components.
(Marc)>> Hey Gabby, how's it going?
(Gabby)>> How you doing Marc.
(Marc)>> You folks probably remember Gabby from Forney, and she always brings us cool tools, and I can see here you have a really compact new machine here. What is this thing?
(Gabby)>> This is our Flex-30. This is actually Forney's first machine that we've put a plasma cutter and a welder together. It's a stick/tig/plasma machine. It's a 30-amp plasma, and 160-amp stick/tig machine. It will cut up to three-eighths as well as weld up to three-eighths.
(Marc)>> That's really cool!
(Gabby)>> Another cool feature on this machine is it is dual voltage. So, you can run it on 240 or 120 volts.
(Marc)>> It just so happens we've got some cutting that needs to be done.
(Gabby)>> Let's go ahead and do it.
(Marc)>> Eric I'd like for you to meet Gabby. Gabby this is Eric.
(Eric)>> Nice to meet you.
(Marc)>> And I trust that the truck's in good hands.
(Eric)>> So what do we got here?
(Gabby)>> This is our Forney Flex-30. We're just gonna worry about the plasma right now. Are we just gonna cut a couple of brackets or something?
(Eric)>> No, this whole frame right here, that's got to get on the ground.
(Gabby)>> Alright, let's do it. Have you ever plasma cut before?
(Eric)>> It's been quite a while.
(Gabby)>> Cool, I'll teach you how to use ours. You have a safety here. So, you have to be underneath that safety, and then you have this little ring. That's just a guide so it'll help you go along, but with this plasma you are going to make contact with the tip. So we'll start the arc off the side and then we'll run it over here. [ plasma torch hissing ]
(Gabby)>> Think you can handle it?
(Eric)>> Oh yeah!
(Gabby)>> Here you go. Are you sure about this?
(Eric)>> No! [ plasma torch hissing ] [ Music ]
(Marc)>> So the flex part of this means that it does other functions. Can you maybe show us some of those as well?
(Gabby)>> You don't want me to cut another frame since that's all I ever do here?
(Marc)>> I think we've cut enough on that one.
(Eric)>> Coming up next, Marc brushes up with a set of skills that he hasn't used in years.
(Marc)>> It's been a while since I've stick welded.
(Gabby)>> How long?
(Marc)>> Probably 20 years.
(Marc)>> Gabby, we saw what this machine can do on the plasma cutting setting, which it does really well on its own, but let's talk about some of the other features.
(Gabby)>> So we'll do a little bit of stick and tig welding. I'll go ahead and set the machine up for stick to start with. So, we still have our plasma torch hooked up, which is fine. We'll go ahead and turn the machine on. We don't have to remove the plasma, but we'll go ahead and remove its ground, and we'll put this to the negative. Then we'll go ahead and tack our electrode holder here and we'll plug it into the positive side. Then on our selector switch here we're gonna go to stick. So it's gonna illuminate next to stick, and let's weld at 95, 96 amps. That'll work for us. We're not welding in anything fancy, but I figure we could go ahead and use this piece just to show you what it can do.
(Marc)>> It's been a while since I've stick welded.
(Gabby)>> How long?
(Marc)>> Probably 20 years.
(Gabby)>> Almost older than me.
(Marc)>> I walked right into that.
(Gabby)>> We'll reteach you then. We're using our 70-14. This is a contact rod. So you will be able to run it really close or be able to touch the material with it. So, you don't have to have any kind of stick out. I'll run this for you and then I'll let you run the other side.
(Marc)>> I can hear my dad saying, scratch it! There you go!
(Gabby)>> That pipe's a little dirty. So it doesn't want to start right away.
(Marc)>> That's beautiful! [ welder crackling ]
(Marc)>> Wow!
(Gabby)>> So you keep that rod right in there and then just give it a tiny bit of motion just to pull it between those two pieces. Then you can come in here and just give it a little bang and go ahead and scrape that flux off the top, and then you have a nice, clean weld right there on the bottom. Once we got through that grease after that arc finally started it burned right through that.
(Marc)>> That looks nicer than it should for a stick weld, especially on that dirty material. I've got to do it!
(Gabby)>> 70-14 lays in really nice.
(Marc)>> I'm a lefty. So, this is perfect. Here we go. It's already wanting to light up!
(Gabby)>> And you can even put a little bit less motion in it too. There you go! [ welder crackling ]
(Gabby)>> So stick isn't the cleanest welding process, but it does come in handy if you have dirty, greasy material. It burns through that really nice, and you don't have to do a whole lot of clean up to start with.
(Marc)>> Save some time! How'd I do?
(Gabby)>> Not bad, looks good! The angle could be down just a little bit more, but that's when you were starting with those big movements. Once you narrowed that down it went in a little better.
(Marc)>> I'm a lot more confident with that. Where I normally wouldn't pick up a stick welder, I might actually use it now.
(Gabby)>> This machine makes stick welding really easy.
(Marc)>> I'm actually impressed.
(Gabby)>> Well that's the stick feature. So, let's go ahead and we'll move on to tig, and we'll weld a little bit of this exhaust. So, gas on, always remember, gas on. It's easy to forget. [ Music ]
(Marc)>> That looks nice.
(Gabby)>> The hard part with welding without a pedal and all that good jazz is that once you get to the end of the weld you do have to break your arc, which also pulls your gas away. So, your gas coverage isn't as pretty but it does still work when you need it.
(Marc)>> Let's give it a try. That's actually really easy.
(Gabby)>> It starts off really nice. Move in a little closer.
(Marc)>> I pulled it away too fast. It started off a little rough, but I got it right there at the end. That's how I burn my gloves all the time. I'm really happy with that.
(Gabby)>> It's a little harder to get the hang of because you don't have complete control of the output, but it works just as well.
(Marc)>> So if you've got all three of those functions that the machine does really well into such a small design that's really all you can ask for.
(Gabby)>> This machine is super lightweight, super easy to handle, move around, take with ya. It'd be a great machine to offer to an offroad person. They can go ahead and hook that up, stick weld or whatever they need to do, cut something off.
(Marc)>> It kinda does a little bit of everything. You're gonna leave it here, right?
(Gabby)>> I guess it can be your new toy.
(Marc)>> I'll play with it, and you're gonna leave this too, right?
(Gabby)>> Yes, you get some new helmets as well.
(Marc)>> Perfect, let's get you out of here. Thank you again! Always a pleasure.
(Gabby)>> Thank you!
(Marc)>> Well we've got ourselves a mini truck to build.
(Eric)>> Next up, we finish our tear down in the rear. Then reassemble our frame.
(Eric)>> So now that we've got half of our frame cut off we've got to put it back together, but before we can do that there's some parts that still have to get removed, and those parts were riveted in from the factory. So we've got to get those rivets out to be able to put our new stuff in. Now there's a lot of different ways to remove rivets, but we're gonna show you two ways that we like to use around here to try and make it just a little bit easier. Let's get to it. All you're gonna do here is take this cutoff wheel and grind that head right off of there. [ grinder buzzing ]
(Eric)>> Once you've got your head ground off you're gonna stick your punch right there, and then just give it a few good hits. So our next method we're gonna use a die grinder to cut an "X" into the head of this rivet, and then we're gonna take our air hammer and hammer it off of there that way. [ grinder buzzing ] [ air hammer vibrating ] [ Music ]
(Eric)>> So now that we've got the frame stripped down with everything removed, before we install our new kit we're gonna go ahead and clean this all off. That way we can put fresh corrosion protection down to make sure we're not gonna get any rust on the original frame rails and the pieces that we're adding on. [ grinder buzzing ] [ Music ]
(Eric)>> Well now that the frame is nice and clean and I'm sufficiently dirty we're gonna go ahead and spray some undercoating on there before we get those frame members on. [ aerosol can hissing ]
(Eric)>> It's important to make sure to do this so you don't have any rust form on the original frame underneath the new pieces. So before we roll this axle back underneath our truck we need to get it cleaned up some, and there's also some stuff that needs to come off of it because we're definitely not reusing these leaf springs. [ drill humming ] [ metal clanging ] [ Music ]
(Eric)>> In order to get this axle ready to go back under the truck later we're spraying it down with a liberal amount of degreaser, followed by some serious pressure washing. [ Music ] So, with the frame cleaned up and recoated, before we can put those new frame members on we have to drill out a couple of holes so that we can get a few bolts in and line everything else up to drill the rest of the holes. This step bit makes quick work of boring out these holes. [ drill humming ] [ Music ]
(Eric)>> Now that we have our alignment holes done Marc and I are lining up the new frame rail that we got from Ben. [ hammer banging ]
(Eric)>> That's the one right there. With a little persuasion the frame rail is on. So we can snug it down and drill the rest of our holes. We're using C-clamps to make sure the rail can't shift while we do the rest of our drilling. [ drill humming ] [ Music ] [ drill humming ]
(Eric)>> With everything drilled out it's time to bolt this together permanently. [ Music ] [ ratchet clicking ] [ Music ]
(Eric)>> This might look like overkill, but you want to make sure this will handle all the motion from our air suspension as well as anything the road might throw at it. [ Music ] Now that both of the frame rails are bolted down we can move on to installing the rest of this kit. [ Music ] And with that the truck has a full frame again. Coming up... You know what an S-10 driver's favorite kind of music is? Rocks! ...we sling some sparks to get this bed prepped for our new notched frame.
(Eric)>> Well now that we've got our frame reassembled this thing's ready for the axle to get back underneath it.
(Marc)>> Before we can get this axle installed there's a couple of things we need to get installed onto it first. Eric did a really good job getting it all cleaned up, leaves are out of the way. Now we just need to get these brackets installed. This is actually gonna bolt where the leaf spring originally bolted. It's got the center ring pin here, and it's gonna install using the original U-bolts, which is really convenient. Then the control arms and shocks will actually bolt to these brackets. So just need to get these bolted in and we'll get this into the truck. [ Music ] [ drill humming ]
(Marc)>> Dare I say it's ready to go in the truck.
(Eric)>> There we go! [ Music ]
(Marc)>> Now it seems a little weird but because of the style of this suspension the bags are actually gonna go back here. Just need to compress them a little bit and get them in there. [ drill humming ]
(Eric)>> Looking pretty good! I think it's time to see how low she can go.
(Marc)>> Go on up with it and I'll get the jack stands under there. That is at two inches now. Well, we made some adjustments and now we've got this thing at full compression, and it looks pretty wild sitting in here. When it was at full droop there was sixteen and a quarter inches from the top of the backing plate to the top of the frame rail. So that's fourteen and a quarter inches of travel.
(Eric)>> That's way more than we're ever gonna actually use with this thing because that frame's gonna hit the ground far before we get to here. Also we'd have some clearance issues with the drive shaft, and that's a lot more work that we're not getting into with this one. But we're gonna be able to do exactly what we want, being able to lay that frame on the ground.
(Marc)>> Now we do need to start working on getting the fuel system back in. It needs shocks and things like that, but we'll get to all that later. For now, I want to try to get this bed fit. I think it's gonna need some adjustments. [ saw buzzing ] [ Music ]
(Eric)>> Don't even need to.
(Marc)>> Hey, can you see me through there. Oh!
(Eric)>> I'd say that fits pretty good now.
(Marc)>> We've got to figure out what we're gonna do about filling this all in. We've got to accomplish two things. One, we've got to have enough room for all of our suspension, frame rails, and wheels and tires to fit. And then also we've got to seal it off against weather because we're gonna be putting our sub box and all of our air ride controls back here. We could just make one big sheet that goes all the way across, but that might be a little cumbersome. I think we've got a better idea.
(Eric)>> And that better idea is that we got these wheel tubs from Summit. They are universal. They will fit anything, but we do have a pretty small truck with a pretty small bed. So, we are gonna have to trim a little bit to make them fit right, but we think we can handle that.
(Marc)>> 34 and a half is our number. [ metal scraping ]
(Eric)>> Close this corner up. [ Music ] The worst part of this is definitely getting it started. [ hammer tapping metal ] [ Music ]
(Marc)>> Well there's a lot of hacking going on here. I got this outer wheel tub all cut out. Drilled out all the spot welds. Did it the hard way. I think in hindsight I'd probably just cut that whole lip off. Probably what I'll do on the other side.
(Eric)>> You about ready to get this thing test fitted?
(Marc)>> Now that's a wheel tub. Let's try it. [ Music ]
(Eric)>> We're definitely gonna have to cut a little bit out back here.
(Marc)>> We'll have to notch it up here, but a little trimming and we'll be in business.
(Eric)>> And I think we're in pretty good shape now.
(Marc)>> That's gonna look nice. I'll move on to that other side. Look at that!
(Eric)>> Get it tacked in, throw some sealer on there, and call it a day.
(Marc)>> Little more bed liner. Our mini truck's coming along!
(Eric)>> We're not quite done yet though.
(Marc)>> Still got the front to do. We'll do that next time.
