Engine Power Featured Projects
Engine Power Builds
Want more content like this?
Join the PowerNation Email NewsletterEpisode Transcript
[ Pat ] You're watching Powernation!
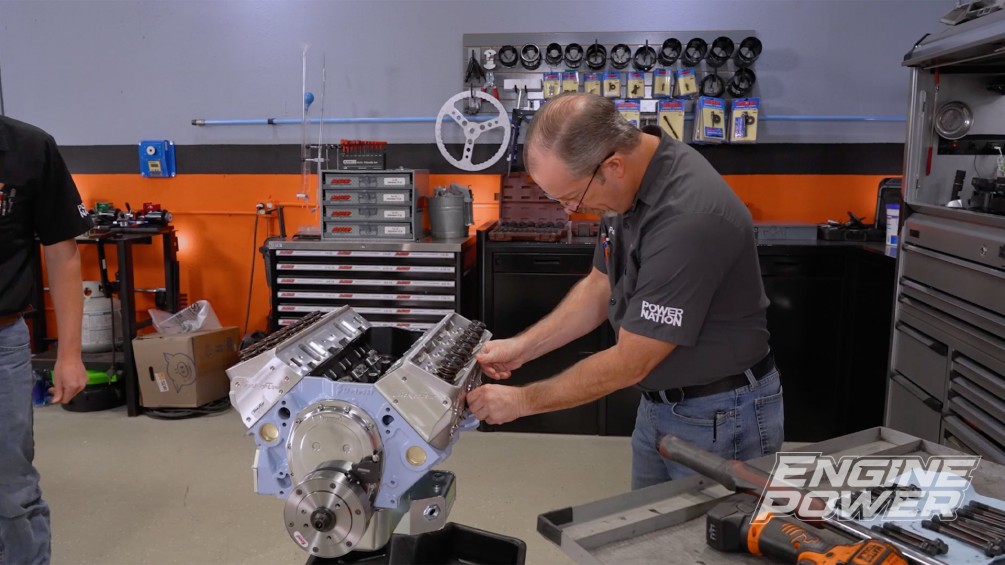
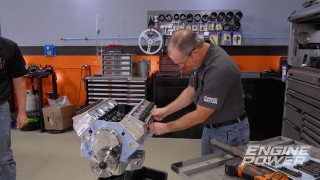
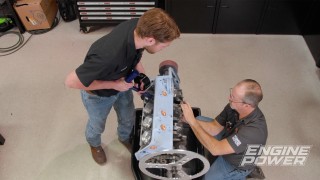
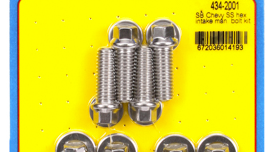
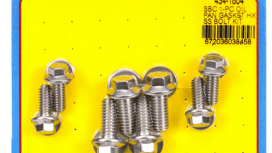
[ Frankie ] Today on Engine Power we pick up our 427 cubic inch small block build and wrap this puppy up. [ Pat ] We finish out a rock solid short block with a serious induction package and send it home on the dyno. [ Music ] Hey everyone, welcome to Engine Power. Today is a great day because we're getting back on our small block project, and at the end of the day we're gonna be making some horsepower on the dyno. But until then we have a very busy day planned. [ Frankie ] Today we are gonna be finishing up our 427 cubic inch hydraulic roller pump gas street engine. Now this is a ground up build and we've already got a forged rotating assembly in the engine and painted in an unconventional color. So if you're not familiar with why this looks like this or how we got it here here's a quick look at the work we've done so far. This is a new build using Summit Racing's aftermarket SPC small block Chevy block and everything is precisely finished machined except for the bores. So the first thing we did was put it in our Sunnen SV-15 cylinder hone. After setting bore size, geometry, and surface finish correctly for our 4.125 bore application we gave the block a quick wash and mocked up the rotating assembly. This block has clearance for a 3.750 stroke but with our forged four inch stroke crank we had to do some minor clearancing for the rod bolts on all eight cylinders. Then we final cleaned the engine block and got it ready for some rust protection and color using a custom mixed POR-15 engine enamel in a color we consider baby blue. [ Pat ] After balancing the crankshaft on our CWT Multi-Val 5,500 we could set up our main and rod bearing clearances, assemble the pistons and connecting rods, install the Summit gas ported rings, and start the assembly process. The cam we spec'ed out for this street engine has specs of 248, 256 at 50 for duration with 624 thousandths valve lift and a 110 degree l-s-a, which we set the intake center line to 109.5 for a half degree of advance. After installing all the rod and piston assemblies and torquing up the bottom end we had built ourselves a solid short block assembly ready for anything. [ Frankie ] The first thing we'll do today is start sealing up this engine with the Summit Racing polished aluminum timing cover that will hold our cam button in place and one of their six and five-eighths harmonic dampers. Using the proper tool is critical to prevent damage to the damper during installation. [ Pat ] After flipping the engine over we can install a Melling high volume oil pump and it is held in place with an ARP oil pump stud that gets torqued to 60 pound feet. [ Music ] [ Frankie ] Now that we have our oil pump and pickup bolted on we're gonna do something we do on every engine and that is measure the oil pump pickup clearance between it and the pan itself. We're gonna show you how to do it in today's Summit Racing Tech Tip. Th two things we need are a straight edge of some sort. This is a calibrated one but you can also use a level or something like that and a regular ole tape measure. So the first thing we're gonna do is take our straight edge and set it across our oil pump pickup. Then we're gonna measure down to both oil pan rails on the block on either side and average the two numbers. So on this we're looking at six and eleven-sixteenths as our block measurement. So we'll take both of these and go over to our oil pan. We're gonna basically do the same thing. Set the straight edge across the oil pan rails and measure to the bottom of the pan. We're looking about six and seven-eighths. In our case we have a really nice one piece oil pan gasket that has these steel compression stop inserts in it. We can measure those with a set of dial calipers. We just have to take it and squish it down a little bit. That's about 150 thousandths or a little over an eighth of an inch. So that makes our oil pan depth about seven inches. Means we have a little over a quarter inch of clearance, which is perfect. We want between a quarter inch and three-eighths of an inch of pickup clearance. That way we have proper scavenging and it's not too close to the bottom of the pan, but also we don't have to worry about it becoming unsubmerged from the oil if it's sloshing around. Now the pickup and the pan are matched to each other, and if you have any questions about what you need for your application you can talk to the experts at Summit Racing Equipment and they'll get you sorted out. Now that we know this is right we can continue on and get this pan on. [ Pat ] Small amounts of silicone are applied to the corners and edges of the oil pan rail before the gasket and this Moroso seven quart oil pan with kickouts, baffling, and a crank scraper are dropped on. The pan easily clears our four inch stroke and is held down with an ARP stainless steel oil pan bolt kit to seal up our bottom end. Up next, we talk cool fastener tech as we go in depth into hardware material that you should be using in your build.
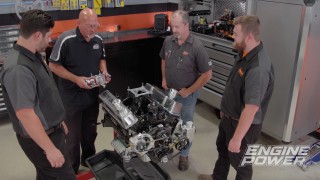
[ Frankie ] Here in Engine Power you see us use all kinds of ARP fasteners and quite frankly it's because they're one of the best. And when we're doing that we usually only talk about the fastener we're using for the application. So today we wanted to go over their full line of products and what applications they are right for. [ Pat ] This is something we get a lot of questions over. What to use in what application. So we have a few examples laid out of what the material is and what application they are used for. [ Frankie ] So the first one starting off kinda at the base of their catalog is an 87-40 fastener. For reference a Grade-8 fastener from the hardware store has a tensile strength of around 150,000 p-s-i, which sounds like a like, but even ARP's base fastener, their 87-40 chro-moly, has a tensile strength of 180,000 p-s-i. So topping that by a large margin. They offer this fastener in basically 90 percent of their catalog. This can be used for anything. Most of the fasteners come with a really pretty black oxide finish. This is offered in a lot of their head and main fastener kits whether you're talking about bolts or studs and a lot of their accessory bolt kits whether you're looking for a distributor stud or oil pump mounting bolts. 87-40 works great for most applications but if for some reason you need a stronger or lighter material ARP can make any of their 87-40 kits in any material that they offer. [ Pat ] Speaking of materials the next thing we're gonna talk about are their stainless fasteners. On the stainless fasteners these have a tensile of 170,000 to 190,000 p-s-i. They're made for almost all the same applications as the 87-40. It's nice to have the stainless in for a few different reasons. Stainless fasteners have a little bit of an advantage over 87-40 chro-moly, not only in tensile strength alone but in corrosion resistance. If you have a highly corrosive environment, perhaps a marine application, stainless fasteners definitely have an advantage. Plus they have a proprietary way they polish the fastener. So not only does it resist corrosion very, very well but it looks great doing it, and there's all types of applications for stainless. Again with ARP if they don't have an application specifically for what you're looking for they have an engineering department that can set you up and make exactly what you want for your application. [ Frankie ] The next step up in terms of tensile strength we move on to an ARP 2,000. This is a proprietary material that they have and the big difference here is that it can be heat treated a little bit higher than an 87-40. So this has a tensile strength of around 220,000 p-s-i. So this is really made for high performance applications and it's mostly used in main and head fasteners. It can also be used in rod bolts. That's where it really shines. If you look at a lot of aftermarket connecting rod manufacturers they use an ARP 2,000 in their high end high horsepower rods and that's because it does a great job of holding up to that immense stress that it has to be put under. This is per the application really. It's not something you're gonna throw in your daily driver but it works really good in racing applications and it's really common for things like circle track, drag racing. Have a lot of high load for a relatively extended period of time. [ Pat ] Now you're seeing the trend here. As we go up in horsepower, as we go up in longevity, as we go up in stress, as we go up in how much this fastener has to handle for whatever amount of time the materials have to get better, and ARP has gone through a lot of different materials and they've created some proprietary alloys that work for the application. That classifies something like our custom age 625 that they use. This is a super alloy that was designed to take not only the highest amount of stress but the highest amount of stress for an extended period of time. This has a tensile of 280,000 to 290,000 p-s-i. Although expensive it is built specifically for the application, and we can go further from there. ARP can engineer fasteners out of materials for your application. You just have to tell them your parameters. [ Frankie ] From backgrounds with things like aerospace and industrial a lot of that stuff trickles down to the automotive world and we are simple just benefiting from it. You know when you're getting a fastener from them you're getting something that is precision machined. It is quality checked. It is one of the highest grade fasteners you can get, whether you're talking about their 87-40 all the way up to custom made 625 plus or titanium. And that's why we use them so much on our builds is because it's great having a fastener that has a high quality, that you can trust that it's going to be right every time, and you know it's gonna live the long life of the engine. Coming up, we install a high flowing induction and wrap up our badass baby blue bullet.
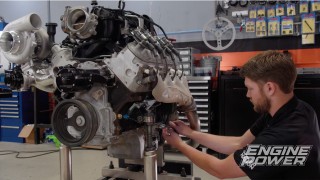
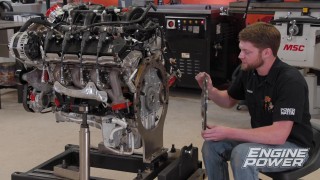
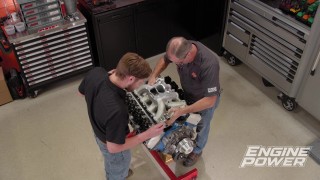
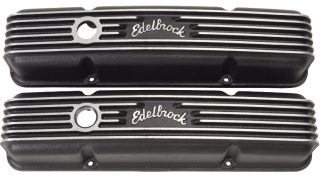
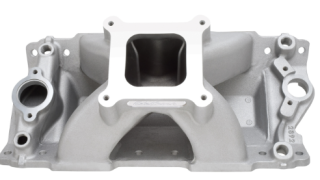
[ Pat ] Next up on our 427 small block build is we're putting in the hydraulic roller lifter kit from Summit Racing Equipment. Now this block has a very tall lifter boss and the lifters themselves are tall. So we have to install them with the cylinder heads off because if the heads were on we wouldn't be able to get them in. This is a high precision, high tolerance, high quality lifter that's gonna work great for our application. We let these lifters soak in engine oil for about an hour just to make sure they are properly lubricated and to help remove any air bubbles from the plungers. Our head gaskets for this build are Cometic m-l-s gaskets with a 4.165 bore and a 27 thousandths compressed thickness. [ Frankie ] The next thing we're gonna do is install our Trick Flow 230 cylinder heads we're gonna be using for this build and we're gonna be holding them down with a Trick Flow head bolt kit that is manufactured by ARP. They make specific bolt kits like this for many manufacturers and we're using it because we know we're gonna have the correct dimensions on the fastener. So we have the correct thread engagement and location with our cylinder heads. These are made of their 87-40 chro-moly material. That means they have a tensile strength of 180,000 p-s-i and they are precision machined and manufactured in ARP's home location in California. To prep these it's a very specific process that ARP uses and what we're gonna do is take one of their head bolts here, take their ARP Ultra Torque Lube, and put a fair amount underneath the head of the bolt. Then we're gonna take one of their washers and it has a bevel on one side of the washer that goes up towards the head of the bolt. So we have a nice layer of lube between the two. We're gonna leave the bottom side of the washer dry. You do not want to put lube on the bottom side of the washer because it could potentially turn it into a bearing basically. When you torque the fastener the washer will spin, cause the clamp load to go up, and it could damage the fastener or the threads you're putting it into. In our application we're gonna put some ARP Ultra Torque on the threads as well. If we were using a stock block where the head bolt holes went into the water jacket we would use their thread sealant but there is one correctly prepped bolt. We have 33 more to do and then we'll be ready to bolt these babies down. These Trick Flow 230s have c-n-c ported 230cc intake runners, 2.080 intake valves, flow over 300 c-f-m, and have a 70cc combustion chamber that gives us a measured 10.26 to 1 static compression ratio. The cylinder head bolts are torqued in three stages to 70 pound feet. Eight of the head bolts are replaced with a low profile design to clear our Jesel Sportsman Rocker Stands. [ Pat ] To gain the correct valvetrain geometry we're using a set of Summit Racing 7.200 long five-sixteenths push rods with an 83 thousandths wall thickness and they receive extreme pressure lube on both ends. The rocker bodies are a 1.7 ratio and are installed at zero lash in the firing order, which is 1-8-7-2 6-5-4-3. Then each rocker is set to one half turn past zero lash for the proper lifter pre-load. [ Frankie ] Beads of r-t-v seal up the China walls and a color matched Edelbrock Super Victor-2 smushes them down to seal up the induction. ARP stainless steel manifold bolts prepped with thread sealer clamp it in place. Before covering the valvetrain it will receive a hefty coating of Comp Cams valvetrain assembly spray to properly lubricate them during initial startup. Then these Edelbrock vintage looking and custom painted valve covers can seal up the crankcase. A Summit Racing billet electric water pump wraps everything up until we get into the dyno room. [ Pat ] Stay tuned because up next our 427 gets primed for dyno time!
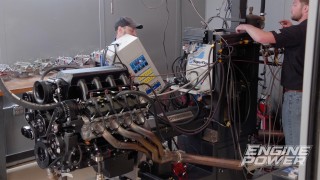
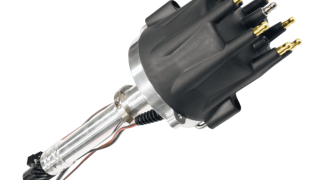
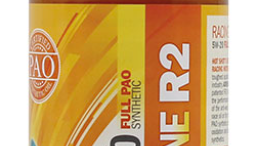
[ Frankie ] We have our 427 into the dyno cell here and we've gone ahead and finished out topping it off with our Edelbrock 850 c-f-m VRS carburetor, a one and half inch four holed taper spacer from Wilson Manifolds, and our Shoenfeld dyno headers with a one and seven-eighths primary and a three and a half inch collector. The next thing we need to do is give this engine some proper lubrication so we can protect all those beautiful parts we just put inside of it, and that's why we're gonna be putting Hot Shot's Secret's Adrenaline R-2 racing oil in it. The reason we're using this is not only because it uses a great group four PO base oil but also it has their FR-3 nano technology in the oil already. This is a nano particle that when you put it inside your engine it goes through and fills in the minor imperfections on the surface of your engine where all the parts are meeting. This gives it a nice, smooth surface for an oil film to build but also it helps protect if there is ever metal to metal contact if that oil film fails. Now what's great about this is you can add it to any base oil you want. Not just Hot Shot's Secret, you can put it in any oil and it does not mess with the additive package that's already in the oil. We're gonna be using their Adrenaline Racing Oil because it already has the FR-3 in it. So we have seven quarts of 5W-20 we're gonna be putting in this engine so we have proper lubrication and protection for it. [ Pat ] Now that our oil is all poured in it's time to prime the engine, and priming is gonna be our subject of today's Summit Tech Tip. Priming is very important because we don't want any of our new parts in our new engine having metal to metal contact on initial startup. So we primed the system. We can do that a couple of different ways. The first way if you can't physically turn the oil pump like in a LS or a Coyote is we use a pressurized tank. What we'll do is take the capacity of the oil system, put it in this tank, and then pressurize it with air up to around 100, 120 p-s-i. Then we'll take the hose, hook it to an oil gallery, and then physically open a valve and that will pump the oil through the engine at pressure. That's a great way of doing it and you also turn the engine over while you're doing it so it gets everywhere it's supposed to be. Another way of doing it is if you can physically turn the pump like the distributor that turns the pump you can get a shaft that goes into a drill and you can physically turn the pump and pump oil through the system. This particular one is for a small block Chevy because a top for the distributor and a section at the bottom that completes the oiling circuit just like the distributor does. It is important to turn the pump in the same direction as the distributor otherwise you turn it in reverse it will aerate the oil and not pressurize the system. This way you can turn it, pressurize the system, turn your engine oil and make sure oil is getting everywhere and that will help your engine. If you have any questions on how to prime your engine contact the experts at Summit Racing and they'll get you set up. While priming the engine we'll also turn it over to ensure oil flow to every part of it. Then this FiTech dual pickup billet distributor can be installed and timed before the FiTech ceramic boot wires can be connected to our spark plugs. [ Frankie ] We have the 427 running on the dyno. We're gonna start relatively conservative on timing. I've set the total timing at 30 degrees. We have a lock out distributor. We're gonna start there and work our way up and tune for the timing. The carburetor so far seems really close. I didn't have to touch the idle circuit or anything. So we'll see how close that is and go from there. [ Pat ] First rip we're gonna go from 3,500 to 6,800. Something like this, street, pump gas, kinda familiar with this type of head, this type of chamber. There are some unknowns on here. There's only one way to find the unknown. [ Frankie ] Should have both peaks in that. So we'll see what it does and then we'll turn from there. [ Pat ] Loads nice. [ engine revving ] [ Pat ] Sailed right through her. [ Frankie ] That carb is right out of the box too and it's right there. [ Pat ] That carb is nice and tight. That's not bad out of the box right there for a start. 515 pound feet 588 horse. I think we picked the right r-p-m cause you can see it's just barely tailing over. [ Frankie ] It's got very little timing in it. So it's a little notchy but that'll smooth out once we get a little timing in it here. Oil pressure is nice and good peaking at 79 basically. [ Pat ] Rides the bypass the whole time. [ Frankie ] Peak torque is right at 5,200 and peak power 6,500. I'll take that for a street engine. [ Pat ] Look at the breaks. Break specific is super consistent, super nice. Timing, fuel, not really fuel, but the typical thing that we do with engines. Montage! [ Music ] Alright after our normal stuff that we do which is fuel and timing. Mostly timing on this one cause the fuel was right on the money. The Edelbrock carb is doing pretty well out there. We ended up just doing our own thing, jacking some timing in it. [ Frankie ] Our small block combo's pretty much always 36 degrees. That's just what they like. You go past that they start to run really hard. They don't really pick up any power. So there's really no point. [ Pat ] Especially pump gas stuff. [ Frankie ] Pump gas as we say is the limiting factor. [ Pat ] The biggest wildcard because it came out of the ground. God knows what it is, but let's see what our final iteration is and we'll see what kind of steam she makes here. [ engine revving ] [ Pat ] Sounds nice. [ engine revving ]
[ Pat ] That's the heat right there. 530 pound feet of torque, we'll take that, 609.3 horsepower. [ Frankie ] And that's a pump gas street engine, hydraulic roller. I mean that's solid. Anything with 600 on the street is already a little sketchy kinda fast depending on what car it's in. [ Pat ] People get so jaded with power numbers because everyone with a little bit of power adder, any sort of artificial atmosphere. Well my Honda with a turbo on it makes that. I'm sure. Put a turbo on this and how much will it make? [ Frankie ] Naturally aspirated it's making 530 pound feet, which is a solid number, and this will go in any spot that a small block Chevy would. You could put this in almost anything and it will rip. Not only that but it looks killer. I love the color that we came up with, the baby blue, polished aluminum. Everything looks good, vitals look good, oil pressure's good. It's got vacuum going up in the crankcase. So we have a good, sealed engine with that block. That tells you the bore's nice and round. [ Pat ] It has a very rigid cylinder. Case in point it's sealing up really nice. Everyone has done their homework including us. I think we've got a really nice pump gas street bullet. Great success! To find more cool builds like this one check out Engine Power on Powernation.
Show Full Transcript
[ Frankie ] Today on Engine Power we pick up our 427 cubic inch small block build and wrap this puppy up. [ Pat ] We finish out a rock solid short block with a serious induction package and send it home on the dyno. [ Music ] Hey everyone, welcome to Engine Power. Today is a great day because we're getting back on our small block project, and at the end of the day we're gonna be making some horsepower on the dyno. But until then we have a very busy day planned. [ Frankie ] Today we are gonna be finishing up our 427 cubic inch hydraulic roller pump gas street engine. Now this is a ground up build and we've already got a forged rotating assembly in the engine and painted in an unconventional color. So if you're not familiar with why this looks like this or how we got it here here's a quick look at the work we've done so far. This is a new build using Summit Racing's aftermarket SPC small block Chevy block and everything is precisely finished machined except for the bores. So the first thing we did was put it in our Sunnen SV-15 cylinder hone. After setting bore size, geometry, and surface finish correctly for our 4.125 bore application we gave the block a quick wash and mocked up the rotating assembly. This block has clearance for a 3.750 stroke but with our forged four inch stroke crank we had to do some minor clearancing for the rod bolts on all eight cylinders. Then we final cleaned the engine block and got it ready for some rust protection and color using a custom mixed POR-15 engine enamel in a color we consider baby blue. [ Pat ] After balancing the crankshaft on our CWT Multi-Val 5,500 we could set up our main and rod bearing clearances, assemble the pistons and connecting rods, install the Summit gas ported rings, and start the assembly process. The cam we spec'ed out for this street engine has specs of 248, 256 at 50 for duration with 624 thousandths valve lift and a 110 degree l-s-a, which we set the intake center line to 109.5 for a half degree of advance. After installing all the rod and piston assemblies and torquing up the bottom end we had built ourselves a solid short block assembly ready for anything. [ Frankie ] The first thing we'll do today is start sealing up this engine with the Summit Racing polished aluminum timing cover that will hold our cam button in place and one of their six and five-eighths harmonic dampers. Using the proper tool is critical to prevent damage to the damper during installation. [ Pat ] After flipping the engine over we can install a Melling high volume oil pump and it is held in place with an ARP oil pump stud that gets torqued to 60 pound feet. [ Music ] [ Frankie ] Now that we have our oil pump and pickup bolted on we're gonna do something we do on every engine and that is measure the oil pump pickup clearance between it and the pan itself. We're gonna show you how to do it in today's Summit Racing Tech Tip. Th two things we need are a straight edge of some sort. This is a calibrated one but you can also use a level or something like that and a regular ole tape measure. So the first thing we're gonna do is take our straight edge and set it across our oil pump pickup. Then we're gonna measure down to both oil pan rails on the block on either side and average the two numbers. So on this we're looking at six and eleven-sixteenths as our block measurement. So we'll take both of these and go over to our oil pan. We're gonna basically do the same thing. Set the straight edge across the oil pan rails and measure to the bottom of the pan. We're looking about six and seven-eighths. In our case we have a really nice one piece oil pan gasket that has these steel compression stop inserts in it. We can measure those with a set of dial calipers. We just have to take it and squish it down a little bit. That's about 150 thousandths or a little over an eighth of an inch. So that makes our oil pan depth about seven inches. Means we have a little over a quarter inch of clearance, which is perfect. We want between a quarter inch and three-eighths of an inch of pickup clearance. That way we have proper scavenging and it's not too close to the bottom of the pan, but also we don't have to worry about it becoming unsubmerged from the oil if it's sloshing around. Now the pickup and the pan are matched to each other, and if you have any questions about what you need for your application you can talk to the experts at Summit Racing Equipment and they'll get you sorted out. Now that we know this is right we can continue on and get this pan on. [ Pat ] Small amounts of silicone are applied to the corners and edges of the oil pan rail before the gasket and this Moroso seven quart oil pan with kickouts, baffling, and a crank scraper are dropped on. The pan easily clears our four inch stroke and is held down with an ARP stainless steel oil pan bolt kit to seal up our bottom end. Up next, we talk cool fastener tech as we go in depth into hardware material that you should be using in your build.
[ Frankie ] Here in Engine Power you see us use all kinds of ARP fasteners and quite frankly it's because they're one of the best. And when we're doing that we usually only talk about the fastener we're using for the application. So today we wanted to go over their full line of products and what applications they are right for. [ Pat ] This is something we get a lot of questions over. What to use in what application. So we have a few examples laid out of what the material is and what application they are used for. [ Frankie ] So the first one starting off kinda at the base of their catalog is an 87-40 fastener. For reference a Grade-8 fastener from the hardware store has a tensile strength of around 150,000 p-s-i, which sounds like a like, but even ARP's base fastener, their 87-40 chro-moly, has a tensile strength of 180,000 p-s-i. So topping that by a large margin. They offer this fastener in basically 90 percent of their catalog. This can be used for anything. Most of the fasteners come with a really pretty black oxide finish. This is offered in a lot of their head and main fastener kits whether you're talking about bolts or studs and a lot of their accessory bolt kits whether you're looking for a distributor stud or oil pump mounting bolts. 87-40 works great for most applications but if for some reason you need a stronger or lighter material ARP can make any of their 87-40 kits in any material that they offer. [ Pat ] Speaking of materials the next thing we're gonna talk about are their stainless fasteners. On the stainless fasteners these have a tensile of 170,000 to 190,000 p-s-i. They're made for almost all the same applications as the 87-40. It's nice to have the stainless in for a few different reasons. Stainless fasteners have a little bit of an advantage over 87-40 chro-moly, not only in tensile strength alone but in corrosion resistance. If you have a highly corrosive environment, perhaps a marine application, stainless fasteners definitely have an advantage. Plus they have a proprietary way they polish the fastener. So not only does it resist corrosion very, very well but it looks great doing it, and there's all types of applications for stainless. Again with ARP if they don't have an application specifically for what you're looking for they have an engineering department that can set you up and make exactly what you want for your application. [ Frankie ] The next step up in terms of tensile strength we move on to an ARP 2,000. This is a proprietary material that they have and the big difference here is that it can be heat treated a little bit higher than an 87-40. So this has a tensile strength of around 220,000 p-s-i. So this is really made for high performance applications and it's mostly used in main and head fasteners. It can also be used in rod bolts. That's where it really shines. If you look at a lot of aftermarket connecting rod manufacturers they use an ARP 2,000 in their high end high horsepower rods and that's because it does a great job of holding up to that immense stress that it has to be put under. This is per the application really. It's not something you're gonna throw in your daily driver but it works really good in racing applications and it's really common for things like circle track, drag racing. Have a lot of high load for a relatively extended period of time. [ Pat ] Now you're seeing the trend here. As we go up in horsepower, as we go up in longevity, as we go up in stress, as we go up in how much this fastener has to handle for whatever amount of time the materials have to get better, and ARP has gone through a lot of different materials and they've created some proprietary alloys that work for the application. That classifies something like our custom age 625 that they use. This is a super alloy that was designed to take not only the highest amount of stress but the highest amount of stress for an extended period of time. This has a tensile of 280,000 to 290,000 p-s-i. Although expensive it is built specifically for the application, and we can go further from there. ARP can engineer fasteners out of materials for your application. You just have to tell them your parameters. [ Frankie ] From backgrounds with things like aerospace and industrial a lot of that stuff trickles down to the automotive world and we are simple just benefiting from it. You know when you're getting a fastener from them you're getting something that is precision machined. It is quality checked. It is one of the highest grade fasteners you can get, whether you're talking about their 87-40 all the way up to custom made 625 plus or titanium. And that's why we use them so much on our builds is because it's great having a fastener that has a high quality, that you can trust that it's going to be right every time, and you know it's gonna live the long life of the engine. Coming up, we install a high flowing induction and wrap up our badass baby blue bullet.
[ Pat ] Next up on our 427 small block build is we're putting in the hydraulic roller lifter kit from Summit Racing Equipment. Now this block has a very tall lifter boss and the lifters themselves are tall. So we have to install them with the cylinder heads off because if the heads were on we wouldn't be able to get them in. This is a high precision, high tolerance, high quality lifter that's gonna work great for our application. We let these lifters soak in engine oil for about an hour just to make sure they are properly lubricated and to help remove any air bubbles from the plungers. Our head gaskets for this build are Cometic m-l-s gaskets with a 4.165 bore and a 27 thousandths compressed thickness. [ Frankie ] The next thing we're gonna do is install our Trick Flow 230 cylinder heads we're gonna be using for this build and we're gonna be holding them down with a Trick Flow head bolt kit that is manufactured by ARP. They make specific bolt kits like this for many manufacturers and we're using it because we know we're gonna have the correct dimensions on the fastener. So we have the correct thread engagement and location with our cylinder heads. These are made of their 87-40 chro-moly material. That means they have a tensile strength of 180,000 p-s-i and they are precision machined and manufactured in ARP's home location in California. To prep these it's a very specific process that ARP uses and what we're gonna do is take one of their head bolts here, take their ARP Ultra Torque Lube, and put a fair amount underneath the head of the bolt. Then we're gonna take one of their washers and it has a bevel on one side of the washer that goes up towards the head of the bolt. So we have a nice layer of lube between the two. We're gonna leave the bottom side of the washer dry. You do not want to put lube on the bottom side of the washer because it could potentially turn it into a bearing basically. When you torque the fastener the washer will spin, cause the clamp load to go up, and it could damage the fastener or the threads you're putting it into. In our application we're gonna put some ARP Ultra Torque on the threads as well. If we were using a stock block where the head bolt holes went into the water jacket we would use their thread sealant but there is one correctly prepped bolt. We have 33 more to do and then we'll be ready to bolt these babies down. These Trick Flow 230s have c-n-c ported 230cc intake runners, 2.080 intake valves, flow over 300 c-f-m, and have a 70cc combustion chamber that gives us a measured 10.26 to 1 static compression ratio. The cylinder head bolts are torqued in three stages to 70 pound feet. Eight of the head bolts are replaced with a low profile design to clear our Jesel Sportsman Rocker Stands. [ Pat ] To gain the correct valvetrain geometry we're using a set of Summit Racing 7.200 long five-sixteenths push rods with an 83 thousandths wall thickness and they receive extreme pressure lube on both ends. The rocker bodies are a 1.7 ratio and are installed at zero lash in the firing order, which is 1-8-7-2 6-5-4-3. Then each rocker is set to one half turn past zero lash for the proper lifter pre-load. [ Frankie ] Beads of r-t-v seal up the China walls and a color matched Edelbrock Super Victor-2 smushes them down to seal up the induction. ARP stainless steel manifold bolts prepped with thread sealer clamp it in place. Before covering the valvetrain it will receive a hefty coating of Comp Cams valvetrain assembly spray to properly lubricate them during initial startup. Then these Edelbrock vintage looking and custom painted valve covers can seal up the crankcase. A Summit Racing billet electric water pump wraps everything up until we get into the dyno room. [ Pat ] Stay tuned because up next our 427 gets primed for dyno time!
[ Frankie ] We have our 427 into the dyno cell here and we've gone ahead and finished out topping it off with our Edelbrock 850 c-f-m VRS carburetor, a one and half inch four holed taper spacer from Wilson Manifolds, and our Shoenfeld dyno headers with a one and seven-eighths primary and a three and a half inch collector. The next thing we need to do is give this engine some proper lubrication so we can protect all those beautiful parts we just put inside of it, and that's why we're gonna be putting Hot Shot's Secret's Adrenaline R-2 racing oil in it. The reason we're using this is not only because it uses a great group four PO base oil but also it has their FR-3 nano technology in the oil already. This is a nano particle that when you put it inside your engine it goes through and fills in the minor imperfections on the surface of your engine where all the parts are meeting. This gives it a nice, smooth surface for an oil film to build but also it helps protect if there is ever metal to metal contact if that oil film fails. Now what's great about this is you can add it to any base oil you want. Not just Hot Shot's Secret, you can put it in any oil and it does not mess with the additive package that's already in the oil. We're gonna be using their Adrenaline Racing Oil because it already has the FR-3 in it. So we have seven quarts of 5W-20 we're gonna be putting in this engine so we have proper lubrication and protection for it. [ Pat ] Now that our oil is all poured in it's time to prime the engine, and priming is gonna be our subject of today's Summit Tech Tip. Priming is very important because we don't want any of our new parts in our new engine having metal to metal contact on initial startup. So we primed the system. We can do that a couple of different ways. The first way if you can't physically turn the oil pump like in a LS or a Coyote is we use a pressurized tank. What we'll do is take the capacity of the oil system, put it in this tank, and then pressurize it with air up to around 100, 120 p-s-i. Then we'll take the hose, hook it to an oil gallery, and then physically open a valve and that will pump the oil through the engine at pressure. That's a great way of doing it and you also turn the engine over while you're doing it so it gets everywhere it's supposed to be. Another way of doing it is if you can physically turn the pump like the distributor that turns the pump you can get a shaft that goes into a drill and you can physically turn the pump and pump oil through the system. This particular one is for a small block Chevy because a top for the distributor and a section at the bottom that completes the oiling circuit just like the distributor does. It is important to turn the pump in the same direction as the distributor otherwise you turn it in reverse it will aerate the oil and not pressurize the system. This way you can turn it, pressurize the system, turn your engine oil and make sure oil is getting everywhere and that will help your engine. If you have any questions on how to prime your engine contact the experts at Summit Racing and they'll get you set up. While priming the engine we'll also turn it over to ensure oil flow to every part of it. Then this FiTech dual pickup billet distributor can be installed and timed before the FiTech ceramic boot wires can be connected to our spark plugs. [ Frankie ] We have the 427 running on the dyno. We're gonna start relatively conservative on timing. I've set the total timing at 30 degrees. We have a lock out distributor. We're gonna start there and work our way up and tune for the timing. The carburetor so far seems really close. I didn't have to touch the idle circuit or anything. So we'll see how close that is and go from there. [ Pat ] First rip we're gonna go from 3,500 to 6,800. Something like this, street, pump gas, kinda familiar with this type of head, this type of chamber. There are some unknowns on here. There's only one way to find the unknown. [ Frankie ] Should have both peaks in that. So we'll see what it does and then we'll turn from there. [ Pat ] Loads nice. [ engine revving ] [ Pat ] Sailed right through her. [ Frankie ] That carb is right out of the box too and it's right there. [ Pat ] That carb is nice and tight. That's not bad out of the box right there for a start. 515 pound feet 588 horse. I think we picked the right r-p-m cause you can see it's just barely tailing over. [ Frankie ] It's got very little timing in it. So it's a little notchy but that'll smooth out once we get a little timing in it here. Oil pressure is nice and good peaking at 79 basically. [ Pat ] Rides the bypass the whole time. [ Frankie ] Peak torque is right at 5,200 and peak power 6,500. I'll take that for a street engine. [ Pat ] Look at the breaks. Break specific is super consistent, super nice. Timing, fuel, not really fuel, but the typical thing that we do with engines. Montage! [ Music ] Alright after our normal stuff that we do which is fuel and timing. Mostly timing on this one cause the fuel was right on the money. The Edelbrock carb is doing pretty well out there. We ended up just doing our own thing, jacking some timing in it. [ Frankie ] Our small block combo's pretty much always 36 degrees. That's just what they like. You go past that they start to run really hard. They don't really pick up any power. So there's really no point. [ Pat ] Especially pump gas stuff. [ Frankie ] Pump gas as we say is the limiting factor. [ Pat ] The biggest wildcard because it came out of the ground. God knows what it is, but let's see what our final iteration is and we'll see what kind of steam she makes here. [ engine revving ] [ Pat ] Sounds nice. [ engine revving ]
[ Pat ] That's the heat right there. 530 pound feet of torque, we'll take that, 609.3 horsepower. [ Frankie ] And that's a pump gas street engine, hydraulic roller. I mean that's solid. Anything with 600 on the street is already a little sketchy kinda fast depending on what car it's in. [ Pat ] People get so jaded with power numbers because everyone with a little bit of power adder, any sort of artificial atmosphere. Well my Honda with a turbo on it makes that. I'm sure. Put a turbo on this and how much will it make? [ Frankie ] Naturally aspirated it's making 530 pound feet, which is a solid number, and this will go in any spot that a small block Chevy would. You could put this in almost anything and it will rip. Not only that but it looks killer. I love the color that we came up with, the baby blue, polished aluminum. Everything looks good, vitals look good, oil pressure's good. It's got vacuum going up in the crankcase. So we have a good, sealed engine with that block. That tells you the bore's nice and round. [ Pat ] It has a very rigid cylinder. Case in point it's sealing up really nice. Everyone has done their homework including us. I think we've got a really nice pump gas street bullet. Great success! To find more cool builds like this one check out Engine Power on Powernation.
