Engine Power Featured Projects
Engine Power Builds
Want more content like this?
Join the PowerNation Email NewsletterEpisode Transcript
[ Pat ] You're watching Powernation!
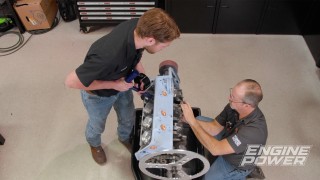
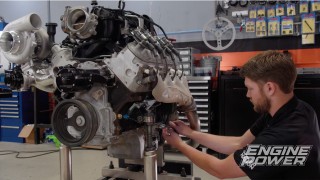
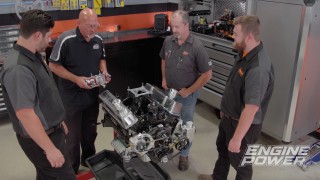
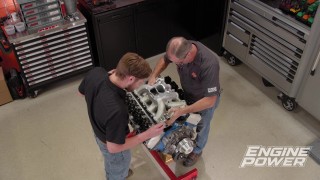
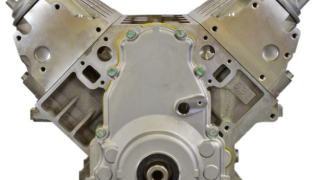
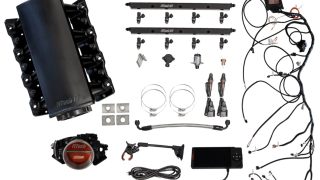
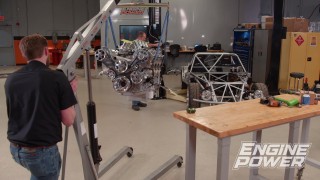
[ Pat ] Today on Engine Power we get into the nuts and bolts of engine building and check out a high horsepower diesel drag car. [ Mike ] Then we put a stout hot rod LS through its paces on the dyno with a new standalone e-f-i system. [ Music ] [ Pat ] Hey everyone, welcome to Engine Power. I know what you're thinking. Usually when you see us we have a pile of parts and an engine to assemble but this time we have a complete engine that is ready to rock and we're gonna get it on the dyno, but there is a very good reason for it. My man Frankie is also out chasing parts. So to dyno this I recruited some help and I would like to introduce you to the newest member of the Powernation team, Michael O'Guin. Micheal and I have similar backgrounds. We chewed a lot of the same dirt in the NHRA. Him with Doug Herbert and Antron Brown in the Top Fuel pits and me with Greg Anderson and Jason Line in Pro Stock. Adding to that we are both instructors at high performance engine schools. So Michael thanks for joining us. [ Michael ] Pat I am super excited to be a part of the Powernation family. Today we're gonna get rolling on this ATK high performance engine. ATK offers engines from all extremes, mild to wild, to fit your application. So if you need a new engine, whether it's a stock replacement or something custom for your application, contact ATK out of Grand Prairie, Texas. They were actually put together in 2007 and have been doing business for a while now. This particular one is a Gen-3 5.3-Liter engine where ATK has gone through all the machining processes and gotten this up to spec for us. A tip for you the next time you're shopping for your next LS project. There are different generations that require different parts. The Generation-3 LS engine has the camshaft position sensor located at the rear of the block. The Gen-4 blocks move the cam sensor to the front on the timing cover. Another thing to look for is the reluctor wheel of the crankshaft. The black crankshaft position sensor is used with the 24-tooth reluctor wheel, and the gray sensor is used for the 58-tooth. The cylinder heads on this engine is what really sets it apart for our custom application. These are from AFR. They are fully c-n-c ported on the chambers and also the ports. Then it leads us to the intake system where we have next level performance. [ Pat ] This is the FiTech Ultimate Rebel LS Kit. This system gives you everything that you need to complete it in your vehicle. It starts off with this manifold. This is a very low profile, fits nicely. They make these for both cathedral and rectangle port. It comes with their 102mm throttle body, all the lines, connections, rails, and injectors, which are a 55 pound per hour injector so you can run gasoline, E-85, or whatever you want. Also it has their own set of coils, which have a really neat feature. They have a blue l-e-d indicator light to show that they are functioning. FiTech has made it very easy to add electronic fuel injection that is user adjustable to the LS platform. They include a custom wiring harness for easy plug and play connection, and they also include the necessary sensors required like a three bar map sensor just in case you want to run up to 30 pounds of boost, an inlet air temp sensor, a throttle position sensor, and two oxygen sensors. This kit is self learning and it can provide sequential fuel and spark control with individual cylinder trim. [ Michael ] And the brains of this FiTech system is their Ultimate LS ECU, which is programmed with their handheld controller. [ Pat ] Enough talk. Let's get this thing on the dyno and see what it makes. [ Music ] Up next, we talk about one of the keys to success in engine building using premium fasteners designed for the application.
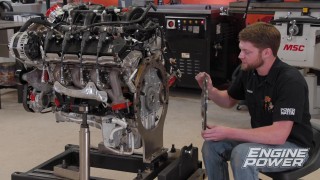
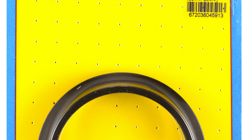
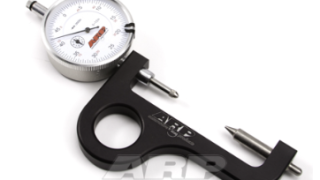
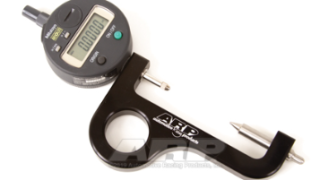
[ Mike ] We build a ton of engines here at Powernation from daily drivers all the way up to full race engines, and the one thing in common that they all need is quality fasteners. From the balancer bolt to the flywheel bolts and everywhere in between each engine needs high quality fasteners. That's why we choose ARP. Automotive Racing Products was born when the founder realized the need for high quality studs and fasteners. ARP manufactures, machines, and tests all their products in their southern California facility. From o-e-m replacement components to exotic hardware found in Formula 1, NASCAR, and NHRA, ARP's reputation is nothing but the best in the industry. [ Pat ] Here at Engine Power we mainly deal with the engine fastener side of ARP but they literally make fasteners for anything that you're working on. As far as materials go we mainly use 87-40 and stainless. 87-40 chromoly is used in things like the oil pump drives, the balancer bolts, things that hold on the crank, and cam, and whatnot. Also we use a lot of their 6- and 12-point stainless fasteners for things like intake manifolds, valve covers, water pumps, headers, and things like that. They come in packages like this specifically for the component, or you get an accessory bolt kit that covers your exact application. Another thing, ARP goes the extra mile and creates tools to help you assemble your engine better and more accurately. Things like the installers for the head studs. Also for checking rod bolt stretch, which is very important. That's the most stressed fastener in the engine. They make some very accurate gauging for checking that both in analog like this or digital, and this is nice cause it has an output. If you're logging it on a computer it has an output where you can log it into a build sheet if you're using it. Also if you're filing rings and you have to get your ring in the top of the bore square they make specific ring squaring tools so you can get your ring in there, get it square, and measure your ring gap accurately. Also they have tapered ring compressors in very specific bores. So no matter what bore you're working on you can get the right size one so your rings go in nice and easy. Over here something you may or may not have seen before. These go on rod bolts. If you have conventional engines with rod bolts, no matter if it's five-sixteenths, three-eighths, or even seven-sixteenths, these are guides that you can screw onto the bolt, not only protecting the threads of the rod bolt but also protecting the crank journal when the piston assembly slides in. Another thing we love about ARP is if you need a fastener for your particular application and they do not manufacture it you can get with their engineering and testing team and they will develop a fastener exactly for your application. And that goes for any sort of material from conventional 87-40 chromoly like they use in their head bolts, head studs, main bolts, and main studs all the way up to something as exotic as aramet or titanium depending on what you're doing. For instance, aramet has a tensile strength of over 260,000 p-s-i. Not sure what you'd use that for but they can make you something that will work just for you. [ Mike ] So the next time you're in the market for high quality fasteners for your engine or the rest of the vehicle make sure you hit up ARP. [ Frankie ] Coming up, this extreme Cadillac comes off the track and into the shop to give us the lowdown on its diesel powered Pro Mod engine.
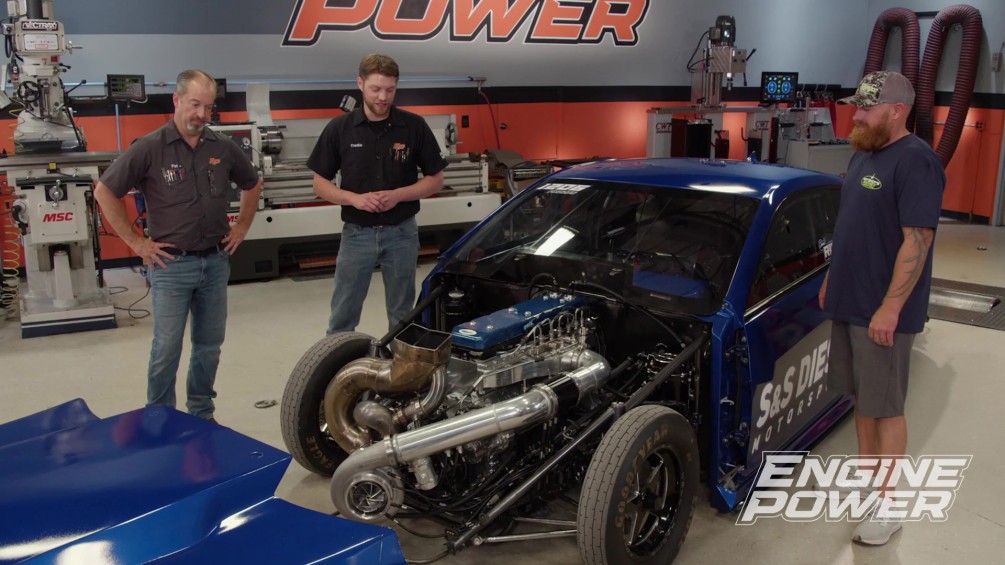
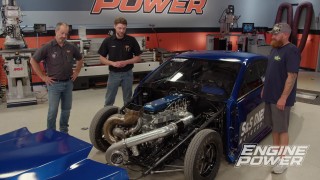
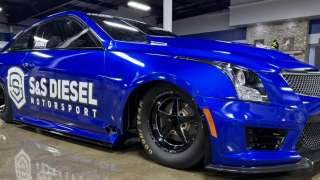
[ Pat ] One of our favorite things to have here in the shop is a cool race car. This one is a Cadillac race car, but this one is not what you think. [ Frankie ] This Cadillac is actually diesel powered, and its owner Jared Ring we actually have him in the studio today to talk to us about this car. Jared, real quick give us the story of the car, how you got it, what class you run it in, the whole lowdown. [ Jared ] So this car's a 2016 ATS. This car was actually Larry Larson's NPK car. He built this car back in '19. They did very well with the Cadillac. Larry had never sold a car in the past of his own race car. At PRI last year we took him an engine. Let him mount it in there for us and get it all ready. We took it home and we were racing it by April of this year. [ Frankie ] Real quick tell us what the engine combination is. Tell us how fast the car goes, and if you have a guess how much power it's making? [ Jared ] This thing has a Freedom Racing engine. Billet Cummins based diesel in it. It runs SNS high pressure fuel system, an SNS control MoTeC system for all of our data logging as well as all the things that run the car. Makes anywhere from 2,800 to 3,200 depending on what we've got set up in it at the time. One of the things that we have brought on board this year with this car especially is Hot Shot's Secrets, and we're running all of their lubricants and everything. Get a lot of help from those guys in what we should be running, and problems that we're having trying to work through them together talking with our engine builders, our transmission builders, our torque converter guys. Just everything. Those guys have supported us a lot, brought us a long ways over the last little bit. [ Pat ] This is not your normal engine. We're doing something with a diesel here that is something way out of the box. How does that translate to Hot Shot's helping you on the r-and-d side because you're really needing something very, very special to do this. How is that instrumental in what you're doing? [ Jared ] This block that's in this car is a new block in the last year or so that's been released by Freedom. When we saw differences in what we were doing between the engines. Bearing wear was one, cylinder wear another. We changed some weights, did some different things, got that stuff moving forward. They have helped us a lot, worked through all that kinda stuff, and showed us different things, tried different things, done different things, and made progress. [ Frankie ] Those relationships are invaluable especially for you guys when you're pushing something like this to the extreme. Obviously they're known for the diesel world but this is an extreme form of diesel. How did you get started with them? How did they become a part of your program. [ Jared ] They have helped our stuff a lot. They provide oils and have helped us with stuff with our tow trucks, all of our things that have made our stuff better. We're really glad that we finally opened up to them. [ Pat ] Now you're running with the big dogs, and you're running it with a diesel. You're trying to get it down to a time where you were running competitively doesn't matter what's on the track. So how fast has this car been? [ Jared ] This car's fastest pass was 4.03 at 186. We're still working on lining a bunch of things out on this car. It is doing well so far. [ Pat ] Now we should get a look at the power plant. [ Frankie ] The car is beautiful and all stock body panels. But for us that's the treat right there. Let's take this front end off and take a look. [ Jared ] For sure! [ Music ] [ Frankie ] Woo, that is a good looking piece of billet. You gave us some relative specs. Tell us more about the engine. Anything that you're willing to share. [ Jared ] This is a Fleece Performance Engineering block with a Winberg crank in it. We're running D&J rods and Diamond pistons. This engine shifts about 6,300. It has a Wagler head on it, conventional style 24 valve head. S&S provides all the fuel system for this thing. It has twin 14mm pumps and a set of very large Ordinance injectors in it. They did all the wiring on this car as well. That's included in their MoTeC program. We provide air to this thing through the Harts 102 charger. So the Harts charger makes anywhere from 90 to 120 p-s-i. We regulate all the boost through Turbosmart waste gates. It is all piped by Cody at 1-X Precision Performance. Built this beautiful header over here. That exhaust there is Larry Larson's original exhaust port for when we was running a big single on this thing. It also has about seven kits of Nitrous Express on it including Nitrous Express water injection. Peterson oil system, all Hot Shot's everywhere. [ Frankie ] What do you see for wear when you are doing teardown or service intervals on the engine? What do you guys see when you're doing your inspections? [ Jared ] The Hot Shots does great. We haven't had any bearing problems. We haven't had any scorching problems in the pistons. No issues like that. [ Frankie ] Jared we appreciate you bringing this in. We love seeing cool stuff like this, and this is definitely one of the cooler ones. [ Pat ] Thanks very much. Good luck! [ Jared ] Thank you guys. [ Mike ] Up next, we get our LS running on the dyno and see what this high performance crate engine can do.
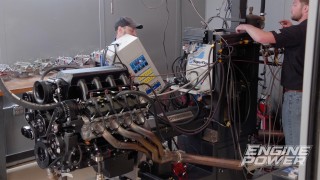
[ Pat ] We're gonna get programmed in here. We're gonna go 3,000 to 6,900. [ Mike ] This FiTech does a really good job labeling everything. Depending on your experience level it's easy to hook up and get running. [ Pat ] That's the key right here because I'm gonna fire this thing up. Nice job! This engine, it's a crate engine. Everything's been put together right. Tell me about timing. What do you have right now for timing in it? [ Mike ] A little over 24 degrees. [ Pat ] It's a street engine with a full accessory drive running on pump gas. We always err to the side of caution. Let's make a rip on her. [ engine revving ]
[ Pat ] Clean, clean right through 7,000. Okay, very good. 446.2 horsepower, 377-pound feet. Now 77 at 5,500 and 446 pretty high, 6,800. That manifold, it's low profile but it's got a little short runner in it. It's gonna want to trend up a little bit. For having a full accessory drive and exhaust manifolds on it and a low profile manifold that's pretty good. Fuel looks good. So we're gonna start sneaking some timing in it. Go ahead and stick two degrees in it and we'll go there. [ Music ]
Here we go! [ engine revving ]
[ Mike ] Clean! [ Pat ] I am very impressed. A little bit more, 450.5 horse at 6,800, 379.7 for torque. [ Mike ] That was two more than last time. [ Pat ] What's nice on torque it's printing at 78, 79, 79, nice, flat. It's up high, and that is a characteristic, with that torque peak being right there, of a short runner. [ Mike ] That pushes that r-p-m you're looking for the higher r-p-m there with the short runners. [ Pat ] Everything looks good. You want to put two more degrees in it and see if it levels off? [ Mike ] The data that we're looking at, spark plugs, all that looks good. [ Pat ] Go jamb two more degrees in her and we'll see if that torque levels off. [ Music ] So we're at 28.3. [ Mike ] Let her rip! [ Pat ] I'm not letting it rip, you let it rip. Now if it blows up it's your fault. [ Mike ] That's fine! Ready! [ engine revving ]
[ Mike ] There you go. We've got 380 on the torque. It's definitely leveled out. That's pretty smooth, and onesies and twosies right now on the tune-up. It looks good, healthy, and what more could you ask for for a street application. [ Pat ] When the torque leveled out with that big a swing cause you took another two degrees at it and torque literally leveled off. On pump gas stuff you're not gonna get anything more out of that. We don't put everything on the razor's edge because you're one bad tank of gas away from wounding something if you're hammering on it. O-2s are tracking great. Oil pressure is going up. Hey we did it! You did a great job! This is your first time dynoing something. [ Mike ] Super fun. [ Pat ] Frankie's gonna be mad he's missing all the fun and you get to dyno some stuff. We've got to go change parts. He'll be back momentarily. You'll get to give him the good news of how this thing did. Job well done man. [ Music ] [ Frankie ] Alright, Pat and Mike wrapped up that dyno session with that great LS. I was out getting these Trick Flow 230 small block Chevy heads for an upcoming project and this gives us a great opportunity to go over today's Summit Racing Tech Tip, and that is c-c'ing combustion chambers for cylinder heads. We do this on every engine so we can get an accurate compression ratio calculation. It's really important but it's also something you can easily do at home. The first thing we're gonna do is install the spark plug. It's very important that you use the correct spark plug for the application and for the cylinder heads. It's also important that the valves are properly sealed. So you either want to use the correct spring package that you'll be using for the engine or if you don't have those yet you can use a set of test springs and a little bit of engine assembly grease on the valve seats to make sure they are properly sealed. We'll also use engine assembly grease to seal up around the chamber. So we'll use a very small amount. Just a dab of our finger and go around. We're not trying to get any inside the combustion chamber. We just want a nice ridge around the outside so it'll seal up. Sometimes I'll take my finger and run it along the edge to keep it all away from it. Once we have enough and it's gonna seal up we'll grab our acrylic plate here. Sometimes if the valve protrudes from the deck surface you have to put a little notch in it so it can sit flat on there. When we're putting this on we want our fill hole to be the highest point in the combustion chamber so all the air can escape. Gently get this on there. You can see as it seals up just want to make sure it's gonna be nice and sealed all the way around. None of the fluid can escape. If you do have a good bit on there you don't want to push it so hard where it ends up inside the combustion chamber taking up too much volume. So that should be good like that. Now that our chamber is set up we can get our 100cc burette set up. We're gonna fill this with 70 percent isopropyl alcohol. This generally works the best, or you can use 90 percent. I've seen some people use anti-freeze, which works fine but it's a little bit harder to get all the bubbles out. We're actually going to overfill this a little bit above the zero c-c mark. Then we will raise it up. We do this so that when we purge the air out of the burette we can catch any excess fluid. We'll put that there, and then we'll crack our valve and you'll watch the air escape out of the bottom. Have it fill with fluid, and then we can set our level at the zero. So we're gonna put the bottom of the meniscus on the zero line. With this set up we'll take it over to our cylinder head. Always hold on to the burette itself so you don't drop it cause if you drop it and hit something hard it's probably gonna crack and then it will be useless. We're gonna get this set up right over our fill hole. Then we can actually fill the combustion chamber. We generally will fill it a little faster than what you would think. We find it helps push all the air bubbles out. You definitely don't want to spill any. You want any of the fluid that comes out of the burette to go into the chamber to get an accurate measurement. We'll just let it fill up there. Make sure all of the air bubbles are coming out with the fluid as it rises. Then we can take our burette and move it away from our chamber and look at our measurement here. This is a direct reading and it looks like 68.5. It's easier to see in front of something, but that is the measurement for this chamber. You can do all the chambers individually but this is something you can easily do at home.
Show Full Transcript
[ Pat ] Today on Engine Power we get into the nuts and bolts of engine building and check out a high horsepower diesel drag car. [ Mike ] Then we put a stout hot rod LS through its paces on the dyno with a new standalone e-f-i system. [ Music ] [ Pat ] Hey everyone, welcome to Engine Power. I know what you're thinking. Usually when you see us we have a pile of parts and an engine to assemble but this time we have a complete engine that is ready to rock and we're gonna get it on the dyno, but there is a very good reason for it. My man Frankie is also out chasing parts. So to dyno this I recruited some help and I would like to introduce you to the newest member of the Powernation team, Michael O'Guin. Micheal and I have similar backgrounds. We chewed a lot of the same dirt in the NHRA. Him with Doug Herbert and Antron Brown in the Top Fuel pits and me with Greg Anderson and Jason Line in Pro Stock. Adding to that we are both instructors at high performance engine schools. So Michael thanks for joining us. [ Michael ] Pat I am super excited to be a part of the Powernation family. Today we're gonna get rolling on this ATK high performance engine. ATK offers engines from all extremes, mild to wild, to fit your application. So if you need a new engine, whether it's a stock replacement or something custom for your application, contact ATK out of Grand Prairie, Texas. They were actually put together in 2007 and have been doing business for a while now. This particular one is a Gen-3 5.3-Liter engine where ATK has gone through all the machining processes and gotten this up to spec for us. A tip for you the next time you're shopping for your next LS project. There are different generations that require different parts. The Generation-3 LS engine has the camshaft position sensor located at the rear of the block. The Gen-4 blocks move the cam sensor to the front on the timing cover. Another thing to look for is the reluctor wheel of the crankshaft. The black crankshaft position sensor is used with the 24-tooth reluctor wheel, and the gray sensor is used for the 58-tooth. The cylinder heads on this engine is what really sets it apart for our custom application. These are from AFR. They are fully c-n-c ported on the chambers and also the ports. Then it leads us to the intake system where we have next level performance. [ Pat ] This is the FiTech Ultimate Rebel LS Kit. This system gives you everything that you need to complete it in your vehicle. It starts off with this manifold. This is a very low profile, fits nicely. They make these for both cathedral and rectangle port. It comes with their 102mm throttle body, all the lines, connections, rails, and injectors, which are a 55 pound per hour injector so you can run gasoline, E-85, or whatever you want. Also it has their own set of coils, which have a really neat feature. They have a blue l-e-d indicator light to show that they are functioning. FiTech has made it very easy to add electronic fuel injection that is user adjustable to the LS platform. They include a custom wiring harness for easy plug and play connection, and they also include the necessary sensors required like a three bar map sensor just in case you want to run up to 30 pounds of boost, an inlet air temp sensor, a throttle position sensor, and two oxygen sensors. This kit is self learning and it can provide sequential fuel and spark control with individual cylinder trim. [ Michael ] And the brains of this FiTech system is their Ultimate LS ECU, which is programmed with their handheld controller. [ Pat ] Enough talk. Let's get this thing on the dyno and see what it makes. [ Music ] Up next, we talk about one of the keys to success in engine building using premium fasteners designed for the application.
[ Mike ] We build a ton of engines here at Powernation from daily drivers all the way up to full race engines, and the one thing in common that they all need is quality fasteners. From the balancer bolt to the flywheel bolts and everywhere in between each engine needs high quality fasteners. That's why we choose ARP. Automotive Racing Products was born when the founder realized the need for high quality studs and fasteners. ARP manufactures, machines, and tests all their products in their southern California facility. From o-e-m replacement components to exotic hardware found in Formula 1, NASCAR, and NHRA, ARP's reputation is nothing but the best in the industry. [ Pat ] Here at Engine Power we mainly deal with the engine fastener side of ARP but they literally make fasteners for anything that you're working on. As far as materials go we mainly use 87-40 and stainless. 87-40 chromoly is used in things like the oil pump drives, the balancer bolts, things that hold on the crank, and cam, and whatnot. Also we use a lot of their 6- and 12-point stainless fasteners for things like intake manifolds, valve covers, water pumps, headers, and things like that. They come in packages like this specifically for the component, or you get an accessory bolt kit that covers your exact application. Another thing, ARP goes the extra mile and creates tools to help you assemble your engine better and more accurately. Things like the installers for the head studs. Also for checking rod bolt stretch, which is very important. That's the most stressed fastener in the engine. They make some very accurate gauging for checking that both in analog like this or digital, and this is nice cause it has an output. If you're logging it on a computer it has an output where you can log it into a build sheet if you're using it. Also if you're filing rings and you have to get your ring in the top of the bore square they make specific ring squaring tools so you can get your ring in there, get it square, and measure your ring gap accurately. Also they have tapered ring compressors in very specific bores. So no matter what bore you're working on you can get the right size one so your rings go in nice and easy. Over here something you may or may not have seen before. These go on rod bolts. If you have conventional engines with rod bolts, no matter if it's five-sixteenths, three-eighths, or even seven-sixteenths, these are guides that you can screw onto the bolt, not only protecting the threads of the rod bolt but also protecting the crank journal when the piston assembly slides in. Another thing we love about ARP is if you need a fastener for your particular application and they do not manufacture it you can get with their engineering and testing team and they will develop a fastener exactly for your application. And that goes for any sort of material from conventional 87-40 chromoly like they use in their head bolts, head studs, main bolts, and main studs all the way up to something as exotic as aramet or titanium depending on what you're doing. For instance, aramet has a tensile strength of over 260,000 p-s-i. Not sure what you'd use that for but they can make you something that will work just for you. [ Mike ] So the next time you're in the market for high quality fasteners for your engine or the rest of the vehicle make sure you hit up ARP. [ Frankie ] Coming up, this extreme Cadillac comes off the track and into the shop to give us the lowdown on its diesel powered Pro Mod engine.
[ Pat ] One of our favorite things to have here in the shop is a cool race car. This one is a Cadillac race car, but this one is not what you think. [ Frankie ] This Cadillac is actually diesel powered, and its owner Jared Ring we actually have him in the studio today to talk to us about this car. Jared, real quick give us the story of the car, how you got it, what class you run it in, the whole lowdown. [ Jared ] So this car's a 2016 ATS. This car was actually Larry Larson's NPK car. He built this car back in '19. They did very well with the Cadillac. Larry had never sold a car in the past of his own race car. At PRI last year we took him an engine. Let him mount it in there for us and get it all ready. We took it home and we were racing it by April of this year. [ Frankie ] Real quick tell us what the engine combination is. Tell us how fast the car goes, and if you have a guess how much power it's making? [ Jared ] This thing has a Freedom Racing engine. Billet Cummins based diesel in it. It runs SNS high pressure fuel system, an SNS control MoTeC system for all of our data logging as well as all the things that run the car. Makes anywhere from 2,800 to 3,200 depending on what we've got set up in it at the time. One of the things that we have brought on board this year with this car especially is Hot Shot's Secrets, and we're running all of their lubricants and everything. Get a lot of help from those guys in what we should be running, and problems that we're having trying to work through them together talking with our engine builders, our transmission builders, our torque converter guys. Just everything. Those guys have supported us a lot, brought us a long ways over the last little bit. [ Pat ] This is not your normal engine. We're doing something with a diesel here that is something way out of the box. How does that translate to Hot Shot's helping you on the r-and-d side because you're really needing something very, very special to do this. How is that instrumental in what you're doing? [ Jared ] This block that's in this car is a new block in the last year or so that's been released by Freedom. When we saw differences in what we were doing between the engines. Bearing wear was one, cylinder wear another. We changed some weights, did some different things, got that stuff moving forward. They have helped us a lot, worked through all that kinda stuff, and showed us different things, tried different things, done different things, and made progress. [ Frankie ] Those relationships are invaluable especially for you guys when you're pushing something like this to the extreme. Obviously they're known for the diesel world but this is an extreme form of diesel. How did you get started with them? How did they become a part of your program. [ Jared ] They have helped our stuff a lot. They provide oils and have helped us with stuff with our tow trucks, all of our things that have made our stuff better. We're really glad that we finally opened up to them. [ Pat ] Now you're running with the big dogs, and you're running it with a diesel. You're trying to get it down to a time where you were running competitively doesn't matter what's on the track. So how fast has this car been? [ Jared ] This car's fastest pass was 4.03 at 186. We're still working on lining a bunch of things out on this car. It is doing well so far. [ Pat ] Now we should get a look at the power plant. [ Frankie ] The car is beautiful and all stock body panels. But for us that's the treat right there. Let's take this front end off and take a look. [ Jared ] For sure! [ Music ] [ Frankie ] Woo, that is a good looking piece of billet. You gave us some relative specs. Tell us more about the engine. Anything that you're willing to share. [ Jared ] This is a Fleece Performance Engineering block with a Winberg crank in it. We're running D&J rods and Diamond pistons. This engine shifts about 6,300. It has a Wagler head on it, conventional style 24 valve head. S&S provides all the fuel system for this thing. It has twin 14mm pumps and a set of very large Ordinance injectors in it. They did all the wiring on this car as well. That's included in their MoTeC program. We provide air to this thing through the Harts 102 charger. So the Harts charger makes anywhere from 90 to 120 p-s-i. We regulate all the boost through Turbosmart waste gates. It is all piped by Cody at 1-X Precision Performance. Built this beautiful header over here. That exhaust there is Larry Larson's original exhaust port for when we was running a big single on this thing. It also has about seven kits of Nitrous Express on it including Nitrous Express water injection. Peterson oil system, all Hot Shot's everywhere. [ Frankie ] What do you see for wear when you are doing teardown or service intervals on the engine? What do you guys see when you're doing your inspections? [ Jared ] The Hot Shots does great. We haven't had any bearing problems. We haven't had any scorching problems in the pistons. No issues like that. [ Frankie ] Jared we appreciate you bringing this in. We love seeing cool stuff like this, and this is definitely one of the cooler ones. [ Pat ] Thanks very much. Good luck! [ Jared ] Thank you guys. [ Mike ] Up next, we get our LS running on the dyno and see what this high performance crate engine can do.
[ Pat ] We're gonna get programmed in here. We're gonna go 3,000 to 6,900. [ Mike ] This FiTech does a really good job labeling everything. Depending on your experience level it's easy to hook up and get running. [ Pat ] That's the key right here because I'm gonna fire this thing up. Nice job! This engine, it's a crate engine. Everything's been put together right. Tell me about timing. What do you have right now for timing in it? [ Mike ] A little over 24 degrees. [ Pat ] It's a street engine with a full accessory drive running on pump gas. We always err to the side of caution. Let's make a rip on her. [ engine revving ]
[ Pat ] Clean, clean right through 7,000. Okay, very good. 446.2 horsepower, 377-pound feet. Now 77 at 5,500 and 446 pretty high, 6,800. That manifold, it's low profile but it's got a little short runner in it. It's gonna want to trend up a little bit. For having a full accessory drive and exhaust manifolds on it and a low profile manifold that's pretty good. Fuel looks good. So we're gonna start sneaking some timing in it. Go ahead and stick two degrees in it and we'll go there. [ Music ]
Here we go! [ engine revving ]
[ Mike ] Clean! [ Pat ] I am very impressed. A little bit more, 450.5 horse at 6,800, 379.7 for torque. [ Mike ] That was two more than last time. [ Pat ] What's nice on torque it's printing at 78, 79, 79, nice, flat. It's up high, and that is a characteristic, with that torque peak being right there, of a short runner. [ Mike ] That pushes that r-p-m you're looking for the higher r-p-m there with the short runners. [ Pat ] Everything looks good. You want to put two more degrees in it and see if it levels off? [ Mike ] The data that we're looking at, spark plugs, all that looks good. [ Pat ] Go jamb two more degrees in her and we'll see if that torque levels off. [ Music ] So we're at 28.3. [ Mike ] Let her rip! [ Pat ] I'm not letting it rip, you let it rip. Now if it blows up it's your fault. [ Mike ] That's fine! Ready! [ engine revving ]
[ Mike ] There you go. We've got 380 on the torque. It's definitely leveled out. That's pretty smooth, and onesies and twosies right now on the tune-up. It looks good, healthy, and what more could you ask for for a street application. [ Pat ] When the torque leveled out with that big a swing cause you took another two degrees at it and torque literally leveled off. On pump gas stuff you're not gonna get anything more out of that. We don't put everything on the razor's edge because you're one bad tank of gas away from wounding something if you're hammering on it. O-2s are tracking great. Oil pressure is going up. Hey we did it! You did a great job! This is your first time dynoing something. [ Mike ] Super fun. [ Pat ] Frankie's gonna be mad he's missing all the fun and you get to dyno some stuff. We've got to go change parts. He'll be back momentarily. You'll get to give him the good news of how this thing did. Job well done man. [ Music ] [ Frankie ] Alright, Pat and Mike wrapped up that dyno session with that great LS. I was out getting these Trick Flow 230 small block Chevy heads for an upcoming project and this gives us a great opportunity to go over today's Summit Racing Tech Tip, and that is c-c'ing combustion chambers for cylinder heads. We do this on every engine so we can get an accurate compression ratio calculation. It's really important but it's also something you can easily do at home. The first thing we're gonna do is install the spark plug. It's very important that you use the correct spark plug for the application and for the cylinder heads. It's also important that the valves are properly sealed. So you either want to use the correct spring package that you'll be using for the engine or if you don't have those yet you can use a set of test springs and a little bit of engine assembly grease on the valve seats to make sure they are properly sealed. We'll also use engine assembly grease to seal up around the chamber. So we'll use a very small amount. Just a dab of our finger and go around. We're not trying to get any inside the combustion chamber. We just want a nice ridge around the outside so it'll seal up. Sometimes I'll take my finger and run it along the edge to keep it all away from it. Once we have enough and it's gonna seal up we'll grab our acrylic plate here. Sometimes if the valve protrudes from the deck surface you have to put a little notch in it so it can sit flat on there. When we're putting this on we want our fill hole to be the highest point in the combustion chamber so all the air can escape. Gently get this on there. You can see as it seals up just want to make sure it's gonna be nice and sealed all the way around. None of the fluid can escape. If you do have a good bit on there you don't want to push it so hard where it ends up inside the combustion chamber taking up too much volume. So that should be good like that. Now that our chamber is set up we can get our 100cc burette set up. We're gonna fill this with 70 percent isopropyl alcohol. This generally works the best, or you can use 90 percent. I've seen some people use anti-freeze, which works fine but it's a little bit harder to get all the bubbles out. We're actually going to overfill this a little bit above the zero c-c mark. Then we will raise it up. We do this so that when we purge the air out of the burette we can catch any excess fluid. We'll put that there, and then we'll crack our valve and you'll watch the air escape out of the bottom. Have it fill with fluid, and then we can set our level at the zero. So we're gonna put the bottom of the meniscus on the zero line. With this set up we'll take it over to our cylinder head. Always hold on to the burette itself so you don't drop it cause if you drop it and hit something hard it's probably gonna crack and then it will be useless. We're gonna get this set up right over our fill hole. Then we can actually fill the combustion chamber. We generally will fill it a little faster than what you would think. We find it helps push all the air bubbles out. You definitely don't want to spill any. You want any of the fluid that comes out of the burette to go into the chamber to get an accurate measurement. We'll just let it fill up there. Make sure all of the air bubbles are coming out with the fluid as it rises. Then we can take our burette and move it away from our chamber and look at our measurement here. This is a direct reading and it looks like 68.5. It's easier to see in front of something, but that is the measurement for this chamber. You can do all the chambers individually but this is something you can easily do at home.
