Engine Power Featured Projects
Engine Power Builds
Want more content like this?
Join the PowerNation Email NewsletterParts Used In This Episode
ARP
ARP Bolts
Comp Cams
COMP Cams Retro-Fit Hydraulic Roller Lifter Set
Comp Cams
COMP Cams Xtreme Energy Hydraulic Roller Camshaft
CVF Racing
CVF Ford 460 Serpentine System
CWT Industries
CWT Multi-Bal 5500
Edelbrock
Edelbrock Performer RPM Air-Gap Intake Manifold
Holley
Sniper EFI X-Flow
Episode Transcript
(Pat)>> You're watching Powernation!
(Frankie)>> Today on Engine Power we give our turbocharged 460 big block some more durable parts and push it to the edge on the dyno. ♪
(Pat)>> But do we push it too far? [Music]
(Frankie)>> Welcome to a new episode and a new season of Engine Power. Your eyes aren't deceiving you. This is Engine Power but with a new look. Engine Power has been going on for about 10 years. That's an entire decade of awesome engine builds and awesome content, and we figured it could use an update. Even though it looks different the content is gonna be just as good, but we blew apart our shop so we could put new paint on the walls, we have new shirts, and most importantly we have a new logo. I even got new pants for this.
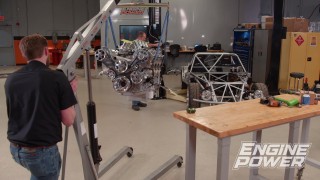
(Pat)>> And while we had the shop all apart getting paint on the walls we said hey, let's do a little bit of rearranging. So we cleaned up the machines and switched their positions. We moved the lathe, we moved the mill, and we moved the hone. Now we can work more efficiently and we have that fresh, clean, new look, but the coolest thing about all this rearranging is just look at all of this extra space that we have.
(Frankie)>> There's so much room for activities.
(Pat)>> My head's spinning thinking about the possibilities.
(Frankie)>> I have a few ideas. Please say yes, please, please! Office chair activities!
(Pat)>> Ready?
(Frankie)>> Hit it! High stakes Uno! You should probably stick to building engines! [ bleep ]
(Pat)>> This game sucks.
(Pat)>> Not so hot yoga!
(Frankie)>> I don't think I'm doing this right.
(Pat)>> Putting practice! [Music]
(Frankie)>> Shop movie theater!
(Pat)>> Shhh, my favorite part! This is one of my favorite shows. (Pat & Frankie)>> Wave party!! [ techno music ]
(Pat)>> To kick things off here in the new shop we have brought back an old favorite. This is our budget Ford 460 project we worked on a short time again. This engine made some downright impressive horsepower and torque numbers, and we did it on pump gas, we did it at low r-p-m, and most important we did it on a tight budget. Although it ran great it is in here for some improvements, but to get you caught up on this project and show you how we made those great numbers have a look at this. We started out with a refreshed but all stock 60 over 460 big block. The only modifications that were made were gapping the rings a little bigger and upgrading the flat tappet valve springs for better control over the stock valvetrain. We even used the stock e-f-i intake manifold and stock cast iron exhaust manifolds to make it as close as possible to a 460 you would find in a later model Ford.
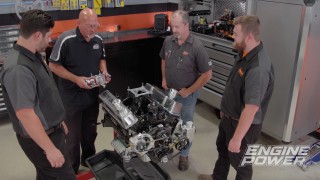
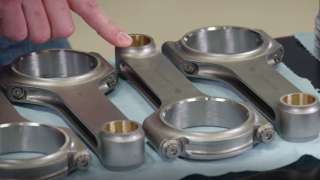
(Frankie)>> We had to know what the engine made in its naturally aspirated form. So we dyno'ed it with one of our 750 QFT carburetors and it pumped out a pretty decent 460 pound feet and 295 horsepower. The real party started with we added a 78 millimeter turbocharger, converted our carb to blow through, and started adding some boost. At 8 p-s-i the big block was pushing a diesel level 720 pound feet and 494 horsepower. Now you can see that we really did put this engine together with stock componentry, and it's extremely impressive that it lived on the dyno at that power level, but that was on the dyno where we can control and monitor everything on the engine very closely. If we were to put this in a project it's potentially one overheated pull away from sending that hypereutectic piston out the exhaust pipe. So we definitely wanted to do some upgrades so that if it goes into a project it's dead reliable and can be beat on. So at Summit Racing Equipment we actually found forged components so that this engine can take that power level with ease. The big, key part of that is the Summit Racing H-beam forged rod. A lot of the aftermarket big block Ford rods use a big block Chevy connecting rod journal size, small end size, and connecting rod length, but if we want to use that stock big block Ford crank to keep the budget low then we needed a rod that was gonna fit the stock specs and these fit the bill perfectly. They have a 2-500 big end, a 1-040 small end, and use the stock big block Ford center to center length at 6-605. So that means it's easy to find an aftermarket piston to work with them. They also are obviously way stronger than the stock I-beam rods, and come with an 87-40 ARP connecting rod cap screw bolt. So that's a huge upgrade over the stock bolt as well. The Icon pistons that we got are made of 26-18 forged aluminum. They have a one sixteenth, one sixteenth, three sixteenths ring pack, which is an upgrade over the stock rings. It has a similar compression height to the stock piston, a little bit higher at 1-772. It uses that 1-040 wrist pin size like we were talking about, and has a 15cc effective dish. So our compression ratio will actually be very similar. We're gonna be filling those with a set of Total Seal piston rings. So we'll have a rock solid bottom end for this engine. Now we laid out these parts so you could see some of the upgrades that we're gonna be doing but we can't touch any of this until we get that thing pulled apart.
(Pat)>> Next up, we finish tearing down our 460 and get it prepped for reassembly.
(Frankie)>> And it's important to have a balanced diet and a balanced crankshaft. Mostly the balanced crankshaft.
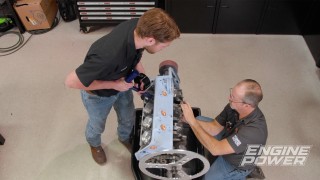
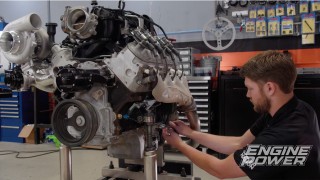
(Pat)>> With all the piping removed and the turbo off we are continuing on the teardown of our 460. Now keep in mind, this engine has to come all the way apart because we have some internal components to replace. As it comes apart we are going to evaluate how all the parts look. Remember, this thing made a whole ton of power on stock components. So we're gonna see what they look like.
(Frankie)>> There are a few more ancillary pieces that have to come off before we can really get down to the nitty gritty. After removing the crank pulley we'll pull off the water pump pulley as well. [ drill humming ] [Music]
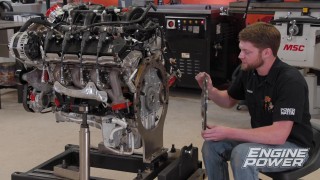
(Frankie)>> While I pop the valve covers off Pat will go ahead and remove the stock style damper. Then we can remove most of the stock valvetrain keeping everything in order and inspecting its condition. With the stock intake manifold pried off we can pull the flat tappet lifters out with a small pick, keeping them in order as well. We were hoping to leave these valve cover adapters sealed on the heads but one pesky head bolt won't come out with them in the way. So we'll pry them off and clean them up for reuse. Finally we can lift off the heads and inspect the condition inside the cylinders. These chambers look really good. Now we were really safe on the tune-up but this is probably right on the edge of what you could do with this setup, and that's one of the reasons we're putting a better piston in it. You go anywhere outside the normal bounds of operation this thing's probably really close to hurting itself.
(Pat)>> But the nice part about it is if you come over here and look at the bores the bores look spectacular for the power level and all that. There's a really nice, pronounced cross hatch. They all look good. The head gasket, there's nothing that's pushing out in the head gasket. When you put that kind of abuse to something and it still looks this good it makes me very, very happy. Would I do it all the time, no, but we're gonna be able to push it a little bit harder with our better parts.
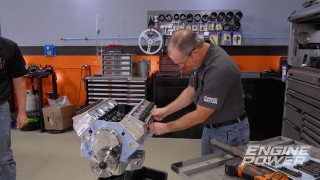
(Frankie)>> We'll continue disassembly with draining the oil, removing the oil pan, and taking off the timing cover. Even though this was a solid setup we will be replacing the timing set with a more adjustable one and swapping out the flat tappet cam shaft for a hydraulic roller. So these parts will hit the shelf for now. Same goes for these stock rods and replacement pistons, which after gently taping them out of the bores can be inspected.
(Pat)>> Not bad at all.
(Frankie)>> And they took the power this thing made like a champ. [ drill humming ]
(Frankie)>> We round the corner on disassembly with the main caps coming off so the crank can be removed. While Pat does some work to get the block prepped and cleaned for final assembly we're gonna go ahead and balance our stock crankshaft. Now since we're using our stock crankshaft it is externally balanced on the front and rear, that means we not only need all of our rotating assembly but we also need our front counterweight, damper, and flywheel. So we have everything we need. So we're gonna get our crank in our CWT Multi-Val 5,500 and get to work. This doesn't get any lighter. To create our bob weight we'll individually weigh each component, and the machine will automatically calculate our target. After building up four precision bob weights they are mounted on the center of each crank pin and we can do our first spin. [Music] This is a great example of why you want to get your crank balanced when you start changing components. We knew this was gonna be way off. We're at one point six-two-three ounce inch on the left and seven point two-three-one ounce inch on the right. That's because our new components are roughly two hundred grams lighter, but no big deal. We can get this fixed. First thing we'll do remove the front external counterweight and chuck it up in the lathe so we can turn roughly 250 thousandths off of it. Then we can finish correcting the imbalance by using the drill head on the machine to remove material in stages until we are ready for our final spin.
So we're gonna call that our last spin cause this is now balanced well within our tolerance of quarter ounce inch. We're at .192 ounce inch on the left and . 155 ounce inch on the right, and the really important thing is that they are 180 degrees apart. What that does is cancel out the forces on the center of the crank. So on the center of the crank we're actually at .037 ounce inch. So definitely minimized, and really shows that if you're changing components inside your engine it's really important that you get them balanced because before this crank, even at 5,000 r-p-m, had 321 pounds of force on the right side on the front, and now we've minimized that down to just 6.89 pounds. So that's a huge difference. We're very happy with that. We're gonna get it off, get it cleaned, and get it in the engine. Up next, we move on to assembly, putting our heavy duty parts into our big block 460.
(Pat)>> And then it's gonna get run on dyno after a whole bunch more work. Send it!
(Frankie)>> We're onto assembly of our turbo 460 big block Ford. I'm setting the end gaps on these Total Seal pistons rings at 26 thousandths on the top and 28 thousandths on the second following Total Seal's recommendations for our turbocharged application.
(Pat)>> And I am setting up the rod bearing clearance on our new Summit H-beam rods. The mains have already been done. So what I'm gonna do is set up our new rod bearing clearance between 23 and 28 ten-thousandths for our application. So once we get that all done we're gonna start clicking this engine together. Once we're ready for assembly we can lay the like new main bearings into the block and lube them up.
(Frankie)>> Doesn't get any lighter. Have to be really gentle with it. Nice and slow and it's in.
(Pat)>> Each of the caps are installed and our new ARP main bolts are torqued to 100 pound feet. With all the rod and piston assemblies lubed up they can be installed with an adjustable ring compressor. The ARP rod bolts are broken loose, and then torqued to 63 pound feet to achieve proper clamp load.
(Frankie)>> The cam is an off the shelf Comp hydraulic roller with durations at 50 thousandths lift of 218 degrees on the intake and 224 degrees on the exhaust. Lobe separation is 110, and lift at the valve with our rockers is 522 thousandths on the intake and 521 thousandths on the exhaust. With the oil gallery plugs installed, the stock cam retaining plate can be torque in place. This Comp Cams' nine keyway adjustable timing set is a huge upgrade, and allows us to degree the cam anywhere we want. We'll set the intake centerline at 108.5. The timing cover, front counterweight, water pump, and harmonic damper can seal up the front end and we can flip the engine over. This new high volume oil pump is the start of our upgraded oiling system. We're gonna be replacing the stock pan with an upgraded Milodon one, and we're gonna be using the matching pick-up, but something that we didn't actually account for is that we thought this was gonna mount like a stock Ford pick-up on top of the stock main bolt, which has a short standoff to bolt it down on, but actually Milodon accounted for using aftermarket fasteners in your engine. So the pick-up actually mounts underneath the head of the bolt. So we're gonna be pulling out this stock made bolt and replacing it with the last ARP bolt from our main bolt kit, which is awesome cause now we have high quality matching main fasteners thoughout the engine.
(Pat)>> A small amount of silicone in the critical areas and a one piece oil pan gasket with keep the new four by four pan sealed on the engine. These m-l-s 4-500 bore 40 thousandths thick head gaskets give us a measured compression ratio of a boost friendly 8.49 to one. The beefy ARP head bolts are torqued in three stages to a final value of 140 pound feet.
(Frankie)>> We've soaked these Comp Cams' retrofit hydraulic roller lifts in oil for about an hour before slipping them into the lifter bores in the correct orientation. Then we can slide in the 8-100 long push rods and install the 1.73 ratio Scorpion bolt down rocker arms in the firing order of the engine. Beads of silicone seal the valley cover, and it is bolted to the China walls before the intake gaskets and intake adapters are secured to the heads.
(Pat)>> The new intake manifold we have chosen for our application is an Edelbrock Performer RPM Air Gap. Compared to the old fuelie intake it is drastically different. It has a larger runner with a larger cross sectional area, and a larger and deeper plenum. Now combined with that new cam shaft that has a hydraulic roller profile and has more lift and duration we're gonna see a nice bump in power, both naturally aspirated and when we put this thing under artificial atmosphere.
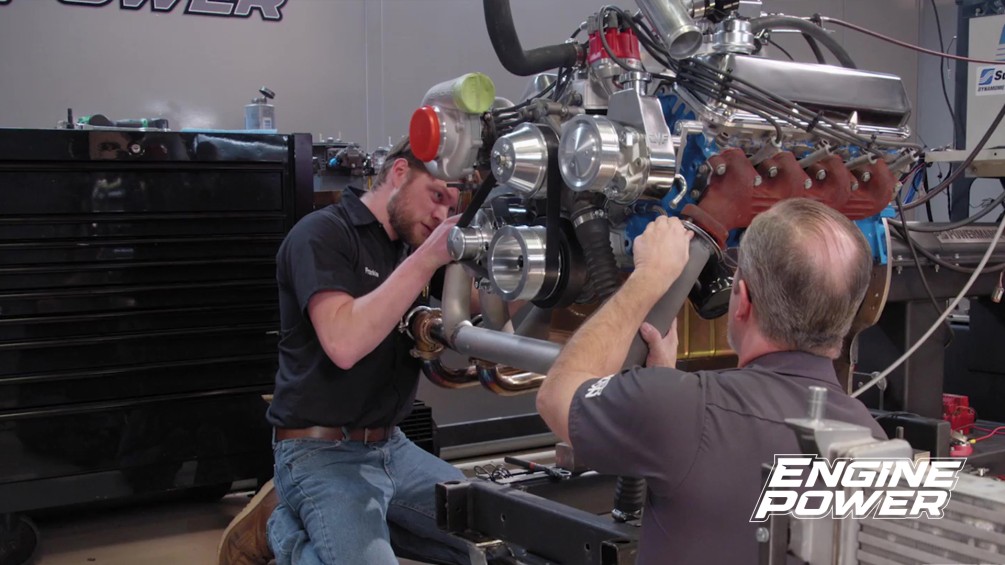
(Frankie)>> With our valve cover adapters sealed back down and some spray lube on the valvetrain we can put our valve covers back on and seal up the top of our engine. Another part of getting this engine ready to go into a future project is getting a front drive. So we reached out to the guys at CVF Racing and they hooked us up with one of their serpentine conversion kits for a big block Ford. With the stock exhaust manifolds re-installed this big block can make its way into the dyno cell. Up next, we finally get our turbo 460 on the dyno.
(Pat)>> But all our hard work goes up in smoke.
(Frankie)>> So we have our 460 on the dyno and we have it running with all of our new upgrades, and one of the other changes we made was switching from the carburetor we ran last time to a Sniper X-flow unit. Now this thing has four 129 pound injectors. So it's gonna be plenty of fuel for the power level we're gonna be making, but we've been making some preliminary pulls, letting it learn, getting it up to temp, tuning on it just a little bit, and we think we have it right where we want it. So we're gonna make a power pull and see what this thing makes with its new upgrades. [ engine revving ]
(Pat)>> Very nice torque! [ engine revving ]
(Frankie)>> I thought I saw some good numbers there.
(Pat)>> Is that a nice graph or what?
(Frankie)>> 480.9 pound feet. So we're up on torque for peak, and power, yeah, 367.5 right at 4,700. So yeah, higher, a little bit higher peak on torque, little bit higher peak on horsepower in terms of r-p-m range, but we're way up on power.
(Pat)>> The thing with where it was.
(Frankie)>> So 295 peak horsepower. So we're at 367, and you can see the torque, it doesn't lose any. It just holds it right where it is and then about 2,500 just goes up. I'm happy with that. I think that's awesome! We're obviously making more n/a.
(Pat)>> Enough talk, more action. After flipping our exhaust manifolds around we can install the same dyno tested turbo setup from last time, which features a 78 millimeter VS Racing turbo, twin 50 millimeter Summit waste gates, and a diesel truck charged air cooler. We are in turbo mode now. We have the engine one, got it fired up, got it warmed up. Everything seems to be great. Only thing we're worried about is getting it to the same r-p-m range that we did when we were running it naturally aspirated. So we're gonna be making our pulls up to 5,500 like we were before. This is gonna be an interesting test because all we did was a slightly better cam and a better intake manifold, and obviously a sniper.
(Frankie)>> We have our more durable parts. So we'll probably be pushing this a little bit harder. We're gonna see as we go.
(Pat)>> The internet says this thing will make all kinds of power. The cranks are good for 1,000 horsepower, blah, blah, blah.
(Frankie)>> We're also on pump gas. So that is a big limiting factor here cause once we start making a lot of cylinder pressure that pump gas is gonna be the link in the chain that's the weakest. So same r-p-m sweep, right on the waste gates like we did last time starting off. So we'll see what she makes. [ engine revving ]
(Pat)>> Legs her all the way out to 5,500 too. That's nice, 528 horsepower.
(Frankie)>> 718, that's crazy!
(Pat)>> It's spiking up in the eights, all the way up to 5,500. It's still at 7.3 pounds of boost at 5,500. Nice and level. It goes nice and flat.
(Frankie)>> It carries the power awesome.
(Pat)>> Air/fuels all look fine. Let's go ahead and make a pull right now and see how much more. Once you start building heat in the turbo housing it's gonna spool up a little bit different. It's gonna make more power. Let's see what it does and put a little bit in it.
(Frankie)>> Go put a few clicks in it like you did last time and see what she does.
(Pat)>> I got a couple of clicks in it, couple meaning four. [ engine revving ]
(Pat)>> Stop! [Music]
(Frankie)>> Ah, it broke our oil line! Our oil line that feeds the oil pressure sensor in the dyno tower got a little hot, little melty, and puked oil out everywhere. Easy fix! Cut it off, put a new end on.
(Pat)>> After cleaning up our oily mess we're ready to try again. [ engine revving ]
(Pat)>> Nice, nice, nice!
(Frankie)>> Oh my gosh!
(Pat)>> That's nice power right there. 568 horse but look at the torque, 769 pound feet. Check the boost on that one.
(Frankie)>> Nine and a half. That's what we ran last time. There's not a ton of crazy high end parts in this thing.
(Pat)>> You could put a $3,000 dollar set of heads on it.
(Frankie)>> And at this boost level it'll make 1,000. I'm super stoked about this. I don't think we have to go any more.
(Pat)>> When you're in that seat you get to make the call.
(Frankie)>> For more high power engine builds like this one you can find Engine Power on Powernation.
Show Full Transcript
(Frankie)>> Today on Engine Power we give our turbocharged 460 big block some more durable parts and push it to the edge on the dyno. ♪
(Pat)>> But do we push it too far? [Music]
(Frankie)>> Welcome to a new episode and a new season of Engine Power. Your eyes aren't deceiving you. This is Engine Power but with a new look. Engine Power has been going on for about 10 years. That's an entire decade of awesome engine builds and awesome content, and we figured it could use an update. Even though it looks different the content is gonna be just as good, but we blew apart our shop so we could put new paint on the walls, we have new shirts, and most importantly we have a new logo. I even got new pants for this.
(Pat)>> And while we had the shop all apart getting paint on the walls we said hey, let's do a little bit of rearranging. So we cleaned up the machines and switched their positions. We moved the lathe, we moved the mill, and we moved the hone. Now we can work more efficiently and we have that fresh, clean, new look, but the coolest thing about all this rearranging is just look at all of this extra space that we have.
(Frankie)>> There's so much room for activities.
(Pat)>> My head's spinning thinking about the possibilities.
(Frankie)>> I have a few ideas. Please say yes, please, please! Office chair activities!
(Pat)>> Ready?
(Frankie)>> Hit it! High stakes Uno! You should probably stick to building engines! [ bleep ]
(Pat)>> This game sucks.
(Pat)>> Not so hot yoga!
(Frankie)>> I don't think I'm doing this right.
(Pat)>> Putting practice! [Music]
(Frankie)>> Shop movie theater!
(Pat)>> Shhh, my favorite part! This is one of my favorite shows. (Pat & Frankie)>> Wave party!! [ techno music ]
(Pat)>> To kick things off here in the new shop we have brought back an old favorite. This is our budget Ford 460 project we worked on a short time again. This engine made some downright impressive horsepower and torque numbers, and we did it on pump gas, we did it at low r-p-m, and most important we did it on a tight budget. Although it ran great it is in here for some improvements, but to get you caught up on this project and show you how we made those great numbers have a look at this. We started out with a refreshed but all stock 60 over 460 big block. The only modifications that were made were gapping the rings a little bigger and upgrading the flat tappet valve springs for better control over the stock valvetrain. We even used the stock e-f-i intake manifold and stock cast iron exhaust manifolds to make it as close as possible to a 460 you would find in a later model Ford.
(Frankie)>> We had to know what the engine made in its naturally aspirated form. So we dyno'ed it with one of our 750 QFT carburetors and it pumped out a pretty decent 460 pound feet and 295 horsepower. The real party started with we added a 78 millimeter turbocharger, converted our carb to blow through, and started adding some boost. At 8 p-s-i the big block was pushing a diesel level 720 pound feet and 494 horsepower. Now you can see that we really did put this engine together with stock componentry, and it's extremely impressive that it lived on the dyno at that power level, but that was on the dyno where we can control and monitor everything on the engine very closely. If we were to put this in a project it's potentially one overheated pull away from sending that hypereutectic piston out the exhaust pipe. So we definitely wanted to do some upgrades so that if it goes into a project it's dead reliable and can be beat on. So at Summit Racing Equipment we actually found forged components so that this engine can take that power level with ease. The big, key part of that is the Summit Racing H-beam forged rod. A lot of the aftermarket big block Ford rods use a big block Chevy connecting rod journal size, small end size, and connecting rod length, but if we want to use that stock big block Ford crank to keep the budget low then we needed a rod that was gonna fit the stock specs and these fit the bill perfectly. They have a 2-500 big end, a 1-040 small end, and use the stock big block Ford center to center length at 6-605. So that means it's easy to find an aftermarket piston to work with them. They also are obviously way stronger than the stock I-beam rods, and come with an 87-40 ARP connecting rod cap screw bolt. So that's a huge upgrade over the stock bolt as well. The Icon pistons that we got are made of 26-18 forged aluminum. They have a one sixteenth, one sixteenth, three sixteenths ring pack, which is an upgrade over the stock rings. It has a similar compression height to the stock piston, a little bit higher at 1-772. It uses that 1-040 wrist pin size like we were talking about, and has a 15cc effective dish. So our compression ratio will actually be very similar. We're gonna be filling those with a set of Total Seal piston rings. So we'll have a rock solid bottom end for this engine. Now we laid out these parts so you could see some of the upgrades that we're gonna be doing but we can't touch any of this until we get that thing pulled apart.
(Pat)>> Next up, we finish tearing down our 460 and get it prepped for reassembly.
(Frankie)>> And it's important to have a balanced diet and a balanced crankshaft. Mostly the balanced crankshaft.
(Pat)>> With all the piping removed and the turbo off we are continuing on the teardown of our 460. Now keep in mind, this engine has to come all the way apart because we have some internal components to replace. As it comes apart we are going to evaluate how all the parts look. Remember, this thing made a whole ton of power on stock components. So we're gonna see what they look like.
(Frankie)>> There are a few more ancillary pieces that have to come off before we can really get down to the nitty gritty. After removing the crank pulley we'll pull off the water pump pulley as well. [ drill humming ] [Music]
(Frankie)>> While I pop the valve covers off Pat will go ahead and remove the stock style damper. Then we can remove most of the stock valvetrain keeping everything in order and inspecting its condition. With the stock intake manifold pried off we can pull the flat tappet lifters out with a small pick, keeping them in order as well. We were hoping to leave these valve cover adapters sealed on the heads but one pesky head bolt won't come out with them in the way. So we'll pry them off and clean them up for reuse. Finally we can lift off the heads and inspect the condition inside the cylinders. These chambers look really good. Now we were really safe on the tune-up but this is probably right on the edge of what you could do with this setup, and that's one of the reasons we're putting a better piston in it. You go anywhere outside the normal bounds of operation this thing's probably really close to hurting itself.
(Pat)>> But the nice part about it is if you come over here and look at the bores the bores look spectacular for the power level and all that. There's a really nice, pronounced cross hatch. They all look good. The head gasket, there's nothing that's pushing out in the head gasket. When you put that kind of abuse to something and it still looks this good it makes me very, very happy. Would I do it all the time, no, but we're gonna be able to push it a little bit harder with our better parts.
(Frankie)>> We'll continue disassembly with draining the oil, removing the oil pan, and taking off the timing cover. Even though this was a solid setup we will be replacing the timing set with a more adjustable one and swapping out the flat tappet cam shaft for a hydraulic roller. So these parts will hit the shelf for now. Same goes for these stock rods and replacement pistons, which after gently taping them out of the bores can be inspected.
(Pat)>> Not bad at all.
(Frankie)>> And they took the power this thing made like a champ. [ drill humming ]
(Frankie)>> We round the corner on disassembly with the main caps coming off so the crank can be removed. While Pat does some work to get the block prepped and cleaned for final assembly we're gonna go ahead and balance our stock crankshaft. Now since we're using our stock crankshaft it is externally balanced on the front and rear, that means we not only need all of our rotating assembly but we also need our front counterweight, damper, and flywheel. So we have everything we need. So we're gonna get our crank in our CWT Multi-Val 5,500 and get to work. This doesn't get any lighter. To create our bob weight we'll individually weigh each component, and the machine will automatically calculate our target. After building up four precision bob weights they are mounted on the center of each crank pin and we can do our first spin. [Music] This is a great example of why you want to get your crank balanced when you start changing components. We knew this was gonna be way off. We're at one point six-two-three ounce inch on the left and seven point two-three-one ounce inch on the right. That's because our new components are roughly two hundred grams lighter, but no big deal. We can get this fixed. First thing we'll do remove the front external counterweight and chuck it up in the lathe so we can turn roughly 250 thousandths off of it. Then we can finish correcting the imbalance by using the drill head on the machine to remove material in stages until we are ready for our final spin.
So we're gonna call that our last spin cause this is now balanced well within our tolerance of quarter ounce inch. We're at .192 ounce inch on the left and . 155 ounce inch on the right, and the really important thing is that they are 180 degrees apart. What that does is cancel out the forces on the center of the crank. So on the center of the crank we're actually at .037 ounce inch. So definitely minimized, and really shows that if you're changing components inside your engine it's really important that you get them balanced because before this crank, even at 5,000 r-p-m, had 321 pounds of force on the right side on the front, and now we've minimized that down to just 6.89 pounds. So that's a huge difference. We're very happy with that. We're gonna get it off, get it cleaned, and get it in the engine. Up next, we move on to assembly, putting our heavy duty parts into our big block 460.
(Pat)>> And then it's gonna get run on dyno after a whole bunch more work. Send it!
(Frankie)>> We're onto assembly of our turbo 460 big block Ford. I'm setting the end gaps on these Total Seal pistons rings at 26 thousandths on the top and 28 thousandths on the second following Total Seal's recommendations for our turbocharged application.
(Pat)>> And I am setting up the rod bearing clearance on our new Summit H-beam rods. The mains have already been done. So what I'm gonna do is set up our new rod bearing clearance between 23 and 28 ten-thousandths for our application. So once we get that all done we're gonna start clicking this engine together. Once we're ready for assembly we can lay the like new main bearings into the block and lube them up.
(Frankie)>> Doesn't get any lighter. Have to be really gentle with it. Nice and slow and it's in.
(Pat)>> Each of the caps are installed and our new ARP main bolts are torqued to 100 pound feet. With all the rod and piston assemblies lubed up they can be installed with an adjustable ring compressor. The ARP rod bolts are broken loose, and then torqued to 63 pound feet to achieve proper clamp load.
(Frankie)>> The cam is an off the shelf Comp hydraulic roller with durations at 50 thousandths lift of 218 degrees on the intake and 224 degrees on the exhaust. Lobe separation is 110, and lift at the valve with our rockers is 522 thousandths on the intake and 521 thousandths on the exhaust. With the oil gallery plugs installed, the stock cam retaining plate can be torque in place. This Comp Cams' nine keyway adjustable timing set is a huge upgrade, and allows us to degree the cam anywhere we want. We'll set the intake centerline at 108.5. The timing cover, front counterweight, water pump, and harmonic damper can seal up the front end and we can flip the engine over. This new high volume oil pump is the start of our upgraded oiling system. We're gonna be replacing the stock pan with an upgraded Milodon one, and we're gonna be using the matching pick-up, but something that we didn't actually account for is that we thought this was gonna mount like a stock Ford pick-up on top of the stock main bolt, which has a short standoff to bolt it down on, but actually Milodon accounted for using aftermarket fasteners in your engine. So the pick-up actually mounts underneath the head of the bolt. So we're gonna be pulling out this stock made bolt and replacing it with the last ARP bolt from our main bolt kit, which is awesome cause now we have high quality matching main fasteners thoughout the engine.
(Pat)>> A small amount of silicone in the critical areas and a one piece oil pan gasket with keep the new four by four pan sealed on the engine. These m-l-s 4-500 bore 40 thousandths thick head gaskets give us a measured compression ratio of a boost friendly 8.49 to one. The beefy ARP head bolts are torqued in three stages to a final value of 140 pound feet.
(Frankie)>> We've soaked these Comp Cams' retrofit hydraulic roller lifts in oil for about an hour before slipping them into the lifter bores in the correct orientation. Then we can slide in the 8-100 long push rods and install the 1.73 ratio Scorpion bolt down rocker arms in the firing order of the engine. Beads of silicone seal the valley cover, and it is bolted to the China walls before the intake gaskets and intake adapters are secured to the heads.
(Pat)>> The new intake manifold we have chosen for our application is an Edelbrock Performer RPM Air Gap. Compared to the old fuelie intake it is drastically different. It has a larger runner with a larger cross sectional area, and a larger and deeper plenum. Now combined with that new cam shaft that has a hydraulic roller profile and has more lift and duration we're gonna see a nice bump in power, both naturally aspirated and when we put this thing under artificial atmosphere.
(Frankie)>> With our valve cover adapters sealed back down and some spray lube on the valvetrain we can put our valve covers back on and seal up the top of our engine. Another part of getting this engine ready to go into a future project is getting a front drive. So we reached out to the guys at CVF Racing and they hooked us up with one of their serpentine conversion kits for a big block Ford. With the stock exhaust manifolds re-installed this big block can make its way into the dyno cell. Up next, we finally get our turbo 460 on the dyno.
(Pat)>> But all our hard work goes up in smoke.
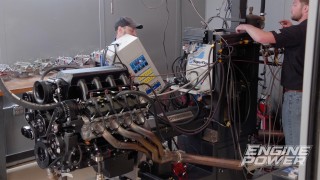
(Frankie)>> So we have our 460 on the dyno and we have it running with all of our new upgrades, and one of the other changes we made was switching from the carburetor we ran last time to a Sniper X-flow unit. Now this thing has four 129 pound injectors. So it's gonna be plenty of fuel for the power level we're gonna be making, but we've been making some preliminary pulls, letting it learn, getting it up to temp, tuning on it just a little bit, and we think we have it right where we want it. So we're gonna make a power pull and see what this thing makes with its new upgrades. [ engine revving ]
(Pat)>> Very nice torque! [ engine revving ]
(Frankie)>> I thought I saw some good numbers there.
(Pat)>> Is that a nice graph or what?
(Frankie)>> 480.9 pound feet. So we're up on torque for peak, and power, yeah, 367.5 right at 4,700. So yeah, higher, a little bit higher peak on torque, little bit higher peak on horsepower in terms of r-p-m range, but we're way up on power.
(Pat)>> The thing with where it was.
(Frankie)>> So 295 peak horsepower. So we're at 367, and you can see the torque, it doesn't lose any. It just holds it right where it is and then about 2,500 just goes up. I'm happy with that. I think that's awesome! We're obviously making more n/a.
(Pat)>> Enough talk, more action. After flipping our exhaust manifolds around we can install the same dyno tested turbo setup from last time, which features a 78 millimeter VS Racing turbo, twin 50 millimeter Summit waste gates, and a diesel truck charged air cooler. We are in turbo mode now. We have the engine one, got it fired up, got it warmed up. Everything seems to be great. Only thing we're worried about is getting it to the same r-p-m range that we did when we were running it naturally aspirated. So we're gonna be making our pulls up to 5,500 like we were before. This is gonna be an interesting test because all we did was a slightly better cam and a better intake manifold, and obviously a sniper.
(Frankie)>> We have our more durable parts. So we'll probably be pushing this a little bit harder. We're gonna see as we go.
(Pat)>> The internet says this thing will make all kinds of power. The cranks are good for 1,000 horsepower, blah, blah, blah.
(Frankie)>> We're also on pump gas. So that is a big limiting factor here cause once we start making a lot of cylinder pressure that pump gas is gonna be the link in the chain that's the weakest. So same r-p-m sweep, right on the waste gates like we did last time starting off. So we'll see what she makes. [ engine revving ]
(Pat)>> Legs her all the way out to 5,500 too. That's nice, 528 horsepower.
(Frankie)>> 718, that's crazy!
(Pat)>> It's spiking up in the eights, all the way up to 5,500. It's still at 7.3 pounds of boost at 5,500. Nice and level. It goes nice and flat.
(Frankie)>> It carries the power awesome.
(Pat)>> Air/fuels all look fine. Let's go ahead and make a pull right now and see how much more. Once you start building heat in the turbo housing it's gonna spool up a little bit different. It's gonna make more power. Let's see what it does and put a little bit in it.
(Frankie)>> Go put a few clicks in it like you did last time and see what she does.
(Pat)>> I got a couple of clicks in it, couple meaning four. [ engine revving ]
(Pat)>> Stop! [Music]
(Frankie)>> Ah, it broke our oil line! Our oil line that feeds the oil pressure sensor in the dyno tower got a little hot, little melty, and puked oil out everywhere. Easy fix! Cut it off, put a new end on.
(Pat)>> After cleaning up our oily mess we're ready to try again. [ engine revving ]
(Pat)>> Nice, nice, nice!
(Frankie)>> Oh my gosh!
(Pat)>> That's nice power right there. 568 horse but look at the torque, 769 pound feet. Check the boost on that one.
(Frankie)>> Nine and a half. That's what we ran last time. There's not a ton of crazy high end parts in this thing.
(Pat)>> You could put a $3,000 dollar set of heads on it.
(Frankie)>> And at this boost level it'll make 1,000. I'm super stoked about this. I don't think we have to go any more.
(Pat)>> When you're in that seat you get to make the call.
(Frankie)>> For more high power engine builds like this one you can find Engine Power on Powernation.
