Engine Power Featured Projects
Engine Power Builds
Want more content like this?
Join the PowerNation Email NewsletterEpisode Transcript
(Pat)>> You're watching Powernation!
(Frankie)>> It may just be a dyno mule but this small block Chevy sure can kick.
(Pat)>> Our revamped Compression Obsession engine makes a strong impression on the dyno. [ Music ] Engine Power is back on our 406 cubic inch small block Chevy dyno mule project. This project came about by taking all the parts out of our frozen, broken 360 Compression Obsession engine, putting them in this cylinder case along with some new goodies to see what would happen if we just add cubic inches to this combo. Now we've gotten a lot accomplished so far, and we are on the homeward stretch of getting this thing on the dyno and making some horsepower. Just in case you missed it here's what we've done so far. We torque plate honed the bores in our Sunnen SV-15 cylinder hone, removing 30 thousandths of material and increasing the engine's displacement from 400 to 406 cubic inches. We swapped in some finishing stones to give the bores the proper finish for our application.
(Frankie)>> After that we used the CWT Industries' multi-valve 5,500 to get our externally balanced stock crankshaft tuned to perfection. We had to remove roughly 120 grams from the front and rear counterweights in our lathe and do some fine tuning with the balancer's drill. The result was a rotating assembly balanced well under our eighth ounce inch target. Now that was a ton of great work, and it really set the foundation for a great dyno mule. We've got ahead and done some work off camera to get this thing ready for assembly. We final cleaned the block and install new cam bearings and new freeze plugs. We've also set the main and rod bearing oil clearances exactly where we want them. We've even polished and final cleaned our crankshaft. So that's ready to be installed, and final cleaned the rods and pistons. So, they're ready to be assembled. We've even gone ahead and gapped the rings so that this thing can go together nice and smooth because we want to get to the dyno session cause we have some cool testing we want to do. So, let's get her together.
(Pat)>> I think we should call this Compression Progression?
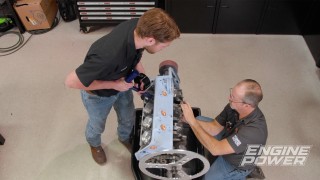
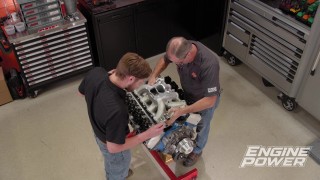
(Frankie)>> We'll workshop it. We'll start our assembly by applying some engine assembly lube to the main bearings. Then we'll install a new Fel Pro two piece rear main seal that we found at Summit Racing Equipment. Following the instructions, the seal is set offset three-eighths of an inch to help prevent leaks. Our crankshaft is dropped in, and the main caps can be installed one by one. [ Music ] Before torquing the main caps, the thrust bases of the rear bearing are aligned in the forward direction by wedging a screwdriver between the counterweight and the block itself. Following ARP's instructions, the main bolts are torqued in sequence to 70-pound feet. With the crank fully installed we can measure the crankshaft end play, which comes in nicely at five thousandths.
(Pat)>> Our Mahle Power Pack pistons are assembled with Scat I-beam rods. This is a floating wrist pin design. So, the pins are retained by two round wire locks. These locks can be installed easily with a small screwdriver and a measure of patience. The Mahle pistons came with a one millimeter, one millimeter, two millimeter thin ring pack with a steel Napier second ring and an HV-385 steel top ring. The pistons, rings, and cylinder bores are coated with Total Seal assembly lube and are installed with a Summit Racing 4.155 piston ring compressor. [ Music ]
The 87-40 rod bolts are loosened and measured for free length, torqued to 45-pound feet, and measured for the proper amount of stretch. [ Music ]
(Frankie)>> Next we slid the gently used custom Comp Cams camshaft from the previous build into the new block. Duration at 50 thousandths lift is 252 degrees on the intake and 260 degrees on the exhaust. The lobes are set on a 110-degree lobe separation angle, and lift at the valve is 652 thousandths on the intake and 660 thousandths on the exhaust. Before we install the timing set we'll tighten down our threaded oil gallery plugs, which is an improvement we made to the block over these stock pressed in plugs. We're reusing our Trick Flow double roller timing set, and it is mocked up with the ARP cam bolt kit. In order to keep everything the same we are degreeing the cam and setting the intake center line exactly where it was before at 105.5 degrees, which is 4.5 degrees advanced. Now that we've verified that the cam is in the right spot we can install the cam button and torque the bolts to 25-pound feet with orange thread locker applied.
(Pat)>> Coming up, will a bunch of old parts make new power? We'll find out!
(Pat)>> On today's Summit Tech Tip we're gonna talk about seeing how well your engine is running, and a great way to do that is a cylinder leak down test. I have Clay Millican, NHRA Top Fuel driver, here to talk about it. Clay, why do you like checking leak down?
(Clay)>> One of my favorite tools in the toolbox. Such a simple way to check the health of your engine. Pretty simple, put a little air in the cylinder. You can either hear it leaking through the intake, out the exhaust, or into the oil pan, or nowhere, which is what we really want. Such a good tool. Check the health of your engine just like that.
(Pat)>> Summit Racing has a lot of great tools for engine builders, for diagnostic, and they have a great leak down tester. So, what do you say we put some air to this one and see how it's doing.
(Clay)>> Let's see if it's in good shape. [ Music ]
(Pat)>> Well it looks like we're on four or five. Now this is a fully dyno'ed hammered on engine. So, what do you think about that?
(Clay)>> I'll tell you 20 percent's good, 10 percent's great. I would say this little small block Mopar is healthy.
(Pat)>> I would say so too. It made great power, but this is the great thing. We go through all the cylinders. Do it on every one, and if you're having a problem, maybe it's down a little bit of power, you're gonna be able to find it.
(Clay)>> I love it, and the cool thing is if you've got questions you can always call Summit Racing and get those experts on the phone to help you out. [ Music ]
(Frankie)>> Oh, idiot! Note to self, don't forget the timing pointer. We're getting back on the 406, sealing it up with the front timing cover and a Summit Racing damper that is part of our freshly balanced rotating assembly. Next up we'll reinstall our slightly used but dyno proven roller lifters.
(Pat)>> It's time to start putting some induction on our new dyno mule 406, but we needed a new set of heads because like the froze broke block the heads did not fare very well either. So, we went to Summit Racing and picked up a brand new set of heads just like the ones that were on our Compression Obsession 360. These are an AFR 220 Eliminator Competition Series heads. Now if you remember these heads flow a ton of air, up to 326 c-f-m at 700 lift. 2.100 intake valve, 1.600 exhaust, and a 65cc chamber. They also have Pac springs with Manley retainers. It will be interesting to see what this induction package does on 46 more cubic inches.
(Frankie)>> Cometic m-l-s head gaskets that are 27 thousandths thick go on first. Combined with our 65cc chamber and a 4cc effective dome piston we have a measured compression ratio of 12.42 to one. The heads are torqued in multiple steps to a final value of 70-pound feet. Our Jesel shaft rocker stands are reinstalled with the correct amount of shims, which is the same number as the previous engine.
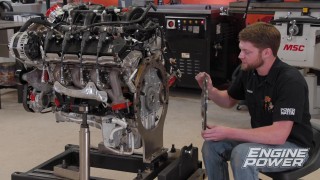
(Pat)>> We are also reusing the three-eighths diameter Comp chro-moly push rods. Because this engine is dimensionally the same as the old engine, swapping over the valvetrain components was very straightforward and easy. Everything fit great. The Jesel rockers are 1.5 ratio, and they get installed in the firing order of the engine. We'll set cold lash afterwards.
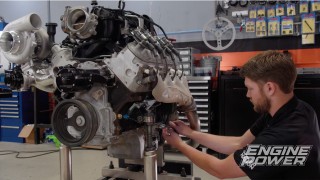
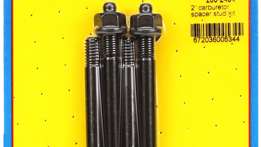
(Frankie)>> The next thing we're gonna do is install our oil pump and oil pan. We're gonna be reusing the oil pump from before because it had perfect oil pressure and it looks great inside. We did have to clean up the stock 400 pan though because the oil dipstick location is on the wrong side, and we wanted to use a stock pan for a fair comparison. One thing we found when we were tearing down our 400 is that the stock oil pump mounting bolt actually protruded a little too far into the main cap, and was pressing onto the back of the bearing, and this caused some uneven wear. It's something that's really important for you to check in an application where the oil pump bolts to the main cap because it could cause catastrophic failure, but we're gonna be fixing that by reusing our ARP oil pump mounting stud kit. This is made from high strength 87-40 chro-moly steel. This means it's gonna be able to take the stress that we're gonna put this engine under thrashing it on the dyno, but it also means that we're gonna be able to reuse it again and again. That's the great thing about ARP products. They're made with high quality materials, and they're made with high quality manufacturing processes. So, we can reuse things like oil pump drive shafts, and oil pan bolts, and accessory bolts. Sometimes things that you wouldn't think about, like distributor hold down fasteners, carburetor fasteners, and header fasteners. These are fasteners that have to take the stress of an engine running, but also in an application like a dyno mule or a race car they have to go through several rebuild cycles. So, they need to be strong enough to take those stresses but also durable enough to outlive the life of the engine. The great thing about ARP products is that they can do that. As an added bonus they're gonna look good doing it.
(Pat)>> This pump has a three quarter pickup tube, which is larger than the stock five-eighths small block Chevy. We've already checked our pickup to pan clearance, which is spot on. So, we'll torque the nut to 60-pound feet. Since the oil pan will be removed several times during this engine's life a reusable one-piece oil pan gasket seals up the stock oil pan. [ Music ] I don't mind the patina finish.
(Frankie)>> I'm sure a lot of people are gonna say, we should leave it looking just like that, but I just can't. It's got to look good, especially we spent all this time and effort building this thing. We're gonna have to make it look good.
(Pat)>> So Chevy orange?
(Frankie)>> Maybe not that good. Up next, we've got 46 more cubic inches and gallons of E-85. Let's get to work!
(Frankie)>> We wanted to paint this engine a different color because if we painted it our previous blue it would look exactly like our 350. So, we picked a color that we really think is one of our favorites, and that is British Racing Green. This along with all the aluminum and black pieces on the engine are gonna look great, and as an added bonus we have brass freeze plugs, which are really gonna pop against the green. We like to paint every engine because it's something that just takes a little bit of time and a little bit of masking tape, and not only can you come up with an engine that performs well but also looks great. We think even though this is a dyno mule it deserves that. Quick tip, you can oil the timing chain after the timing cover and oil pan are installed. That way you don't end up with oil dripping all over your floor.
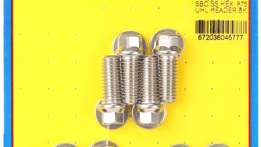
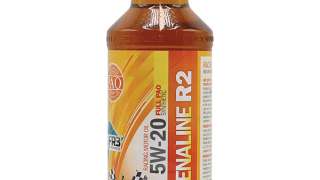
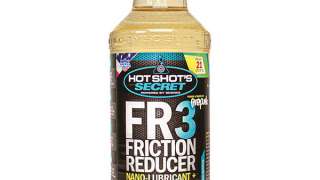
(Pat)>> These AFR intake gaskets are matched to the cylinder heads and the intake to provide uninterrupted air flow. Like before, our intake manifold is held down with a set of ARP 12-point stainless bolts. The valvetrain receives a coating of Comp Cams' Valvetrain Assembly Spray before the valve covers go on. This engine is sealed up and sent to the dyno cell. Hot Shot's Secret's tag line is "Powered by Science". Well we really love that, and they make a wide variety of products that can benefit your vehicle and engine. Today we're gonna be talking about their oil additive, FR-3. FR-3 is an oil additive that reduces friction and contains three proprietary synthetic lubricants. It is a carbon nano-based molecule that is used for anti-wear properties, friction reduction, and improves sheer stability and oxidation stability of the oil. It also increases film strength for added protection. The carbon nano molecule fills in microscopic irregularities in machined surfaces, and it can be added to any oil. Not only your oil for your diesel or gas, but also things like your differential, your transmission, and even your power steering. They even make their own PAO based oil infused with the FR-3 molecule. Today we'll be using some 5-W-20 Adrenaline R-2 for our spicy small block.
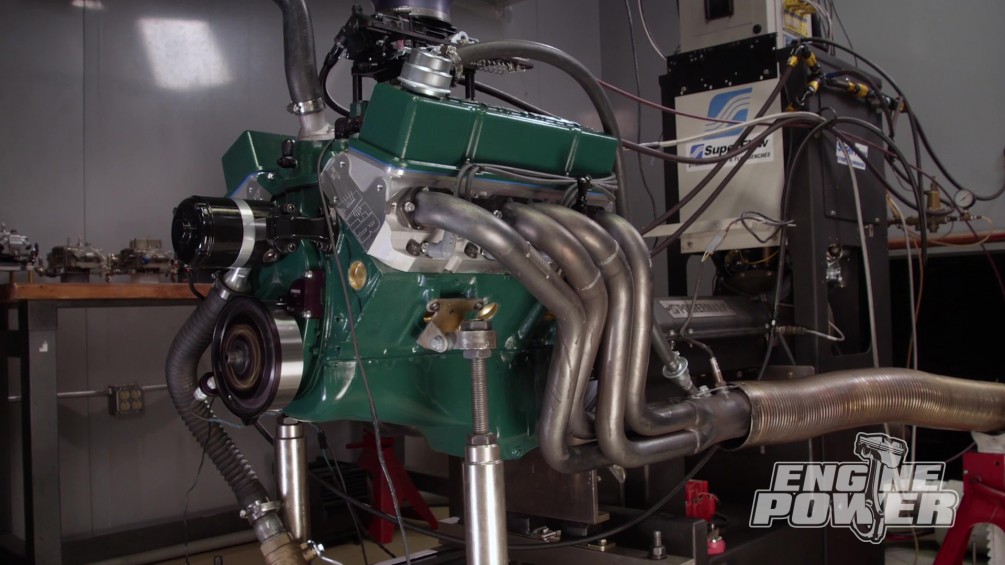
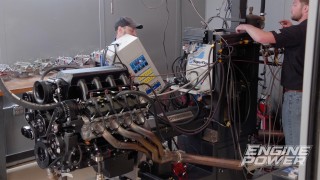
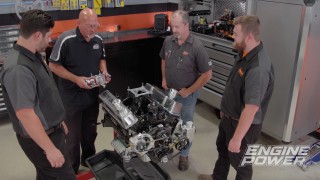
(Frankie)>> We have our new Compression Obsession 406 small block Chevy on the dyno. We've got it completely together, and it is running. This thing looks great, running great, and effectively this is the exact same engine that we had before except for it is 46 cubic inches bigger. But we have the same induction package, the same valvetrain, the same camshaft. We have the same setup going on. So, we have our one and seven-eighths primary, three collector long tube headers. We have our Edelbrock Super Victor with a two-inch four hole tapered spacer, and our drag race E-85 850 c-f-m QFT carburetor. That's the exact same one we used before, and we are using the same E-85 as before. We're gonna start E-485 to get a fair comparison, and then later we'll switch it to race gas. We are a little bit lower on compression. Because the way the deck height is and we don't have a way to surface the decks our compression ratio static came out to 12.42 to 1, which is a little bit lower. It's gonna be worth a few percentage points of power, but it won't make a major difference in this application. That thing sounds good, doesn't it?
(Pat)>> I want to run it, but you keep talking.
(Frankie)>> Let's go! I'm excited! [ engine revving ]
(Pat)>> First hit out of the box. And we are at 603 horse, 554-pound feet of torque. Look how sweet that graph is.
(Frankie)>> 554.2 at 4,900, and 603.3 at 6,500. So that peak is a little bit down.
(Pat)>> Swung down just like it should.
(Frankie)>> That's not necessarily a bad thing with the setup we have going on with the I-beam rods and stuff. That's right in that range where they're supposed to be.
(Pat)>> First thing we're gonna do. Everything looked great, jam a couple of degrees of timing in it. [ engine revving ]
(Pat)>> I like that!
(Frankie)>> 617 horsepower, 562.6-pound feet.
(Pat)>> Wow!
(Frankie)>> Wow, indeed!
(Pat)>> So do we keep going until she stops, or do you want to stop there.
(Frankie)>> I say we keep going until it stops. Let's put two more in it and it'll either make more, or it'll not make anymore, or it'll make less and then we'll know. [ engine revving ]
(Pat)>> Maybe, 618, torque is about the same, 559.
(Frankie)>> I would consider that right there or very close to the limit. So, I don't think that's a huge point in putting any more into it.
(Pat)>> If you increase timing and the torque doesn't go up, we're pretty much there.
(Frankie)>> That is the comparison between our 360 and this engine, this 406, which it's interesting how the graph looks pretty much the same but it's kinda shifted down a little bit, which is exactly what it's supposed to do with the relatively smaller cam and induction compared to the engine. Torque per cubic inch has gone up but our horsepower per cubic inch has gone down, which again is what you'd have with that combination. That's a beautiful curve and a really nice engine, and if it's the same as last time race gas should make more.
(Pat)>> I think it might make a little bit more. There's only one way to find out. Put the new mixer valve on. Up next!
(Frankie)>> Holy moly!
(Pat)>> We are almost to the point of internet pump gas numbers.
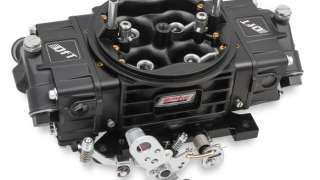
(Pat)>> The next round of dyno testing is on gasoline. So, we'll reinstall our QFT Black Diamond 950 and run 104 octane oxygenated race fuel. What we did do is went back on our timing. We're going back to 32 degrees of timing just like we were on our baseline for our E-85. So, we're comparing apples to apples, or apples to corn?
(Frankie)>> You had me corn-fused there for a second. 32 degrees, race gas, here we go. [ engine revving ]
(Frankie)>> Oh snap! 631.3 horsepower and 566-pound feet. So, this thing is up already.
(Pat)>> Everything is snazzy-tastic! I'm gonna put two degrees in it.
(Frankie)>> Fuel looks good. I would say go ahead and put two degrees in it. This thing is gonna rock the house. [ engine revving ]
(Pat)>> I think that's all she's got captain.
(Frankie)>> That's pretty good.
(Pat)>> Good cut off.
(Frankie)>> Engine's not into detonation. That is pretty stout. 1.56 horsepower per cubic inch and 1.39-pound feet per cubic inch. So, we've traded a little bit there going to the bigger size with the same size components.
(Pat)>> By the way the plug looked I think two more degrees is gonna be it.
(Frankie)>> So we're at 36 now?
(Pat)>> Yes, 36. [ engine revving ]
(Pat)>> I think it snuck some good ones in there.
(Frankie)>> I think it did! Wow, holy moly!
(Pat)>> 642.5.
(Frankie)>> 568.8-pound feet. We're starting the pull at 4,000 but this thing is making over 500-pound feet at 4,000. 1.58 horsepower per cubic inch and 1.40.
(Pat)>> We are almost to the point of internet pump gas numbers.
(Frankie)>> That's super cool though.
(Pat)>> I still can't reiterate more, this is a 1971 block. It has a stock cast crank, 10-10, in it and this thing's cranking out some power. Would this live in a circle track application? Maybe, maybe not, but a street application though?
(Frankie)>> Oh yeah, 100 percent.
(Pat)>> We have a winner with this one.
(Frankie)>> That's the difference between our 360 Compression Obsession and this 400 on race gas. It is up everywhere, which is awesome. That is great success, and now we have an awesome dyno mule that we can do other stuff with too. Heck yeah! For more quality builds and quality tech go check out Powernation.
Show Full Transcript
(Frankie)>> It may just be a dyno mule but this small block Chevy sure can kick.
(Pat)>> Our revamped Compression Obsession engine makes a strong impression on the dyno. [ Music ] Engine Power is back on our 406 cubic inch small block Chevy dyno mule project. This project came about by taking all the parts out of our frozen, broken 360 Compression Obsession engine, putting them in this cylinder case along with some new goodies to see what would happen if we just add cubic inches to this combo. Now we've gotten a lot accomplished so far, and we are on the homeward stretch of getting this thing on the dyno and making some horsepower. Just in case you missed it here's what we've done so far. We torque plate honed the bores in our Sunnen SV-15 cylinder hone, removing 30 thousandths of material and increasing the engine's displacement from 400 to 406 cubic inches. We swapped in some finishing stones to give the bores the proper finish for our application.
(Frankie)>> After that we used the CWT Industries' multi-valve 5,500 to get our externally balanced stock crankshaft tuned to perfection. We had to remove roughly 120 grams from the front and rear counterweights in our lathe and do some fine tuning with the balancer's drill. The result was a rotating assembly balanced well under our eighth ounce inch target. Now that was a ton of great work, and it really set the foundation for a great dyno mule. We've got ahead and done some work off camera to get this thing ready for assembly. We final cleaned the block and install new cam bearings and new freeze plugs. We've also set the main and rod bearing oil clearances exactly where we want them. We've even polished and final cleaned our crankshaft. So that's ready to be installed, and final cleaned the rods and pistons. So, they're ready to be assembled. We've even gone ahead and gapped the rings so that this thing can go together nice and smooth because we want to get to the dyno session cause we have some cool testing we want to do. So, let's get her together.
(Pat)>> I think we should call this Compression Progression?
(Frankie)>> We'll workshop it. We'll start our assembly by applying some engine assembly lube to the main bearings. Then we'll install a new Fel Pro two piece rear main seal that we found at Summit Racing Equipment. Following the instructions, the seal is set offset three-eighths of an inch to help prevent leaks. Our crankshaft is dropped in, and the main caps can be installed one by one. [ Music ] Before torquing the main caps, the thrust bases of the rear bearing are aligned in the forward direction by wedging a screwdriver between the counterweight and the block itself. Following ARP's instructions, the main bolts are torqued in sequence to 70-pound feet. With the crank fully installed we can measure the crankshaft end play, which comes in nicely at five thousandths.
(Pat)>> Our Mahle Power Pack pistons are assembled with Scat I-beam rods. This is a floating wrist pin design. So, the pins are retained by two round wire locks. These locks can be installed easily with a small screwdriver and a measure of patience. The Mahle pistons came with a one millimeter, one millimeter, two millimeter thin ring pack with a steel Napier second ring and an HV-385 steel top ring. The pistons, rings, and cylinder bores are coated with Total Seal assembly lube and are installed with a Summit Racing 4.155 piston ring compressor. [ Music ]
The 87-40 rod bolts are loosened and measured for free length, torqued to 45-pound feet, and measured for the proper amount of stretch. [ Music ]
(Frankie)>> Next we slid the gently used custom Comp Cams camshaft from the previous build into the new block. Duration at 50 thousandths lift is 252 degrees on the intake and 260 degrees on the exhaust. The lobes are set on a 110-degree lobe separation angle, and lift at the valve is 652 thousandths on the intake and 660 thousandths on the exhaust. Before we install the timing set we'll tighten down our threaded oil gallery plugs, which is an improvement we made to the block over these stock pressed in plugs. We're reusing our Trick Flow double roller timing set, and it is mocked up with the ARP cam bolt kit. In order to keep everything the same we are degreeing the cam and setting the intake center line exactly where it was before at 105.5 degrees, which is 4.5 degrees advanced. Now that we've verified that the cam is in the right spot we can install the cam button and torque the bolts to 25-pound feet with orange thread locker applied.
(Pat)>> Coming up, will a bunch of old parts make new power? We'll find out!
(Pat)>> On today's Summit Tech Tip we're gonna talk about seeing how well your engine is running, and a great way to do that is a cylinder leak down test. I have Clay Millican, NHRA Top Fuel driver, here to talk about it. Clay, why do you like checking leak down?
(Clay)>> One of my favorite tools in the toolbox. Such a simple way to check the health of your engine. Pretty simple, put a little air in the cylinder. You can either hear it leaking through the intake, out the exhaust, or into the oil pan, or nowhere, which is what we really want. Such a good tool. Check the health of your engine just like that.
(Pat)>> Summit Racing has a lot of great tools for engine builders, for diagnostic, and they have a great leak down tester. So, what do you say we put some air to this one and see how it's doing.
(Clay)>> Let's see if it's in good shape. [ Music ]
(Pat)>> Well it looks like we're on four or five. Now this is a fully dyno'ed hammered on engine. So, what do you think about that?
(Clay)>> I'll tell you 20 percent's good, 10 percent's great. I would say this little small block Mopar is healthy.
(Pat)>> I would say so too. It made great power, but this is the great thing. We go through all the cylinders. Do it on every one, and if you're having a problem, maybe it's down a little bit of power, you're gonna be able to find it.
(Clay)>> I love it, and the cool thing is if you've got questions you can always call Summit Racing and get those experts on the phone to help you out. [ Music ]
(Frankie)>> Oh, idiot! Note to self, don't forget the timing pointer. We're getting back on the 406, sealing it up with the front timing cover and a Summit Racing damper that is part of our freshly balanced rotating assembly. Next up we'll reinstall our slightly used but dyno proven roller lifters.
(Pat)>> It's time to start putting some induction on our new dyno mule 406, but we needed a new set of heads because like the froze broke block the heads did not fare very well either. So, we went to Summit Racing and picked up a brand new set of heads just like the ones that were on our Compression Obsession 360. These are an AFR 220 Eliminator Competition Series heads. Now if you remember these heads flow a ton of air, up to 326 c-f-m at 700 lift. 2.100 intake valve, 1.600 exhaust, and a 65cc chamber. They also have Pac springs with Manley retainers. It will be interesting to see what this induction package does on 46 more cubic inches.
(Frankie)>> Cometic m-l-s head gaskets that are 27 thousandths thick go on first. Combined with our 65cc chamber and a 4cc effective dome piston we have a measured compression ratio of 12.42 to one. The heads are torqued in multiple steps to a final value of 70-pound feet. Our Jesel shaft rocker stands are reinstalled with the correct amount of shims, which is the same number as the previous engine.
(Pat)>> We are also reusing the three-eighths diameter Comp chro-moly push rods. Because this engine is dimensionally the same as the old engine, swapping over the valvetrain components was very straightforward and easy. Everything fit great. The Jesel rockers are 1.5 ratio, and they get installed in the firing order of the engine. We'll set cold lash afterwards.
(Frankie)>> The next thing we're gonna do is install our oil pump and oil pan. We're gonna be reusing the oil pump from before because it had perfect oil pressure and it looks great inside. We did have to clean up the stock 400 pan though because the oil dipstick location is on the wrong side, and we wanted to use a stock pan for a fair comparison. One thing we found when we were tearing down our 400 is that the stock oil pump mounting bolt actually protruded a little too far into the main cap, and was pressing onto the back of the bearing, and this caused some uneven wear. It's something that's really important for you to check in an application where the oil pump bolts to the main cap because it could cause catastrophic failure, but we're gonna be fixing that by reusing our ARP oil pump mounting stud kit. This is made from high strength 87-40 chro-moly steel. This means it's gonna be able to take the stress that we're gonna put this engine under thrashing it on the dyno, but it also means that we're gonna be able to reuse it again and again. That's the great thing about ARP products. They're made with high quality materials, and they're made with high quality manufacturing processes. So, we can reuse things like oil pump drive shafts, and oil pan bolts, and accessory bolts. Sometimes things that you wouldn't think about, like distributor hold down fasteners, carburetor fasteners, and header fasteners. These are fasteners that have to take the stress of an engine running, but also in an application like a dyno mule or a race car they have to go through several rebuild cycles. So, they need to be strong enough to take those stresses but also durable enough to outlive the life of the engine. The great thing about ARP products is that they can do that. As an added bonus they're gonna look good doing it.
(Pat)>> This pump has a three quarter pickup tube, which is larger than the stock five-eighths small block Chevy. We've already checked our pickup to pan clearance, which is spot on. So, we'll torque the nut to 60-pound feet. Since the oil pan will be removed several times during this engine's life a reusable one-piece oil pan gasket seals up the stock oil pan. [ Music ] I don't mind the patina finish.
(Frankie)>> I'm sure a lot of people are gonna say, we should leave it looking just like that, but I just can't. It's got to look good, especially we spent all this time and effort building this thing. We're gonna have to make it look good.
(Pat)>> So Chevy orange?
(Frankie)>> Maybe not that good. Up next, we've got 46 more cubic inches and gallons of E-85. Let's get to work!
(Frankie)>> We wanted to paint this engine a different color because if we painted it our previous blue it would look exactly like our 350. So, we picked a color that we really think is one of our favorites, and that is British Racing Green. This along with all the aluminum and black pieces on the engine are gonna look great, and as an added bonus we have brass freeze plugs, which are really gonna pop against the green. We like to paint every engine because it's something that just takes a little bit of time and a little bit of masking tape, and not only can you come up with an engine that performs well but also looks great. We think even though this is a dyno mule it deserves that. Quick tip, you can oil the timing chain after the timing cover and oil pan are installed. That way you don't end up with oil dripping all over your floor.
(Pat)>> These AFR intake gaskets are matched to the cylinder heads and the intake to provide uninterrupted air flow. Like before, our intake manifold is held down with a set of ARP 12-point stainless bolts. The valvetrain receives a coating of Comp Cams' Valvetrain Assembly Spray before the valve covers go on. This engine is sealed up and sent to the dyno cell. Hot Shot's Secret's tag line is "Powered by Science". Well we really love that, and they make a wide variety of products that can benefit your vehicle and engine. Today we're gonna be talking about their oil additive, FR-3. FR-3 is an oil additive that reduces friction and contains three proprietary synthetic lubricants. It is a carbon nano-based molecule that is used for anti-wear properties, friction reduction, and improves sheer stability and oxidation stability of the oil. It also increases film strength for added protection. The carbon nano molecule fills in microscopic irregularities in machined surfaces, and it can be added to any oil. Not only your oil for your diesel or gas, but also things like your differential, your transmission, and even your power steering. They even make their own PAO based oil infused with the FR-3 molecule. Today we'll be using some 5-W-20 Adrenaline R-2 for our spicy small block.
(Frankie)>> We have our new Compression Obsession 406 small block Chevy on the dyno. We've got it completely together, and it is running. This thing looks great, running great, and effectively this is the exact same engine that we had before except for it is 46 cubic inches bigger. But we have the same induction package, the same valvetrain, the same camshaft. We have the same setup going on. So, we have our one and seven-eighths primary, three collector long tube headers. We have our Edelbrock Super Victor with a two-inch four hole tapered spacer, and our drag race E-85 850 c-f-m QFT carburetor. That's the exact same one we used before, and we are using the same E-85 as before. We're gonna start E-485 to get a fair comparison, and then later we'll switch it to race gas. We are a little bit lower on compression. Because the way the deck height is and we don't have a way to surface the decks our compression ratio static came out to 12.42 to 1, which is a little bit lower. It's gonna be worth a few percentage points of power, but it won't make a major difference in this application. That thing sounds good, doesn't it?
(Pat)>> I want to run it, but you keep talking.
(Frankie)>> Let's go! I'm excited! [ engine revving ]
(Pat)>> First hit out of the box. And we are at 603 horse, 554-pound feet of torque. Look how sweet that graph is.
(Frankie)>> 554.2 at 4,900, and 603.3 at 6,500. So that peak is a little bit down.
(Pat)>> Swung down just like it should.
(Frankie)>> That's not necessarily a bad thing with the setup we have going on with the I-beam rods and stuff. That's right in that range where they're supposed to be.
(Pat)>> First thing we're gonna do. Everything looked great, jam a couple of degrees of timing in it. [ engine revving ]
(Pat)>> I like that!
(Frankie)>> 617 horsepower, 562.6-pound feet.
(Pat)>> Wow!
(Frankie)>> Wow, indeed!
(Pat)>> So do we keep going until she stops, or do you want to stop there.
(Frankie)>> I say we keep going until it stops. Let's put two more in it and it'll either make more, or it'll not make anymore, or it'll make less and then we'll know. [ engine revving ]
(Pat)>> Maybe, 618, torque is about the same, 559.
(Frankie)>> I would consider that right there or very close to the limit. So, I don't think that's a huge point in putting any more into it.
(Pat)>> If you increase timing and the torque doesn't go up, we're pretty much there.
(Frankie)>> That is the comparison between our 360 and this engine, this 406, which it's interesting how the graph looks pretty much the same but it's kinda shifted down a little bit, which is exactly what it's supposed to do with the relatively smaller cam and induction compared to the engine. Torque per cubic inch has gone up but our horsepower per cubic inch has gone down, which again is what you'd have with that combination. That's a beautiful curve and a really nice engine, and if it's the same as last time race gas should make more.
(Pat)>> I think it might make a little bit more. There's only one way to find out. Put the new mixer valve on. Up next!
(Frankie)>> Holy moly!
(Pat)>> We are almost to the point of internet pump gas numbers.
(Pat)>> The next round of dyno testing is on gasoline. So, we'll reinstall our QFT Black Diamond 950 and run 104 octane oxygenated race fuel. What we did do is went back on our timing. We're going back to 32 degrees of timing just like we were on our baseline for our E-85. So, we're comparing apples to apples, or apples to corn?
(Frankie)>> You had me corn-fused there for a second. 32 degrees, race gas, here we go. [ engine revving ]
(Frankie)>> Oh snap! 631.3 horsepower and 566-pound feet. So, this thing is up already.
(Pat)>> Everything is snazzy-tastic! I'm gonna put two degrees in it.
(Frankie)>> Fuel looks good. I would say go ahead and put two degrees in it. This thing is gonna rock the house. [ engine revving ]
(Pat)>> I think that's all she's got captain.
(Frankie)>> That's pretty good.
(Pat)>> Good cut off.
(Frankie)>> Engine's not into detonation. That is pretty stout. 1.56 horsepower per cubic inch and 1.39-pound feet per cubic inch. So, we've traded a little bit there going to the bigger size with the same size components.
(Pat)>> By the way the plug looked I think two more degrees is gonna be it.
(Frankie)>> So we're at 36 now?
(Pat)>> Yes, 36. [ engine revving ]
(Pat)>> I think it snuck some good ones in there.
(Frankie)>> I think it did! Wow, holy moly!
(Pat)>> 642.5.
(Frankie)>> 568.8-pound feet. We're starting the pull at 4,000 but this thing is making over 500-pound feet at 4,000. 1.58 horsepower per cubic inch and 1.40.
(Pat)>> We are almost to the point of internet pump gas numbers.
(Frankie)>> That's super cool though.
(Pat)>> I still can't reiterate more, this is a 1971 block. It has a stock cast crank, 10-10, in it and this thing's cranking out some power. Would this live in a circle track application? Maybe, maybe not, but a street application though?
(Frankie)>> Oh yeah, 100 percent.
(Pat)>> We have a winner with this one.
(Frankie)>> That's the difference between our 360 Compression Obsession and this 400 on race gas. It is up everywhere, which is awesome. That is great success, and now we have an awesome dyno mule that we can do other stuff with too. Heck yeah! For more quality builds and quality tech go check out Powernation.
