Engine Power Featured Projects
Engine Power Builds
Want more content like this?
Join the PowerNation Email NewsletterParts Used In This Episode
CWT Industries
Multi-Bal 5500
Sunnen Products Company
Sunnen SV-15 Honing Machine
Episode Transcript
(Pat)>> You're watching Powernation!
(Frankie)>> Our Compression Obsession small block Chevy had an unfortunate mishap.
(Pat)>> But it's coming back better than ever with more cubic inches and more power. [ Music ]
(Frankie)>> Welcome to Engine Power, and today here in the shop it's actually kind of a sad day. It might be hard to recognize but this is our Compression Obsession 360 cubic inch dyno mule. This thing actually performed amazing. It was a dyno mule that we built with high compression and a solid roller valvetrain so it would turn a bunch of r-p-m, and it did just that on the dyno. It made 576 horsepower on E-85, and when we put it on 114 octane oxygenated racing fuel it made 591 horsepower and turned 7,000 r-p-m. This thing was a rocket, and if it performed so well you're probably wondering why did we take it all apart? Just like anything else there's a story behind that.
(Pat)> Now the engine didn't blow up. That might be the first thing that you're thinking. It actually had a structural failure after the fact while the engine wasn't even running. When we pulled it apart all the parts looked great. The rods, pistons, bearings, valvetrain, everything looked awesome, but we had a structural failure that usually happens to something in the northern climates, not here in Tennessee. Back a little bit ago we had a rash of bad weather, and that meant freezing rain, but also freezing temperatures. What happened is the building had lost power while we weren't here. Our dyno room, obviously heated, is not gonna be heated if there's no power. Since it's hooked to outside air the inside of that room got extremely cold. Cold enough to let the engine freeze and actually externally break the block. The first thing you might ask is, why didn't the freeze plugs pop out and help it? A freeze plug is technically not a freeze plug. It's actually a core plug that is used to get the casting sand out when the block is made. It is not a safety feature of the block. So just by the power of freezing and expanding water it pushed the sides of the block out very easily, rendering it junk.
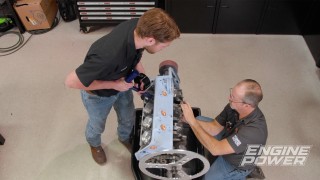
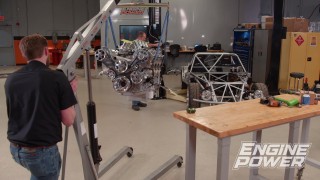
(Frankie)>> And that sucks a lot. So we sat around trying to figure out what we were gonna do with all these great parts and a busted block, but we think we came up with a pretty good solution. Tommy and Joel from Detroit Muscle recently started a 1971 Chevy Caprice project, and when they pulled the original engine they set it aside. We pulled it off the shelf to become our new Compression Obsession dyno mule, and this is that engine. It is the infamous small block Chevy 400, which is pretty cool because dimensionally the exact same as our small block Chevy 350 that's busted. That means that even though it has a longer stroke and a bigger bore we should be able to take all our old parts and bolt it into this engine. That means we can use the same cam shaft, valvetrain, and induction package as before. It's gonna be pretty interesting because not only is it gonna show that there's no replacement for displacement, but it also will tell us if the r-p-m range will change for the peak power and if it will make the same specific output.
(Pat)>> This is going on the dyno and running exactly like it came out of the car. We are not changing the timing. We are not changing anything about this two barrel carburetor. All we have done is hook fire and fuel to it, and we're gonna see how it runs. It should be pretty interesting.
(Frankie)>> But underwhelming. [ engine starts ]
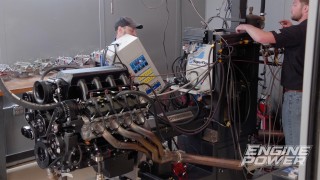
(Frankie)>> Alright, we got the 400 on the dyno. We hooked fuel to it and we hooked ignition to it, and this thing started right up. We've got it up to temp. We didn't change the timing. Actually, we haven't changed anything, but we did check the timing just to see where it was and it's at 16 degrees of base timing. So, we're gonna see how much this thing makes. They didn't make a ton from the factory. So, if it makes over 200 I'll be impressed and excited. Loads in at 2,000.
(Pat)>> Two barrel action! Look at the O-2.
(Frankie)>> Look at the torque, not bad! [ engine revving ]
(Frankie)>> Headers are smoking a little bit there.
(Pat)>> There's a little bit of erl on the manifolds.
(Frankie)>> 225.5 at 3,900.
(Pat)>> 373-pound feet of torque.
(Frankie)>> It's flat up until it starts to fall off.
(Pat)>> We're loading in at 2,000. It's nice and flat.
(Frankie)>> The manifold vacuum peaking at six inches probably isn't helping.
(Pat)>> That's what I classify as a restriction.
(Frankie)>> Just for fun we added two degrees of base timing to see if it'd make a little more power. [ engine revving ] [ Music ]
(Pat)>> 376.7, 226.
(Frankie)>> I guess we get started.
(Pat)>> The fun is over but really the fun has just begun.
(Frankie)>> Up next, the 400 small block Chevy performed pretty well on the dyno, but what will we find once we crack it open. Little bit of crusties!
(Frankie)>> In today's Summit Tech Tip we're gonna talk about something that's very important, and that is testing your valve spring pressure. We're gonna do it with somebody that's super famous, Clay Millican, Top Fuel dragster driver. Clay let's talk about why valve spring pressure is really important and why it's important to get it right.
(Clay)>> It is such a huge part of the performance of your vehicle. This valve spring controls keeping the lifter against the cam shaft and that push rod touching that rocker arm. If this is not right your engine ain't right.
(Frankie)>> If you don't have enough it doesn't control it, and if you have too much you can prematurely wear out parts, right?
(Clay)>> No doubt about it. You've got to hit it just right, and thankfully the folks at Summit Racing got the springs, they got the tester. Everything you need to get your engine performing exactly right.
(Frankie)>> All the way from economy style ones up to this professional grade Intercomp. So why don't we go ahead and test one, see where it comes, and go from there. First, we'll check the pressure at its installed height or where it would be when the valve is closed. Then we check it at its open position, or where the valve reaches max lift.
(Clay)>> Alright Frankie, one down, 15 to go, but it looks like this is gonna work great in our hydraulic roller situation here.
(Frankie)>> I think we'll make sure the rest match and we'll be good go.
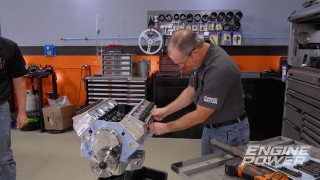
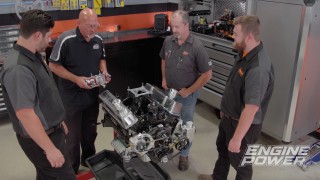
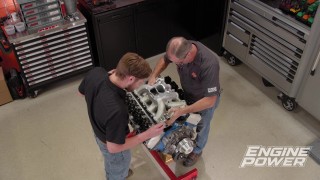
(Pat)>> After a successful baseline dyno session the teardown of our 400 cubic inch small block Chevy begins. Even though we won't reuse most of the engine's parts we'll still take note of their condition because it reveals a lot about how the engine ran. Ow! There's all kinds of sharp rusty stuff on it. [ Music ] Clean one owner.
(Frankie)>> Yeah, it's got that unmaintenanced oil smell. It made okay power, ran okay. A little bit of crusties.
(Pat)>> That's like the crust you get on the outside of a brownie pan. I would venture to say this is the first time this engine's been apart. It's got the original style gasket on the China wall. The intake gaskets look like they're stock. [ rubber mallet banging ]
(Pat)>> Oh geez, don't hit me! [ rubber mallet banging ]
(Pat)>> Get her! Don't hit me in the face! It doesn't want to come apart. That feels good. There we go, feel something happening! [ push rods clinking ]
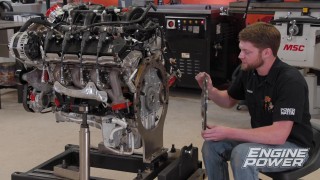
(Frankie)>> Kept those in order if you didn't notice. Everywhere but major and minor thrust I have good crosshatch below the first inch, which is pretty cool. All the pistons look good. Inside the chambers look good.
(Pat)>> What's the over/under, standard bore?
(Frankie)>> I think at this point it's pretty good because I think this thing has never been apart. Look at that! That's good news for us because we already have pistons. We kinda banked on that just from what we had been told about it.
(Pat)>> All the lifters obviously spin. This thing made no noise. No clattery lifters.
(Frankie)>> Had good oil flow.
(Pat)>> Beautiful foundation. Original head gaskets. It's a time capsule. The engine oil is dark, but it appears free of sludge or grit.
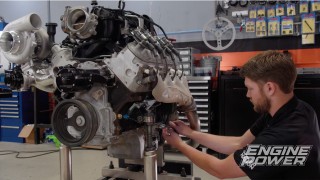
(Frankie)>> That's because it was all trapped in the bottom of the oil pan. After removing the balancer and the front cover we'll check the condition of the timing chain. [ Music ] [ drill humming ] [ Music ] Since the lifters had some crusty old buildup on them it was easier to take the cam shaft out after rotating the engine upside down. You know what's cool about this is that factory four bolt mains, which is encouraging.
(Pat)>> Up until '72 the 400s, '70 through '72 were four bolts. '73 to '79 they all went to two bolt, which had that big pyramid looking thing.
(Frankie)>> We weren't sure. At this point we've pretty much determined that this is the original engine out of that car, but there was still a little doubt in my mind. Maybe somebody had swapped one in later.
(Pat)>> That has a GM bearing in it.
(Frankie)>> Something interesting is that this engine has factory bearings. Some that are oversized and some that undersized from standard. This was common practice to set bearing clearances on stock engines.
(Pat)>> Back in the day these engines that would not be up to spec on the line were called target master engines, and what they would do is if they found a crank, a bore, or something that was out of spec they would take that engine off the line, set it aside, put stuff in it that actually works, and then put the engines back in circulation.
(Frankie)>> All the bearings were in great shape, which is promising for the condition of the block. The oil buildup meant we had to gently tap out the lifters, but they have no excessive wear.
(Pat)>> Up next, we prep our bores for bigger pistons and give them the correct finish in the cylinder hone.
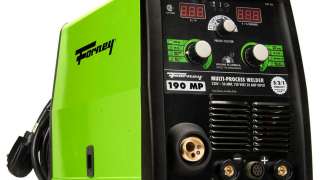
(Frankie)>> Here in the shop we primarily build engines, but something that goes with that is welding with our Forney mig and tig welders, and today we have a really cool opportunity to have Gabby from Forney in the shop, and she brought one of their new machines, a 190 Multi-Process welder. Now this welder's a little bit different than what we already have, and it has a bunch of cool features. So why don't you walk us through what this machine can do?
(Gabby)>> So this 190 MP, it can stick, mig, and tig weld. You can also use a spool gun on it. You also have features of flux core welding. So, most mig welders can also flux core weld. This machine has our TruSet settings. That means you can select what thickness of wire you're using in this machine, and then the thickness of material that you're going to be welding. The machine will then set the settings for you, and then you have the option to trim. So, everybody welds a little bit different. If you want it a little hotter, a little colder, you can adjust that trim, and it does have manual settings as well if you don't want to deal with the TruSet, but it is a good setting for anybody who's just starting out and wanting to know how to mig weld. Another really cool feature that we have here is our set and forget de-spooler. So, what that means is that most de-spoolers have springs, and washers, and a nut, and you have to tighten that in there, and what happens is people can overtighten this spool, which can cause extra wear and tear on your drive motor as well as the gears inside of there. What we did here is allowed this to be set up, and then it has all the tension that it needs right here in the spool from the spring and everything we put together there. It comes with all the things that you need. It comes with your electrode holder, your mig gun, a ground clamp, your regulator, and a gas hose. Everything you need except for your tig torch if you wanted to tig weld with it, or a spool gun if you were going to spool.
(Frankie)>> I think it's cool that you can buy one machine and then you can get so much functionality out of it. You can do a bunch of different things.
(Gabby)>> Definitely, this machine also runs off of 240 and 120 volts. So, you have dual voltage so that anywhere you're working you can plug it in. It's also generator friendly.
(Frankie)>> We might have to get you to leave this one here for us.
(Gabby)>> Definitely, I'm sure you guys have plenty of projects to use it on. We'll leave this one here for you.
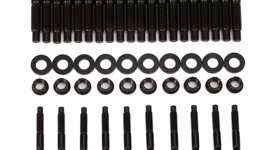
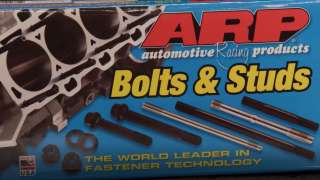
(Frankie)>> Excellent! After running the block through the jet washer, we can start prepping it by porting the oil galleries and deburring the block. We did this to our previous 350 block. So, we're gonna put the same amount of attention and care into this one. We'll also chamfer every hole in the block and tap the threads in the front oil galleries for threaded pipe plugs. Our previous version of our Compression Obsession dyno mule made really impressive power, and this one, since it's bigger, is gonna make more. So, we know we needed to start with a good, solid foundation. We ran our small block Chevy 400 through the jet washer to knock off some of the metal debris and the oil sludge that was there before so we could visually look at it and make sure it was sound. We've also mag checked it and measured the main bores to make sure they are round and straight, and they are, which is awesome. Means we can save a little bit of money and not have align honed. We're also gonna save a little bit of money by reusing our ARP main bolt kit for a four-bolt small block Chevy. We were pretty lucky to find a 400 with four bolt mains. They're a little bit more rare, and that means we can reuse our high quality fasteners. These are made from 87-40 chro-moly steel, and they have a tensile strength of 180,000 p-s-i, which is gonna be way stronger than the stock fasteners and even way stronger than a grade eight bolt that you could get at the hardware store. It's also important that you follow the torque specification in the instructions, not the stock specification. We'll get these bolts in our mains and get them torqued up. [ torque wrench beeping ]
(Pat)>> The next operation we're gonna do on our 400 is finish the cylinders to size to match our new pistons. We're gonna have to take 30 thousandths out of the bore but we are not gonna rough it out in a boring bar first. We're gonna do the entire operation in our cylinder hone, and we can do that because we use diamond abrasives here. They are very rigid, and they maintain proper bore geometry throughout the entire process. Another thing we're gonna be using is a torque plate. This is an ICT Billet 4-200 bore torque plate for a small block Chevy, and what it does is recreate the cylinder distortion that happens when a cylinder head is bolted to a block. Any time a cylinder head is bolted down to an engine there's gonna be a little bit of distortion in the bores depending on how close the head bolts are to the cylinders themselves. Our 400 has a very big bore and the bolts are very close to the cylinder. So, it is especially prevalent, and you'll see that sometimes when you drop the hone in and you'll see hone marks where the cylinder head bolts are. So, we know that it's making some distortion. When the torque plate is bolted down it recreates that cylinder distortion so when it's together it has a nice, round, true cylinder. Another important factor in this is to use the same style head gasket that you will when you're assembling the engine. So, we have another Cometic m-l-s head gasket that goes under the torque plate. Adding to that we are gonna be using a set of actual head bolts in our torque plate. These are the same ARP 87-40s that will be going in the actual cylinder head, and they have to protrude out of the back of the torque plate the same amount as they protrude out of the cylinder head to get an accurate recreation of cylinder distortion. [ drill humming ]
(Pat)>> It's installed just like a cylinder head would be, and torque to a final value of 70-pound feet. Then the block is ready for our Sunnen SV-15 cylinder hone. Listen to that! [ mechanical humming ]
(Pat)>> That bore is really out of whack. That's crazy looking. That'll smooth out as it starts to hone more material out. The auto dwell feature is getting a workout on this particular block, focusing on the tight spots to get the cylinder straight. Look how much nicer the cylinder is looking. Now everything's starting to come in really nice. We're taking nine thousandths out of the cylinder, and it's within a couple of ten thousandths of being dead straight. Roughing cylinders is gonna take about 25 to 30 minutes a piece because there's so much material to remove, but it's easy to do in this SV-15 because it has a lot of power, keeps things very straight with the abrasive. Now to get it to that point we're gonna have to do something else with the cylinder. We're gonna have to let it cool down, remeasure it, change our stones, and put in our finishing stones, and that starts the process all over. In our finishing stone it's gonna take a lot less material out. So, it'll be a little bit faster after that, but we've got to get there. After a couple of hours of honing we're finally ready for the finishing stones. The 220 grit stones are replaced with 600s for final size and finish. [ mechanical humming ]
(Pat)>> We'll accurately check every cylinder's surface profile with our profilometer. These numbers are right on spec for our application and the parts we're using.
(Frankie)>> Up next, if you want a high powered long lasting engine you need a properly balanced crankshaft.
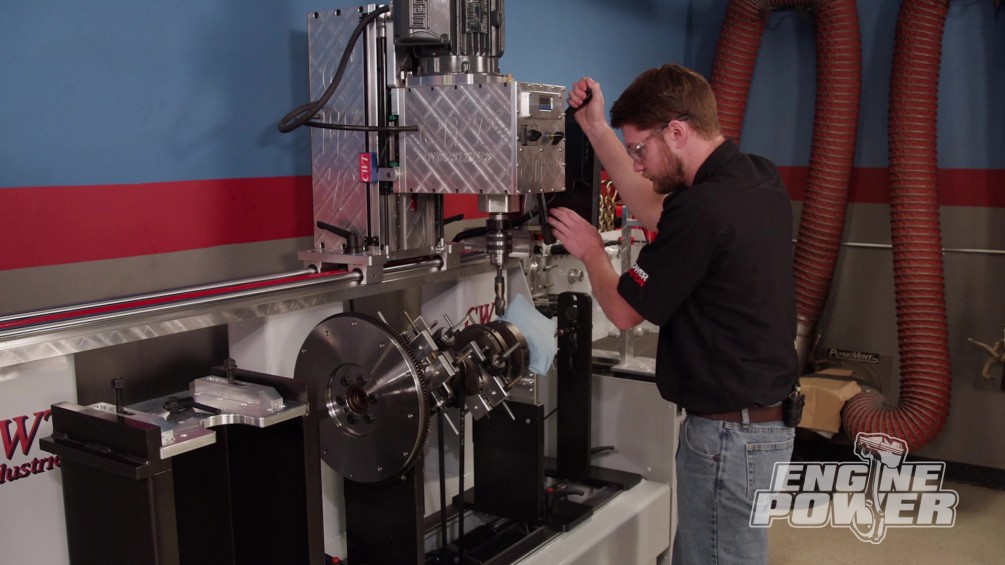
(Frankie)>> The next thing we're gonna do is balance our rotating assembly in our CWT multivalve 5,500. Since we used the stock crankshaft before we wanted to continue that trend. So, we had this crankshaft thoroughly cleaned, magnafluxed to check for cracks, and turned 10 thousandths under on the rods and main journals to make sure that they are round and straight and that we're starting with a good foundation. Since this is a stock 400 crankshaft it is externally balanced on the front and rear, and what that means is that the counterweights don't have enough mass to counteract the rotating and reciprocating forces of the pistons and rods. Mostly because of the space constraints inside the crankcase. So, the cost effective solution that GM came up with was to use the balancer and the flex plate, or flywheel, to counteract those forces and externally balance the engine. What this means is that the crankshaft has to be balanced with a damper and the flywheel or flex plate installed. So, we're gonna be using our billet steel SFI approved externally balanced dyno flywheel and a brand new Summit Racing bracket racer harmonic damper with a front weight installed in it. We're also gonna be reusing our Scat Pro Series I-beam rods that are 5-700 long. We've gone ahead and taken the 350 pistons off and thoroughly cleaned them so that they're ready to go. Since we are using a longer stroke crankshaft but the same length connecting rods and the same deck height, we not only needed a piston with a larger bore but the right compression height for this build. So, we found this Mahle Power Pack piston and ring kit from Summit Racing Equipment and it's gonna work perfect in our application. These are a really nice piece, and they come with the rings, wrist pins, and locks. This seems like a lot of stuff, but if you're gonna take your crankshaft to a machine shop you need to take all of this with you to make sure it's done accurately. If it's externally balanced on the front and rear you need to make sure you take the damper and flywheel, or flex plate, with you as well. We'll start grabbing some weights of our components and then we can start balancing. This machine makes it really easy to generate bob weights. When a component is weighed simply hit the print button and the value is uploaded to the computer. With the damper and flywheel installed we can set the crank into the machine and start installing our bob weights. We know our new piston and rod assemblies are more than 200 grams lighter than the originals. So, we will have to remove roughly 120 grams from the front and rear counterweights. Since we have so much to remove a cleaner looking and easier way to do it is turning down the counterweights in the lathe. We're removing roughly 300 thousandths from the front and rear counterweights, and to fine tune it we'll use the drill on our balancer. Wow, that's really nice. We had a target of eighth ounce inch and we are way under that, and the forces on the crank are almost 180 degrees apart from each other. So that really cancels the force on the center of the crank. You can see it's been minimized down. So, we're gonna save that as our last spin and get our printout here, which you can tell that if you hadn't got this crank balanced there'd be a ton of force that we don't want on the crank. Now that we have it's really minimized down. So, we're gonna print that and keep it.
(Pat)>> How'd you do?
(Frankie)>> I think it's pretty good for a stock crank. This is gonna be really nice in our dyno mule.
(Pat)>> Before it was balanced it had 1,124 pounds of force on the crank and now at 7,000 it will have two pounds.
(Frankie)>> Definitely an important aspect of building this.
(Pat)>> I think that we did a lot of good stuff today. We got a lot accomplished with our block, our crank, and it's all good but we ran out of time. So, the next time you see all this stuff it's gonna be going together and getting it on the dyno. For more information and to see more cool tech check out Powernation.
Show Full Transcript
(Frankie)>> Our Compression Obsession small block Chevy had an unfortunate mishap.
(Pat)>> But it's coming back better than ever with more cubic inches and more power. [ Music ]
(Frankie)>> Welcome to Engine Power, and today here in the shop it's actually kind of a sad day. It might be hard to recognize but this is our Compression Obsession 360 cubic inch dyno mule. This thing actually performed amazing. It was a dyno mule that we built with high compression and a solid roller valvetrain so it would turn a bunch of r-p-m, and it did just that on the dyno. It made 576 horsepower on E-85, and when we put it on 114 octane oxygenated racing fuel it made 591 horsepower and turned 7,000 r-p-m. This thing was a rocket, and if it performed so well you're probably wondering why did we take it all apart? Just like anything else there's a story behind that.
(Pat)> Now the engine didn't blow up. That might be the first thing that you're thinking. It actually had a structural failure after the fact while the engine wasn't even running. When we pulled it apart all the parts looked great. The rods, pistons, bearings, valvetrain, everything looked awesome, but we had a structural failure that usually happens to something in the northern climates, not here in Tennessee. Back a little bit ago we had a rash of bad weather, and that meant freezing rain, but also freezing temperatures. What happened is the building had lost power while we weren't here. Our dyno room, obviously heated, is not gonna be heated if there's no power. Since it's hooked to outside air the inside of that room got extremely cold. Cold enough to let the engine freeze and actually externally break the block. The first thing you might ask is, why didn't the freeze plugs pop out and help it? A freeze plug is technically not a freeze plug. It's actually a core plug that is used to get the casting sand out when the block is made. It is not a safety feature of the block. So just by the power of freezing and expanding water it pushed the sides of the block out very easily, rendering it junk.
(Frankie)>> And that sucks a lot. So we sat around trying to figure out what we were gonna do with all these great parts and a busted block, but we think we came up with a pretty good solution. Tommy and Joel from Detroit Muscle recently started a 1971 Chevy Caprice project, and when they pulled the original engine they set it aside. We pulled it off the shelf to become our new Compression Obsession dyno mule, and this is that engine. It is the infamous small block Chevy 400, which is pretty cool because dimensionally the exact same as our small block Chevy 350 that's busted. That means that even though it has a longer stroke and a bigger bore we should be able to take all our old parts and bolt it into this engine. That means we can use the same cam shaft, valvetrain, and induction package as before. It's gonna be pretty interesting because not only is it gonna show that there's no replacement for displacement, but it also will tell us if the r-p-m range will change for the peak power and if it will make the same specific output.
(Pat)>> This is going on the dyno and running exactly like it came out of the car. We are not changing the timing. We are not changing anything about this two barrel carburetor. All we have done is hook fire and fuel to it, and we're gonna see how it runs. It should be pretty interesting.
(Frankie)>> But underwhelming. [ engine starts ]
(Frankie)>> Alright, we got the 400 on the dyno. We hooked fuel to it and we hooked ignition to it, and this thing started right up. We've got it up to temp. We didn't change the timing. Actually, we haven't changed anything, but we did check the timing just to see where it was and it's at 16 degrees of base timing. So, we're gonna see how much this thing makes. They didn't make a ton from the factory. So, if it makes over 200 I'll be impressed and excited. Loads in at 2,000.
(Pat)>> Two barrel action! Look at the O-2.
(Frankie)>> Look at the torque, not bad! [ engine revving ]
(Frankie)>> Headers are smoking a little bit there.
(Pat)>> There's a little bit of erl on the manifolds.
(Frankie)>> 225.5 at 3,900.
(Pat)>> 373-pound feet of torque.
(Frankie)>> It's flat up until it starts to fall off.
(Pat)>> We're loading in at 2,000. It's nice and flat.
(Frankie)>> The manifold vacuum peaking at six inches probably isn't helping.
(Pat)>> That's what I classify as a restriction.
(Frankie)>> Just for fun we added two degrees of base timing to see if it'd make a little more power. [ engine revving ] [ Music ]
(Pat)>> 376.7, 226.
(Frankie)>> I guess we get started.
(Pat)>> The fun is over but really the fun has just begun.
(Frankie)>> Up next, the 400 small block Chevy performed pretty well on the dyno, but what will we find once we crack it open. Little bit of crusties!
(Frankie)>> In today's Summit Tech Tip we're gonna talk about something that's very important, and that is testing your valve spring pressure. We're gonna do it with somebody that's super famous, Clay Millican, Top Fuel dragster driver. Clay let's talk about why valve spring pressure is really important and why it's important to get it right.
(Clay)>> It is such a huge part of the performance of your vehicle. This valve spring controls keeping the lifter against the cam shaft and that push rod touching that rocker arm. If this is not right your engine ain't right.
(Frankie)>> If you don't have enough it doesn't control it, and if you have too much you can prematurely wear out parts, right?
(Clay)>> No doubt about it. You've got to hit it just right, and thankfully the folks at Summit Racing got the springs, they got the tester. Everything you need to get your engine performing exactly right.
(Frankie)>> All the way from economy style ones up to this professional grade Intercomp. So why don't we go ahead and test one, see where it comes, and go from there. First, we'll check the pressure at its installed height or where it would be when the valve is closed. Then we check it at its open position, or where the valve reaches max lift.
(Clay)>> Alright Frankie, one down, 15 to go, but it looks like this is gonna work great in our hydraulic roller situation here.
(Frankie)>> I think we'll make sure the rest match and we'll be good go.
(Pat)>> After a successful baseline dyno session the teardown of our 400 cubic inch small block Chevy begins. Even though we won't reuse most of the engine's parts we'll still take note of their condition because it reveals a lot about how the engine ran. Ow! There's all kinds of sharp rusty stuff on it. [ Music ] Clean one owner.
(Frankie)>> Yeah, it's got that unmaintenanced oil smell. It made okay power, ran okay. A little bit of crusties.
(Pat)>> That's like the crust you get on the outside of a brownie pan. I would venture to say this is the first time this engine's been apart. It's got the original style gasket on the China wall. The intake gaskets look like they're stock. [ rubber mallet banging ]
(Pat)>> Oh geez, don't hit me! [ rubber mallet banging ]
(Pat)>> Get her! Don't hit me in the face! It doesn't want to come apart. That feels good. There we go, feel something happening! [ push rods clinking ]
(Frankie)>> Kept those in order if you didn't notice. Everywhere but major and minor thrust I have good crosshatch below the first inch, which is pretty cool. All the pistons look good. Inside the chambers look good.
(Pat)>> What's the over/under, standard bore?
(Frankie)>> I think at this point it's pretty good because I think this thing has never been apart. Look at that! That's good news for us because we already have pistons. We kinda banked on that just from what we had been told about it.
(Pat)>> All the lifters obviously spin. This thing made no noise. No clattery lifters.
(Frankie)>> Had good oil flow.
(Pat)>> Beautiful foundation. Original head gaskets. It's a time capsule. The engine oil is dark, but it appears free of sludge or grit.
(Frankie)>> That's because it was all trapped in the bottom of the oil pan. After removing the balancer and the front cover we'll check the condition of the timing chain. [ Music ] [ drill humming ] [ Music ] Since the lifters had some crusty old buildup on them it was easier to take the cam shaft out after rotating the engine upside down. You know what's cool about this is that factory four bolt mains, which is encouraging.
(Pat)>> Up until '72 the 400s, '70 through '72 were four bolts. '73 to '79 they all went to two bolt, which had that big pyramid looking thing.
(Frankie)>> We weren't sure. At this point we've pretty much determined that this is the original engine out of that car, but there was still a little doubt in my mind. Maybe somebody had swapped one in later.
(Pat)>> That has a GM bearing in it.
(Frankie)>> Something interesting is that this engine has factory bearings. Some that are oversized and some that undersized from standard. This was common practice to set bearing clearances on stock engines.
(Pat)>> Back in the day these engines that would not be up to spec on the line were called target master engines, and what they would do is if they found a crank, a bore, or something that was out of spec they would take that engine off the line, set it aside, put stuff in it that actually works, and then put the engines back in circulation.
(Frankie)>> All the bearings were in great shape, which is promising for the condition of the block. The oil buildup meant we had to gently tap out the lifters, but they have no excessive wear.
(Pat)>> Up next, we prep our bores for bigger pistons and give them the correct finish in the cylinder hone.
(Frankie)>> Here in the shop we primarily build engines, but something that goes with that is welding with our Forney mig and tig welders, and today we have a really cool opportunity to have Gabby from Forney in the shop, and she brought one of their new machines, a 190 Multi-Process welder. Now this welder's a little bit different than what we already have, and it has a bunch of cool features. So why don't you walk us through what this machine can do?
(Gabby)>> So this 190 MP, it can stick, mig, and tig weld. You can also use a spool gun on it. You also have features of flux core welding. So, most mig welders can also flux core weld. This machine has our TruSet settings. That means you can select what thickness of wire you're using in this machine, and then the thickness of material that you're going to be welding. The machine will then set the settings for you, and then you have the option to trim. So, everybody welds a little bit different. If you want it a little hotter, a little colder, you can adjust that trim, and it does have manual settings as well if you don't want to deal with the TruSet, but it is a good setting for anybody who's just starting out and wanting to know how to mig weld. Another really cool feature that we have here is our set and forget de-spooler. So, what that means is that most de-spoolers have springs, and washers, and a nut, and you have to tighten that in there, and what happens is people can overtighten this spool, which can cause extra wear and tear on your drive motor as well as the gears inside of there. What we did here is allowed this to be set up, and then it has all the tension that it needs right here in the spool from the spring and everything we put together there. It comes with all the things that you need. It comes with your electrode holder, your mig gun, a ground clamp, your regulator, and a gas hose. Everything you need except for your tig torch if you wanted to tig weld with it, or a spool gun if you were going to spool.
(Frankie)>> I think it's cool that you can buy one machine and then you can get so much functionality out of it. You can do a bunch of different things.
(Gabby)>> Definitely, this machine also runs off of 240 and 120 volts. So, you have dual voltage so that anywhere you're working you can plug it in. It's also generator friendly.
(Frankie)>> We might have to get you to leave this one here for us.
(Gabby)>> Definitely, I'm sure you guys have plenty of projects to use it on. We'll leave this one here for you.
(Frankie)>> Excellent! After running the block through the jet washer, we can start prepping it by porting the oil galleries and deburring the block. We did this to our previous 350 block. So, we're gonna put the same amount of attention and care into this one. We'll also chamfer every hole in the block and tap the threads in the front oil galleries for threaded pipe plugs. Our previous version of our Compression Obsession dyno mule made really impressive power, and this one, since it's bigger, is gonna make more. So, we know we needed to start with a good, solid foundation. We ran our small block Chevy 400 through the jet washer to knock off some of the metal debris and the oil sludge that was there before so we could visually look at it and make sure it was sound. We've also mag checked it and measured the main bores to make sure they are round and straight, and they are, which is awesome. Means we can save a little bit of money and not have align honed. We're also gonna save a little bit of money by reusing our ARP main bolt kit for a four-bolt small block Chevy. We were pretty lucky to find a 400 with four bolt mains. They're a little bit more rare, and that means we can reuse our high quality fasteners. These are made from 87-40 chro-moly steel, and they have a tensile strength of 180,000 p-s-i, which is gonna be way stronger than the stock fasteners and even way stronger than a grade eight bolt that you could get at the hardware store. It's also important that you follow the torque specification in the instructions, not the stock specification. We'll get these bolts in our mains and get them torqued up. [ torque wrench beeping ]
(Pat)>> The next operation we're gonna do on our 400 is finish the cylinders to size to match our new pistons. We're gonna have to take 30 thousandths out of the bore but we are not gonna rough it out in a boring bar first. We're gonna do the entire operation in our cylinder hone, and we can do that because we use diamond abrasives here. They are very rigid, and they maintain proper bore geometry throughout the entire process. Another thing we're gonna be using is a torque plate. This is an ICT Billet 4-200 bore torque plate for a small block Chevy, and what it does is recreate the cylinder distortion that happens when a cylinder head is bolted to a block. Any time a cylinder head is bolted down to an engine there's gonna be a little bit of distortion in the bores depending on how close the head bolts are to the cylinders themselves. Our 400 has a very big bore and the bolts are very close to the cylinder. So, it is especially prevalent, and you'll see that sometimes when you drop the hone in and you'll see hone marks where the cylinder head bolts are. So, we know that it's making some distortion. When the torque plate is bolted down it recreates that cylinder distortion so when it's together it has a nice, round, true cylinder. Another important factor in this is to use the same style head gasket that you will when you're assembling the engine. So, we have another Cometic m-l-s head gasket that goes under the torque plate. Adding to that we are gonna be using a set of actual head bolts in our torque plate. These are the same ARP 87-40s that will be going in the actual cylinder head, and they have to protrude out of the back of the torque plate the same amount as they protrude out of the cylinder head to get an accurate recreation of cylinder distortion. [ drill humming ]
(Pat)>> It's installed just like a cylinder head would be, and torque to a final value of 70-pound feet. Then the block is ready for our Sunnen SV-15 cylinder hone. Listen to that! [ mechanical humming ]
(Pat)>> That bore is really out of whack. That's crazy looking. That'll smooth out as it starts to hone more material out. The auto dwell feature is getting a workout on this particular block, focusing on the tight spots to get the cylinder straight. Look how much nicer the cylinder is looking. Now everything's starting to come in really nice. We're taking nine thousandths out of the cylinder, and it's within a couple of ten thousandths of being dead straight. Roughing cylinders is gonna take about 25 to 30 minutes a piece because there's so much material to remove, but it's easy to do in this SV-15 because it has a lot of power, keeps things very straight with the abrasive. Now to get it to that point we're gonna have to do something else with the cylinder. We're gonna have to let it cool down, remeasure it, change our stones, and put in our finishing stones, and that starts the process all over. In our finishing stone it's gonna take a lot less material out. So, it'll be a little bit faster after that, but we've got to get there. After a couple of hours of honing we're finally ready for the finishing stones. The 220 grit stones are replaced with 600s for final size and finish. [ mechanical humming ]
(Pat)>> We'll accurately check every cylinder's surface profile with our profilometer. These numbers are right on spec for our application and the parts we're using.
(Frankie)>> Up next, if you want a high powered long lasting engine you need a properly balanced crankshaft.
(Frankie)>> The next thing we're gonna do is balance our rotating assembly in our CWT multivalve 5,500. Since we used the stock crankshaft before we wanted to continue that trend. So, we had this crankshaft thoroughly cleaned, magnafluxed to check for cracks, and turned 10 thousandths under on the rods and main journals to make sure that they are round and straight and that we're starting with a good foundation. Since this is a stock 400 crankshaft it is externally balanced on the front and rear, and what that means is that the counterweights don't have enough mass to counteract the rotating and reciprocating forces of the pistons and rods. Mostly because of the space constraints inside the crankcase. So, the cost effective solution that GM came up with was to use the balancer and the flex plate, or flywheel, to counteract those forces and externally balance the engine. What this means is that the crankshaft has to be balanced with a damper and the flywheel or flex plate installed. So, we're gonna be using our billet steel SFI approved externally balanced dyno flywheel and a brand new Summit Racing bracket racer harmonic damper with a front weight installed in it. We're also gonna be reusing our Scat Pro Series I-beam rods that are 5-700 long. We've gone ahead and taken the 350 pistons off and thoroughly cleaned them so that they're ready to go. Since we are using a longer stroke crankshaft but the same length connecting rods and the same deck height, we not only needed a piston with a larger bore but the right compression height for this build. So, we found this Mahle Power Pack piston and ring kit from Summit Racing Equipment and it's gonna work perfect in our application. These are a really nice piece, and they come with the rings, wrist pins, and locks. This seems like a lot of stuff, but if you're gonna take your crankshaft to a machine shop you need to take all of this with you to make sure it's done accurately. If it's externally balanced on the front and rear you need to make sure you take the damper and flywheel, or flex plate, with you as well. We'll start grabbing some weights of our components and then we can start balancing. This machine makes it really easy to generate bob weights. When a component is weighed simply hit the print button and the value is uploaded to the computer. With the damper and flywheel installed we can set the crank into the machine and start installing our bob weights. We know our new piston and rod assemblies are more than 200 grams lighter than the originals. So, we will have to remove roughly 120 grams from the front and rear counterweights. Since we have so much to remove a cleaner looking and easier way to do it is turning down the counterweights in the lathe. We're removing roughly 300 thousandths from the front and rear counterweights, and to fine tune it we'll use the drill on our balancer. Wow, that's really nice. We had a target of eighth ounce inch and we are way under that, and the forces on the crank are almost 180 degrees apart from each other. So that really cancels the force on the center of the crank. You can see it's been minimized down. So, we're gonna save that as our last spin and get our printout here, which you can tell that if you hadn't got this crank balanced there'd be a ton of force that we don't want on the crank. Now that we have it's really minimized down. So, we're gonna print that and keep it.
(Pat)>> How'd you do?
(Frankie)>> I think it's pretty good for a stock crank. This is gonna be really nice in our dyno mule.
(Pat)>> Before it was balanced it had 1,124 pounds of force on the crank and now at 7,000 it will have two pounds.
(Frankie)>> Definitely an important aspect of building this.
(Pat)>> I think that we did a lot of good stuff today. We got a lot accomplished with our block, our crank, and it's all good but we ran out of time. So, the next time you see all this stuff it's gonna be going together and getting it on the dyno. For more information and to see more cool tech check out Powernation.
