Engine Power Featured Projects
Engine Power Builds
Want more content like this?
Join the PowerNation Email NewsletterParts Used In This Episode
ARP
ARP Fasteners
Matco Tools
Matco Spiral Flute Step Drill
Sunnen Products Company
Sunnen SV-15 Honing Machine
The Industrial Depot
Tools, Hardware, Shop Supplies
Episode Transcript
(Pat)>> You're watching Powernation!
(Frankie)>> The GM 4.3 liter V-6 was an industry workhorse for decades, and it only needs one thing.
(Pat)>> More power!
(Frankie)>> Today on Engine Power our V-6 gets turbocharged. [ Music ]
(Frankie)>> Welcome to Engine Power where we are back on our GM 4.3 liter V-6. This engine was a lot of fun, and honestly, it's one of my favorite engine builds we've done so far.
(Pat)>> This project actually started out as some universal tech that would apply to any engine that you build, but because it gained so much popularity we decided to do a full build.
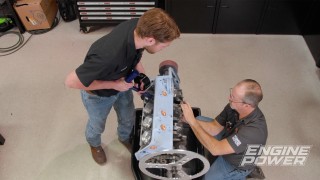
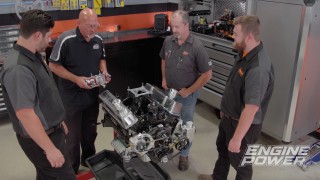
(Frankie)>> It ran really great on the dyno, made some good numbers, and we got a lot of great feedback from you the viewers, and one suggestion really stood out and that was a power adder. So today that is what we're gonna tackle, but first if you haven't seen this engine before or don't know everything we've done to it take a look at this. We used the V-6 to demonstrate how to prep an engine for a build, how to make some mods to increase oil flow, and how to port the heads to increase air flow. We then used our Sunnen SV-15 cylinder hone to give the bores a factory fresh finish. By that point people started asking us, why don't you just go ahead and build the engine? After putting that much time into it we agreed it would be a waste just to cover it in plastic and stick it in the corner.
(Pat)>> Some of the existing pieces were reused, such as the rods and crankshaft. Some of the pieces were upgrades, including a bigger cam shaft, forged pistons that also increased compression, and a fresh set of valve springs. We topped the engine off with an Edelbrock Performer intake manifold. In the dyno cell with the Quick Fuel QFT 950 c-f-m carburetor the V-6 put out 262 horsepower, and 296 pound feet of torque.
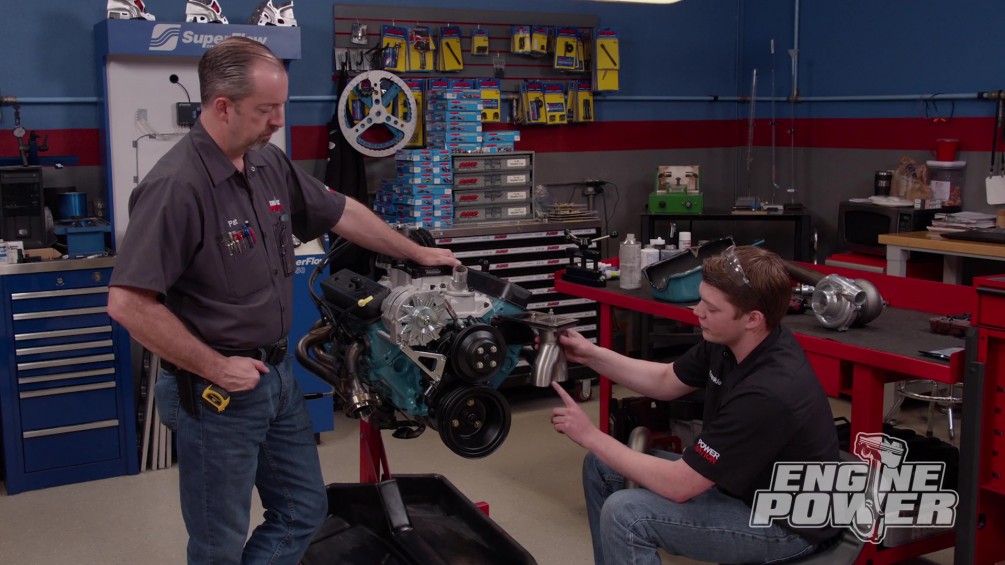
(Frankie)>> On our V-6 our power adder of choice is going to be a turbocharger. These are really simple to install and a great way to add power. These engines even have a history with turbocharging going all the way back to the '90's with the Typhoons and the Cyclones. Now our engine is very solid. So, all we have to do is build around it.
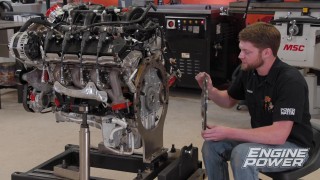
(Pat)>> This engine is still gonna be a pump gas street engine. So, we're not gonna pour the boost to it, but we are doing some updates, like converting this engine to fuel injection with a Holley Super Sniper Stealth. Also, we have to build the entire turbo system ourselves, which isn't exactly hard, but we have a lot of work we have to do. So, no better time like the present to get going on it. [ Music ] This engine only has dyno time on it. So, we aren't expecting any surprises. The oil looks clean. [ Music ] [ drill humming ]
(Pat)>> Since we're adding a turbo, we will be adding a turbo drain to the side of the oil pan. Off it goes, nice! [ Music ] [ drill humming ] [ Music ]
(Pat)>> There you silly, silly piece of equipment. [ Music ] I'll tell you what. This thing was running very nice.
(Frankie)>> All the ports look good, nothing's leaking. So, we should be able to... I'm pretty sure this works. Go like that.
(Pat)>> Like it was made for a turbo setup.
(Frankie)>> And now we have turbo headers, and we can get new gaskets but for now we can still mock them up, get them bolted on cause we've got to figure out where we're gonna put the turbo, how we're gonna drain it, how we're gonna tie these together to go into one turbo. There's a bunch of other stuff to figure out. So, I say for now we just get them mocked up. We'll get some new gaskets coming and go from there.
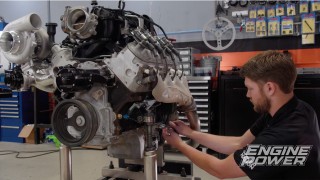
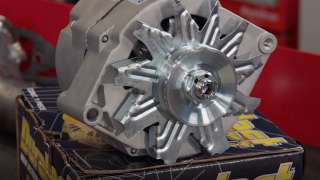
(Pat)>> I'm way ahead of you. I'm already doing it! [ Music ] We are going to be switching over our 4.3 from an electric water pump setup that we used on the dyno to a conventional belt driven setup, and for that we need an alternator as well. We chose to pick up a Duralast Gold alternator. The Gold line is a 100 percent new alternator. There are no reused pieces in it. They will also go the extra mile and create proprietary componentry so the alternator at or above o-e-m standards. During its assembly it is triple tested to ensure that everything works properly, and it is designed to be a 100 percent bolt in for its o-e-m counterpart. So, we will get everything mocked up on the front of the engine and then build our turbo system around it so everything fits like it should.
(Frankie)>> We had a pulley setup and a mechanical water pump for a small block Chevy truck engine in house. So, we're using them on the build. [ drill humming ]
(Frankie)>> After getting them bolted on we use an aftermarket bracket to install our alternator.
(Pat)>> Up next, when you're building a custom turbo setup it takes a lot of work, but the result is worth it.
(Pat)>> If you are new to turbocharging there may be a few things that you just haven't learned yet. And whether it's a daily driver or a full out race car, turbocharging can give you an advantage in the horsepower department if everything is set up right, and this Summit Tech Tip is gonna help you out with that. Today we're gonna talk about the difference between a waste gate and a blow off valve. A waste gate is a valve that is used on the exhaust side before the turbocharger that regulates how fast the turbine spins. It gets reference from the pressurized side of the compressor, and when it achieves the pressure that is needed, via either manually with springs and a boost controller or electronically through solenoids, it bleeds pressure around the turbine to limit its speed and that limits how much boost you can produce. Now on the other side of the system we'll talk about what a flow off valve does. This is a valve that's installed on the cold side of the system before pressurized air enters the engine. It represents vacuum from behind the throttle blades in this port, and what it is designed to do is keep that pressure wave from damaging your compressor wheel, bearings, and all sorts of stuff in your system when the throttle blades are snapped closed during wide open throttle operation. And although this is just a small part of an entire turbo system these components are extremely important for things to run right.
(Frankie)>> Keeping our other turbo components in mind and easy packaging, we had to figure out where we were gonna put the turbo, and what we landed on is somewhere in this area. We get too close it makes it hard to route the exhaust. We get too far away it makes it hard to brace. So, we're gonna be somewhere in here, and to do that we drew up a bracket in cad, or cardboard aided design, and what we end up with is this. This is just solid tacked for now but it will mount right here to the head, and the turbo will sit on top. We'll figure out how to get everything routed up to it, and then once everything is mocked up we can fully weld the bracket and our exhaust. We'll use some ARP fasteners to hold our stainless turbo flange in place.
(Pat)>> Alright I dug around out back. There is a two and a half inch 180 like you requested. Now tell me exactly what you're gonna do here.
(Frankie)>> Well this is kinda the heart of the plan. It's a Vibrant Performance Y-pipe from Summit Racing. We actually used one of these on the Ford 300. This one's different though. It has a two and a half inch inlet and a three inch outlet cause that's actually the same size as a T-4 flange. So, I've already boxed that, and that is gonna go right here on this flange. And then probably the hardest part about this is getting this pipe to make this turn into this header. It's really tight. Not a big fan of pie cuts. So, I'd like to use mandrel bent tubing as much as I can. I might have to cut this up a little bit to make it fit, but I think it's definitely do-able, and then this side is really easy. Just 90, 45, another 90, and probably another 45, and then probably gonna have the waste gate come out right here so it hits both sides. Just out at an angle, and then that'll go out the back and the turbo exhaust will go out the back too. I think that should work.
(Joe)>> Usually we just build stuff for the dyno, but it's compact enough you don't have a power steering unit. It might be able to fit in some sort of vehicle. No plan for it yet, but there's always that hope.
(Frankie)>> There's a hope that it will fit. We usually just build these for the dyno cause that's all we need it to work for, and this one doesn't have a project planned yet. So, we can't build it around a vehicle. We have nothing planned for it. So, I think this is gonna work really well for now. It's gonna spool up nice. I think it's gonna be good. [ Music ] We'll start by tacking our Y-pipe to our flange. [ Music ] So, we've made this bend right here. We've basically taken a mandrel bent piece and slash cut it, and then made the holes pretty round again. You could have done this with pie cuts, but this is gonna be a smoother transition for the air. It might not look as good but it's probably gonna work a little bit better. So, all we have to do now is make a few pieces of pipe that space it out. We've got one there and then we'll make another one that goes to here and connect everything together. [ Music ]
(Pat)>> That's quasi straight. Right there! [ Music ]
(Frankie)>> Okay, good?
(Pat)>> The rest of the exhaust is pretty simple. We'll get everything tacked into place and make sure it fits before it's final welded.
(Frankie)>> Coming up, our V-6 gets a stealthy e-f-i system, and then it's off to the dyno cell.
(Pat)>> The next thing we will be doing in our series of events is installing the waste gate. Now this is a 40-millimeter unit with a seven pound spring installed. It doesn't sound like a lot, but we will also be adding a manual boost controller. So, if want to crank it up later we can. Because this is a completely custom system, we can install this wherever we want. We want it in-line with the flow, and we want to see pressure from both sides of the engine. So, we're gonna stick it right on our merge right there. That way we can run our pipe to our exhaust or separately if we want to. [ Music ] [ drill humming ]
(Pat)>> Oh, right in the oil! [ Music ] A lot easier than drilling out a hole is to take our Forney plasma cutter and color inside the lines, sort of. [ Music ] Alright!
(Frankie)>> Since this is the final component we can now go through and fully weld the entire hot side. We'll also take this time to add an O-2 bung for the e-f-i system. [ drill humming ]
(Frankie)>> Remember that turbo drain we talked about? Now it's time for it to go in. After drilling a pilot hole and finishing it to size with a Matco spiral flute step drill we'll remove the paint from around the weld area with a Forney abrasive pad. [ grinder buzzing ]
(Frankie)>> Finally we'll install the bung. [ Music ] We finished welded our dash-10 bung in the side of our oil pan for our turbo drain, and now that that's repainted we also added a baffle to the inside to hopefully keep some of the returning oil from splashing directly on the crank and keep some windage down. But since he's got silicone on this is ready to go back on. [ Music ]
(Pat)>> High temperature r-t-v will help keep the headers sealed up tight. Now they will be installed for good. [ Music ] Since you last saw this bracket we've installed a gusset and fully welded it. [ ratchet clicking ]
(Pat)>> With everything covered in heat wrap, the hot side is bolted down. [ Music ]
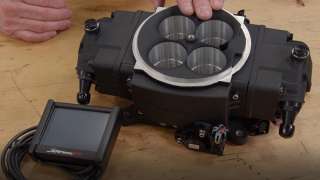
(Frankie)>> Then the turbo is installed, and the boost-T is connected to the waste gate. [ Music ] We only have a few components left to install on our V-6, and one of the more important ones is the fuel metering device. And since we are going turbocharge, we are gonna be going with throttle body fuel injection and using this Holley Super Sniper Stealth to do that. These units are really cool because the module is integral to the unit, and it's been designed to look like a carburetor for that stealthy under hood look. We're not gonna push our V-6 that hard, but in case we want to use this on any other projects this unit is good for up to 1,250 horsepower under forced induction. These units will do quite a bit with three programmable inputs and up to six outputs, but if you want to keep it simple you only actually need four wires to make it run, and it comes with everything you need. You can do all the tuning with the handheld right here. It's a three and a half inch touch screen, but we are gonna actually upgrade that and move on to the Sniper five inch digital dash. This replaces the three and a half inch handheld cause it will do all the same functions like the setup wizard and the tuning, but it also has three pre-programmed dashes that have r-p-m and speed as well as a bunch of other data. It comes with its own g-p-s for speed signal, a windshield mount, and the can connection for the unit. We also need to design an intercooler system, and to get the air into our Super Sniper Stealth we are gonna use one of Holley's black carb hats. Before we can do that we have to get this one installed. [ Music ] This unit bolts to any 41-50 flange and it has two dash six fuel inlets to feed the eight 100 pound an hour injectors. [ Music ]
(Pat)>> Up next, we "T" up some boost on our 4.3 liter V-6.
(Pat)>> The last thing our 4.3 will get is a small charged air cooler with an electric fan already attached. It will be plenty.
(Frankie)>> It's running very nicely. It's up to temp, idling beautifully. I'm really excited, are you excited?
(Pat)>> Yeah, I'm excited. More excited that I'm not dyno'ing this one because I don't know what's gonna happen. [ engine revving ]
(Pat)>> Nice, boost already! [ engine revving ]
(Frankie)>> Oh my!
(Pat)>> That's not a bad start.
(Frankie)>> That's a good looking graph too. 446.8 pound feet, right at 4,000, and 340.3 horsepower.
(Pat)>> We're already making good power. So, eight pounds of boost at 4,000. That's gonna go up.
(Frankie)>> Making 1.68 torque per cube.
(Pat)>> Something like this you just don't want to get aggressive with it because it does have a forged piston in it, but you can really get yourself into trouble. How froggy are you feeling?
(Frankie)>> I don't know. If something bad does happen it's not the end of the world. We are treading new ground. This is something I've never done, you've never done. We've heard stories.
(Pat)>> I might have done it.
(Frankie)>> Oh, well you didn't tell me that before.
(Pat)>> In the naturally aspirated version we turned it 5,500. Go ahead and turn it 5,500.
(Frankie)>> That is what we're gonna do, and we're gonna see what it peaks at for horsepower. Here we go!
(Pat)>> Don't blow it up! [ engine revving ]
(Pat)>> That's about it. We're right there. I wanted to see where things would start to level off.
(Frankie)>> 444.9, call that 445, and it did that right at 5,200. And torque's still good, 474.1. The tune is super safe. Not a ton of timing, not a ton of fuel. We chose fuel injection for a reason. So, we could control timing, control the fuel. We have an accurate way to do that to make sure this thing is not gonna run lean.
(Pat)>> I've been watching the little monitor, which the five inch screen is really nice. It's easy to use. It's very, very clear. I like it cause I can see it without my glasses on. You want to go for the gusto? [ Pat whistling ]
(Frankie)>> If this was a street engine I would stop there. If this was my engine I was putting in a vehicle I would top right there on pump gas.
(Pat)>> This is the point where we can tell everybody else to stop. We don't have to stop.
(Frankie)>> There should be a disclaimer at the bottom that says stop here. Maybe we'll go give that boost a few turns?
(Pat)>> I don't know anything about boosties. You're gonna have to do that.
(Frankie)>> It's just a couple of turns.
(Pat)>> I'll go do it.
(Frankie)>> Alright, how many turns did you actually put in it?
(Pat)>> You're supposed to count the clicks?
(Frankie)>> Oh boy, oh no! [ engine revving ]
(Frankie)>> Oh my gosh!
(Pat)>> Watch this torque number right here.
(Frankie)>> Oh my gosh! You put a couple of turns in it didn't you?
(Pat)>> I put four clicks in it. 503.7-pound feet.
(Frankie)>> And we're at 468.3 horsepower at 5,200.
(Pat)>> That's pretty mean right there. We still have six cylinders. There's no smoke, there are no parts on the ground. I don't know how many times I would repeat doing that, but that thing just made 500-pound feet at 266 inches.
(Frankie)>> Do you want to just go for one atmosphere?
(Pat)>> It's one of those things I would like to go for one atmosphere.
(Frankie)>> Is it gonna last much longer? I don't know but there's only one way to find out.
(Pat)>> Let me go put another couple of those clicks in there and then we'll stop. I don't know if it'll get one atmosphere, but I really, really think we should stop after this.
(Frankie)>> Alright here we go. [ engine revving ]
(Frankie)>> I was so scared.
(Pat)>> Let's go ahead and stop now.
(Frankie)>> 525.8-pound feet and 485.5 horsepower.
(Pat)>> That is pushing the envelop on this thing. I don't know cause you could literally keep going until it flushes parts out of it. The graph looks beautiful. All the air/fuels look nice. The engine's still running. What did we learn today?
(Frankie)>> I learned that I like V-6's a little bit more if they have a turbo.
(Pat)>> That's true. What really helped us out on this one a lot is we did a lot of pre-work. I know it's universal for all engines, but with the oiling mods, and the torque plate honing, and the careful assembly. We put rod bolts in it, and we put a forged piston.
(Frankie)>> And ported the heads, and that allows us to run a little bit less boost and make the equal amount of power, which is helpful. We are getting in the medium range for boost here at 13.8. So, we're getting close there. So, imagine this is an S-10, or an S-10 Blazer, or something like that.
(Pat)>> This could be in a full size pickup. This thing's making 375-pound feet at 2,500.
(Frankie)>> Over 3,100 it's making over 450, and that doesn't go back below. Now we just have to find something to put it in. That's not our job, but.
(Pat)>> It'd be great to put it in something but that's not our department.
(Frankie)>> Still great success!
(Pat)>> Happy times!
(Frankie)>> If you want to see more of this or more cool stuff go check out our website.
Show Full Transcript
(Frankie)>> The GM 4.3 liter V-6 was an industry workhorse for decades, and it only needs one thing.
(Pat)>> More power!
(Frankie)>> Today on Engine Power our V-6 gets turbocharged. [ Music ]
(Frankie)>> Welcome to Engine Power where we are back on our GM 4.3 liter V-6. This engine was a lot of fun, and honestly, it's one of my favorite engine builds we've done so far.
(Pat)>> This project actually started out as some universal tech that would apply to any engine that you build, but because it gained so much popularity we decided to do a full build.
(Frankie)>> It ran really great on the dyno, made some good numbers, and we got a lot of great feedback from you the viewers, and one suggestion really stood out and that was a power adder. So today that is what we're gonna tackle, but first if you haven't seen this engine before or don't know everything we've done to it take a look at this. We used the V-6 to demonstrate how to prep an engine for a build, how to make some mods to increase oil flow, and how to port the heads to increase air flow. We then used our Sunnen SV-15 cylinder hone to give the bores a factory fresh finish. By that point people started asking us, why don't you just go ahead and build the engine? After putting that much time into it we agreed it would be a waste just to cover it in plastic and stick it in the corner.
(Pat)>> Some of the existing pieces were reused, such as the rods and crankshaft. Some of the pieces were upgrades, including a bigger cam shaft, forged pistons that also increased compression, and a fresh set of valve springs. We topped the engine off with an Edelbrock Performer intake manifold. In the dyno cell with the Quick Fuel QFT 950 c-f-m carburetor the V-6 put out 262 horsepower, and 296 pound feet of torque.
(Frankie)>> On our V-6 our power adder of choice is going to be a turbocharger. These are really simple to install and a great way to add power. These engines even have a history with turbocharging going all the way back to the '90's with the Typhoons and the Cyclones. Now our engine is very solid. So, all we have to do is build around it.
(Pat)>> This engine is still gonna be a pump gas street engine. So, we're not gonna pour the boost to it, but we are doing some updates, like converting this engine to fuel injection with a Holley Super Sniper Stealth. Also, we have to build the entire turbo system ourselves, which isn't exactly hard, but we have a lot of work we have to do. So, no better time like the present to get going on it. [ Music ] This engine only has dyno time on it. So, we aren't expecting any surprises. The oil looks clean. [ Music ] [ drill humming ]
(Pat)>> Since we're adding a turbo, we will be adding a turbo drain to the side of the oil pan. Off it goes, nice! [ Music ] [ drill humming ] [ Music ]
(Pat)>> There you silly, silly piece of equipment. [ Music ] I'll tell you what. This thing was running very nice.
(Frankie)>> All the ports look good, nothing's leaking. So, we should be able to... I'm pretty sure this works. Go like that.
(Pat)>> Like it was made for a turbo setup.
(Frankie)>> And now we have turbo headers, and we can get new gaskets but for now we can still mock them up, get them bolted on cause we've got to figure out where we're gonna put the turbo, how we're gonna drain it, how we're gonna tie these together to go into one turbo. There's a bunch of other stuff to figure out. So, I say for now we just get them mocked up. We'll get some new gaskets coming and go from there.
(Pat)>> I'm way ahead of you. I'm already doing it! [ Music ] We are going to be switching over our 4.3 from an electric water pump setup that we used on the dyno to a conventional belt driven setup, and for that we need an alternator as well. We chose to pick up a Duralast Gold alternator. The Gold line is a 100 percent new alternator. There are no reused pieces in it. They will also go the extra mile and create proprietary componentry so the alternator at or above o-e-m standards. During its assembly it is triple tested to ensure that everything works properly, and it is designed to be a 100 percent bolt in for its o-e-m counterpart. So, we will get everything mocked up on the front of the engine and then build our turbo system around it so everything fits like it should.
(Frankie)>> We had a pulley setup and a mechanical water pump for a small block Chevy truck engine in house. So, we're using them on the build. [ drill humming ]
(Frankie)>> After getting them bolted on we use an aftermarket bracket to install our alternator.
(Pat)>> Up next, when you're building a custom turbo setup it takes a lot of work, but the result is worth it.
(Pat)>> If you are new to turbocharging there may be a few things that you just haven't learned yet. And whether it's a daily driver or a full out race car, turbocharging can give you an advantage in the horsepower department if everything is set up right, and this Summit Tech Tip is gonna help you out with that. Today we're gonna talk about the difference between a waste gate and a blow off valve. A waste gate is a valve that is used on the exhaust side before the turbocharger that regulates how fast the turbine spins. It gets reference from the pressurized side of the compressor, and when it achieves the pressure that is needed, via either manually with springs and a boost controller or electronically through solenoids, it bleeds pressure around the turbine to limit its speed and that limits how much boost you can produce. Now on the other side of the system we'll talk about what a flow off valve does. This is a valve that's installed on the cold side of the system before pressurized air enters the engine. It represents vacuum from behind the throttle blades in this port, and what it is designed to do is keep that pressure wave from damaging your compressor wheel, bearings, and all sorts of stuff in your system when the throttle blades are snapped closed during wide open throttle operation. And although this is just a small part of an entire turbo system these components are extremely important for things to run right.
(Frankie)>> Keeping our other turbo components in mind and easy packaging, we had to figure out where we were gonna put the turbo, and what we landed on is somewhere in this area. We get too close it makes it hard to route the exhaust. We get too far away it makes it hard to brace. So, we're gonna be somewhere in here, and to do that we drew up a bracket in cad, or cardboard aided design, and what we end up with is this. This is just solid tacked for now but it will mount right here to the head, and the turbo will sit on top. We'll figure out how to get everything routed up to it, and then once everything is mocked up we can fully weld the bracket and our exhaust. We'll use some ARP fasteners to hold our stainless turbo flange in place.
(Pat)>> Alright I dug around out back. There is a two and a half inch 180 like you requested. Now tell me exactly what you're gonna do here.
(Frankie)>> Well this is kinda the heart of the plan. It's a Vibrant Performance Y-pipe from Summit Racing. We actually used one of these on the Ford 300. This one's different though. It has a two and a half inch inlet and a three inch outlet cause that's actually the same size as a T-4 flange. So, I've already boxed that, and that is gonna go right here on this flange. And then probably the hardest part about this is getting this pipe to make this turn into this header. It's really tight. Not a big fan of pie cuts. So, I'd like to use mandrel bent tubing as much as I can. I might have to cut this up a little bit to make it fit, but I think it's definitely do-able, and then this side is really easy. Just 90, 45, another 90, and probably another 45, and then probably gonna have the waste gate come out right here so it hits both sides. Just out at an angle, and then that'll go out the back and the turbo exhaust will go out the back too. I think that should work.
(Joe)>> Usually we just build stuff for the dyno, but it's compact enough you don't have a power steering unit. It might be able to fit in some sort of vehicle. No plan for it yet, but there's always that hope.
(Frankie)>> There's a hope that it will fit. We usually just build these for the dyno cause that's all we need it to work for, and this one doesn't have a project planned yet. So, we can't build it around a vehicle. We have nothing planned for it. So, I think this is gonna work really well for now. It's gonna spool up nice. I think it's gonna be good. [ Music ] We'll start by tacking our Y-pipe to our flange. [ Music ] So, we've made this bend right here. We've basically taken a mandrel bent piece and slash cut it, and then made the holes pretty round again. You could have done this with pie cuts, but this is gonna be a smoother transition for the air. It might not look as good but it's probably gonna work a little bit better. So, all we have to do now is make a few pieces of pipe that space it out. We've got one there and then we'll make another one that goes to here and connect everything together. [ Music ]
(Pat)>> That's quasi straight. Right there! [ Music ]
(Frankie)>> Okay, good?
(Pat)>> The rest of the exhaust is pretty simple. We'll get everything tacked into place and make sure it fits before it's final welded.
(Frankie)>> Coming up, our V-6 gets a stealthy e-f-i system, and then it's off to the dyno cell.
(Pat)>> The next thing we will be doing in our series of events is installing the waste gate. Now this is a 40-millimeter unit with a seven pound spring installed. It doesn't sound like a lot, but we will also be adding a manual boost controller. So, if want to crank it up later we can. Because this is a completely custom system, we can install this wherever we want. We want it in-line with the flow, and we want to see pressure from both sides of the engine. So, we're gonna stick it right on our merge right there. That way we can run our pipe to our exhaust or separately if we want to. [ Music ] [ drill humming ]
(Pat)>> Oh, right in the oil! [ Music ] A lot easier than drilling out a hole is to take our Forney plasma cutter and color inside the lines, sort of. [ Music ] Alright!
(Frankie)>> Since this is the final component we can now go through and fully weld the entire hot side. We'll also take this time to add an O-2 bung for the e-f-i system. [ drill humming ]
(Frankie)>> Remember that turbo drain we talked about? Now it's time for it to go in. After drilling a pilot hole and finishing it to size with a Matco spiral flute step drill we'll remove the paint from around the weld area with a Forney abrasive pad. [ grinder buzzing ]
(Frankie)>> Finally we'll install the bung. [ Music ] We finished welded our dash-10 bung in the side of our oil pan for our turbo drain, and now that that's repainted we also added a baffle to the inside to hopefully keep some of the returning oil from splashing directly on the crank and keep some windage down. But since he's got silicone on this is ready to go back on. [ Music ]
(Pat)>> High temperature r-t-v will help keep the headers sealed up tight. Now they will be installed for good. [ Music ] Since you last saw this bracket we've installed a gusset and fully welded it. [ ratchet clicking ]
(Pat)>> With everything covered in heat wrap, the hot side is bolted down. [ Music ]
(Frankie)>> Then the turbo is installed, and the boost-T is connected to the waste gate. [ Music ] We only have a few components left to install on our V-6, and one of the more important ones is the fuel metering device. And since we are going turbocharge, we are gonna be going with throttle body fuel injection and using this Holley Super Sniper Stealth to do that. These units are really cool because the module is integral to the unit, and it's been designed to look like a carburetor for that stealthy under hood look. We're not gonna push our V-6 that hard, but in case we want to use this on any other projects this unit is good for up to 1,250 horsepower under forced induction. These units will do quite a bit with three programmable inputs and up to six outputs, but if you want to keep it simple you only actually need four wires to make it run, and it comes with everything you need. You can do all the tuning with the handheld right here. It's a three and a half inch touch screen, but we are gonna actually upgrade that and move on to the Sniper five inch digital dash. This replaces the three and a half inch handheld cause it will do all the same functions like the setup wizard and the tuning, but it also has three pre-programmed dashes that have r-p-m and speed as well as a bunch of other data. It comes with its own g-p-s for speed signal, a windshield mount, and the can connection for the unit. We also need to design an intercooler system, and to get the air into our Super Sniper Stealth we are gonna use one of Holley's black carb hats. Before we can do that we have to get this one installed. [ Music ] This unit bolts to any 41-50 flange and it has two dash six fuel inlets to feed the eight 100 pound an hour injectors. [ Music ]
(Pat)>> Up next, we "T" up some boost on our 4.3 liter V-6.
(Pat)>> The last thing our 4.3 will get is a small charged air cooler with an electric fan already attached. It will be plenty.
(Frankie)>> It's running very nicely. It's up to temp, idling beautifully. I'm really excited, are you excited?
(Pat)>> Yeah, I'm excited. More excited that I'm not dyno'ing this one because I don't know what's gonna happen. [ engine revving ]
(Pat)>> Nice, boost already! [ engine revving ]
(Frankie)>> Oh my!
(Pat)>> That's not a bad start.
(Frankie)>> That's a good looking graph too. 446.8 pound feet, right at 4,000, and 340.3 horsepower.
(Pat)>> We're already making good power. So, eight pounds of boost at 4,000. That's gonna go up.
(Frankie)>> Making 1.68 torque per cube.
(Pat)>> Something like this you just don't want to get aggressive with it because it does have a forged piston in it, but you can really get yourself into trouble. How froggy are you feeling?
(Frankie)>> I don't know. If something bad does happen it's not the end of the world. We are treading new ground. This is something I've never done, you've never done. We've heard stories.
(Pat)>> I might have done it.
(Frankie)>> Oh, well you didn't tell me that before.
(Pat)>> In the naturally aspirated version we turned it 5,500. Go ahead and turn it 5,500.
(Frankie)>> That is what we're gonna do, and we're gonna see what it peaks at for horsepower. Here we go!
(Pat)>> Don't blow it up! [ engine revving ]
(Pat)>> That's about it. We're right there. I wanted to see where things would start to level off.
(Frankie)>> 444.9, call that 445, and it did that right at 5,200. And torque's still good, 474.1. The tune is super safe. Not a ton of timing, not a ton of fuel. We chose fuel injection for a reason. So, we could control timing, control the fuel. We have an accurate way to do that to make sure this thing is not gonna run lean.
(Pat)>> I've been watching the little monitor, which the five inch screen is really nice. It's easy to use. It's very, very clear. I like it cause I can see it without my glasses on. You want to go for the gusto? [ Pat whistling ]
(Frankie)>> If this was a street engine I would stop there. If this was my engine I was putting in a vehicle I would top right there on pump gas.
(Pat)>> This is the point where we can tell everybody else to stop. We don't have to stop.
(Frankie)>> There should be a disclaimer at the bottom that says stop here. Maybe we'll go give that boost a few turns?
(Pat)>> I don't know anything about boosties. You're gonna have to do that.
(Frankie)>> It's just a couple of turns.
(Pat)>> I'll go do it.
(Frankie)>> Alright, how many turns did you actually put in it?
(Pat)>> You're supposed to count the clicks?
(Frankie)>> Oh boy, oh no! [ engine revving ]
(Frankie)>> Oh my gosh!
(Pat)>> Watch this torque number right here.
(Frankie)>> Oh my gosh! You put a couple of turns in it didn't you?
(Pat)>> I put four clicks in it. 503.7-pound feet.
(Frankie)>> And we're at 468.3 horsepower at 5,200.
(Pat)>> That's pretty mean right there. We still have six cylinders. There's no smoke, there are no parts on the ground. I don't know how many times I would repeat doing that, but that thing just made 500-pound feet at 266 inches.
(Frankie)>> Do you want to just go for one atmosphere?
(Pat)>> It's one of those things I would like to go for one atmosphere.
(Frankie)>> Is it gonna last much longer? I don't know but there's only one way to find out.
(Pat)>> Let me go put another couple of those clicks in there and then we'll stop. I don't know if it'll get one atmosphere, but I really, really think we should stop after this.
(Frankie)>> Alright here we go. [ engine revving ]
(Frankie)>> I was so scared.
(Pat)>> Let's go ahead and stop now.
(Frankie)>> 525.8-pound feet and 485.5 horsepower.
(Pat)>> That is pushing the envelop on this thing. I don't know cause you could literally keep going until it flushes parts out of it. The graph looks beautiful. All the air/fuels look nice. The engine's still running. What did we learn today?
(Frankie)>> I learned that I like V-6's a little bit more if they have a turbo.
(Pat)>> That's true. What really helped us out on this one a lot is we did a lot of pre-work. I know it's universal for all engines, but with the oiling mods, and the torque plate honing, and the careful assembly. We put rod bolts in it, and we put a forged piston.
(Frankie)>> And ported the heads, and that allows us to run a little bit less boost and make the equal amount of power, which is helpful. We are getting in the medium range for boost here at 13.8. So, we're getting close there. So, imagine this is an S-10, or an S-10 Blazer, or something like that.
(Pat)>> This could be in a full size pickup. This thing's making 375-pound feet at 2,500.
(Frankie)>> Over 3,100 it's making over 450, and that doesn't go back below. Now we just have to find something to put it in. That's not our job, but.
(Pat)>> It'd be great to put it in something but that's not our department.
(Frankie)>> Still great success!
(Pat)>> Happy times!
(Frankie)>> If you want to see more of this or more cool stuff go check out our website.
