Engine Power Featured Projects
Engine Power Builds
Want more content like this?
Join the PowerNation Email NewsletterParts Used In This Episode
ARP
ARP Bolts & Fasteners
ARP
ARP Rod Bolts
ARP
ARP Ultra Torque Lube
Goodson Shop Supplies
Goodson Piston Ring Installation Tool
Matco Tools
Matco Digital Torque Wrench
Sunnen Products Company
Sunnen Dial Bore Gauge
The Industrial Depot
Tools, Hardware, Shop Supplies
Episode Transcript
(Pat)>> You're watching Powernation!
(Frankie)>> Coming up with a wild plan to run two engines at the same time on the dyno is one thing.
(Pat)>> But sharing that plan with one of NHRA's most respected drag racers, that's a whole other story.
(Tim)>> Wow, that's the craziest thing I've ever heard.
(Pat)>> I was afraid you were gonna say that. [ MUSIC ]
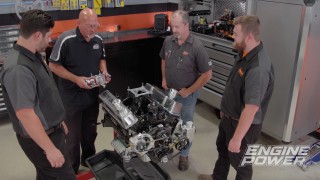
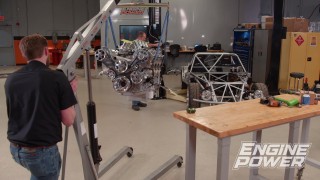
(Pat)>> Hey everyone, welcome to Engine Power. Today we have a very special project in the shop that we have been teasing you about, but today it is time to start building.
(Frankie)>> And we have a really special guest in the shop. Nitro Funny Car driver, superstar, and US Nationals champion Tim Wilkerson. Tim, you have been hearing about some of what we've been doing and now you see all the parts. So, I'm glad you're in the building to experience this.
(Tim)>> Well I was looking around to see if Caps was behind. You said superstar for a minute there, but I appreciate that. Who doesn't like a big block Chevrolet? They're a neat deal, and we build a lot of them in our machine shop for people, and they're just a great motor to make horsepower with.
(Frankie)>> Well you can see that we're doing something a little special because we have two of them, and enough parts to build two of them, and I don't know if you've done any twin engine stuff. Have you done anything where it's identical engines?
(Tim)>> Believe it or not we do a lot of tractor pull motors for people, and most of them are blown stuff, but we see a lot of that stuff, and I am always amazed at how they can put all that junk in one pile and stuff don't fall out the sides. They've got all those boxes, and hook ups, and amazing. Yeah, this'll be pretty neat, but I was wondering why we have two.
(Pat)>> Well the big thing with engines. One of the things people always ask if you have two engines, and you have all the same parts, and you build them exactly the same, will they make the same power? Well yes and no.
(Tim)>> Top Fuel funny car, right? We have six motors in the trailer at any point in time. You are betting on taking one out, putting the other one in, putting the same tune up in it, hoping to God it does the same thing.
(Pat)>> Engines have their own personality. It's all in their tune up, stacked tolerances. There's a whole bunch of subtleties. They will make close power, usually not identical. So, one of the things we're gonna do is we're gonna build two identical engines. We're gonna dyno them to see if they make the same power, but what else would you do, besides a tractor pull, with two engines?
(Tim)>> I don't know that I do much else with two engines. Our stuff is so unique to its own application that this kind of stuff, you're looking for 5, 10, 20 horsepower, and it will be interesting to see, put all the same parts in all the same piles and see how they work.
(Pat)>> Well we're gonna do one better than that. One thing that people have never seen before is we're gonna dyno these separately, but then we're gonna dyno them together on the dyno.
(Tim)>> That's the craziest thing I ever heard.
(Pat)>> I was afraid you were gonna say that.
(Tim)>> What's your dyno people say about something like that?
(Pat)>> Well, they're curious why would we want to do that, and two, the reason why we're doing it there's a lot of things we don't know, and this, if it works, is gonna teach us a few things about how engines, if they're coupled together, what they will do. Literally we just don't know.
(Tim)>> Do they work together like you said? Is engine-A counting on engine-B to do the same thing, or is it pulling it backwards? I would expect that that would be a problem, but it'll be really interesting to see.
(Pat)>> It will, and we have a lot of good parts. Everything is identical for each engine. We have two big block Chevys. They're actually honed the same, all the parts are gonna be the same. They're gonna be put together the same, and because of what we're doing we want to make the engines last. So, we want to put some good parts in them.
(Tim)>> Well I can see that. There's name brand parts, the same stuff I run in my funny car. Fel Pro, Total Seal, ARP! If it'll work in my car it'll work in this. You take all this stuff and get it right out of the Summit catalog, right? Get that stuff, and anybody can buy this stuff.
(Frankie)>> This is all off the shelf stuff. We got every single piece from Summit, and that's a great place to go where you just if you need everything to build a complete engine you can get it all there. So that was a huge help.
(Pat)>> We spent some time digging through and picking out exactly what we wanted. Started off with 43-40 forged cranks, right? You've got to have something that's gonna last. Those are a 4.250 stroke, and we have a big ole piston here.
(Tim)>> Look at that big bugger.
(Pat)>> 4.310 bore, forged, nice, heavy duty, little bit of a dome on it.
(Tim)>> What kind of compression is this thing gonna have?
(Pat)>> These are gonna be almost 11 to 1.
(Tim)>> So pump gas?
(Frankie)>> Still gonna be pump gas, but like he said, really nice parts. Total Seal rings, a nice, forged rod, nice intakes, nice heads, Trick Flow 320 head. So, they're gonna make some pretty decent power.
(Tim)>> I see you've got some ATI balancers on them. You've got all kinds of neat stuff like that.
(Pat)>> Because of what we're doing, at some point we may separate the engines. I'm hoping at some point they'll always stay together.
(Frankie)>> Once you building them in twins it's like ah, I can't break them up.
(Pat)>> All of a sudden they're a couple.
(Tim)>> That's one of the things I was noticing about the higher quality parts that are here. I'm thinking to myself, boy for a 500 or 600 horsepower motor that's a lot of nice stuff.
(Pat)>> Times two! We just wanted them to be the same because if at any point we want to test different things on identical engines. Say you might want to put a power adder on one, or a different power adder on the other we can do a whole lot of things. It's nice to have two inventory. I would love to see them together in a vehicle.
(Tim)>> I was standing here thinking the same thing. If Frankie had an old pickup truck or something. I don't know where he would sit after we put them together.
(Pat)>> Right on top, we'll build a seat.
(Tim)>> Wouldn't that be neat if we could find something to put them in?
(Frankie)>> I've seen some old hot rods like that.
(Tim)>> Back in the '60s that was a big deal, wasn't it?
(Pat)>> Our application is dual dynoing right now, but these would be at home just about in any vehicle that you would want to run them. You can run a torque wrench. I think maybe enlist you on some help with one of these, and the talking's the easy part. Let's get to working. Up next, we'll show you the easy way to get bearing clearances set up just right.
(Frankie)>> Then our twin big block build begins.
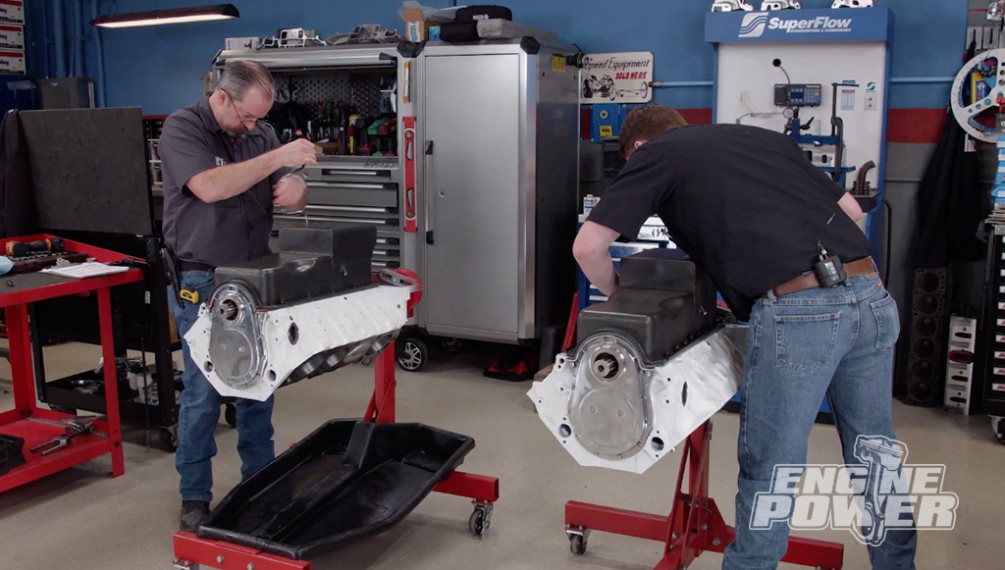
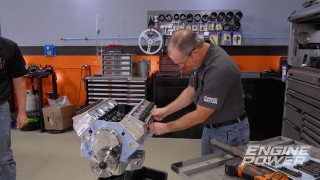
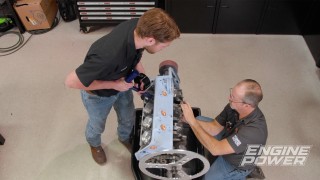
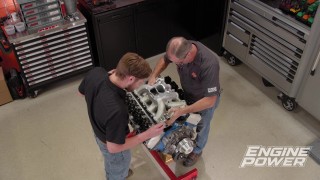
(Frankie)>> With the blocks freshly cleaned our twin big block Chevy extravaganza can begin. Alright Tim, we got that block all cleaned. So now we can move on to mockup because with a lot of parts comes a lot of pre-work before you can actually go to assemble. You have a ton of experience with that.
(Tim)>> Like you say, you buy all these parts and you just assume they're perfect, but we're not ever gonna assume that when we build a motor. We run into the same thing in our car. We'll buy, I'm using crazy rounded numbers here, but 500 connecting rods and we'll take everyone of them apart, put them all back together, and check the clearance in them. Kinda what you're up to here.
(Frankie)>> And this block doesn't even have the cam bearings in it because when we're doing mockup like this, not that you're expecting to find problems, but you always want to plan for the worst case scenario. So, checking main bearing oil clearance, if you have to adjust something, it's better just to have the cam bearings out in case you have to take it to the machine shop and get it align honed.
(Tim)>> If you're gonna stroke the thing with an align hone it's gonna get all kind of grit and garbage back inside of it. You're gonna have to clean it again. Don't need any chance of that getting back in your cam bearing.
(Frankie)>> I had a question cause I kinda wanted to know just for fun, but what do you guys run for main bearing oil clearance on your stuff?
(Tim)>> Our cars, they're such a ridiculous scenario in what happens with our vehicles. The application we use for this block is aluminum. So, it's growing like a banshee. It's getting bigger as it goes, but ours usually have anywhere between 5 to 7. Rod bearings are the same way. They're 5 to 6. Huge oil-bearing clearances, but you're not talking about zero weight oil either. You're talking about a 70-weight race oil. We're running mud through a big hole, for a lack of a better term. The load is so terrible. We have cylinder pressures that most motors can't dream of.
(Frankie)>> When you're doing this, I think a lot of people, the part that they skip or the part that they might not realize is the prep work. When you're doing the prep work you have to do it just like you would during assembly cause that's the most important part.
(Tim)>>> We're gonna check this thing front to back, make sure all the clearances are correct.
(Pat)>> Sounds like you've done it a couple of times. Engine building shouldn't be guess work. It should work pretty much in absolutes.
(Tim)>> Even our engines we actually have a complete motor sheet. I wish I would have brought one. You would be amazed at the stupid stuff that we write down.
(Pat)>> It's not stupid, it's all data. I'm a data guy, he's a data guy. On an aftermarket setup like this stuff is very, very close tolerances. They go extra mile because they know the parts are gonna be stressed more. They know things are gonna be run harder. So, the accuracy of them. Companies go through great lengths to make things accurate.
(Tim)>> Well you've got some high-quality parts too. That's gonna make a difference.
(Frankie)>> After cleaning the bearings and bearing saddles we'll install standard bearings, starting with number five. We'll apply ARP Ultra Torque lube to their main bolt kit.
(Tim)>> Now you're a Funny Car guy. That's what I was hoping to see.
(Frankie)>> The caps get torqued in three equal steps to 100-pound feet. With the rear two main caps installed we used the Sunnen dial bore gauge to precisely check vertical oil clearance. The rear came in at three thousandths, but number four came in a little a tight at 24 ten thousandths.
(Tim)>> Well we know this one's two-four right. We sure like this clearance on the back one than we did number four.
(Frankie)>> Like to make it match.
(Tim)>> How can we fix that?
(Frankie)>> We do have a set of standard "X's". Normally when we're building something we'll order a set of standard bearings. Standard "X's" are extra clearance, which I'm sure you guys do that all the time. Trading bearings around to get different clearances.
(Tim)>> In the machine shop I do that. You can throw a dead cat through the clearance in our fuel motor. That thing we don't care about but this thing we want it to be correct right?
(Frankie)>> Yeah, exactly, and I think we get that question sometimes is how do you correct that? If you have it too tight, what can you do to correct that, and I think an easy way is to have an extra clearance bearing where basically if you use both bearings, it has one thousandth extra clearance over the standard.
(Tim)>> So we're just gonna put half a shell in it?
(Frankie)>> Yeah, so we can just put a half in it and theoretically raise it up to two-nine, which is really close to three, within a tenth of the 3,000 that we want. We have a set, and we can put that in.
(Tim)>> What side do you want to put that on then since you're using half of it?
(Frankie)>> Location is really important when you're doing that because you want the thicker bearing always on the load side. At the parting lines there's not going to be a ledge because they're really close in size. You're talking about a half a thousandth, but usually you want to put the thicker side on the load bearings. On this one it'll be on the caps side, the bottom side where the crank's gonna load. Okay, so we'll do that and see what she measures up at. After swapping the bearing in the block for an extra clearance we can re-install the cap, torque it up, and see what the vertical oil clearance comes in at.
(Pat)>> Because of the bearing's construction you're not putting a big rigid. That's the big misnomer. People think there's gonna be a big ridge at the parting line, there's not. It's only a half thousandths difference.
(Frankie)>> And it's okay to do this cause we've measured the crank. We know that the journal isn't really big, it's just a combination of parts.
(Pat)>> The main housing's on the low, and the crank's mid to high.
(Tim)>> So you get what you get. Look at your math-magic there my friend.
(Pat)>> See, math-magic, two-nine, on the nose!
(Tim)>> That thing's dead on what we want it to be.
(Pat)>> As far as we're doing here, I think we got a handle on it, and I know that you have stuff to do as well.
(Tim)>> I think that I've tutored you along long enough for you to finish the job.
(Pat)>> I think we can figure it out.
(Tim)>> You guys have forgotten more about building motors than I will probably ever know. The applications are just what you said, and I love that saying that you have Pat. Most everything that we do is application specific. I tell everybody that about our car. It's good for absolutely nothing but what we use it for. So, you've got this under control. That's yours now my friend. I'm gonna go back and I'm gonna find me a Funny Car to work on. I've got junk everywhere at my shop. I appreciate you having me.
(Frankie)>> Thank you sir!
(Pat)>> Up next, our big blocks get robust rotating assemblies and hydraulic roller cam shafts.
(Frankie)>> Now that we've got our main bearing oil clearance all set where we want it, we can move on to the connecting rods, and we're gonna use the same rule. One thousandth per inch of shaft. [ MUSIC ] For these engines we opted for an upgraded rod bolt from ARP made of L-19. We'll torque them to achieve the appropriate stretch, and then check our vertical oil clearance. The King rod bearings have a coating for extra protection. All the oil clearances come in between 21 and 23 ten-thousandths. [ grinder buzzing ]
(Frankie)>> Next, we'll file our Total Seal rings for both engines. The gaps are set at 32 thousandths on the top ring and 35 thousandths on the second ring. We chose this specification so that these big blocks are ready for anything we want to do with them later.
(Pat)>> Get out of the way. [ grinder buzzing ] [ MUSIC ]
(Frankie)>> Whenever you're ready.
(Pat)>> Am I in your way?
(Frankie)>> Whenever you're done. [ MUSIC ]
(Pat)>> Okay! [ Frankie laughing ] [ grinder buzzing ]
(Frankie)>> An easy way to keep the rings in order is to leave them in their respective bores after they're finished.
(Pat)>> With ring filing done, we're ready to install the pistons. These use a single spiral lock on each side, which means there are 32 to install. It takes a little patience to get them into place, but the more you do the easier it gets. While Frankie cleans the bores, I'll load up the pistons with our Total Seal ring pack. These are 5/64ths, 5/64ths, 3/16ths in size. Using the Goodson piston ring installation tool simplifies the process. When cleaning the bores, we alternate between lacquer thinner and transmission fluid until the rag comes out clean. Even if the block has been final cleaned there is always some debris in the bore.
(Frankie)>> We can finally begin assembly starting with the King Racing high performance main bearings. With the rear main seal installed they receive a coat of assembly lube. Then the Scat 4.250 stroke crank shafts are dropped in. They are forged from 43-40 steel, giving them excellent durability. They were balanced by our favorite machine shop, Shacklett Automotive Machine. [ torque wrenches beeping ]
(Pat)>> That sounds really weird.
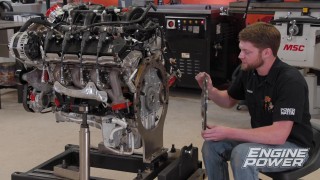
(Frankie)>> Having two Matco digital torque wrenches makes it easy to torque the main cap bolts in three equal steps to a final value of 100-pound feet.
(Pat)>> To get the compression ratio we wanted we chose a set of Icon forged 40-32 pistons. They have a 23cc dome and coated skirts. The Eagle H-beam rods are 6.385 center to center length with full floating wrist pins. All the components have been labeled for their respective engine and location. So, all we have to do now is drop them in. [ MUSIC ]
(Pat)>> Go ahead. [ drill buzzing ]
(Frankie)>> Before final torque we make sure the fasteners are completely loose. This gives the most consistent torque and stretch values. The rods are torqued in two steps to their correct stretch at 100-pound feet. Eight pistons down, eight more to go. [ MUSIC ]
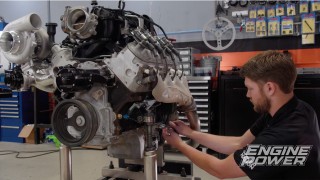
(Pat)>> With our crank, rod, and piston assemblies in both blocks it's time to look at everything else to finish out the short blocks. These are a relatively tame set of engines, but that does not mean we're not putting quality parts in, and that starts with the cam shaft. We have a cam kit here from Howards. We've decided to go with a hydraulic roller, and the kit comes with the cam and the corresponding lifters. As far as specs we'll get to those later. Along with that we've picked up some double row timing sets. These are billet gears with a nine-position crank sprocket so we can dial in our cams where we want them. Since we are missing some timing covers for this operation, we picked up some polished cast aluminum ones from Summit, and they looked awesome. In addition to that we needed some great balancers for this build. So, we have some ATI super dampers, and these have a double keyway provision, and that is gonna be very important later on. For our oiling system we found something very cool. This is Summit Racing's Pro Pack Oil Pan Kit, and it comes with everything you need to get your oil system setup. We have a six-quart oil pan that is clearanced for our 4.250 stroke and it has a screen and scraper already inside. Also, a one-piece oil pan gasket, a new high volume oil pump, and the pickup that matches the pan, and it even comes with a chro-moly driveshaft with a steel sleeve. Now we can continue with the installation of the cam shafts. At 50 thousandths lift the cams have 236 degrees of intake duration, and 242 degrees of exhaust duration. Lobe separation angle is 112 degrees. Lift at the valve is 634 thousandths at the intake and 641 thousandths at the exhaust.
(Frankie)>> Before going any further make sure to install the two threaded oil gallery plugs. Some people don't like white paint on engines because it shows oil leaks.
(Pat)>> Our question is, why is your engine leaking in the first place?
(Pat)>> Our twin big block Chevy build continues with Summit Racing's billet double roller timing set. It has a nine keyway crank gear so we can adjust our cam's intake center line.
(Frankie)>> Before we can degree the cam, we have to find true t-d-c, and to degree the cam accurately this measurement needs to be precise. Because we want power lower in the r-p-m range, the cam will be put in at 103.5, which is 8.5 degrees advanced. To make these engines pop we'll go with gloss white. [ aersol can hissing ] Now that the cam is locked into place where we want we can install the thrust button. Roller cam conversions require a thrust button to control the forward movement of the cam shaft. The ARP fasteners are torqued to 25-pound feet. [ MUSIC ] A fiber gasket is put into place, and a touch of silicone is added for extra insurance. Then the heavy duty cast aluminum timing cover is bolted on. [ MUSIC ] After getting some thread locking compound we'll lightly screw in the ARP oil pump stud. We've already checked to make sure it does not interfere with the back of the main bearing and has proper thread engagement with the oil pump installed. The oil pan kit comes with a copper gasket. The high-volume oil pump can be dropped on next. [ MUSIC ] We'll apply some ARP Ultra Torque Lube and tighten the fastener to 65-pound feet. [ MUSIC ]
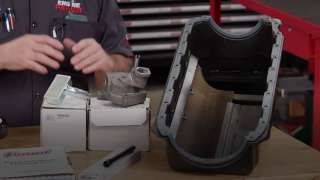
(Pat)>> For proper engine operation the oil pump pick up clearance must be correctly set. Using a straight edge, we measured down to the oil pan rail on both sides of the engine. It averages seven- and three-quarter inches. We'll measure the oil pan depth, which is precisely eight inches deep. The gasket is one-eighth inch, giving us a clearance of three-eighths of an inch, perfect! With some silicone on the gasket the oil pan goes on for good. It's secured with an ARP bolt kit. [ MUSIC ] We have reached a great stopping point on our twin big block Chevy build, and I must say, so far so good. They're going together very well, but we still have a ton of work to do.
(Frankie)>> We're gonna get to that next time though. We'll be putting on our cylinder heads, the rest of our valvetrain, getting our engines sealed up, getting them on the dyno, and I'm real excited to see if they make the same power or not.
(Pat)>> But that is the easy part. The next engineering challenge we will have is coupling the engines together on the dyno. That coupling has to be rigid enough to transfer the power but be easy enough that we may get to use it in a vehicle.
(Frankie)>> We'll cross that bridge when we get to it though. For now this is a good day's work.
(Pat)>> To learn more about this build go check out Powernation TV dot com.
Show Full Transcript
(Frankie)>> Coming up with a wild plan to run two engines at the same time on the dyno is one thing.
(Pat)>> But sharing that plan with one of NHRA's most respected drag racers, that's a whole other story.
(Tim)>> Wow, that's the craziest thing I've ever heard.
(Pat)>> I was afraid you were gonna say that. [ MUSIC ]
(Pat)>> Hey everyone, welcome to Engine Power. Today we have a very special project in the shop that we have been teasing you about, but today it is time to start building.
(Frankie)>> And we have a really special guest in the shop. Nitro Funny Car driver, superstar, and US Nationals champion Tim Wilkerson. Tim, you have been hearing about some of what we've been doing and now you see all the parts. So, I'm glad you're in the building to experience this.
(Tim)>> Well I was looking around to see if Caps was behind. You said superstar for a minute there, but I appreciate that. Who doesn't like a big block Chevrolet? They're a neat deal, and we build a lot of them in our machine shop for people, and they're just a great motor to make horsepower with.
(Frankie)>> Well you can see that we're doing something a little special because we have two of them, and enough parts to build two of them, and I don't know if you've done any twin engine stuff. Have you done anything where it's identical engines?
(Tim)>> Believe it or not we do a lot of tractor pull motors for people, and most of them are blown stuff, but we see a lot of that stuff, and I am always amazed at how they can put all that junk in one pile and stuff don't fall out the sides. They've got all those boxes, and hook ups, and amazing. Yeah, this'll be pretty neat, but I was wondering why we have two.
(Pat)>> Well the big thing with engines. One of the things people always ask if you have two engines, and you have all the same parts, and you build them exactly the same, will they make the same power? Well yes and no.
(Tim)>> Top Fuel funny car, right? We have six motors in the trailer at any point in time. You are betting on taking one out, putting the other one in, putting the same tune up in it, hoping to God it does the same thing.
(Pat)>> Engines have their own personality. It's all in their tune up, stacked tolerances. There's a whole bunch of subtleties. They will make close power, usually not identical. So, one of the things we're gonna do is we're gonna build two identical engines. We're gonna dyno them to see if they make the same power, but what else would you do, besides a tractor pull, with two engines?
(Tim)>> I don't know that I do much else with two engines. Our stuff is so unique to its own application that this kind of stuff, you're looking for 5, 10, 20 horsepower, and it will be interesting to see, put all the same parts in all the same piles and see how they work.
(Pat)>> Well we're gonna do one better than that. One thing that people have never seen before is we're gonna dyno these separately, but then we're gonna dyno them together on the dyno.
(Tim)>> That's the craziest thing I ever heard.
(Pat)>> I was afraid you were gonna say that.
(Tim)>> What's your dyno people say about something like that?
(Pat)>> Well, they're curious why would we want to do that, and two, the reason why we're doing it there's a lot of things we don't know, and this, if it works, is gonna teach us a few things about how engines, if they're coupled together, what they will do. Literally we just don't know.
(Tim)>> Do they work together like you said? Is engine-A counting on engine-B to do the same thing, or is it pulling it backwards? I would expect that that would be a problem, but it'll be really interesting to see.
(Pat)>> It will, and we have a lot of good parts. Everything is identical for each engine. We have two big block Chevys. They're actually honed the same, all the parts are gonna be the same. They're gonna be put together the same, and because of what we're doing we want to make the engines last. So, we want to put some good parts in them.
(Tim)>> Well I can see that. There's name brand parts, the same stuff I run in my funny car. Fel Pro, Total Seal, ARP! If it'll work in my car it'll work in this. You take all this stuff and get it right out of the Summit catalog, right? Get that stuff, and anybody can buy this stuff.
(Frankie)>> This is all off the shelf stuff. We got every single piece from Summit, and that's a great place to go where you just if you need everything to build a complete engine you can get it all there. So that was a huge help.
(Pat)>> We spent some time digging through and picking out exactly what we wanted. Started off with 43-40 forged cranks, right? You've got to have something that's gonna last. Those are a 4.250 stroke, and we have a big ole piston here.
(Tim)>> Look at that big bugger.
(Pat)>> 4.310 bore, forged, nice, heavy duty, little bit of a dome on it.
(Tim)>> What kind of compression is this thing gonna have?
(Pat)>> These are gonna be almost 11 to 1.
(Tim)>> So pump gas?
(Frankie)>> Still gonna be pump gas, but like he said, really nice parts. Total Seal rings, a nice, forged rod, nice intakes, nice heads, Trick Flow 320 head. So, they're gonna make some pretty decent power.
(Tim)>> I see you've got some ATI balancers on them. You've got all kinds of neat stuff like that.
(Pat)>> Because of what we're doing, at some point we may separate the engines. I'm hoping at some point they'll always stay together.
(Frankie)>> Once you building them in twins it's like ah, I can't break them up.
(Pat)>> All of a sudden they're a couple.
(Tim)>> That's one of the things I was noticing about the higher quality parts that are here. I'm thinking to myself, boy for a 500 or 600 horsepower motor that's a lot of nice stuff.
(Pat)>> Times two! We just wanted them to be the same because if at any point we want to test different things on identical engines. Say you might want to put a power adder on one, or a different power adder on the other we can do a whole lot of things. It's nice to have two inventory. I would love to see them together in a vehicle.
(Tim)>> I was standing here thinking the same thing. If Frankie had an old pickup truck or something. I don't know where he would sit after we put them together.
(Pat)>> Right on top, we'll build a seat.
(Tim)>> Wouldn't that be neat if we could find something to put them in?
(Frankie)>> I've seen some old hot rods like that.
(Tim)>> Back in the '60s that was a big deal, wasn't it?
(Pat)>> Our application is dual dynoing right now, but these would be at home just about in any vehicle that you would want to run them. You can run a torque wrench. I think maybe enlist you on some help with one of these, and the talking's the easy part. Let's get to working. Up next, we'll show you the easy way to get bearing clearances set up just right.
(Frankie)>> Then our twin big block build begins.
(Frankie)>> With the blocks freshly cleaned our twin big block Chevy extravaganza can begin. Alright Tim, we got that block all cleaned. So now we can move on to mockup because with a lot of parts comes a lot of pre-work before you can actually go to assemble. You have a ton of experience with that.
(Tim)>> Like you say, you buy all these parts and you just assume they're perfect, but we're not ever gonna assume that when we build a motor. We run into the same thing in our car. We'll buy, I'm using crazy rounded numbers here, but 500 connecting rods and we'll take everyone of them apart, put them all back together, and check the clearance in them. Kinda what you're up to here.
(Frankie)>> And this block doesn't even have the cam bearings in it because when we're doing mockup like this, not that you're expecting to find problems, but you always want to plan for the worst case scenario. So, checking main bearing oil clearance, if you have to adjust something, it's better just to have the cam bearings out in case you have to take it to the machine shop and get it align honed.
(Tim)>> If you're gonna stroke the thing with an align hone it's gonna get all kind of grit and garbage back inside of it. You're gonna have to clean it again. Don't need any chance of that getting back in your cam bearing.
(Frankie)>> I had a question cause I kinda wanted to know just for fun, but what do you guys run for main bearing oil clearance on your stuff?
(Tim)>> Our cars, they're such a ridiculous scenario in what happens with our vehicles. The application we use for this block is aluminum. So, it's growing like a banshee. It's getting bigger as it goes, but ours usually have anywhere between 5 to 7. Rod bearings are the same way. They're 5 to 6. Huge oil-bearing clearances, but you're not talking about zero weight oil either. You're talking about a 70-weight race oil. We're running mud through a big hole, for a lack of a better term. The load is so terrible. We have cylinder pressures that most motors can't dream of.
(Frankie)>> When you're doing this, I think a lot of people, the part that they skip or the part that they might not realize is the prep work. When you're doing the prep work you have to do it just like you would during assembly cause that's the most important part.
(Tim)>>> We're gonna check this thing front to back, make sure all the clearances are correct.
(Pat)>> Sounds like you've done it a couple of times. Engine building shouldn't be guess work. It should work pretty much in absolutes.
(Tim)>> Even our engines we actually have a complete motor sheet. I wish I would have brought one. You would be amazed at the stupid stuff that we write down.
(Pat)>> It's not stupid, it's all data. I'm a data guy, he's a data guy. On an aftermarket setup like this stuff is very, very close tolerances. They go extra mile because they know the parts are gonna be stressed more. They know things are gonna be run harder. So, the accuracy of them. Companies go through great lengths to make things accurate.
(Tim)>> Well you've got some high-quality parts too. That's gonna make a difference.
(Frankie)>> After cleaning the bearings and bearing saddles we'll install standard bearings, starting with number five. We'll apply ARP Ultra Torque lube to their main bolt kit.
(Tim)>> Now you're a Funny Car guy. That's what I was hoping to see.
(Frankie)>> The caps get torqued in three equal steps to 100-pound feet. With the rear two main caps installed we used the Sunnen dial bore gauge to precisely check vertical oil clearance. The rear came in at three thousandths, but number four came in a little a tight at 24 ten thousandths.
(Tim)>> Well we know this one's two-four right. We sure like this clearance on the back one than we did number four.
(Frankie)>> Like to make it match.
(Tim)>> How can we fix that?
(Frankie)>> We do have a set of standard "X's". Normally when we're building something we'll order a set of standard bearings. Standard "X's" are extra clearance, which I'm sure you guys do that all the time. Trading bearings around to get different clearances.
(Tim)>> In the machine shop I do that. You can throw a dead cat through the clearance in our fuel motor. That thing we don't care about but this thing we want it to be correct right?
(Frankie)>> Yeah, exactly, and I think we get that question sometimes is how do you correct that? If you have it too tight, what can you do to correct that, and I think an easy way is to have an extra clearance bearing where basically if you use both bearings, it has one thousandth extra clearance over the standard.
(Tim)>> So we're just gonna put half a shell in it?
(Frankie)>> Yeah, so we can just put a half in it and theoretically raise it up to two-nine, which is really close to three, within a tenth of the 3,000 that we want. We have a set, and we can put that in.
(Tim)>> What side do you want to put that on then since you're using half of it?
(Frankie)>> Location is really important when you're doing that because you want the thicker bearing always on the load side. At the parting lines there's not going to be a ledge because they're really close in size. You're talking about a half a thousandth, but usually you want to put the thicker side on the load bearings. On this one it'll be on the caps side, the bottom side where the crank's gonna load. Okay, so we'll do that and see what she measures up at. After swapping the bearing in the block for an extra clearance we can re-install the cap, torque it up, and see what the vertical oil clearance comes in at.
(Pat)>> Because of the bearing's construction you're not putting a big rigid. That's the big misnomer. People think there's gonna be a big ridge at the parting line, there's not. It's only a half thousandths difference.
(Frankie)>> And it's okay to do this cause we've measured the crank. We know that the journal isn't really big, it's just a combination of parts.
(Pat)>> The main housing's on the low, and the crank's mid to high.
(Tim)>> So you get what you get. Look at your math-magic there my friend.
(Pat)>> See, math-magic, two-nine, on the nose!
(Tim)>> That thing's dead on what we want it to be.
(Pat)>> As far as we're doing here, I think we got a handle on it, and I know that you have stuff to do as well.
(Tim)>> I think that I've tutored you along long enough for you to finish the job.
(Pat)>> I think we can figure it out.
(Tim)>> You guys have forgotten more about building motors than I will probably ever know. The applications are just what you said, and I love that saying that you have Pat. Most everything that we do is application specific. I tell everybody that about our car. It's good for absolutely nothing but what we use it for. So, you've got this under control. That's yours now my friend. I'm gonna go back and I'm gonna find me a Funny Car to work on. I've got junk everywhere at my shop. I appreciate you having me.
(Frankie)>> Thank you sir!
(Pat)>> Up next, our big blocks get robust rotating assemblies and hydraulic roller cam shafts.
(Frankie)>> Now that we've got our main bearing oil clearance all set where we want it, we can move on to the connecting rods, and we're gonna use the same rule. One thousandth per inch of shaft. [ MUSIC ] For these engines we opted for an upgraded rod bolt from ARP made of L-19. We'll torque them to achieve the appropriate stretch, and then check our vertical oil clearance. The King rod bearings have a coating for extra protection. All the oil clearances come in between 21 and 23 ten-thousandths. [ grinder buzzing ]
(Frankie)>> Next, we'll file our Total Seal rings for both engines. The gaps are set at 32 thousandths on the top ring and 35 thousandths on the second ring. We chose this specification so that these big blocks are ready for anything we want to do with them later.
(Pat)>> Get out of the way. [ grinder buzzing ] [ MUSIC ]
(Frankie)>> Whenever you're ready.
(Pat)>> Am I in your way?
(Frankie)>> Whenever you're done. [ MUSIC ]
(Pat)>> Okay! [ Frankie laughing ] [ grinder buzzing ]
(Frankie)>> An easy way to keep the rings in order is to leave them in their respective bores after they're finished.
(Pat)>> With ring filing done, we're ready to install the pistons. These use a single spiral lock on each side, which means there are 32 to install. It takes a little patience to get them into place, but the more you do the easier it gets. While Frankie cleans the bores, I'll load up the pistons with our Total Seal ring pack. These are 5/64ths, 5/64ths, 3/16ths in size. Using the Goodson piston ring installation tool simplifies the process. When cleaning the bores, we alternate between lacquer thinner and transmission fluid until the rag comes out clean. Even if the block has been final cleaned there is always some debris in the bore.
(Frankie)>> We can finally begin assembly starting with the King Racing high performance main bearings. With the rear main seal installed they receive a coat of assembly lube. Then the Scat 4.250 stroke crank shafts are dropped in. They are forged from 43-40 steel, giving them excellent durability. They were balanced by our favorite machine shop, Shacklett Automotive Machine. [ torque wrenches beeping ]
(Pat)>> That sounds really weird.
(Frankie)>> Having two Matco digital torque wrenches makes it easy to torque the main cap bolts in three equal steps to a final value of 100-pound feet.
(Pat)>> To get the compression ratio we wanted we chose a set of Icon forged 40-32 pistons. They have a 23cc dome and coated skirts. The Eagle H-beam rods are 6.385 center to center length with full floating wrist pins. All the components have been labeled for their respective engine and location. So, all we have to do now is drop them in. [ MUSIC ]
(Pat)>> Go ahead. [ drill buzzing ]
(Frankie)>> Before final torque we make sure the fasteners are completely loose. This gives the most consistent torque and stretch values. The rods are torqued in two steps to their correct stretch at 100-pound feet. Eight pistons down, eight more to go. [ MUSIC ]
(Pat)>> With our crank, rod, and piston assemblies in both blocks it's time to look at everything else to finish out the short blocks. These are a relatively tame set of engines, but that does not mean we're not putting quality parts in, and that starts with the cam shaft. We have a cam kit here from Howards. We've decided to go with a hydraulic roller, and the kit comes with the cam and the corresponding lifters. As far as specs we'll get to those later. Along with that we've picked up some double row timing sets. These are billet gears with a nine-position crank sprocket so we can dial in our cams where we want them. Since we are missing some timing covers for this operation, we picked up some polished cast aluminum ones from Summit, and they looked awesome. In addition to that we needed some great balancers for this build. So, we have some ATI super dampers, and these have a double keyway provision, and that is gonna be very important later on. For our oiling system we found something very cool. This is Summit Racing's Pro Pack Oil Pan Kit, and it comes with everything you need to get your oil system setup. We have a six-quart oil pan that is clearanced for our 4.250 stroke and it has a screen and scraper already inside. Also, a one-piece oil pan gasket, a new high volume oil pump, and the pickup that matches the pan, and it even comes with a chro-moly driveshaft with a steel sleeve. Now we can continue with the installation of the cam shafts. At 50 thousandths lift the cams have 236 degrees of intake duration, and 242 degrees of exhaust duration. Lobe separation angle is 112 degrees. Lift at the valve is 634 thousandths at the intake and 641 thousandths at the exhaust.
(Frankie)>> Before going any further make sure to install the two threaded oil gallery plugs. Some people don't like white paint on engines because it shows oil leaks.
(Pat)>> Our question is, why is your engine leaking in the first place?
(Pat)>> Our twin big block Chevy build continues with Summit Racing's billet double roller timing set. It has a nine keyway crank gear so we can adjust our cam's intake center line.
(Frankie)>> Before we can degree the cam, we have to find true t-d-c, and to degree the cam accurately this measurement needs to be precise. Because we want power lower in the r-p-m range, the cam will be put in at 103.5, which is 8.5 degrees advanced. To make these engines pop we'll go with gloss white. [ aersol can hissing ] Now that the cam is locked into place where we want we can install the thrust button. Roller cam conversions require a thrust button to control the forward movement of the cam shaft. The ARP fasteners are torqued to 25-pound feet. [ MUSIC ] A fiber gasket is put into place, and a touch of silicone is added for extra insurance. Then the heavy duty cast aluminum timing cover is bolted on. [ MUSIC ] After getting some thread locking compound we'll lightly screw in the ARP oil pump stud. We've already checked to make sure it does not interfere with the back of the main bearing and has proper thread engagement with the oil pump installed. The oil pan kit comes with a copper gasket. The high-volume oil pump can be dropped on next. [ MUSIC ] We'll apply some ARP Ultra Torque Lube and tighten the fastener to 65-pound feet. [ MUSIC ]
(Pat)>> For proper engine operation the oil pump pick up clearance must be correctly set. Using a straight edge, we measured down to the oil pan rail on both sides of the engine. It averages seven- and three-quarter inches. We'll measure the oil pan depth, which is precisely eight inches deep. The gasket is one-eighth inch, giving us a clearance of three-eighths of an inch, perfect! With some silicone on the gasket the oil pan goes on for good. It's secured with an ARP bolt kit. [ MUSIC ] We have reached a great stopping point on our twin big block Chevy build, and I must say, so far so good. They're going together very well, but we still have a ton of work to do.
(Frankie)>> We're gonna get to that next time though. We'll be putting on our cylinder heads, the rest of our valvetrain, getting our engines sealed up, getting them on the dyno, and I'm real excited to see if they make the same power or not.
(Pat)>> But that is the easy part. The next engineering challenge we will have is coupling the engines together on the dyno. That coupling has to be rigid enough to transfer the power but be easy enough that we may get to use it in a vehicle.
(Frankie)>> We'll cross that bridge when we get to it though. For now this is a good day's work.
(Pat)>> To learn more about this build go check out Powernation TV dot com.
