Engine Power Featured Projects
Engine Power Builds
Want more content like this?
Join the PowerNation Email NewsletterParts Used In This Episode
ARP
Ultra Torque Lube
Matco Tools
MATCO Tools are the Official Tool Supplier to Engine Power
The Industrial Depot
Tools, Hardware, Shop Supplies
Episode Transcript
(Pat)>> You're watching Powernation.
(Frankie)>> From simple hand tools and an afternoon in your garage...
(Pat)>> To a machine shop full of industrial grade equipment...
(Frankie)>> There's plenty of ways to help your engine run it's best.
(Pat)>> Today on Engine Power, we'll show you how. ♪
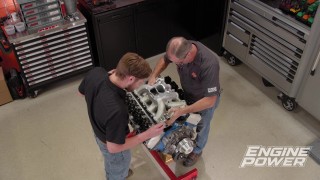
(Frankie)>> Welcome to Engine Power. We recently took behind the scenes to show you all the prep work that goes into a block before we even get it on camera. Now we got a lot of great stuff done, but there's still more to do. If you haven't seen what we've done so far, check this out.
(Pat)>> We started with a re-manufactured four-point three-liter, Chevy v-six. Which we tore down probably with some future upgrades in mind. We measured the deck clearance at TDC. Which was thirty-nine and a half thousandths in the hole. Not great for compression, but the factory hydraulic roller cam shaft, gives us good versatility for making more horsepower down the road.
(Frankie)>> With the engine down to a bare block, we chased all the threads to remove any debris. We reinstalled the main caps, torqued them to spec and checked the main housing bore size. Ours were well within spec, so we moved on to the cylinder bores. Which came in twenty thousandths over. Finally, we deburred the engine to remove sharp edges. And chamfered the bolt holes to protect the top of the threads.
(Pat)>> That is a good start, but there's always more to do. So, we're going to show you a little bit more tech on this block right here. We're going to show you some oiling system mods, do a little bit of cylinder head work and show how to prep a block for better pistons. And with that being said... let's get started.
(Frankie)>> We'll start by removing all the threaded oil gallery plugs. That allows us to knock out the press fit plugs using a metal rod and a hammer.
[hammer tapping]
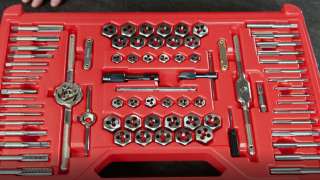
(Pat)>> To make sure no debris, gets stuck behind them, we'll also knock out the cam bearings. [hammer tapping] The oil filter adaptor and internal filter bypass valve are removed next. ♪ Threading and plugging the bypass valve hole ensures that oil is always filtered before it enters the engine. We'll also thread the front oil galleries for pipe plugs. This is a more secure way to seal the galleries compared to the press in plug. ♪ While we've got the tap set out, we'll tap the water pump bypass hole in the front of the block. Being able to plug this, allows us to use an electric water pump in the future. The new thread are then cleaned with some Berryman Products Brake Parts Cleaner.
(Frankie)>> Now that we've got that done, we're going to be moving on to some other oiling mods. Now, what we're going to be doing is basically going through the oiling passages and trying to eliminate any sharp edges. Sharp edges can create turbulence and reduce flow, which is bad. Now this is universal for pretty much on any engine, but on our v six, since it's similar to a small block Chevy. We're going to be smoothing out places like where the oil returns from the filter and goes back in the engine. We're also going to be trying to clean up any drainage ports so the oil can get back to the pan faster.
(Pat)>> In addition to what Frankie is doing, I'll be working on the rear main cap where the oil pump bolts down to it. Oil flows through the pump into the cap and it has a very sharp edge. And it definitely needs some attention. I'll be looking at the oil pump itself, to see if it needs any work as well. Typically, it does. Now this very simple to do, but you can get yourself into a lot of trouble if you hurry and you could mess something up very easily. So, take your time. Take small bites. And you can do it yourself. [dremel humming]
(Frankie)>> Using a ball carbide, the sharp edges are broken and gradually rounded in to a radius. [hose hissing] After the carbide does the work, everything gets smoothed out with a cartridge roll. [dremel humming] The finished result allows oil to flow unrestricted into the block. Now that the main cap is done, we're going to go ahead and just follow the flow of oil. So, it comes out of the cap. Goes into the block. And then comes over and goes into our oil filter area. Then after it goes through the oil filter, it's going to go back down through this hole and back into the engine. So, we're just going to go through, clean up any sharp edges and try to turn them into nice smooth radiuses. ♪ The same ball carbide, used on the cap, allows us to get into tight spaces. Using light pressure, and letting the carbide do the work, is crucial. [dremel humming] Going through different holes and using a variety of bits, can make the job easier. We'll just blow out the debris for now. And when all the work is done, the engine will get a deep thorough cleaning.
(Pat)>> We're just removing the minimal amount of material to round out the sharp edge. And nothing more. [dremel humming] Once again, a cartridge roll provides a smooth finish. [hose hissing] Even the places that are harder to see, still need just as much attention. Like this port, which sends filtered oil directly into the block. [dremel humming] Another area on any block that can always use work is the oil return. Ours has some jagged edges left over from the casting process, which will impede the oil flow.
That's much better. [hose hissing] To really make your engine go, first you've got to make it blow. Up next, we'll show you how to improve air flow on your cylinder heads.
(Frankie)>> Hey guys! I'm hanging out with Team Summit NHRA Funny Car driver Tim Wilkerson. Tim, today's subject is something I think can get a lot of engine builders in trouble.
(Tim)>> Well you're absolutely right Frankie. We're talking about the difference between threading or cleaning a tapped or threaded hole.
(Frankie)>> Ok, so what's the difference and what's the correct tool to use in each situation.
(Tim)>> Well, basically I use in layman's terms, if you are going to use a tap, you're making a new hole. If you're trying to clean a hole, that has a damaged thread or some debris in it. You want to use a cleanup tool.
(Frankie)>> Yeah, I agree with that Tim. I think sometimes guys are too quick to grab a machine tap for something important like a head bolt hole.
(Tim)>> Well you're absolutely right. What happens is, is you end up running that machine tap through there. It actually distorts the thread. When you but the bolt in there, you lose clamp. Doesn't have the correct torque.
(Frankie)>> So for something like that, you'd want to use a thread restorer kit like this.
(Tim)>> Exactly! That's your best effort on the thread of a bolt or the thread in a hole.
(Frankie)>> So the next time you need to fix a threaded hole, you need to use the right tool for the job.
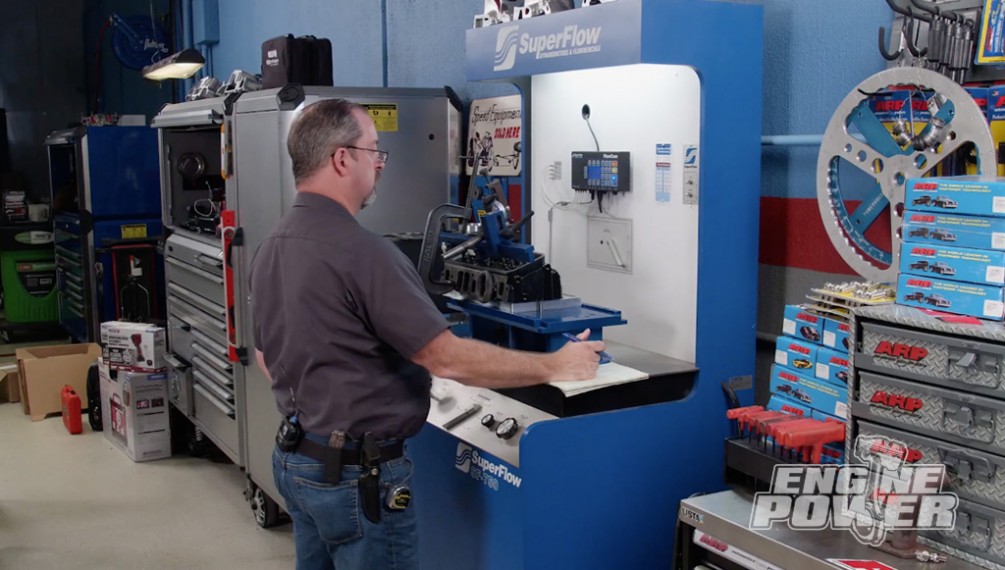
(Pat)>> We're moving on to show some cylinder head work. For demonstration purposes, we have a Chevy four-point three liter v-six head up on the SuperFlow SF seven fifty. Air flow through an engine, is what makes horsepower. And we can measure that very accurately. So, we're going to get some baseline numbers on this head. This head is just like it's v-eight counterpart. It has a one nine forty intake valve, one five-hundred exhaust valve and it's a t-b-i swirl port design. After finding out or baseline numbers, we're going to take the head off and make some small changes to it and see if we pick up flow. Again, this is another area where if you just get in there and start grinding, you can do more harm than good. So, we're going to show you how to keep yourself out of trouble. ♪ We'll start off by flowing the intake in one hundred thousandths increments up to six hundred thousandths valve lift. As expected, we weren't expecting much. At peak lift, the intake port flows a mediocre one hundred ninety-eight c-f-m. Switching over to the exhaust, we'll repeat the process. The lackluster port levels out at one hundred thirty-three c-f-m. [SuperFlow hissing] We are not going to get too crazy, but we will focus on these areas here, where the valve job was cut. This is the bottom bolt cut, we're going to blend that in. And there's two humps on the short side radius of both of these ports. We're just going to go in and clean those up. But not make anything bigger. This is real easy work. But just take your time and go in small increments. And check your work continually. [dremel humming]
(Frankie)>> Since it's really messy, porting cast iron is not a lot of fun. But, it's a great way to get yourself accustomed to grinding. Compared to aluminum, material gets removed at a slower rate. One important note... be very careful around the valve seat. If you accidently touch it with the grinder, you'll have to have the valve job redone. A couple, of different carbides, are used to reach tighter areas of the port. [dremel hummning] We'll switch to a cartridge roll to put the final finish on the bolt. [air hissing]
(Pat)>> We'll give the same treatment to the exhaust and we'll get it back on the flow bench. We'll run the same test to see if we've made any improvements. [SuperFlow hissing] Both the intake and the exhaust, perked up nicely from our baseline numbers. [SuperFlow hissing] On the intake side, we gained seventeen c-f-m at peak lift but, all points of measurement showed an increase. We had an average gain of thirteen-point thirty-three c-f-m.
(Frankie)>> The exhaust was even better. At peak lift, we got a solid thirty-three c-f-m increase. And our average gain was an identical thirteen-point thirty-three c-f-m.
(Pat)>> These are some nice little gains for a minimal amount of work. I spent about twenty minutes on each port. I didn't make them any bigger. I just smoothed them out and knocked down the rough edges. Keep in mind, the runner was not touched. That's one area where if you start reshaping things and making it bigger, you can cause all types of problems. This is something you can do at home that will definitely pick you up some horsepower.
(Frankie)>> Up next... inside the cylinder bore is where power is made. So, setting them up correctly is crucial for peak performance.
(Pat)>> We have some happy little plug wires. I think he wants to go right there. Let's put his sibling right next to him. That's nice. Hello! I'm Pat Topolinski, and I'd love to welcome you to The Joy of Engine Building. You know, growing up in northern Michigan as a small boy, I would tune in to public television and watch this amazing man paint these beautiful pictures. And it was so inspiring. And it was fun to listen to. The way the brush crunched against the canvas. I decided, I'd love to do the same thing one day. And after years of practice and hard work, I came to the realization that... I have absolutely zero talent for painting. So, I did the next best thing. Become a professional race engine builder. Race engine building and painting, have many parallels like, there are no mistakes, they're just happy accidents. Actually, that's not true at all. In engine building, if you make a mistake, it usually causes catastrophic engine failure. And then you end up with a pile of broken parts. And even more... broken dreams.
(Frankie)>> What are you doing in here?
(Pat)>> I'm just living in the eighties man!
(Frankie)>> Come on man! We've got work to do.
(Pat)>> Alright! [metal clanging] ♪ Next on our list of tech to show you, is getting a block ready to get honed. Now you usually see us hone blocks when we get them in and get them out. This time, we're going to go a little behind the scenes and show you what it takes to prep a block, to go in the hone and get done right. And the big part of that is... the fasteners.
(Frankie)>> When you're bolting down your cylinder head, you can either use studs or you can use bolts. And it really doesn't matter. But, when you're trying to torque plate hone an engine, you're trying to recreate the distortion that happens during final assembly. So, it's always the best idea to use the fasteners you're going to use, when you actually put the head on. If we were to build this four three, we would probably put some studs in it. So, that's what we're going to do here. We'll get our studs in, then we can torque our torque plate on. We might even show you the distortion that happens.
(Pat)>> Just as important as having the mains on... to recreate lower cylinder distortion. So, we'll put the main caps on and torque them to spec. And we'll probably show you what that does to the cylinder when that's all done.
(Frankie)>> The mains are torqued to spec at sixty-five pound feet. Even though it's designed for a small block v-eight, the i-c-t torque plate works fine with our v-six. The bore spacing and bolt pattern are identical on both engines. We'll apply some ARP Ultra Torque lube and torque the studs in three stages to ARP's specification of eighty-pound feet. We'll then take multiple cylinder bore measurements at three depths, inside the cylinder to document the distortions in the bore. We've gone ahead and measured our bore before and after putting on our torque plate and mains. And this is kind of a good way to give you a visual of what's actually happening. You can see some pretty big changes going on just by the numbers. But, it kind of depends on where you measure in the bore and how close you are to a fastener. Like here, we can see that it's grown almost thirteen ten-thousandths in just one spot. So, now that we have our torque plate and mains bolted on, when we hone it, it will be round and straight for our final assembly. [metal clicking]
(Pat)>> Our block is now installed in our s-v fifteen. Now just like the torque plate on the top and torquing the mains on the bottom, the mechanism that holds the lock in the hone, if you over torque that, you can distort the cylinders as well. So, you've got to be careful. Now we're going to go over a few things that we're going to set up on the machine itself. To make sure that we get the right hone. And it's going to deal with size and actual the travel of the head. We're going to go to the screen. We have to plug in a few parameters to make sure the machine understands what we're doing. First is going to be bore diameter. And on this block, that will be four inch thirty thousandths. ♪ Next... the bore length. That is the physical length of the cylinder itself. On this particular engine, like it's three-fifty v-eight counterpart, it is five five-hundred. The stone length is a given because, we can just measure that. And they're at three-inch. Overstroke, that is how much the stone comes out of the top and the overstroke on the bottom is how much it comes out of the bottom. Three eights of an inch on each one. ♪ And our ratchet setting is a physical setting on the machine itself to how much it expands the stones every cycle. And we're going to set that at one. The next thing we'll set is spindle speed and the stroke. And that determines our crosshatch angle. On a block like this, we're going to set it at about thirty-six to thirty-eight degrees. Right now, as it sits, we have a roughing spindle speed of one ninety and a rough stroke speed of eighty. And that puts our crosshatch angle at thirty-eight degrees. Cut that in half, because a spindle spins half as fast on the finishing side. It still ends up at thirty-eight. I will both rough and finish the bore at the same crosshatch angle. That way, the bore stays consistent. Those parameters are already in, so we are all set to go. Up next... we prep our block for bigger pistons and measure the results down to the millionth of an inch.
(Pat)>> To get to our four o thirty final bore size, we have to take roughly ten thousandths out. We'll be using diamond abrasives. First we'll start off with a two-hundred twenty grit stone and then finish with a six-hundred. This machine has no problem taking that amount of material out. We could even take more out if we wanted to. With the diamonds, it keeps the cylinders very straight and very round. So, we're going to raise our cabinet and get going. ♪ Fist thing we going to do is turn the machine on with no oil in it. And we're going to be able to hear that cylinder. We want it slow, travel to make sure... it doesn't hit anything. [machine humming] Then... [machine humming] Hear that? Right now, the cylinder... it's kind of hunting because the machine will actually detect the tight spot. And that's what it's doing right now and it auto dwells. [machine humming] Boy! She's really out of round. Holey moley! [machine humming] You really don't want to put an excessive amount of pressure on the something like that initially because... it is so far out of round. It will start doing some very bad things with chatter. So, we're just trying to sneak up on it. You can tell, when it was first going, how it was really notchy sounding. It's starting to settle back down. We're just trying to get it straight before we move the bulk of the material. Now we're going to go to a... our cylinder straightens up. As much as it can. And then we're going to check it and see how our progress is. We're going to hone it within a about a thousandths of it's final size. ♪ Taking roughly, four thousandths out of the bores. It's a little tight at the bottom. That's ok. The important part now is the cylinder is round and straight. It took four thousandths to do it. But we still have six thousandths to go, to get to our final size. But now we can take out the rest of the material and not have any more problems. We'll get it within about a thousandths of our final bore size and then we'll switch stones. That sounds way better. Cylinder sealing is a combination of a bunch of different factors. But the main one is how accurate the cylinder is. How round it is and how straight it is. [machine humming] We are just under a thousandths to go to get to final size. So the next thing we have to do is switch our stones. We're going form our two-hundred twenty grit diamond to a six-hundred grit diamond. But before we do that, we have to get these cleaned off for the next time. So, what I'm going to do is use some Berryman Brake Parts Cleaner, to hose them off. I really like using the Berryman parts cleaner for several different reasons. One... it cleans off all of our oil very well. Two... it leaves no residue and three... it is fast drying. So, we're just going to put our popcorn can over here, and we're going to give it a spray. [can spraying] Look at that. It's already starting to evaporate off. Berryman Brake Parts Cleaner is very versatile. I don't know if it was specifically designed for cleaning off honing oil off a diamond head. But it works awfully well for that. For finished honing, we'll replace a two-hundred twenty grit abrasive with six-hundred grit abrasive. A dressing stone makes sure those abrasives are clean before we get started. Any residue left behind, is removed with more Berryman Brake Parts Cleaner. ♪ This engine block is pretty soft. So, it doesn't take long to remove the final thousandths of material and check our work. Oh baby! ♪ We'll take that. With cylinder to size, now it's time to check its' surface finish. Just because it's been honed, doesn't mean it has the proper surface finish for the ring pack or our application. So, we're going to measure it with a profilometer. A profilometer has a sapphire stylus that drags across the cylinder and measure very accurately. And it's displayed on our screen. So, we're going to check to see what it is. The stylus measures in millionths of an inch and creates a detailed profile of the cylinder's finish. It's securely mounted in the bore because the instrument has to remain completely still during measurement. Our numbers look spot on, for the type of ring, we will be using in this build. ♪
(Frankie)>> We've almost wrapped up our four-point three-liter v-six prep. And if you put this much time and effort into an engine build, you're definitely going to want to use quality components during the final assembly. And for that, we choose Duralast. We've used Duralast components quite a bit before and they've taken a bunch of abuse on the dyno. That's because Duralast manufactures their part to have an o-e quality or better. Their sensors and vehicle electronics are manufactured brand new. But their designed to fit and function better than their o-e counterparts. Things like starters, alternators and water pumps are available new or remanufactured. Where Duralast dives in and fixes some of o-e defects and replaces all the critical wear items with brand new ones. Then components are triple tested throughout the assembly process to make sure that they meet or exceed o-e specifications. If you're interested in anything else that Duralast offers... you can got to duralast parts dot com.
(Pat)>> For more information on anything you've seen today... check out powernation t-v dot com.
Show Full Transcript
(Frankie)>> From simple hand tools and an afternoon in your garage...
(Pat)>> To a machine shop full of industrial grade equipment...
(Frankie)>> There's plenty of ways to help your engine run it's best.
(Pat)>> Today on Engine Power, we'll show you how. ♪
(Frankie)>> Welcome to Engine Power. We recently took behind the scenes to show you all the prep work that goes into a block before we even get it on camera. Now we got a lot of great stuff done, but there's still more to do. If you haven't seen what we've done so far, check this out.
(Pat)>> We started with a re-manufactured four-point three-liter, Chevy v-six. Which we tore down probably with some future upgrades in mind. We measured the deck clearance at TDC. Which was thirty-nine and a half thousandths in the hole. Not great for compression, but the factory hydraulic roller cam shaft, gives us good versatility for making more horsepower down the road.
(Frankie)>> With the engine down to a bare block, we chased all the threads to remove any debris. We reinstalled the main caps, torqued them to spec and checked the main housing bore size. Ours were well within spec, so we moved on to the cylinder bores. Which came in twenty thousandths over. Finally, we deburred the engine to remove sharp edges. And chamfered the bolt holes to protect the top of the threads.
(Pat)>> That is a good start, but there's always more to do. So, we're going to show you a little bit more tech on this block right here. We're going to show you some oiling system mods, do a little bit of cylinder head work and show how to prep a block for better pistons. And with that being said... let's get started.
(Frankie)>> We'll start by removing all the threaded oil gallery plugs. That allows us to knock out the press fit plugs using a metal rod and a hammer.
[hammer tapping]
(Pat)>> To make sure no debris, gets stuck behind them, we'll also knock out the cam bearings. [hammer tapping] The oil filter adaptor and internal filter bypass valve are removed next. ♪ Threading and plugging the bypass valve hole ensures that oil is always filtered before it enters the engine. We'll also thread the front oil galleries for pipe plugs. This is a more secure way to seal the galleries compared to the press in plug. ♪ While we've got the tap set out, we'll tap the water pump bypass hole in the front of the block. Being able to plug this, allows us to use an electric water pump in the future. The new thread are then cleaned with some Berryman Products Brake Parts Cleaner.
(Frankie)>> Now that we've got that done, we're going to be moving on to some other oiling mods. Now, what we're going to be doing is basically going through the oiling passages and trying to eliminate any sharp edges. Sharp edges can create turbulence and reduce flow, which is bad. Now this is universal for pretty much on any engine, but on our v six, since it's similar to a small block Chevy. We're going to be smoothing out places like where the oil returns from the filter and goes back in the engine. We're also going to be trying to clean up any drainage ports so the oil can get back to the pan faster.
(Pat)>> In addition to what Frankie is doing, I'll be working on the rear main cap where the oil pump bolts down to it. Oil flows through the pump into the cap and it has a very sharp edge. And it definitely needs some attention. I'll be looking at the oil pump itself, to see if it needs any work as well. Typically, it does. Now this very simple to do, but you can get yourself into a lot of trouble if you hurry and you could mess something up very easily. So, take your time. Take small bites. And you can do it yourself. [dremel humming]
(Frankie)>> Using a ball carbide, the sharp edges are broken and gradually rounded in to a radius. [hose hissing] After the carbide does the work, everything gets smoothed out with a cartridge roll. [dremel humming] The finished result allows oil to flow unrestricted into the block. Now that the main cap is done, we're going to go ahead and just follow the flow of oil. So, it comes out of the cap. Goes into the block. And then comes over and goes into our oil filter area. Then after it goes through the oil filter, it's going to go back down through this hole and back into the engine. So, we're just going to go through, clean up any sharp edges and try to turn them into nice smooth radiuses. ♪ The same ball carbide, used on the cap, allows us to get into tight spaces. Using light pressure, and letting the carbide do the work, is crucial. [dremel humming] Going through different holes and using a variety of bits, can make the job easier. We'll just blow out the debris for now. And when all the work is done, the engine will get a deep thorough cleaning.
(Pat)>> We're just removing the minimal amount of material to round out the sharp edge. And nothing more. [dremel humming] Once again, a cartridge roll provides a smooth finish. [hose hissing] Even the places that are harder to see, still need just as much attention. Like this port, which sends filtered oil directly into the block. [dremel humming] Another area on any block that can always use work is the oil return. Ours has some jagged edges left over from the casting process, which will impede the oil flow.
That's much better. [hose hissing] To really make your engine go, first you've got to make it blow. Up next, we'll show you how to improve air flow on your cylinder heads.
(Frankie)>> Hey guys! I'm hanging out with Team Summit NHRA Funny Car driver Tim Wilkerson. Tim, today's subject is something I think can get a lot of engine builders in trouble.
(Tim)>> Well you're absolutely right Frankie. We're talking about the difference between threading or cleaning a tapped or threaded hole.
(Frankie)>> Ok, so what's the difference and what's the correct tool to use in each situation.
(Tim)>> Well, basically I use in layman's terms, if you are going to use a tap, you're making a new hole. If you're trying to clean a hole, that has a damaged thread or some debris in it. You want to use a cleanup tool.
(Frankie)>> Yeah, I agree with that Tim. I think sometimes guys are too quick to grab a machine tap for something important like a head bolt hole.
(Tim)>> Well you're absolutely right. What happens is, is you end up running that machine tap through there. It actually distorts the thread. When you but the bolt in there, you lose clamp. Doesn't have the correct torque.
(Frankie)>> So for something like that, you'd want to use a thread restorer kit like this.
(Tim)>> Exactly! That's your best effort on the thread of a bolt or the thread in a hole.
(Frankie)>> So the next time you need to fix a threaded hole, you need to use the right tool for the job.
(Pat)>> We're moving on to show some cylinder head work. For demonstration purposes, we have a Chevy four-point three liter v-six head up on the SuperFlow SF seven fifty. Air flow through an engine, is what makes horsepower. And we can measure that very accurately. So, we're going to get some baseline numbers on this head. This head is just like it's v-eight counterpart. It has a one nine forty intake valve, one five-hundred exhaust valve and it's a t-b-i swirl port design. After finding out or baseline numbers, we're going to take the head off and make some small changes to it and see if we pick up flow. Again, this is another area where if you just get in there and start grinding, you can do more harm than good. So, we're going to show you how to keep yourself out of trouble. ♪ We'll start off by flowing the intake in one hundred thousandths increments up to six hundred thousandths valve lift. As expected, we weren't expecting much. At peak lift, the intake port flows a mediocre one hundred ninety-eight c-f-m. Switching over to the exhaust, we'll repeat the process. The lackluster port levels out at one hundred thirty-three c-f-m. [SuperFlow hissing] We are not going to get too crazy, but we will focus on these areas here, where the valve job was cut. This is the bottom bolt cut, we're going to blend that in. And there's two humps on the short side radius of both of these ports. We're just going to go in and clean those up. But not make anything bigger. This is real easy work. But just take your time and go in small increments. And check your work continually. [dremel humming]
(Frankie)>> Since it's really messy, porting cast iron is not a lot of fun. But, it's a great way to get yourself accustomed to grinding. Compared to aluminum, material gets removed at a slower rate. One important note... be very careful around the valve seat. If you accidently touch it with the grinder, you'll have to have the valve job redone. A couple, of different carbides, are used to reach tighter areas of the port. [dremel hummning] We'll switch to a cartridge roll to put the final finish on the bolt. [air hissing]
(Pat)>> We'll give the same treatment to the exhaust and we'll get it back on the flow bench. We'll run the same test to see if we've made any improvements. [SuperFlow hissing] Both the intake and the exhaust, perked up nicely from our baseline numbers. [SuperFlow hissing] On the intake side, we gained seventeen c-f-m at peak lift but, all points of measurement showed an increase. We had an average gain of thirteen-point thirty-three c-f-m.
(Frankie)>> The exhaust was even better. At peak lift, we got a solid thirty-three c-f-m increase. And our average gain was an identical thirteen-point thirty-three c-f-m.
(Pat)>> These are some nice little gains for a minimal amount of work. I spent about twenty minutes on each port. I didn't make them any bigger. I just smoothed them out and knocked down the rough edges. Keep in mind, the runner was not touched. That's one area where if you start reshaping things and making it bigger, you can cause all types of problems. This is something you can do at home that will definitely pick you up some horsepower.
(Frankie)>> Up next... inside the cylinder bore is where power is made. So, setting them up correctly is crucial for peak performance.
(Pat)>> We have some happy little plug wires. I think he wants to go right there. Let's put his sibling right next to him. That's nice. Hello! I'm Pat Topolinski, and I'd love to welcome you to The Joy of Engine Building. You know, growing up in northern Michigan as a small boy, I would tune in to public television and watch this amazing man paint these beautiful pictures. And it was so inspiring. And it was fun to listen to. The way the brush crunched against the canvas. I decided, I'd love to do the same thing one day. And after years of practice and hard work, I came to the realization that... I have absolutely zero talent for painting. So, I did the next best thing. Become a professional race engine builder. Race engine building and painting, have many parallels like, there are no mistakes, they're just happy accidents. Actually, that's not true at all. In engine building, if you make a mistake, it usually causes catastrophic engine failure. And then you end up with a pile of broken parts. And even more... broken dreams.
(Frankie)>> What are you doing in here?
(Pat)>> I'm just living in the eighties man!
(Frankie)>> Come on man! We've got work to do.
(Pat)>> Alright! [metal clanging] ♪ Next on our list of tech to show you, is getting a block ready to get honed. Now you usually see us hone blocks when we get them in and get them out. This time, we're going to go a little behind the scenes and show you what it takes to prep a block, to go in the hone and get done right. And the big part of that is... the fasteners.
(Frankie)>> When you're bolting down your cylinder head, you can either use studs or you can use bolts. And it really doesn't matter. But, when you're trying to torque plate hone an engine, you're trying to recreate the distortion that happens during final assembly. So, it's always the best idea to use the fasteners you're going to use, when you actually put the head on. If we were to build this four three, we would probably put some studs in it. So, that's what we're going to do here. We'll get our studs in, then we can torque our torque plate on. We might even show you the distortion that happens.
(Pat)>> Just as important as having the mains on... to recreate lower cylinder distortion. So, we'll put the main caps on and torque them to spec. And we'll probably show you what that does to the cylinder when that's all done.
(Frankie)>> The mains are torqued to spec at sixty-five pound feet. Even though it's designed for a small block v-eight, the i-c-t torque plate works fine with our v-six. The bore spacing and bolt pattern are identical on both engines. We'll apply some ARP Ultra Torque lube and torque the studs in three stages to ARP's specification of eighty-pound feet. We'll then take multiple cylinder bore measurements at three depths, inside the cylinder to document the distortions in the bore. We've gone ahead and measured our bore before and after putting on our torque plate and mains. And this is kind of a good way to give you a visual of what's actually happening. You can see some pretty big changes going on just by the numbers. But, it kind of depends on where you measure in the bore and how close you are to a fastener. Like here, we can see that it's grown almost thirteen ten-thousandths in just one spot. So, now that we have our torque plate and mains bolted on, when we hone it, it will be round and straight for our final assembly. [metal clicking]
(Pat)>> Our block is now installed in our s-v fifteen. Now just like the torque plate on the top and torquing the mains on the bottom, the mechanism that holds the lock in the hone, if you over torque that, you can distort the cylinders as well. So, you've got to be careful. Now we're going to go over a few things that we're going to set up on the machine itself. To make sure that we get the right hone. And it's going to deal with size and actual the travel of the head. We're going to go to the screen. We have to plug in a few parameters to make sure the machine understands what we're doing. First is going to be bore diameter. And on this block, that will be four inch thirty thousandths. ♪ Next... the bore length. That is the physical length of the cylinder itself. On this particular engine, like it's three-fifty v-eight counterpart, it is five five-hundred. The stone length is a given because, we can just measure that. And they're at three-inch. Overstroke, that is how much the stone comes out of the top and the overstroke on the bottom is how much it comes out of the bottom. Three eights of an inch on each one. ♪ And our ratchet setting is a physical setting on the machine itself to how much it expands the stones every cycle. And we're going to set that at one. The next thing we'll set is spindle speed and the stroke. And that determines our crosshatch angle. On a block like this, we're going to set it at about thirty-six to thirty-eight degrees. Right now, as it sits, we have a roughing spindle speed of one ninety and a rough stroke speed of eighty. And that puts our crosshatch angle at thirty-eight degrees. Cut that in half, because a spindle spins half as fast on the finishing side. It still ends up at thirty-eight. I will both rough and finish the bore at the same crosshatch angle. That way, the bore stays consistent. Those parameters are already in, so we are all set to go. Up next... we prep our block for bigger pistons and measure the results down to the millionth of an inch.
(Pat)>> To get to our four o thirty final bore size, we have to take roughly ten thousandths out. We'll be using diamond abrasives. First we'll start off with a two-hundred twenty grit stone and then finish with a six-hundred. This machine has no problem taking that amount of material out. We could even take more out if we wanted to. With the diamonds, it keeps the cylinders very straight and very round. So, we're going to raise our cabinet and get going. ♪ Fist thing we going to do is turn the machine on with no oil in it. And we're going to be able to hear that cylinder. We want it slow, travel to make sure... it doesn't hit anything. [machine humming] Then... [machine humming] Hear that? Right now, the cylinder... it's kind of hunting because the machine will actually detect the tight spot. And that's what it's doing right now and it auto dwells. [machine humming] Boy! She's really out of round. Holey moley! [machine humming] You really don't want to put an excessive amount of pressure on the something like that initially because... it is so far out of round. It will start doing some very bad things with chatter. So, we're just trying to sneak up on it. You can tell, when it was first going, how it was really notchy sounding. It's starting to settle back down. We're just trying to get it straight before we move the bulk of the material. Now we're going to go to a... our cylinder straightens up. As much as it can. And then we're going to check it and see how our progress is. We're going to hone it within a about a thousandths of it's final size. ♪ Taking roughly, four thousandths out of the bores. It's a little tight at the bottom. That's ok. The important part now is the cylinder is round and straight. It took four thousandths to do it. But we still have six thousandths to go, to get to our final size. But now we can take out the rest of the material and not have any more problems. We'll get it within about a thousandths of our final bore size and then we'll switch stones. That sounds way better. Cylinder sealing is a combination of a bunch of different factors. But the main one is how accurate the cylinder is. How round it is and how straight it is. [machine humming] We are just under a thousandths to go to get to final size. So the next thing we have to do is switch our stones. We're going form our two-hundred twenty grit diamond to a six-hundred grit diamond. But before we do that, we have to get these cleaned off for the next time. So, what I'm going to do is use some Berryman Brake Parts Cleaner, to hose them off. I really like using the Berryman parts cleaner for several different reasons. One... it cleans off all of our oil very well. Two... it leaves no residue and three... it is fast drying. So, we're just going to put our popcorn can over here, and we're going to give it a spray. [can spraying] Look at that. It's already starting to evaporate off. Berryman Brake Parts Cleaner is very versatile. I don't know if it was specifically designed for cleaning off honing oil off a diamond head. But it works awfully well for that. For finished honing, we'll replace a two-hundred twenty grit abrasive with six-hundred grit abrasive. A dressing stone makes sure those abrasives are clean before we get started. Any residue left behind, is removed with more Berryman Brake Parts Cleaner. ♪ This engine block is pretty soft. So, it doesn't take long to remove the final thousandths of material and check our work. Oh baby! ♪ We'll take that. With cylinder to size, now it's time to check its' surface finish. Just because it's been honed, doesn't mean it has the proper surface finish for the ring pack or our application. So, we're going to measure it with a profilometer. A profilometer has a sapphire stylus that drags across the cylinder and measure very accurately. And it's displayed on our screen. So, we're going to check to see what it is. The stylus measures in millionths of an inch and creates a detailed profile of the cylinder's finish. It's securely mounted in the bore because the instrument has to remain completely still during measurement. Our numbers look spot on, for the type of ring, we will be using in this build. ♪
(Frankie)>> We've almost wrapped up our four-point three-liter v-six prep. And if you put this much time and effort into an engine build, you're definitely going to want to use quality components during the final assembly. And for that, we choose Duralast. We've used Duralast components quite a bit before and they've taken a bunch of abuse on the dyno. That's because Duralast manufactures their part to have an o-e quality or better. Their sensors and vehicle electronics are manufactured brand new. But their designed to fit and function better than their o-e counterparts. Things like starters, alternators and water pumps are available new or remanufactured. Where Duralast dives in and fixes some of o-e defects and replaces all the critical wear items with brand new ones. Then components are triple tested throughout the assembly process to make sure that they meet or exceed o-e specifications. If you're interested in anything else that Duralast offers... you can got to duralast parts dot com.
(Pat)>> For more information on anything you've seen today... check out powernation t-v dot com.
