Engine Power Featured Projects
Engine Power Builds
Want more content like this?
Join the PowerNation Email NewsletterParts Used In This Episode
Matco Tools
MATCO Tools are the Official Tool Supplier to Engine Power
The Industrial Depot
Tools, Hardware, Shop Supplies
Episode Transcript
(Pat)>> You're watching Powernation!
(Pat)>> Today on Engine Power, we build a hard pulling, big block Chevy.
(Frankie)>> And we brought along some friends to help. [ Music ] [engine revving]
(Frankie)>> Not bad at all.
(Pat)>> That is not bad. Let's check that out. Hey! Look at that. Pretty good. Hey everyone, welcome to Engine Power. Usually, you see us build engines in the mid to upper r-p-m ranges because their application specific. Well today, we're doing something a little bit different. We've been getting a lot of requests and comments for doing something in the low r-p-m range, so today is your lucky day. We dug through the warehouse and found us an engine we think is a suitable candidate. This is a four fifty-four Chevy out of an eighties one ton. Now, we don't know a whole lot about it because it is a takeout. So we decided to get it up on the pump and what it's all about and see if it's worthy to work on. And speaking of working on it... we're going have some help today in the shop and their Frankie's friends.
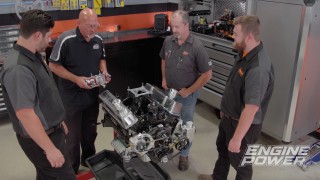
(Frankie)>> That's right. I'm a graduate of the University of Northwestern Ohio. And I still have several friends that are current students. So I decided to invite a few of them down so they could help us out installing some budget minded upgrades, to increase some low end torque on our big block four fifty-four. The University of Northwestern Ohio, located in the city of Lima, is highly regarded for their college of applied technologies. Which includes programs in automotive, diesel and high performance technology. Their curriculum is roughly thirty percent textbook instruction and seventy percent hands on experience.
(Jack)>> We have our textbook side which is all great and everything, but the hands on side really ties everything together. Allows you as a student to get the best experience out of everything. You read one day. Go out and work on it the next day. It's also a great experience and fantastic for learning.
(Frankie)>> The course work, along with many opportunities, such as internships and industry specific clubs, let's students explore a wide variety of fields. Giving them the time and experience they need to discover and grow their interest and passions in the automotive world.
(Trey)>> So they can bounce around, try this job, try that job, try the next job until they find the perfect fit. And when they come back, and I get that email or I get that phone call. I get to talk to them about how excited they are. And hearing that they've built that confidence in themselves and future. It's more rewarding than anything I thought I would expect.
(Brenden)>> We're a big enough school to give a lot of amazing opportunities and that's why are graduates get to go all over the world. But, it's also small enough to feel like home.
(Frankie)>> With small class sizes, students receive plenty of one on one interaction and they're encouraged to ask questions.
(John)>> It's a great environment because it's not like a huge mega-school but still a small enough environment where you can connect to each other fairly easily.
(Jack)>> My favorite part is definitely working with some of the instructors. I'm able to ask them questions and get honest answers to create my own opinions on things.
(Frankie)>> Joining us today are some guys that I actually went to school with, my good buddies, John Hartman and Jack Reusch. So guys this think made like four hundred sixty pound feet and around three hundred and five horse power. So the idea is to increase some low r-p-m torque while still going easy on the wallet. We don't want to blow the budget out the window.
(Pat)>> And doing that we're going to retain the stock cylinder heads, obviously the stock block. But we need to move some more air through this engine. What's the best way to do that?
(John)>> My thoughts, is we can change the cam shaft. That's a real good budget friendly.
(Frankie)>> That will work. We can keep the stock heads and just waking up the cam shaft I think is a good idea. Flat tap it. If we keep it flat tapped it's still pretty affordable.
(Jack)>> So for changing the cam shaft, are we going to have to change the valve train out?
(Frankie)>> Yeah! We can go ahead and see what springs are in there. Maybe we'll do a spring upgrade. And we can even do some roller rocker arms because that's a pretty affordable way to kind of improve the valve train.
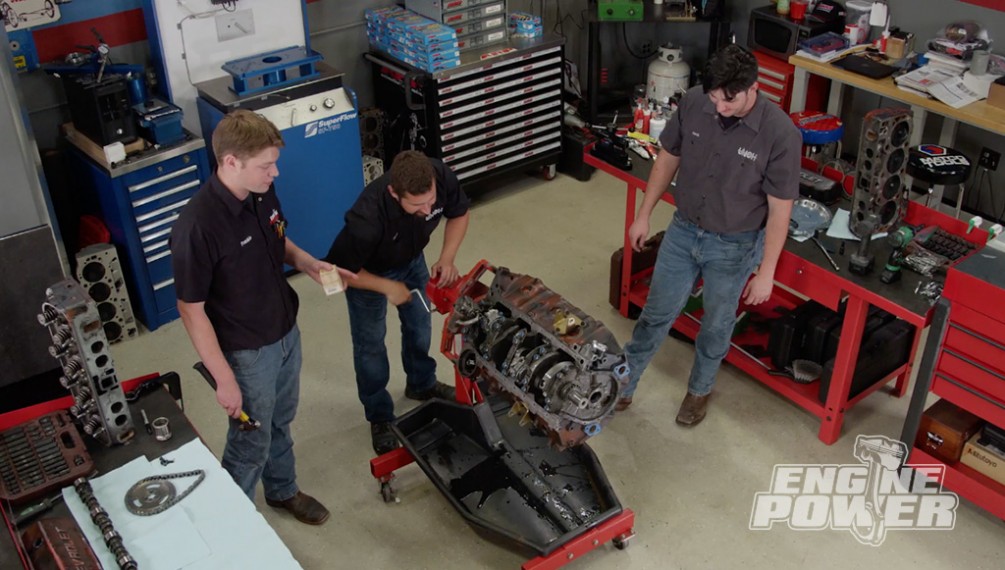
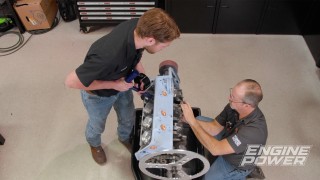
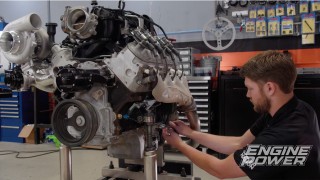
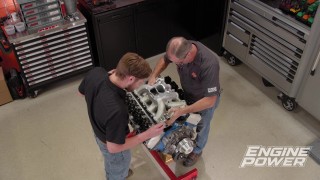
(Pat)>> Now that being said... before we do any of that. I want to get this engine completely apart because it is an unknown quantity. It's a t-code engine. So I'd like to check all the bearings, make sure there's nothing wrong with it internal. Make sure we have something good to work with. Now you guys have one of these dynos. So I think you know how to remove this and get it on an engine stand. So you're up.
(John)>> Yes sir. Let's do it.
(Pat)>> Alright, I'm going to stay out of the way. [ Music ]
(Frankie)>> Both Jack and John have earned their associates degrees in automotive high performance technology. And they're in the process of earning their bachelors of science degrees in business. Johns has concentrations on automotive after market and marketing. And Jack has a concentration on marketing.
(Pat)>> Takeout engines can sometimes be full of unpleasant surprises. But the oil looks great so that's a good sign.
(Jack)>> So far so good.
(Pat)>> Yeah! A little dark. [ Music ] As we continue the tear down, we don't see any indications of heavy wear or damage.
(John)>> That looks pretty good to me. [ Music ]
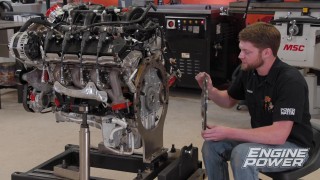
(Frankie)>> The piston tops are pretty clean and there's even a fair amount of cross hatch in the bores. We'll get the oil pump out, mark all the rods, and then pull all the rod and piston assemblies out. [ Music ] The rod bearings have slight wear but nothing alarming. So, we'll reuse them. Oh nice! You guys found the rod boots huh.
(John)>> Yep! Sure did. Don't want to scratch up the journal when we take the rod out.
(Frankie)>> Exactly! [ Music ]
(John)>> Got it.
(Frankie)>> So what are guys looking for when you pull those out?
(Jack)>> So on top of the piston, we'll check for detonation and see if we have any pinging. For the rings, we want to make sure that they spin freely. If they should get stuck, we could have a larger issue. We'll also look at the skirts and see if there's any extra wear that could cause some potential issues. [ Music ]
(Frankie)>> Not too bad. It looks about the same as the rod bearings. [ Music ]
(Pat)>> Coming up... will our mix of existing parts and carefully calculated upgrades, lead to success in a dyno cell? We'll find out.
(Frankie)>> Today, Pat and I are taking things a little easier. Because we have Jack Reusch and John Hartman from UNOH, working in the shop. The rebuild begins by installing the old bearings and the new Victor Reinz rear main seal. To keep costs low, we'll reuse the stock main cap fasteners, which get torqued to one hundred and ten pound feet.
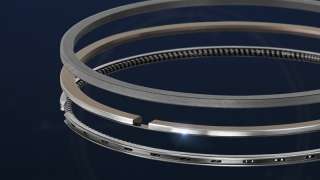
(Pat)>> We will be reusing our stock rod and piston assemblies because quite frankly, they're in fantastic shape. But we do want to improve the ring seal. One way we could potentially do that would be to gas port the piston. Gas porting is common in high performance engines for improving ring seal, by drilling into the top ring land, either horizontally or vertically to let combustion pressure in behind the ring and forcing it out on the cylinder. But, there are some distinct disadvantages to doing that. One being weakening the top of the piston and that can cause all types of problems. Total Seal has developed a better way of gas porting by integrating the port into the top of the piston ring itself. This is more efficient in allowing gas pressure to travel behind the ring and force it outwards against the cylinder wall, providing a tighter ring seal, which leads to higher efficiency and horse power.
(Frankie)>> The ring is made of four forty four B stainless steel, utilizes Total Seal's proprietary AP ring process and has an aerospace grade C thirty three p-v-d face coating, for a longer life span. After gapping the rings for our application, they're installed with the ports facing up.
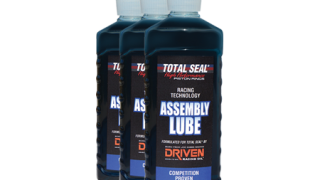
(Pat)>> Since the original rod bearings are in great shape, we'll slide them into place and get them prepped for installation. We'll use Total Seal assembly lube on the new ring set, making sure to work it into the ring lands. We'll also apply a thin film to the cylinder bores. This is critical to establish proper ring seal during start up. [hammer tapping] [ Music ] [drill humming] [ Music ] With short block wrapped up, we'll re-install the after market oil pump that came with the engine, torquing the stud to sixty five pound feet.
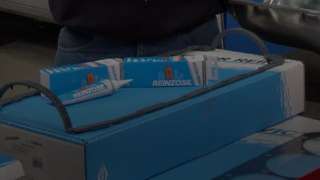
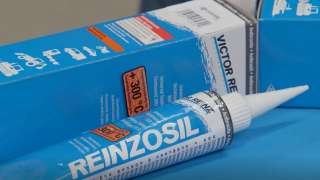
(Frankie)>> Following John's budget friendly advice, we're installing a new Comp Cams hydraulic flat tappet cam shaft from Summit Racing Equipment. At fifty thousands lift, it has two hundred and thirty four degrees of intake duration and two hundred and forty four degrees of exhaust duration. Lobe separation angle is one hundred and twelve degrees. John's degreed plenty of cams at UNOH, so we'll let him take the wheel on this one. It comes in at one hundred and five and a half degrees of intake center line, which six and a half degrees advanced. [ Music ] With a new Victor Reinz gasket, the used timing cover is re-installed. [ Music ] Now that we've got our timing cover on, we can move on to our oil pan. We're going to be sealing that up with a Victor Reinz one piece oil can gasket. It's molded rubber around a steel core and has compression stops so the gasket doesn't smoosh out when you tighten it down. Victor Reinz is well known in the European market but also have a wide variety of gaskets for U.S. manufacturers for both old and late model vehicles. For our four fifty four, they have things like intake and exhaust manifold gaskets, oil pan gaskets, timing cover sets and even a complete head gasket set. For any surfaces that need a little help sealing, we're going to be using Vitor Reinz's Reinzosil. This works in many different applications because it's good from negative fifty eight, all the way up to five hundred and seventy two degrees Fahrenheit. It's also resistant to fuels, oils, grease, water and even saltwater for marine applications. We'll put a little bit on the bating surfaces of our block, put our gasket on and then we can get our oil pan bolted down. [ Music ]
(Pat)>> The new lifters are Chevrolet Performance hydraulic flat tappets from Summit Racing Equipment. They receive installation lube and are slid into the block. Finally we'll re-install the Summit Bracket Racer harmonic damper, which is SFI approved. [ Music ]
(Frankie)>> Up next... the big block get a heavy duty e-f-i system that's ready to rumble.
(Pat)>> Jon and Jack are hard at work on our big block Chevy build, setting true t-d-c on the balancer and lapping the valves. What's the reason you lap valves.
(Jack)>> We're looking for that seat to valve contact and seeing how it seals up.
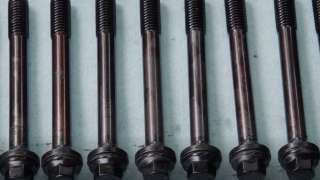
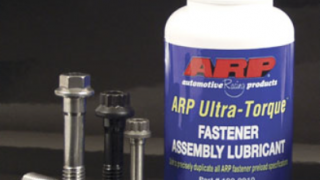
(Pat)>> That tells you what kind of concentricity you have, if you have a nice even seal around the valve. This one was running ok so I'm not expecting any problems. [spring popping] [ Music ] Perfect! With our head gaskets in place and our with our short block looking sharp, it's time to re-install our cast iron, stock and actually very heavy, peanut port cylinder heads. And we'll be bolting them down with ARP hardware. ARP goes through an extensive measurement and engineering process to ensure that the right amount of fastener is in the cylinder head and has proper thread engagement into the block, so the fastener works like it's suppose to. ARP has several different materials to use depending on your application. From eighty-seven forty chrome moly, stainless steel or more exotic things. One things that's important is ARP includes with every kit they sell, some very detailed & precise instructions on how to install their fasteners. [ Music ] Since our head bolts go into the water jacket, they receive ARP Ultra Torque lube under the bolt head and sealant on the threads. [ Music ] Perfect! Continue on, I'll stay out of the way. [ Music ] Following ARP's instructions, the head bolts are torqued in three equal steps, to a final value of seventy pound feet. [ Music ] We'll reuse the stock push rods and apply some extreme pressure lube to both ends. [ Music ] Now what rockers are those Jack?
(Jack)>> These are the Comp Cams Pro Magnums. It's really a nice rocker it's a one point seven ratio, which happens to be the stock ratio.
(Pat)>> Very nice. We'll install them in the firing order, setting them one half turn past zero lash, as we go. So half turn past that. [ Music ] To give our engine a clean, timeless look, we paint it gloss black. [ Music ]
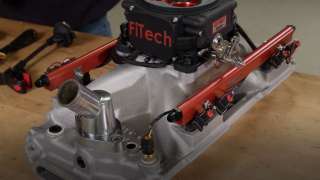
(Frankie)>> Since our engine is going to be used in a street or towing application, we wanted to go with a nice fuel injection setup over our carburetor. This going to make cold starts, fuel efficiency and drivability much, much better. We chose to go with FiTech's Go Port e-f-i system and it comes pretty much with everything you need to get it running. Including, a wiring harness with a few simple connections, an O two sensor and a handheld that can do all the setup and tuning. We've already gone ahead and preassembled our setup including our eighty pound an hour fuel injectors, which make the system good for up to a thousand and fifty horse power. Our painted fuel rails, our coolant temp sensor in the front and our throttle body on top. This is really nice because the module is mounted inside. So you don't have to worry about mounting it in the car. All we have to do now, is get this system installed and then we're one step closer to the dyno. [ Music ] Some weather strip adhesive, will hold the Victor Reinz intake manifold gaskets in place. And a bead of Reinzosil is laid down on the china wall. This FiTech injection kit, uses an Edelbrock e-f-i intake manifold that will fit any oval port big block chevy. It drops right into place and is synched down with some ARP fasteners. Valve train assembly spray, lubricates the springs for protection during initial startup. Victor Reinz's molded rubber gaskets will seal up our repainted valve covers. [ Music ] [stand rolling] [ Music ]
(Pat)>> The fuel injection system requires an O two sensor. So Jack makes good use of the welding skills he learned at UNOH, adding a bun for the sensor and an evac port. [ Music ] [drill humming] [ Music ] We got our Moroso evac system as a kit from Summit Racing Equipment. It's a very affordable way to add a little extra power to your engine. [ Music ] After a few simple connections, our FiTech unit powers right up and the e-c-u can be programmed for the engine. Up next... we give our engine spark and then we fire it up. [engine revving]
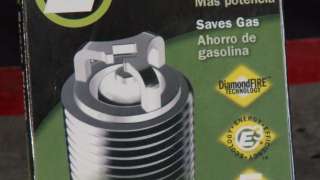
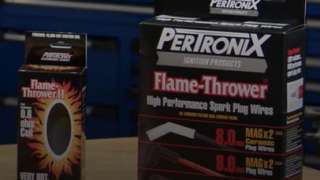
(Frankie)>> One of the last as possibly the most important systems we need to install on our engine is the ignition system. And that starts with a good spark plug. We use E Three spark plugs all the time and we always have great results. We've even done some testing to show their performance gains. Their plugs have some really unique features that make them stand out from a traditional j wire style plug. First, they have an open ground electrode, which helps direct the spark and flame front into the combustion chamber faster. They also have sharp edges on both electrodes, which helps start the migration of electrons, making it easier to initiate a spark. This means that more of the air fuel mixture can be burnt before the exhaust valve opens, increasing efficiency and power. It's also important that spark plugs have a long life span and E Three plugs have ben tested and proven to maintain power better over standard plugs, for up to twenty million combustion cycles. We'll apply a little bit of anti-seize lubricant to the threads to keep them from galling on installation and more importantly removal, after the engine has run at operating temperature. [ Music ] Now that we've got our spark plugs installed, we can move on to how we're actually going to generate the spark. We're going to be doing that with the Pertonix ignition bundle. This is for a small block or big block Chevy and it all starts with one of their low resistance forty five thousand volt Flame Thrower Two ignition coils. This is going to feed one of their ready to run billet distributors and it has a Flame Thrower Ignitor Two module in it. The best part about these is that they are a ready to run distributor. So, there's only two wires to hook up. One to an ignition and one to the negative post on the coil. From there we'll using a set of their eight millimeter universal, ninety degree boot wires to distribute it to each spark plug. We've already gone ahead a preassembled these but this whole thing comes as a complete kit. So now that it's ready, all we have to do is get it on our engine. [ Music ] After lubing the gear, the distributor drops into place. [ Music ] We'll install the coil in a temporary mount for use in the dyno cell. [ Music ]
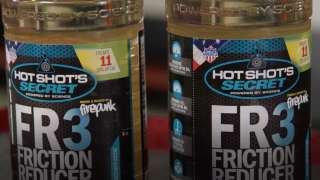
(Pat)>> Engines have advanced in both technology and outright power at a very rapid pace in the last ten years, which is a good thing. But a lot of the stresses associated with that performance fall on engine oil to keep efficiency up and the engine living. A great way to fortify any oil's ability to protect your investment, is to add FR Three Friction Reducer from Hotshot's Secret. Three patented technologies combine to reduce friction, lower oil operating temps and improve both sheer and oxidation stability in any oil you add it to. It uses carbon nano-lubricant molecules that attach to microscopic irregularities of machine services to increase film strength and decrease wear up to forty three percent. Which can also increase your engine's efficiency and free up some horsepower. This is a one hundred percent synthetic formula that not only protect and reduce friction in your engine, it can be used in any closed lubrication system. Like your transmission, differentials, power steering, you get the idea. Dosage is about one point five ounces of FR Three per quart of oil. It safe for both gas and diesel applications and all conventional or synthetic oils. The bottle has some handy increments on it so with ten and a half ounces, we're going to run it down just below the six ounce mark. [ Music ] Alright! I think we got her. [ Music ] What do you think it's going to do?
(Frankie)>> Make more power hopefully. Are you guys ready?
(John)>> Oh I'm ready. Let's go. [engine revving]
(Pat)>> Well it made more power. I'm not sure if it made more torque? Oh it did make more torque. [ Music ]
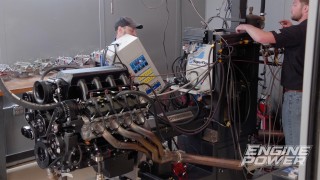
(Frankie)>> The big block put out three hundred and eighty-seven horsepower. A gain of eighty-two peak, compared to our baseline run. It made four hundred and seventy-one pound feet of torque. A gain of ten peak over the baseline. We made several runs and made some adjustments. Deciding on thirty-six degrees of total timing and a thirteen to one target of air fuel ratio. We also ran the engine a little higher, from twenty-five hundred to five thousand r-p-m. [engine revving] Oh yeah!
(John)>> That's a big difference.
(Frankie)>> That's really big.
(Pat)>> After thirty-five hundred, it just crushes the other one right into the earth. Our final numbers are three hundred ninety horsepower and four hundred seventy-three pound feet of torque. Compared to the peak horsepower and torque numbers, the averages tell the real story. The engine picked up twenty-two average horsepower and twenty-five pound feet of torque. All below five thousand r-p-m. Guys, you're the one's that put this together. What do you think?
(John)>> It's amazing. You go from the whole, it was on the dyno before, we tear down and build it back up. It's an awesome experience. It's great to see on the dyno, making more power.
(Pat)>> What do you think?
(Jack)>> Looks great. It's running great. As you can see by the numbers, the improvements we tried to make, they're happening. So I'd say pretty good.
(Frankie)>> Yeah! Well, guys had a huge part in that. We honestly, we really didn't do too much. You guys did most of it.
(Pat)>> I didn't do anything.
(Frankie)>> This is the engine that you guys built.
(Pat)>> We'd like to thank John and Jack for their work on this build. Two guys who are dedicated to their profession.
(Jack)>> The only thing you can control, is you attitude and your effort. There's resources. There's tools. There's people that are willing to help you. You just have to put in the effort in order to do so.
(Frankie)>> If you like what you saw here, go to powernation t-v dot com for more.
Show Full Transcript
(Pat)>> Today on Engine Power, we build a hard pulling, big block Chevy.
(Frankie)>> And we brought along some friends to help. [ Music ] [engine revving]
(Frankie)>> Not bad at all.
(Pat)>> That is not bad. Let's check that out. Hey! Look at that. Pretty good. Hey everyone, welcome to Engine Power. Usually, you see us build engines in the mid to upper r-p-m ranges because their application specific. Well today, we're doing something a little bit different. We've been getting a lot of requests and comments for doing something in the low r-p-m range, so today is your lucky day. We dug through the warehouse and found us an engine we think is a suitable candidate. This is a four fifty-four Chevy out of an eighties one ton. Now, we don't know a whole lot about it because it is a takeout. So we decided to get it up on the pump and what it's all about and see if it's worthy to work on. And speaking of working on it... we're going have some help today in the shop and their Frankie's friends.
(Frankie)>> That's right. I'm a graduate of the University of Northwestern Ohio. And I still have several friends that are current students. So I decided to invite a few of them down so they could help us out installing some budget minded upgrades, to increase some low end torque on our big block four fifty-four. The University of Northwestern Ohio, located in the city of Lima, is highly regarded for their college of applied technologies. Which includes programs in automotive, diesel and high performance technology. Their curriculum is roughly thirty percent textbook instruction and seventy percent hands on experience.
(Jack)>> We have our textbook side which is all great and everything, but the hands on side really ties everything together. Allows you as a student to get the best experience out of everything. You read one day. Go out and work on it the next day. It's also a great experience and fantastic for learning.
(Frankie)>> The course work, along with many opportunities, such as internships and industry specific clubs, let's students explore a wide variety of fields. Giving them the time and experience they need to discover and grow their interest and passions in the automotive world.
(Trey)>> So they can bounce around, try this job, try that job, try the next job until they find the perfect fit. And when they come back, and I get that email or I get that phone call. I get to talk to them about how excited they are. And hearing that they've built that confidence in themselves and future. It's more rewarding than anything I thought I would expect.
(Brenden)>> We're a big enough school to give a lot of amazing opportunities and that's why are graduates get to go all over the world. But, it's also small enough to feel like home.
(Frankie)>> With small class sizes, students receive plenty of one on one interaction and they're encouraged to ask questions.
(John)>> It's a great environment because it's not like a huge mega-school but still a small enough environment where you can connect to each other fairly easily.
(Jack)>> My favorite part is definitely working with some of the instructors. I'm able to ask them questions and get honest answers to create my own opinions on things.
(Frankie)>> Joining us today are some guys that I actually went to school with, my good buddies, John Hartman and Jack Reusch. So guys this think made like four hundred sixty pound feet and around three hundred and five horse power. So the idea is to increase some low r-p-m torque while still going easy on the wallet. We don't want to blow the budget out the window.
(Pat)>> And doing that we're going to retain the stock cylinder heads, obviously the stock block. But we need to move some more air through this engine. What's the best way to do that?
(John)>> My thoughts, is we can change the cam shaft. That's a real good budget friendly.
(Frankie)>> That will work. We can keep the stock heads and just waking up the cam shaft I think is a good idea. Flat tap it. If we keep it flat tapped it's still pretty affordable.
(Jack)>> So for changing the cam shaft, are we going to have to change the valve train out?
(Frankie)>> Yeah! We can go ahead and see what springs are in there. Maybe we'll do a spring upgrade. And we can even do some roller rocker arms because that's a pretty affordable way to kind of improve the valve train.
(Pat)>> Now that being said... before we do any of that. I want to get this engine completely apart because it is an unknown quantity. It's a t-code engine. So I'd like to check all the bearings, make sure there's nothing wrong with it internal. Make sure we have something good to work with. Now you guys have one of these dynos. So I think you know how to remove this and get it on an engine stand. So you're up.
(John)>> Yes sir. Let's do it.
(Pat)>> Alright, I'm going to stay out of the way. [ Music ]
(Frankie)>> Both Jack and John have earned their associates degrees in automotive high performance technology. And they're in the process of earning their bachelors of science degrees in business. Johns has concentrations on automotive after market and marketing. And Jack has a concentration on marketing.
(Pat)>> Takeout engines can sometimes be full of unpleasant surprises. But the oil looks great so that's a good sign.
(Jack)>> So far so good.
(Pat)>> Yeah! A little dark. [ Music ] As we continue the tear down, we don't see any indications of heavy wear or damage.
(John)>> That looks pretty good to me. [ Music ]
(Frankie)>> The piston tops are pretty clean and there's even a fair amount of cross hatch in the bores. We'll get the oil pump out, mark all the rods, and then pull all the rod and piston assemblies out. [ Music ] The rod bearings have slight wear but nothing alarming. So, we'll reuse them. Oh nice! You guys found the rod boots huh.
(John)>> Yep! Sure did. Don't want to scratch up the journal when we take the rod out.
(Frankie)>> Exactly! [ Music ]
(John)>> Got it.
(Frankie)>> So what are guys looking for when you pull those out?
(Jack)>> So on top of the piston, we'll check for detonation and see if we have any pinging. For the rings, we want to make sure that they spin freely. If they should get stuck, we could have a larger issue. We'll also look at the skirts and see if there's any extra wear that could cause some potential issues. [ Music ]
(Frankie)>> Not too bad. It looks about the same as the rod bearings. [ Music ]
(Pat)>> Coming up... will our mix of existing parts and carefully calculated upgrades, lead to success in a dyno cell? We'll find out.
(Frankie)>> Today, Pat and I are taking things a little easier. Because we have Jack Reusch and John Hartman from UNOH, working in the shop. The rebuild begins by installing the old bearings and the new Victor Reinz rear main seal. To keep costs low, we'll reuse the stock main cap fasteners, which get torqued to one hundred and ten pound feet.
(Pat)>> We will be reusing our stock rod and piston assemblies because quite frankly, they're in fantastic shape. But we do want to improve the ring seal. One way we could potentially do that would be to gas port the piston. Gas porting is common in high performance engines for improving ring seal, by drilling into the top ring land, either horizontally or vertically to let combustion pressure in behind the ring and forcing it out on the cylinder. But, there are some distinct disadvantages to doing that. One being weakening the top of the piston and that can cause all types of problems. Total Seal has developed a better way of gas porting by integrating the port into the top of the piston ring itself. This is more efficient in allowing gas pressure to travel behind the ring and force it outwards against the cylinder wall, providing a tighter ring seal, which leads to higher efficiency and horse power.
(Frankie)>> The ring is made of four forty four B stainless steel, utilizes Total Seal's proprietary AP ring process and has an aerospace grade C thirty three p-v-d face coating, for a longer life span. After gapping the rings for our application, they're installed with the ports facing up.
(Pat)>> Since the original rod bearings are in great shape, we'll slide them into place and get them prepped for installation. We'll use Total Seal assembly lube on the new ring set, making sure to work it into the ring lands. We'll also apply a thin film to the cylinder bores. This is critical to establish proper ring seal during start up. [hammer tapping] [ Music ] [drill humming] [ Music ] With short block wrapped up, we'll re-install the after market oil pump that came with the engine, torquing the stud to sixty five pound feet.
(Frankie)>> Following John's budget friendly advice, we're installing a new Comp Cams hydraulic flat tappet cam shaft from Summit Racing Equipment. At fifty thousands lift, it has two hundred and thirty four degrees of intake duration and two hundred and forty four degrees of exhaust duration. Lobe separation angle is one hundred and twelve degrees. John's degreed plenty of cams at UNOH, so we'll let him take the wheel on this one. It comes in at one hundred and five and a half degrees of intake center line, which six and a half degrees advanced. [ Music ] With a new Victor Reinz gasket, the used timing cover is re-installed. [ Music ] Now that we've got our timing cover on, we can move on to our oil pan. We're going to be sealing that up with a Victor Reinz one piece oil can gasket. It's molded rubber around a steel core and has compression stops so the gasket doesn't smoosh out when you tighten it down. Victor Reinz is well known in the European market but also have a wide variety of gaskets for U.S. manufacturers for both old and late model vehicles. For our four fifty four, they have things like intake and exhaust manifold gaskets, oil pan gaskets, timing cover sets and even a complete head gasket set. For any surfaces that need a little help sealing, we're going to be using Vitor Reinz's Reinzosil. This works in many different applications because it's good from negative fifty eight, all the way up to five hundred and seventy two degrees Fahrenheit. It's also resistant to fuels, oils, grease, water and even saltwater for marine applications. We'll put a little bit on the bating surfaces of our block, put our gasket on and then we can get our oil pan bolted down. [ Music ]
(Pat)>> The new lifters are Chevrolet Performance hydraulic flat tappets from Summit Racing Equipment. They receive installation lube and are slid into the block. Finally we'll re-install the Summit Bracket Racer harmonic damper, which is SFI approved. [ Music ]
(Frankie)>> Up next... the big block get a heavy duty e-f-i system that's ready to rumble.
(Pat)>> Jon and Jack are hard at work on our big block Chevy build, setting true t-d-c on the balancer and lapping the valves. What's the reason you lap valves.
(Jack)>> We're looking for that seat to valve contact and seeing how it seals up.
(Pat)>> That tells you what kind of concentricity you have, if you have a nice even seal around the valve. This one was running ok so I'm not expecting any problems. [spring popping] [ Music ] Perfect! With our head gaskets in place and our with our short block looking sharp, it's time to re-install our cast iron, stock and actually very heavy, peanut port cylinder heads. And we'll be bolting them down with ARP hardware. ARP goes through an extensive measurement and engineering process to ensure that the right amount of fastener is in the cylinder head and has proper thread engagement into the block, so the fastener works like it's suppose to. ARP has several different materials to use depending on your application. From eighty-seven forty chrome moly, stainless steel or more exotic things. One things that's important is ARP includes with every kit they sell, some very detailed & precise instructions on how to install their fasteners. [ Music ] Since our head bolts go into the water jacket, they receive ARP Ultra Torque lube under the bolt head and sealant on the threads. [ Music ] Perfect! Continue on, I'll stay out of the way. [ Music ] Following ARP's instructions, the head bolts are torqued in three equal steps, to a final value of seventy pound feet. [ Music ] We'll reuse the stock push rods and apply some extreme pressure lube to both ends. [ Music ] Now what rockers are those Jack?
(Jack)>> These are the Comp Cams Pro Magnums. It's really a nice rocker it's a one point seven ratio, which happens to be the stock ratio.
(Pat)>> Very nice. We'll install them in the firing order, setting them one half turn past zero lash, as we go. So half turn past that. [ Music ] To give our engine a clean, timeless look, we paint it gloss black. [ Music ]
(Frankie)>> Since our engine is going to be used in a street or towing application, we wanted to go with a nice fuel injection setup over our carburetor. This going to make cold starts, fuel efficiency and drivability much, much better. We chose to go with FiTech's Go Port e-f-i system and it comes pretty much with everything you need to get it running. Including, a wiring harness with a few simple connections, an O two sensor and a handheld that can do all the setup and tuning. We've already gone ahead and preassembled our setup including our eighty pound an hour fuel injectors, which make the system good for up to a thousand and fifty horse power. Our painted fuel rails, our coolant temp sensor in the front and our throttle body on top. This is really nice because the module is mounted inside. So you don't have to worry about mounting it in the car. All we have to do now, is get this system installed and then we're one step closer to the dyno. [ Music ] Some weather strip adhesive, will hold the Victor Reinz intake manifold gaskets in place. And a bead of Reinzosil is laid down on the china wall. This FiTech injection kit, uses an Edelbrock e-f-i intake manifold that will fit any oval port big block chevy. It drops right into place and is synched down with some ARP fasteners. Valve train assembly spray, lubricates the springs for protection during initial startup. Victor Reinz's molded rubber gaskets will seal up our repainted valve covers. [ Music ] [stand rolling] [ Music ]
(Pat)>> The fuel injection system requires an O two sensor. So Jack makes good use of the welding skills he learned at UNOH, adding a bun for the sensor and an evac port. [ Music ] [drill humming] [ Music ] We got our Moroso evac system as a kit from Summit Racing Equipment. It's a very affordable way to add a little extra power to your engine. [ Music ] After a few simple connections, our FiTech unit powers right up and the e-c-u can be programmed for the engine. Up next... we give our engine spark and then we fire it up. [engine revving]
(Frankie)>> One of the last as possibly the most important systems we need to install on our engine is the ignition system. And that starts with a good spark plug. We use E Three spark plugs all the time and we always have great results. We've even done some testing to show their performance gains. Their plugs have some really unique features that make them stand out from a traditional j wire style plug. First, they have an open ground electrode, which helps direct the spark and flame front into the combustion chamber faster. They also have sharp edges on both electrodes, which helps start the migration of electrons, making it easier to initiate a spark. This means that more of the air fuel mixture can be burnt before the exhaust valve opens, increasing efficiency and power. It's also important that spark plugs have a long life span and E Three plugs have ben tested and proven to maintain power better over standard plugs, for up to twenty million combustion cycles. We'll apply a little bit of anti-seize lubricant to the threads to keep them from galling on installation and more importantly removal, after the engine has run at operating temperature. [ Music ] Now that we've got our spark plugs installed, we can move on to how we're actually going to generate the spark. We're going to be doing that with the Pertonix ignition bundle. This is for a small block or big block Chevy and it all starts with one of their low resistance forty five thousand volt Flame Thrower Two ignition coils. This is going to feed one of their ready to run billet distributors and it has a Flame Thrower Ignitor Two module in it. The best part about these is that they are a ready to run distributor. So, there's only two wires to hook up. One to an ignition and one to the negative post on the coil. From there we'll using a set of their eight millimeter universal, ninety degree boot wires to distribute it to each spark plug. We've already gone ahead a preassembled these but this whole thing comes as a complete kit. So now that it's ready, all we have to do is get it on our engine. [ Music ] After lubing the gear, the distributor drops into place. [ Music ] We'll install the coil in a temporary mount for use in the dyno cell. [ Music ]
(Pat)>> Engines have advanced in both technology and outright power at a very rapid pace in the last ten years, which is a good thing. But a lot of the stresses associated with that performance fall on engine oil to keep efficiency up and the engine living. A great way to fortify any oil's ability to protect your investment, is to add FR Three Friction Reducer from Hotshot's Secret. Three patented technologies combine to reduce friction, lower oil operating temps and improve both sheer and oxidation stability in any oil you add it to. It uses carbon nano-lubricant molecules that attach to microscopic irregularities of machine services to increase film strength and decrease wear up to forty three percent. Which can also increase your engine's efficiency and free up some horsepower. This is a one hundred percent synthetic formula that not only protect and reduce friction in your engine, it can be used in any closed lubrication system. Like your transmission, differentials, power steering, you get the idea. Dosage is about one point five ounces of FR Three per quart of oil. It safe for both gas and diesel applications and all conventional or synthetic oils. The bottle has some handy increments on it so with ten and a half ounces, we're going to run it down just below the six ounce mark. [ Music ] Alright! I think we got her. [ Music ] What do you think it's going to do?
(Frankie)>> Make more power hopefully. Are you guys ready?
(John)>> Oh I'm ready. Let's go. [engine revving]
(Pat)>> Well it made more power. I'm not sure if it made more torque? Oh it did make more torque. [ Music ]
(Frankie)>> The big block put out three hundred and eighty-seven horsepower. A gain of eighty-two peak, compared to our baseline run. It made four hundred and seventy-one pound feet of torque. A gain of ten peak over the baseline. We made several runs and made some adjustments. Deciding on thirty-six degrees of total timing and a thirteen to one target of air fuel ratio. We also ran the engine a little higher, from twenty-five hundred to five thousand r-p-m. [engine revving] Oh yeah!
(John)>> That's a big difference.
(Frankie)>> That's really big.
(Pat)>> After thirty-five hundred, it just crushes the other one right into the earth. Our final numbers are three hundred ninety horsepower and four hundred seventy-three pound feet of torque. Compared to the peak horsepower and torque numbers, the averages tell the real story. The engine picked up twenty-two average horsepower and twenty-five pound feet of torque. All below five thousand r-p-m. Guys, you're the one's that put this together. What do you think?
(John)>> It's amazing. You go from the whole, it was on the dyno before, we tear down and build it back up. It's an awesome experience. It's great to see on the dyno, making more power.
(Pat)>> What do you think?
(Jack)>> Looks great. It's running great. As you can see by the numbers, the improvements we tried to make, they're happening. So I'd say pretty good.
(Frankie)>> Yeah! Well, guys had a huge part in that. We honestly, we really didn't do too much. You guys did most of it.
(Pat)>> I didn't do anything.
(Frankie)>> This is the engine that you guys built.
(Pat)>> We'd like to thank John and Jack for their work on this build. Two guys who are dedicated to their profession.
(Jack)>> The only thing you can control, is you attitude and your effort. There's resources. There's tools. There's people that are willing to help you. You just have to put in the effort in order to do so.
(Frankie)>> If you like what you saw here, go to powernation t-v dot com for more.
