Engine Power Featured Projects
Engine Power Builds
Want more content like this?
Join the PowerNation Email NewsletterEpisode Transcript
(Pat)>> You're watching Powernation!
(Pat)>> It's easy to find the beauty in anything but first you've got to give it some love. Plus when it comes to learning about cars there's no replacement for hands on experience. [ MUSIC ]
(Pat)>> Beauty they say is in the eye of the beholder. Even though Tim Lindsey sees the beauty in his 1979 Ford Ranchero he understands the reactions other drivers give him from time to time.
(Tim)>> When I'm driving it home from work and I'm on the interstate and I pass cars they give me secondary looks cause they can't believe something like this is passing them on the interstate. It's pretty neat to see the expressions when you pull up to a stop sign. And lots of thumbs up, and a lot of people don't know what it is. It gets lots of looks, lots of looks.
(Pat)>> When Tim bought the Ranchero it had been parked under a tree mostly likely to end up in a scrap yard.
(Tim)>> The car was sitting in a field unwanted and I felt like I was gonna save a car, and when I did save the car then I kinda fell in love with it because it's ugly. Nobody I know likes it. I love it!
(Pat)>> If it sounds like this old Ford means a lot to Tim it does. During the time when he was battling cancer working on the Ranchero gave him joy and something to focus positive energy on. He tackled problem after problem but the list of car troubles just seemed endless.
(Tim)>> There's gotten so many small things wrong with it. It's overwhelming and I don't know which one to try to fix first. This thing needs some love.
(Pat)>> Tim told us the Ford had a radiator leak and some carburetor issues. We ordered what we needed from Rock Auto dot com's website and headed his way.
(Brandon)>> Pat you like how I materialize every time you need help?
(Pat)>> I really appreciate that. That's a little heavy for you. I don't know if you can get that little guy. [ MUSIC ]
(Brandon)>> We've got the chiropractor on speed dial right?
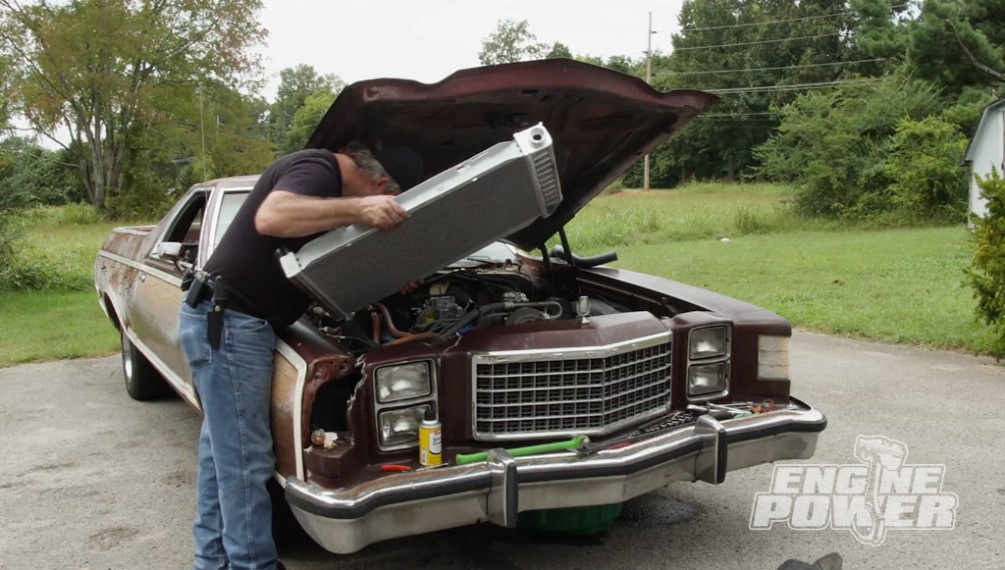
(Pat)>> The plan on this one the biggest issue, cooling system right? I can see there's a leak right here. See how it's all green and it's wet right there. At the top it's not bad but this is, because it sat in a field, a lot of original parts still on it. What's cool about this it's got the original wing nut on it. We're gonna get this man running though. He wants to drive this thing to work and he wants something that's reliable. So taking a look at the 351 Windsor under the hood we found evidence of the faulty carb, some fuel pooled on top of the intake manifold. Definitely something to be taken care of both for performance and for safety sake. [ metal clanging ] [ drill humming ] [ MUSIC ]
(Pat)>> Watch your face! The coolant hoses felt spongy and looked worn out. [ MUSIC ] There he goes. Once we got the radiator out the fluid damage was evident. A three core aluminum radiator from Rock Auto dot com big upgrade. This one's way nicer and way lighter.
(Brandon)>> You can see all the layers of the hose actually deteriorated. [ MUSIC ] There's a little corrosion on the water pump neck. You can see this one is just about as deteriorated as all the rest of them.
(Pat)>> We brought new hoses and worm gear clamps for all the connections. The transmission line fittings will be reused after being coated with some thread sealant. [ MUSIC ] Try that. After giving the alternator a little persuasion the old belts come right off. [ MUSIC ] The new belts are premium quality o-e-m replacements. Having an extra set of hands makes all the difference when you need to hold the belts under tension while tightening fasteners. [ MUSIC ] I got it, I got it! There's not much reason to diagnose or rebuild a worn out carburetor when you can find an affordable re-man from Rock Auto dot com. The needed parts transfer easily to the new carb and it's ready to drop on. The Autoline rebuilt Motorcraft two barrel is remanufactured back to brand new condition just like it came from Detroit in 1979. A big radiator upgrade helps get the Ranchero back on the road. Plus if it's got anything to do with automobiles you can learn about it at Wyotech.
(Pat)>> We're almost there. We're on the home stretch. The Ranchero spark plugs are too dark. A sure sign of too much fuel in the combustion chamber. With a fresh clean running carb installed a new set of spark plugs is a must. [ MUSIC ] Another easy effective ignition upgrade is a new distributor rotor, cap, and spark plug wires. We'll use dielectric grease inside the boots to repel water and prevent corrosion. If you're unfamiliar with your engine's firing order it's a smart idea to replace the wires one at a time. This ensures you maintain your engine's firing order. We are very familiar with the Windsor power plant. So we'll change them all at once. Honestly I don't mind a ground being exposed but a hot that makes me nervous as all get out. So we're gonna change this without hopefully shocking myself. It doesn't take long to replace frayed or damaged battery cables, and the safety benefit is huge. We'll let the terminal soak in battery cleaner while we finish up our work. Next a new water pump hose. [ MUSIC ] Before installation always compare your new radiator to the old one making sure its dimensions, coolant hose connections, and transmission line connections are identical. Our new one is thicker. So we may have to modify the shroud a little but that's a small price to pay for increased performance and longevity. If you've got line wrenches use them. It keeps you from rounding off difficult to replace fittings. [ MUSIC ] With a small cutout at the bottom of the fan shroud it fits into place perfectly. It's followed by the radiator fan. Next the shroud is secured to the radiator using the factory bolts. When you're in the middle of wrenching the last thing you want to do is go to the auto parts store. We got 50/50 pre-mixed anti-freeze along with the rest of our order. When filling the radiator always put a drain pain under it just in case this happens.
(Brandon)>> Whoops! [ MUSIC ] There's a bucket!
(Pat)>> Finally a new cable is tightened to the hot side of the battery. You happy?
(Brandon)>> Yeah, got everything buttoned up, carburetor, radiator.
(Pat)>> Now it's gonna take a little bit to prime up because we emptied the gas out, see what happens here. Alright clear?
(Brandon)>> Clear. [ engine cranking ] [ MUSIC ]
(Pat)>> We need the battery charger. [ engine starting ] [ engine idling ]
(Pat)>> That's better. Dude that's nice!
(Brandon)>> Yeah it's just burning a little oil off the manifold.
(Pat)>> That's gonna be just from sitting. I like it. After a day's work the 351 runs great. [ engine revving ]
(Pat)>> I like seeing them saved. I don't like seeing something just left for dead, especially with something you know it's gonna run once you put some parts in it. Tim let me take a little drive around the neighborhood. The best way to describe the experience, smooth and stylish. Thanks to Rock Auto dot com this Ranchero will be on the road for years to come.
(Tim)>> With you guys here to help me fix this thing I will drive it to work first thing in the morning and show all the guys at work that she's still alive.
(Pat)>> Up next from text book to torque wrench, prepare yourself for an exciting automotive career. Plus a quick, easy, and cheap way to help diagnose your engine.
(Pat)>> Hey everyone we have caught up with Eric Paul from Wyotech. They have a bunch of cool stuff going on. So it's good to talk to him. Eric how are things going out there.
(Eric)>> Things are going pretty darn good.
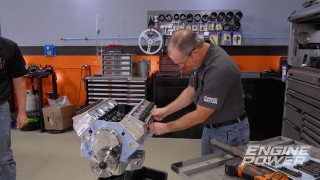
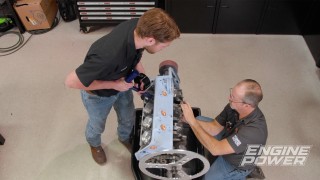
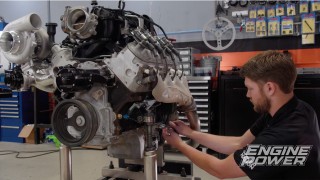
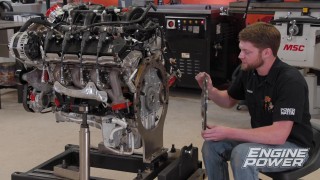
(Pat)>> You guys always have a lot of cool stuff going on out there and we caught you mid-way through a small block Ford build, and I know you guys do a lot of hands on out there. Tell me a little bit about the Wyotech course of study as a whole and then what you do.
(Eric)>> So basically we have our core programs, which are gonna include automotive, diesel, and collision refinishing, and that gets the students the basic hands on entry level position requirements to go to a job. We also have our specialties program which will allow us to take whatever knowledge that they learned in core and enhance that into even more knowledge or a more advanced level of learning. So in the specialties program we literally have chassis fabrication, applied service management. If they want to become a service advisor. We also have our high performance powertrains which the prerequisite for that would be to either be student from diesel or auto with a basic engine knowledge, and then we also have our street rod department. Metal shaping, custom painting, and then we have our trim and upholstery department.
(Pat)>> It looks like you had a really cool project going on with this small block Ford. We are small block Ford lovers around here. Tell me a little bit about the process and how you teach, how things go together, and what it takes to put something together right the first time.
(Eric)>> So basically when we start this high performance powertrains program out with a basic engine r&r, and this could be on any modern vehicle, and once they get the lower end done then we're gonna start dressing it with the heads, the intake, figuring out which ignition system we want. Do we want it fuel injected, do we want it carbureted, and we'll build up to that point. So this engine really was no different aside of the fact that we started with preassembled lower end.
(Pat)>> What qualities make up a good Wyotech student?
(Eric)>> Drive, drive's probably the best thing that they could have. You've got to want it, and if you want it bad enough there is so much knowledge, and capabilities, and infrastructure, and tooling around here.
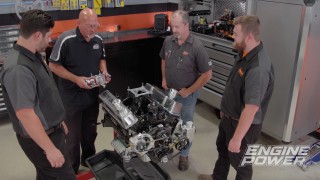
(Pat)>> Your facility looks spectacular. It looks like you have a lot of room to work in, and you have some great stuff around. Tell me a little bit the size of the facility there that we were looking at.
(Eric)>> So our specialties building is approximately 70,000 square feet of working space. Granted some of that is taken up by a classroom that's capable of holding of up to about 50 students. Because this is such a precision class we try to keep those classes minimized to a smaller class than what it's even capable of holding just so we can provide enough hands on with the student to make sure it's done right. We've got three dynos in there, an engine dyno, two chassis dynos, an all-wheel drive dyno, any and every tool you could imagine as far as engine building.
(Pat)>> Tell me a little bit about yourself. You obviously have a lot of experience. You've been there a long time. Tell me about what you've done and what brought you to that place.
(Eric)>> I've been here over 15 years. I came here in 2005. I've probably been in the industry at that point in time about 17 and a half years but I always had a passion for not only making things cool but making them go fast as well, but I was still fascinated with cars because we all know that there's a lot more to a car than most people give it credit for. So it's always intrigued me. It's kinda been my passion all along. So I really feed for this kind of stuff.
(Pat)>> What feeling do you get from teaching though? Doing it's one thing, teaching somebody else. What do you get out of the teaching aspect of it?
(Eric)>> I love seeing that light bulb come on. When a student totally has no idea what you're talking about but you can finally figure out a way to show him and teach him how to do that, and then he finally figures it out. The excitement that you get to see is worth it. Obviously the opportunities are endless but you only get out of it what you put into it, and if a student comes here with an open mind willing to learn and forget about what they think they know and maybe learn a different angle, as far what they can get out of it after they leave here if they've applied themselves 150 percent while they're here the options are endless when they get out to the field.
(Pat)>> I really appreciate the time to talk with us. Hopefully we get to come out there at some point.
(Eric)>> Yeah I hope you guys do and it's been a pleasure working with you on this project.
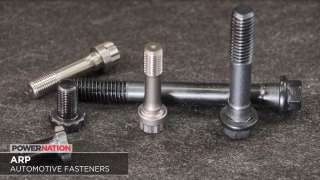
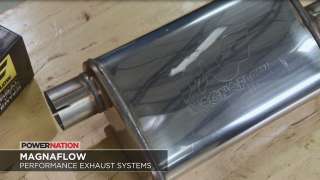
(Pat)>> Very good, we appreciate it as well. Thank you very much for everything. You'll notice that we're always using ARP fasteners in our engine builds no matter the power level or application, and there is a great reason for this. They are precisely made using the most advanced technology in both metallurgy and production. ARP only uses premium materials and several proprietary alloys. Depending on the material used the fasteners are initially shaped by either a hot or cold forging process, which is called heading. Many ARP fasteners undergo a fillet roll process during manufacturing. It work hardens the fillet radius of the fastener's head to increase its strength. The grain structure of the material is tight for superior strength and fatigue resistance. The fillet roll forming process after heat treating and finish grinding increase the fatigue strength up to 20 times higher than fasteners that aren't fillet rolled. When you put a lot of time, money, and effort into your engine build you always want to use quality fasteners. Visit ARP dash bolts dot com to learn more. When you hear the name Magnaflow you think of that smooth, deep exhaust tone. Whether we're running a cat-back setup on our Challenger SRT, frying the tires on the Triple Threat Camaro, or trying out their new customizable xMOD series on this 1,000 horsepower Ghoul, there's a Magnaflow exhaust underneath it all. They offer direct fit vehicle specific kits for a massive variety of vehicles as well as universal mufflers and builders kits to fabricate top quality stainless steel exhaust for any project imaginable. Magnaflow invests deeply in research and development to create reliable high performance exhaust systems. As they put it, if it doesn't produce power we don't make it. You can always chat with a technician and find out more at Magnaflow dot com. You can learn a lot about how your engine is running just by taking a look inside your oil filter.
(Pat)>> You've seen us run a lot of our engines on our dyno and we do a lot of testing here at the shop. What you don't always see us do but we do every time is cut the oil filter apart after our running to see if we're having any sort of problem with the engine. The oil filter's job is to trap debris, and if your engine is having a problem the first indicator will be caught in the oil filter. I'm gonna show you how to cut one apart and see what's inside one and how to look for damage. Depending on what you have on hand there are several different ways to get a filter cut apart, from the absolutely brutal to the very precise, and here are a few tools that will do it. What I meant by brutal is you can use either a sawz-all or a hack saw to get the filter apart. Now obviously you have to drain the oil first and clamp the filter in some sort of vice to cut it apart. What the problem is is sawing on it like this will introduce more debris into the filter and cloud what you're trying to look, but they will work if you have them. On the opposite end of the spectrum you can buy a specifically designed filter cutter. Here's a couple of different types. These precisely cut the filter apart and put a minimum of material into the can. To show you what kind of innards an oil filter has I've already gone ahead and cut one apart to show you what's inside. When you get the filter open it's pretty simple on the inside. The top contains an anti-drain back valve to keep oil in the engine after it's shutoff, and the paper filter element is held on a steel spool that has inner perforations. The oil passes through a paper element. Now I've gone ahead and cut it off the spool so we can see inside. What we are looking for is debris inside these pleats. This is out of a running engine that was thrashed on the dyno for a very long time, and if there is any debris going through the engine it would be evident in the pleats. Sometimes you'll see gasket material, you'll see bearing material, sometimes a little bit of silicone, but what we're looking for are very large chunks or very obvious metal debris. This one looks extremely clean. To show how easy it is to cut one apart let's try one. This is very similar to cutting off a brake line or a piece of copper pipe. Take your time and don't screw in the cutter blade too tight all at once. It will bind up and make the job more difficult. It will go smooth if you just make easy revolutions and eventually it comes right off. In racing applications it's very common to look inside the filter on a regular basis. So instead of having to cut one apart every time it's easier to get a cleanable filter. This particular filter has a convenient drain in the bottom, and as it comes apart you can see that it has a steel filter element instead of a paper one, which makes it easier to inspect and is reusable over and over again. So no matter whether it's a racing application or simply changing your oil for regular maintenance it's always a good idea to cut your filter open and look inside it to see the condition of your engine. For more information on anything you've seen on today's show visit Powernation TV dot com. [ MUSIC ] Recently we paid a visit to Kaase Racing engines in Winder, Georgia. If you're looking to make big power with a big block Ford Jon Kaase and his team can help. They built us a 598 cubic inch engine that made 1,108 ponies and 933 pound feet of torque. One of the featured pieces on this engine was the Kaase SR-71 cylinder head, which was designed specifically for high horsepower applications. Jon shared his wisdom on the subject of cylinder head flow and now we'd like to share it with you. We're not real big air flow guys. We more like what we see on the dyno and the air flow whatever it takes to do that, but some people that are really smart have told me that the air flow and fuel through this port is over 400 miles an hour. So let's think about that for a minute. It's pretty fast. So there's a lot of mass going through there. Even dry air has weight but what's in here also seven percent of it is fuel, fuel vapor. So it has a lot of weight, and when you have a larger cubic inch engine and there's 400 miles an hour worth of air and fuel going through it it has to make turns. In a perfect it'd be straight but you have to make a turn, and so the faster it's going the harder time it has making turns, but at the same time speed is your friend as far as inertia, and filling the cylinder at the end of the cycle, and all that. So you don't want slow air, which would be a really big port with the same amount of flow it would be slow air. Slow air's not gonna continue to fill the port. So you have to have it fast in some places, slow in some places. On a head like this fast down the middle of the port, when it goes to make its right turn down into the bore it better get bigger because if it gets bigger it slows down and it can make the turn. It's like if you're in your car and you're driving down the road and you go to pull into the driveway you don't speed up right? The same thing here. Everything in there has weight to it. So when it goes around a corner it wants to throw the fuel out of the air if it goes too fast cause the fuel's gonna go the long distance cause it weighs more than the air. If you have a port that's a little too small and you're trying to flow a lot of air speed through a big cubic inch engine what we see happening is the air and the fuel can separate again, and then all of a sudden you'll have an engine where it detonates and it burns the piston up or something. You really don't know what happened, and you come back and make the port a little bit bigger in this one area and all of a sudden it goes away. When you're making bigger cubic inch motors and you're trying to make advancements in the head. You want to make it bigger in the right place but not so big that it slows the air down.
(Pat)>> Well Jon I want to thank you for having us down and talking air flow, and science, and engine building. It was very much appreciated.
(Jon)>> Thanks, it was a pleasure having you here.
Show Full Transcript
(Pat)>> It's easy to find the beauty in anything but first you've got to give it some love. Plus when it comes to learning about cars there's no replacement for hands on experience. [ MUSIC ]
(Pat)>> Beauty they say is in the eye of the beholder. Even though Tim Lindsey sees the beauty in his 1979 Ford Ranchero he understands the reactions other drivers give him from time to time.
(Tim)>> When I'm driving it home from work and I'm on the interstate and I pass cars they give me secondary looks cause they can't believe something like this is passing them on the interstate. It's pretty neat to see the expressions when you pull up to a stop sign. And lots of thumbs up, and a lot of people don't know what it is. It gets lots of looks, lots of looks.
(Pat)>> When Tim bought the Ranchero it had been parked under a tree mostly likely to end up in a scrap yard.
(Tim)>> The car was sitting in a field unwanted and I felt like I was gonna save a car, and when I did save the car then I kinda fell in love with it because it's ugly. Nobody I know likes it. I love it!
(Pat)>> If it sounds like this old Ford means a lot to Tim it does. During the time when he was battling cancer working on the Ranchero gave him joy and something to focus positive energy on. He tackled problem after problem but the list of car troubles just seemed endless.
(Tim)>> There's gotten so many small things wrong with it. It's overwhelming and I don't know which one to try to fix first. This thing needs some love.
(Pat)>> Tim told us the Ford had a radiator leak and some carburetor issues. We ordered what we needed from Rock Auto dot com's website and headed his way.
(Brandon)>> Pat you like how I materialize every time you need help?
(Pat)>> I really appreciate that. That's a little heavy for you. I don't know if you can get that little guy. [ MUSIC ]
(Brandon)>> We've got the chiropractor on speed dial right?
(Pat)>> The plan on this one the biggest issue, cooling system right? I can see there's a leak right here. See how it's all green and it's wet right there. At the top it's not bad but this is, because it sat in a field, a lot of original parts still on it. What's cool about this it's got the original wing nut on it. We're gonna get this man running though. He wants to drive this thing to work and he wants something that's reliable. So taking a look at the 351 Windsor under the hood we found evidence of the faulty carb, some fuel pooled on top of the intake manifold. Definitely something to be taken care of both for performance and for safety sake. [ metal clanging ] [ drill humming ] [ MUSIC ]
(Pat)>> Watch your face! The coolant hoses felt spongy and looked worn out. [ MUSIC ] There he goes. Once we got the radiator out the fluid damage was evident. A three core aluminum radiator from Rock Auto dot com big upgrade. This one's way nicer and way lighter.
(Brandon)>> You can see all the layers of the hose actually deteriorated. [ MUSIC ] There's a little corrosion on the water pump neck. You can see this one is just about as deteriorated as all the rest of them.
(Pat)>> We brought new hoses and worm gear clamps for all the connections. The transmission line fittings will be reused after being coated with some thread sealant. [ MUSIC ] Try that. After giving the alternator a little persuasion the old belts come right off. [ MUSIC ] The new belts are premium quality o-e-m replacements. Having an extra set of hands makes all the difference when you need to hold the belts under tension while tightening fasteners. [ MUSIC ] I got it, I got it! There's not much reason to diagnose or rebuild a worn out carburetor when you can find an affordable re-man from Rock Auto dot com. The needed parts transfer easily to the new carb and it's ready to drop on. The Autoline rebuilt Motorcraft two barrel is remanufactured back to brand new condition just like it came from Detroit in 1979. A big radiator upgrade helps get the Ranchero back on the road. Plus if it's got anything to do with automobiles you can learn about it at Wyotech.
(Pat)>> We're almost there. We're on the home stretch. The Ranchero spark plugs are too dark. A sure sign of too much fuel in the combustion chamber. With a fresh clean running carb installed a new set of spark plugs is a must. [ MUSIC ] Another easy effective ignition upgrade is a new distributor rotor, cap, and spark plug wires. We'll use dielectric grease inside the boots to repel water and prevent corrosion. If you're unfamiliar with your engine's firing order it's a smart idea to replace the wires one at a time. This ensures you maintain your engine's firing order. We are very familiar with the Windsor power plant. So we'll change them all at once. Honestly I don't mind a ground being exposed but a hot that makes me nervous as all get out. So we're gonna change this without hopefully shocking myself. It doesn't take long to replace frayed or damaged battery cables, and the safety benefit is huge. We'll let the terminal soak in battery cleaner while we finish up our work. Next a new water pump hose. [ MUSIC ] Before installation always compare your new radiator to the old one making sure its dimensions, coolant hose connections, and transmission line connections are identical. Our new one is thicker. So we may have to modify the shroud a little but that's a small price to pay for increased performance and longevity. If you've got line wrenches use them. It keeps you from rounding off difficult to replace fittings. [ MUSIC ] With a small cutout at the bottom of the fan shroud it fits into place perfectly. It's followed by the radiator fan. Next the shroud is secured to the radiator using the factory bolts. When you're in the middle of wrenching the last thing you want to do is go to the auto parts store. We got 50/50 pre-mixed anti-freeze along with the rest of our order. When filling the radiator always put a drain pain under it just in case this happens.
(Brandon)>> Whoops! [ MUSIC ] There's a bucket!
(Pat)>> Finally a new cable is tightened to the hot side of the battery. You happy?
(Brandon)>> Yeah, got everything buttoned up, carburetor, radiator.
(Pat)>> Now it's gonna take a little bit to prime up because we emptied the gas out, see what happens here. Alright clear?
(Brandon)>> Clear. [ engine cranking ] [ MUSIC ]
(Pat)>> We need the battery charger. [ engine starting ] [ engine idling ]
(Pat)>> That's better. Dude that's nice!
(Brandon)>> Yeah it's just burning a little oil off the manifold.
(Pat)>> That's gonna be just from sitting. I like it. After a day's work the 351 runs great. [ engine revving ]
(Pat)>> I like seeing them saved. I don't like seeing something just left for dead, especially with something you know it's gonna run once you put some parts in it. Tim let me take a little drive around the neighborhood. The best way to describe the experience, smooth and stylish. Thanks to Rock Auto dot com this Ranchero will be on the road for years to come.
(Tim)>> With you guys here to help me fix this thing I will drive it to work first thing in the morning and show all the guys at work that she's still alive.
(Pat)>> Up next from text book to torque wrench, prepare yourself for an exciting automotive career. Plus a quick, easy, and cheap way to help diagnose your engine.
(Pat)>> Hey everyone we have caught up with Eric Paul from Wyotech. They have a bunch of cool stuff going on. So it's good to talk to him. Eric how are things going out there.
(Eric)>> Things are going pretty darn good.
(Pat)>> You guys always have a lot of cool stuff going on out there and we caught you mid-way through a small block Ford build, and I know you guys do a lot of hands on out there. Tell me a little bit about the Wyotech course of study as a whole and then what you do.
(Eric)>> So basically we have our core programs, which are gonna include automotive, diesel, and collision refinishing, and that gets the students the basic hands on entry level position requirements to go to a job. We also have our specialties program which will allow us to take whatever knowledge that they learned in core and enhance that into even more knowledge or a more advanced level of learning. So in the specialties program we literally have chassis fabrication, applied service management. If they want to become a service advisor. We also have our high performance powertrains which the prerequisite for that would be to either be student from diesel or auto with a basic engine knowledge, and then we also have our street rod department. Metal shaping, custom painting, and then we have our trim and upholstery department.
(Pat)>> It looks like you had a really cool project going on with this small block Ford. We are small block Ford lovers around here. Tell me a little bit about the process and how you teach, how things go together, and what it takes to put something together right the first time.
(Eric)>> So basically when we start this high performance powertrains program out with a basic engine r&r, and this could be on any modern vehicle, and once they get the lower end done then we're gonna start dressing it with the heads, the intake, figuring out which ignition system we want. Do we want it fuel injected, do we want it carbureted, and we'll build up to that point. So this engine really was no different aside of the fact that we started with preassembled lower end.
(Pat)>> What qualities make up a good Wyotech student?
(Eric)>> Drive, drive's probably the best thing that they could have. You've got to want it, and if you want it bad enough there is so much knowledge, and capabilities, and infrastructure, and tooling around here.
(Pat)>> Your facility looks spectacular. It looks like you have a lot of room to work in, and you have some great stuff around. Tell me a little bit the size of the facility there that we were looking at.
(Eric)>> So our specialties building is approximately 70,000 square feet of working space. Granted some of that is taken up by a classroom that's capable of holding of up to about 50 students. Because this is such a precision class we try to keep those classes minimized to a smaller class than what it's even capable of holding just so we can provide enough hands on with the student to make sure it's done right. We've got three dynos in there, an engine dyno, two chassis dynos, an all-wheel drive dyno, any and every tool you could imagine as far as engine building.
(Pat)>> Tell me a little bit about yourself. You obviously have a lot of experience. You've been there a long time. Tell me about what you've done and what brought you to that place.
(Eric)>> I've been here over 15 years. I came here in 2005. I've probably been in the industry at that point in time about 17 and a half years but I always had a passion for not only making things cool but making them go fast as well, but I was still fascinated with cars because we all know that there's a lot more to a car than most people give it credit for. So it's always intrigued me. It's kinda been my passion all along. So I really feed for this kind of stuff.
(Pat)>> What feeling do you get from teaching though? Doing it's one thing, teaching somebody else. What do you get out of the teaching aspect of it?
(Eric)>> I love seeing that light bulb come on. When a student totally has no idea what you're talking about but you can finally figure out a way to show him and teach him how to do that, and then he finally figures it out. The excitement that you get to see is worth it. Obviously the opportunities are endless but you only get out of it what you put into it, and if a student comes here with an open mind willing to learn and forget about what they think they know and maybe learn a different angle, as far what they can get out of it after they leave here if they've applied themselves 150 percent while they're here the options are endless when they get out to the field.
(Pat)>> I really appreciate the time to talk with us. Hopefully we get to come out there at some point.
(Eric)>> Yeah I hope you guys do and it's been a pleasure working with you on this project.
(Pat)>> Very good, we appreciate it as well. Thank you very much for everything. You'll notice that we're always using ARP fasteners in our engine builds no matter the power level or application, and there is a great reason for this. They are precisely made using the most advanced technology in both metallurgy and production. ARP only uses premium materials and several proprietary alloys. Depending on the material used the fasteners are initially shaped by either a hot or cold forging process, which is called heading. Many ARP fasteners undergo a fillet roll process during manufacturing. It work hardens the fillet radius of the fastener's head to increase its strength. The grain structure of the material is tight for superior strength and fatigue resistance. The fillet roll forming process after heat treating and finish grinding increase the fatigue strength up to 20 times higher than fasteners that aren't fillet rolled. When you put a lot of time, money, and effort into your engine build you always want to use quality fasteners. Visit ARP dash bolts dot com to learn more. When you hear the name Magnaflow you think of that smooth, deep exhaust tone. Whether we're running a cat-back setup on our Challenger SRT, frying the tires on the Triple Threat Camaro, or trying out their new customizable xMOD series on this 1,000 horsepower Ghoul, there's a Magnaflow exhaust underneath it all. They offer direct fit vehicle specific kits for a massive variety of vehicles as well as universal mufflers and builders kits to fabricate top quality stainless steel exhaust for any project imaginable. Magnaflow invests deeply in research and development to create reliable high performance exhaust systems. As they put it, if it doesn't produce power we don't make it. You can always chat with a technician and find out more at Magnaflow dot com. You can learn a lot about how your engine is running just by taking a look inside your oil filter.
(Pat)>> You've seen us run a lot of our engines on our dyno and we do a lot of testing here at the shop. What you don't always see us do but we do every time is cut the oil filter apart after our running to see if we're having any sort of problem with the engine. The oil filter's job is to trap debris, and if your engine is having a problem the first indicator will be caught in the oil filter. I'm gonna show you how to cut one apart and see what's inside one and how to look for damage. Depending on what you have on hand there are several different ways to get a filter cut apart, from the absolutely brutal to the very precise, and here are a few tools that will do it. What I meant by brutal is you can use either a sawz-all or a hack saw to get the filter apart. Now obviously you have to drain the oil first and clamp the filter in some sort of vice to cut it apart. What the problem is is sawing on it like this will introduce more debris into the filter and cloud what you're trying to look, but they will work if you have them. On the opposite end of the spectrum you can buy a specifically designed filter cutter. Here's a couple of different types. These precisely cut the filter apart and put a minimum of material into the can. To show you what kind of innards an oil filter has I've already gone ahead and cut one apart to show you what's inside. When you get the filter open it's pretty simple on the inside. The top contains an anti-drain back valve to keep oil in the engine after it's shutoff, and the paper filter element is held on a steel spool that has inner perforations. The oil passes through a paper element. Now I've gone ahead and cut it off the spool so we can see inside. What we are looking for is debris inside these pleats. This is out of a running engine that was thrashed on the dyno for a very long time, and if there is any debris going through the engine it would be evident in the pleats. Sometimes you'll see gasket material, you'll see bearing material, sometimes a little bit of silicone, but what we're looking for are very large chunks or very obvious metal debris. This one looks extremely clean. To show how easy it is to cut one apart let's try one. This is very similar to cutting off a brake line or a piece of copper pipe. Take your time and don't screw in the cutter blade too tight all at once. It will bind up and make the job more difficult. It will go smooth if you just make easy revolutions and eventually it comes right off. In racing applications it's very common to look inside the filter on a regular basis. So instead of having to cut one apart every time it's easier to get a cleanable filter. This particular filter has a convenient drain in the bottom, and as it comes apart you can see that it has a steel filter element instead of a paper one, which makes it easier to inspect and is reusable over and over again. So no matter whether it's a racing application or simply changing your oil for regular maintenance it's always a good idea to cut your filter open and look inside it to see the condition of your engine. For more information on anything you've seen on today's show visit Powernation TV dot com. [ MUSIC ] Recently we paid a visit to Kaase Racing engines in Winder, Georgia. If you're looking to make big power with a big block Ford Jon Kaase and his team can help. They built us a 598 cubic inch engine that made 1,108 ponies and 933 pound feet of torque. One of the featured pieces on this engine was the Kaase SR-71 cylinder head, which was designed specifically for high horsepower applications. Jon shared his wisdom on the subject of cylinder head flow and now we'd like to share it with you. We're not real big air flow guys. We more like what we see on the dyno and the air flow whatever it takes to do that, but some people that are really smart have told me that the air flow and fuel through this port is over 400 miles an hour. So let's think about that for a minute. It's pretty fast. So there's a lot of mass going through there. Even dry air has weight but what's in here also seven percent of it is fuel, fuel vapor. So it has a lot of weight, and when you have a larger cubic inch engine and there's 400 miles an hour worth of air and fuel going through it it has to make turns. In a perfect it'd be straight but you have to make a turn, and so the faster it's going the harder time it has making turns, but at the same time speed is your friend as far as inertia, and filling the cylinder at the end of the cycle, and all that. So you don't want slow air, which would be a really big port with the same amount of flow it would be slow air. Slow air's not gonna continue to fill the port. So you have to have it fast in some places, slow in some places. On a head like this fast down the middle of the port, when it goes to make its right turn down into the bore it better get bigger because if it gets bigger it slows down and it can make the turn. It's like if you're in your car and you're driving down the road and you go to pull into the driveway you don't speed up right? The same thing here. Everything in there has weight to it. So when it goes around a corner it wants to throw the fuel out of the air if it goes too fast cause the fuel's gonna go the long distance cause it weighs more than the air. If you have a port that's a little too small and you're trying to flow a lot of air speed through a big cubic inch engine what we see happening is the air and the fuel can separate again, and then all of a sudden you'll have an engine where it detonates and it burns the piston up or something. You really don't know what happened, and you come back and make the port a little bit bigger in this one area and all of a sudden it goes away. When you're making bigger cubic inch motors and you're trying to make advancements in the head. You want to make it bigger in the right place but not so big that it slows the air down.
(Pat)>> Well Jon I want to thank you for having us down and talking air flow, and science, and engine building. It was very much appreciated.
(Jon)>> Thanks, it was a pleasure having you here.
