Engine Power Featured Projects
Engine Power Builds
Want more content like this?
Join the PowerNation Email NewsletterParts Used In This Episode
ARP
Balancer Bolts
Cloyes Gear and Products
Quick Button Two-Piece Timing Cover
Cometic Gasket, Inc.
Gaskets
Comp Cams
Hydraulic Roller Tie Bar Lifters
Comp Cams
Push Rods
Goodson Shop Supplies
Magnetic Crack Detector
Holley
02 Oxygen Sensor
Matco Tools
MATCO Tools are the Official Tool Supplier to PowerNation
MSD Ignition
Lockout Distributor
MSD Ignition
Timing Set
Permatex
Anti-Seize Lubricant
Permatex
Right Stuff Silicone
Sea Foam
Sea Foam
Sunnen Products Company
SV-15 Hones
The Industrial Depot
Tools, Hardware, Shop Supplies
Trick Flow Specialties
Cylinder Heads Super 23
Trick Flow Specialties
Intake Manifold Dual Plane Street Burner
Trick Flow Specialties
Timing Set
Episode Transcript
(Mike)>> You're watching Powernation.
(Mike)>> This '69 Camaro is a beauty but it needs a stronger power plant. [ Music ]
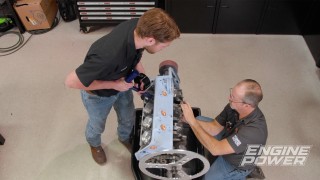
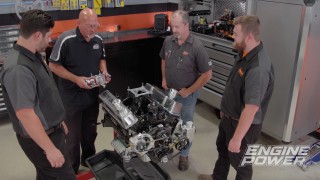
(Mike)>> Hey everybody, welcome to Engine Power. Today we're getting a delivery from the Detroit Muscle guys. Now they've been down working on a project for a sweepstakes giveaway that one of you guys can win.
(Pat)>> And Mike and I have been given the task to upgrade this power plant to make it the ultimate cruiser.
(Tommy)>> Well fellas we brought y'all a jewel.
(Pat)>> This makes me very happy to see something like this in this complete state.
(Tommy)>> Why does it make you so happy?
(Pat)>> Because we rarely get to say that we've ran something as it came out of a car. So with rams horns on it, that distributor, kinda excited to see what it will make for power just like it came out of the car.
(Mike)>> How did it feel driving the car?
(Tommy)>> It could have used a tune up, that kind of deal. Other than that it just drove like a stock 350.
(Marc)>> It needed a driver mod I can tell you that.
(Tommy)>> Well the biggest problem was the squealing from the passenger side.
(Marc)>> It had plenty of power though. I mean it'd ride out. You gonna run it with the carb and the air cleaner?
(Pat)>> Run it just like it is. Now because it ran on the chassis dyno it'll be interesting to see the loss from engine dyno to chassis dyno.
(Mike)>> Are we gonna leave the fan on it?
(Pat)>> Heck yeah! Why wouldn't a guy? For safety reasons we're not gonna be standing in the room. I think it'll be fine.
(Tommy)>> What kind of power numbers do you reckon this thing's gonna make?
(Pat)>> I don't know what they made stock. The engines, because they're so easy to change on these cars. I don't know if this is the original engine. It may or may not be the original engine from the car. A lot of times some have said this is a 350 and it's a 305. Just stuff like that all the time. If it made in the 200's I'd be impressed.
(Marc)>> Okay so let's talk about where we're going with it. We're talking about dynoing it the way it is but what about the changes you guys are gonna make then?
(Pat)>> Well we have a top end for it. We have some spiffy heads, a better intake, electronical injection system. I think we're just gonna modernize the car. Make it run a little bit more consistently better and easier to drive. This is a giveaway car. So these people will hopefully just cruise this thing until the wheels fall off because that's what it's going to be designed for.
(Tommy)>> Yeah perfect! We weren't looking for some kind of big stump puller. We just wanted something a little more peppy and reliable.
(Mike)>> Sounds a little better!
(Marc)>> Is there a way that you guys can reuse the factory air cleaner just cause it's so nice? Like in the end or do you think it may not be big enough?
(Pat)>> It may not be big enough. That's your air hole right there. We'll dyno it. We'll see what it does. It'll fit what we're gonna be putting on it okay but the problem with it is if it kills too much power you're defeating the purpose of putting all these cool parts on. Regardless of the fact we are gonna run it just like it is before we tear it apart.
(Marc)>> Awesome thanks guys.
(Tommy)>> Let y'all get at it.
(Pat)>> I love it. [ Music ] On this casting number right here that's cleaned off, 393-23-88. I looked that up. That is a '69 only. So this is quite possibly the original engine.
(Mike)>> Or at least they were smart enough to find one for it.
(Pat)>> This car is a real RS/SS. Who knows the history of this thing?
(Mike)>> We want to monitor the air/fuel ratio. So a hole is drilled in the exhaust pipe and a Holley O-2 sensor boss is strapped on. You ready for this?
(Pat)>> Light it! [ engine revving ]
(Pat)>> Get out of it. The thing's rich as all get out.
(Mike)>> Yeah, real rich.
(Pat)>> It wouldn't have anything to do with that air cleaner on there looking like it's about the size of a quarter on the entry.
(Mike)>> Well it is about the size of a quarter. I wouldn't even give it silver dollar status. Because of how rich it was and how it ran on the dyno go pull the air cleaner off. [ Music ] [ engine revving ]
(Pat)>> A little choppy!
(Mike)>> Yeah a little bit but still way better, and three and a half points higher in air/fuel. 243 on power, 311 pound feet, 3,400.
(Pat)>> It doesn't seem to be running as good as it ran when they brought it in.
(Mike)>> They did go and beat the fire out of it after they chassis dynoed it, and it's got quite a bit of blow by now.
(Pat)>> It did amazing clean pulls on the chassis dyno.
(Mike)>> 227 to 231 I think.
(Pat)>> I can't remember what it was. Somewhere in there.
(Mike)>> Let's make another hit. Same setup, same step.
(Pat)>> It's definitely way leaner.
(Mike)>> Yes! [ engine revving ]
(Mike)>> Cleaned right up.
(Pat)>> Maybe it had some dirt dobbers or something like that? There we go!
(Mike)>> 247 and 311. It likes that 311 number.
(Pat)>> It's scaring 250 on power, 311 on torque. Does it have oil pressure?
(Mike)>> It's got great oil pressure.
(Pat)>> It's got a little bit of blow-by. So we'll have to look at that.
(Mike)>> 65 pounds of oil pressure at 5,000. It's a starting point.
(Pat)>> Absolutely, the big thing is people buy projects. This wasn't really a project. This came out of a running car. I think that there's a lot of potential and we're gonna definitely improve it with the parts we're gonna put on.
(Mike)>> Now we talked about not going into the bottom end but with that blow-by I think we do.
(Pat)>> Yeah, we might have to spiff that up, but we have the tools and we have the technology.
(Mike)>> That's right and the parts!
(Pat)>> Up next, this tool tells you the truth even when you don't want to know it.
(Mike)>> Plus big horsepower improvements on the dyno.
(Pat)>> Is using racing oil in your daily driver a good idea? Let's find out in today's tech tip.
(Tim)>> Not everything made for racing is good for street use since street engines, even high performance engines, rarely go above partial throttle. They don't usually push oil temperatures high enough to boil off contaminants that cause wear. That's why motor oil for street driven vehicles contain detergents and other additives to remove and suspend contaminants. Racing oils are designed to be changed every few races. So they don't need detergents to remove contaminants. Just remember if you use race oil in your daily driver and you follow the 3,000 mile change interval that can lead to harmful build ups. [ Music ]
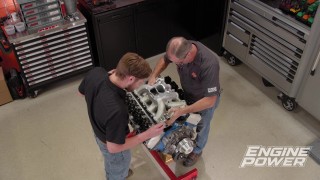
(Mike)>> Tearing down a small block Chevy is as simple as things get for a V-8. This one leaked and looks like it should have come out of an off road truck, not a restored muscle car.
(Pat)>> Here we go! [ Music ] Iron! [ Music ]
(Mike)>> Got it?
(Pat)>> This engine sat for a long time. Now that happens when you have it sitting without coolant in it and then you put coolant in it. You know it'll sometimes loosen all that stuff up and ew!
(Mike)>> Crusty, crusty! Wow! They weren't leaking.
(Pat)>> That was nice. The rest of the parts didn't show any damage but they did have normal wear. This engine has been on the road for a long time. [ Music ] I'll tell you it's not horrible. The block is already 40 over.
(Mike)>> Now what's safe on these over bore?
(Pat)>> 60!
(Mike)>> There you go. [ drill humming ]
(Pat)>> We did happen to find a nice surprise though.
(Mike)>> Oh my goodness, look at the skirts. Look at that!
(Pat)>> Dude it ran fine. [ Music ]
(Mike)>> After a quick wash job and before this block goes to the machine shop we want to check it out with our Goodson crack detector. Before machining a used block this procedure is a must. One semi clean block.
(Pat)>> Well it's clean enough to do what we're doing. Is your wallet out? This will generate so much gauss, which initially now I don't think we have to use this because I think we see a giant problem already before we get started.
(Mike)>> There's a decent bulge right here.
(Pat)>> Look at this.
(Mike)>> How did that not leak on the dyno?
(Pat)>> I can tell you why. When I drained the anti-freeze before I put it on the dyno, when I pulled these two plugs out they were solid and they we're filled with block filler. Block sealer is not uncommon on these because half the time the radiators are clogged or whatever, or they're leaking, and they want to plug them. So they dump all that stuff in, and this was completely covered by oil. This particular one, because it didn't leak, it could probably be repaired but we are not going to mess with that. All around the drain plug. Look at that up there. There's one up there too. When one bites the dust, literally, we pull another out of our stash. This is a later model block that has been converted to accept a two piece rear main seal. Just like the cracked one this is a four bolt main too. The block has been machined, and since we already have the rotating assembly with pistons the only thing it needs is to have the bores enlarged 30 thousandths.
(Mike)>> To enlarge the bores we will use our Sunnen SV-15 hone. A torque plate will be used to mimic a cylinder head torqued to the block. This will eliminate bore distortion so the cylinder stays round and true during final assembly.
(Pat)>> Coming up, engine upgrades and free flowing heads breathe new life into the 350.
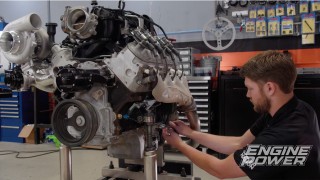
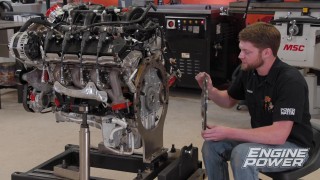
(Mike)>> With the cylinder honing finished the block got a wash so we could start the assembly process. We checked all the bearing clearances, filed the rings to achieve a 27 thousandths end gap, and verified piston to wall clearance. Half of the two piece rear main seal was installed, and now the Scat cast crank is ready to go in. The Icon forged pistons are mated up to the Scat 51-40 I-beam rods and secured with spiral locks. [ Music ] Installing the Total Seal gapless ring set is a little more involved than a standard ring set. Make sure to follow the instructions for ring orientation and keep the gaps away from each other. With lube on the rings, piston skirts and bearings, the assemblies can go into the bores. [ drill humming ]
(Pat)>> Here's a look at all the specs. If you like this build sheet and want it log on to Powernation TV dot com. Go to Engine Power and it's available for you to download. Now the cam shaft can be installed. It's a Comp Cams hydraulic roller straight off the Summit Racing shelf. Duration at 50 thousandths lift is 242 degrees on the intake and 248 degrees on the exhaust. Lobe separation is 110 degrees and lift is 540 thousandths on the intake and 562 thousandths on the hot side.
(Mike)>> Linking the crank and cam shaft is a double row Trick Flow timing set.
(Pat)>> Every cam that is installed here gets degreed. This one installs at six degrees advanced.
(Mike)>> We had a Cloyes quick button two piece timing cover on the shelf. So it's being used. It has a built in roller button that is adjustable. A Summit Racing eight inch harmonic balancer is next. Make sure to apply Permatex anti-seize inside its bore before pressing it on. An ARP balancer bolt is torqued to 80 pound feet.
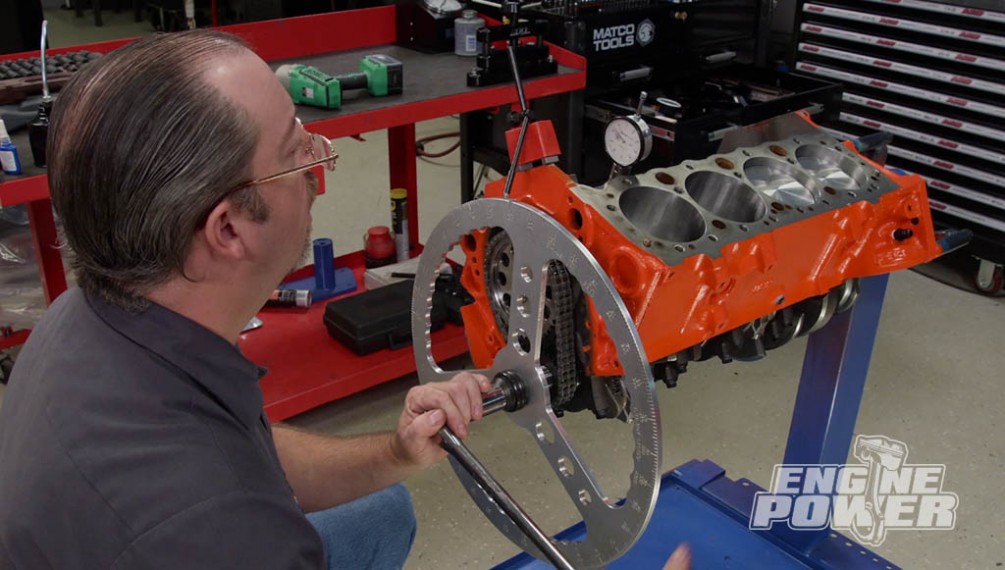
(Pat)>> Setting the MSD timing pointer at true t-d-c is a must. This one specifically made for an eight inch balancer. A Melling high volume oil pump is mounting up. The pickup is for a pan that we had on the shelf off a different engine. We checked the pickup to pan clearance and it's good. It will fit the Camaro chassis great as well. ARP bolts are securing everything.
(Mike)>> After soaking in oil for a little bit of time the hydraulic roller tie bar lifters from Comp Cams are going in the block's lifter bores. We have Cometic gaskets with a 27 thousandths compressed thickness resting on the decks. The cylinder heads are Trick Flow Super 23's with 195cc intake runner. The exhaust runner volume is 75cc and has a "D" shaped port. The combustion chamber is 72cc and has a 202 intake and a 1-600 exhaust valve. They come as cast but the extra thick decks and walls give you plenty of material to do extensive porting if you want to.
(Pat)>> With the intake gaskets in place we're laying down this super sweet bead of silicone on the China rails. It's Permatex Right Stuff One Minute black gasket maker and it works most excellent. The intake manifold for this build is a dual plane street burner from Trick Flow. It has an operating range from 1,500 to 6,500 r-p-m and is an open air design. It has rear water outlets and two distributor clamp locations. ARP bolts are tightened in a cross pattern to lock it down.
(Mike)>> An electric water pump is our go to for the dyno. Not just for power but also safety.
(Pat)>> Comp Cam's push rods are going in. These have an 80 thousandths wall thickness and are 7-100 long. They have a five-sixteenths ball on each end. Also from Comp are 1.6 roller rockers. These are from their Ultra Pro Magnum line and are a full roller with a chro-moly body.
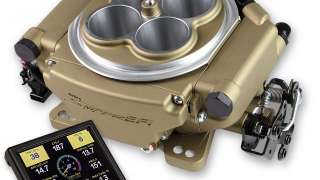
(Mike)>> We can't get enough of Holley e-f-i components. This is the Sniper Stealth 41-50 system. It looks like a carburetor and we ordered this one in a gold finish. It has four 100 pound an hour injectors and is capable of supporting 650 naturally aspirated horsepower or 600 with forced induction. It's self-learning, super simple to install, and even easier to setup. [ drill humming ]
(Pat)>> A locked out MSD distributor will send a spark to the plugs.
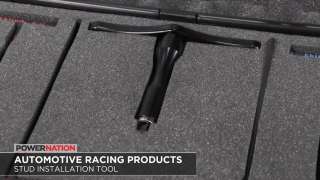
(Mike)>> ARP has a new tool they developed called the stud installation tool. Now it's designed to be used when the actual head gasket and cylinder head are placed on the engine's deck surface. It was developed to avoid the stud's run out thread from contacting the top of the deck when slightly loaded, causing the stud to sit crooked or angled. The original fix was to back the stud off about a half a turn. Now the tool also helps with having the studs not installed when you put the cylinder head on. There's no aluminum shavings that could fall into the bore or other areas of the engine. This tool works on all types of studs, not just for the cylinder head. Now proper installation of them is a must to achieve the proper torque loads. ARP is always coming up with ways for engine builders and d-i-y guys to improve assembly and results. Here's a quick look at how it works. It accepts a conventional socket for the nut size you are dealing with. The T-handle slips through the center of the handle to engage the stud. Depending on the stud design you will bottom it out, or after bottoming out reverse it a turn. Then simple put a little pre-load on the nut and you are ready to torque. Log on to ARP dash bolts dot com to find out more. Up next we add up the numbers in the dyno cell. Look at that graph!
(Pat)>> Now we've got some torque.
(Pat)>> Alright my favorite time of day, dyno day.
(Mike)>> Here comes fuel. [ Music ]
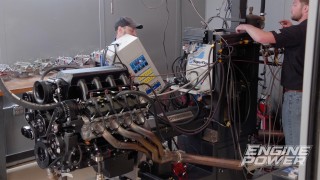
(Pat)>> Light it! [ Music ] There's always one question on everyone's mind when an engine fires up on the dyno.
(Mike)>> What do you think it's gonna make?
(Pat)>> You know conservatively I think this thing's gonna make in the low to mid fours relatively easy. We're not trying to swing for the fence on power on this. This car has to have drivability. I'd be happy if it made 4 anything. If it makes 4 anything you know we've already doubled the power.
(Mike)>> Oh yeah! The e-f-i system comes with a hand held monitor where you input all the engine's parameters and do all the tuning. It cannot get any more simple. It will prompt you to start the engine. Then let it warm up to 160 degrees. At this point the system starts learning and dialing in to reach the targeted air/fuel ratio.
(Pat)>> 30 degrees of timing right now. This is the 2,500 to 5,500 at 600 per second just to see where we're at. This is the fact finding run.
(Mike)>> Here we go! [ engine revving ]
(Mike)>> Man not bad first hit.
(Pat)>> It's still learning a little bit.
(Mike)>> 396 on power, 388 on torque.
(Pat)>> Almost 400.
(Mike)>> Torque peaked at 4,800. [ engine revving ]
(Pat)>> Ooh that sounds nice.
(Mike)>> Super clean! Look at that graph.
(Pat)>> Alright now we've got some torque, we've got some power.
(Mike)>> 434 on power, 437 on torque.
(Pat)>> That torque is flat.
(Mike)>> Yeah peak torque was at 4,300 and it held 437 for about 400 r-p-m.
(Pat)>> Nice okay now I'm gonna put a little bit of timing to it. This thing flat top 9:1. I'm gonna throw like three degrees at it.
(Mike)>> Sounds good! It should pick up quite a bit. [ engine revving ]
(Pat)>> Sounded good, of course they all sound good.
(Mike)>> 442, 439.
(Pat)>> Okay, alright, we haven't messed with the fuel. We've got a target air/fuel of like 12-8 or something like that right? We're not razoring that down to the umphth degree just because these are more advantageous when you're tuning on them on the street because we're doing very specific ranges. On the street you can tight tail your cruise air/fuel, your wide open, and your idle.
(Mike)>> And we're on a good path right here. You can tell that by the graph.
(Pat)>> Typically flat top big chamber like this. I'm gonna stab her up to like 36 and I know it's a big jump. Pump gas, 9:1, 93 octane in it. That'll tell you if we went too far. We could eke it up like a degree at a time but on something like this I want to see that change, and these engines I feel a lot more confident doing that than if this was a race gas 15:1 operation like that. So let me stick some timing in it. [ engine revving ]
(Pat)>> I think it picked up a little bit but we're about right there aren't we?
(Mike)>> 442, 442.
(Pat)>> That's a good round number to stop on.
(Mike)>> To the tenth, 442.3, 442.3, that's cool.
(Pat)>> That is sweet. That sounds like a lucky number to stop on right there.
(Mike)>> Yep 5,800 on power and 4,500 on torque.
(Pat)>> See that right there, 1,300 r-p-m between peaks. That makes a very nice street engine. The more you can spread out the peak torque to peak power the better the engine runs over the average. So nice! For more info on any of the parts you've seen log on to Powernation t-v dot com.
Show Full Transcript
(Mike)>> This '69 Camaro is a beauty but it needs a stronger power plant. [ Music ]
(Mike)>> Hey everybody, welcome to Engine Power. Today we're getting a delivery from the Detroit Muscle guys. Now they've been down working on a project for a sweepstakes giveaway that one of you guys can win.
(Pat)>> And Mike and I have been given the task to upgrade this power plant to make it the ultimate cruiser.
(Tommy)>> Well fellas we brought y'all a jewel.
(Pat)>> This makes me very happy to see something like this in this complete state.
(Tommy)>> Why does it make you so happy?
(Pat)>> Because we rarely get to say that we've ran something as it came out of a car. So with rams horns on it, that distributor, kinda excited to see what it will make for power just like it came out of the car.
(Mike)>> How did it feel driving the car?
(Tommy)>> It could have used a tune up, that kind of deal. Other than that it just drove like a stock 350.
(Marc)>> It needed a driver mod I can tell you that.
(Tommy)>> Well the biggest problem was the squealing from the passenger side.
(Marc)>> It had plenty of power though. I mean it'd ride out. You gonna run it with the carb and the air cleaner?
(Pat)>> Run it just like it is. Now because it ran on the chassis dyno it'll be interesting to see the loss from engine dyno to chassis dyno.
(Mike)>> Are we gonna leave the fan on it?
(Pat)>> Heck yeah! Why wouldn't a guy? For safety reasons we're not gonna be standing in the room. I think it'll be fine.
(Tommy)>> What kind of power numbers do you reckon this thing's gonna make?
(Pat)>> I don't know what they made stock. The engines, because they're so easy to change on these cars. I don't know if this is the original engine. It may or may not be the original engine from the car. A lot of times some have said this is a 350 and it's a 305. Just stuff like that all the time. If it made in the 200's I'd be impressed.
(Marc)>> Okay so let's talk about where we're going with it. We're talking about dynoing it the way it is but what about the changes you guys are gonna make then?
(Pat)>> Well we have a top end for it. We have some spiffy heads, a better intake, electronical injection system. I think we're just gonna modernize the car. Make it run a little bit more consistently better and easier to drive. This is a giveaway car. So these people will hopefully just cruise this thing until the wheels fall off because that's what it's going to be designed for.
(Tommy)>> Yeah perfect! We weren't looking for some kind of big stump puller. We just wanted something a little more peppy and reliable.
(Mike)>> Sounds a little better!
(Marc)>> Is there a way that you guys can reuse the factory air cleaner just cause it's so nice? Like in the end or do you think it may not be big enough?
(Pat)>> It may not be big enough. That's your air hole right there. We'll dyno it. We'll see what it does. It'll fit what we're gonna be putting on it okay but the problem with it is if it kills too much power you're defeating the purpose of putting all these cool parts on. Regardless of the fact we are gonna run it just like it is before we tear it apart.
(Marc)>> Awesome thanks guys.
(Tommy)>> Let y'all get at it.
(Pat)>> I love it. [ Music ] On this casting number right here that's cleaned off, 393-23-88. I looked that up. That is a '69 only. So this is quite possibly the original engine.
(Mike)>> Or at least they were smart enough to find one for it.
(Pat)>> This car is a real RS/SS. Who knows the history of this thing?
(Mike)>> We want to monitor the air/fuel ratio. So a hole is drilled in the exhaust pipe and a Holley O-2 sensor boss is strapped on. You ready for this?
(Pat)>> Light it! [ engine revving ]
(Pat)>> Get out of it. The thing's rich as all get out.
(Mike)>> Yeah, real rich.
(Pat)>> It wouldn't have anything to do with that air cleaner on there looking like it's about the size of a quarter on the entry.
(Mike)>> Well it is about the size of a quarter. I wouldn't even give it silver dollar status. Because of how rich it was and how it ran on the dyno go pull the air cleaner off. [ Music ] [ engine revving ]
(Pat)>> A little choppy!
(Mike)>> Yeah a little bit but still way better, and three and a half points higher in air/fuel. 243 on power, 311 pound feet, 3,400.
(Pat)>> It doesn't seem to be running as good as it ran when they brought it in.
(Mike)>> They did go and beat the fire out of it after they chassis dynoed it, and it's got quite a bit of blow by now.
(Pat)>> It did amazing clean pulls on the chassis dyno.
(Mike)>> 227 to 231 I think.
(Pat)>> I can't remember what it was. Somewhere in there.
(Mike)>> Let's make another hit. Same setup, same step.
(Pat)>> It's definitely way leaner.
(Mike)>> Yes! [ engine revving ]
(Mike)>> Cleaned right up.
(Pat)>> Maybe it had some dirt dobbers or something like that? There we go!
(Mike)>> 247 and 311. It likes that 311 number.
(Pat)>> It's scaring 250 on power, 311 on torque. Does it have oil pressure?
(Mike)>> It's got great oil pressure.
(Pat)>> It's got a little bit of blow-by. So we'll have to look at that.
(Mike)>> 65 pounds of oil pressure at 5,000. It's a starting point.
(Pat)>> Absolutely, the big thing is people buy projects. This wasn't really a project. This came out of a running car. I think that there's a lot of potential and we're gonna definitely improve it with the parts we're gonna put on.
(Mike)>> Now we talked about not going into the bottom end but with that blow-by I think we do.
(Pat)>> Yeah, we might have to spiff that up, but we have the tools and we have the technology.
(Mike)>> That's right and the parts!
(Pat)>> Up next, this tool tells you the truth even when you don't want to know it.
(Mike)>> Plus big horsepower improvements on the dyno.
(Pat)>> Is using racing oil in your daily driver a good idea? Let's find out in today's tech tip.
(Tim)>> Not everything made for racing is good for street use since street engines, even high performance engines, rarely go above partial throttle. They don't usually push oil temperatures high enough to boil off contaminants that cause wear. That's why motor oil for street driven vehicles contain detergents and other additives to remove and suspend contaminants. Racing oils are designed to be changed every few races. So they don't need detergents to remove contaminants. Just remember if you use race oil in your daily driver and you follow the 3,000 mile change interval that can lead to harmful build ups. [ Music ]
(Mike)>> Tearing down a small block Chevy is as simple as things get for a V-8. This one leaked and looks like it should have come out of an off road truck, not a restored muscle car.
(Pat)>> Here we go! [ Music ] Iron! [ Music ]
(Mike)>> Got it?
(Pat)>> This engine sat for a long time. Now that happens when you have it sitting without coolant in it and then you put coolant in it. You know it'll sometimes loosen all that stuff up and ew!
(Mike)>> Crusty, crusty! Wow! They weren't leaking.
(Pat)>> That was nice. The rest of the parts didn't show any damage but they did have normal wear. This engine has been on the road for a long time. [ Music ] I'll tell you it's not horrible. The block is already 40 over.
(Mike)>> Now what's safe on these over bore?
(Pat)>> 60!
(Mike)>> There you go. [ drill humming ]
(Pat)>> We did happen to find a nice surprise though.
(Mike)>> Oh my goodness, look at the skirts. Look at that!
(Pat)>> Dude it ran fine. [ Music ]
(Mike)>> After a quick wash job and before this block goes to the machine shop we want to check it out with our Goodson crack detector. Before machining a used block this procedure is a must. One semi clean block.
(Pat)>> Well it's clean enough to do what we're doing. Is your wallet out? This will generate so much gauss, which initially now I don't think we have to use this because I think we see a giant problem already before we get started.
(Mike)>> There's a decent bulge right here.
(Pat)>> Look at this.
(Mike)>> How did that not leak on the dyno?
(Pat)>> I can tell you why. When I drained the anti-freeze before I put it on the dyno, when I pulled these two plugs out they were solid and they we're filled with block filler. Block sealer is not uncommon on these because half the time the radiators are clogged or whatever, or they're leaking, and they want to plug them. So they dump all that stuff in, and this was completely covered by oil. This particular one, because it didn't leak, it could probably be repaired but we are not going to mess with that. All around the drain plug. Look at that up there. There's one up there too. When one bites the dust, literally, we pull another out of our stash. This is a later model block that has been converted to accept a two piece rear main seal. Just like the cracked one this is a four bolt main too. The block has been machined, and since we already have the rotating assembly with pistons the only thing it needs is to have the bores enlarged 30 thousandths.
(Mike)>> To enlarge the bores we will use our Sunnen SV-15 hone. A torque plate will be used to mimic a cylinder head torqued to the block. This will eliminate bore distortion so the cylinder stays round and true during final assembly.
(Pat)>> Coming up, engine upgrades and free flowing heads breathe new life into the 350.
(Mike)>> With the cylinder honing finished the block got a wash so we could start the assembly process. We checked all the bearing clearances, filed the rings to achieve a 27 thousandths end gap, and verified piston to wall clearance. Half of the two piece rear main seal was installed, and now the Scat cast crank is ready to go in. The Icon forged pistons are mated up to the Scat 51-40 I-beam rods and secured with spiral locks. [ Music ] Installing the Total Seal gapless ring set is a little more involved than a standard ring set. Make sure to follow the instructions for ring orientation and keep the gaps away from each other. With lube on the rings, piston skirts and bearings, the assemblies can go into the bores. [ drill humming ]
(Pat)>> Here's a look at all the specs. If you like this build sheet and want it log on to Powernation TV dot com. Go to Engine Power and it's available for you to download. Now the cam shaft can be installed. It's a Comp Cams hydraulic roller straight off the Summit Racing shelf. Duration at 50 thousandths lift is 242 degrees on the intake and 248 degrees on the exhaust. Lobe separation is 110 degrees and lift is 540 thousandths on the intake and 562 thousandths on the hot side.
(Mike)>> Linking the crank and cam shaft is a double row Trick Flow timing set.
(Pat)>> Every cam that is installed here gets degreed. This one installs at six degrees advanced.
(Mike)>> We had a Cloyes quick button two piece timing cover on the shelf. So it's being used. It has a built in roller button that is adjustable. A Summit Racing eight inch harmonic balancer is next. Make sure to apply Permatex anti-seize inside its bore before pressing it on. An ARP balancer bolt is torqued to 80 pound feet.
(Pat)>> Setting the MSD timing pointer at true t-d-c is a must. This one specifically made for an eight inch balancer. A Melling high volume oil pump is mounting up. The pickup is for a pan that we had on the shelf off a different engine. We checked the pickup to pan clearance and it's good. It will fit the Camaro chassis great as well. ARP bolts are securing everything.
(Mike)>> After soaking in oil for a little bit of time the hydraulic roller tie bar lifters from Comp Cams are going in the block's lifter bores. We have Cometic gaskets with a 27 thousandths compressed thickness resting on the decks. The cylinder heads are Trick Flow Super 23's with 195cc intake runner. The exhaust runner volume is 75cc and has a "D" shaped port. The combustion chamber is 72cc and has a 202 intake and a 1-600 exhaust valve. They come as cast but the extra thick decks and walls give you plenty of material to do extensive porting if you want to.
(Pat)>> With the intake gaskets in place we're laying down this super sweet bead of silicone on the China rails. It's Permatex Right Stuff One Minute black gasket maker and it works most excellent. The intake manifold for this build is a dual plane street burner from Trick Flow. It has an operating range from 1,500 to 6,500 r-p-m and is an open air design. It has rear water outlets and two distributor clamp locations. ARP bolts are tightened in a cross pattern to lock it down.
(Mike)>> An electric water pump is our go to for the dyno. Not just for power but also safety.
(Pat)>> Comp Cam's push rods are going in. These have an 80 thousandths wall thickness and are 7-100 long. They have a five-sixteenths ball on each end. Also from Comp are 1.6 roller rockers. These are from their Ultra Pro Magnum line and are a full roller with a chro-moly body.
(Mike)>> We can't get enough of Holley e-f-i components. This is the Sniper Stealth 41-50 system. It looks like a carburetor and we ordered this one in a gold finish. It has four 100 pound an hour injectors and is capable of supporting 650 naturally aspirated horsepower or 600 with forced induction. It's self-learning, super simple to install, and even easier to setup. [ drill humming ]
(Pat)>> A locked out MSD distributor will send a spark to the plugs.
(Mike)>> ARP has a new tool they developed called the stud installation tool. Now it's designed to be used when the actual head gasket and cylinder head are placed on the engine's deck surface. It was developed to avoid the stud's run out thread from contacting the top of the deck when slightly loaded, causing the stud to sit crooked or angled. The original fix was to back the stud off about a half a turn. Now the tool also helps with having the studs not installed when you put the cylinder head on. There's no aluminum shavings that could fall into the bore or other areas of the engine. This tool works on all types of studs, not just for the cylinder head. Now proper installation of them is a must to achieve the proper torque loads. ARP is always coming up with ways for engine builders and d-i-y guys to improve assembly and results. Here's a quick look at how it works. It accepts a conventional socket for the nut size you are dealing with. The T-handle slips through the center of the handle to engage the stud. Depending on the stud design you will bottom it out, or after bottoming out reverse it a turn. Then simple put a little pre-load on the nut and you are ready to torque. Log on to ARP dash bolts dot com to find out more. Up next we add up the numbers in the dyno cell. Look at that graph!
(Pat)>> Now we've got some torque.
(Pat)>> Alright my favorite time of day, dyno day.
(Mike)>> Here comes fuel. [ Music ]
(Pat)>> Light it! [ Music ] There's always one question on everyone's mind when an engine fires up on the dyno.
(Mike)>> What do you think it's gonna make?
(Pat)>> You know conservatively I think this thing's gonna make in the low to mid fours relatively easy. We're not trying to swing for the fence on power on this. This car has to have drivability. I'd be happy if it made 4 anything. If it makes 4 anything you know we've already doubled the power.
(Mike)>> Oh yeah! The e-f-i system comes with a hand held monitor where you input all the engine's parameters and do all the tuning. It cannot get any more simple. It will prompt you to start the engine. Then let it warm up to 160 degrees. At this point the system starts learning and dialing in to reach the targeted air/fuel ratio.
(Pat)>> 30 degrees of timing right now. This is the 2,500 to 5,500 at 600 per second just to see where we're at. This is the fact finding run.
(Mike)>> Here we go! [ engine revving ]
(Mike)>> Man not bad first hit.
(Pat)>> It's still learning a little bit.
(Mike)>> 396 on power, 388 on torque.
(Pat)>> Almost 400.
(Mike)>> Torque peaked at 4,800. [ engine revving ]
(Pat)>> Ooh that sounds nice.
(Mike)>> Super clean! Look at that graph.
(Pat)>> Alright now we've got some torque, we've got some power.
(Mike)>> 434 on power, 437 on torque.
(Pat)>> That torque is flat.
(Mike)>> Yeah peak torque was at 4,300 and it held 437 for about 400 r-p-m.
(Pat)>> Nice okay now I'm gonna put a little bit of timing to it. This thing flat top 9:1. I'm gonna throw like three degrees at it.
(Mike)>> Sounds good! It should pick up quite a bit. [ engine revving ]
(Pat)>> Sounded good, of course they all sound good.
(Mike)>> 442, 439.
(Pat)>> Okay, alright, we haven't messed with the fuel. We've got a target air/fuel of like 12-8 or something like that right? We're not razoring that down to the umphth degree just because these are more advantageous when you're tuning on them on the street because we're doing very specific ranges. On the street you can tight tail your cruise air/fuel, your wide open, and your idle.
(Mike)>> And we're on a good path right here. You can tell that by the graph.
(Pat)>> Typically flat top big chamber like this. I'm gonna stab her up to like 36 and I know it's a big jump. Pump gas, 9:1, 93 octane in it. That'll tell you if we went too far. We could eke it up like a degree at a time but on something like this I want to see that change, and these engines I feel a lot more confident doing that than if this was a race gas 15:1 operation like that. So let me stick some timing in it. [ engine revving ]
(Pat)>> I think it picked up a little bit but we're about right there aren't we?
(Mike)>> 442, 442.
(Pat)>> That's a good round number to stop on.
(Mike)>> To the tenth, 442.3, 442.3, that's cool.
(Pat)>> That is sweet. That sounds like a lucky number to stop on right there.
(Mike)>> Yep 5,800 on power and 4,500 on torque.
(Pat)>> See that right there, 1,300 r-p-m between peaks. That makes a very nice street engine. The more you can spread out the peak torque to peak power the better the engine runs over the average. So nice! For more info on any of the parts you've seen log on to Powernation t-v dot com.
