Engine Power Featured Projects
Engine Power Builds
Want more content like this?
Join the PowerNation Email NewsletterParts Used In This Episode
ARP
ARP is the Official Bolt Supplier to Engine Power
Matco Tools
MATCO Tools are the Official Tool Supplier to Engine Power
The Industrial Depot
Tools, Hardware, and Shop Supplies
Episode Transcript
(Narrator)>> Even in stock form the 2019 Challenger R/T is a blast, but we're gonna make it better. Today on Engine Power the Dodge gets a big h-p boost with a Procharger system and a wicked sound from Magnaflow's race series exhaust. [ music ]
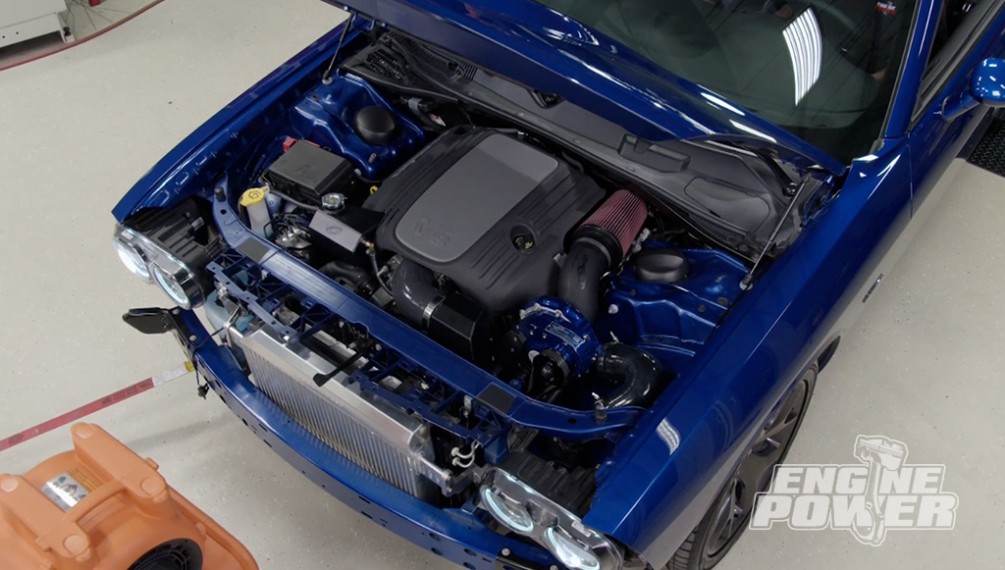
(Mike)>> What's better than a brand new indigo blue Dodge Challenger R/T? A brand new Procharged one that you can win in a Permatex sweepstakes giveaway. On today's show we will show you how to install Procharger's high output intercooled supercharger system on this brand new 2019 Challenger R/T. It's going to add over 160 horsepower with only seven pounds of boost. Talk about efficient.
(Pat)>> This coupe rolled out of the factory with a base curb weight of 4,190 pounds. Under this sexy hood is a five point seven liter V-8 with variable valve timing and m-d-s, which is for fuel economy at cruise speeds.
(Mike)>> Joining us today is Sergio Shifman, Procharger's senior performance technician. Sergio Procharger is the obvious leader when it comes to systems available for Dodge vehicles. Now there's several different engine platforms between the Challengers, and the Chargers, and all the different models. What all do you guys cover?
(Sergio)>> Yeah Procharger offers complete systems for all the late model Hemi engines. Car applications for the Challengers, Chargers like you mentioned, the 300-C's, the Magnums, and even the full size trucks with the five-seven and now the six-four in the 2500 Ram.
(Mike)>> Now with this system what are we looking at here?
(Sergio)>> It's the HO system with the upgrade to the race intercooler. When we call them a complete system it includes fuel injectors, any fuel pump upgrades that are required for this vehicle, and also tuning in the form of a hand held programmer that plugs in and uploads a tune into the computer.
(Pat)>> Alright let's get down to the heart of the system, which is the head unit. Tell me about this.
(Sergio)>> This is Procharger's POne-SCOne model Procharger. It's our entry level, and usually what comes in complete systems. This has the upgrade to the quiet helical gear set. Quiets it down at idle quite a bit. It's capable of mid-700, upper 700 horsepower capability. So it definitely can keep up with a few additional upgrades to the engine. Of course tuning and fuel system requirements are gonna be a little more than what we send with our complete systems, but just like with this system we upgraded to the race intercooler this supercharger can also be sent back to Procharger to be upgraded to the next larger model, which is the DOne-SC or even a DOne-X, which is capable of all the way up to 1,000 horsepower. Still basically in the same gear case, same brackets, everything else.
(Pat)>> Before we get started there are a few things that you need to know about installing one of these kits on a Challenger. First off it comes with everything that you need for the installation. It requires only basic hand tools to get it done, and no fabrication or modification is required to put the kit on. So if you want to return your car back to its stock form you're good to go.
(Mike)>> Procharger's instruction are excellent. They always give a full detailed picture of the step you are working on and the description is so straight forward a wrench can probably do it by itself. Always make sure to read through them before you start. It really helps out. The teardown steps are basic. The items that are removed are replaced with items from the Procharger kit. When the car is raised the front fascia is removed to make way for the intercooler. [ drill spinning ]
(Pat)>> Look at that. [ music ]
(Mike)>> The coolant must be drained slightly since the expansion tank is removed and replaced. A step that was previously done at Procharger was pinning the crankshaft to prevent the balancer from spinning on the crank. It's done with a fixture that they supply. The new Dodge e-c-m's are locked from the factory. So you have to remove it from the car, send it in to Procharger to get it unlocked. It's located right underneath this cover. Now after they unlock it they send it back to you and the turnaround time is about two days. So make sure you send it off when you start the actual Procharger install. Now once you get the e-c-m back and it's unlocked that will allow you to use the hand held supplied in the kit to upload the Procharger tune and drive the car.
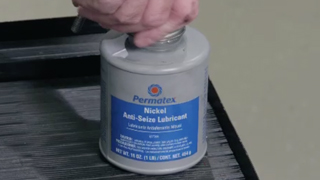
(Pat)>> While Mike is installing this sub-bracket I'm getting the oil drain line for the blower setup. It's a braided stainless steel one that allows you to drain the blower's oil when it needs changing. The Procharger is filled with exclusive Procharger oil. Six ounces to be exact. Permatex anti-seize is a must when installing stainless steel fasteners into aluminum material. It's made from a highly refined blend of aluminum, copper, and graphite lubricants. It prevents seizing, galling, and corrosion due to either weathering or other chemicals. Permatex anti-seize has a temperature range negative 60 to 1,600 degrees Fahrenheit. It's also salt and moisture resistant, and is ideal for marine applications as well. Use it on spark plugs, engine fasteners, header bolts, hinges, and anything else that has a moving part or threads. [ music ] Doesn't get any easier than that.
(Mike)>> Procharger offers custom colors on the head units. This one was coated to match our Challenger's paint job. It's a great addition to any engine bay and will set you apart from others at your local car meets.
(Narrator)>> Coming up, with the supercharger system buttoned up and a high performance exhaust under the chassis we're expecting great numbers on the dyno.
(Mike)>> We're back with the Permatex sweepstakes Challenger. Now it's receiving a high output Procharger supercharger system. The serpentine belt goes on next. It's supplied by Procharger and is longer to route to the supercharger pulley. With the belt tension set we can move on to installing the high quality super shiny intercooler. First the brackets are installed to the core support. Now the cooler is slid into place and centered into position before tightening. [ music ]
(Pat)>> An aluminum plenum made in house at Procharger is installed using a coupler connecting it to the outlet of the cooler. [ music ] Another coupler connects the plenum to the throttle body. [ ratchet clicking ]
(Pat)>> Radiator support bracket spacers are installed and the bracket is replaced. This moves the radiator and condenser down a slight amount for clearance. [ drill spinning ]
(Mike)>> Now the charge pipe assembly can go from the outlet of the supercharger to the inlet of the cooler. It attaches to the steel charge pipe that has a standoff welded to it. Procharger supplies a bypass valve with this system. Now this allows pressurized air to escape during closed throttle and super light load situations. During hard acceleration the valve closes and allows all the pressurized boost to go into the engine. Now during the light load and closed throttle position this is really big on helping drivability. [ music ] Procharger also supplies a vacuum manifold that splices into the brake booster line. Now the reason it's needed is because this small vacuum hose actually runs up to the bypass valve to control it. Now it also has a port on the back that you can run a boost gauge off of if you plan to. We also blacked it out so it blended in with the firewall. This machined aluminum piece is a maf adapter fitting. Make sure the sensor is installed right side up. [ music ]
(Pat)>> Look at that.
(Mike)>> The safest way to do it.
(Pat)>> The fuel injectors are replaced next with new ones from the kit. Remove the entire rail and injectors. This eliminates the chance of fuel running into the cylinder and potentially hydra locking the engine. [ music ] Next up the new fuel pump assembly will go in the stock tank. Now luckily for us we don't have to mess with this because Procharger already has done it for us. One thing of note, you do not have to drop the tank to put the fuel pump in. It can be accessed underneath the seat. A new coolant reservoir is installed. It replaces the factory plastic one. Now the coolant we removed earlier is poured back into the system. The engine cover is replaced and the Procharger air inlet tube and filter are attached to the supercharger. Installing the Procharger tune with a Diablo Sport in tune is the final step. It is super simple to do. Just follow the steps. It takes about 10 minutes. Okay Sergio, after one and probably the most straight forward installs we've ever done with you guys, what's next after it fires up?
(Sergio)>> We'll check all the plumbing for air leaks. We'll check the coolant lines for any fluid leaks. Then once it's running we'll look at the belt and make sure belt alignment and no weird sounds coming from that area, and that's about it.
(Pat)>> Alright well you're here, you make the call.
(Sergio)>> Alright Mike, fire it up.
(Mike)>> Here we go. [ engine starts and idles ]
(Pat)>> Fires right up. That's a test to the tune up right. If it fires right up and didn't have to do anything crazy.
(Sergio)>> Right absolutely, we take a lot of pride and a lot of time developing our tuning, and make sure their idle quality is great and full throttle quality is great, and everything in between.
(Pat)>> I love it. Give her a little goose there. [ engine revving ]
(Mike)>> This thing didn't stumble. It idles perfect out of the bag. I mean this is nice.
(Pat)>> That's amazing. [ engine revving ]
(Narrator)>> Up next, the Challenger receives race series exhaust and gets down to business on the dyno.
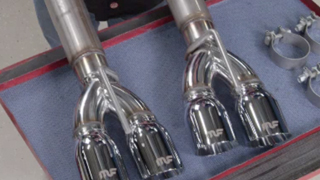
(Mike)>> Welcome back to Engine Power. The Procharger's installed and it was the easiest and most straight forward system that we ever put on here in the shop. We are going to leave the front fascia off for the dyno. Now we do want this car to sound as aggressive as possible. So we reached out to Magnaflow Performance Exhaust and they delivered. This is their race axle back system for the Challenger. It has a super aggressive exterior sound and a pretty aggressive interior sound. It's designed to remove the muffler, eliminating unwanted back pressure and creating a loud, aggressive race car sound, which is what we love. It's made from stainless steel and has a three inch diameter. The tips are double wall angle cut folded edge welded style that are polished to a mirror like finish. Magnaflow also offers a competition series cat back exhaust that comes with mufflers for a more tame down sound. Check out the Magnaflow website where you will find all the information and detailed instructions on how the systems are installed.
(Pat)>> The factory system requires you to cut both sides of the exhaust. On the driver's and passenger's side cut four inches back from the outlet weld on the exhaust control valve. Next we can loosen the band clamps attaching the mufflers to the o-e-m tips. This allows the rear section of the exhaust system to be removed. The factory tips can also be removed but you do have the option to reused them if you like them. The inlet pipes are the first to go on. They slip over the pipe we cut at the beginning of the installation. Slide on the clamps and loosely secure them. [ music ]
(Mike)>> The Magnaflow polished quad tips are slid into place with their assigned clamp. Once aligned all the clamps can be tightened down. This system was extremely simple to install. It can definitely be done in your driveway.
(Pat)>> Magnaflow bends all of their systems on state of the art robotic benders. There we go. That's nice right there. Each system is designed to optimize weight and provide dyno proven performance. [ music ] And of course with it fired up we have that throaty Magnaflow sound from idle all the way through full throttle. [ engine revving ]
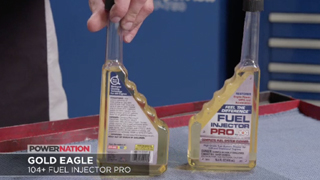
(Mike)>> Direct injected engines are notorious for carbon build up, not only on the valves but also on the tips of the injectors since they are located directly in the combustion chamber. Now they are subject to high heat. So that causes caking on the injectors tips in less than 5,000 miles in some cases. Now this causes rough idle, poor fuel mileage, and even rough starts. Gold Eagle's Fuel Injector Pro with the new dual tech technology excels in these conditions. It's a high grade complete fuel system cleaner for direct injected and traditional engines. A direct injection detergent helps restore engine power and m-p-g's and reduces carbon build up. Purchase it at Walmart, pour it in, and feel the difference.
(Narrator)>> Up next! [ engine revving ]
[ music ]
(Pat)>> Alright this first hit just go to 5 grand to see if all the hose clamps and everything stays on.
(Mike)>> Alright! [ engine revving ]
(Pat)>> That exhaust sounds pretty good doesn't it?
(Sergio)>> Yeah. [ engine revving ]
(Pat)>> Wow! That was fast. Right now we're at 457 horse and 440 pound feet of torque. So that's pretty mean.
(Mike)>> For the first pull man after installing it and that's the first thing that's awesome.
(Sergio)>> On cold transmission, cold drivetrain.
(Pat)>> And nothing spit out. So the next one, take it and just kind of bump it off the rev limiter. [ engine revving ]
(Pat)>> 476, 442.
(Mike)>> 476?
(Pat)>> 476!
(Mike)>> Alright, man that's some power at the crank now.
(Pat)>> That is, that is awesome!
(Sergio)>> And the nice part about our system with an air to air intercooler, everything heats up, stabilizes, makes more power. The boost doesn't suffer from that heat. You still get good air across the intercooler and good temps going into the engine.
(Pat)>> This thing is impressive. [ engine revving ]
(Pat)>> That's the sound of success. Look at that! 480, 480, 444.93 pound feet.
(Mike)>> That is super impressive.
(Pat)>> That's slick right there.
(Mike)>> Super easy bolt on, and you know that's a really good testament to how this intercooler works after back to back runs.
(Pat)>> Absolutely, once everything's all stabilized the intercooler's doing its job.
(Sergio)>> Right, absolutely. It is making good power back to back.
(Pat)>> And that's repeatability and there's obviously more left. We can't get too crazy because we're giving this thing away right? It runs like a dream. You wouldn't even know this was on there if you're just driving it around until you stomp on it.
(Mike)>> It's really cool inside the car. You can hear the blower and you can hear the exhaust. So this race kit isn't as loud as I thought it was gonna be.
(Pat)>> I think it's just right for what it is. So man nice job.
(Sergio)>> Good job guys.
(Pat)>> Nice, nice, nice.
(Mike)>> Today we started off with a bone stock 2019 Challenger R/T. It made 375 horsepower from the factory at the crankshaft. We followed Procharger's detailed instruction sheets to install an American made high output intercooled supercharger system that makes seven pounds of boost. It increased the power output to 480 horsepower at the tires. This translates to about 160 horsepower gain at the crankshaft. A typical install time is eight to 10 hours on this setup. Procharger makes kits for all types of vehicles, including marine and power sport applications. Check them out to see what they have for you.
(Pat)>> For more information on anything you've seen on today's show check out Powernation TV dot com. [ music ]
(Mike)>> Pat and I build and dyno several engines per year. Some are purpose built race engines and some are built just for the street. No matter what they're for our goal is to help you decide on what parts to buy and learn the techniques and procedures to build your own engines at home.
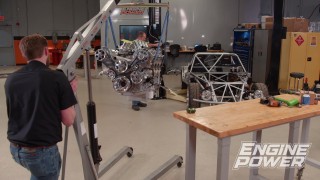
(Pat)>> When some of the engines that we build come off of the dyno they can sit on an engine stand or engine cradle for quite some time, and that can raise a few issues like losing some valve spring tension, getting rust on the internals due to temperature or condensation in the building, along with even the fuel and the carburetor or the fuel rails turning to varnish, but today we are going to show you how to properly store an engine to avoid all of that.
(Mike)>> This is our tech savvy small block stroker with the project name Re-Rev 2.0. It's a 383 cubic inch stroker we use for all types of part swapping tech. It produces 561 horsepower at 6,700 r-p-m and 491 at 5,100 naturally aspirated. Now we also installed an NOS nitrous kit and printed off 720 horsepower and 704 pound feet of torque.
(Pat)>> The first order of business for properly storing an engine is removing the carburetor, or in some cases fuel rails. Once removed drain the bowls or rails. A carb is flipped upside down and the fuel exits through the bowl vents. Once empty cycle the linkage several times so the fuel in the accelerator pumps and squirters is gone. Now we can remove the bowls since there will be a small amount of fuel left in them. [ music ] Next compressed air will clean out the jets and air bleeds. The bowls go back on now and the carb is wrapped in plastic for storage.
(Mike)>> Now the spark plugs are removed to access the cylinders. We like to use Sta-Bil fogging oil to prevent rust on the cylinder walls and piston rings. A few seconds of spraying is all that's needed. Next up are the valve springs. When they sit for a long period of time with the rocker arms tight they lose tension. We will loosen the rocker arms so all 16 valves are in the closed position. Any exposed ports like the exhaust, intake, or locations for sensors need to be sealed up. This will keep out unwanted pests and debris. Now is the time to replace the spark plugs. Make sure to do it after loosening the rocker since there will not be any compression when turning the engine over. The plastic fogging oil and tape are all items you can find at a local box store. Now this is the right way to store an engine and keep it safe from the elements.
(Pat)>> Now this may seem like a little bit of overkill but you never know where your engine's gonna sit and how long it's gonna sit for, and this will keep it safe until it's ready to get back in service.
Show Full Transcript
(Mike)>> What's better than a brand new indigo blue Dodge Challenger R/T? A brand new Procharged one that you can win in a Permatex sweepstakes giveaway. On today's show we will show you how to install Procharger's high output intercooled supercharger system on this brand new 2019 Challenger R/T. It's going to add over 160 horsepower with only seven pounds of boost. Talk about efficient.
(Pat)>> This coupe rolled out of the factory with a base curb weight of 4,190 pounds. Under this sexy hood is a five point seven liter V-8 with variable valve timing and m-d-s, which is for fuel economy at cruise speeds.
(Mike)>> Joining us today is Sergio Shifman, Procharger's senior performance technician. Sergio Procharger is the obvious leader when it comes to systems available for Dodge vehicles. Now there's several different engine platforms between the Challengers, and the Chargers, and all the different models. What all do you guys cover?
(Sergio)>> Yeah Procharger offers complete systems for all the late model Hemi engines. Car applications for the Challengers, Chargers like you mentioned, the 300-C's, the Magnums, and even the full size trucks with the five-seven and now the six-four in the 2500 Ram.
(Mike)>> Now with this system what are we looking at here?
(Sergio)>> It's the HO system with the upgrade to the race intercooler. When we call them a complete system it includes fuel injectors, any fuel pump upgrades that are required for this vehicle, and also tuning in the form of a hand held programmer that plugs in and uploads a tune into the computer.
(Pat)>> Alright let's get down to the heart of the system, which is the head unit. Tell me about this.
(Sergio)>> This is Procharger's POne-SCOne model Procharger. It's our entry level, and usually what comes in complete systems. This has the upgrade to the quiet helical gear set. Quiets it down at idle quite a bit. It's capable of mid-700, upper 700 horsepower capability. So it definitely can keep up with a few additional upgrades to the engine. Of course tuning and fuel system requirements are gonna be a little more than what we send with our complete systems, but just like with this system we upgraded to the race intercooler this supercharger can also be sent back to Procharger to be upgraded to the next larger model, which is the DOne-SC or even a DOne-X, which is capable of all the way up to 1,000 horsepower. Still basically in the same gear case, same brackets, everything else.
(Pat)>> Before we get started there are a few things that you need to know about installing one of these kits on a Challenger. First off it comes with everything that you need for the installation. It requires only basic hand tools to get it done, and no fabrication or modification is required to put the kit on. So if you want to return your car back to its stock form you're good to go.
(Mike)>> Procharger's instruction are excellent. They always give a full detailed picture of the step you are working on and the description is so straight forward a wrench can probably do it by itself. Always make sure to read through them before you start. It really helps out. The teardown steps are basic. The items that are removed are replaced with items from the Procharger kit. When the car is raised the front fascia is removed to make way for the intercooler. [ drill spinning ]
(Pat)>> Look at that. [ music ]
(Mike)>> The coolant must be drained slightly since the expansion tank is removed and replaced. A step that was previously done at Procharger was pinning the crankshaft to prevent the balancer from spinning on the crank. It's done with a fixture that they supply. The new Dodge e-c-m's are locked from the factory. So you have to remove it from the car, send it in to Procharger to get it unlocked. It's located right underneath this cover. Now after they unlock it they send it back to you and the turnaround time is about two days. So make sure you send it off when you start the actual Procharger install. Now once you get the e-c-m back and it's unlocked that will allow you to use the hand held supplied in the kit to upload the Procharger tune and drive the car.
(Pat)>> While Mike is installing this sub-bracket I'm getting the oil drain line for the blower setup. It's a braided stainless steel one that allows you to drain the blower's oil when it needs changing. The Procharger is filled with exclusive Procharger oil. Six ounces to be exact. Permatex anti-seize is a must when installing stainless steel fasteners into aluminum material. It's made from a highly refined blend of aluminum, copper, and graphite lubricants. It prevents seizing, galling, and corrosion due to either weathering or other chemicals. Permatex anti-seize has a temperature range negative 60 to 1,600 degrees Fahrenheit. It's also salt and moisture resistant, and is ideal for marine applications as well. Use it on spark plugs, engine fasteners, header bolts, hinges, and anything else that has a moving part or threads. [ music ] Doesn't get any easier than that.
(Mike)>> Procharger offers custom colors on the head units. This one was coated to match our Challenger's paint job. It's a great addition to any engine bay and will set you apart from others at your local car meets.
(Narrator)>> Coming up, with the supercharger system buttoned up and a high performance exhaust under the chassis we're expecting great numbers on the dyno.
(Mike)>> We're back with the Permatex sweepstakes Challenger. Now it's receiving a high output Procharger supercharger system. The serpentine belt goes on next. It's supplied by Procharger and is longer to route to the supercharger pulley. With the belt tension set we can move on to installing the high quality super shiny intercooler. First the brackets are installed to the core support. Now the cooler is slid into place and centered into position before tightening. [ music ]
(Pat)>> An aluminum plenum made in house at Procharger is installed using a coupler connecting it to the outlet of the cooler. [ music ] Another coupler connects the plenum to the throttle body. [ ratchet clicking ]
(Pat)>> Radiator support bracket spacers are installed and the bracket is replaced. This moves the radiator and condenser down a slight amount for clearance. [ drill spinning ]
(Mike)>> Now the charge pipe assembly can go from the outlet of the supercharger to the inlet of the cooler. It attaches to the steel charge pipe that has a standoff welded to it. Procharger supplies a bypass valve with this system. Now this allows pressurized air to escape during closed throttle and super light load situations. During hard acceleration the valve closes and allows all the pressurized boost to go into the engine. Now during the light load and closed throttle position this is really big on helping drivability. [ music ] Procharger also supplies a vacuum manifold that splices into the brake booster line. Now the reason it's needed is because this small vacuum hose actually runs up to the bypass valve to control it. Now it also has a port on the back that you can run a boost gauge off of if you plan to. We also blacked it out so it blended in with the firewall. This machined aluminum piece is a maf adapter fitting. Make sure the sensor is installed right side up. [ music ]
(Pat)>> Look at that.
(Mike)>> The safest way to do it.
(Pat)>> The fuel injectors are replaced next with new ones from the kit. Remove the entire rail and injectors. This eliminates the chance of fuel running into the cylinder and potentially hydra locking the engine. [ music ] Next up the new fuel pump assembly will go in the stock tank. Now luckily for us we don't have to mess with this because Procharger already has done it for us. One thing of note, you do not have to drop the tank to put the fuel pump in. It can be accessed underneath the seat. A new coolant reservoir is installed. It replaces the factory plastic one. Now the coolant we removed earlier is poured back into the system. The engine cover is replaced and the Procharger air inlet tube and filter are attached to the supercharger. Installing the Procharger tune with a Diablo Sport in tune is the final step. It is super simple to do. Just follow the steps. It takes about 10 minutes. Okay Sergio, after one and probably the most straight forward installs we've ever done with you guys, what's next after it fires up?
(Sergio)>> We'll check all the plumbing for air leaks. We'll check the coolant lines for any fluid leaks. Then once it's running we'll look at the belt and make sure belt alignment and no weird sounds coming from that area, and that's about it.
(Pat)>> Alright well you're here, you make the call.
(Sergio)>> Alright Mike, fire it up.
(Mike)>> Here we go. [ engine starts and idles ]
(Pat)>> Fires right up. That's a test to the tune up right. If it fires right up and didn't have to do anything crazy.
(Sergio)>> Right absolutely, we take a lot of pride and a lot of time developing our tuning, and make sure their idle quality is great and full throttle quality is great, and everything in between.
(Pat)>> I love it. Give her a little goose there. [ engine revving ]
(Mike)>> This thing didn't stumble. It idles perfect out of the bag. I mean this is nice.
(Pat)>> That's amazing. [ engine revving ]
(Narrator)>> Up next, the Challenger receives race series exhaust and gets down to business on the dyno.
(Mike)>> Welcome back to Engine Power. The Procharger's installed and it was the easiest and most straight forward system that we ever put on here in the shop. We are going to leave the front fascia off for the dyno. Now we do want this car to sound as aggressive as possible. So we reached out to Magnaflow Performance Exhaust and they delivered. This is their race axle back system for the Challenger. It has a super aggressive exterior sound and a pretty aggressive interior sound. It's designed to remove the muffler, eliminating unwanted back pressure and creating a loud, aggressive race car sound, which is what we love. It's made from stainless steel and has a three inch diameter. The tips are double wall angle cut folded edge welded style that are polished to a mirror like finish. Magnaflow also offers a competition series cat back exhaust that comes with mufflers for a more tame down sound. Check out the Magnaflow website where you will find all the information and detailed instructions on how the systems are installed.
(Pat)>> The factory system requires you to cut both sides of the exhaust. On the driver's and passenger's side cut four inches back from the outlet weld on the exhaust control valve. Next we can loosen the band clamps attaching the mufflers to the o-e-m tips. This allows the rear section of the exhaust system to be removed. The factory tips can also be removed but you do have the option to reused them if you like them. The inlet pipes are the first to go on. They slip over the pipe we cut at the beginning of the installation. Slide on the clamps and loosely secure them. [ music ]
(Mike)>> The Magnaflow polished quad tips are slid into place with their assigned clamp. Once aligned all the clamps can be tightened down. This system was extremely simple to install. It can definitely be done in your driveway.
(Pat)>> Magnaflow bends all of their systems on state of the art robotic benders. There we go. That's nice right there. Each system is designed to optimize weight and provide dyno proven performance. [ music ] And of course with it fired up we have that throaty Magnaflow sound from idle all the way through full throttle. [ engine revving ]
(Mike)>> Direct injected engines are notorious for carbon build up, not only on the valves but also on the tips of the injectors since they are located directly in the combustion chamber. Now they are subject to high heat. So that causes caking on the injectors tips in less than 5,000 miles in some cases. Now this causes rough idle, poor fuel mileage, and even rough starts. Gold Eagle's Fuel Injector Pro with the new dual tech technology excels in these conditions. It's a high grade complete fuel system cleaner for direct injected and traditional engines. A direct injection detergent helps restore engine power and m-p-g's and reduces carbon build up. Purchase it at Walmart, pour it in, and feel the difference.
(Narrator)>> Up next! [ engine revving ]
[ music ]
(Pat)>> Alright this first hit just go to 5 grand to see if all the hose clamps and everything stays on.
(Mike)>> Alright! [ engine revving ]
(Pat)>> That exhaust sounds pretty good doesn't it?
(Sergio)>> Yeah. [ engine revving ]
(Pat)>> Wow! That was fast. Right now we're at 457 horse and 440 pound feet of torque. So that's pretty mean.
(Mike)>> For the first pull man after installing it and that's the first thing that's awesome.
(Sergio)>> On cold transmission, cold drivetrain.
(Pat)>> And nothing spit out. So the next one, take it and just kind of bump it off the rev limiter. [ engine revving ]
(Pat)>> 476, 442.
(Mike)>> 476?
(Pat)>> 476!
(Mike)>> Alright, man that's some power at the crank now.
(Pat)>> That is, that is awesome!
(Sergio)>> And the nice part about our system with an air to air intercooler, everything heats up, stabilizes, makes more power. The boost doesn't suffer from that heat. You still get good air across the intercooler and good temps going into the engine.
(Pat)>> This thing is impressive. [ engine revving ]
(Pat)>> That's the sound of success. Look at that! 480, 480, 444.93 pound feet.
(Mike)>> That is super impressive.
(Pat)>> That's slick right there.
(Mike)>> Super easy bolt on, and you know that's a really good testament to how this intercooler works after back to back runs.
(Pat)>> Absolutely, once everything's all stabilized the intercooler's doing its job.
(Sergio)>> Right, absolutely. It is making good power back to back.
(Pat)>> And that's repeatability and there's obviously more left. We can't get too crazy because we're giving this thing away right? It runs like a dream. You wouldn't even know this was on there if you're just driving it around until you stomp on it.
(Mike)>> It's really cool inside the car. You can hear the blower and you can hear the exhaust. So this race kit isn't as loud as I thought it was gonna be.
(Pat)>> I think it's just right for what it is. So man nice job.
(Sergio)>> Good job guys.
(Pat)>> Nice, nice, nice.
(Mike)>> Today we started off with a bone stock 2019 Challenger R/T. It made 375 horsepower from the factory at the crankshaft. We followed Procharger's detailed instruction sheets to install an American made high output intercooled supercharger system that makes seven pounds of boost. It increased the power output to 480 horsepower at the tires. This translates to about 160 horsepower gain at the crankshaft. A typical install time is eight to 10 hours on this setup. Procharger makes kits for all types of vehicles, including marine and power sport applications. Check them out to see what they have for you.
(Pat)>> For more information on anything you've seen on today's show check out Powernation TV dot com. [ music ]
(Mike)>> Pat and I build and dyno several engines per year. Some are purpose built race engines and some are built just for the street. No matter what they're for our goal is to help you decide on what parts to buy and learn the techniques and procedures to build your own engines at home.
(Pat)>> When some of the engines that we build come off of the dyno they can sit on an engine stand or engine cradle for quite some time, and that can raise a few issues like losing some valve spring tension, getting rust on the internals due to temperature or condensation in the building, along with even the fuel and the carburetor or the fuel rails turning to varnish, but today we are going to show you how to properly store an engine to avoid all of that.
(Mike)>> This is our tech savvy small block stroker with the project name Re-Rev 2.0. It's a 383 cubic inch stroker we use for all types of part swapping tech. It produces 561 horsepower at 6,700 r-p-m and 491 at 5,100 naturally aspirated. Now we also installed an NOS nitrous kit and printed off 720 horsepower and 704 pound feet of torque.
(Pat)>> The first order of business for properly storing an engine is removing the carburetor, or in some cases fuel rails. Once removed drain the bowls or rails. A carb is flipped upside down and the fuel exits through the bowl vents. Once empty cycle the linkage several times so the fuel in the accelerator pumps and squirters is gone. Now we can remove the bowls since there will be a small amount of fuel left in them. [ music ] Next compressed air will clean out the jets and air bleeds. The bowls go back on now and the carb is wrapped in plastic for storage.
(Mike)>> Now the spark plugs are removed to access the cylinders. We like to use Sta-Bil fogging oil to prevent rust on the cylinder walls and piston rings. A few seconds of spraying is all that's needed. Next up are the valve springs. When they sit for a long period of time with the rocker arms tight they lose tension. We will loosen the rocker arms so all 16 valves are in the closed position. Any exposed ports like the exhaust, intake, or locations for sensors need to be sealed up. This will keep out unwanted pests and debris. Now is the time to replace the spark plugs. Make sure to do it after loosening the rocker since there will not be any compression when turning the engine over. The plastic fogging oil and tape are all items you can find at a local box store. Now this is the right way to store an engine and keep it safe from the elements.
(Pat)>> Now this may seem like a little bit of overkill but you never know where your engine's gonna sit and how long it's gonna sit for, and this will keep it safe until it's ready to get back in service.
