Engine Power Featured Projects
Engine Power Builds
Want more content like this?
Join the PowerNation Email NewsletterParts Used In This Episode
ARP
ARP is the Official Bolt Supplier to Engine Power
Holley
Fuel Cell Pump Module Assembly
Holley
Pro Dash
Holley
VR1 Series Fuel Regulator
Matco Tools
MATCO Tools are the Official Tool Supplier to Engine Power
Episode Transcript
(Narrator)>> Our mobile engine test sled has to handle any engine we can throw at it. So it's got to be ready when things heat up. Today on Engine Power we'll keep the drivetrain cool and the fuel flowing freely, and an old friend will drop by to create a wicked custom exhaust. Plus from bare steel to finished product, we'll show you how Dustless Blasting builds their world class blasting equipment. ♪ ♪
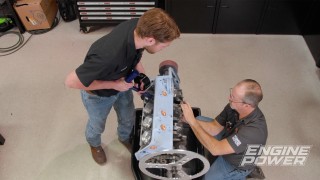
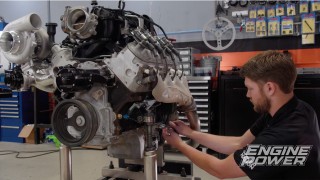
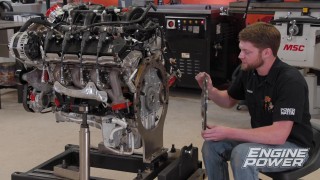
(Mike)>> Welcome to Engine Power. Today we are going to get some of the main components installed on our new test sled project. Now the first engine going between its frame rails is a big inch LS and this Gen two Precision turbocharger. Now the plan for today is to get the intercooler, trans cooler, fuel system, and the dash all wrapped up.
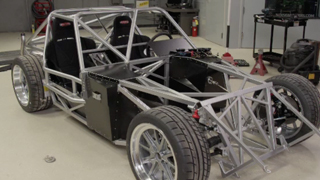
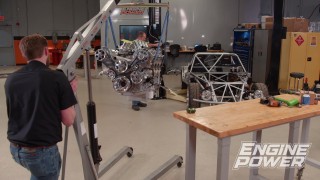
(Pat)>> Just in case you have not seen our test sled here it is. This is a Factory Five Type 65 Coupe-R chassis. We have an engine dyno and we have a chassis dyno, but now we have a rolling dyno and this will be the test bed for any engine combination we can put in it. The engine bay is large, and we have mounts for just about anything from Ford, Chevy, and Mopar. And hey, if we don't we have the equipment and know how to do it ourselves.
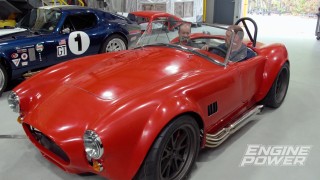
(Mike)>> We approached the guys at Factory Five Racing with the idea of having a vehicle we can utilize as a test sled for all the different engines we build throughout the year. They must have liked it because this light weight, great handling, and very safe chassis was delivered, and even came with a couple of guys to help us get it together. It's equipped with a super eight-eight Mustang independent rear suspension, fox body fuel tank, and fully adjustable front coil over suspension. The cockpit was fitted with pre-fabbed panels, and that gave us the perfect platform for our idea. The look will pretty much stay like this, but here's a look at what a finished Factory Five Type 65 Coupe-R looks like. This has to be one of the nicest transmission coolers we've seen and the first thing we'll be installing on the test sled today. Now it was custom made for us by No Corners Cut, or NCC. Now they make the most customizable products on the market so you get exactly what you need. They use Bell cores in all of their trans coolers, oil coolers, radiators, heat exchangers, and intercoolers. Now each one is pressure tested before it leaves so they know there are no issues with the welds or the cores. That way you know you're getting an excellent product. Pat and I made these brackets to mount it. They were fitted with small cushion grommets. The fan was supplied by No Corners Cut and will definitely keep the trans temps in check.
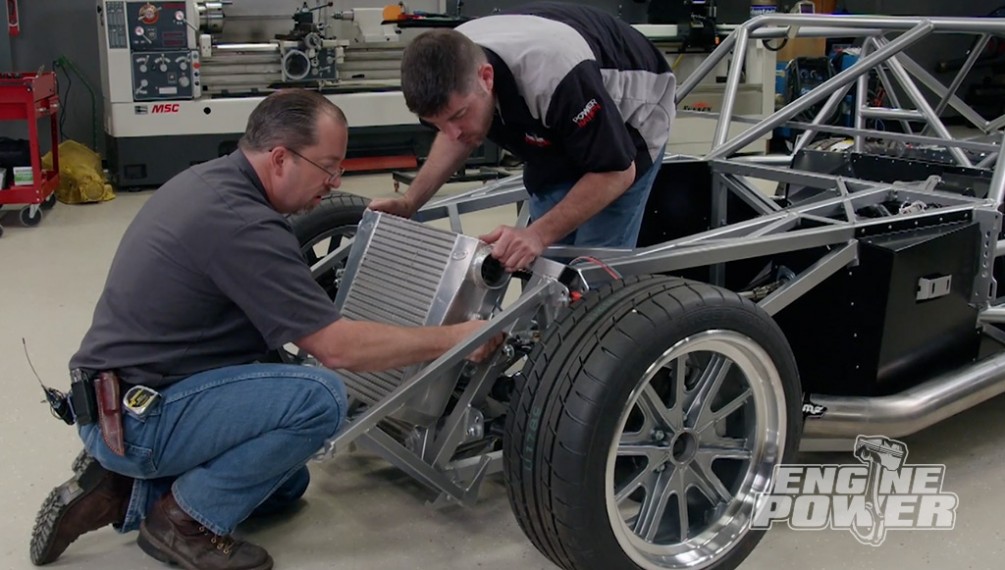
(Pat)>> Since the first engine that we're putting in the test sled will be a turbocharged operation making north of 1,000 horsepower we're gonna need to combat some heat. This intercooler is actually designed for a late model Mustang but it ends up fitting perfectly in our test sled. It has 1103 cubic inches of core area, a boss for a mass air meter, and standoffs for an easy install. We also bent up these aluminum brackets and put some nut-serts in the chassis to get it all in place. ♪ ♪ Ready?
(Mike)>> Yeah buddy.
(Pat)>> This aligns so nice you can practically throw the fasteners in.
(Mike)>> The fuel system on a vehicle with a big power plant needs to be up to the task of supplying enough fuel pressure and fuel volume. We want to use the fox body Mustang tank that came in our chassis but the stock pick up tube is a little too small to handle our big LS power we're putting in it. So we did a little research and came up with a unique solution that will supply the engine with more than enough fuel. This is Holley's fuel cell pump module assembly that is designed to drop into a fuel cell with a 10 bolt fill cap. The billet top houses a dash 10 feed and dash eight return line. Now this is designed for boosted, endurance, or weekend warrior cars, and the brushless fuel pump supports 2,400 horsepower in a carbureted application and 2,150 for e-f-i engines. A hole was cut in the top of the tank just above the tank's sump. Then the top of the pump was used as a template to drill the 10 holes needed for mounting. Now the pump can be installed for good. A split ring will give the fasteners a place to thread into. [ ratchet clicking ]
(Mike)>> The pump includes a two speed controller. It allows the pump to be ran in one of two speeds. Low speed for low fuel consumption requirements and a high speed for high fuel requirements.
(Narrator)>> Up next we'll visit a company that builds blasting systems and businesses.
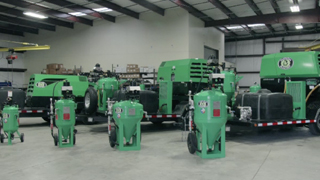
(Mike)>> Today we're out on the road. This time in Houston, Texas at the five acre manufacturing facility for Dustless Blasting. The reason we're here is to show you how they manufacture their equipment from start to finish and show you how you can get involved with your own business for basically the cost of an average pickup truck.
(Pat)>> And the business you create could be anything from a part time gig on the weekend to a full time job. So we're here to show how all of that equipment will come together and make that happen. You've seen the Powernation team use Dustless Blasting equipment on all kinds of parts and pieces, and for good reason. It's quick, effective, and portable. In addition it leaves behind very little blasting media. The media is suspended in water, which means there's no cloud of dry, drifting dust when blasting.
(Benny)>> What we're doing essentially is throwing wet handfuls of sand. So don't think we're standing in a puddle of water. As a matter of fact we only use five gallons over a 15 minute period.
(Mike)>> Manufacturing begins with raw stock that will be transformed into blast pots. First the shell and head are precisely cut using robotic equipment. Fittings will be welded on to these holes later. After the cylinder is measured and marked a seam is rolled onto each end where the head and cone will be welded into place. Next a fitting is tacked and finish welded to the bottom of the cone. The certified welders ensure that every blast pot meets ASME certification, making sure the equipment will easily handle the 150 p-s-i operating pressure.
(Pat)>> We've seen some impressive welding machines over the years but this one is truly industrial grade. The cylinder and cone are mated together with a submerged arc welding machine. The filler material is protected from atmospheric contamination by a powdered flux, which covers and protects the welding surface. A thick strong weld is made with excellent penetration. From the sub arc machine to here it looks like we have a lot more stuff. What has happened from there to here?
(Blain)>> Right so following our sub arc process we're gonna start to populate the machine with a different attachments that start to make it look like a finished product. Once we've tacked everything into place we move over to the next station where our certified welder will weld that because we're gonna be welding onto a pressurized vessel. So we want to make sure that we have certified welders doing that procedure.
(Mike)>> Attention to detail is crucial. For perfect fit and finish the hardware is trimmed in the c-n-c machine. Then it's chamfered by hand.
(Pat)>> Once the blast tanks are finish welded and pressure tested they are prepped for paint. These machines will spend years blasting hundreds of items but this is the one time they are blasted.
(Mike)>> After the blast tanks are primed they are sprayed with Dustless Blasting's signature shade of green. From there the hardware and labels are meticulously attached by hand. Each piece of hardware is industrial grade, designed for years of hard service. The blast tanks carry a lifetime limited warranty. Once everything is installed the unit is pressurized and check for proper operation.
(Pat)>> Dustless Blasting equipment is available in dozens of configurations, from smaller units on wheels to massive layouts on dedicated trailers. Just like the blast tanks, the trailers are built at Dustless Blasting's facility. They are custom designed for the layout of the blasting equipment, and everything is organized for ease of operation in the field.
(Mike)>> Diamond plate steel and aluminum are cut to size for the tool boxes and trailer floor. Then it's all set into place. The towing equipment, heavy duty axles, and eight ply tires come next. The total weight of these mobile blasting systems ranges from just over 4,000 pounds to almost 10,000, and these trailers are built to handle it.
(Pat)>> Dustless Blasting systems can be shipped to you or you can pick up your new equipment in person at the manufacturing facility in Houston. Many people choose this option because they can meet the team that built their system, get some hands on training, and see the place where it all comes together. The walls here are covered with photos from people of all walks of life who came here to start their own business.
(Mike)>> When you purchase Dustless Blasting equipment you're starting a business that you own yourself. It's not a franchise. We all think if cars but the need for blasting goes way beyond that. There are restorations of all sorts, such as buildings, industrial equipment, anything that needs rust or paint removal. In addition Dustless Blasting offers comprehensive training and tech support, as well as marketing and advertising materials to let your community know you're in business.
(Jennifer)>> The slogan being work for yourself not by yourself, and that comes into play with our after the sale support, marketing materials, and things that we're able to provide for them with that. A lot of people do come to us and they have a drive and a passion, but it's for the work itself. It's not for the business side of it.
(Pat)>> If you've always wanted to work for yourself but weren't sure where to begin Dustless Blasting has the answers you need.
(Narrator)>> Up next, with a test sled we need to see all the numbers. This dash display has got that covered.
(Pat)>> We reached out to Summit Racing for one of their adjustable battery mount kits. This is a bolt in design that can handle several different battery sizes. It's made from steel and has an outer mount and J-bolt mounting hardware. It's powder coated and can be mounted to frame rails, roll cage tubing, inner fender wells, or anywhere you can find a solid spot. We will mount it to the back of the chassis just above the fuel tank. We installed nut-serts to secure it just like we used on the trans cooler and intercooler. An aluminum spacer is being used to support the bottom, which is important since the battery has some weight to it. For all of the electronics this vehicle has on board we have to have a battery designed to handle them. This one is 99.99 percent lead, not lead alloy. It has 1,500 hot cranking amps and 792 cold cranking amps. It weighs 46 pounds, which will help us get some more weight at the rear of the vehicle.
(Mike)>> With such a powerful fuel pump installed back in the tank we need a way to control the pressure and the volume. For that we're using one of Holley's VR One series two port fuel pressure regulators. Now this one is adjustable from 40 to 100 p-s-i and has a one to one boost reference. Both of the inlets and the return are dash 10 O-ring fittings and the entire body is made out of billet aluminum. The bottom portion is anodized to resist corrosion, and this regulator is designed to be used with Holley's brushless fuel pumps. It's also available in a four port version, and if you have a carburetor they offer a low pressure model to cover your needs.
(Pat)>> Mocking up an engine in a new project has several factors involved, from the correct location, the angle for the driveshaft alignment, and all the clearance for the accessories in regards to the radiator are all important factors. This Pyar block is a plastic version of the real LS we'll be installing later. We fabricated these mount plates from steel we had laying around. They we're tig welded and bolted to the chassis in three locations. We coated them with Dupli-Color's premium truck bed coating. It prevents rust and is also resistant to fading and chipping.
(Mike)>> You sure are a strong fella. ♪ ♪ Newly released automotive products always get our attention, and recently we laid eyes on one that's going to dress up the driver's compartment of our dyno sled in epic fashion. It's Holley's new 12.3 inch pro dash. A digital touch screen dash board that that has a huge viewing area and it's fully customizable. ♪ ♪
(Narrator)>> Up next the test sled gets a custom exhaust system with plenty of style.
(Pat)>> Whenever we've got a custom exhaust project in our shop we call on Magnaflow's Richard Waitas. As always he brought a wide selection of components along with his creativity and many years' worth of exhaust building experience. For the test sled we needed a side exhaust setup that could handle any engine configuration that we can imagine.
(Mike)>> Richard this one's a little different than the normal you do. We don't have to go underneath the car or anything like that. Tell us what you have planned.
(Richard)>> Well it looks like we're gonna be doing kind of that open wheelish outside the perimeter. That's definitely within the design of the vehicle, but I see an LS in here. So what are we starting with?
(Pat)>> Well because this is our universal test vehicle the first engine's gonna be a big single turbocharger, but keep in mind that this is setup, engine bay wise and how big it is, we're gonna put anything and everything in here from small, big block, Ford, Chevy, Mopar. This could have a straight six, it could have a four cylinder, V-10, the sky's the limit.
(Richard)>> Got it, so mobile demonstration engine dyno.
(Pat)>> I like that!
(Mike)>> Richard uses what he calls the eye-rometer, meaning if it looks good it is good. After several marks and a few cuts everything is coming together nicely. Here Richard is welding on the brackets that will secure the muffler to the chassis. ♪ ♪
(Richard)>> So something that you may have noticed that's slightly different is that I've started building in the middle. I had to mount the muffler because my other hard point is the manifold, and to determine where all the pipes are gonna run I basically had to have the second point, my A to B. So now I'm gonna build between them, finish up the tail pipe, and be ready to go.
(Pat)>> He welds on the ball flange for the header down pipe and checks the fitment of the exhaust piping, including the mid pipe. After measuring the front end of the mid pipe it's trimmed to fit.
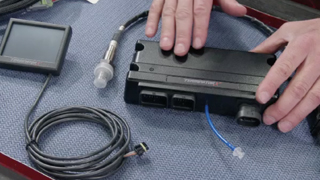
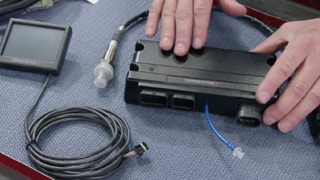
(Mike)>> The exhaust pipes are made from 409 stainless steel, which looks great underneath or in our case on the sides of any vehicle. It also has excellent longevity. If you're interested in building a custom exhaust system visit Magnaflow's website and check out their builder kits. With the exhaust welded up and bolted up, and a little bling for good measure we've got a killer three inch exhaust that matches the look of our test sled perfectly. Richard even made us a four inch straight through short system, which we'll use with the turbo LS. For more information on any of the products you've seen today head on over to Powernation TV dot com. Holley's Terminator-X is a standalone plug and play LS engine controller. Now it's available for both 24-X and 58-X crank reluctor wheels. It has onboard diagnostic so you can identify any critical engine issues at a glance. It uses a genuine Bosch wide man sensor and has four inputs and four outputs. Other features include a boost controller, nitrous controller, and integrated data logging to the three and a half inch hand held s-d card. It also comes with the main wiring harness and free tuning software. Plus it's very affordable. To find out more information on the system and get pricing visit Holley dot com.
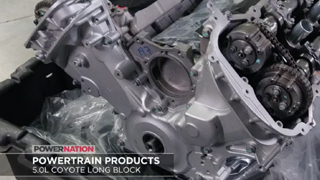
(Pat)>> Powertrain Products is one of the nation's leaders in business of providing quality remanufactured engines, transmissions, and driveline components for both domestic and foreign vehicles. For example, this is a Ford five liter Coyote long block assembly that fits 2011 to 2013 F-150's. These fully rebuilt and tested engines are o-e-m quality, fully updated, and re-engineered to address any known issues that may be present with a given design. You can also get an industry leading seven year million mile no fault warranty to cover you and you'll pay no upfront core fee. Go check them out at Powertrain Products dot net. ♪ ♪ Whether you're behind the wheel of your daily driver, a drag car, or even a corner carver one thing they all have to have in common to handle correctly is the front end geometry has to be right. If it's not the vehicle will pull to one side or the other, or will pull in either direction during breaking, causing the vehicle to lose control. Steering during hard acceleration can be affected as well. Good and even tire wear is also sacrificed when the wheel alignment is not correct. The geometry is made up of three different settings called castor, camber, and toe, and these settings have to be done at the vehicle's ride height because the suspension's travel effects each one. Recently we set the alignment on our new dyno sled chassis from Factory Five Racing. The tools used were a castor/camber gauge, toe plates, and a couple of tape measures. Castor angle is the forward or backward angle of a line that's drawn through the steering's pivots as viewed from the side of a vehicle. It's expressed in degrees, and it's measured by the comparison of the line that's drawn through the steering's pivots, which is usually the upper or lower ball joints in most cases, and a line that's drawn perpendicular to the ground. This setting optimizes the self-centering of the steering on a vehicle and reduces the amount of force it takes to return the wheels to center. Camber is simple to understand. It is how far the tire angles toward or away from the vertical position when looking at the tire from the front of the vehicle. It is also expressed in degrees. When the top of the tire leans outward or away from the vehicle that is called positive camber. When the top of the tire leans inward it is referred to as negative camber. Negative camber increases the grip of the tire during cornering because it puts it at a better angle, increasing the contact patch of the tire on the road surface. Toe is the direction the tires are pointed compared to the center line of the vehicle when viewed from above the vehicle. It is usually expressed in fractions of an inch. Toe in means that the front of the tires are point slightly inward towards each other. Toe out means the exact opposite. The front of the tires are pointing slightly outwards, meaning the front of the tire is further away and the back of the tires are closing together. Driving styles and the vehicle's purpose will all effect what these alignment settings need to be, and here's a look at some of the tools to setup the castor, camber, and toe at the track or at home on a project of your own. A castor/camber gauge let's you adjust both settings within a fraction of a degree. They come in digital and vial models like the ones seen here. Expect to pay between $100 to $300 for a quality model with highdf price versions including additional adapters for a wider variety of uses. A toe gauge measures toe in and toe out with excellent precision, often around one-sixteenth of an inch. A good toe gauge can be purchased for roughly $100 dollars. For anyone who spends time adjusting vehicle alignment both of these tools are essential purchases.
Show Full Transcript
(Mike)>> Welcome to Engine Power. Today we are going to get some of the main components installed on our new test sled project. Now the first engine going between its frame rails is a big inch LS and this Gen two Precision turbocharger. Now the plan for today is to get the intercooler, trans cooler, fuel system, and the dash all wrapped up.
(Pat)>> Just in case you have not seen our test sled here it is. This is a Factory Five Type 65 Coupe-R chassis. We have an engine dyno and we have a chassis dyno, but now we have a rolling dyno and this will be the test bed for any engine combination we can put in it. The engine bay is large, and we have mounts for just about anything from Ford, Chevy, and Mopar. And hey, if we don't we have the equipment and know how to do it ourselves.
(Mike)>> We approached the guys at Factory Five Racing with the idea of having a vehicle we can utilize as a test sled for all the different engines we build throughout the year. They must have liked it because this light weight, great handling, and very safe chassis was delivered, and even came with a couple of guys to help us get it together. It's equipped with a super eight-eight Mustang independent rear suspension, fox body fuel tank, and fully adjustable front coil over suspension. The cockpit was fitted with pre-fabbed panels, and that gave us the perfect platform for our idea. The look will pretty much stay like this, but here's a look at what a finished Factory Five Type 65 Coupe-R looks like. This has to be one of the nicest transmission coolers we've seen and the first thing we'll be installing on the test sled today. Now it was custom made for us by No Corners Cut, or NCC. Now they make the most customizable products on the market so you get exactly what you need. They use Bell cores in all of their trans coolers, oil coolers, radiators, heat exchangers, and intercoolers. Now each one is pressure tested before it leaves so they know there are no issues with the welds or the cores. That way you know you're getting an excellent product. Pat and I made these brackets to mount it. They were fitted with small cushion grommets. The fan was supplied by No Corners Cut and will definitely keep the trans temps in check.
(Pat)>> Since the first engine that we're putting in the test sled will be a turbocharged operation making north of 1,000 horsepower we're gonna need to combat some heat. This intercooler is actually designed for a late model Mustang but it ends up fitting perfectly in our test sled. It has 1103 cubic inches of core area, a boss for a mass air meter, and standoffs for an easy install. We also bent up these aluminum brackets and put some nut-serts in the chassis to get it all in place. ♪ ♪ Ready?
(Mike)>> Yeah buddy.
(Pat)>> This aligns so nice you can practically throw the fasteners in.
(Mike)>> The fuel system on a vehicle with a big power plant needs to be up to the task of supplying enough fuel pressure and fuel volume. We want to use the fox body Mustang tank that came in our chassis but the stock pick up tube is a little too small to handle our big LS power we're putting in it. So we did a little research and came up with a unique solution that will supply the engine with more than enough fuel. This is Holley's fuel cell pump module assembly that is designed to drop into a fuel cell with a 10 bolt fill cap. The billet top houses a dash 10 feed and dash eight return line. Now this is designed for boosted, endurance, or weekend warrior cars, and the brushless fuel pump supports 2,400 horsepower in a carbureted application and 2,150 for e-f-i engines. A hole was cut in the top of the tank just above the tank's sump. Then the top of the pump was used as a template to drill the 10 holes needed for mounting. Now the pump can be installed for good. A split ring will give the fasteners a place to thread into. [ ratchet clicking ]
(Mike)>> The pump includes a two speed controller. It allows the pump to be ran in one of two speeds. Low speed for low fuel consumption requirements and a high speed for high fuel requirements.
(Narrator)>> Up next we'll visit a company that builds blasting systems and businesses.
(Mike)>> Today we're out on the road. This time in Houston, Texas at the five acre manufacturing facility for Dustless Blasting. The reason we're here is to show you how they manufacture their equipment from start to finish and show you how you can get involved with your own business for basically the cost of an average pickup truck.
(Pat)>> And the business you create could be anything from a part time gig on the weekend to a full time job. So we're here to show how all of that equipment will come together and make that happen. You've seen the Powernation team use Dustless Blasting equipment on all kinds of parts and pieces, and for good reason. It's quick, effective, and portable. In addition it leaves behind very little blasting media. The media is suspended in water, which means there's no cloud of dry, drifting dust when blasting.
(Benny)>> What we're doing essentially is throwing wet handfuls of sand. So don't think we're standing in a puddle of water. As a matter of fact we only use five gallons over a 15 minute period.
(Mike)>> Manufacturing begins with raw stock that will be transformed into blast pots. First the shell and head are precisely cut using robotic equipment. Fittings will be welded on to these holes later. After the cylinder is measured and marked a seam is rolled onto each end where the head and cone will be welded into place. Next a fitting is tacked and finish welded to the bottom of the cone. The certified welders ensure that every blast pot meets ASME certification, making sure the equipment will easily handle the 150 p-s-i operating pressure.
(Pat)>> We've seen some impressive welding machines over the years but this one is truly industrial grade. The cylinder and cone are mated together with a submerged arc welding machine. The filler material is protected from atmospheric contamination by a powdered flux, which covers and protects the welding surface. A thick strong weld is made with excellent penetration. From the sub arc machine to here it looks like we have a lot more stuff. What has happened from there to here?
(Blain)>> Right so following our sub arc process we're gonna start to populate the machine with a different attachments that start to make it look like a finished product. Once we've tacked everything into place we move over to the next station where our certified welder will weld that because we're gonna be welding onto a pressurized vessel. So we want to make sure that we have certified welders doing that procedure.
(Mike)>> Attention to detail is crucial. For perfect fit and finish the hardware is trimmed in the c-n-c machine. Then it's chamfered by hand.
(Pat)>> Once the blast tanks are finish welded and pressure tested they are prepped for paint. These machines will spend years blasting hundreds of items but this is the one time they are blasted.
(Mike)>> After the blast tanks are primed they are sprayed with Dustless Blasting's signature shade of green. From there the hardware and labels are meticulously attached by hand. Each piece of hardware is industrial grade, designed for years of hard service. The blast tanks carry a lifetime limited warranty. Once everything is installed the unit is pressurized and check for proper operation.
(Pat)>> Dustless Blasting equipment is available in dozens of configurations, from smaller units on wheels to massive layouts on dedicated trailers. Just like the blast tanks, the trailers are built at Dustless Blasting's facility. They are custom designed for the layout of the blasting equipment, and everything is organized for ease of operation in the field.
(Mike)>> Diamond plate steel and aluminum are cut to size for the tool boxes and trailer floor. Then it's all set into place. The towing equipment, heavy duty axles, and eight ply tires come next. The total weight of these mobile blasting systems ranges from just over 4,000 pounds to almost 10,000, and these trailers are built to handle it.
(Pat)>> Dustless Blasting systems can be shipped to you or you can pick up your new equipment in person at the manufacturing facility in Houston. Many people choose this option because they can meet the team that built their system, get some hands on training, and see the place where it all comes together. The walls here are covered with photos from people of all walks of life who came here to start their own business.
(Mike)>> When you purchase Dustless Blasting equipment you're starting a business that you own yourself. It's not a franchise. We all think if cars but the need for blasting goes way beyond that. There are restorations of all sorts, such as buildings, industrial equipment, anything that needs rust or paint removal. In addition Dustless Blasting offers comprehensive training and tech support, as well as marketing and advertising materials to let your community know you're in business.
(Jennifer)>> The slogan being work for yourself not by yourself, and that comes into play with our after the sale support, marketing materials, and things that we're able to provide for them with that. A lot of people do come to us and they have a drive and a passion, but it's for the work itself. It's not for the business side of it.
(Pat)>> If you've always wanted to work for yourself but weren't sure where to begin Dustless Blasting has the answers you need.
(Narrator)>> Up next, with a test sled we need to see all the numbers. This dash display has got that covered.
(Pat)>> We reached out to Summit Racing for one of their adjustable battery mount kits. This is a bolt in design that can handle several different battery sizes. It's made from steel and has an outer mount and J-bolt mounting hardware. It's powder coated and can be mounted to frame rails, roll cage tubing, inner fender wells, or anywhere you can find a solid spot. We will mount it to the back of the chassis just above the fuel tank. We installed nut-serts to secure it just like we used on the trans cooler and intercooler. An aluminum spacer is being used to support the bottom, which is important since the battery has some weight to it. For all of the electronics this vehicle has on board we have to have a battery designed to handle them. This one is 99.99 percent lead, not lead alloy. It has 1,500 hot cranking amps and 792 cold cranking amps. It weighs 46 pounds, which will help us get some more weight at the rear of the vehicle.
(Mike)>> With such a powerful fuel pump installed back in the tank we need a way to control the pressure and the volume. For that we're using one of Holley's VR One series two port fuel pressure regulators. Now this one is adjustable from 40 to 100 p-s-i and has a one to one boost reference. Both of the inlets and the return are dash 10 O-ring fittings and the entire body is made out of billet aluminum. The bottom portion is anodized to resist corrosion, and this regulator is designed to be used with Holley's brushless fuel pumps. It's also available in a four port version, and if you have a carburetor they offer a low pressure model to cover your needs.
(Pat)>> Mocking up an engine in a new project has several factors involved, from the correct location, the angle for the driveshaft alignment, and all the clearance for the accessories in regards to the radiator are all important factors. This Pyar block is a plastic version of the real LS we'll be installing later. We fabricated these mount plates from steel we had laying around. They we're tig welded and bolted to the chassis in three locations. We coated them with Dupli-Color's premium truck bed coating. It prevents rust and is also resistant to fading and chipping.
(Mike)>> You sure are a strong fella. ♪ ♪ Newly released automotive products always get our attention, and recently we laid eyes on one that's going to dress up the driver's compartment of our dyno sled in epic fashion. It's Holley's new 12.3 inch pro dash. A digital touch screen dash board that that has a huge viewing area and it's fully customizable. ♪ ♪
(Narrator)>> Up next the test sled gets a custom exhaust system with plenty of style.
(Pat)>> Whenever we've got a custom exhaust project in our shop we call on Magnaflow's Richard Waitas. As always he brought a wide selection of components along with his creativity and many years' worth of exhaust building experience. For the test sled we needed a side exhaust setup that could handle any engine configuration that we can imagine.
(Mike)>> Richard this one's a little different than the normal you do. We don't have to go underneath the car or anything like that. Tell us what you have planned.
(Richard)>> Well it looks like we're gonna be doing kind of that open wheelish outside the perimeter. That's definitely within the design of the vehicle, but I see an LS in here. So what are we starting with?
(Pat)>> Well because this is our universal test vehicle the first engine's gonna be a big single turbocharger, but keep in mind that this is setup, engine bay wise and how big it is, we're gonna put anything and everything in here from small, big block, Ford, Chevy, Mopar. This could have a straight six, it could have a four cylinder, V-10, the sky's the limit.
(Richard)>> Got it, so mobile demonstration engine dyno.
(Pat)>> I like that!
(Mike)>> Richard uses what he calls the eye-rometer, meaning if it looks good it is good. After several marks and a few cuts everything is coming together nicely. Here Richard is welding on the brackets that will secure the muffler to the chassis. ♪ ♪
(Richard)>> So something that you may have noticed that's slightly different is that I've started building in the middle. I had to mount the muffler because my other hard point is the manifold, and to determine where all the pipes are gonna run I basically had to have the second point, my A to B. So now I'm gonna build between them, finish up the tail pipe, and be ready to go.
(Pat)>> He welds on the ball flange for the header down pipe and checks the fitment of the exhaust piping, including the mid pipe. After measuring the front end of the mid pipe it's trimmed to fit.
(Mike)>> The exhaust pipes are made from 409 stainless steel, which looks great underneath or in our case on the sides of any vehicle. It also has excellent longevity. If you're interested in building a custom exhaust system visit Magnaflow's website and check out their builder kits. With the exhaust welded up and bolted up, and a little bling for good measure we've got a killer three inch exhaust that matches the look of our test sled perfectly. Richard even made us a four inch straight through short system, which we'll use with the turbo LS. For more information on any of the products you've seen today head on over to Powernation TV dot com. Holley's Terminator-X is a standalone plug and play LS engine controller. Now it's available for both 24-X and 58-X crank reluctor wheels. It has onboard diagnostic so you can identify any critical engine issues at a glance. It uses a genuine Bosch wide man sensor and has four inputs and four outputs. Other features include a boost controller, nitrous controller, and integrated data logging to the three and a half inch hand held s-d card. It also comes with the main wiring harness and free tuning software. Plus it's very affordable. To find out more information on the system and get pricing visit Holley dot com.
(Pat)>> Powertrain Products is one of the nation's leaders in business of providing quality remanufactured engines, transmissions, and driveline components for both domestic and foreign vehicles. For example, this is a Ford five liter Coyote long block assembly that fits 2011 to 2013 F-150's. These fully rebuilt and tested engines are o-e-m quality, fully updated, and re-engineered to address any known issues that may be present with a given design. You can also get an industry leading seven year million mile no fault warranty to cover you and you'll pay no upfront core fee. Go check them out at Powertrain Products dot net. ♪ ♪ Whether you're behind the wheel of your daily driver, a drag car, or even a corner carver one thing they all have to have in common to handle correctly is the front end geometry has to be right. If it's not the vehicle will pull to one side or the other, or will pull in either direction during breaking, causing the vehicle to lose control. Steering during hard acceleration can be affected as well. Good and even tire wear is also sacrificed when the wheel alignment is not correct. The geometry is made up of three different settings called castor, camber, and toe, and these settings have to be done at the vehicle's ride height because the suspension's travel effects each one. Recently we set the alignment on our new dyno sled chassis from Factory Five Racing. The tools used were a castor/camber gauge, toe plates, and a couple of tape measures. Castor angle is the forward or backward angle of a line that's drawn through the steering's pivots as viewed from the side of a vehicle. It's expressed in degrees, and it's measured by the comparison of the line that's drawn through the steering's pivots, which is usually the upper or lower ball joints in most cases, and a line that's drawn perpendicular to the ground. This setting optimizes the self-centering of the steering on a vehicle and reduces the amount of force it takes to return the wheels to center. Camber is simple to understand. It is how far the tire angles toward or away from the vertical position when looking at the tire from the front of the vehicle. It is also expressed in degrees. When the top of the tire leans outward or away from the vehicle that is called positive camber. When the top of the tire leans inward it is referred to as negative camber. Negative camber increases the grip of the tire during cornering because it puts it at a better angle, increasing the contact patch of the tire on the road surface. Toe is the direction the tires are pointed compared to the center line of the vehicle when viewed from above the vehicle. It is usually expressed in fractions of an inch. Toe in means that the front of the tires are point slightly inward towards each other. Toe out means the exact opposite. The front of the tires are pointing slightly outwards, meaning the front of the tire is further away and the back of the tires are closing together. Driving styles and the vehicle's purpose will all effect what these alignment settings need to be, and here's a look at some of the tools to setup the castor, camber, and toe at the track or at home on a project of your own. A castor/camber gauge let's you adjust both settings within a fraction of a degree. They come in digital and vial models like the ones seen here. Expect to pay between $100 to $300 for a quality model with highdf price versions including additional adapters for a wider variety of uses. A toe gauge measures toe in and toe out with excellent precision, often around one-sixteenth of an inch. A good toe gauge can be purchased for roughly $100 dollars. For anyone who spends time adjusting vehicle alignment both of these tools are essential purchases.
