Engine Power Featured Projects
Engine Power Builds
Want more content like this?
Join the PowerNation Email NewsletterParts Used In This Episode
MSC
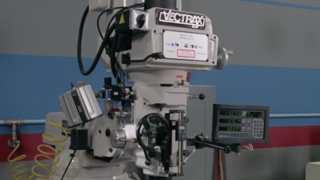
Vectrax - 10 Inch Wide x 54 Inch Long Table, Variable Speed Pulley Control, 3 Phase Knee Milling Machine with Digital Readout (DRO)
ARP
ARP is the Official Bolt Supplier to Engine Power
Matco Tools
MATCO Tools are the Official Tool Supplier to Engine Power
Episode Transcript
(Narrator)>> Our Windsor stroker needs a bigger crank shaft, and that requires a little surgery. Today on Engine Power we clearance the block, and while we're in a machining mood we fire up the cylinder hone too. Plus the shop gets a state of the art test cell and some needed dyno upgrades. We can't wait to go full throttle! [ engine revving ]
♪ ♪
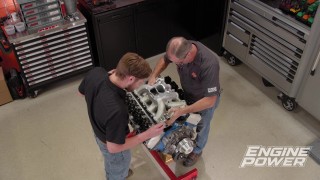
(Pat)>> Welcome to Engine Power. We are getting back on our old 351 Windsor project turning it into a stroker engine, but we're gonna do it a little bit different this time. Instead of changing out a bunch of parts to maximize horsepower the only components we're changing right now will be the crank shaft, the connecting rods, and the pistons. Just the pieces needed to increase its cubic inch displacement. We've already filled this power plant with plenty of performance parts, such as a set of Trick Flow 225 high port cylinder heads and one of their street and strip hydraulic roller cams. The 351 made 448 horses and 423 pound feet of torque. The stock stroke on a Windsor is three-500 and we'll be increasing that to four inch. Now that doesn't like much but it will increase the total displacement of the engine from 357 inches currently to 408. an additional 51 cubes, and with no other changes made that should give us a significant increase in horsepower. We've still got to finish the teardown, and while we're at it we'll continue to inspect the engine closely for any wear problems or mechanical issues. The pick-up is removed from the standard volume oil pump. Then a couple of ARP's are loosened and the pump comes off. A Summit Racing balancer is next for the removal procedure, followed by the timing pointer and timing cover. Whoa! With the timing chain and cam plate removed, the hydraulic roller bump stick can carefully be pulled out. It's a common practice on small block Ford strokers to have to notch the bottom of the cylinder for the rod bolt going by. Now we already have this engine together. So we have a centerline for the location of the notch. So we're gonna go ahead and mark it now.
(Mike)>> A stroker crankshaft's rod journals are further away from the center line of the crankshaft. So that's why the block needs to be notched. Factory applications are not designed to handle increases in stroke. With the block marked we will continue the rest of the teardown on the other side of the shop where the machining equipment is. Even though we are not reusing these rod assemblies it's always a good idea to mark the rod and cap to keep them in order. These may be used in a build down the line. Here's what the markings should look like.
(Pat)>> I got some boots.
(Mike)>> I thought you were gonna put one on my thumb.
(Pat)>> What's with the Bugs Bunny thumb?
(Mike)>> I've got some stitches under there. The band saw and I got in a fight and the band saw won.
(Pat)>> Everybody hacks on me about hurting myself and look at that.
(Mike)>> Yeah I hit it pretty bad. We can loosen the rod nuts half way and use a mallet to break the cap and rod apart. This is a press fit. The nuts are removed now, the cap is pulled, and the rod and piston can be pressed out of the bore, all eight of them. ♪ ♪ Now the main caps are loosened. We do them in reverse of the original torque sequence. Starting from the outside in keeps the main bearing bore alignment from warping when the block is hot. Obviously this one isn't but perfect practice makes perfect.
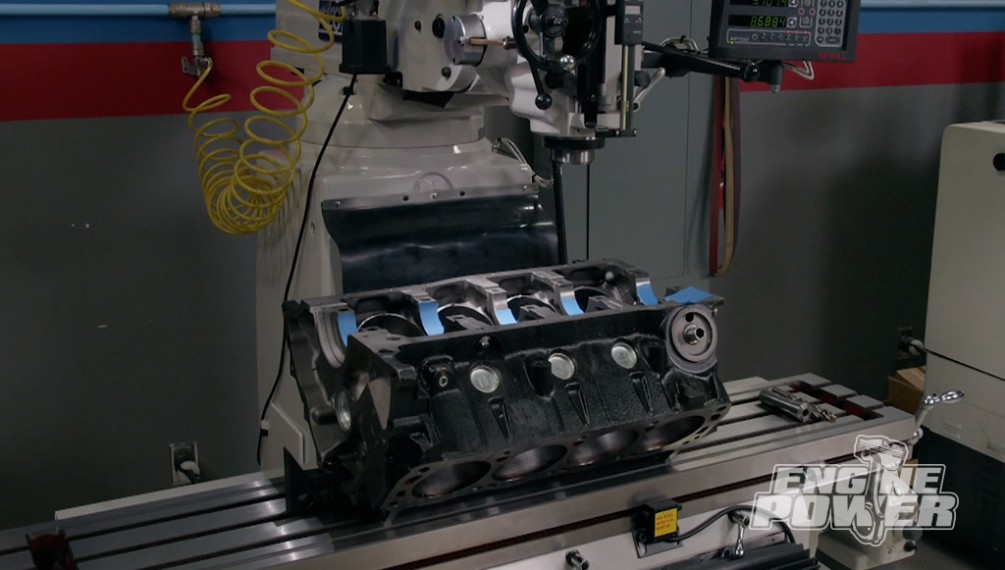
(Pat)>> The block is on the table of our MSC Vectrax vertical mill. This is where the clearancing for the rod bolts will be precisely performed. This can be done on an engine stand with a carbide burr but since we have the capabilities we are gonna take advantage of it. Since we marked the center of the area where the rod bolt will interfere it's easy to maintain centers for the others because we know the bore spacing of this Windsor is four point three-eight-zero inches. So that's how far the mill table will have to move to reach the next clearancing location. [ drill spinning ]
(Mike)>> Each area being clearanced gets several passes. This removes a little material at a time, keeping the cutter cool. This is considered plunge cutting. Getting too aggressive is hard on the tooling and can be catastrophic on the work piece. ♪ ♪
(Pat)>> Watch all the other fingers.
(Mike)>> I'm good. To remove all the metal shavings left behind and clean the block before honing the last step is a quick bath in the heated washer.
(Narrator)>> Up next the most precise hone job begins with a torque plate. Plus our engine dyno gets a major update starting from the ground up.
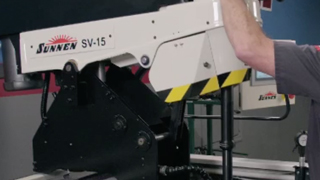
(Mike)>> Engine Power is back and we're loading our 351 Windsor block into our newest machine, a Sunnen SV-15 hone. Today we're going to touch up the cylinder bores and get them ready for the new pistons on our soon to be 408 cubic inch stroker.
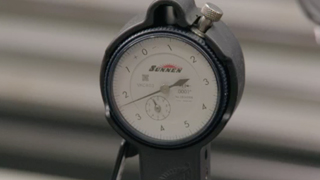
(Pat)>> To accurately measure the bores down to the ten thousandths of an inch we will be using Sunnen's gauge setting fixture and dial bore gauge. These are the most accurate and reliable in the industry. We're setting the gauge to four inch 30 thousandths, which will be our finished bore size. We always double check with a micrometer but there is never any differences unless something has been damaged or mishandled.
(Mike)>> Before we start honing we're gonna hit the brakes and slow down a little bit to fill you in on some honing tech. Now this will help you understand what goes on at the machine shop when you drop your block off for this process. Now Pat has a lot of experience with this machine. So he's gonna take it away.
(Pat)>> And what we're referring to is we're gonna hone this engine with a torque plate attached, and what a torque plate does, it simulates the distortion in the bore as the cylinder head is bolted on, and there are a few things that you need to know about torque plate honing before you even start that. One is the gasket. We are using the same thickness and bore size gasket because when you clamp the plate down it will distort the top of the cylinder the same way as a gasket while running. Also the length of the bolt is a concern. It has to protrude the same amount out of the torque plate as it does in the cylinder head. So we'll go measure that.
(Mike)>> Measuring an existing ARP head bolt it protrudes out of the head 968 thousandths. So the bolts we installed on the torque plate are within six thousandths, which is close enough. The MLS gasket is the first thing to go on the deck's surface. Now the bolts and the plate are getting lubed with ARP Ultra Torque, which is the same stuff we will use on the head bolts. This will ensure the torque values are the same. The torque plate goes in place now. It is snugged down using the torque sequence of the cylinder head. They are now torqued to 100 pound feet, which is what the cylinder head will be tightened to when installed.
(Pat)>> We are all torqued up and almost ready to go, but before we do any honing we're gonna have to plug in a few parameters into the SV-15. The first entry is the final bore size, which is four inch 30 thousandths, followed by the bore length of six inches. Then we lay in all of the other variables, which are the stone length, over stroke at top and bottom. Then the spindle speed and stroke speed of the hone. The last two gives us the cross hatch angle that we want for this application, which is 38 degrees. Starting off with 220 grit diamond abrasives we can drop the hone into the first bore and set the crown for the increment we want taken out. After several strokes we get within a half thousandths of our finished bore size. The Sunnen gauge not only shows the bore size but also if the bore has taper or if the cylinder is out of round. With this hone there is almost none of either. The process is repeated for the remaining bores, checking in between the hone cycles with the bore gauge. The machine auto dwells on where it has a tight spot. Where it's dwelling is where that torque pulled it out of round. I've never used a machine as nice as this one. Now the stones are change to an 800 grit for the final plateau hone. The stones are dressed to make sure there is no material that has built up on the diamond abrasive. The final passes by the hone are removing the last half thousandths of material. The accuracy of the hone is impressive. We are within one 10 thousandths of an inch top to bottom. That's roughly 10 times smaller than a human hair. We confirm these numbers with the dial bore gauge. [ drill spinning ] ♪ ♪ [ ratchet twisting ]
(Pat)>> The whole process is then repeated on the other four bores. This is the final result, a beautiful, accurate cylinder bore. Now our cylinders are all tuned up and this block is ready to come out, and get put in the cleaner, and cleaned for final assembly. Now we only had to take one thousandths worth of material out of this block and that's because our pistons required a specific skirt clearance and the block was a little small, which is okay. The way we did it here we did it in a step so it had a nice plateau hone finish, and to be able to do this in house is something I can't even describe.
(Narrator)>> Up next bigger is better when you're talking about dyno cells.
(Pat)>> Welcome back to Engine Power. Last year we made some big upgrades in our shop including a new lift, the cylinder hone we've been using today, and an in ground chassis dyno. This year we're upgrading our engine dyno, starting with the cell itself. First the exhaust fan ducting was removed, and using a wet saw a four by five rectangle was cut for the air inlet vent. Then the exhaust fan was pulled very carefully. The new exhaust fan is larger. So the exhaust outlet was cut to match the inlet. Four feet tall by five feet wide. Finally panel by panel the old dyno cell was dismantled.
(Mike)>> Questmark laid down their thin mill coating, which is a high performance floor product that offers excellent abrasion and chemical resistance. The perfect choice for a dyno cell. They finished it out with decorative flake and cleared it with a semi-gloss top coat. Tons of cool packages show up on our loading dock, and this is one of the coolest. The SoundMaster dyno cell arrived carefully packed in a rather substantial shipping crate.
(Jason)>> So once you receive your test cell you can uncrate it. You're gonna start with your floor and your foundation. Once you have the floor channel down that's already pre-cut. All of our products and materials are pre-cut and pre-assembled where they can be. You're gonna level up your floor track, and then you're gonna start your construction with the panels, and it's really a good modular package where we give you a full set of design drawings. Prior to us creating your test cell you actually get to approve your test cell.
(Mike)>> With the track installed and leveled, the wall panels drop into position. They are only four inches thick but perform comparably to eight inch thick concrete block filled with sand. The panels have an STC-50 rating. The sound level outside the dyno cell will be roughly 40 decibels quieter than the level inside during engine testing. More important, the panels, doors, and walls are ballistic rated to protect operators and observers in case of major engine failure.
(Jason)>> Engines do come apart. It's just reality. The test cell is gonna be double wall construction. Typically in the engine dynomometers it's gonna be a hard interior wall, hard exterior wall. That can capture a lot of objects, things that come apart in the engine.
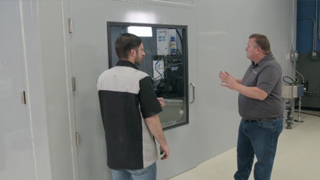
(Pat)>> Because the test cell is modular it can be manufactured in about three weeks, and Noise Barriers can install the cell in just a few days. Also it can be modified or even moved to a new location if needed. We had a special request for our dyno in the form of an oversized door in the side of the test cell. We wanted plenty of room for engines and production gear, and an oversized window to give us another angle to observe the engine during dyno runs.
(Jason)>> This one's actually built specifically for you guys. So you're kind of the first to get this size. It's hopefully something we'll have in the future for a lot of other customers cause I'm pretty impressed with it. It's a six foot wide by seven foot tall door. It's a single leaf door, which was obviously unique for the dyno test cell.
(Pat)>> The inlet duct brings in fresh outside air, which flows across the top of the engine to keep it cool during testing. Here's a look at how the air flows through the cell.
(Mike)>> The test cell has a plenum with a powerful fan that draws in fresh air and evacuates heat and exhaust gas through an enclosed exhaust stack. Thanks to an exhaust fan which moves 30,000 cubic feet per minute the system exchanges all the air in the room 10 times a minute or more. Beyond the exhaust fan is an industrial silencer, which reduces the sound level transmitted to the outside air.
(Jason)>> In this test cell we also have an air inlet silencer that's designed for your combustion air. You can dry your combustion air directly from your shop, which is a much more consistent location to dry your air flow from.
(Mike)>> And with the test cell all buttoned up we'll turn our attention to the dynamometer.
(Narrator)>> Up next all systems are go for the new dyno cell.
(Mike)>> With the dyno cell installed Brett Williamson made a visit to update our SuperFlow dynamometer. Before we get into the upgrade let's take a minute to show you how a dyno works. The twisting an engine makes is called torque. To measure it accurately the dynamometer acts like a giant water brake. The engine's crankshaft gets connected to the dyno's impeller housing. Water inside the housing creates resistance, making it hard to turn the crankshaft. This heats up the water and puts a serious load on the impeller housing as it literally tries to rotate off the dyno's frame. A force transducer bolted between the housing and the frame measures the rotational strain, which the computer translates into torque and horsepower measurements. The hot water gets pumped back to the main storage tank for reuse. While most of the dyno's water is used to absorb torque, some of it regulates engine temperature. All of this makes for an accurate, efficient, and consistent dyno test system.
(Brett)>> The Powermark absorber is a twin rotor design. It also uses an inlet and an outlet valve. The advantage to that is that if we're gonna test over a very wide range of r-p-m, like a wide span, that lets us adjust for that so that you can run that engine from 2,000 to 8,000 r-p-m if you wanted to. The capacity of the absorber is pretty good as well. People are testing engines 3,000 horsepower or so with that kind of brake.
(Pat)>> SuperFlow's Powermark dynamometer can monitor a whopping 139 channels of engine data. Well we don't need that many but Brett is setting us up to measure boost level. On the console side of the equation he is updating the firmware to make sure we have the latest enhancements to the dyno software. Before the dyno's first use it needs calibration. To check accuracy we hung 400 pounds from the power absorption unit and looked at the reading on the console. Now we simply calibrate the software to match that value.
(Brett)>> Calibration is a matter of faith in the system. You must build that faith yourself, and if calibrating frequently is something you need to do to build that faith then do so. Otherwise what I normally say is you could leave it alone until that day that you think the numbers are wrong. Then put those weights on there and check it.
(Pat)>> All that's left now is to make the first dyno run with our new setup. Okay so right away noticeably quieter, like by a bunch.
(Brett)>> Much quieter.
(Pat)>> Usually when we start the engine a bunch of people will come running back because they know we're running. So I kinda like that we're a little bit more secretive now.
(Brett)>> You can always open the door and fire it up. They'll come back.
(Pat)>> Alright you guys ready?
(Jason)>> Let's do it.
(Pat)>> Alright!
(Mike)>> Make some noise. [ engine revving ]
(Pat)>> I think now that we have a running dyno we're gonna make some power.
(Brett)>> It's time to go in there and make more power.
(Pat)>> It's time to go in there and make some more, you're right! Thank you very much. I'm gonna fire it back up.
(Mike)>> For more information on anything you've seen today visit Powernation TV dot com. ♪ ♪
(Mike)>> Today we're going to show you how an oil catch can is installed and why one is needed in some applications. Now there are a couple of different designs. Oil separators are also in this category, and they are used in line with the p-c-v system on vehicles that are equipped with them.
(Pat)>> The cause of the problem, which all cars have to some degree, is called blow by. This is when expanding gases and pressure from combustion work their way past the piston rings and find their way into the crankcase causing a positive pressure. With the movement of the rotating assembly and with already having positive pressure in the crankcase a large amount of oil in the form of vapor is pushed towards the breathers.
(Mike)>> Or in the case of a vehicle with a p-c-v system the vapors are directed into the intake tube. Then into the intake manifold and its runners. This can dilute the fuel, lowering the octane rating, and create a sludge like film through the entire intake tract.
(Pat)>> A catch can is designed with baffling on the inside to trap oil and vapor in the bottom side of the reservoir while still allowing the crankcase to breathe freely through a filter that's on the top side. An oil separator is placed in line between p-c-v hoses. It has a mesh screen and filter material that traps the oil and vapor, and also has an easily accessible drain. This Trick Flow unit also has an indicator that tells when it's full.
(Mike)>> We're going to run lines from each vent on these LS valve covers. Those lines will route up to the catch can that has fittings on either side. The catch can will be mounted somewhere in the engine bay. The catch can is being mounted to the bracket that secures the remote thermostat housing in place. This location will allow easy access to the drain on the bottom of the can and give us a nice path for the lines to follow from the vents. To make the connections to the catch can we're using Earl's push on fittings. ♪ ♪ The first line attaches to the driver's side valve cover vent. It then routes under the intake manifold and attaches to a dash six fitting on the catch can. ♪ ♪ The passenger's side line attaches to the vent tube, runs along the coolant hose, and to the other fitting on the catch can. This breather attaches to the top of the catch can and is secured with a clamp. That wraps up the install of the catch can. Remember an oil separator does not have a breather. It will be a part of the closed p-c-v system. Now any vehicle with a p-c-v can benefit from an oil separator because the oil vapors will always find their way into the intake.
(Pat)>> And if you want to find out how much oil is migrating into your intake tract take your air tube off, crack your throttle body open, and run your finger around inside towards the back of manifold. All in all this is a quick and effective installation.
Show Full Transcript
♪ ♪
(Pat)>> Welcome to Engine Power. We are getting back on our old 351 Windsor project turning it into a stroker engine, but we're gonna do it a little bit different this time. Instead of changing out a bunch of parts to maximize horsepower the only components we're changing right now will be the crank shaft, the connecting rods, and the pistons. Just the pieces needed to increase its cubic inch displacement. We've already filled this power plant with plenty of performance parts, such as a set of Trick Flow 225 high port cylinder heads and one of their street and strip hydraulic roller cams. The 351 made 448 horses and 423 pound feet of torque. The stock stroke on a Windsor is three-500 and we'll be increasing that to four inch. Now that doesn't like much but it will increase the total displacement of the engine from 357 inches currently to 408. an additional 51 cubes, and with no other changes made that should give us a significant increase in horsepower. We've still got to finish the teardown, and while we're at it we'll continue to inspect the engine closely for any wear problems or mechanical issues. The pick-up is removed from the standard volume oil pump. Then a couple of ARP's are loosened and the pump comes off. A Summit Racing balancer is next for the removal procedure, followed by the timing pointer and timing cover. Whoa! With the timing chain and cam plate removed, the hydraulic roller bump stick can carefully be pulled out. It's a common practice on small block Ford strokers to have to notch the bottom of the cylinder for the rod bolt going by. Now we already have this engine together. So we have a centerline for the location of the notch. So we're gonna go ahead and mark it now.
(Mike)>> A stroker crankshaft's rod journals are further away from the center line of the crankshaft. So that's why the block needs to be notched. Factory applications are not designed to handle increases in stroke. With the block marked we will continue the rest of the teardown on the other side of the shop where the machining equipment is. Even though we are not reusing these rod assemblies it's always a good idea to mark the rod and cap to keep them in order. These may be used in a build down the line. Here's what the markings should look like.
(Pat)>> I got some boots.
(Mike)>> I thought you were gonna put one on my thumb.
(Pat)>> What's with the Bugs Bunny thumb?
(Mike)>> I've got some stitches under there. The band saw and I got in a fight and the band saw won.
(Pat)>> Everybody hacks on me about hurting myself and look at that.
(Mike)>> Yeah I hit it pretty bad. We can loosen the rod nuts half way and use a mallet to break the cap and rod apart. This is a press fit. The nuts are removed now, the cap is pulled, and the rod and piston can be pressed out of the bore, all eight of them. ♪ ♪ Now the main caps are loosened. We do them in reverse of the original torque sequence. Starting from the outside in keeps the main bearing bore alignment from warping when the block is hot. Obviously this one isn't but perfect practice makes perfect.
(Pat)>> The block is on the table of our MSC Vectrax vertical mill. This is where the clearancing for the rod bolts will be precisely performed. This can be done on an engine stand with a carbide burr but since we have the capabilities we are gonna take advantage of it. Since we marked the center of the area where the rod bolt will interfere it's easy to maintain centers for the others because we know the bore spacing of this Windsor is four point three-eight-zero inches. So that's how far the mill table will have to move to reach the next clearancing location. [ drill spinning ]
(Mike)>> Each area being clearanced gets several passes. This removes a little material at a time, keeping the cutter cool. This is considered plunge cutting. Getting too aggressive is hard on the tooling and can be catastrophic on the work piece. ♪ ♪
(Pat)>> Watch all the other fingers.
(Mike)>> I'm good. To remove all the metal shavings left behind and clean the block before honing the last step is a quick bath in the heated washer.
(Narrator)>> Up next the most precise hone job begins with a torque plate. Plus our engine dyno gets a major update starting from the ground up.
(Mike)>> Engine Power is back and we're loading our 351 Windsor block into our newest machine, a Sunnen SV-15 hone. Today we're going to touch up the cylinder bores and get them ready for the new pistons on our soon to be 408 cubic inch stroker.
(Pat)>> To accurately measure the bores down to the ten thousandths of an inch we will be using Sunnen's gauge setting fixture and dial bore gauge. These are the most accurate and reliable in the industry. We're setting the gauge to four inch 30 thousandths, which will be our finished bore size. We always double check with a micrometer but there is never any differences unless something has been damaged or mishandled.
(Mike)>> Before we start honing we're gonna hit the brakes and slow down a little bit to fill you in on some honing tech. Now this will help you understand what goes on at the machine shop when you drop your block off for this process. Now Pat has a lot of experience with this machine. So he's gonna take it away.
(Pat)>> And what we're referring to is we're gonna hone this engine with a torque plate attached, and what a torque plate does, it simulates the distortion in the bore as the cylinder head is bolted on, and there are a few things that you need to know about torque plate honing before you even start that. One is the gasket. We are using the same thickness and bore size gasket because when you clamp the plate down it will distort the top of the cylinder the same way as a gasket while running. Also the length of the bolt is a concern. It has to protrude the same amount out of the torque plate as it does in the cylinder head. So we'll go measure that.
(Mike)>> Measuring an existing ARP head bolt it protrudes out of the head 968 thousandths. So the bolts we installed on the torque plate are within six thousandths, which is close enough. The MLS gasket is the first thing to go on the deck's surface. Now the bolts and the plate are getting lubed with ARP Ultra Torque, which is the same stuff we will use on the head bolts. This will ensure the torque values are the same. The torque plate goes in place now. It is snugged down using the torque sequence of the cylinder head. They are now torqued to 100 pound feet, which is what the cylinder head will be tightened to when installed.
(Pat)>> We are all torqued up and almost ready to go, but before we do any honing we're gonna have to plug in a few parameters into the SV-15. The first entry is the final bore size, which is four inch 30 thousandths, followed by the bore length of six inches. Then we lay in all of the other variables, which are the stone length, over stroke at top and bottom. Then the spindle speed and stroke speed of the hone. The last two gives us the cross hatch angle that we want for this application, which is 38 degrees. Starting off with 220 grit diamond abrasives we can drop the hone into the first bore and set the crown for the increment we want taken out. After several strokes we get within a half thousandths of our finished bore size. The Sunnen gauge not only shows the bore size but also if the bore has taper or if the cylinder is out of round. With this hone there is almost none of either. The process is repeated for the remaining bores, checking in between the hone cycles with the bore gauge. The machine auto dwells on where it has a tight spot. Where it's dwelling is where that torque pulled it out of round. I've never used a machine as nice as this one. Now the stones are change to an 800 grit for the final plateau hone. The stones are dressed to make sure there is no material that has built up on the diamond abrasive. The final passes by the hone are removing the last half thousandths of material. The accuracy of the hone is impressive. We are within one 10 thousandths of an inch top to bottom. That's roughly 10 times smaller than a human hair. We confirm these numbers with the dial bore gauge. [ drill spinning ] ♪ ♪ [ ratchet twisting ]
(Pat)>> The whole process is then repeated on the other four bores. This is the final result, a beautiful, accurate cylinder bore. Now our cylinders are all tuned up and this block is ready to come out, and get put in the cleaner, and cleaned for final assembly. Now we only had to take one thousandths worth of material out of this block and that's because our pistons required a specific skirt clearance and the block was a little small, which is okay. The way we did it here we did it in a step so it had a nice plateau hone finish, and to be able to do this in house is something I can't even describe.
(Narrator)>> Up next bigger is better when you're talking about dyno cells.
(Pat)>> Welcome back to Engine Power. Last year we made some big upgrades in our shop including a new lift, the cylinder hone we've been using today, and an in ground chassis dyno. This year we're upgrading our engine dyno, starting with the cell itself. First the exhaust fan ducting was removed, and using a wet saw a four by five rectangle was cut for the air inlet vent. Then the exhaust fan was pulled very carefully. The new exhaust fan is larger. So the exhaust outlet was cut to match the inlet. Four feet tall by five feet wide. Finally panel by panel the old dyno cell was dismantled.
(Mike)>> Questmark laid down their thin mill coating, which is a high performance floor product that offers excellent abrasion and chemical resistance. The perfect choice for a dyno cell. They finished it out with decorative flake and cleared it with a semi-gloss top coat. Tons of cool packages show up on our loading dock, and this is one of the coolest. The SoundMaster dyno cell arrived carefully packed in a rather substantial shipping crate.
(Jason)>> So once you receive your test cell you can uncrate it. You're gonna start with your floor and your foundation. Once you have the floor channel down that's already pre-cut. All of our products and materials are pre-cut and pre-assembled where they can be. You're gonna level up your floor track, and then you're gonna start your construction with the panels, and it's really a good modular package where we give you a full set of design drawings. Prior to us creating your test cell you actually get to approve your test cell.
(Mike)>> With the track installed and leveled, the wall panels drop into position. They are only four inches thick but perform comparably to eight inch thick concrete block filled with sand. The panels have an STC-50 rating. The sound level outside the dyno cell will be roughly 40 decibels quieter than the level inside during engine testing. More important, the panels, doors, and walls are ballistic rated to protect operators and observers in case of major engine failure.
(Jason)>> Engines do come apart. It's just reality. The test cell is gonna be double wall construction. Typically in the engine dynomometers it's gonna be a hard interior wall, hard exterior wall. That can capture a lot of objects, things that come apart in the engine.
(Pat)>> Because the test cell is modular it can be manufactured in about three weeks, and Noise Barriers can install the cell in just a few days. Also it can be modified or even moved to a new location if needed. We had a special request for our dyno in the form of an oversized door in the side of the test cell. We wanted plenty of room for engines and production gear, and an oversized window to give us another angle to observe the engine during dyno runs.
(Jason)>> This one's actually built specifically for you guys. So you're kind of the first to get this size. It's hopefully something we'll have in the future for a lot of other customers cause I'm pretty impressed with it. It's a six foot wide by seven foot tall door. It's a single leaf door, which was obviously unique for the dyno test cell.
(Pat)>> The inlet duct brings in fresh outside air, which flows across the top of the engine to keep it cool during testing. Here's a look at how the air flows through the cell.
(Mike)>> The test cell has a plenum with a powerful fan that draws in fresh air and evacuates heat and exhaust gas through an enclosed exhaust stack. Thanks to an exhaust fan which moves 30,000 cubic feet per minute the system exchanges all the air in the room 10 times a minute or more. Beyond the exhaust fan is an industrial silencer, which reduces the sound level transmitted to the outside air.
(Jason)>> In this test cell we also have an air inlet silencer that's designed for your combustion air. You can dry your combustion air directly from your shop, which is a much more consistent location to dry your air flow from.
(Mike)>> And with the test cell all buttoned up we'll turn our attention to the dynamometer.
(Narrator)>> Up next all systems are go for the new dyno cell.
(Mike)>> With the dyno cell installed Brett Williamson made a visit to update our SuperFlow dynamometer. Before we get into the upgrade let's take a minute to show you how a dyno works. The twisting an engine makes is called torque. To measure it accurately the dynamometer acts like a giant water brake. The engine's crankshaft gets connected to the dyno's impeller housing. Water inside the housing creates resistance, making it hard to turn the crankshaft. This heats up the water and puts a serious load on the impeller housing as it literally tries to rotate off the dyno's frame. A force transducer bolted between the housing and the frame measures the rotational strain, which the computer translates into torque and horsepower measurements. The hot water gets pumped back to the main storage tank for reuse. While most of the dyno's water is used to absorb torque, some of it regulates engine temperature. All of this makes for an accurate, efficient, and consistent dyno test system.
(Brett)>> The Powermark absorber is a twin rotor design. It also uses an inlet and an outlet valve. The advantage to that is that if we're gonna test over a very wide range of r-p-m, like a wide span, that lets us adjust for that so that you can run that engine from 2,000 to 8,000 r-p-m if you wanted to. The capacity of the absorber is pretty good as well. People are testing engines 3,000 horsepower or so with that kind of brake.
(Pat)>> SuperFlow's Powermark dynamometer can monitor a whopping 139 channels of engine data. Well we don't need that many but Brett is setting us up to measure boost level. On the console side of the equation he is updating the firmware to make sure we have the latest enhancements to the dyno software. Before the dyno's first use it needs calibration. To check accuracy we hung 400 pounds from the power absorption unit and looked at the reading on the console. Now we simply calibrate the software to match that value.
(Brett)>> Calibration is a matter of faith in the system. You must build that faith yourself, and if calibrating frequently is something you need to do to build that faith then do so. Otherwise what I normally say is you could leave it alone until that day that you think the numbers are wrong. Then put those weights on there and check it.
(Pat)>> All that's left now is to make the first dyno run with our new setup. Okay so right away noticeably quieter, like by a bunch.
(Brett)>> Much quieter.
(Pat)>> Usually when we start the engine a bunch of people will come running back because they know we're running. So I kinda like that we're a little bit more secretive now.
(Brett)>> You can always open the door and fire it up. They'll come back.
(Pat)>> Alright you guys ready?
(Jason)>> Let's do it.
(Pat)>> Alright!
(Mike)>> Make some noise. [ engine revving ]
(Pat)>> I think now that we have a running dyno we're gonna make some power.
(Brett)>> It's time to go in there and make more power.
(Pat)>> It's time to go in there and make some more, you're right! Thank you very much. I'm gonna fire it back up.
(Mike)>> For more information on anything you've seen today visit Powernation TV dot com. ♪ ♪
(Mike)>> Today we're going to show you how an oil catch can is installed and why one is needed in some applications. Now there are a couple of different designs. Oil separators are also in this category, and they are used in line with the p-c-v system on vehicles that are equipped with them.
(Pat)>> The cause of the problem, which all cars have to some degree, is called blow by. This is when expanding gases and pressure from combustion work their way past the piston rings and find their way into the crankcase causing a positive pressure. With the movement of the rotating assembly and with already having positive pressure in the crankcase a large amount of oil in the form of vapor is pushed towards the breathers.
(Mike)>> Or in the case of a vehicle with a p-c-v system the vapors are directed into the intake tube. Then into the intake manifold and its runners. This can dilute the fuel, lowering the octane rating, and create a sludge like film through the entire intake tract.
(Pat)>> A catch can is designed with baffling on the inside to trap oil and vapor in the bottom side of the reservoir while still allowing the crankcase to breathe freely through a filter that's on the top side. An oil separator is placed in line between p-c-v hoses. It has a mesh screen and filter material that traps the oil and vapor, and also has an easily accessible drain. This Trick Flow unit also has an indicator that tells when it's full.
(Mike)>> We're going to run lines from each vent on these LS valve covers. Those lines will route up to the catch can that has fittings on either side. The catch can will be mounted somewhere in the engine bay. The catch can is being mounted to the bracket that secures the remote thermostat housing in place. This location will allow easy access to the drain on the bottom of the can and give us a nice path for the lines to follow from the vents. To make the connections to the catch can we're using Earl's push on fittings. ♪ ♪ The first line attaches to the driver's side valve cover vent. It then routes under the intake manifold and attaches to a dash six fitting on the catch can. ♪ ♪ The passenger's side line attaches to the vent tube, runs along the coolant hose, and to the other fitting on the catch can. This breather attaches to the top of the catch can and is secured with a clamp. That wraps up the install of the catch can. Remember an oil separator does not have a breather. It will be a part of the closed p-c-v system. Now any vehicle with a p-c-v can benefit from an oil separator because the oil vapors will always find their way into the intake.
(Pat)>> And if you want to find out how much oil is migrating into your intake tract take your air tube off, crack your throttle body open, and run your finger around inside towards the back of manifold. All in all this is a quick and effective installation.
