More Datsun 280z Heritage Restomod Episodes
Carcass Featured Projects
Carcass Builds
Want more content like this?
Join the PowerNation Email NewsletterEpisode Transcript
(Jeremy)>> You're watching Powernation!
(Jeremy)>> On this episode of Carcass our Datsun undergoes a huge transformation. We'll hack up our fenders so we can add some flares. Plus, bolt on a set of fender mirrors and give our 280Z a true JDM feel.
(Jimmy)>> Then we head down to the paint booth for some body work tech and a total color revision. [ Music ] [ engine revving ] [ Music ]
(Jimmy)>> Hey everyone, welcome back to Carcass. Jeremy and I have been making some good headway on our 1978 280-Z, and this car came to us bone stock. So even with the little bit of work we've done to it so far it's quite a bit different. If you haven't seen what we've done here's a quick rundown, and also what we have planned next.
(Jeremy)>> After a quick test drive we got to work by pulling the engine and trans out so we could give the L-28 a quick refresh and make the swap to the CD-0-0-9 six speed manual. Tackling the suspension started with us removing all parts from the front and the rear of the Datsun. Our Apex suspension setup was bolted in along with an upgraded diff from a newer 370-Z. We followed that up with a set of BC coilovers. More 370 parts came into play with a full set of 14-inch rotors, four piston calipers in the front, and dual piston calipers in the rear. Some 17 by 9 Rota wheels and Continental's Extreme Contact Force tires took care of filling out the wheel wells. Up next on the list of things to do will be some body mods, including a set of fender flares, removing the crash bumpers and swapping them out for a sleeker set, and adding a pair of fender mirrors. We'll finish the project off by painting our Datsun Boulder Gray, which is a color you can find on the newly released "Z". So, as you guys can see, we have the engine and transmission in the car that's simulating all the weight we need to compress the suspension cause this is the ride height that Jimmy and I are shooting for. You can see there's not a lot of room between the tire and the fender. So, we're gonna be cutting this out and running ZG style fender flare. Now this is as close as you can get to the JDM style fender flare that came on this S-30 chassis. Now Jimmy and I have done a couple mockups, and we've looked for a good spot to put these, and it's entirely up to your discretion, and we think we're gonna run it up this high. I don't think so, no. We're actually gonna run it low. Again, you can put it wherever you want. All we're looking to do here is give us that JDM look, get the flare on it, and give us some clearance so the tires don't run into the fenders. Now the idea here is to drill a couple of holes. We're gonna use these cool cleco clamps. This is just gonna hold everything in place so we don't have to continuously bolt it on and unbolt it. So, we're gonna mark some holes here. We'll come back, cut the fender, and then we've just got to do that three more times. You like that?
(Jimmy)>> Yeah, I think that's good. [ Music ] [ drill humming ]
(Jimmy)>> Clecos are a nice tool to hold together sheet metal panels, or in our case fiberglass fender flares. They do come in a few different sizes. So, you'll have to make sure you use the correct size drill bit. [ Music ] I've got our clecos in our fender now. So, this thing's fitting pretty tight to the body. One hole's a little bit misplaced. We'll have to go back and adjust it for the final installation, but otherwise we can get the car up in the air and start cutting the fender. [ mechanical humming ] [ Music ]
(Jeremy)>> I'm gonna trace a line on the inside of the flare on the fender here, and I'll also trace a line on the outside. That way we know exactly where to cut, and where our mounting holes are gonna be. [ Music ] Get these off of here, lay down some tape, and then we'll start cutting. [ Music ] [ saw buzzing ] [ Music ] [ saw buzzing ] [ Music ]
(Jeremy)>> Okay, so we have the fender cut out for the fender flare, and since we're up here making a mess anyways we're gonna go ahead and ditch these marker lights. Jimmy and I don't care for them. They stick out entirely too far, and we're just going for a sleeker look with the car. So, I'll go ahead and get rid of this. We'll build a little patch panel, and then we'll get it welded into place. [ Music ] Our patch panel will be made out of 16-gauge sheet metal. [ Music ] [ sander buzzing ]
(Jeremy)>> Once we have the correct shape we'll stitch weld it into place making sure not to put too much heat into the panel, causing it to warp. [ welder crackling ] [ Music ]
(Jeremy)>> We'll grind the welds down flush, and then finish them off with a sanding disc. [ grinder buzzing ]
(Jeremy)>> Well we have the fender flare on the car. It's sitting at ride height, and we took care of the marker light area. We still have a little more work to do. We've got to come down here and trim the bottom of the valence so our tires can go to full lock, but for now I've got three more corners to take care of.
(Jimmy)>> We ditch the park bench bumpers for a sleeker look and add some more JDM styling cues.
(Jimmy)>> So we've got all four fender flares mocked up on the car now and it looks really good, but something to note is that the rear is a little bit different than the front. When we cut the fender, we not only cut the outside skin but there's also some inner structure to it as well. So, when we put this thing back together you have to weld the two pieces together. Then when we finish the car we'll go ahead and smear some seam sealer on it to make sure that's watertight. So now moving on, with the exterior modifications we're gonna get rid of the bumpers and for good reason, cause they're pretty ugly. So, we've got this really cool carbon fiber piece, and this is basically a 240-Z bumper, just to make this thing look a little bit more slim. So, it's just as easy as getting the old stuff off and getting the new one on. [ Music ] [ drill humming ] [ Music ] [ drill humming ] [ Music ]
(Jimmy)>> Get this in once and see how it fits.
(Jeremy)>> Inside ones?
(Jimmy)>> Inside bolt.
(Jeremy)>> The trick is not letting the bolt fall through the bumper. [ Music ] I got mine started. [ Music ] Got that side in? [ Music ]
(Jimmy)>> Working on it! [ drill humming ]
(Jimmy)>> With the front bumper on the car this thing definitely has more style than it did before, and even without a bumper on it at all it looked way better than the stock bumper that was on it. Now to move forward with the JDM style we have our fender mount mirrors instead of the door mounted ones, and we have to know where they go. So, we've got two templates already taped on the fender, and there's two holes marked. So, we'll just center punch these, drill the holes, and then install the mirrors. [ punch popping ] [ Music ] [ drill buzzing ]
(Jimmy)>> To make it easy I'll drill a pilot hole, and then use a stepped drill bit to get the final size. [ drill humming ] [ Music ]
(Jimmy)>> The mirrors are a super easy upgrade that give our car a ton of style.
(Jeremy)>> Stay tuned! We show you some tips on making those body mods as smooth as glass.
(Jeremy)>> Well we've made our way down here into the prep booth, and it's time to straighten this car out. We've done a bunch of metal work. We shaved the marker lights. We made the fenders and the quarters quite a bit bigger so we can run our fender flares. Plus, we decided to ditch the rear bumper. So, Jimmy did a bunch of metal work back there. So, the steps from here are pretty simple. We're gonna prep the areas that are bare metal. We're gonna lay down some mud, or body filler, straighten that all out. Then we'll prep the entire car and get it ready for some high build primer. [ pad scratching ]
(Jeremy)>> To make sure our body filler has a good bite we'll scratch the area up with 36 grit sandpaper. [ Music ] [ sandpaper scratching ] [ Music ]
(Jeremy)>> I like to mix my mud heavy because I don't like to wait around before I can start sanding. [ Music ] Applying even pressure with the paddle, I like to make it as straight as possible even though I'm gonna come back later and sand it. This just makes the job go quite a bit faster. [ Music ] To get this straight we'll first knock it down with 36 grit, and then we'll switch over to 80. [ sandpaper scratching ]
(Jeremy)>> Alright guys, well that feels really good. it took a really nice shape with the fender here. Now we're not gonna take it any further cause we do have to 180 the entire car to get it ready for primer. When it comes time to doing all that work we always like an extra set of hands. So, everybody this is Michael Huxley. He's the newest member of the Powernation team, and you're gonna see him all over the four shows that we do here at Powernation. Like I said, an extra set of hands is always good. So, he's got a sanding block. I'm gonna pick mine up and we're gonna get back to work. [ Music ] We're using sanding blocks instead of a d/a because the car was already pretty straight. So, we're gonna use the existing paint to make it just a bit straighter. [ Music ] Working our way around the car we'll take care of the rest of the body work. We're gonna make sure that the car is completely sanded with no shiny spots left. Sanding the car will give it the texture for the next step. [ Music ] [ sandpaper scratching ] [ Music ]
(Jeremy)>> Well the car is all sanded down, and we even masked it off, and Jimmy and Michael are gonna hit this thing with some wax and grease remover and I'm gonna go mix the high build primer. [ Music ]
This 2-K primer will fill in any small imperfections, and we'll apply two wet coats giving it ample time to flash between each coat. [ Music ] [ spray gun hissing ] [ Music ]
(Michael)>> Alright, Jeremy's got the high build down. So now we're gonna block it down until it's smooth. [ Music ]
(Jeremy)>> This step is started with 180 grit to knock down all the high spots off the primer using a long sanding block that will ensure that we keep all the panels as straight as possible. We'll work our way through 180 grit all the way up to 320 before we head into the booth. [ Music ] Coming up, after all of our hard work it's time to put this Datsun in its new color.
(Jeremy)>> Well after hours and hours of body work we have the Datsun nice and smooth, and we're gonna get ready to lay down some color. [ mechanical humming ]
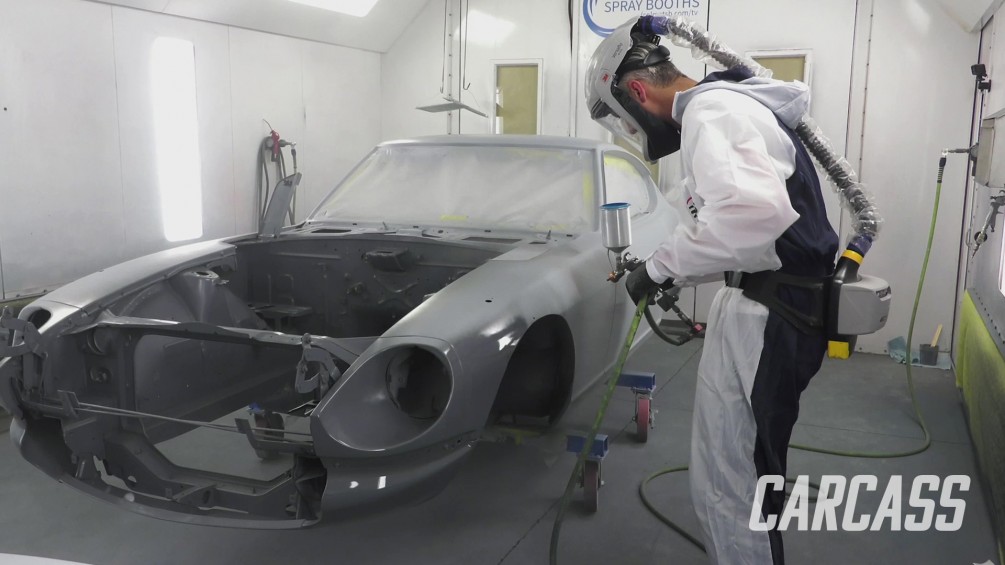
(Jeremy)>> Before we can get to that step we do have to lay down some sealer. What sealer does is gives the car a good, solid color. Plus, it gives us a good chemical bond when we lay down the paint. It's pretty easy to mix up. It's four to one. So, we'll get this mixed up here, get it in the gun. Then we'll go tack the car off and start spraying. [ Music ] Before we begin, we'll tack the car off to get rid of any leftover dust and lay down one medium coat. [ spray gun hissing ] [ Music ] [ spray gun hissing ] [ Music ]
(Jeremy)>> The overspray you see on the door gaps is where we already laid down body color in the door jambs. This will just make it easier when we transition into paint. [ spray gun hissing ]
(Jimmy)>> Jeremy's got the sealer down on the car. So, we're ready for some color, and we're going with Boulder Gray, which is a color offered on the new "Z". So, we've just got to mix this one to one with reducer. As long as Jeremy can lay it down this is gonna look super good. [ Music ] Scrape the bottom and the sides, got it? [ Music ] [ spray gun hissing ]
(Jeremy)>> We'll start in the engine bay with a touch-up gun to make sure I cover all the hard to reach areas. [ spray gun hissing ] [ Music ]
(Jeremy)>> I'm using a different style to me while I'm painting, and painting each panel individually keeping in mind where I start and stop. This is a little different than painting the entire side of the car in one fell swoop, but either way works. Just choose the style that best fits the project and your preference. [ spray gun hissing ] [ Music ] [ spray gun hissing ] [ Music ]
(Jeremy)>> Alright guys, we have our base color down. Now it's time to move on to some clear. Not only is this gonna make the car look really shiny and wet. It's also gonna give us some u/v protection as well. [ spray gun hissing ] [ Music ]
(Jeremy)>> Spraying the clear can be a little bit tricky. Just make sure you follow the correct overlap and don't leave any dry sprayed areas. You want to make sure it looks like glass when you're done. So, take your time, move slowly, and lay it down wet. [ spray gun hissing ] [ Music ] [ spray gun hissing ] [ Music ] [ spray gun hissing ] [ Music ]
(Jeremy)>> You know Jimmy, this is the slickest paint job I've ever laid down, and what better car to put it on.
(Jimmy)>> You did a heck of a job, and just wait until we cut and buff this thing. It's gonna look even better, and it matches the new "Z". We can't ask for much more.
(Jeremy)>> We should get a couple of Big Gulps.
(Jimmy)>> See you later!
Show Full Transcript
(Jeremy)>> On this episode of Carcass our Datsun undergoes a huge transformation. We'll hack up our fenders so we can add some flares. Plus, bolt on a set of fender mirrors and give our 280Z a true JDM feel.
(Jimmy)>> Then we head down to the paint booth for some body work tech and a total color revision. [ Music ] [ engine revving ] [ Music ]
(Jimmy)>> Hey everyone, welcome back to Carcass. Jeremy and I have been making some good headway on our 1978 280-Z, and this car came to us bone stock. So even with the little bit of work we've done to it so far it's quite a bit different. If you haven't seen what we've done here's a quick rundown, and also what we have planned next.
(Jeremy)>> After a quick test drive we got to work by pulling the engine and trans out so we could give the L-28 a quick refresh and make the swap to the CD-0-0-9 six speed manual. Tackling the suspension started with us removing all parts from the front and the rear of the Datsun. Our Apex suspension setup was bolted in along with an upgraded diff from a newer 370-Z. We followed that up with a set of BC coilovers. More 370 parts came into play with a full set of 14-inch rotors, four piston calipers in the front, and dual piston calipers in the rear. Some 17 by 9 Rota wheels and Continental's Extreme Contact Force tires took care of filling out the wheel wells. Up next on the list of things to do will be some body mods, including a set of fender flares, removing the crash bumpers and swapping them out for a sleeker set, and adding a pair of fender mirrors. We'll finish the project off by painting our Datsun Boulder Gray, which is a color you can find on the newly released "Z". So, as you guys can see, we have the engine and transmission in the car that's simulating all the weight we need to compress the suspension cause this is the ride height that Jimmy and I are shooting for. You can see there's not a lot of room between the tire and the fender. So, we're gonna be cutting this out and running ZG style fender flare. Now this is as close as you can get to the JDM style fender flare that came on this S-30 chassis. Now Jimmy and I have done a couple mockups, and we've looked for a good spot to put these, and it's entirely up to your discretion, and we think we're gonna run it up this high. I don't think so, no. We're actually gonna run it low. Again, you can put it wherever you want. All we're looking to do here is give us that JDM look, get the flare on it, and give us some clearance so the tires don't run into the fenders. Now the idea here is to drill a couple of holes. We're gonna use these cool cleco clamps. This is just gonna hold everything in place so we don't have to continuously bolt it on and unbolt it. So, we're gonna mark some holes here. We'll come back, cut the fender, and then we've just got to do that three more times. You like that?
(Jimmy)>> Yeah, I think that's good. [ Music ] [ drill humming ]
(Jimmy)>> Clecos are a nice tool to hold together sheet metal panels, or in our case fiberglass fender flares. They do come in a few different sizes. So, you'll have to make sure you use the correct size drill bit. [ Music ] I've got our clecos in our fender now. So, this thing's fitting pretty tight to the body. One hole's a little bit misplaced. We'll have to go back and adjust it for the final installation, but otherwise we can get the car up in the air and start cutting the fender. [ mechanical humming ] [ Music ]
(Jeremy)>> I'm gonna trace a line on the inside of the flare on the fender here, and I'll also trace a line on the outside. That way we know exactly where to cut, and where our mounting holes are gonna be. [ Music ] Get these off of here, lay down some tape, and then we'll start cutting. [ Music ] [ saw buzzing ] [ Music ] [ saw buzzing ] [ Music ]
(Jeremy)>> Okay, so we have the fender cut out for the fender flare, and since we're up here making a mess anyways we're gonna go ahead and ditch these marker lights. Jimmy and I don't care for them. They stick out entirely too far, and we're just going for a sleeker look with the car. So, I'll go ahead and get rid of this. We'll build a little patch panel, and then we'll get it welded into place. [ Music ] Our patch panel will be made out of 16-gauge sheet metal. [ Music ] [ sander buzzing ]
(Jeremy)>> Once we have the correct shape we'll stitch weld it into place making sure not to put too much heat into the panel, causing it to warp. [ welder crackling ] [ Music ]
(Jeremy)>> We'll grind the welds down flush, and then finish them off with a sanding disc. [ grinder buzzing ]
(Jeremy)>> Well we have the fender flare on the car. It's sitting at ride height, and we took care of the marker light area. We still have a little more work to do. We've got to come down here and trim the bottom of the valence so our tires can go to full lock, but for now I've got three more corners to take care of.
(Jimmy)>> We ditch the park bench bumpers for a sleeker look and add some more JDM styling cues.
(Jimmy)>> So we've got all four fender flares mocked up on the car now and it looks really good, but something to note is that the rear is a little bit different than the front. When we cut the fender, we not only cut the outside skin but there's also some inner structure to it as well. So, when we put this thing back together you have to weld the two pieces together. Then when we finish the car we'll go ahead and smear some seam sealer on it to make sure that's watertight. So now moving on, with the exterior modifications we're gonna get rid of the bumpers and for good reason, cause they're pretty ugly. So, we've got this really cool carbon fiber piece, and this is basically a 240-Z bumper, just to make this thing look a little bit more slim. So, it's just as easy as getting the old stuff off and getting the new one on. [ Music ] [ drill humming ] [ Music ] [ drill humming ] [ Music ]
(Jimmy)>> Get this in once and see how it fits.
(Jeremy)>> Inside ones?
(Jimmy)>> Inside bolt.
(Jeremy)>> The trick is not letting the bolt fall through the bumper. [ Music ] I got mine started. [ Music ] Got that side in? [ Music ]
(Jimmy)>> Working on it! [ drill humming ]
(Jimmy)>> With the front bumper on the car this thing definitely has more style than it did before, and even without a bumper on it at all it looked way better than the stock bumper that was on it. Now to move forward with the JDM style we have our fender mount mirrors instead of the door mounted ones, and we have to know where they go. So, we've got two templates already taped on the fender, and there's two holes marked. So, we'll just center punch these, drill the holes, and then install the mirrors. [ punch popping ] [ Music ] [ drill buzzing ]
(Jimmy)>> To make it easy I'll drill a pilot hole, and then use a stepped drill bit to get the final size. [ drill humming ] [ Music ]
(Jimmy)>> The mirrors are a super easy upgrade that give our car a ton of style.
(Jeremy)>> Stay tuned! We show you some tips on making those body mods as smooth as glass.
(Jeremy)>> Well we've made our way down here into the prep booth, and it's time to straighten this car out. We've done a bunch of metal work. We shaved the marker lights. We made the fenders and the quarters quite a bit bigger so we can run our fender flares. Plus, we decided to ditch the rear bumper. So, Jimmy did a bunch of metal work back there. So, the steps from here are pretty simple. We're gonna prep the areas that are bare metal. We're gonna lay down some mud, or body filler, straighten that all out. Then we'll prep the entire car and get it ready for some high build primer. [ pad scratching ]
(Jeremy)>> To make sure our body filler has a good bite we'll scratch the area up with 36 grit sandpaper. [ Music ] [ sandpaper scratching ] [ Music ]
(Jeremy)>> I like to mix my mud heavy because I don't like to wait around before I can start sanding. [ Music ] Applying even pressure with the paddle, I like to make it as straight as possible even though I'm gonna come back later and sand it. This just makes the job go quite a bit faster. [ Music ] To get this straight we'll first knock it down with 36 grit, and then we'll switch over to 80. [ sandpaper scratching ]
(Jeremy)>> Alright guys, well that feels really good. it took a really nice shape with the fender here. Now we're not gonna take it any further cause we do have to 180 the entire car to get it ready for primer. When it comes time to doing all that work we always like an extra set of hands. So, everybody this is Michael Huxley. He's the newest member of the Powernation team, and you're gonna see him all over the four shows that we do here at Powernation. Like I said, an extra set of hands is always good. So, he's got a sanding block. I'm gonna pick mine up and we're gonna get back to work. [ Music ] We're using sanding blocks instead of a d/a because the car was already pretty straight. So, we're gonna use the existing paint to make it just a bit straighter. [ Music ] Working our way around the car we'll take care of the rest of the body work. We're gonna make sure that the car is completely sanded with no shiny spots left. Sanding the car will give it the texture for the next step. [ Music ] [ sandpaper scratching ] [ Music ]
(Jeremy)>> Well the car is all sanded down, and we even masked it off, and Jimmy and Michael are gonna hit this thing with some wax and grease remover and I'm gonna go mix the high build primer. [ Music ]
This 2-K primer will fill in any small imperfections, and we'll apply two wet coats giving it ample time to flash between each coat. [ Music ] [ spray gun hissing ] [ Music ]
(Michael)>> Alright, Jeremy's got the high build down. So now we're gonna block it down until it's smooth. [ Music ]
(Jeremy)>> This step is started with 180 grit to knock down all the high spots off the primer using a long sanding block that will ensure that we keep all the panels as straight as possible. We'll work our way through 180 grit all the way up to 320 before we head into the booth. [ Music ] Coming up, after all of our hard work it's time to put this Datsun in its new color.
(Jeremy)>> Well after hours and hours of body work we have the Datsun nice and smooth, and we're gonna get ready to lay down some color. [ mechanical humming ]
(Jeremy)>> Before we can get to that step we do have to lay down some sealer. What sealer does is gives the car a good, solid color. Plus, it gives us a good chemical bond when we lay down the paint. It's pretty easy to mix up. It's four to one. So, we'll get this mixed up here, get it in the gun. Then we'll go tack the car off and start spraying. [ Music ] Before we begin, we'll tack the car off to get rid of any leftover dust and lay down one medium coat. [ spray gun hissing ] [ Music ] [ spray gun hissing ] [ Music ]
(Jeremy)>> The overspray you see on the door gaps is where we already laid down body color in the door jambs. This will just make it easier when we transition into paint. [ spray gun hissing ]
(Jimmy)>> Jeremy's got the sealer down on the car. So, we're ready for some color, and we're going with Boulder Gray, which is a color offered on the new "Z". So, we've just got to mix this one to one with reducer. As long as Jeremy can lay it down this is gonna look super good. [ Music ] Scrape the bottom and the sides, got it? [ Music ] [ spray gun hissing ]
(Jeremy)>> We'll start in the engine bay with a touch-up gun to make sure I cover all the hard to reach areas. [ spray gun hissing ] [ Music ]
(Jeremy)>> I'm using a different style to me while I'm painting, and painting each panel individually keeping in mind where I start and stop. This is a little different than painting the entire side of the car in one fell swoop, but either way works. Just choose the style that best fits the project and your preference. [ spray gun hissing ] [ Music ] [ spray gun hissing ] [ Music ]
(Jeremy)>> Alright guys, we have our base color down. Now it's time to move on to some clear. Not only is this gonna make the car look really shiny and wet. It's also gonna give us some u/v protection as well. [ spray gun hissing ] [ Music ]
(Jeremy)>> Spraying the clear can be a little bit tricky. Just make sure you follow the correct overlap and don't leave any dry sprayed areas. You want to make sure it looks like glass when you're done. So, take your time, move slowly, and lay it down wet. [ spray gun hissing ] [ Music ] [ spray gun hissing ] [ Music ] [ spray gun hissing ] [ Music ]
(Jeremy)>> You know Jimmy, this is the slickest paint job I've ever laid down, and what better car to put it on.
(Jimmy)>> You did a heck of a job, and just wait until we cut and buff this thing. It's gonna look even better, and it matches the new "Z". We can't ask for much more.
(Jeremy)>> We should get a couple of Big Gulps.
(Jimmy)>> See you later!
