More Diesel Buggy Episodes
Xtreme 4x4 Builds
Want more content like this?
Join the PowerNation Email NewsletterParts Used In This Episode
Ballistic Fabrication
I.D. Tube Clamps
Ballistic Fabrication
Shock Mounting Bung
Ruffstuff Specialties
Dual Optima Battery Mount Box
Twisted Stitch,Inc.
Apex Custom Suspension Seats
Episode Transcript
Sometimes it's the little things that can bog down your build today. Xtreme 4x4 is all about the details where and how to mount your engine, fuel cell, plus some safety tips on how to best keep your rear planted where it should be extreme starts. Now,
the term bigger is better, definitely holds true when you're talking about off road rigs. We're always pulling axles out of bigger trucks to get that extra string,
want more ground clearance underneath your rig. Well, it's as simple as slipping on a set of bigger tires. And if you're having trouble conquering that Mo
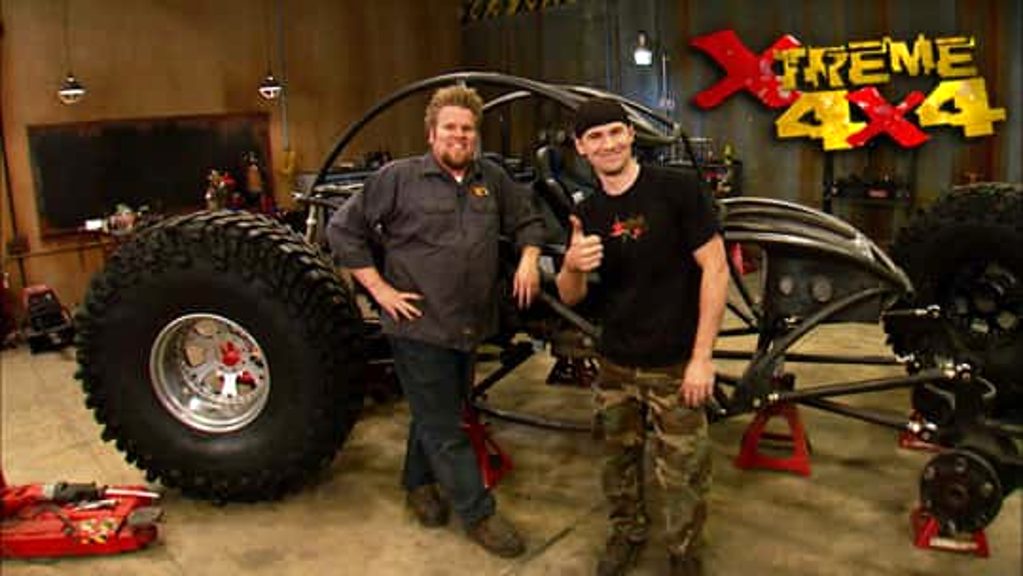
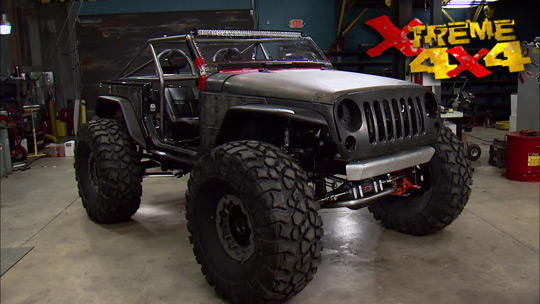
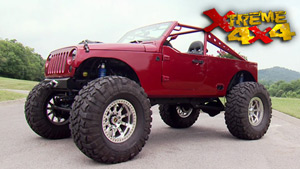
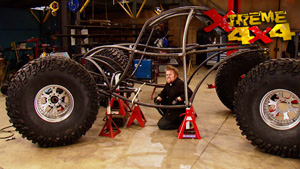
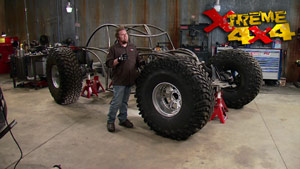
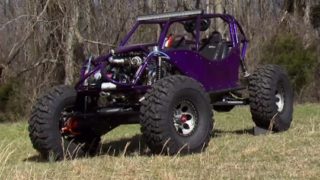
Hill climb at your local off road park, maybe you're a little short on horsepower, maybe you need a bigger engine stuffed underneath the hood. Now, none of our projects has truly embraced that phrase quite like our curvy buggy, Rockwell axles, 54 inch tall tires and a monster drive train stuffed in the back.
The idea for this buggy was simple, build a tube chassis to show you guys how to design and build one yourself but make this one as different as possible.
Diesel engine,
all rolled tube
and Rockwell axles narrowed for two short shafts
today, we're gonna keep working on this beast and just like before take you guys step by step through a couple of the procedures that normally we would just glass over and it's all gonna start with the correct way to mount an engine.
So,
a common misconception when installing a drive train in a buggy is that it has to be right in the middle of the chassis for weight distribution and that's just not true. You can offset it either towards the driver or the passenger. Many car companies do that straight from the factory to get better angles on the drive line. We do it in an off road rig for the front transfer case output. You'll get more room to get it down past the tranny and past the oil pan,
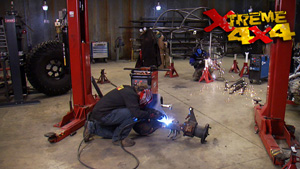
you offset the whole drive train towards that center mount and that's exactly what we're going to do here. We're going to take the entire drive lane and kick it over just a little bit, probably two or three inches towards the driver that will give us more room to get the drive shaft out of the transfer case past the transmission and past the oil pan to hook up to our center mounted rear steer, rockwell axle. Now, we're also going to mount this drive line 100% solid, no motor mounts,
poly mounts. And the reason we're doing that is just, it makes it a lot easier and a lot stronger. This engine weighs a lot. It's almost 800 pounds. We mount it solid, it'll be locked into the chassis securely. The only thing you have to watch out there is when you mount the engine solid, you have to mount the transmission and the transfer case solid as well. And the first step to this, we're gonna get the transmission engine and the whole package up off the floor because the oil pan is contacting the rear link mounts.
The easiest way to make a cardboard template like this is simply trim it to fit
and then hold it against the block.
Use the ball end of a ball peen hammer and tap around all the bulb holes. The edges of the bold holes will actually cut them into the cardboard.
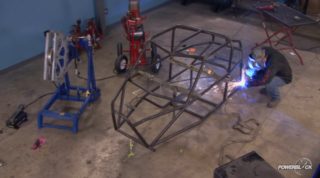
The plan for this buggy from the very beginning has been 100% roll tubing
and the engine cradle will be no different.
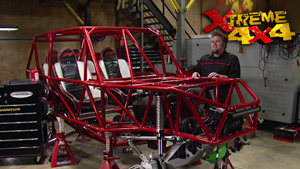
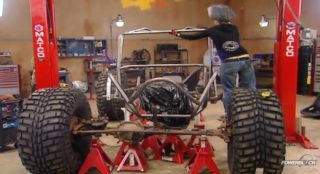
And what we built on the back of this buggy is basically an engine cradle. We have tube traveling down both sides of the engine and underneath it and then tapped into the block on these flat plates. Now, the benefit of that is all the weight of the engine is supported by the chassis. If we just came off the chassis with the tube and tied into the block, the block would almost become part of the buggy. And that means on harsh environments where you're pounding the buggy a lot, the weight of the motor can start to bend those tubes out and believe it or not,
the engine can actually fall right out of the back of your rig. Now, you don't want that. So if you support it all the way around, it's definitely not going to go anywhere. The downfall is how do you make it removable? Well, we're going to use these ID tube clamps that we got from ballistic fabrication. We'll simply mount them right in line on this upper tube, cut this apart and weld it in
that way. When it comes time to break this engine out, we can simply take apart this tube clamp, unbolt it from the block, lower the cradle right out of the rig
just because you're mounting items to your chassis doesn't mean you're always gonna be breaking out the plasma cutter and the welder and building custom pieces. Sometimes you can go ahead and just buy a premade piece like this dual battery box that we got from rough stuff, specialties. It comes preformed pre welded and pre bent to accept two optimal batteries. And all you have to do is bolt it in or weld it to the tubes inside your rig and you have a 100% custom battery box.
Now, we're gonna be using optimal batteries in this rig. And the reason we like them is because you can mount them in almost any orientation. You can mount them in the traditional orientation with the post up on their side or even all the way upside down because these are an A GM or absorbed glass matte gel battery. They do not have lead acid inside of it that could leak out when mounted upside down. All we have to do is mount the battery box and we're ready for the batteries.
Oh,
yeah.
If you're digging our curvy buggy so far, no flipping lots more ahead, including the right way to mot
a fuel cell baby.
Stay tuned.
Today, we've got our curvy buggy back in the shop and just like before we're taking some time to show you guys some detailed steps that you need to follow when building a custom chassis. And today we're focusing on the mounts. Now, we've already got the motor locked in place as well as the battery box installed. And now we're gonna focus on probably the second most important part of your buggy and that is your seat mounts. Now, to show you how to do it, I've got two
twisted stitch seats here. Now, these are a apex seat with what's called a vortex style headrest with two holes designed for the five point harness to come through. They're a full suspension seat, just like all suspension seats will really absorb the shock when you're off road. Now, when you order your seats, you're gonna be asked a couple of different questions when it comes to mounting. These are what's called a tab style mount. The steel frame of the seat has
tabs welded to it to permanently fix the seats in place. You can also order the seats with a flat style mount that it's usually designed to work hand in hand with a set of sliders. You'll use that type of mount. When you're installing a set of seats, it may be a Jeep or a truck where you wanna make the seats adjustable for different drivers. But in a two buggy, a tab style seat is a lot stronger because it locks the seat into place.
I do
just like our engine cradle, the seat mount tubes will also be rolled.
Um,
you know, a rock crawler is only as safe as you make it. And that includes the seat belts.
There are three main types of mounting a five point harness to your rig and each one has a distinct advantage. A
clip in style harness simply has a clip at the end of the belt that locks into an islet that you mount to the chassis to secure it to the rig.
And the benefit of the clip and style is that they're required by certain sanctioning bodies. And that has to do a driver extraction. If you're in a wreck, the rescuers can simply get into the chassis and unclip the belt instead of having to fumble around and find the latch at the center of your body, minimizing the stress to your body. In the advent of a removal now, a bolt in style is very popular and off road and it simply has a tab at the end of the belt that attaches it to the chassis. One thing you do need to remember when installing a bolt in style is you need to install it in what's called double shear. That means a tab on either side with a bolt running through both metal tabs as well as the seatbelt to evenly distribute that load for the belt when it's locked in.
Now, another popular style is the wrap around type. Now, the wrap around belt simply travels down through this buckle around the roll cage tube and back using the belt itself to anchor it to the chest. See,
now, the one thing you do need to remember with a wrap around belt is you have to triple wrap the straps. If you can see this tab hanging out, the belt is not safe. It's only traveled through this buckle two times. You need to lock it in a third time by tucking it back through the backside of the buckle and pulling it through nice and tight. That'll keep the belt from unraveling when you get in a wreck and put stress on it.
Now, if you're gonna install five point belts in your rig, you need to build the chassis or roll cage specifically for them.
You're gonna have to have a belt bar that travels directly behind the seat, 1 to 4 inches below your shoulder height. When you're actually sitting in the rig,
the submarine belt or crotch strap that travels down between your legs is designed to keep the belt from traveling up your body and it needs a tube attachment as well. So you'll need to add a tube directly below the seat. Now, the black belt wraps around your body and needs to block into the chassis 1 to 4 inches back from the intersect point from the seat back to the seat bottom.
But mounting the belts is only the first part of the puzzle. When you get in your rig. Every time there's a certain way to adjust them.
The first step is to adjust the lap belt, sit in the seat comfortably and adjust the crotch strap. So it holds the lap belt securely across your hips. When you pull it tight,
then you can add the shoulder harnesses, simply pull the shoulder harnesses and let them sit right in the middle of each of your shoulders
or you attach them down to the buckle. Now, the shoulder straps go on, then the submarine belt,
then the second shoulder strap
and then the already adjusted lap belt.
Now the lap belt is fixed in place and held low by the submarine belt. All you have to do now is take the shoulder straps and pull them tight.
You wanna have the shoulder straps holding you back in the seat as well as down in the seat all at the same time, if your body is fixed to the seat,
you're in a roll over, it's not going to thrash around as much and it's not gonna move around the cab and possibly hurt you. Now, if you're the only person that ever drives your buggy, you'll only have to ever do this once. If you have other people driving your buggy every time you get in, it's best to double check all these adjustments before you go wheeling.
Today. We're taking some time to show you guys correct procedures for mounting items to a tube chassis using our curvy buggy as a base. And one item that you definitely have to pay attention to is the fuel cell. One of the easiest ways to get a fuel cell for your rig is to buy a premade one like this one from summit racing. It's an all aluminum fuel cell, fully welded and it's been pressure tested for leaks. But how you mount it to the rig is very important. See, you pull out of the box, got these little tabs on it right here and you would think simply weld a little tab onto your chassis and bolt it in place. The problem comes when you fill it with fuel, start driving around on the trail. There's a lot of weight here. 16 gallons of fuel, the weight of this fuel is moving up and down in the cell can actually start to bend these tabs one of these tabs bends and breaks off. There's a good chance that you're going to have a leak in your fuel cell that can lead to fire.
You don't just have to support it on the bottom with some plate. You also need to support it on the top.
So you'll make a set of straps that attach to the bottom plate, go up and around the top of the fuel cell to hold it down. Basically sandwiching it between two sections of the chassis.
That way the whole cell will move around with your chassis instead of moving on its own and possibly breaking apart.
Hey, look,
it's me
gonna make a crust now.
Oh, no,
there. Now it's chris
securing the fuel lines to the chassis is just as important as mounting the fuel cell. But you have to remember a couple of things. You can go ahead and use zip ties and they don't look very good. But more importantly, there's an issue. This is stainless braided line. And if you attach it to the chassis of your rock roller, you basically have one big piece of steel that means that there's electrical current or ground circuit running through your fuel line. If you're ever
on the trail and you have some bare wires or even just work in the shop, drop them, just set them on the fuel line, it's going to arc through and possibly cause a fire. A better solution is to mount the fuel line independent. Use some of these clamps for made for you products. They're chemical and conductive resistant and they come in a complete kit with everything that you'll need to mount a bunch of different lines. The nice thing is, is the through bolt that attaches
the two halves actually is a little bit longer. So you can just drill and tap the tubing to mount the line in place. If you do have a line going through any firewalls, you do need to add a Grommet.
Great type of Grommet is this one from Earls that you screw into the firewall and then just cut to the size that you need. This will keep any of the fuel lines or oil lines from chafing against the exposed metal of the firewall creating a leak.
You're watching Xtreme 4x4 for a DVD copy of this episode. Just go to Power Block tv.com and order your copy for just 595 plus shipping and handling. Start your own Xtreme 4x4 collection delivered right to your door from the power block.
Welcome back to extreme where today our curvy buggy has made a bunch of headway with the drive train locked in place and the seats mounted. It's time to get the suspension bolted back up and get this chassis up off the floor.
The last type of mount we want to talk about today is a suspension mount and in particular a coil over shock mount and one of the easiest ways to do it is with two small metal taps, simply attach a through bolt and weld them onto the chassis.
But a little bit better way to do it is with what's called a shock bung and this is a small machine piece of steel that actually is mounted inside that chassis rail and the shock is
it in from the outside with another additional tap. Now, this is a lot stronger because the weight of that coil over shock is being carried by the chassis itself, not by two small tabs welded on to the outside of it.
Now, the orientation of the shock bolts is also very important. You install a coil over shock at an extreme angle like we do all the time, especially in a rock crawler. You want to have the bolts running at nine
degrees to each other. If we have this top bolt mounted across the chassis like this, the bottom bolt must mount with the chassis front to back at 90 degrees to the top bolt. Now, that means that the shock won't get in a bind when the suspension articulates up and down, it will ride on the misalignment, spacers at one end and on the other end, it will ride across the bolt making sure that the suspension doesn't bind up
and we are not going to mount our suspension up today. We just wanted to get the fuel cell installed up front and the drive train locked into the back so we could check for the location of the coil overs and order the correct length.
Now, so far, everything about this buggy seems larger than life. We've got giant axles, huge tires and a monster drive train stuffed in the back. But so far the pasture compartment
seem a little small because of this drop down dash bar and the design of it.
And honestly, our crew has been busting our chops all the time about building buggies, but they just can't fit in
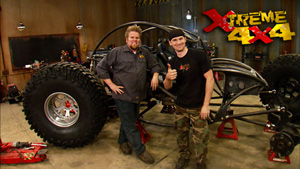
and to prove us wrong. We've got Matt Everett, one of our cameramen here. Now, he is 6 ft eight just under 270 pounds and he'll let us know if it feels a little bit different than the samurai.
What do you think, Matt?
Oh,
yeah, this is much better. Uh I got a little headroom there. Uh
I like this window. It's nice and open
and I like this dash it. It's pretty cool. Well, we'll strap them in, maybe put some padding up above your head there. So you don't buy, we'll even let you drive this one on the trail and that's all we got for today. And I'm gonna let Matt finish it all off.
Actually, I'm only 267. I don't know where he gets that 270 from.
Show Full Transcript
the term bigger is better, definitely holds true when you're talking about off road rigs. We're always pulling axles out of bigger trucks to get that extra string,
want more ground clearance underneath your rig. Well, it's as simple as slipping on a set of bigger tires. And if you're having trouble conquering that Mo
Hill climb at your local off road park, maybe you're a little short on horsepower, maybe you need a bigger engine stuffed underneath the hood. Now, none of our projects has truly embraced that phrase quite like our curvy buggy, Rockwell axles, 54 inch tall tires and a monster drive train stuffed in the back.
The idea for this buggy was simple, build a tube chassis to show you guys how to design and build one yourself but make this one as different as possible.
Diesel engine,
all rolled tube
and Rockwell axles narrowed for two short shafts
today, we're gonna keep working on this beast and just like before take you guys step by step through a couple of the procedures that normally we would just glass over and it's all gonna start with the correct way to mount an engine.
So,
a common misconception when installing a drive train in a buggy is that it has to be right in the middle of the chassis for weight distribution and that's just not true. You can offset it either towards the driver or the passenger. Many car companies do that straight from the factory to get better angles on the drive line. We do it in an off road rig for the front transfer case output. You'll get more room to get it down past the tranny and past the oil pan,
you offset the whole drive train towards that center mount and that's exactly what we're going to do here. We're going to take the entire drive lane and kick it over just a little bit, probably two or three inches towards the driver that will give us more room to get the drive shaft out of the transfer case past the transmission and past the oil pan to hook up to our center mounted rear steer, rockwell axle. Now, we're also going to mount this drive line 100% solid, no motor mounts,
poly mounts. And the reason we're doing that is just, it makes it a lot easier and a lot stronger. This engine weighs a lot. It's almost 800 pounds. We mount it solid, it'll be locked into the chassis securely. The only thing you have to watch out there is when you mount the engine solid, you have to mount the transmission and the transfer case solid as well. And the first step to this, we're gonna get the transmission engine and the whole package up off the floor because the oil pan is contacting the rear link mounts.
The easiest way to make a cardboard template like this is simply trim it to fit
and then hold it against the block.
Use the ball end of a ball peen hammer and tap around all the bulb holes. The edges of the bold holes will actually cut them into the cardboard.
The plan for this buggy from the very beginning has been 100% roll tubing
and the engine cradle will be no different.
And what we built on the back of this buggy is basically an engine cradle. We have tube traveling down both sides of the engine and underneath it and then tapped into the block on these flat plates. Now, the benefit of that is all the weight of the engine is supported by the chassis. If we just came off the chassis with the tube and tied into the block, the block would almost become part of the buggy. And that means on harsh environments where you're pounding the buggy a lot, the weight of the motor can start to bend those tubes out and believe it or not,
the engine can actually fall right out of the back of your rig. Now, you don't want that. So if you support it all the way around, it's definitely not going to go anywhere. The downfall is how do you make it removable? Well, we're going to use these ID tube clamps that we got from ballistic fabrication. We'll simply mount them right in line on this upper tube, cut this apart and weld it in
that way. When it comes time to break this engine out, we can simply take apart this tube clamp, unbolt it from the block, lower the cradle right out of the rig
just because you're mounting items to your chassis doesn't mean you're always gonna be breaking out the plasma cutter and the welder and building custom pieces. Sometimes you can go ahead and just buy a premade piece like this dual battery box that we got from rough stuff, specialties. It comes preformed pre welded and pre bent to accept two optimal batteries. And all you have to do is bolt it in or weld it to the tubes inside your rig and you have a 100% custom battery box.
Now, we're gonna be using optimal batteries in this rig. And the reason we like them is because you can mount them in almost any orientation. You can mount them in the traditional orientation with the post up on their side or even all the way upside down because these are an A GM or absorbed glass matte gel battery. They do not have lead acid inside of it that could leak out when mounted upside down. All we have to do is mount the battery box and we're ready for the batteries.
Oh,
yeah.
If you're digging our curvy buggy so far, no flipping lots more ahead, including the right way to mot
a fuel cell baby.
Stay tuned.
Today, we've got our curvy buggy back in the shop and just like before we're taking some time to show you guys some detailed steps that you need to follow when building a custom chassis. And today we're focusing on the mounts. Now, we've already got the motor locked in place as well as the battery box installed. And now we're gonna focus on probably the second most important part of your buggy and that is your seat mounts. Now, to show you how to do it, I've got two
twisted stitch seats here. Now, these are a apex seat with what's called a vortex style headrest with two holes designed for the five point harness to come through. They're a full suspension seat, just like all suspension seats will really absorb the shock when you're off road. Now, when you order your seats, you're gonna be asked a couple of different questions when it comes to mounting. These are what's called a tab style mount. The steel frame of the seat has
tabs welded to it to permanently fix the seats in place. You can also order the seats with a flat style mount that it's usually designed to work hand in hand with a set of sliders. You'll use that type of mount. When you're installing a set of seats, it may be a Jeep or a truck where you wanna make the seats adjustable for different drivers. But in a two buggy, a tab style seat is a lot stronger because it locks the seat into place.
I do
just like our engine cradle, the seat mount tubes will also be rolled.
Um,
you know, a rock crawler is only as safe as you make it. And that includes the seat belts.
There are three main types of mounting a five point harness to your rig and each one has a distinct advantage. A
clip in style harness simply has a clip at the end of the belt that locks into an islet that you mount to the chassis to secure it to the rig.
And the benefit of the clip and style is that they're required by certain sanctioning bodies. And that has to do a driver extraction. If you're in a wreck, the rescuers can simply get into the chassis and unclip the belt instead of having to fumble around and find the latch at the center of your body, minimizing the stress to your body. In the advent of a removal now, a bolt in style is very popular and off road and it simply has a tab at the end of the belt that attaches it to the chassis. One thing you do need to remember when installing a bolt in style is you need to install it in what's called double shear. That means a tab on either side with a bolt running through both metal tabs as well as the seatbelt to evenly distribute that load for the belt when it's locked in.
Now, another popular style is the wrap around type. Now, the wrap around belt simply travels down through this buckle around the roll cage tube and back using the belt itself to anchor it to the chest. See,
now, the one thing you do need to remember with a wrap around belt is you have to triple wrap the straps. If you can see this tab hanging out, the belt is not safe. It's only traveled through this buckle two times. You need to lock it in a third time by tucking it back through the backside of the buckle and pulling it through nice and tight. That'll keep the belt from unraveling when you get in a wreck and put stress on it.
Now, if you're gonna install five point belts in your rig, you need to build the chassis or roll cage specifically for them.
You're gonna have to have a belt bar that travels directly behind the seat, 1 to 4 inches below your shoulder height. When you're actually sitting in the rig,
the submarine belt or crotch strap that travels down between your legs is designed to keep the belt from traveling up your body and it needs a tube attachment as well. So you'll need to add a tube directly below the seat. Now, the black belt wraps around your body and needs to block into the chassis 1 to 4 inches back from the intersect point from the seat back to the seat bottom.
But mounting the belts is only the first part of the puzzle. When you get in your rig. Every time there's a certain way to adjust them.
The first step is to adjust the lap belt, sit in the seat comfortably and adjust the crotch strap. So it holds the lap belt securely across your hips. When you pull it tight,
then you can add the shoulder harnesses, simply pull the shoulder harnesses and let them sit right in the middle of each of your shoulders
or you attach them down to the buckle. Now, the shoulder straps go on, then the submarine belt,
then the second shoulder strap
and then the already adjusted lap belt.
Now the lap belt is fixed in place and held low by the submarine belt. All you have to do now is take the shoulder straps and pull them tight.
You wanna have the shoulder straps holding you back in the seat as well as down in the seat all at the same time, if your body is fixed to the seat,
you're in a roll over, it's not going to thrash around as much and it's not gonna move around the cab and possibly hurt you. Now, if you're the only person that ever drives your buggy, you'll only have to ever do this once. If you have other people driving your buggy every time you get in, it's best to double check all these adjustments before you go wheeling.
Today. We're taking some time to show you guys correct procedures for mounting items to a tube chassis using our curvy buggy as a base. And one item that you definitely have to pay attention to is the fuel cell. One of the easiest ways to get a fuel cell for your rig is to buy a premade one like this one from summit racing. It's an all aluminum fuel cell, fully welded and it's been pressure tested for leaks. But how you mount it to the rig is very important. See, you pull out of the box, got these little tabs on it right here and you would think simply weld a little tab onto your chassis and bolt it in place. The problem comes when you fill it with fuel, start driving around on the trail. There's a lot of weight here. 16 gallons of fuel, the weight of this fuel is moving up and down in the cell can actually start to bend these tabs one of these tabs bends and breaks off. There's a good chance that you're going to have a leak in your fuel cell that can lead to fire.
You don't just have to support it on the bottom with some plate. You also need to support it on the top.
So you'll make a set of straps that attach to the bottom plate, go up and around the top of the fuel cell to hold it down. Basically sandwiching it between two sections of the chassis.
That way the whole cell will move around with your chassis instead of moving on its own and possibly breaking apart.
Hey, look,
it's me
gonna make a crust now.
Oh, no,
there. Now it's chris
securing the fuel lines to the chassis is just as important as mounting the fuel cell. But you have to remember a couple of things. You can go ahead and use zip ties and they don't look very good. But more importantly, there's an issue. This is stainless braided line. And if you attach it to the chassis of your rock roller, you basically have one big piece of steel that means that there's electrical current or ground circuit running through your fuel line. If you're ever
on the trail and you have some bare wires or even just work in the shop, drop them, just set them on the fuel line, it's going to arc through and possibly cause a fire. A better solution is to mount the fuel line independent. Use some of these clamps for made for you products. They're chemical and conductive resistant and they come in a complete kit with everything that you'll need to mount a bunch of different lines. The nice thing is, is the through bolt that attaches
the two halves actually is a little bit longer. So you can just drill and tap the tubing to mount the line in place. If you do have a line going through any firewalls, you do need to add a Grommet.
Great type of Grommet is this one from Earls that you screw into the firewall and then just cut to the size that you need. This will keep any of the fuel lines or oil lines from chafing against the exposed metal of the firewall creating a leak.
You're watching Xtreme 4x4 for a DVD copy of this episode. Just go to Power Block tv.com and order your copy for just 595 plus shipping and handling. Start your own Xtreme 4x4 collection delivered right to your door from the power block.
Welcome back to extreme where today our curvy buggy has made a bunch of headway with the drive train locked in place and the seats mounted. It's time to get the suspension bolted back up and get this chassis up off the floor.
The last type of mount we want to talk about today is a suspension mount and in particular a coil over shock mount and one of the easiest ways to do it is with two small metal taps, simply attach a through bolt and weld them onto the chassis.
But a little bit better way to do it is with what's called a shock bung and this is a small machine piece of steel that actually is mounted inside that chassis rail and the shock is
it in from the outside with another additional tap. Now, this is a lot stronger because the weight of that coil over shock is being carried by the chassis itself, not by two small tabs welded on to the outside of it.
Now, the orientation of the shock bolts is also very important. You install a coil over shock at an extreme angle like we do all the time, especially in a rock crawler. You want to have the bolts running at nine
degrees to each other. If we have this top bolt mounted across the chassis like this, the bottom bolt must mount with the chassis front to back at 90 degrees to the top bolt. Now, that means that the shock won't get in a bind when the suspension articulates up and down, it will ride on the misalignment, spacers at one end and on the other end, it will ride across the bolt making sure that the suspension doesn't bind up
and we are not going to mount our suspension up today. We just wanted to get the fuel cell installed up front and the drive train locked into the back so we could check for the location of the coil overs and order the correct length.
Now, so far, everything about this buggy seems larger than life. We've got giant axles, huge tires and a monster drive train stuffed in the back. But so far the pasture compartment
seem a little small because of this drop down dash bar and the design of it.
And honestly, our crew has been busting our chops all the time about building buggies, but they just can't fit in
and to prove us wrong. We've got Matt Everett, one of our cameramen here. Now, he is 6 ft eight just under 270 pounds and he'll let us know if it feels a little bit different than the samurai.
What do you think, Matt?
Oh,
yeah, this is much better. Uh I got a little headroom there. Uh
I like this window. It's nice and open
and I like this dash it. It's pretty cool. Well, we'll strap them in, maybe put some padding up above your head there. So you don't buy, we'll even let you drive this one on the trail and that's all we got for today. And I'm gonna let Matt finish it all off.
Actually, I'm only 267. I don't know where he gets that 270 from.
