More Diesel Buggy Episodes
More CJ8 Scrambler Episodes
Xtreme 4x4 Builds
Want more content like this?
Join the PowerNation Email NewsletterParts Used In This Episode
Golden Mountain OHV Park
Sparta TN, Off Road park with 40 plus trails from level 1 to level 5. Good mixture of loose hill climbs and technical rock crawling for all off road vehicles. Home of the infamous \Bounty Hill"."""
Ruffstuff Specialties
Rockwell Link Towers
Ruffstuff Specialties
Ruffstuff Heat & Cryo Treated Rod End Set
Stazworks
20 x 14" Custom Wheels Style 16" with Cold Roll Rings and Double Beadlocks
Episode Transcript
You wanna build it big, then you've come to the right place today on extreme custom width, rockwells, massive bead locks, plus how to get the wheels of a rear engine buggy spinning. Right. Then we're whistling Dixie at this annual Southern trail ride.
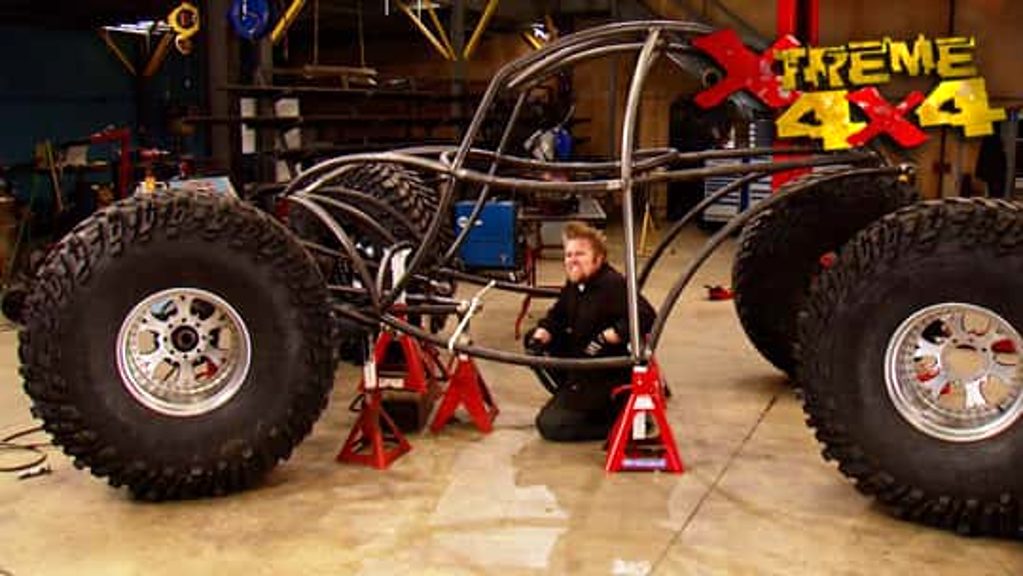
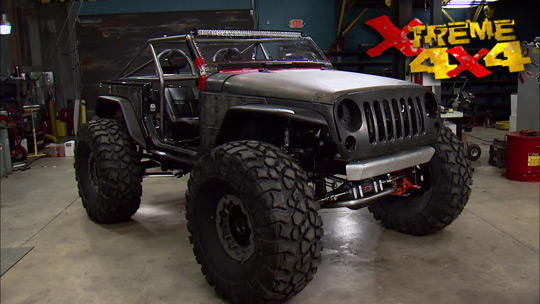
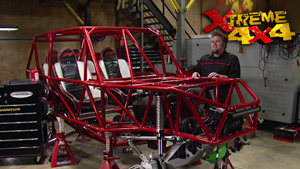
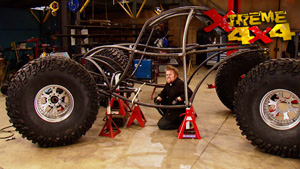
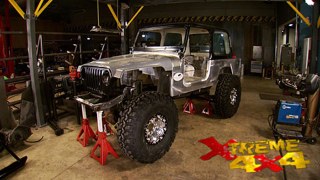
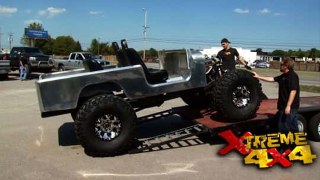
One of the cool things about building a two buggy is there's honestly no rules. If you can dream it, you can build it. You can build a two seater, you can build a four seater, you can build it to look like something like a jeep or you can build it to look like nothing that's ever been on the trail before. And that is exactly what we're doing with our latest project. Basically thinking outside of the box on as many things as we can, throwing out any rules that there ever was when it comes to building a two buggy. And it all started with a rather unique engine,
like using a diesel power plant, pulled from a wrecked three quarter ton pickup, mounting it in the rear
instead of up front
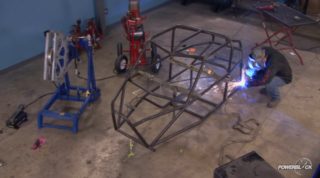
and using all roll tubing instead of simple bends and straight pieces.
And of course the biggest tires we could find 54 inch tt C Baha
Claws.
Now, even though there are no rules, there are some basic guidelines that you have to follow when you're putting together your tube chassis. That way you won't build your,
yourself into a corner, you'll always know you'll have room for your engine and room for your passengers. And that's what we did last time, took you guys step by step through the process of building a tube chassis with the end build in mind. And today we're gonna continue on that. We're gonna start with the axles
when it comes to custom wood axles and the wheels you choose for them, you have a couple of different options. You can go ahead and get an off the shelf wheel and work with the back spacing that the manufacturers set it at or you can order a set of custom wheels and pick your own back spacing. And that's what we did here. We have a set of STAS
works true, dual bead lock wheels that are 20 inches tall and 14 inches wide and they set the back spacing for us at four inches from the back. Now, when I'm talking about back spacing, I'm talking about the mounting flange of the wheel. You see stas
works, welds these wheels together for you and you basically pick the design of your center as well as the bolt pattern and where it lands in relation to the center of the wheel for a portal axle, you may wanna push all the way forward, so you have more room or if you're looking to make your rig a little bit wider, you can push the center way back and have a lot more of the tire and wheel hanging out off of the front. Now, when I say dual bead lock, I mean, it's pinching both beads of the tire. See the wheel is a two piece wheel, has a steel in her. And then this two piece liner that mounts inside of the tire.
Once the wheel is fully assembled, it's actually gonna clamp down on both the inner and outer bead holding them in place when you air down the tire.
And the nice thing about these wheels is we have an integrated rim stiffener welded to the outside
and they have two different options. We chose a cold rolled steel rim stiffener which just looks like more like a factory wheel. But if you want a different look, they do a flat plate rim stiffener with a bunch of different designs. You can choose from weld it in place.
This type of bead lock is much more labor intensive than the conventional style. But considering you have both the inner and outer be lock with a liner, it's well worth the work.
Now, before we talk about the actual axles we're gonna use on this project, we need to address a subject that comes up with this buggy's design when you're dealing with a rear engine drive train. How do you make sure the wheels and tires turn the right way because basically everything's in here backwards. And the best way to understand that is to have a look at a drive train completely on its own
in a conventional set up. You have the engine in the front of your rig, you're sitting in the seats looking over it and the power from it is traveling through the transmission through the transfer case down the drive shaft to the axle. When it reaches the axle, it turns the input yoke in a clockwise direction that in turn, turns the tires around that push the buggy forward down the trail. Now, when you set the buggy up with a rear engine configuration, you're basically spinning the seats around and the engine is now behind you. The power is still traveling the same way down the drive shaft, reaching the rear axle. It's still turning the yoke in a clockwise direction and turning the tires as if you're going to go forwards. But now that is actually backwards because it's going to push the buggy that way. Now, the best way to solve that problem is simple. You take your axles and you turn them upside down
by running the axle upside down. We've actually solved two problems. We are now turning the tires in the correct rotation because we're still turning the Pinion yoke that clockwise direction. But now we've reversed the rotation of the tires. So when we put the transmission in first gear, the buggy is actually gonna go forward. We've also improved our pinion angle. We now have what's called a high pin differential. So we've got the drive line up out of the way of any trail obstacles and actually
makes the pinion angle a little bit better for both the drive line at the axle and the transfer case. Now there are some strength and oiling issues. When you run an axle upside down, you're gonna be running on what's called the coast side of the ring gear, which is about 10% weaker. You're also gonna have problem getting oil to this back pinion bearing.
So axle lubricates itself by the spinning of the ring gear, basically sloshes the oil up and lubricates this rear bearing with the axle upside down. It has trouble getting oil up to this
back bearing right here. Now, you can solve that by grooving out some of the bearing housings and that's gonna be different depending on what axle you choose to run upside down. Best thing to do is do a little bit of research online. You'll find guys that can walk you through each step. Now, we are not going to be running these axles in our buggy. When you're talking about a Dira
Ax engine, it's probably gonna push about 1000 horsepower when we're done and 54 inch tall tires, this axle would not handle the abuse for that. We need something special.
Next. It's no guts, no glory at the annual Dixie run when Xtreme 4x4 continues.
Welcome back to extreme and to the trail where there is no better place to spend the weekend than in the woods trying to break your junk.
This time, we're at the annual Dixie run put on by the Southern Four Wheel Drive Association
for years. The Dixie was run at North Carolina's Upper Tohv.
But since its closure,
they've moved 175 miles northwest to Sparta, Tennessee. And one of our favorite parks, Golden Mountain off road parks, 500 acres. Mild to wild.
The young ones are weaned off road here and with tons of volunteers and vendor support. Folks come back year after year,
I came out here to wheel, see what it's like to wheel in the mud and the,
and the rocks.
Everybody's willing to stop and help you. We'll wait hours on end to make sure that you will get fixed and take you back. If you need a ride,
they're doing whatever they need to do in order to get you home
time is what this weekend is really all about.
But one of the highlights for us was their annual challenge.
We're going back to the woods on this one. This is gonna be real life. This is gonna be the big boys. The weather is nasty and it's gonna make it even worse. We're looking forward to see who can complete it.
All right, Brent, we got a lot of slop here, a lot of rain. Uh, what do you think is gonna happen? Who's pulling cable? Everyone, or just a few guys? I don't know. We're gonna see. I know, uh, Woodley and his wide open design buggy. He's, he's gonna hit it. Uh, Shane mccormick and the Rancho buggy.
Eat your heart out. You know,
you need to set the precedent today.
The cable,
I'll be pulling cable all throttle,
all throttle. No electricity. That's what we're looking
at.
Cable.
Ian's time. 12, 34.49.
Next up, Shane mccormick and his Rancho bucket.
What Rancho do it in
one minute?
Shut up. You
one minute 55.71 seconds. But as of right now,
I am in second place.
All right, we've got another DNF.
I'm not really satisfied. Can we run again?
You knock down the third
thoughts. I still on the podium, man. I'm still in the money.
That's too much about work.
1509.43. Well, you know what that means? Third place, baby. Look at that. Third three.
Don't leave me hanging in here. Woodley
ha
from the rocks to Rockwells. How to create custom with 2.5 ton axles. Stay tuned
today, we're back working on our curvy buggy. Now, we've already shown you guys that the wheel options for your project help determine your axle width and that by flipping an axle upside down, you will get the correct rotation of the tires in a rear engine buggy. Now, our tire
and drive train really dictated what axles we could use for this project. And it's none other than the monster 2.5 ton top loader Rockwell axle. But when you're going to flip the rotation in a Rockwell for a rear engine buggy, it's a different story altogether.
Yeah.
Oh
yeah,
that
so,
so
the Rockwell axle has what's called a double reduction housing and it sits right on top of the axle buried inside. This housing is a pinion gear and a ring gear that in turn drives a small spur gear that is meshed with a larger spur gear to give us that total 6.72 to 1 gear ratio. Now to reverse the rotation of this axle, you certainly don't want to flip it upside down because this entire reduction box would be below the axle center line, give you very little ground clearance and the front pin yoke would get into trail obstacles all the time.
You can't just spin it around the opposite way because it's still gonna turn in the standard rotation, whether you hook the drive line up to this flange or up to this flange right here. What you need to do is modify the housing on the inside.
This reduction box right here has been modified for reverse rotation. You can see opinion has been moved from this side of the ring gear to the opposite side. Now, what that does is it changes the direction that the spur gear turns. As you can see when I turn these two input yokes, both in a clockwise direction. The spur gears are moving in opposite directions from each other. That's what it takes to reverse the rotation of a rockwall housing.
The reduction box will still be sitting up top giving us lots of ground clearance, but it's prepped for a rear engine buggy.
Rockwell axles are still the go to choice when you're talking about big tires.
The top loading, Rockwell used to be the number one axle choice for monster trucks.
Excuse
me.
The best place to find a Rockwell axle is at a military surplus yard when they pull them out of deuce and a half trucks.
Now, the Rockwell axle has one drawback and that is that it is extremely wide. It's almost 80 inches wheel mount to wheel mount. But the nice thing is, is like all steering differentials. It has an offset center section which means that one axle tube is lost
bigger than the other. Now, what we can do is cut down this long side axle tube, that'll give us a new width of about 67 inches. The best part is it'll save us money because we won't need any custom shafts. We'll just run two short side axle shafts in this Rockwell housing
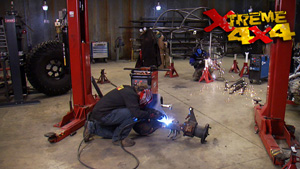
to help line these two axle tubes together. What I've done is cut two small pieces of heavy gauge angle iron.
It
well them inside this inner housing
and then I'll be able to slide the outer housing over it. The pieces will help line up the two axle tubes together
and then we'll lay down three wells, a root pass in the bottom of the bevel
and then two covering welds to make it strong.
Ok.
With our axle in place, we went ahead and tacked the bracket assembly to it to check for possible clearance issues between our tire and our four length bars. Now, the bracket assembly comes from rough stuff specialties and it's laser cut at a 38 inch plate and has an integrated angle worked into the lower mount to give us that triangulation, we need to locate our axle. Now, the
joints are also from rough stuff specialties and they come as a kit with both the misalignment spacers, the hem
joint, the tubing adapter and the nut all in one package. Now, rough stuff does something a little bit different with their
hem joints. They go ahead machine them have them heat treated and then they send them out to have them cryogenically treated for the plastic liner inside.
The cryogenic treatment improves the life of the plastic line,
which means the, he
will last a lot longer in our buggy even when it's locating a huge axle like a rock. Well, now the one issue we have here with everything in place is the angle is a little bit steep on this tire. It's gonna get into this upper bar. So all I'm gonna do now is blow the tax off that bracket, move it over about an inch, weld it back in place, check it again and then we'll do the other side.
You're watching Xtreme 4x4 for a DVD copy of this episode. Just go to power block tv.com and order your copy for just 595 plus shipping and handling. Start your own Xtreme 4x4 collection delivered right to your door from the power block.
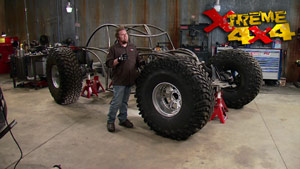
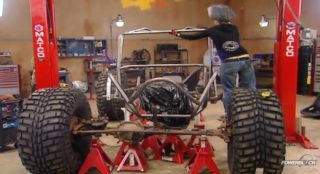
Today, we're working on the suspension for our curvy buggy chassis. Now, so far, we've gone ahead and installed our bead locks onto our big 54 inch tall tires and shortened up our Rockwell axle to get everything in place to mount our suspension links. Now, we don't want to use precut brackets here on the chassis like we did on the axle, mainly because of the design of the chassis. All these curved tubes in here, the precut brackets just won't fit perfectly. So we're gonna need to custom build all the brackets. I went ahead and made the suspension links and just set them on some jack stands with a rough idea of how long we need them to be. And now all I have to do is cut up some tubing and some plate to mount these in place.
Yeah.
Can
you.
Now, everything we've done today should really reinforce the fact that when you're building a custom tube chassis and a tube buggy, you can't just focus on the one job you're working on at that time. You need to think two or three steps down the line to make sure that what you're putting on your rig right now won't affect its performance later on when you need to add things like the wheels and tires or the fuel cell. Now, one of the nice things about building a four wheel steer buggy is honestly the four link ends up almost identical, both front and rear. So I'm gonna go ahead and add the frame side mounts for our Rockwell mounts on the back and then we'll be really close to having a rolling chassis.
Thanks for watching Xtreme 4x4 where we like to keep it right in them ditches.
Show Full Transcript
One of the cool things about building a two buggy is there's honestly no rules. If you can dream it, you can build it. You can build a two seater, you can build a four seater, you can build it to look like something like a jeep or you can build it to look like nothing that's ever been on the trail before. And that is exactly what we're doing with our latest project. Basically thinking outside of the box on as many things as we can, throwing out any rules that there ever was when it comes to building a two buggy. And it all started with a rather unique engine,
like using a diesel power plant, pulled from a wrecked three quarter ton pickup, mounting it in the rear
instead of up front
and using all roll tubing instead of simple bends and straight pieces.
And of course the biggest tires we could find 54 inch tt C Baha
Claws.
Now, even though there are no rules, there are some basic guidelines that you have to follow when you're putting together your tube chassis. That way you won't build your,
yourself into a corner, you'll always know you'll have room for your engine and room for your passengers. And that's what we did last time, took you guys step by step through the process of building a tube chassis with the end build in mind. And today we're gonna continue on that. We're gonna start with the axles
when it comes to custom wood axles and the wheels you choose for them, you have a couple of different options. You can go ahead and get an off the shelf wheel and work with the back spacing that the manufacturers set it at or you can order a set of custom wheels and pick your own back spacing. And that's what we did here. We have a set of STAS
works true, dual bead lock wheels that are 20 inches tall and 14 inches wide and they set the back spacing for us at four inches from the back. Now, when I'm talking about back spacing, I'm talking about the mounting flange of the wheel. You see stas
works, welds these wheels together for you and you basically pick the design of your center as well as the bolt pattern and where it lands in relation to the center of the wheel for a portal axle, you may wanna push all the way forward, so you have more room or if you're looking to make your rig a little bit wider, you can push the center way back and have a lot more of the tire and wheel hanging out off of the front. Now, when I say dual bead lock, I mean, it's pinching both beads of the tire. See the wheel is a two piece wheel, has a steel in her. And then this two piece liner that mounts inside of the tire.
Once the wheel is fully assembled, it's actually gonna clamp down on both the inner and outer bead holding them in place when you air down the tire.
And the nice thing about these wheels is we have an integrated rim stiffener welded to the outside
and they have two different options. We chose a cold rolled steel rim stiffener which just looks like more like a factory wheel. But if you want a different look, they do a flat plate rim stiffener with a bunch of different designs. You can choose from weld it in place.
This type of bead lock is much more labor intensive than the conventional style. But considering you have both the inner and outer be lock with a liner, it's well worth the work.
Now, before we talk about the actual axles we're gonna use on this project, we need to address a subject that comes up with this buggy's design when you're dealing with a rear engine drive train. How do you make sure the wheels and tires turn the right way because basically everything's in here backwards. And the best way to understand that is to have a look at a drive train completely on its own
in a conventional set up. You have the engine in the front of your rig, you're sitting in the seats looking over it and the power from it is traveling through the transmission through the transfer case down the drive shaft to the axle. When it reaches the axle, it turns the input yoke in a clockwise direction that in turn, turns the tires around that push the buggy forward down the trail. Now, when you set the buggy up with a rear engine configuration, you're basically spinning the seats around and the engine is now behind you. The power is still traveling the same way down the drive shaft, reaching the rear axle. It's still turning the yoke in a clockwise direction and turning the tires as if you're going to go forwards. But now that is actually backwards because it's going to push the buggy that way. Now, the best way to solve that problem is simple. You take your axles and you turn them upside down
by running the axle upside down. We've actually solved two problems. We are now turning the tires in the correct rotation because we're still turning the Pinion yoke that clockwise direction. But now we've reversed the rotation of the tires. So when we put the transmission in first gear, the buggy is actually gonna go forward. We've also improved our pinion angle. We now have what's called a high pin differential. So we've got the drive line up out of the way of any trail obstacles and actually
makes the pinion angle a little bit better for both the drive line at the axle and the transfer case. Now there are some strength and oiling issues. When you run an axle upside down, you're gonna be running on what's called the coast side of the ring gear, which is about 10% weaker. You're also gonna have problem getting oil to this back pinion bearing.
So axle lubricates itself by the spinning of the ring gear, basically sloshes the oil up and lubricates this rear bearing with the axle upside down. It has trouble getting oil up to this
back bearing right here. Now, you can solve that by grooving out some of the bearing housings and that's gonna be different depending on what axle you choose to run upside down. Best thing to do is do a little bit of research online. You'll find guys that can walk you through each step. Now, we are not going to be running these axles in our buggy. When you're talking about a Dira
Ax engine, it's probably gonna push about 1000 horsepower when we're done and 54 inch tall tires, this axle would not handle the abuse for that. We need something special.
Next. It's no guts, no glory at the annual Dixie run when Xtreme 4x4 continues.
Welcome back to extreme and to the trail where there is no better place to spend the weekend than in the woods trying to break your junk.
This time, we're at the annual Dixie run put on by the Southern Four Wheel Drive Association
for years. The Dixie was run at North Carolina's Upper Tohv.
But since its closure,
they've moved 175 miles northwest to Sparta, Tennessee. And one of our favorite parks, Golden Mountain off road parks, 500 acres. Mild to wild.
The young ones are weaned off road here and with tons of volunteers and vendor support. Folks come back year after year,
I came out here to wheel, see what it's like to wheel in the mud and the,
and the rocks.
Everybody's willing to stop and help you. We'll wait hours on end to make sure that you will get fixed and take you back. If you need a ride,
they're doing whatever they need to do in order to get you home
time is what this weekend is really all about.
But one of the highlights for us was their annual challenge.
We're going back to the woods on this one. This is gonna be real life. This is gonna be the big boys. The weather is nasty and it's gonna make it even worse. We're looking forward to see who can complete it.
All right, Brent, we got a lot of slop here, a lot of rain. Uh, what do you think is gonna happen? Who's pulling cable? Everyone, or just a few guys? I don't know. We're gonna see. I know, uh, Woodley and his wide open design buggy. He's, he's gonna hit it. Uh, Shane mccormick and the Rancho buggy.
Eat your heart out. You know,
you need to set the precedent today.
The cable,
I'll be pulling cable all throttle,
all throttle. No electricity. That's what we're looking
at.
Cable.
Ian's time. 12, 34.49.
Next up, Shane mccormick and his Rancho bucket.
What Rancho do it in
one minute?
Shut up. You
one minute 55.71 seconds. But as of right now,
I am in second place.
All right, we've got another DNF.
I'm not really satisfied. Can we run again?
You knock down the third
thoughts. I still on the podium, man. I'm still in the money.
That's too much about work.
1509.43. Well, you know what that means? Third place, baby. Look at that. Third three.
Don't leave me hanging in here. Woodley
ha
from the rocks to Rockwells. How to create custom with 2.5 ton axles. Stay tuned
today, we're back working on our curvy buggy. Now, we've already shown you guys that the wheel options for your project help determine your axle width and that by flipping an axle upside down, you will get the correct rotation of the tires in a rear engine buggy. Now, our tire
and drive train really dictated what axles we could use for this project. And it's none other than the monster 2.5 ton top loader Rockwell axle. But when you're going to flip the rotation in a Rockwell for a rear engine buggy, it's a different story altogether.
Yeah.
Oh
yeah,
that
so,
so
the Rockwell axle has what's called a double reduction housing and it sits right on top of the axle buried inside. This housing is a pinion gear and a ring gear that in turn drives a small spur gear that is meshed with a larger spur gear to give us that total 6.72 to 1 gear ratio. Now to reverse the rotation of this axle, you certainly don't want to flip it upside down because this entire reduction box would be below the axle center line, give you very little ground clearance and the front pin yoke would get into trail obstacles all the time.
You can't just spin it around the opposite way because it's still gonna turn in the standard rotation, whether you hook the drive line up to this flange or up to this flange right here. What you need to do is modify the housing on the inside.
This reduction box right here has been modified for reverse rotation. You can see opinion has been moved from this side of the ring gear to the opposite side. Now, what that does is it changes the direction that the spur gear turns. As you can see when I turn these two input yokes, both in a clockwise direction. The spur gears are moving in opposite directions from each other. That's what it takes to reverse the rotation of a rockwall housing.
The reduction box will still be sitting up top giving us lots of ground clearance, but it's prepped for a rear engine buggy.
Rockwell axles are still the go to choice when you're talking about big tires.
The top loading, Rockwell used to be the number one axle choice for monster trucks.
Excuse
me.
The best place to find a Rockwell axle is at a military surplus yard when they pull them out of deuce and a half trucks.
Now, the Rockwell axle has one drawback and that is that it is extremely wide. It's almost 80 inches wheel mount to wheel mount. But the nice thing is, is like all steering differentials. It has an offset center section which means that one axle tube is lost
bigger than the other. Now, what we can do is cut down this long side axle tube, that'll give us a new width of about 67 inches. The best part is it'll save us money because we won't need any custom shafts. We'll just run two short side axle shafts in this Rockwell housing
to help line these two axle tubes together. What I've done is cut two small pieces of heavy gauge angle iron.
It
well them inside this inner housing
and then I'll be able to slide the outer housing over it. The pieces will help line up the two axle tubes together
and then we'll lay down three wells, a root pass in the bottom of the bevel
and then two covering welds to make it strong.
Ok.
With our axle in place, we went ahead and tacked the bracket assembly to it to check for possible clearance issues between our tire and our four length bars. Now, the bracket assembly comes from rough stuff specialties and it's laser cut at a 38 inch plate and has an integrated angle worked into the lower mount to give us that triangulation, we need to locate our axle. Now, the
joints are also from rough stuff specialties and they come as a kit with both the misalignment spacers, the hem
joint, the tubing adapter and the nut all in one package. Now, rough stuff does something a little bit different with their
hem joints. They go ahead machine them have them heat treated and then they send them out to have them cryogenically treated for the plastic liner inside.
The cryogenic treatment improves the life of the plastic line,
which means the, he
will last a lot longer in our buggy even when it's locating a huge axle like a rock. Well, now the one issue we have here with everything in place is the angle is a little bit steep on this tire. It's gonna get into this upper bar. So all I'm gonna do now is blow the tax off that bracket, move it over about an inch, weld it back in place, check it again and then we'll do the other side.
You're watching Xtreme 4x4 for a DVD copy of this episode. Just go to power block tv.com and order your copy for just 595 plus shipping and handling. Start your own Xtreme 4x4 collection delivered right to your door from the power block.
Today, we're working on the suspension for our curvy buggy chassis. Now, so far, we've gone ahead and installed our bead locks onto our big 54 inch tall tires and shortened up our Rockwell axle to get everything in place to mount our suspension links. Now, we don't want to use precut brackets here on the chassis like we did on the axle, mainly because of the design of the chassis. All these curved tubes in here, the precut brackets just won't fit perfectly. So we're gonna need to custom build all the brackets. I went ahead and made the suspension links and just set them on some jack stands with a rough idea of how long we need them to be. And now all I have to do is cut up some tubing and some plate to mount these in place.
Yeah.
Can
you.
Now, everything we've done today should really reinforce the fact that when you're building a custom tube chassis and a tube buggy, you can't just focus on the one job you're working on at that time. You need to think two or three steps down the line to make sure that what you're putting on your rig right now won't affect its performance later on when you need to add things like the wheels and tires or the fuel cell. Now, one of the nice things about building a four wheel steer buggy is honestly the four link ends up almost identical, both front and rear. So I'm gonna go ahead and add the frame side mounts for our Rockwell mounts on the back and then we'll be really close to having a rolling chassis.
Thanks for watching Xtreme 4x4 where we like to keep it right in them ditches.
