Parts Used In This Episode
2020 Software Solutions, Inc.
Bend-Tech PRO software.
Allterrain Carts
All Terrain Welding Cart.
Certified Auto Recycling
Recycled Acura Integra motor and Honda Civic transmission.
Garage-Pak, LLC
Curtis CT and Ultra Reciprocating Compressor Series
, Curtis SE Series oil-injected rotary screw air compressors, Air Hose Reels for Garage Pak Compressed Air Piping Systems, Commercial Three Bay Professional Garage Pak Compressed Air Piping System.
Matco Tools
Electric cord reel, Folding metal welding table.
Miller Electric Manufacturing Co.
Dynasty series welder, Spectrum 375 X-TREME plasma cutter.
STOUT Tool Corp.
X-Band Cordless Band Saw and Cutting Station.
Tube Shark
SharkPool Combines TubeShark Bender & Notcher on Sturdy Rolling Bench.
Volunteer Welding Supply
Liner, Nozzle, .030 Tips, Solid Wire, Flux Wire, Cleaner Pads
Episode Transcript
Today something we've never done before. Build a single seat rear engine fun rig on a budget. See how plans from a laptop come to life in our fab shop. Plus a do it yourself locker that costs nothing.
Xtreme 4x4 starts now.
Now, as I'm sure most of you have figured out there's a lot of freedom when it comes to having a TV show. I mean, if you can dream up a project idea in your head, you can pretty much go ahead and build it everything from a wild over the top 10 or maybe even a classic scout. Anything you wanna do, you're pretty much allowed to do it.
Now, with all that freedom, sometimes it's easy to lose touch with what you guys are doing at home on the weekends in your small two car garages and trust me, it's easy. All the
of crate engines and axles and transmissions and tires and wheels that come flowing in the door. It's easy to forget that you guys at home are just working with sometimes bare bones parts and bare bones money. Now, recently we went ahead and took a part of the extreme shop and put together a small two car garage to put some perspective back into the projects that we build here every day.
We fill the place with minimal hand tools and showed you what you could build if you spent your money on parts instead of tools.
Now, so far, we've made a lot of progress on our CJ eight scrambler that we've been building inside that two car garage. Now, the truck is almost done, but we're gonna put it on the back burner just for a little while. Now, the reason for that is we recently received an invitation to the Scrambler Owners Association's National scramble. And we thought, what better place to debut this ride than with a whole bunch of other CJ eight.
Now, a lot of you guys like this G
project, some of you guys didn't like it at all, but all of you seem to really dig the whole two car garage theme. Now, we thought, why not take it to the next level if this truck represents what you can build, if you spend your money on parts instead of tools, why not spend our money on tools? Build a small two car garage, fab shop and then put together one killer custom budget buggy.
We'll start with the common tools we had in the garage before.
Good Jack
and some stamps,
set of torches,
couple hand grinders and a good workbench and of course an engine crane.
We also need some new tools and a place to keep them. So a new Mac code, double bay low boy toolbox will do the trick.
One of the first pieces of equipment you're gonna want to invest in. When you take that step from small two car garage work to serious fab work is gonna be a good air compressor. Now, you gotta be honest with yourself here guys, small little compressors like this that you get from the home Center, they're not gonna do it. They do not have enough pressure or store enough air to have you do any type of work in the shop. You need some of these big boys right here. Now, we got both these units from garage pack and they are Curtis industrial series compressors. So they're up to the task of some serious work. Now, this is your standard compressor you've probably seen in many shops. It is a two stage reciprocating type compressor that has a piston up here works just like an internal combustion engine that compresses the air and stores it in this large tank down below. Now, the downfall of this compressor is it develops a lot of heat as it's compressing. That air, that heat develops a lot of moisture. The other downfall is they are loud. I'm sure you've all heard them the next step up to eliminate that heat and the noise is one of these, this is a rotary screw type compressor. It's very similar to a blower that you'd see on a blown engine, basically two impellers compressing the air making it a lot quieter and a lot more easier to live with, especially in a small space. Now, the nice thing is, is because it operates at a lower temperature. It doesn't develop as much moisture and any moisture that is developed is removed with one of these refrigerators
units. Now, although this compressor right here can cost twice as much as a reciprocating compressor. You have to look at it as an investment. These compressors because they operate at less temperature and less moisture. Your tools are going to last a lot longer with this series of compressor. You also have to look at, what's your plans? Are you going to stay in a two car garage? Are you possibly going to move out and start doing some serious fab work if that's in your future? This compressor right here is your best bet
with the compressor in place. We can finish building the rest of our air system.
Nothing will keep Airlines off the shop floor better than a couple of hose reels
and we're mounting two cox reels. One in each corner.
Airlines from garage pack will get the air to the hose rails made from powder coated aluminum tubing. It's not only easy to install,
it can handle the high pressure of a commercial compressor.
Now, our set up here is 100% custom. We simply call the guys a garage pack with the size of our space and what we wanted in it and they put together a kit specifically for us. But if you have a real standard 12 or three car garage, they have kits that come with everything you need to install your own piping in your own garage. Now, it has all the anodized blue aluminum tubing that you need even comes with a little anti vibration connection for your compressor. All the fittings and a really unique set of quick disconnects that you turn one way to release the pressure and the second way to remove the tool. Now, the nice thing about this whole system is even if later on down the road, you plan to move, you can take it out just as easy as it was to put in and take it with you.
Nice,
just like our hose reels. A cord reel will keep extension cords from being trapped under our feet.
This unit from mat co has an integrated circuit breaker and a stinger that lights up when you know, it's got power
later on a viewer provides inspiration for our next build a tube chassis crawler with a unique drive train. Stay tuned
extreme. We're taking the space that was our small two car garage and turning it into a two car fab shop, filling it up with some hard core tools to build a custom buggy. Now, one of the first things we're going to want to install now is a new welder. How just because you need to do some serious,
doesn't mean you gotta run out and buy a brand new welder. You can get a used welder just like this small Lincoln sp 170 T. It is a 220 volt midrange welder, which will make it great for chassis and roll cages and bumpers. And with a little bit of rebuilding this welder will be good as new
first inspect the ground clamp and make sure the connection is in good shape. And of course, tight
replacing the liner will give the welding wire a smooth path to follow to the torch
and then follow it up with a new tip.
A wire Luber will help remove any scale from the wire before it hits the drive rolls. This will improve the consistency of the wire speed and extend the life of our new liner.
And when you have a small welder like this, you definitely need a cart to get it around the shop when you're working in a small space. Sooner or later, the welder is gonna have to go outside to do some welding. And for that, there's nothing better than one of these all terrain welding carts. Now, they're specifically designed for these small to mid range welders. They have
the front to hang up your ground clamp as well as your torch. A spot back here for your shield and gas bottle and hooks for grinders and helmets and anything you'd need to do your welding. But the best part is, is the entire cart has independent suspension at all four wheels. Now, that means that this cart is not gonna get stuck anywhere.
Now, when you're putting together a small space to do some serious fabrication, you gotta do a little bit of planning. You can't just fill the room with equipment because you'll have no room for your project. Some of your stuff has to do more than one job. And that's what we're gonna show you. Now, a good example of that is our Macco toolbox. Not only will it store all of our tools, it also gives us a workbench to work off of. Now. Another good example of that is this
and from stout now, this is a cordless portable band saw
that you can use just to trim things up around your shop. But it also has this mobile cutting station base. And that means when you drop it in there and lock it in, you have a small bench top band saw that you can easily store away when you're not gonna use it. Now, this is not the only space saving thing
we're gonna show you here today.
You have seen these matco welding tables in the extreme shop for a long time.
But did you know that they fold up for easy storage?
The original tube Shark Bender was also designed to fold away so you can tuck it into a corner
welders used to be big and bulky,
but the Miller Dynasty packs a punch in a small package.
The inverter technology enables it to handle large scale welding
but easily stores away.
The Miller extreme 375 plasma cutter is great for its size.
Plus the dual voltage input allows this cutter to run on either 110 or 220 volts.
Not too long ago, we showed you guys how to make a homemade dipple dye press.
And this will be the first of many homemade tools we put into this small shop.
Now that we have a well equipped all those small fab shop ready to roll. We can go ahead and start building a project. Now, here's the kicker. We've invested some serious money in the tools in this small space, probably somewhere between 15 to $20,000 if you did
in one shot. Now, the good thing about that is those tools are an investment. They're gonna pay us back over time. The bad thing is it doesn't leave us with a lot of money for our project. That's ok because we have good tools. We can build a lot of parts and fix up stuff from the junk yard.
Now, I'm sure some of you guys think you know what's gonna happen right now, we're gonna bring in some tubing, maybe an old V8, old transmission transfer case, put together a buggy. Well, no, because we already did that. Not too long ago, we built a four wheel steer buggy out of those exact parts called it our bottom door buggy. You guys like that project a lot? That's the other option. Now.
Maybe we should go out and buy a cheap little used truck, throw it together with some junkyard parts and go wheeling. Well, no, because we already did that too.
Not too long ago, we built our little eco friendly green samurai and ran in a turbo diesel on some vegetable oil. This time, we wanna think outside of the box and I mean way outside of the box
every now and again, a buggy pops up that pushes the envelope. Jeremy Winters did just that with his single seed buggy.
His build up was documented on his web forum, the Rock Gods.
And after seeing the buggy finished, we knew the extreme shop had to build one.
Uh,
Jeremy builds these chassis and sells them, but we talked him into sending us his Ben Tech profile. Now, what that means is we can go ahead and look in here and we have everything we need to build the chassis right here in our own shop. Now, Jeremy did use a different bender. But the nice thing about Ben Tech Pro is we can go
in and change all those settings for our tube shark that we have in the shop just by selecting it from the drop down menu and it will change everything in the chassis and give us bend, print out sheets. So all we have to do is go through our chassis, select each tube, give us a printout sheet. We can start putting together a chassis
that notch is on the wrong side of the tube.
Here's a tip for you guys at home.
You make a mistake like this
and you put the notch on the wrong side of the tube.
Don't get angry and like throw it around and go sign
up,
got
stup
its
lot
cut. No peace man.
You'll use that later.
Swear. Huh.
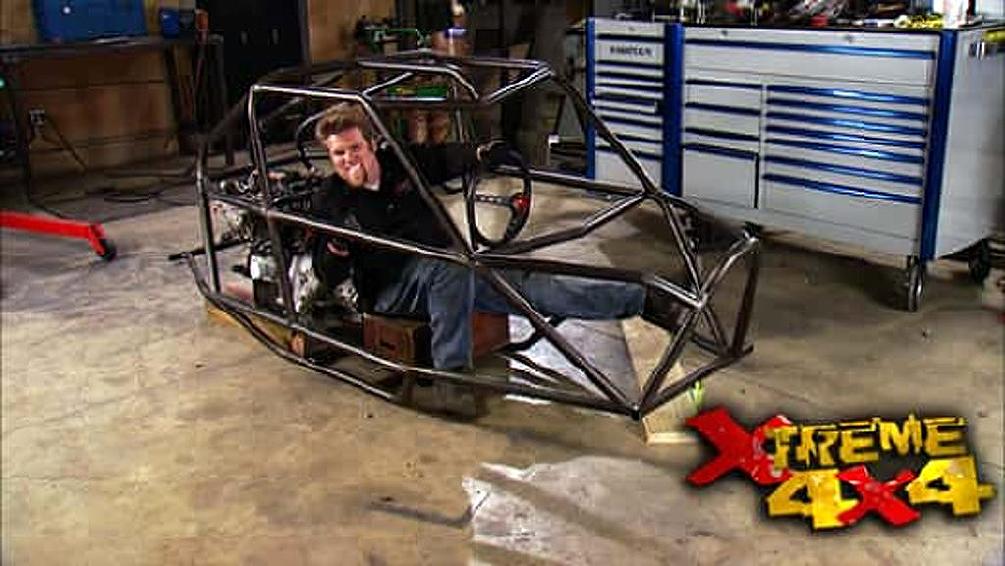
Now we made some subtle changes to the original chassis design. We kept most of the measurements identical to the original one, but we changed the front end here completely. The original design had a shock hoop that just came up here and ran straight down. Now we added this small stinger and these little bars here to sort of keep the chassis flowing down at a steep angle,
kind of like a sports car look, which is what it sort of already had with this bent roof bar. Now, back here in the back, the engine compartment back here is the same as the original plan, but we added this third bar right down the middle just to give it a little more style on the back end. Now, we did have to make this bar removable, so we will be able to pull the motor and transmission in and out
through the top. Now, also back here,
Jeremy had a design of a piece of tube coming down here to support this rear spot. But instead of doing that, it kind of ruins this bend, we're going to come off the centerpiece with two pieces that come down at an angle. Now, we do have to add more tubes in here and do them finished welding on the whole thing. But for now,
it's ready for the drive train
build on a budget Xtreme 4x4 projects that save you time and money.
Now, the purpose of a differential inside your axle housing is to give you what's called differential action.
That means that your axles can turn at different speeds when the vehicle is going around a corner. Now, this is accomplished by the spider and side gears inside the housing. Now, off road, we want maximum
action so we usually lose the differential and replace it with a selectable locker to tie both wheels together. Now, if you're short on cash,
you can go ahead and build what's called a Lincoln locker. You simply take the differential out of your axle housing, clean it up and we're gonna weld the side gears right to the spider gears.
Now, by welding these gears together, it prevents them from turning and removes that differential action. A great locker for your trail truck.
Now today and extreme, we're putting together a pretty innovative crawler. Now, it's not just the size of the chassis or the design that makes it unique. It's mainly the drive train and what's going to power. This buggy is right here, a four cylinder Honda engine. Now, this is AJ DM series engine and this particular one came out of an 89 Acura Integra. Now, we had to find one of these in a junk yard. So we called up our friends at Certified Auto.
They were able to hunt around in a couple other yards and find a low mileage one for us for less than 500 bucks. Now, behind that, we're gonna be mounting this, this is a Honda Civic four door transaxle. Now, I'm sure some of you guys are thinking right now. Well, great. You got an engine and you got a transmission, but you don't have a transfer case. How are you gonna power the axles? Well, to understand that it's best to take a look at a front wheel drive engine under the hood.
What you'll find is an engine mounted in a manner that we refer to as transverse. Now, that's a fancy way of basically saying sideways in a rear wheel drive car, the front of the motor is at the front of the car, but in a front wheel drive car, the front of the motor is actually at the side, the power from the engine then
travels down into the transaxle. Now, the transaxle takes that power and splits it into two different axles that go out and drive either front wheel. Now, that's what's gonna help us out with the drive train in our buggy, we'll tap into either one of those outputs for the front wheels to drive both our front and rear axle.
Normally, when you install an engine in the back of your buggy, you run into an inherent drive line problem and that is that you have to flip the axles upside down because everything will be turning the wrong way.
But here's the kicker with the Honda motor. This is a reverse rotation engine. So we can matter in the back, put the transaxle in the middle and we'll be able to matter axles right side up.
It is a tight fit back here, but we still have room for everything that we need
lots of space for a fuel tank as well as a radiator. We did move the engine all the way to the right hand side of the chassis to give us a good angle on the rear drive shaft as well as plenty of room for the front drive shaft to clear the driver's seat as it leaves the transaxle. Now, you guys in the know, we're probably thinking what about the differential action
inside that transaxle won't it just be splitting power front to rear, depending on what axle stuck? Well, you're right. We're gonna have to tear that transaxle down and weld up that diff like a spool to give us 100% power all the time. We'll do that later. Now. So far there's less than 1000 bucks sitting right here and we have a good drive train and a good chassis. Next time we'll sling some axles underneath this thing and make it a roller.
Show Full Transcript
Xtreme 4x4 starts now.
Now, as I'm sure most of you have figured out there's a lot of freedom when it comes to having a TV show. I mean, if you can dream up a project idea in your head, you can pretty much go ahead and build it everything from a wild over the top 10 or maybe even a classic scout. Anything you wanna do, you're pretty much allowed to do it.
Now, with all that freedom, sometimes it's easy to lose touch with what you guys are doing at home on the weekends in your small two car garages and trust me, it's easy. All the
of crate engines and axles and transmissions and tires and wheels that come flowing in the door. It's easy to forget that you guys at home are just working with sometimes bare bones parts and bare bones money. Now, recently we went ahead and took a part of the extreme shop and put together a small two car garage to put some perspective back into the projects that we build here every day.
We fill the place with minimal hand tools and showed you what you could build if you spent your money on parts instead of tools.
Now, so far, we've made a lot of progress on our CJ eight scrambler that we've been building inside that two car garage. Now, the truck is almost done, but we're gonna put it on the back burner just for a little while. Now, the reason for that is we recently received an invitation to the Scrambler Owners Association's National scramble. And we thought, what better place to debut this ride than with a whole bunch of other CJ eight.
Now, a lot of you guys like this G
project, some of you guys didn't like it at all, but all of you seem to really dig the whole two car garage theme. Now, we thought, why not take it to the next level if this truck represents what you can build, if you spend your money on parts instead of tools, why not spend our money on tools? Build a small two car garage, fab shop and then put together one killer custom budget buggy.
We'll start with the common tools we had in the garage before.
Good Jack
and some stamps,
set of torches,
couple hand grinders and a good workbench and of course an engine crane.
We also need some new tools and a place to keep them. So a new Mac code, double bay low boy toolbox will do the trick.
One of the first pieces of equipment you're gonna want to invest in. When you take that step from small two car garage work to serious fab work is gonna be a good air compressor. Now, you gotta be honest with yourself here guys, small little compressors like this that you get from the home Center, they're not gonna do it. They do not have enough pressure or store enough air to have you do any type of work in the shop. You need some of these big boys right here. Now, we got both these units from garage pack and they are Curtis industrial series compressors. So they're up to the task of some serious work. Now, this is your standard compressor you've probably seen in many shops. It is a two stage reciprocating type compressor that has a piston up here works just like an internal combustion engine that compresses the air and stores it in this large tank down below. Now, the downfall of this compressor is it develops a lot of heat as it's compressing. That air, that heat develops a lot of moisture. The other downfall is they are loud. I'm sure you've all heard them the next step up to eliminate that heat and the noise is one of these, this is a rotary screw type compressor. It's very similar to a blower that you'd see on a blown engine, basically two impellers compressing the air making it a lot quieter and a lot more easier to live with, especially in a small space. Now, the nice thing is, is because it operates at a lower temperature. It doesn't develop as much moisture and any moisture that is developed is removed with one of these refrigerators
units. Now, although this compressor right here can cost twice as much as a reciprocating compressor. You have to look at it as an investment. These compressors because they operate at less temperature and less moisture. Your tools are going to last a lot longer with this series of compressor. You also have to look at, what's your plans? Are you going to stay in a two car garage? Are you possibly going to move out and start doing some serious fab work if that's in your future? This compressor right here is your best bet
with the compressor in place. We can finish building the rest of our air system.
Nothing will keep Airlines off the shop floor better than a couple of hose reels
and we're mounting two cox reels. One in each corner.
Airlines from garage pack will get the air to the hose rails made from powder coated aluminum tubing. It's not only easy to install,
it can handle the high pressure of a commercial compressor.
Now, our set up here is 100% custom. We simply call the guys a garage pack with the size of our space and what we wanted in it and they put together a kit specifically for us. But if you have a real standard 12 or three car garage, they have kits that come with everything you need to install your own piping in your own garage. Now, it has all the anodized blue aluminum tubing that you need even comes with a little anti vibration connection for your compressor. All the fittings and a really unique set of quick disconnects that you turn one way to release the pressure and the second way to remove the tool. Now, the nice thing about this whole system is even if later on down the road, you plan to move, you can take it out just as easy as it was to put in and take it with you.
Nice,
just like our hose reels. A cord reel will keep extension cords from being trapped under our feet.
This unit from mat co has an integrated circuit breaker and a stinger that lights up when you know, it's got power
later on a viewer provides inspiration for our next build a tube chassis crawler with a unique drive train. Stay tuned
extreme. We're taking the space that was our small two car garage and turning it into a two car fab shop, filling it up with some hard core tools to build a custom buggy. Now, one of the first things we're going to want to install now is a new welder. How just because you need to do some serious,
doesn't mean you gotta run out and buy a brand new welder. You can get a used welder just like this small Lincoln sp 170 T. It is a 220 volt midrange welder, which will make it great for chassis and roll cages and bumpers. And with a little bit of rebuilding this welder will be good as new
first inspect the ground clamp and make sure the connection is in good shape. And of course, tight
replacing the liner will give the welding wire a smooth path to follow to the torch
and then follow it up with a new tip.
A wire Luber will help remove any scale from the wire before it hits the drive rolls. This will improve the consistency of the wire speed and extend the life of our new liner.
And when you have a small welder like this, you definitely need a cart to get it around the shop when you're working in a small space. Sooner or later, the welder is gonna have to go outside to do some welding. And for that, there's nothing better than one of these all terrain welding carts. Now, they're specifically designed for these small to mid range welders. They have
the front to hang up your ground clamp as well as your torch. A spot back here for your shield and gas bottle and hooks for grinders and helmets and anything you'd need to do your welding. But the best part is, is the entire cart has independent suspension at all four wheels. Now, that means that this cart is not gonna get stuck anywhere.
Now, when you're putting together a small space to do some serious fabrication, you gotta do a little bit of planning. You can't just fill the room with equipment because you'll have no room for your project. Some of your stuff has to do more than one job. And that's what we're gonna show you. Now, a good example of that is our Macco toolbox. Not only will it store all of our tools, it also gives us a workbench to work off of. Now. Another good example of that is this
and from stout now, this is a cordless portable band saw
that you can use just to trim things up around your shop. But it also has this mobile cutting station base. And that means when you drop it in there and lock it in, you have a small bench top band saw that you can easily store away when you're not gonna use it. Now, this is not the only space saving thing
we're gonna show you here today.
You have seen these matco welding tables in the extreme shop for a long time.
But did you know that they fold up for easy storage?
The original tube Shark Bender was also designed to fold away so you can tuck it into a corner
welders used to be big and bulky,
but the Miller Dynasty packs a punch in a small package.
The inverter technology enables it to handle large scale welding
but easily stores away.
The Miller extreme 375 plasma cutter is great for its size.
Plus the dual voltage input allows this cutter to run on either 110 or 220 volts.
Not too long ago, we showed you guys how to make a homemade dipple dye press.
And this will be the first of many homemade tools we put into this small shop.
Now that we have a well equipped all those small fab shop ready to roll. We can go ahead and start building a project. Now, here's the kicker. We've invested some serious money in the tools in this small space, probably somewhere between 15 to $20,000 if you did
in one shot. Now, the good thing about that is those tools are an investment. They're gonna pay us back over time. The bad thing is it doesn't leave us with a lot of money for our project. That's ok because we have good tools. We can build a lot of parts and fix up stuff from the junk yard.
Now, I'm sure some of you guys think you know what's gonna happen right now, we're gonna bring in some tubing, maybe an old V8, old transmission transfer case, put together a buggy. Well, no, because we already did that. Not too long ago, we built a four wheel steer buggy out of those exact parts called it our bottom door buggy. You guys like that project a lot? That's the other option. Now.
Maybe we should go out and buy a cheap little used truck, throw it together with some junkyard parts and go wheeling. Well, no, because we already did that too.
Not too long ago, we built our little eco friendly green samurai and ran in a turbo diesel on some vegetable oil. This time, we wanna think outside of the box and I mean way outside of the box
every now and again, a buggy pops up that pushes the envelope. Jeremy Winters did just that with his single seed buggy.
His build up was documented on his web forum, the Rock Gods.
And after seeing the buggy finished, we knew the extreme shop had to build one.
Uh,
Jeremy builds these chassis and sells them, but we talked him into sending us his Ben Tech profile. Now, what that means is we can go ahead and look in here and we have everything we need to build the chassis right here in our own shop. Now, Jeremy did use a different bender. But the nice thing about Ben Tech Pro is we can go
in and change all those settings for our tube shark that we have in the shop just by selecting it from the drop down menu and it will change everything in the chassis and give us bend, print out sheets. So all we have to do is go through our chassis, select each tube, give us a printout sheet. We can start putting together a chassis
that notch is on the wrong side of the tube.
Here's a tip for you guys at home.
You make a mistake like this
and you put the notch on the wrong side of the tube.
Don't get angry and like throw it around and go sign
up,
got
stup
its
lot
cut. No peace man.
You'll use that later.
Swear. Huh.
Now we made some subtle changes to the original chassis design. We kept most of the measurements identical to the original one, but we changed the front end here completely. The original design had a shock hoop that just came up here and ran straight down. Now we added this small stinger and these little bars here to sort of keep the chassis flowing down at a steep angle,
kind of like a sports car look, which is what it sort of already had with this bent roof bar. Now, back here in the back, the engine compartment back here is the same as the original plan, but we added this third bar right down the middle just to give it a little more style on the back end. Now, we did have to make this bar removable, so we will be able to pull the motor and transmission in and out
through the top. Now, also back here,
Jeremy had a design of a piece of tube coming down here to support this rear spot. But instead of doing that, it kind of ruins this bend, we're going to come off the centerpiece with two pieces that come down at an angle. Now, we do have to add more tubes in here and do them finished welding on the whole thing. But for now,
it's ready for the drive train
build on a budget Xtreme 4x4 projects that save you time and money.
Now, the purpose of a differential inside your axle housing is to give you what's called differential action.
That means that your axles can turn at different speeds when the vehicle is going around a corner. Now, this is accomplished by the spider and side gears inside the housing. Now, off road, we want maximum
action so we usually lose the differential and replace it with a selectable locker to tie both wheels together. Now, if you're short on cash,
you can go ahead and build what's called a Lincoln locker. You simply take the differential out of your axle housing, clean it up and we're gonna weld the side gears right to the spider gears.
Now, by welding these gears together, it prevents them from turning and removes that differential action. A great locker for your trail truck.
Now today and extreme, we're putting together a pretty innovative crawler. Now, it's not just the size of the chassis or the design that makes it unique. It's mainly the drive train and what's going to power. This buggy is right here, a four cylinder Honda engine. Now, this is AJ DM series engine and this particular one came out of an 89 Acura Integra. Now, we had to find one of these in a junk yard. So we called up our friends at Certified Auto.
They were able to hunt around in a couple other yards and find a low mileage one for us for less than 500 bucks. Now, behind that, we're gonna be mounting this, this is a Honda Civic four door transaxle. Now, I'm sure some of you guys are thinking right now. Well, great. You got an engine and you got a transmission, but you don't have a transfer case. How are you gonna power the axles? Well, to understand that it's best to take a look at a front wheel drive engine under the hood.
What you'll find is an engine mounted in a manner that we refer to as transverse. Now, that's a fancy way of basically saying sideways in a rear wheel drive car, the front of the motor is at the front of the car, but in a front wheel drive car, the front of the motor is actually at the side, the power from the engine then
travels down into the transaxle. Now, the transaxle takes that power and splits it into two different axles that go out and drive either front wheel. Now, that's what's gonna help us out with the drive train in our buggy, we'll tap into either one of those outputs for the front wheels to drive both our front and rear axle.
Normally, when you install an engine in the back of your buggy, you run into an inherent drive line problem and that is that you have to flip the axles upside down because everything will be turning the wrong way.
But here's the kicker with the Honda motor. This is a reverse rotation engine. So we can matter in the back, put the transaxle in the middle and we'll be able to matter axles right side up.
It is a tight fit back here, but we still have room for everything that we need
lots of space for a fuel tank as well as a radiator. We did move the engine all the way to the right hand side of the chassis to give us a good angle on the rear drive shaft as well as plenty of room for the front drive shaft to clear the driver's seat as it leaves the transaxle. Now, you guys in the know, we're probably thinking what about the differential action
inside that transaxle won't it just be splitting power front to rear, depending on what axle stuck? Well, you're right. We're gonna have to tear that transaxle down and weld up that diff like a spool to give us 100% power all the time. We'll do that later. Now. So far there's less than 1000 bucks sitting right here and we have a good drive train and a good chassis. Next time we'll sling some axles underneath this thing and make it a roller.
