More Toyota Mini Episodes
Xtreme 4x4 Builds
Want more content like this?
Join the PowerNation Email NewsletterParts Used In This Episode
Ballistic Fabrication
7075-T6 Billet CNC Machined Hubs and Chromoly Drive Flanges
Ballistic Fabrication
Full Float Spindles Billet 4130 Chromoly Rear
Ballistic Fabrication
Performance Series 9" Bump Formed Housing Front
Ballistic Fabrication
Performance Series 9" Bump Formed Housing Rear
Northwest Fab
Black Box - 2.72:1 secondary reduction housing unit - and a set of Triple Stick Cable Shifters
Northwest Fab
Dana 60 Hydraulic Steering Arms
Pitbull Tire Company
Pitbull 44x19.5-17 LT Bias Rocker
Randy's Ring & Pinion
Dana 60 Front Spindle
Randy's Ring & Pinion
Dana 60 Kingpin Rebuild Kit
Trail Gear Inc.
Trail-Link Four Rear Link Suspension Kit
Trail Gear Inc.
Trail-Link Three Front 3-Link Kit
Trail Ready
HD17 Beadlocked Wheel
Episode Transcript
Off road trucks are built to be tough
taking off the truck, but
they're used and abused driven places where cars were never meant to go basically lead a life of pain and suffering. Well, today, the suffering stops for our Black Toyota.
If you're gonna compare a trail truck to something you may have laying around the shop. The best comparison is gonna be to a big old piece of chain,
very utilitarian built with one purpose in mind
and incredibly strong, but just like a piece of chain. When you have an epic failure in your trail truck, it can usually be
somewhat catastrophic. Now you can fix chain, you can go ahead and put in a repair link, but then you have a weak link in your chain and trail trucks are no different. We spend more time chasing weak links out of them than we usually do driving them. And no project has shown us more weak links than our Black Toyota.
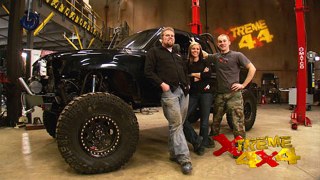
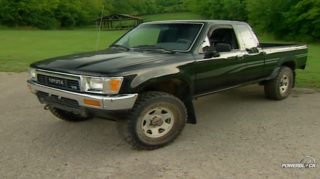
It started life as a bone stock extra cab pickup with a bad engine.
We stripped it down,
ditched the drive train
and performed a solid axle swap
then slid in a ram jet 3 5700 R four automatic and a stack three speed transfer case.
And then we took it wheeling
and found the first of the Weak Lakes
a bad angle on our front drive shaft.
So we brought the truck back into the shop, threw it up on the lift and installed a Northwest fab black box range box. Now, what that did was move the transfer case back. Almost 12 inches really improved the angle on our front drive line. So we loaded the truck up, went wheeling
one more time.
And although the truck worked pretty well, honestly, we had to hold back more than a little.
We knew that with the additional 2.72 to 1 reduction
and the power of the Ram jet 350
the little Yoda axles were not going to last long.
So before we actually blow these axles apart, we're gonna be proactive and replace them. So we've invested some serious money in these houses. We've got 529 gears, Detroit lockers and chrome moley
axle shafts. Someone will pay us a pretty penny for these axles as long as they still together. So replacing them. Now, we can sell these ones and recoup some of the cost of our new units. At the same time, we'll go ahead and ditch this spring over suspension as well as the leaf springs in the rear. Do a suspension upgrade and swap to some bigger wheels and tires.
Call
me
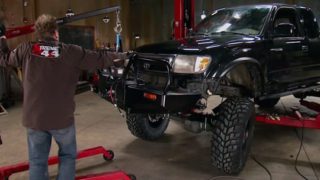
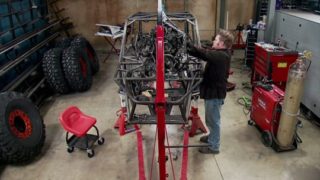
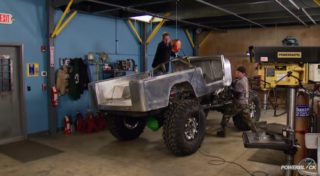
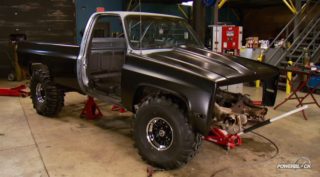
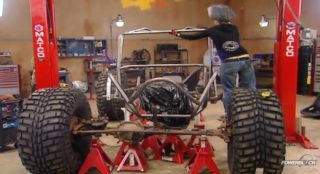
now, we're ditching the majority of the sheet metal on the front and the rear to make room for the larger wheels and tires we have planned. Now, we could easily cut the back end of this frame off and completely build a new tube structure. But that would be kind of wasteful since we've already got the majority of this built out of this inch and a half dom. So we'll work off of that. But before we go ahead and start cleaning up this frame rail, it's a good idea to get our axles underneath the truck and set our wheel base for that. We
need some new parts.
We're gonna start with the axle housings and for our Toyota, we're gonna be using fabricated Ford nine inch axle housing that we got from ballistic fabrication and they have a 3.5 inch axle tube that is a quarter inch thick that's attached to a formed housing that's fully welded for maximum ground clearance and then it's been machined to accept the Ford nine inch drop out. Now, on the,
it's their new full float kit that includes a spindle we weld in once we set the wind and a rather unique rotor hat assembly that includes this dry flange puck. Now, not only does it key in off the rotor, it also has the integrated spines worked into it for that rear axle shaft. That means once we have this put together, we don't need to buy a set of dry flans for a rear axle.
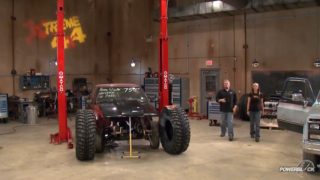
We'll rest the housings on some jack stands with the center of the tube 22 inches above the floor to mark the center line of our new tires.
Then we can set the wheel base, go to the front edge of the tube.
Ok.
Right there. Yep.
The rear axle will be in the same location as the stock. Yoda.
No, don't move.
Yeah, your tape measure has to stay there. Yep. So I can measure.
But the front axle, we're gonna move forward six inches for more clearance at the firewall.
Then we'll need to set the truck at ride height on the lift 26 inches to the bottom of the frame rail
finally roll in the wheels and tires to set the wid
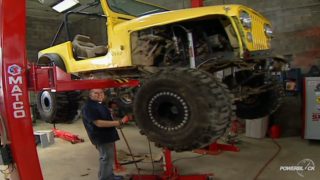
while we're underneath this truck swapping out the axles. It is a great time for us to upgrade our wheel and tire package. And we've told you guys before how important it is to have the actual wheels and tires you're gonna use on your project in the shop when you're building custom with axles like we are here. So we're ditching those small little 30 sevens that were on this truck and upgrading to these monster pit,
44 inch tall rockers. These have 19.5 inches worth of tread face which will work great for our little Toyota mini truck, giving it lots of floatation when it's in the dirt. And we've told you guys before, Pitbull Rockers work very well for the type of wheeling that we do. The tread blocks tear into the dirt like a set of paddle tires. But the tread design as well as the bias p side wall air
down. Well, when you're on to the rocks, now, these are set up for a 17 inch wheel and we're going to be installing trail ready's all aluminum bead lock. Now, it has an integrated bead lock ring that's been cast into the wheel and striations that are machined into the outer ring to keep the tire from spinning. The 716 inch thick ring is not only polished, the bolts are recessed to protect it when it's in the dirt
today. On extreme, our black Yoda mini truck is back in the shop to have its final weak link repaired
and with a width of 67 inches chosen,
we'll start by shortening up the new ballistic fabrication housing.
Now, with the housings underneath our truck, we can turn our attention towards our suspension system and we ditch the leaf springs both front and rear so we can upgrade to a link type set up and on the back. It's going to be a double triangulated four L
up front. It's going to be a three link with a pan
bar all riding on coil over shocks. But instead of breaking out the plasma cutter in the welder building a bunch of custom brackets. We got a hold of trail gear because they have a Toyota mini truck specific kit
that comes with everything we need.
All the brackets are pre bent and welded and designed to key off the factory frame rail. The tubing even comes with the kit and it's quarter inch wall dom making it incredibly strong for this application.
The rear four link includes this unique cross member that will weld in behind the cab that keys in off the factory frame rail and has all the link mounts built in and it has an axle trust to sit on top of our new housing to triangulate those upper links. Now, all the joints are also included in the kit and we're using trail gears, new creeper
and this is a fully rebuildable forged rod end that has the misalignment spacers built into it. All the nuts and bolts come on the kit, even all the jam nuts and the tubing adapters to so we can build our links to whatever length they need to be. Now, the shocks are Bill Stein 9100 rock crawler specific shocks. They have a 78 inch shaft and we opted for a 17 inch travel shock with a two inch body that's fully threaded with a dual rate coil over kit. Now, the
crawler specific valving is actually pretty unique when the shock is traveling slowly through the oil. When you're out crawling, the valves actually open up a little bit, make the shock a little bit softer. So it's easier for the tires to fall off the rocks or climb up them. But when you start to speed up your travel and the shock is cycling quicker, the valving actually starts to close up making the shock a little bit firmer, limiting it from bottoming out when you're traveling at those excessive speeds. Now, our system starts by installing this rear cross member.
Now we go to the front
before we weld any of our suspension in for good. We wanna bolt up all four wheels and tires, cycle the suspension and check for any binding or rubbing and for that, we're gonna need a few more parts and on our front axle up front, we welded on dead and bear racing chrome Molly Inner Seas. And so we're gonna finish them off with a set of their dead and bear reed racing. Chrome Molly Dana 60 outers and they have a very unique five stud high steer arm attachment that uses chrome Molly studs instead of bolts. And those high steer arms are from Northwest Fab Works and they're machine from one piece billet steel for the parts and pieces. We went to Randy's Ring and Pin. We got one of their kingpin rebuild kits as well as two of their heavy duty Dana 60 spindles. Now, the rear axle, it's something completely different. This hub is 100% aftermarket and it's all aluminum, but it's modeled after the hub that you'd normally find on the back of a 14 bolt rear axle. All that means is we'll use all the bearings and seals from a 14 bolt axle, load them into this hub, bolt them onto our new axle.
You asked for it.
You got it. Pretty tires, big axes,
Toyota.
We have all of our suspension mounts locked into place with some good heavy tack welds and rolled the tires and wheels into place to get an idea of what they look like on the truck, went ahead and lowered the truck down on the lift. So it's fully compressed. That way we can check for any clearance issues we might have with our link set up. Now it's time to install some coil over shocks. Now how you set up your coal over shocks really depends on what you're going to do with your rake. In this case, we're building a crawler. So what we are going to do is install our shocks with maybe five inches worth of the shock shaft exposed when the truck is at ride height. And that means we have enough up travel for when we're slowly traveling through the trails. But more importantly, we have a lot of droop out or travel down with the tires and wheels. We're coming off large obstacles. The axle can travel all the way down to reach the ground. If we're building this truck for maybe high speed stuff like rock racing. We'd want a lot more up travel. We'd pull this shaft out at ride height,
maybe set it at eight or nine inches of travel. Now, the reason we'd want this much up travel, because when you're traveling fast through the rocks, there's a lot of inertia on these tires. When you hit something, it's gonna fly way up in the air and it's gonna wanna keep going that way. You need that much up travel in order to absorb it quickly before you bought the truck out.
Now,
where you install your coil overs really depends on your rig. In our case here, our hands are kind of tied. There is no way we're going to fit a coil over shock between the frame rail and the tire on this rig. But we lucked out, we're going to leave this stock tube structure in place that we built before because it's already here. We're going to reuse the mounts that we had on just our standard shocks inboard, the coil over to the inside, mount it off the axle, just make sure the springs stay away from this inside frame rail.
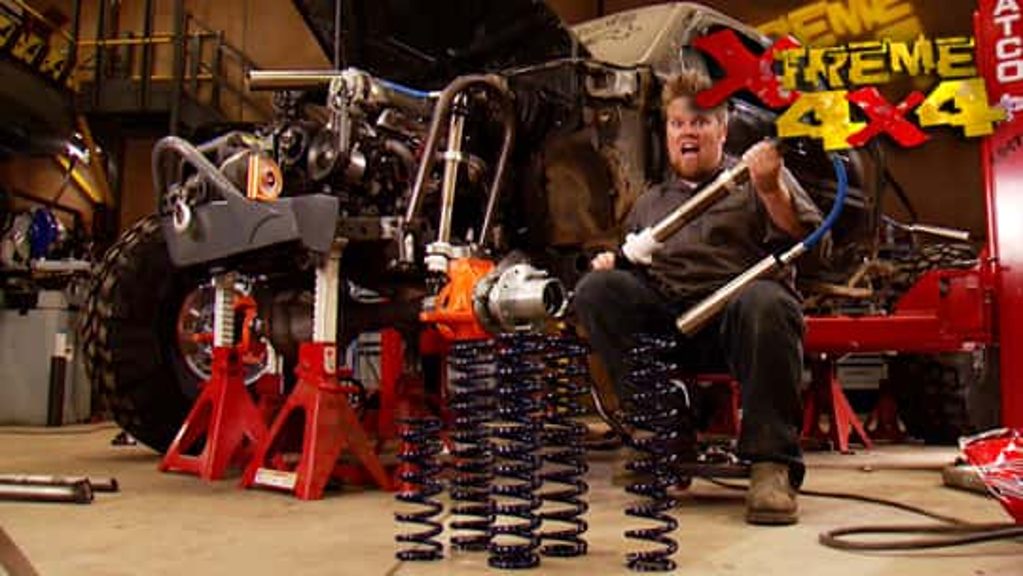
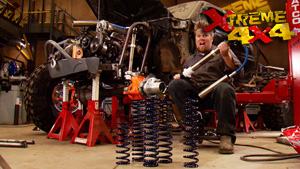
Now, just like all of our suspension mounts, we're just tacking all of these coil over mounts in place and then we'll check them once we cycle the suspension to make sure they're not binding anywhere. But right now we want to slip on some coil springs. Now, coil springs come in all different shapes and all different sizes and they're identified a couple of different ways. First is the height. This one here is a 16 inch tall spring. The inside diameter it's 2.5 inch to fit it two inch sock. And then more importantly is the rate and the rate is determined not only by the thickness of the wire, but how many times it's wrapped inside the spring. You can see when we compare a 250 pound spring to a 450 pound spring. The 450 is a lot thicker and wrapped a lot tighter. Now, those rates right there determine how much pressure it takes to compress that spring. One inch,
250 pounds, brain 250 pounds will compress it one inch of travel. Now, we're going to be installing a progressive spring rate on this truck. And there's a real simple way to describe how it works. Basically, we're going to have two springs on the shock, a very light upper spring and then a heavier lower or main spring as we're driving around the trails, this slider will move up and down and most of the work is going to be done by this upper spring. But when we hit large rock or fall off a big ledge, this slider is going to slide up, hit these jam nuts and then the lower spring is going to take over a lot of the work. It's gonna basically stiffen up the suspension because we're going to have that heavier rate we can change when that happens by adjusting these little adjusters right here to make the suspension stiffen up at specific points in the travel that we want right now,
gonna slide some springs in the truck. See how it looks
for added strength. We're going to tie the two hoops together with a removable crossbar.
Yeah,
you're watching Xtreme 4x4 for a DVD copy of this episode, just go to Power Block tv.com and order your copy for just 595 plus shipping and handling. Start your own Xtreme 4x4 collection delivered right to your door from the power block
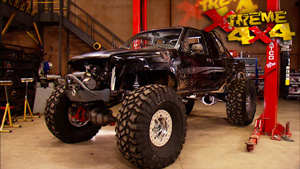
with the truck off the lift. We have a ride height that we are very happy with. Our wheel base is around 100 and 28 inches and the belly height is right at 27 inches. Overall height is 6.5 ft, which is really good for a truck sitting on 44 inch tall tires. Now, the front end is sitting a little bit high right now, but that's ok because the springs will settle down over time. If they don't, we'll simply swap out that upper spring up front for one with a little bit softer rate. Now, when we started this project, we talked about ditching all the sheet metal and just tubing out the entire truck, but we're not gonna do that now that we have it all on ride height. We see that there's lots of room to put the factory sheet metal back on this truck. Nice thing about that is it'll finish off the looks a little bit and
honestly,
they won't lose the truck's Toyota.
Now, putting the factory sheet metal back on this truck definitely retains that Toyota look that we're after, but makes this truck still look really mean with that six inch stretch in the front and our new 44 inch tall tires, you know, I think the fact that we took this truck from a ifs daily driver to a solid axle swap, a small block of 37 to this 44 inch tall tires link front and rear. Now
it's extreme worthy.
Show Full Transcript
taking off the truck, but
they're used and abused driven places where cars were never meant to go basically lead a life of pain and suffering. Well, today, the suffering stops for our Black Toyota.
If you're gonna compare a trail truck to something you may have laying around the shop. The best comparison is gonna be to a big old piece of chain,
very utilitarian built with one purpose in mind
and incredibly strong, but just like a piece of chain. When you have an epic failure in your trail truck, it can usually be
somewhat catastrophic. Now you can fix chain, you can go ahead and put in a repair link, but then you have a weak link in your chain and trail trucks are no different. We spend more time chasing weak links out of them than we usually do driving them. And no project has shown us more weak links than our Black Toyota.
It started life as a bone stock extra cab pickup with a bad engine.
We stripped it down,
ditched the drive train
and performed a solid axle swap
then slid in a ram jet 3 5700 R four automatic and a stack three speed transfer case.
And then we took it wheeling
and found the first of the Weak Lakes
a bad angle on our front drive shaft.
So we brought the truck back into the shop, threw it up on the lift and installed a Northwest fab black box range box. Now, what that did was move the transfer case back. Almost 12 inches really improved the angle on our front drive line. So we loaded the truck up, went wheeling
one more time.
And although the truck worked pretty well, honestly, we had to hold back more than a little.
We knew that with the additional 2.72 to 1 reduction
and the power of the Ram jet 350
the little Yoda axles were not going to last long.
So before we actually blow these axles apart, we're gonna be proactive and replace them. So we've invested some serious money in these houses. We've got 529 gears, Detroit lockers and chrome moley
axle shafts. Someone will pay us a pretty penny for these axles as long as they still together. So replacing them. Now, we can sell these ones and recoup some of the cost of our new units. At the same time, we'll go ahead and ditch this spring over suspension as well as the leaf springs in the rear. Do a suspension upgrade and swap to some bigger wheels and tires.
Call
me
now, we're ditching the majority of the sheet metal on the front and the rear to make room for the larger wheels and tires we have planned. Now, we could easily cut the back end of this frame off and completely build a new tube structure. But that would be kind of wasteful since we've already got the majority of this built out of this inch and a half dom. So we'll work off of that. But before we go ahead and start cleaning up this frame rail, it's a good idea to get our axles underneath the truck and set our wheel base for that. We
need some new parts.
We're gonna start with the axle housings and for our Toyota, we're gonna be using fabricated Ford nine inch axle housing that we got from ballistic fabrication and they have a 3.5 inch axle tube that is a quarter inch thick that's attached to a formed housing that's fully welded for maximum ground clearance and then it's been machined to accept the Ford nine inch drop out. Now, on the,
it's their new full float kit that includes a spindle we weld in once we set the wind and a rather unique rotor hat assembly that includes this dry flange puck. Now, not only does it key in off the rotor, it also has the integrated spines worked into it for that rear axle shaft. That means once we have this put together, we don't need to buy a set of dry flans for a rear axle.
We'll rest the housings on some jack stands with the center of the tube 22 inches above the floor to mark the center line of our new tires.
Then we can set the wheel base, go to the front edge of the tube.
Ok.
Right there. Yep.
The rear axle will be in the same location as the stock. Yoda.
No, don't move.
Yeah, your tape measure has to stay there. Yep. So I can measure.
But the front axle, we're gonna move forward six inches for more clearance at the firewall.
Then we'll need to set the truck at ride height on the lift 26 inches to the bottom of the frame rail
finally roll in the wheels and tires to set the wid
while we're underneath this truck swapping out the axles. It is a great time for us to upgrade our wheel and tire package. And we've told you guys before how important it is to have the actual wheels and tires you're gonna use on your project in the shop when you're building custom with axles like we are here. So we're ditching those small little 30 sevens that were on this truck and upgrading to these monster pit,
44 inch tall rockers. These have 19.5 inches worth of tread face which will work great for our little Toyota mini truck, giving it lots of floatation when it's in the dirt. And we've told you guys before, Pitbull Rockers work very well for the type of wheeling that we do. The tread blocks tear into the dirt like a set of paddle tires. But the tread design as well as the bias p side wall air
down. Well, when you're on to the rocks, now, these are set up for a 17 inch wheel and we're going to be installing trail ready's all aluminum bead lock. Now, it has an integrated bead lock ring that's been cast into the wheel and striations that are machined into the outer ring to keep the tire from spinning. The 716 inch thick ring is not only polished, the bolts are recessed to protect it when it's in the dirt
today. On extreme, our black Yoda mini truck is back in the shop to have its final weak link repaired
and with a width of 67 inches chosen,
we'll start by shortening up the new ballistic fabrication housing.
Now, with the housings underneath our truck, we can turn our attention towards our suspension system and we ditch the leaf springs both front and rear so we can upgrade to a link type set up and on the back. It's going to be a double triangulated four L
up front. It's going to be a three link with a pan
bar all riding on coil over shocks. But instead of breaking out the plasma cutter in the welder building a bunch of custom brackets. We got a hold of trail gear because they have a Toyota mini truck specific kit
that comes with everything we need.
All the brackets are pre bent and welded and designed to key off the factory frame rail. The tubing even comes with the kit and it's quarter inch wall dom making it incredibly strong for this application.
The rear four link includes this unique cross member that will weld in behind the cab that keys in off the factory frame rail and has all the link mounts built in and it has an axle trust to sit on top of our new housing to triangulate those upper links. Now, all the joints are also included in the kit and we're using trail gears, new creeper
and this is a fully rebuildable forged rod end that has the misalignment spacers built into it. All the nuts and bolts come on the kit, even all the jam nuts and the tubing adapters to so we can build our links to whatever length they need to be. Now, the shocks are Bill Stein 9100 rock crawler specific shocks. They have a 78 inch shaft and we opted for a 17 inch travel shock with a two inch body that's fully threaded with a dual rate coil over kit. Now, the
crawler specific valving is actually pretty unique when the shock is traveling slowly through the oil. When you're out crawling, the valves actually open up a little bit, make the shock a little bit softer. So it's easier for the tires to fall off the rocks or climb up them. But when you start to speed up your travel and the shock is cycling quicker, the valving actually starts to close up making the shock a little bit firmer, limiting it from bottoming out when you're traveling at those excessive speeds. Now, our system starts by installing this rear cross member.
Now we go to the front
before we weld any of our suspension in for good. We wanna bolt up all four wheels and tires, cycle the suspension and check for any binding or rubbing and for that, we're gonna need a few more parts and on our front axle up front, we welded on dead and bear racing chrome Molly Inner Seas. And so we're gonna finish them off with a set of their dead and bear reed racing. Chrome Molly Dana 60 outers and they have a very unique five stud high steer arm attachment that uses chrome Molly studs instead of bolts. And those high steer arms are from Northwest Fab Works and they're machine from one piece billet steel for the parts and pieces. We went to Randy's Ring and Pin. We got one of their kingpin rebuild kits as well as two of their heavy duty Dana 60 spindles. Now, the rear axle, it's something completely different. This hub is 100% aftermarket and it's all aluminum, but it's modeled after the hub that you'd normally find on the back of a 14 bolt rear axle. All that means is we'll use all the bearings and seals from a 14 bolt axle, load them into this hub, bolt them onto our new axle.
You asked for it.
You got it. Pretty tires, big axes,
Toyota.
We have all of our suspension mounts locked into place with some good heavy tack welds and rolled the tires and wheels into place to get an idea of what they look like on the truck, went ahead and lowered the truck down on the lift. So it's fully compressed. That way we can check for any clearance issues we might have with our link set up. Now it's time to install some coil over shocks. Now how you set up your coal over shocks really depends on what you're going to do with your rake. In this case, we're building a crawler. So what we are going to do is install our shocks with maybe five inches worth of the shock shaft exposed when the truck is at ride height. And that means we have enough up travel for when we're slowly traveling through the trails. But more importantly, we have a lot of droop out or travel down with the tires and wheels. We're coming off large obstacles. The axle can travel all the way down to reach the ground. If we're building this truck for maybe high speed stuff like rock racing. We'd want a lot more up travel. We'd pull this shaft out at ride height,
maybe set it at eight or nine inches of travel. Now, the reason we'd want this much up travel, because when you're traveling fast through the rocks, there's a lot of inertia on these tires. When you hit something, it's gonna fly way up in the air and it's gonna wanna keep going that way. You need that much up travel in order to absorb it quickly before you bought the truck out.
Now,
where you install your coil overs really depends on your rig. In our case here, our hands are kind of tied. There is no way we're going to fit a coil over shock between the frame rail and the tire on this rig. But we lucked out, we're going to leave this stock tube structure in place that we built before because it's already here. We're going to reuse the mounts that we had on just our standard shocks inboard, the coil over to the inside, mount it off the axle, just make sure the springs stay away from this inside frame rail.
Now, just like all of our suspension mounts, we're just tacking all of these coil over mounts in place and then we'll check them once we cycle the suspension to make sure they're not binding anywhere. But right now we want to slip on some coil springs. Now, coil springs come in all different shapes and all different sizes and they're identified a couple of different ways. First is the height. This one here is a 16 inch tall spring. The inside diameter it's 2.5 inch to fit it two inch sock. And then more importantly is the rate and the rate is determined not only by the thickness of the wire, but how many times it's wrapped inside the spring. You can see when we compare a 250 pound spring to a 450 pound spring. The 450 is a lot thicker and wrapped a lot tighter. Now, those rates right there determine how much pressure it takes to compress that spring. One inch,
250 pounds, brain 250 pounds will compress it one inch of travel. Now, we're going to be installing a progressive spring rate on this truck. And there's a real simple way to describe how it works. Basically, we're going to have two springs on the shock, a very light upper spring and then a heavier lower or main spring as we're driving around the trails, this slider will move up and down and most of the work is going to be done by this upper spring. But when we hit large rock or fall off a big ledge, this slider is going to slide up, hit these jam nuts and then the lower spring is going to take over a lot of the work. It's gonna basically stiffen up the suspension because we're going to have that heavier rate we can change when that happens by adjusting these little adjusters right here to make the suspension stiffen up at specific points in the travel that we want right now,
gonna slide some springs in the truck. See how it looks
for added strength. We're going to tie the two hoops together with a removable crossbar.
Yeah,
you're watching Xtreme 4x4 for a DVD copy of this episode, just go to Power Block tv.com and order your copy for just 595 plus shipping and handling. Start your own Xtreme 4x4 collection delivered right to your door from the power block
with the truck off the lift. We have a ride height that we are very happy with. Our wheel base is around 100 and 28 inches and the belly height is right at 27 inches. Overall height is 6.5 ft, which is really good for a truck sitting on 44 inch tall tires. Now, the front end is sitting a little bit high right now, but that's ok because the springs will settle down over time. If they don't, we'll simply swap out that upper spring up front for one with a little bit softer rate. Now, when we started this project, we talked about ditching all the sheet metal and just tubing out the entire truck, but we're not gonna do that now that we have it all on ride height. We see that there's lots of room to put the factory sheet metal back on this truck. Nice thing about that is it'll finish off the looks a little bit and
honestly,
they won't lose the truck's Toyota.
Now, putting the factory sheet metal back on this truck definitely retains that Toyota look that we're after, but makes this truck still look really mean with that six inch stretch in the front and our new 44 inch tall tires, you know, I think the fact that we took this truck from a ifs daily driver to a solid axle swap, a small block of 37 to this 44 inch tall tires link front and rear. Now
it's extreme worthy.
