More Toyota Mini Episodes
Xtreme 4x4 Builds
Want more content like this?
Join the PowerNation Email NewsletterParts Used In This Episode
FEIN Power Tools Inc.
Metal Finisher Professional Set
Miller Electric Manufacturing Co.
Miller Electric Dynasty 200 Tig Welder
The Industrial Depot
Pearl Abrasives D.A. Series Aluminum Grinding Disc
The Industrial Depot
Pearl Abrasives Maxi-Disc Aluminum Oxide Premium Flap Disc
Episode Transcript
Today, we're rolling up our sleeves to get down to the basics of how we create the great custom pieces you see on the shelf. It all starts with a welder today on Xtreme 4x4 welding aluminum, how to convert the machine you have, how a spool gun works, plus how to make it all shine.
Not too long ago here at extreme, we pushed all the projects outside. We spent the entire day talking about mig welding specifically how to mid weld miles steel tubing.
Now, a lot of you guys wanted more information on that topic and to be honest with you, the mid welder is one of the most versatile welders you can have in your shop. So today we're gonna talk about mid welding again. But this time aluminum
aluminum is an alloy that is found everywhere in both the automotive world as well as the world of fabrication. Now, when you're fabricating with aluminum, you can get it in a bunch of different forms. You can get large sheets of it either smooth or textured like this piece here, you can get it in all sorts of different sizes and thicknesses of strips, bar stock round stock and even aluminum tubing, it can then easily be machined into items like this aluminum pulley or in the automotive world, you're going to find it most commonly melted down, poured into a mold and cast into something like this cylinder head. Now, when we say aluminum is an alloy, that means it's not pure. They take aluminum and they mix it with other substances to make it stronger or weaker. Now, we mix it together usually with copper zinc, manganese silicone and even magnesium. And the strengths range from 1000 to
8000 and there's hundreds of different versions of that number inside that area.
The most commonly found alloys in the automotive and fabrication world are 50 52
60 61 and 7075.
7075 is one of the stronger alloys which has a large amount of zinc in it.
And depending on the temper, it can be comparable to some steels.
7075 is one of the more expensive aluminum alloys and is not commonly found in automotive applications.
It has become very popular in the off road road for suspension links due to its high tensile strength
and its ability to resist bending.
6061 is a heat treatable alloy and that's why you see it used a lot in light to medium structural applications like this pinion support especially after it's been heat treated. Now what I mean by that is simple, this pinion support started as a billet chunk of aluminum, it then was machined out and then placed in a furnace to be heat treated. That is basically heating and cooling the item at a very specific rate that heating and cooling causes the molecules to align and therefore makes it
incredibly strong. That's why you see a lot of adapters for transmissions or opinion supports and automotive parts made it of 6061 after it's been heat treated. Now, today, we're going to be using this sheet. Once they get it in place, we're going to cut up this sheet of 5052 aluminum. Now, 5052 is not heat treatable in any way, but it is very easy to weld and it's very easy to work with handles, vibrations well, without cracking, which makes it ideal for
off road roll. Now, the first thing we have to do obviously with this sheet right here is cut it up
and the nice thing about working with aluminum is that's easy to do.
If you're at home in a small garage, you can use a jigsaw with a metal blade.
If you have access to one, it's easy to do on a band saw
and you can even use the good old plasma cutter, but be aware, the heat from the cutter can cause some discoloration to the material and the aluminum tends to gall up as it melts.
Now, this type of aluminum can be used for a whole bunch of stuff. You can use it for body panels, floors, roofs, you can even build your own fuel cell because of its thickness at 3/16 of an inch. You can actually even use it for a skid plate. Even though it's incredibly light. Now, no matter what you use, the aluminum for, it has to be prepped different than metal. You see raw aluminum
melts at 1200 degrees. But the oxide coating that's on top of this aluminum, it melts at 3700 degrees. That means if you just jump in here and start welding on your aluminum, the aluminum will melt, but the coating will actually contaminate your weld. So before you do any welding on your aluminum, you have to prepare it, you have to remove that oxide coating and there's two ways to do it.
You can mechanically remove it using a stainless steel brush and a little bit of elbow grease
or you can chemically remove it
either way. Once the shine is off the aluminum, it's ready to weld
before we stick any aluminum together, we obviously need to set up our mig machine to specifically weld aluminum. One of the easiest ways to do that is to add a spool gun attachment. You see aluminum wire is too soft to push all the way up the liner and out a conventional gun. So by adding a spool gun, you mount a small roll of aluminum wire right up here near the workpiece it's fed out through a small set of drive rolls through a short liner and then through the tip where it welds just like a conventional welder, there's three connections that are usually protected by a leather sleeve to keep them from being damaged from arc sparks. You have the main power feed to deliver the arc up to the tip. You have a gas feed so the gas can get to the nozzle and an electrical connection. So you can operate your mig welder from the remote settings on your Spool gun. And when we're talking about welding aluminum and gas, you can't use a mixed gas like we use with mild steel. You need 100% pure argon to protect it. Now, some welders have two cylinder banks on the back so you can have a cylinder of pure argon on one side and mix gas on the other. And you can keep using your welder for both mild steel or aluminum whenever you want to use it.
You do need to ensure that your welder can accept a Spool gun that usually means purchasing a high dollar professional series welder and the Spool gun certainly is not cheap,
but there is a cheaper way to do it
after the break. Drive rolls liners and filler material, everything you need to convert the machine you already own. When Xtreme 4x4 continues
today, we're talking about welding aluminum. So far we've prepped some metal and we've shown you guys one option, which is a spool gun attachment that you hook up to a professional series welder like this 220 volt machine right here. But I know a lot of you guys, you dream about owning a welder like this, especially since by the time you add the Spool gun to this, it costs almost $2000. Well, don't be worried, there's a cheaper way to weld your aluminum together if you have a small welder like this, we picked this one up a while ago for 350 bucks used and then rebuilt it. It's a 220 volt machine, but 100 and 10 volt machine will work just as well. You can convert these small welders to weld aluminum. You just have to make some specific changes inside.
It starts by replacing the metal liner inside the gun cable with a non metallic liner.
This will prevent the aluminum from galling up inside the liner
and jamming
aluminum wire is so soft that a standard V groove drive roll will crush it and jam up the spool.
A new drive roll that has a U shaped groove will prevent this from happening.
Finally, a new tank of pure Argo
is hooked up to the regulator.
Now, if you remember when we talked about the types of aluminum, we mentioned that there was a lot of different alloys. Well, the one thing about aluminum is you need to match your filler material or wire to that specific type of alloy. It's not like welding steel where you can just pick up a roll of wire, throw it in your welder and start welding and usually end up with a pretty good weld. If you don't match your filler material with your base material, you can end up with a weak weld or sometimes it won't even penetrate.
Now, this is where a little bit of research is gonna come in. Best thing to do is go to the welding supply store, maybe even take a sample of what you want to weld. They'll be able to suggest a filler material for you nine times out of 10. They're probably gonna tell you to use this. This is er 4043 aluminum wire. Now, this is a very versatile wire that can weld almost any alloy out there. It's very soft and it's designed to fit right into our spool gun. Now, the downfall of this wire when you adapt the small machine like we just did, the wire is too soft to push all the way from the drive rolls up to the end. So you need to step up to a little bit stiffer wire. Now, this is er, 5356 has many of the similar properties to the 4043 but it actually is a little bit harder because it's harder, it can handle that ride all the way through the liner without jamming up or getting jammed up in the drive rolls and causing a big bird's nest.
So you can see we took this scrap piece of alloy, ran a bunch of different test beads with different voltage settings as well as wire speeds to determine the correct one. And we've picked up this one right here as one that we're happy with 17.7 and 184 las
real flat gives us good penetration. But before we begin welding, there's a few things about aluminum itself. You need to understand
the aluminum is an excellent
conductor of both electricity and heat. Now, that heat inductive can actually cause what's called burn back on the edges. Now, what that means is as you're welding, the metal is actually melting away from you no matter how much filler material you'll have, you just keep burning through the hole. Now, do you stop that by actually physically changing the speed in which you move the torch. When you pick up your spool gun, you want to weld this bead
twice as fast as you weld a bead in a piece of steel of similar thickness and that'll prevent that burn back from happening. Now, one other problem with aluminum because of that heat transfer is the fact that a little bit of heat can actually warp the aluminum very easily. We've taken this piece of thick aluminum just laid down nine beads and we've warped it completely out of its natural shape. Now, there's a couple of tips and tricks to keep that from happening
on long joints. It's best to tack it in as many places as possible and then weld different sections of the joint to prevent that deformation.
There are some key safety differences though, between weld and steel and aluminum and the biggest difference is the shade in your helmet. If you have an adjustable helmet like this here, you can just darken it down right on the side and the number you're looking for is an 11 or a 12. And that's because the arc on the aluminum is a little bit brighter than when you're welding steel. Another issue has to do with the 10,
the aluminum, it doesn't change color like steel does, whether it's room temperature or 1000 degrees, it always looks the same. So you just need to be cautious of that, especially if you're just practicing in your shop with a bunch of different pieces of steel, have an extremely hot piece of aluminum. Not even realize it.
Now, aluminum welding doesn't end with mid welding. There's a couple of other ways to do it.
Next. How the pros weld radiators, dash panels and more aluminum welding with tungsten inert gas. Can you take it
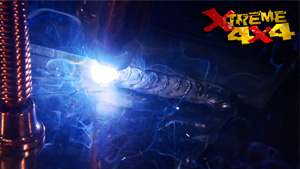
today? We're having a close up look at aluminum, different properties of the alloy, how to work with it and how to weld it. Now, we just had a look at one of the easiest ways to do it. And that is with a spool gun attached to a meg welder. But if you're dealing with really thin material like this piece of aluminum here, an easier and better way is actually with a tig welder. Now, the reason for that has to do with control, see, the tig welder and the foot control, you have full control over the welders output as you weld. What that means is if you notice your weld is getting a little bit too hot, you can ramp it back and prevent that burn through. Now, tig welding has changed a lot recently. The old standby used to be the square wave machine, but Miller's New Dynasty series has completely changed how we tig weld aluminum and it starts right at the torch with the material we use in it.
See, the old standard for aluminum was 100% pure tungsten that you'd load in the torch and then you'd ball up the end of it. That would give you a very fast
that arc when you were welding,
the Miller machine uses 2% thi
the same tungsten we use for steel and you sharpen it to a sharp point that gives you a more precise arc that comes out of that torch. Therefore, more control. Now, the way to make tig welding a little bit easier is to go ahead and get yourself one of these flex head torches. That means you can adjust the torch to fit into tight areas when you're welding and the shielding gas we use is just like with mig welding. Pure Argo
surface prep is the same as with mig welding first, removing the oxide surface mechanically and then cleaning it off
filler material is available in different alloy and sizes. Just like the mig wire we looked at before.
Then we sharpen the tungsten on a dedicated grinding stone to prevent contamination into our tungsten.
Now, I'm not gonna lie to you. Tig welding is a very hard skill to master all it takes is time and a whole lot of practice and I surely can't cover everything here right now to make you an expert aluminum tig welder. But here's a couple of tips and tricks to make it a lot easier. Number one comfort, get yourself a stool to sit on. It's basically like playing the drums. You got two hands going and 1 ft. So you need to be in a comfortable working position. Number two even. So these filler rods ship at this length don't work with them at this length. It's very long and springy, go ahead and trim them down to a usable length. So it's easy to control in your hand.
Now, tig welding gloves are different than mid welding gloves. They're very thin leather so you can feel everything in your hand, just go ahead and put them on and it just got one layer of lamb skin. So you can feel that filler rod between your fingers. And even though there's no spatter, like a mig welder, don't think you can get away without wearing long sleeves. The UV off the tig welder will burn your skin instantly. Now, the last tip I got for you has to do with your helmet inside this helmet. I have what's called a magnifying lens. Basically, if you put this helmet on, you can't see anything until you get extremely close. It's like a set of reading glasses. When you get right down there to tig weld, you'll be able to see the puddle form and you'll be able to melt it.
Now, while you're welding, you wanna keep the filler rod as close to the gas cloud as possible. You're gonna be holding the torch almost vertical and melting the aluminum, putting the rod into the melted puddle, backing it away and moving down.
You're gonna wanna keep this end of your filler rod inside that gas cloud or it can get contaminated. It sounds pretty hard. And actually it is,
all you can do is practice, practice, practice
and you can only get better.
What is your,
you're watching Xtreme 4x4 for a DVD copy of this episode. Just go to Power Block tv.com and order your copy for just 595 plus shipping and handling. Start your own Xtreme 4x4 collection delivered right to your door from the power block.
As I'm sure most of you have figured out by now, working with aluminum is similar to working with steel, there's just some subtle differences. And once you're used to those differences, you're going to find a pile of uses for aluminum on your rig, you can build your own custom sized aluminum fuel cell. You can modify an aluminum radiator to fit in your project or even build a 100% custom aluminum dash. But when it comes to finishing out those aluminum wells, there's some more subtle differences. A grinding stone like this one here designed for mild steel
cannot be used to weld aluminum. It will pack up with the base material as you grind and that becomes a safety issue. The wheel can become off balance and blow apart. You need to find an aluminum specific grinding stone like this one here that's designed for non ferrous metals. You can pick these up at most welding supply stores or you can even get them online from places like Industrial Depot.
And the same goes true with the flap wheels. You want to get some aluminum specific flap wheels so they don't pack up either.
There are some key safety differences as well. Not only do you want to wear safety glasses, you'll also want to wear a respirator to protect you from the dust. Aluminum dust has been linked to some neurological disorders.
When you look at all the benefits to using aluminum, you'll wonder why you haven't used it in your rig. All the time strong enough to use as a skid plate, yet light enough to make removal and installation that skid plate very easy. It resists corrosion. So using it for a body panel means you don't necessarily have to paint it. But the best thing is is if you've used it for a purely cosmetic piece
like that, all aluminum dash, you can polish it to an almost mirror finish to do that though. You do need a dedicated polishing kit because you can only get so far with flap wheels. Now, ours came from fine power tools and includes everything you need from a polishing motor and all the grit wheels as well as cloth wheels and the paste to bring out that mirror shine.
We start with a scotch, bright style pad and a medium speed on our polisher
and then move through three different cloth wheels with compound moving from coarse to fine.
Now, that is a mere finish to take a piece of raw aluminum from that
to that makes a huge change. Imagine doing that to your entire buggy's body. And more importantly, it didn't take that long polish this section right here only took about 15 minutes.
Well, I certainly think we covered a lot of areas of aluminum welding today. We showed you that you don't necessarily need to spend thousands of dollars. You can just modify your small welder that you've picked up for a couple of 100 bucks, but on top of that we also showed you super modern technology and the way Miller is changing how we weld aluminum together and plus how to bring up that show mirror finish polish. So trust me the next time you're trying to figure out a piece for your buggy. Don't just grab a piece of steel. Look into all the different types of aluminum you can use. You'll end up with a sweet looking ride.
Show Full Transcript
Not too long ago here at extreme, we pushed all the projects outside. We spent the entire day talking about mig welding specifically how to mid weld miles steel tubing.
Now, a lot of you guys wanted more information on that topic and to be honest with you, the mid welder is one of the most versatile welders you can have in your shop. So today we're gonna talk about mid welding again. But this time aluminum
aluminum is an alloy that is found everywhere in both the automotive world as well as the world of fabrication. Now, when you're fabricating with aluminum, you can get it in a bunch of different forms. You can get large sheets of it either smooth or textured like this piece here, you can get it in all sorts of different sizes and thicknesses of strips, bar stock round stock and even aluminum tubing, it can then easily be machined into items like this aluminum pulley or in the automotive world, you're going to find it most commonly melted down, poured into a mold and cast into something like this cylinder head. Now, when we say aluminum is an alloy, that means it's not pure. They take aluminum and they mix it with other substances to make it stronger or weaker. Now, we mix it together usually with copper zinc, manganese silicone and even magnesium. And the strengths range from 1000 to
8000 and there's hundreds of different versions of that number inside that area.
The most commonly found alloys in the automotive and fabrication world are 50 52
60 61 and 7075.
7075 is one of the stronger alloys which has a large amount of zinc in it.
And depending on the temper, it can be comparable to some steels.
7075 is one of the more expensive aluminum alloys and is not commonly found in automotive applications.
It has become very popular in the off road road for suspension links due to its high tensile strength
and its ability to resist bending.
6061 is a heat treatable alloy and that's why you see it used a lot in light to medium structural applications like this pinion support especially after it's been heat treated. Now what I mean by that is simple, this pinion support started as a billet chunk of aluminum, it then was machined out and then placed in a furnace to be heat treated. That is basically heating and cooling the item at a very specific rate that heating and cooling causes the molecules to align and therefore makes it
incredibly strong. That's why you see a lot of adapters for transmissions or opinion supports and automotive parts made it of 6061 after it's been heat treated. Now, today, we're going to be using this sheet. Once they get it in place, we're going to cut up this sheet of 5052 aluminum. Now, 5052 is not heat treatable in any way, but it is very easy to weld and it's very easy to work with handles, vibrations well, without cracking, which makes it ideal for
off road roll. Now, the first thing we have to do obviously with this sheet right here is cut it up
and the nice thing about working with aluminum is that's easy to do.
If you're at home in a small garage, you can use a jigsaw with a metal blade.
If you have access to one, it's easy to do on a band saw
and you can even use the good old plasma cutter, but be aware, the heat from the cutter can cause some discoloration to the material and the aluminum tends to gall up as it melts.
Now, this type of aluminum can be used for a whole bunch of stuff. You can use it for body panels, floors, roofs, you can even build your own fuel cell because of its thickness at 3/16 of an inch. You can actually even use it for a skid plate. Even though it's incredibly light. Now, no matter what you use, the aluminum for, it has to be prepped different than metal. You see raw aluminum
melts at 1200 degrees. But the oxide coating that's on top of this aluminum, it melts at 3700 degrees. That means if you just jump in here and start welding on your aluminum, the aluminum will melt, but the coating will actually contaminate your weld. So before you do any welding on your aluminum, you have to prepare it, you have to remove that oxide coating and there's two ways to do it.
You can mechanically remove it using a stainless steel brush and a little bit of elbow grease
or you can chemically remove it
either way. Once the shine is off the aluminum, it's ready to weld
before we stick any aluminum together, we obviously need to set up our mig machine to specifically weld aluminum. One of the easiest ways to do that is to add a spool gun attachment. You see aluminum wire is too soft to push all the way up the liner and out a conventional gun. So by adding a spool gun, you mount a small roll of aluminum wire right up here near the workpiece it's fed out through a small set of drive rolls through a short liner and then through the tip where it welds just like a conventional welder, there's three connections that are usually protected by a leather sleeve to keep them from being damaged from arc sparks. You have the main power feed to deliver the arc up to the tip. You have a gas feed so the gas can get to the nozzle and an electrical connection. So you can operate your mig welder from the remote settings on your Spool gun. And when we're talking about welding aluminum and gas, you can't use a mixed gas like we use with mild steel. You need 100% pure argon to protect it. Now, some welders have two cylinder banks on the back so you can have a cylinder of pure argon on one side and mix gas on the other. And you can keep using your welder for both mild steel or aluminum whenever you want to use it.
You do need to ensure that your welder can accept a Spool gun that usually means purchasing a high dollar professional series welder and the Spool gun certainly is not cheap,
but there is a cheaper way to do it
after the break. Drive rolls liners and filler material, everything you need to convert the machine you already own. When Xtreme 4x4 continues
today, we're talking about welding aluminum. So far we've prepped some metal and we've shown you guys one option, which is a spool gun attachment that you hook up to a professional series welder like this 220 volt machine right here. But I know a lot of you guys, you dream about owning a welder like this, especially since by the time you add the Spool gun to this, it costs almost $2000. Well, don't be worried, there's a cheaper way to weld your aluminum together if you have a small welder like this, we picked this one up a while ago for 350 bucks used and then rebuilt it. It's a 220 volt machine, but 100 and 10 volt machine will work just as well. You can convert these small welders to weld aluminum. You just have to make some specific changes inside.
It starts by replacing the metal liner inside the gun cable with a non metallic liner.
This will prevent the aluminum from galling up inside the liner
and jamming
aluminum wire is so soft that a standard V groove drive roll will crush it and jam up the spool.
A new drive roll that has a U shaped groove will prevent this from happening.
Finally, a new tank of pure Argo
is hooked up to the regulator.
Now, if you remember when we talked about the types of aluminum, we mentioned that there was a lot of different alloys. Well, the one thing about aluminum is you need to match your filler material or wire to that specific type of alloy. It's not like welding steel where you can just pick up a roll of wire, throw it in your welder and start welding and usually end up with a pretty good weld. If you don't match your filler material with your base material, you can end up with a weak weld or sometimes it won't even penetrate.
Now, this is where a little bit of research is gonna come in. Best thing to do is go to the welding supply store, maybe even take a sample of what you want to weld. They'll be able to suggest a filler material for you nine times out of 10. They're probably gonna tell you to use this. This is er 4043 aluminum wire. Now, this is a very versatile wire that can weld almost any alloy out there. It's very soft and it's designed to fit right into our spool gun. Now, the downfall of this wire when you adapt the small machine like we just did, the wire is too soft to push all the way from the drive rolls up to the end. So you need to step up to a little bit stiffer wire. Now, this is er, 5356 has many of the similar properties to the 4043 but it actually is a little bit harder because it's harder, it can handle that ride all the way through the liner without jamming up or getting jammed up in the drive rolls and causing a big bird's nest.
So you can see we took this scrap piece of alloy, ran a bunch of different test beads with different voltage settings as well as wire speeds to determine the correct one. And we've picked up this one right here as one that we're happy with 17.7 and 184 las
real flat gives us good penetration. But before we begin welding, there's a few things about aluminum itself. You need to understand
the aluminum is an excellent
conductor of both electricity and heat. Now, that heat inductive can actually cause what's called burn back on the edges. Now, what that means is as you're welding, the metal is actually melting away from you no matter how much filler material you'll have, you just keep burning through the hole. Now, do you stop that by actually physically changing the speed in which you move the torch. When you pick up your spool gun, you want to weld this bead
twice as fast as you weld a bead in a piece of steel of similar thickness and that'll prevent that burn back from happening. Now, one other problem with aluminum because of that heat transfer is the fact that a little bit of heat can actually warp the aluminum very easily. We've taken this piece of thick aluminum just laid down nine beads and we've warped it completely out of its natural shape. Now, there's a couple of tips and tricks to keep that from happening
on long joints. It's best to tack it in as many places as possible and then weld different sections of the joint to prevent that deformation.
There are some key safety differences though, between weld and steel and aluminum and the biggest difference is the shade in your helmet. If you have an adjustable helmet like this here, you can just darken it down right on the side and the number you're looking for is an 11 or a 12. And that's because the arc on the aluminum is a little bit brighter than when you're welding steel. Another issue has to do with the 10,
the aluminum, it doesn't change color like steel does, whether it's room temperature or 1000 degrees, it always looks the same. So you just need to be cautious of that, especially if you're just practicing in your shop with a bunch of different pieces of steel, have an extremely hot piece of aluminum. Not even realize it.
Now, aluminum welding doesn't end with mid welding. There's a couple of other ways to do it.
Next. How the pros weld radiators, dash panels and more aluminum welding with tungsten inert gas. Can you take it
today? We're having a close up look at aluminum, different properties of the alloy, how to work with it and how to weld it. Now, we just had a look at one of the easiest ways to do it. And that is with a spool gun attached to a meg welder. But if you're dealing with really thin material like this piece of aluminum here, an easier and better way is actually with a tig welder. Now, the reason for that has to do with control, see, the tig welder and the foot control, you have full control over the welders output as you weld. What that means is if you notice your weld is getting a little bit too hot, you can ramp it back and prevent that burn through. Now, tig welding has changed a lot recently. The old standby used to be the square wave machine, but Miller's New Dynasty series has completely changed how we tig weld aluminum and it starts right at the torch with the material we use in it.
See, the old standard for aluminum was 100% pure tungsten that you'd load in the torch and then you'd ball up the end of it. That would give you a very fast
that arc when you were welding,
the Miller machine uses 2% thi
the same tungsten we use for steel and you sharpen it to a sharp point that gives you a more precise arc that comes out of that torch. Therefore, more control. Now, the way to make tig welding a little bit easier is to go ahead and get yourself one of these flex head torches. That means you can adjust the torch to fit into tight areas when you're welding and the shielding gas we use is just like with mig welding. Pure Argo
surface prep is the same as with mig welding first, removing the oxide surface mechanically and then cleaning it off
filler material is available in different alloy and sizes. Just like the mig wire we looked at before.
Then we sharpen the tungsten on a dedicated grinding stone to prevent contamination into our tungsten.
Now, I'm not gonna lie to you. Tig welding is a very hard skill to master all it takes is time and a whole lot of practice and I surely can't cover everything here right now to make you an expert aluminum tig welder. But here's a couple of tips and tricks to make it a lot easier. Number one comfort, get yourself a stool to sit on. It's basically like playing the drums. You got two hands going and 1 ft. So you need to be in a comfortable working position. Number two even. So these filler rods ship at this length don't work with them at this length. It's very long and springy, go ahead and trim them down to a usable length. So it's easy to control in your hand.
Now, tig welding gloves are different than mid welding gloves. They're very thin leather so you can feel everything in your hand, just go ahead and put them on and it just got one layer of lamb skin. So you can feel that filler rod between your fingers. And even though there's no spatter, like a mig welder, don't think you can get away without wearing long sleeves. The UV off the tig welder will burn your skin instantly. Now, the last tip I got for you has to do with your helmet inside this helmet. I have what's called a magnifying lens. Basically, if you put this helmet on, you can't see anything until you get extremely close. It's like a set of reading glasses. When you get right down there to tig weld, you'll be able to see the puddle form and you'll be able to melt it.
Now, while you're welding, you wanna keep the filler rod as close to the gas cloud as possible. You're gonna be holding the torch almost vertical and melting the aluminum, putting the rod into the melted puddle, backing it away and moving down.
You're gonna wanna keep this end of your filler rod inside that gas cloud or it can get contaminated. It sounds pretty hard. And actually it is,
all you can do is practice, practice, practice
and you can only get better.
What is your,
you're watching Xtreme 4x4 for a DVD copy of this episode. Just go to Power Block tv.com and order your copy for just 595 plus shipping and handling. Start your own Xtreme 4x4 collection delivered right to your door from the power block.
As I'm sure most of you have figured out by now, working with aluminum is similar to working with steel, there's just some subtle differences. And once you're used to those differences, you're going to find a pile of uses for aluminum on your rig, you can build your own custom sized aluminum fuel cell. You can modify an aluminum radiator to fit in your project or even build a 100% custom aluminum dash. But when it comes to finishing out those aluminum wells, there's some more subtle differences. A grinding stone like this one here designed for mild steel
cannot be used to weld aluminum. It will pack up with the base material as you grind and that becomes a safety issue. The wheel can become off balance and blow apart. You need to find an aluminum specific grinding stone like this one here that's designed for non ferrous metals. You can pick these up at most welding supply stores or you can even get them online from places like Industrial Depot.
And the same goes true with the flap wheels. You want to get some aluminum specific flap wheels so they don't pack up either.
There are some key safety differences as well. Not only do you want to wear safety glasses, you'll also want to wear a respirator to protect you from the dust. Aluminum dust has been linked to some neurological disorders.
When you look at all the benefits to using aluminum, you'll wonder why you haven't used it in your rig. All the time strong enough to use as a skid plate, yet light enough to make removal and installation that skid plate very easy. It resists corrosion. So using it for a body panel means you don't necessarily have to paint it. But the best thing is is if you've used it for a purely cosmetic piece
like that, all aluminum dash, you can polish it to an almost mirror finish to do that though. You do need a dedicated polishing kit because you can only get so far with flap wheels. Now, ours came from fine power tools and includes everything you need from a polishing motor and all the grit wheels as well as cloth wheels and the paste to bring out that mirror shine.
We start with a scotch, bright style pad and a medium speed on our polisher
and then move through three different cloth wheels with compound moving from coarse to fine.
Now, that is a mere finish to take a piece of raw aluminum from that
to that makes a huge change. Imagine doing that to your entire buggy's body. And more importantly, it didn't take that long polish this section right here only took about 15 minutes.
Well, I certainly think we covered a lot of areas of aluminum welding today. We showed you that you don't necessarily need to spend thousands of dollars. You can just modify your small welder that you've picked up for a couple of 100 bucks, but on top of that we also showed you super modern technology and the way Miller is changing how we weld aluminum together and plus how to bring up that show mirror finish polish. So trust me the next time you're trying to figure out a piece for your buggy. Don't just grab a piece of steel. Look into all the different types of aluminum you can use. You'll end up with a sweet looking ride.
