More Project Saggin' Wagon Episodes
Xtreme 4x4 Builds
Want more content like this?
Join the PowerNation Email NewsletterParts Used In This Episode
Flowmaster
This indestructable off-road muffler is made of 14 guage steel diamond plate, and still has the low restrictive flow-through design like all Flowmaster mufflers.
Holley
No longer is the Land Cruiser a carburated "Saggin Wagon", it is now fuel injected with the Projection II D 607 CFM unit. All the parts included in the kit; trottle body, wiring harness, ECM, fuel pump and adapter units; are making it that much closer to becoming the "Shaggin Wagon".
TPI 4X4
One chrome full length header with 1.5" primary tubes and and a thick mating flange for better airflow than the stock manifold.
Episode Transcript
Today with their junkyard Toyota. Now backhand, our extreme team brings project sag and wagon closer to hitting the trail, plus Mig and Tig Welding +101 and a trip to the Dakota Territory challenge. That's all right. Now on Xtreme 4x4
recline.
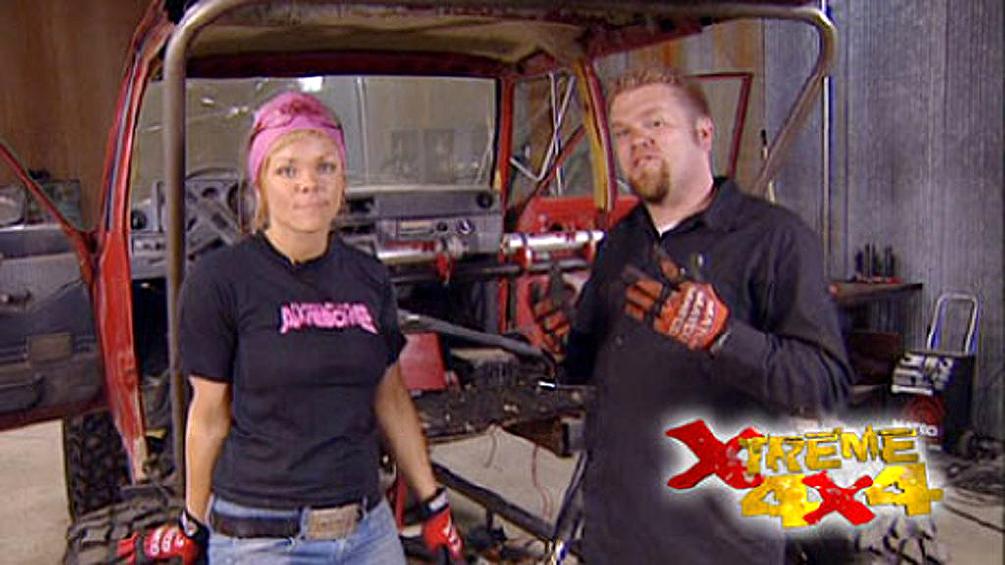
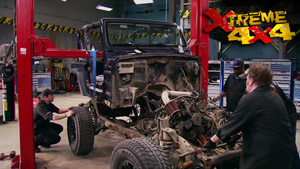
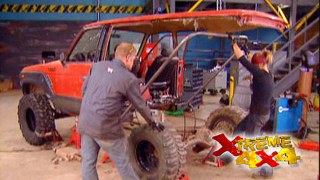
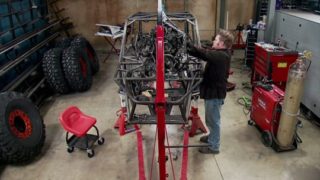
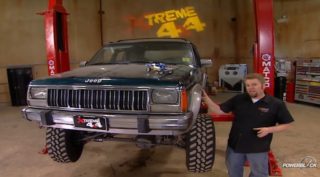
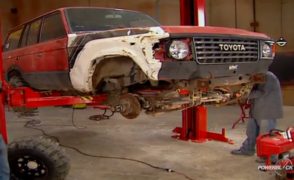
Hey, guys, welcome to the extreme shop. As you can see, we're tearing into our old wrecking yard FJ 60. What used to be sagging wagon is gonna be a great trail truck for the weekend fun.
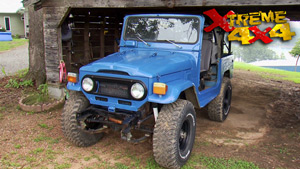
Now, these wagons really do have a cult following and when you look around on the trail, you're gonna see a lot of them out there and guys really love the wheel these things. And so to keep with that whole Toyota theme, we've been upgrading this thing one step at a time, but keeping most of the base parts still Toyotas,
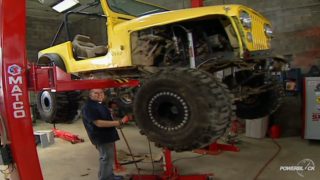
we've already upgraded the axles, both front and rear with new shafts, gears and selectable lockers. And now the rear axle is hung on a double triangulated four
length with some monster he
joints and it's sitting on some new coil over shocks
and the front axle was treated to a spring over and shackle reversal to help keep costs down.
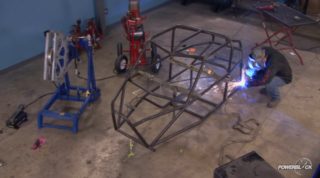
So today we're gonna finish up the roll cage and do some engine work. And for all you guys watching the show looking for some tips on welding tubing. Today is your lucky day
and the roof, we gotta shorten that
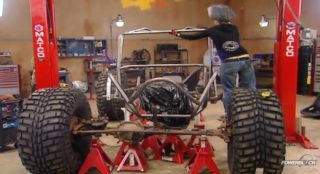
the main hoop is really the backbone of your cage spending time on. This will make sure that everything is safe and strong.
This may take a bunch of trips to the vendor and a lot of measuring,
but it will be worth it.
That
positioning the hoop would be the guidelines for the rest of the tubing.
Make sure it is level and looking correct side to side.
Then it's just a matter of measure, cut
notch, bend
text and then repeat
and always remember. Triangulation is your friend when building a cage.
All right. So the cage is built and t together and you're probably wondering how in the
heck am I going to well on top of the roll cage? Because of course you want you to be
as high as you can get. So you have extra headroom inside the cab.
Well, we got a cool little trick to show you
where every down tube meets the floor. We went ahead and cut a hole.
This freaking hurts with the floor plates removed, the entire cage is lower. Then we can finish all the top of the tubes.
Afterwards, the cage can be raised back into place. These four plates will slide under the down tube and later we welcome them to the frame.
Now, I know what you're thinking. What are they doing? Drilling holes in a perfectly good roll cage everywhere where the tubing meets? Well, there's a reason behind that. If you remember when we rebuilt our axles, front and rear, we put in a RB air lockers and those air lockers need compressed air to run. And the compressed air comes from this little mini compressor that we also got from a RB.
It's a good idea when you put one of these in to have a storage tank to store up some air.
Now, you can go ahead and put one of these steel tanks pretty much anywhere you want in the truck, but it's good take up some space.
We got a super trick little idea here.
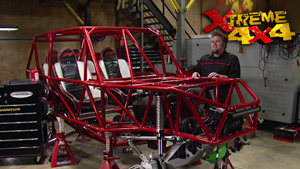
What we're doing is basically using the rear hoop, these two outer tubes and the main hoop as our air storage tank by drilling these holes at the intersection, that's gonna allow the air to hold in the whole cage. All we have to do later is basically drill an adapter fitting here for the compressed air to get in another one below it to come out down the link. And then just right into the locker
genius,
the
60 really is considered a mid to full size C
but if you're building a mini truck, like a Toyota pickup or a Ford Ranger or you just need more room inside. You always have the option of moving your roll cage out a little bit and putting it into this piler.
All you have to do is kind a group for the tubing
slide
in and then weld the sheet metal to the roll cage and you're good to go. Probably one of the neatest things we're trying to pull off with this truck is with these rear doors. This thing started life as a wagon and we're gonna try and keep it looking that way and then eventually use these doors to get into the back of the truck. This is very awkward here.
Let me take something.
We
fed up a mouth in order to use the rear latch mechanism.
It's looking like a wagon again.
Good job. I,
no sweat. Jesse's
very innovative.
Now, the last thing that we have to do here is shorten the roof. We left the extra long so we able to bring it up and meet up with this back bar here. So the first thing we got to do is mark out the cut line with masking tape
because
I will cut the roof using a saws off
and then shorten it up to meet the rear tube.
I apologize
later on. Extreme Ian and Jessi go step by step through the two welding process. But up next serious trails await these competitors at the Dakota Territory challenge. Stay tuned.
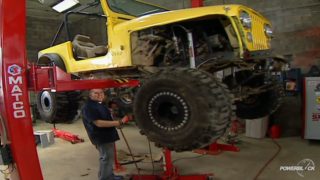
You're watching Xtreme 4x4 where we're in the middle of cutting up this 85 land cruiser basically back half it, turning it into a really good trail truck.
We
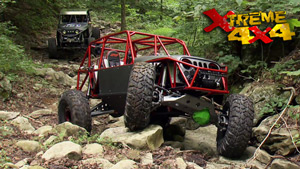
both the front and rear suspension for some serious articulation. Something every good trail truck needs for serious rocks
for 23 years. The Black Hills four Wheelers have put on one of the toughest trail rides in the country. The Dakota Territory challenge.
Oh,
there's usually 100 rigs from all over the country that come out here
to wheel with us for four days
just so they can come out here and do the hardest, nastiest stuff that we have to offer.
Located west of Rapid City. The 50 plus trails all have one common denominator.
Most people have a tendency to think that South Dakota is nothing but flat and barren, but really it's full of big cliffs and big gigantic rocks place is bad ass.
They don't know what to expect when they come to the challenge
and they come and they're going, oh my gosh. Look at this. I pray to the Rock Gods. This is my church. It's amazing how much fun you can have every time you come out because you can take different lines. The obstacles do change throughout the day and throughout the year, depending on rainfalls and, uh, other people throwing rocks around. So you pretty much confirm new stuff every time you come out.
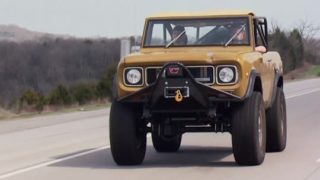
Jason Pauley grew up on these trails and as a pro rock crawler and rig builder he knows what it takes to conquer the Black Hills. These trails are pretty tough. Uh, good, good suspension is great quality of parts
and really well built rig really helps the day.
He built his latest creation for Mike and Josey. Nor who were making the Black Hill Trails look very easy. It's cool. It's a third day out with it, you know, still getting used to it, but it's, uh,
works awesome and it's really fun.
They had a pretty sweet C JSE
they've had for years and years and kind of reached a point where they needed something. Maybe a little bit more radical.
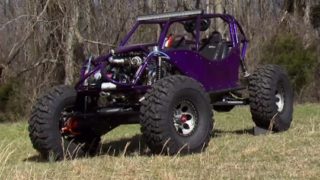
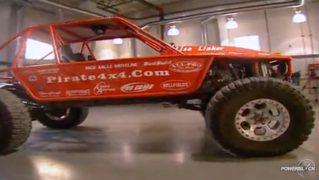
Mike and Josey decided to do something a little bit crazy. They ended up with a all aluminum dual overhead cam Lexus motor of an S CFOUR 100 looks pretty radical.
Great 265 horse seems to be plenty for anything he's wanting to do with it for the steering. We went with a pretty radical way to do it. It's a fully hydraulic system
centered Ram.
It offers great power, really good reliability. It does offer great high speed and low speed.
You never have any kick back through the steering wheel. So even big rocks you can drive with ease the body on this buggy does resemble an old CJ like they used to have. We put some pretty fancy paint on it to make it look cool when it's brand new.
See some of these trails they're not just for the little guys, they're for the big, full size guys too.
You better not like your body.
You will get damaged out here.
You hear the scraping, but I'm used to that sound by now.
You can tell that I don't much care if I bump a rock or when I'm going around a corner,
but take your time and go through the trails. Right? And you have really good spotters so you can get through them and not damage anything majorly and have a good time. Two of the toughest trails in the Black Hills are the full size and Kong
and they call it the full monkey.
Some of the hard stuff included this mud covered waterfall,
just transmission damage today.
An eagle, once the first guy goes over it, it gets a little slick, gets a little mud on it and then
it makes it a little bit harder than the couple undercuts that are there.
Hopefully we'll get to the top on the first round.
Takes more than optimism to get through the full
monkey.
The trail may have gotten the best of Ray this time,
but he loves this kind of punishment.
We come back every year. It's a lot of fun. So
everybody's definitely check it out. You will like South Dakota, we like it. It's uh some of the funnest around.
Most definitely.
You've heard us talk about bending and not
to be
picking the right to be for your project.
Well, you guys ask for it. We
take on steel and most importantly on t
now we're gonna start with possibly the easiest form of welding to learn. And also the most common you're gonna see in a shop and that's Mig Welding. Now, Mig stands for metal inert gas and it's a form of shielded metal arc welding. Now, the business end of a mig welder is behind this door.
Now, the first thing you notice in here is this great big roll of wire that's consumed during the welding process. We like to use Mirex Sfo wire because it doesn't have very much droop when you're running overhead. And this is an 0 35 wire perfect for heavy fab work. Now, the wire may look copper in color, but it's actually a mild steel wire with a copper coating to keep it from rusting
and the wire is pulled off the spool by the drive roll mechanism and this is where it's electrified by the transformer at the welder. Once it's pulled off the spool, it's actually fed out into a liner inside this tube and onto the gun.
Now, the other thing that's running through this tube and heading up to the gun is the shielding gas mixture that comes from this cylinder on the back of the welder. That's where the mi water gets its name. Metal inert gas inside here is an inert gas and we use a mixture 75% argon and 25% C two. The CO2 helps strike the ac gets good penetration into the steel and the argon helps protect the weld when it's at its molten state.
Is the other form of we
that we use here at extreme which you find in most f
shops. But unlike me,
the electrode is not consumed during the welding process. So there is no material being used unless you manly added in yourself. Now, running from the torch to the machine is the line that carries the electric current which is controlled by the foot pedal
and the gas.
But this gas is 100% are gone and not 7525.
The business end of this welder is in here inside of this torch is the tungsten which is where tungsten inert gas welding gets its name
and tungsten comes in different sizes depending upon the thickness of metal, you're going to be welding.
You have 100% tungsten for aluminum and you have 2%
thord which is an alloy in the tungsten for metals like stainless steel, steel, chromo
cast iron. Now, this electrode is what delivers the art to create the molten puddle for the world. And because it's made of tungsten, it's not going to melt itself. So the gas is going to come up through the line through the torch and through this gas lens which is going to eliminate the turbulence for the gas cloud, which is then focused by the cup for the world.
Now, welding with a mig welder is actually pretty simple. Once you hook the ground clamp to the piece of work you're working on, all you have to do is set your welder to the settings found inside the machine, simply trim your wire, feed a quarter inch away from the end of your gun
and you just gotta hold your gun at a 45 degree angle from what you're gonna be welding, flip your mask down, you're ready to go
moving the tip in small c formations,
you basically connect the two pieces of metal together.
The best way to become a good welder is keep your scrap pieces around and practice. Practice, practice.
He's been practicing. But as far as to
welding, it requires a little bit more patience and a lot more practice. The first thing you want to do is make sure that your tons
and is prep correctly. It should be sharpened to a 15 to 30 degree point for steel and have a ball up and for aluminum.
Also
the
metal to be free of any oil or grease or you will get a defective.
Make sure you got a good ground connection
and set the electrode between 1/8 of an inch to a quarter of an inch from the edge of the nozzle.
And remember your filler rod should be sized to match the thickness of the material you're welding. So thin a rod for thinner metal, thicker rod, for thicker metal,
keep the tungsten away from the work. Because if it touches the steel, it will ground out and contaminate the electrode, you'll have to take the torch apart and sharpen it. Again,
you can control the world puddle size by using the foot pedal to control the amount of heat input into the metal.
Once you have a molten puddle, you simply move it along the metal with the torch. Alternately adding filler.
One of the trickiest types of welding out there is welding tubing together because the first thing you have to worry about is make sure that your joint is good and strong because if it's tubing, it's usually either a roll cage or a chassis.
The next thing you got to worry about is you're welding one piece right on its edge where the steel is really weak. So you can actually burn that
to steal right away and have a big gap there.
Now, when it comes to welding tube together, there's a couple different techniques. The first one is bead and the second one is stitch. A
bead weld is when you run a length of weld across the two pieces of tubing. Stopping only when the torch is in a poor position.
A
stitch weld is when you trigger weld the tubing together, basically placing a series of heavy spot welds on top of each other.
Now, these two different styles of welding do breed a lot of controversy. And here's what it boils down to when you're welding steel together, you're actually melting it together to create a bond in one joint. When you run a bead, you know that you have a uniform heat effect zone all the way across that bead.
Whereas when you stitch weld every time you start and stop the metal can cool down creating a series of cold joints. Now, is it weaker?
You really don't know until it breaks. But in my opinion, I've always been taught and I always did teach if you're going to weld, the bead strength comes first. So go for the beat. What do you think, Jessi?
I fully agree with you, but I've also been told that when you're stitch welding and you're moving fast enough and you're not allowing those worlds to cool down. It can be close to as strong as your continuous beat. So I think it all depends upon personal preference and how you want it to look.
Hey, everybody, welcome back to Xtreme 4x4. The second wagon has been treated to a full custom roll cage
and with all the welding tips that we just went through, you should be able to weld up your own cage in no time.
And now we can start dealing with the fuel delivery system for our in-line six
trucks of this vintage were mostly carbureted
and a carbureted vehicle, especially a stock one does not run very well off road. So this truck's gonna lose its carb for a new EF I unit
and we're just pulling this off for insurance because you don't know how long a truck like this has been laying around for. And you could have had a mouse climb into your intake manifold and build a nice little house in there.
Since we're dealing with the air and fuel intake, we'll deal with the exhaust. At the same time,
the restrictive and cracked stock manifold will be replaced with a full and
from TP
this chrome header with inch and a half primary tubes is fully welded and has a thick flange to eliminate leaks at the head.
We're going to use 2.5 inch exhaust to be running from the collector into one of the toughest mufflers ever. This new Flowmaster off Road muffler is made of 14 gauge diamond plate steel and is basically indestructible. Plus, it still has the low restrictive flow through design that all master mufflers.
Now with our manifold cleaned up and check for instructions, we can go ahead and start adapting in our EF I unit. Now, we're using Holly's projection two D 670 CFM unit and it comes with everything you need to hook it up to almost any truck. It's obviously got a throttle body unit, wiring harness, EC MA fuel pump, all the nuts and bolts and of course adapter plates.
And then once we get the TB I unit adapted to the manifold, just pull the manifold back onto the truck and then the next time you see this thing, it should be ready to rock and roll or maybe rolling on some rocks.
I think it's gonna sound like this.
What?
No, it's a V8 now. It's like
it's a two F dude.
There
you
go.
Show Full Transcript
recline.
Hey, guys, welcome to the extreme shop. As you can see, we're tearing into our old wrecking yard FJ 60. What used to be sagging wagon is gonna be a great trail truck for the weekend fun.
Now, these wagons really do have a cult following and when you look around on the trail, you're gonna see a lot of them out there and guys really love the wheel these things. And so to keep with that whole Toyota theme, we've been upgrading this thing one step at a time, but keeping most of the base parts still Toyotas,
we've already upgraded the axles, both front and rear with new shafts, gears and selectable lockers. And now the rear axle is hung on a double triangulated four
length with some monster he
joints and it's sitting on some new coil over shocks
and the front axle was treated to a spring over and shackle reversal to help keep costs down.
So today we're gonna finish up the roll cage and do some engine work. And for all you guys watching the show looking for some tips on welding tubing. Today is your lucky day
and the roof, we gotta shorten that
the main hoop is really the backbone of your cage spending time on. This will make sure that everything is safe and strong.
This may take a bunch of trips to the vendor and a lot of measuring,
but it will be worth it.
That
positioning the hoop would be the guidelines for the rest of the tubing.
Make sure it is level and looking correct side to side.
Then it's just a matter of measure, cut
notch, bend
text and then repeat
and always remember. Triangulation is your friend when building a cage.
All right. So the cage is built and t together and you're probably wondering how in the
heck am I going to well on top of the roll cage? Because of course you want you to be
as high as you can get. So you have extra headroom inside the cab.
Well, we got a cool little trick to show you
where every down tube meets the floor. We went ahead and cut a hole.
This freaking hurts with the floor plates removed, the entire cage is lower. Then we can finish all the top of the tubes.
Afterwards, the cage can be raised back into place. These four plates will slide under the down tube and later we welcome them to the frame.
Now, I know what you're thinking. What are they doing? Drilling holes in a perfectly good roll cage everywhere where the tubing meets? Well, there's a reason behind that. If you remember when we rebuilt our axles, front and rear, we put in a RB air lockers and those air lockers need compressed air to run. And the compressed air comes from this little mini compressor that we also got from a RB.
It's a good idea when you put one of these in to have a storage tank to store up some air.
Now, you can go ahead and put one of these steel tanks pretty much anywhere you want in the truck, but it's good take up some space.
We got a super trick little idea here.
What we're doing is basically using the rear hoop, these two outer tubes and the main hoop as our air storage tank by drilling these holes at the intersection, that's gonna allow the air to hold in the whole cage. All we have to do later is basically drill an adapter fitting here for the compressed air to get in another one below it to come out down the link. And then just right into the locker
genius,
the
60 really is considered a mid to full size C
but if you're building a mini truck, like a Toyota pickup or a Ford Ranger or you just need more room inside. You always have the option of moving your roll cage out a little bit and putting it into this piler.
All you have to do is kind a group for the tubing
slide
in and then weld the sheet metal to the roll cage and you're good to go. Probably one of the neatest things we're trying to pull off with this truck is with these rear doors. This thing started life as a wagon and we're gonna try and keep it looking that way and then eventually use these doors to get into the back of the truck. This is very awkward here.
Let me take something.
We
fed up a mouth in order to use the rear latch mechanism.
It's looking like a wagon again.
Good job. I,
no sweat. Jesse's
very innovative.
Now, the last thing that we have to do here is shorten the roof. We left the extra long so we able to bring it up and meet up with this back bar here. So the first thing we got to do is mark out the cut line with masking tape
because
I will cut the roof using a saws off
and then shorten it up to meet the rear tube.
I apologize
later on. Extreme Ian and Jessi go step by step through the two welding process. But up next serious trails await these competitors at the Dakota Territory challenge. Stay tuned.
You're watching Xtreme 4x4 where we're in the middle of cutting up this 85 land cruiser basically back half it, turning it into a really good trail truck.
We
both the front and rear suspension for some serious articulation. Something every good trail truck needs for serious rocks
for 23 years. The Black Hills four Wheelers have put on one of the toughest trail rides in the country. The Dakota Territory challenge.
Oh,
there's usually 100 rigs from all over the country that come out here
to wheel with us for four days
just so they can come out here and do the hardest, nastiest stuff that we have to offer.
Located west of Rapid City. The 50 plus trails all have one common denominator.
Most people have a tendency to think that South Dakota is nothing but flat and barren, but really it's full of big cliffs and big gigantic rocks place is bad ass.
They don't know what to expect when they come to the challenge
and they come and they're going, oh my gosh. Look at this. I pray to the Rock Gods. This is my church. It's amazing how much fun you can have every time you come out because you can take different lines. The obstacles do change throughout the day and throughout the year, depending on rainfalls and, uh, other people throwing rocks around. So you pretty much confirm new stuff every time you come out.
Jason Pauley grew up on these trails and as a pro rock crawler and rig builder he knows what it takes to conquer the Black Hills. These trails are pretty tough. Uh, good, good suspension is great quality of parts
and really well built rig really helps the day.
He built his latest creation for Mike and Josey. Nor who were making the Black Hill Trails look very easy. It's cool. It's a third day out with it, you know, still getting used to it, but it's, uh,
works awesome and it's really fun.
They had a pretty sweet C JSE
they've had for years and years and kind of reached a point where they needed something. Maybe a little bit more radical.
Mike and Josey decided to do something a little bit crazy. They ended up with a all aluminum dual overhead cam Lexus motor of an S CFOUR 100 looks pretty radical.
Great 265 horse seems to be plenty for anything he's wanting to do with it for the steering. We went with a pretty radical way to do it. It's a fully hydraulic system
centered Ram.
It offers great power, really good reliability. It does offer great high speed and low speed.
You never have any kick back through the steering wheel. So even big rocks you can drive with ease the body on this buggy does resemble an old CJ like they used to have. We put some pretty fancy paint on it to make it look cool when it's brand new.
See some of these trails they're not just for the little guys, they're for the big, full size guys too.
You better not like your body.
You will get damaged out here.
You hear the scraping, but I'm used to that sound by now.
You can tell that I don't much care if I bump a rock or when I'm going around a corner,
but take your time and go through the trails. Right? And you have really good spotters so you can get through them and not damage anything majorly and have a good time. Two of the toughest trails in the Black Hills are the full size and Kong
and they call it the full monkey.
Some of the hard stuff included this mud covered waterfall,
just transmission damage today.
An eagle, once the first guy goes over it, it gets a little slick, gets a little mud on it and then
it makes it a little bit harder than the couple undercuts that are there.
Hopefully we'll get to the top on the first round.
Takes more than optimism to get through the full
monkey.
The trail may have gotten the best of Ray this time,
but he loves this kind of punishment.
We come back every year. It's a lot of fun. So
everybody's definitely check it out. You will like South Dakota, we like it. It's uh some of the funnest around.
Most definitely.
You've heard us talk about bending and not
to be
picking the right to be for your project.
Well, you guys ask for it. We
take on steel and most importantly on t
now we're gonna start with possibly the easiest form of welding to learn. And also the most common you're gonna see in a shop and that's Mig Welding. Now, Mig stands for metal inert gas and it's a form of shielded metal arc welding. Now, the business end of a mig welder is behind this door.
Now, the first thing you notice in here is this great big roll of wire that's consumed during the welding process. We like to use Mirex Sfo wire because it doesn't have very much droop when you're running overhead. And this is an 0 35 wire perfect for heavy fab work. Now, the wire may look copper in color, but it's actually a mild steel wire with a copper coating to keep it from rusting
and the wire is pulled off the spool by the drive roll mechanism and this is where it's electrified by the transformer at the welder. Once it's pulled off the spool, it's actually fed out into a liner inside this tube and onto the gun.
Now, the other thing that's running through this tube and heading up to the gun is the shielding gas mixture that comes from this cylinder on the back of the welder. That's where the mi water gets its name. Metal inert gas inside here is an inert gas and we use a mixture 75% argon and 25% C two. The CO2 helps strike the ac gets good penetration into the steel and the argon helps protect the weld when it's at its molten state.
Is the other form of we
that we use here at extreme which you find in most f
shops. But unlike me,
the electrode is not consumed during the welding process. So there is no material being used unless you manly added in yourself. Now, running from the torch to the machine is the line that carries the electric current which is controlled by the foot pedal
and the gas.
But this gas is 100% are gone and not 7525.
The business end of this welder is in here inside of this torch is the tungsten which is where tungsten inert gas welding gets its name
and tungsten comes in different sizes depending upon the thickness of metal, you're going to be welding.
You have 100% tungsten for aluminum and you have 2%
thord which is an alloy in the tungsten for metals like stainless steel, steel, chromo
cast iron. Now, this electrode is what delivers the art to create the molten puddle for the world. And because it's made of tungsten, it's not going to melt itself. So the gas is going to come up through the line through the torch and through this gas lens which is going to eliminate the turbulence for the gas cloud, which is then focused by the cup for the world.
Now, welding with a mig welder is actually pretty simple. Once you hook the ground clamp to the piece of work you're working on, all you have to do is set your welder to the settings found inside the machine, simply trim your wire, feed a quarter inch away from the end of your gun
and you just gotta hold your gun at a 45 degree angle from what you're gonna be welding, flip your mask down, you're ready to go
moving the tip in small c formations,
you basically connect the two pieces of metal together.
The best way to become a good welder is keep your scrap pieces around and practice. Practice, practice.
He's been practicing. But as far as to
welding, it requires a little bit more patience and a lot more practice. The first thing you want to do is make sure that your tons
and is prep correctly. It should be sharpened to a 15 to 30 degree point for steel and have a ball up and for aluminum.
Also
the
metal to be free of any oil or grease or you will get a defective.
Make sure you got a good ground connection
and set the electrode between 1/8 of an inch to a quarter of an inch from the edge of the nozzle.
And remember your filler rod should be sized to match the thickness of the material you're welding. So thin a rod for thinner metal, thicker rod, for thicker metal,
keep the tungsten away from the work. Because if it touches the steel, it will ground out and contaminate the electrode, you'll have to take the torch apart and sharpen it. Again,
you can control the world puddle size by using the foot pedal to control the amount of heat input into the metal.
Once you have a molten puddle, you simply move it along the metal with the torch. Alternately adding filler.
One of the trickiest types of welding out there is welding tubing together because the first thing you have to worry about is make sure that your joint is good and strong because if it's tubing, it's usually either a roll cage or a chassis.
The next thing you got to worry about is you're welding one piece right on its edge where the steel is really weak. So you can actually burn that
to steal right away and have a big gap there.
Now, when it comes to welding tube together, there's a couple different techniques. The first one is bead and the second one is stitch. A
bead weld is when you run a length of weld across the two pieces of tubing. Stopping only when the torch is in a poor position.
A
stitch weld is when you trigger weld the tubing together, basically placing a series of heavy spot welds on top of each other.
Now, these two different styles of welding do breed a lot of controversy. And here's what it boils down to when you're welding steel together, you're actually melting it together to create a bond in one joint. When you run a bead, you know that you have a uniform heat effect zone all the way across that bead.
Whereas when you stitch weld every time you start and stop the metal can cool down creating a series of cold joints. Now, is it weaker?
You really don't know until it breaks. But in my opinion, I've always been taught and I always did teach if you're going to weld, the bead strength comes first. So go for the beat. What do you think, Jessi?
I fully agree with you, but I've also been told that when you're stitch welding and you're moving fast enough and you're not allowing those worlds to cool down. It can be close to as strong as your continuous beat. So I think it all depends upon personal preference and how you want it to look.
Hey, everybody, welcome back to Xtreme 4x4. The second wagon has been treated to a full custom roll cage
and with all the welding tips that we just went through, you should be able to weld up your own cage in no time.
And now we can start dealing with the fuel delivery system for our in-line six
trucks of this vintage were mostly carbureted
and a carbureted vehicle, especially a stock one does not run very well off road. So this truck's gonna lose its carb for a new EF I unit
and we're just pulling this off for insurance because you don't know how long a truck like this has been laying around for. And you could have had a mouse climb into your intake manifold and build a nice little house in there.
Since we're dealing with the air and fuel intake, we'll deal with the exhaust. At the same time,
the restrictive and cracked stock manifold will be replaced with a full and
from TP
this chrome header with inch and a half primary tubes is fully welded and has a thick flange to eliminate leaks at the head.
We're going to use 2.5 inch exhaust to be running from the collector into one of the toughest mufflers ever. This new Flowmaster off Road muffler is made of 14 gauge diamond plate steel and is basically indestructible. Plus, it still has the low restrictive flow through design that all master mufflers.
Now with our manifold cleaned up and check for instructions, we can go ahead and start adapting in our EF I unit. Now, we're using Holly's projection two D 670 CFM unit and it comes with everything you need to hook it up to almost any truck. It's obviously got a throttle body unit, wiring harness, EC MA fuel pump, all the nuts and bolts and of course adapter plates.
And then once we get the TB I unit adapted to the manifold, just pull the manifold back onto the truck and then the next time you see this thing, it should be ready to rock and roll or maybe rolling on some rocks.
I think it's gonna sound like this.
What?
No, it's a V8 now. It's like
it's a two F dude.
There
you
go.
