More Project Saggin' Wagon Episodes
Xtreme 4x4 Builds
Want more content like this?
Join the PowerNation Email NewsletterParts Used In This Episode
Blue Torch FabWorks
Laser cut brackets - shock mounts, link mounts, gussets.
Evolution Machine & Fabrication
Giant rebuildable heim joints.
Longfield Super Axles
Longfield birfields and 30 spline chrome moly axle shafts - front axle.
Pitbull Tire Company
37"x13.5 Rockers - tires.
Poly Performace
4340 high strength chrome moly axle shafts - rear axle only.
Quadratec
Lockers and compressor.
Randy's Ring & Pinion
5.29 axle gears/ring and pinion.
Randy's Ring & Pinion
RSX 9000 dual coil over shocks - 2 for the rear only.
Stazworks
Custom 17"x9" dual beadlock wheels.
TCI Automotive
Randy's Ring and Pinion.
Episode Transcript
Today.
See this land cruiser destroyed, then transformed into one bad back half buggy. Plus they're a necessary evil competition judges see how these off road zebras keep their cool in the heat of battle.
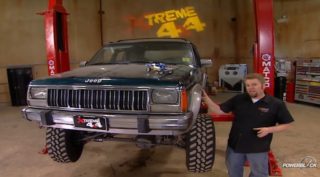
Welcome to Xtreme 4x4. Today you guys are in for a wild ride. We're about to take the next step into turning this lumpy olds
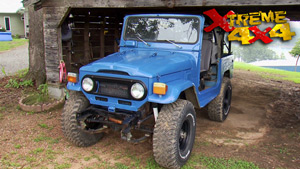
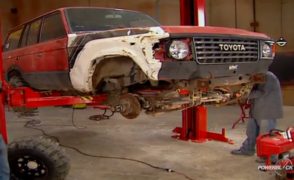
and wagon of an FJ 60 into a true off road machine.
That's right. We've already made more room for bigger tires by doing a spring over on the front, but approaching by doing a shackle reversal
and proper line
goes by doing a cut.
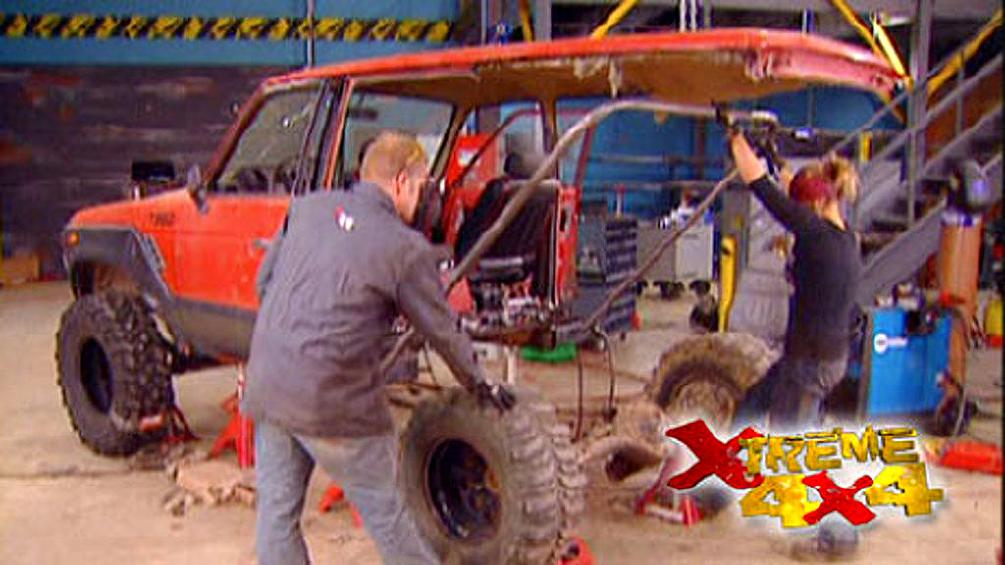
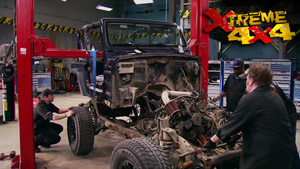
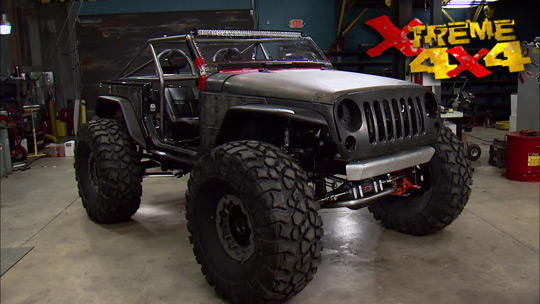
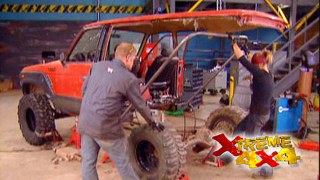
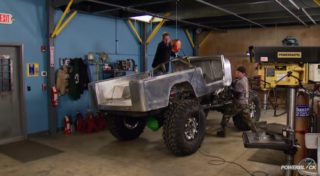
Now, if we wanted to keep this wagon treatable, we'd simply do another spring over axle on the rear and be done with it. But we aren't. We want this thing to be hardcore off road. So this FJ 60 is about to become a back half buggy. We're gonna slice it right down the middle with a custom four length. Now, this has become very popular off road because these things were great.
Plus it's a lot easier than linking both
ends
and you get to keep the frame from about here forward. So don't have to worry about making any custom amount for any of your drive in the transmission steering
like you would have to do on like a two
B or whatever,
lot easier this way.
That's not going to be swap meet.
What's the expression do as I say? Not as I do
halt.
Ok, break time. Get a bucket out there.
Where's our budgets
when that happened in a truck?
Always be aware of your fuel line location that stinks
to have a guy named S nearby with an extinguisher just in case
you ready. Sid
the exhaust actually might hold us together, believe it or not.
Do me a favor. Jessi. Jump up and down on the back of the thing. You're gonna land on me.
It's stock right here. Hold on.
That kind of hurt me
at this point in a project like this. You have to do two things. First of all, you gotta call up all your friends and everyone, you know and have them go
and look at your truck because they're gonna think you're absolutely crazy. Second thing you gotta figure out what you need to save off the back half of your truck. In our case, all we're gonna save is this rear axle, so we gotta cut it off.
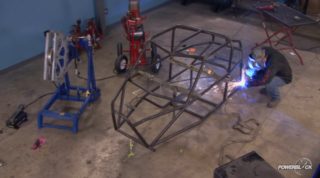
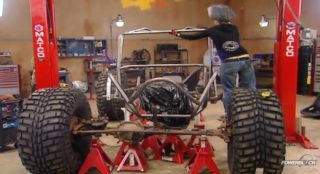
This whole rear frame section is going to be replaced with an entire tube structure so we can get better articulation on the rear axle. Now, of course, there will be a roll cage in the entire truck. But we need to start here with the main who
the nice thing about a tube buggy or in this case, a tube back half truck is you don't have to extend the vehicle's frame rails past the axle center line that gives us great departure angles and rear approach.
And the only thing you need back here is a tube to act as the upper shock mount. And with this tube in here, we can go ahead and set our wheel base and start planning our four link.
We could probably go up a couple of inches if we want.
It's called just one inch
with the wheelbase set at 100 and nine inches in the rear axel on jack stands. We can start to build some links for our fourth.
We went to evolution machine and fab and got these monster rod ends. These things are just flat out huge and they're strong. These things have never failed when they've tested these things on typical testing equipment. It just maxes out the machine. You cannot break this thing. So possibly they're gonna outlive the truck, we'll just take them out and use them in another project.
And the nice thing is is if they do start to wear out, they're fully rebuildable, just break the joint down and you just have to replace these two Teflon inner sleeves and then reassemble it and it's good as new. Now, we got obviously the jam nuts and the tubing adapters for our truck. And it takes a pretty specialized piece of tubing. It needs to have an inch and three quarter inch inside diameter. And the tubing adapter just slides right in place. Once we tap that in, we can start figuring out the L
with the
ace in place, we can begin our shock mounts and normally that would require is building a bunch of little tabs. But instead we called up the guys that blue torch fab
and they grabbed us a pile of these custom laser cut tabs and brackets
including these lower shock mounts.
The design for the four L
on this truck is going to be a pretty typical double triangulated four
length with two opposing vs.
The lower links will have the rod end on one end. But on the other end, we're going to use evolution machine and fabs sage joint. It's the same design as the rod end. It just doesn't the threaded shaft coming out of the end. So the lowers won't have a lot of adjustment. The uppers will go from the center to the axle out and have opposing threads, a right hand on one side and a left hand on the other. So when you twist that link, it changes the pin angle, all we got to do now is figure out how long the lower has to be
suspension requires a spring of some sort, whether it's a coil spring or coil over shock.
Now we went with the Rancho Rx 9000 coil overs Rancho packages, their shocks with the most popular spring rates available as one package deal.
Now, we went with the 12 inch 125 pound tender spring
and the 14 inch 250 pound main spring.
The nice thing about coil shocks aside from the gas charge body that is adjustable to change how the shock performs
the adjustable ride height on the threaded body. And the variable spring rates is they actually really easy to install
with the shock mount in the lower braking.
We can measure for the upper two.
The most popular design of four link and trail trucks is the double triangulated four link set up.
We will put the lower links into place as high on the actual tube as possible.
And then on to the bottom side of the frame,
the uppers are built at 70% of the lowers length mounting them on a truss from the top of the pumpkin provides vertical separation
mounted at a slightly higher angle than the lowers and with multiple attachment points at the frame to fine tune the suspension
up next inside the most thankless job in rock crawling. We'll hit the trail and go behind the scorecard with the judges of we rock. When Xtreme 4x4 continues
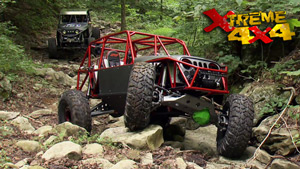
competitive rock crawling tests the mental toughness of the driver, the physicality of the spotter and of course the mechanical ability of the vehicle, how all three work together, determines the winner.
But here's where it gets complicated. You lose points for backing up on the course using a winch and then of course, hitting a cone, you got bonus lines and progression points and that's where it gets tough for the We Rock judges
put up more than $10,000 for the winner. And the Wheat Rock Grand National Finals brought up this country's best rock crawlers. This is a great event. This is the biggest. It's the Super bowl of all rock crawling. You got the top teams from both coasts
going at it for a big person
with the national title on the line. Even the judges were immune to this pressure cooker. Pressure is intense. It's a lot of pressure. Yeah, it is because these guys are running for a lot of money from a hit cone to using reverse. The sport of rock crawling is all about points.
I gotta have some good math skills. You got the spotter bonus. You didn't use a strap. So that was a negative five points negates that they had two backs, but they had three progress points
ended up negative one. The judging is the key to this.
If they had an extra backup or two to our points, that could be the difference between 1st and 2nd. We want them on their game, which means close calls can get ugly
as a judge. There's always going to be friction between the driver and the judge. Judging sometimes is, is thankless. They're in competition, they're going to be heated sometimes if they think a call didn't go their way.
I
don't believe we hit this cone going up. But that's what the judges say.
I let him
get up in my face, but in the end,
I've got final say and I know that these men and women face more than verbal abuse. The level of danger I think is pretty high. We do get scars. We get hurt out here just like anybody else does. You know, you've got to watch these drivers run their horse and it puts you in some positions where if you're not on your toes, you know, you can either get run over or flipped over on
very dangerous sport. I got this in Goldendale, Washington judging.
Ok?
Away from the course, judges and drivers can have a good laugh. You guys ready come race day is all business.
I drink beers with these guys. I have fun with these guys and I know a lot of them personally and I hang out with them outside of the competition setting. But for me, as soon as I put on that judge's shirt, all bets are off. Everybody is the same to me.
It's not that hard to separate. You know, our social,
social knowings here from the judging.
No, everybody's the same. Everybody out here is fair. We all treat their
when it comes to inside info, a judge's shirt won't stop the drivers from trying, you know, they all try to get information out of you. So they're all trying to, you know, what's the best way to go, you know? Can I go up here? What can I do? This? The hardest thing about judging is
you see the lines that they need to take on your course and you can't say anything.
I'm a wheeler. I like to go wheeling and I want to say no, go left, go right. You know, I want to help him but you have to, you have to remain neutral in this colossal event. A long call would not have been funny,
but these judges met the challenges thrown their way,
never can talk good about the judges and, and they, they have done an excellent job this week.
They're real good. They're real good. I haven't heard anyone complain about the judging so far. So it
must be doing.
There is a brotherhood of judges. We stick together, we go to all these events. You know, you'll see the same judges, you know, that, you know, you're familiar with these guys. It's a really good core group of judges. I do this because I love it and I love everybody here, everybody here's friends. This is my family, this is totally my family.
There's nothing that compares to being a judge. I mean, until you've done it and experienced it once I did it. I was hooked.
Welcome back to Extreme Four by Foreigner FJ 60 back half wagon. The front end has already been taken care of with a spring over and the rear end is hanging off of a custom double triangulated falling system and some Rancho coil over shock.
Now it's time to take care of the axles. I mean, the stuff inside the axles, the gears, the shafts, the lockers, things that are really going to help this truck perform off road. And the nice thing about the Toyota is it all comes out as an assembly and this third member. So when it comes time to change a ring or opinion or a locker can do it on a bench, relax, comfortable, not laying on your back trying to work in the dirt.
Now, on this truck, we're gonna install a set of Yukon gear 529 ring and Pinion super deep gear ratio to help with our crawling. We're gonna put that on a RB air lockers, front and rear selectable locker that uses compressed air to lock the two axle shafts together.
Now, you're probably asking yourself why do I need a selectable locker? Well, here's the main reason
you think of a truck driving down the trail. When you go to make a corner, your tires take two different trips around that corner. One takes a short distance and the outside one takes the long distance. So they travel at different speeds.
If this axle is locked, when you try to take the corner, the wheels pull the whole truck completely off line, it just basically gets off the trail. Worst case scenario, you might have to back up to get it pointed down the trail. If you have a selectable locker, you can just unlock that front axle when you're making that corner, make that super duper tight turn. Get pointed straight down the trail. Lock it up. True four wheel drive away. You go
with the adjuster lock removed and the carrier bearing caps unbolted.
The carrier is removed from the house
loosen the flange nut to remove the pinion.
Tap out both bearing races with a brass drift
and now you have an empty house
with the chims under the bearing race. You can install both front and rear races with a driver and a hammer.
Remove the bearing from the old pinon to get the master shim,
install it under the new bearing on the pinion
and installed a pin into the house.
The new ring gear is bolted to the A RB,
new side bearings installed
and put back into the third member.
This crush sleeve is what controls pin bearing preload in the Toyota differential. The more you tighten the flange nut, this sleeve will actually crush or physically get shorter. Now, this will control the preload or the pressure on the bearings. And if you get it too tight, this piece here is garbage. You can't un crush it. So you gotta take it back apart and replace it. If this is your first set of gears, you may want to get your vendor to send you a couple of these.
It's a one shot deal. Now, backlash or side to side movement is controlled by adjuster nuts. When you turn this one in and obviously the other side out, the whole ring gear will move to one side giving you more backlash, do the opposite and obviously it moves in and gets tighter.
Now, the A RB unit comes with a special adjuster nut to make room for the actual seal driver that drives the locker itself. And once this differential is all set up, we can tear into the rear axle
for the rear end. We're going to be using poly performance 4340 high strength Cro
Ales,
they're made with a constant taper instead of an aggressive neck down, which is where the stock a will have a tendency to break.
They're also designed with more deflection, which means that under stress and
a twist and then un instead of breaking.
So as soon as we get these
Ale shafts in and
go ahead and get it on some
Ws and tires.
Welcome back to Xtreme 4x4. Our FJ 60 has got some beefed up axles hanging on some custom suspension. And the last thing to deal with today,
tires and wheels
with everything mounted where it's actually gonna stay, we can go ahead and finish, weld everything in and add in some support braces here for our shock tube
stas
works is one of the few companies that can custom build a set of steel, double bead lock wheels. Now, they press a custom designed center section into a steel wheel blank and that allows them to set the back spacing at whatever you desire. Now, the double bead lock feature pinches both sides of the tire to hold it steady when you're aired down. And the coolest part is you can either choose from a vast array of their choice of designs or you can even have one custom designed for. You.
Use a ratchet strap to compress the insert and place it inside the tire,
make sure it's aligned,
then place both halves of the rim together
and bolt it up.
And for the meat, we chose these pit bull 37 by 13.5 inch rockers.
They have an aggressive, deep love for easy, clean out
and they have real side wall to help keep them puncture heat and cut.
It's looking pretty sick. What do you think? I like it. It looks good, but I think right now we have two more wheels to build. Do we have to? Of course, we have to
Mr workaholic.
Show Full Transcript
See this land cruiser destroyed, then transformed into one bad back half buggy. Plus they're a necessary evil competition judges see how these off road zebras keep their cool in the heat of battle.
Welcome to Xtreme 4x4. Today you guys are in for a wild ride. We're about to take the next step into turning this lumpy olds
and wagon of an FJ 60 into a true off road machine.
That's right. We've already made more room for bigger tires by doing a spring over on the front, but approaching by doing a shackle reversal
and proper line
goes by doing a cut.
Now, if we wanted to keep this wagon treatable, we'd simply do another spring over axle on the rear and be done with it. But we aren't. We want this thing to be hardcore off road. So this FJ 60 is about to become a back half buggy. We're gonna slice it right down the middle with a custom four length. Now, this has become very popular off road because these things were great.
Plus it's a lot easier than linking both
ends
and you get to keep the frame from about here forward. So don't have to worry about making any custom amount for any of your drive in the transmission steering
like you would have to do on like a two
B or whatever,
lot easier this way.
That's not going to be swap meet.
What's the expression do as I say? Not as I do
halt.
Ok, break time. Get a bucket out there.
Where's our budgets
when that happened in a truck?
Always be aware of your fuel line location that stinks
to have a guy named S nearby with an extinguisher just in case
you ready. Sid
the exhaust actually might hold us together, believe it or not.
Do me a favor. Jessi. Jump up and down on the back of the thing. You're gonna land on me.
It's stock right here. Hold on.
That kind of hurt me
at this point in a project like this. You have to do two things. First of all, you gotta call up all your friends and everyone, you know and have them go
and look at your truck because they're gonna think you're absolutely crazy. Second thing you gotta figure out what you need to save off the back half of your truck. In our case, all we're gonna save is this rear axle, so we gotta cut it off.
This whole rear frame section is going to be replaced with an entire tube structure so we can get better articulation on the rear axle. Now, of course, there will be a roll cage in the entire truck. But we need to start here with the main who
the nice thing about a tube buggy or in this case, a tube back half truck is you don't have to extend the vehicle's frame rails past the axle center line that gives us great departure angles and rear approach.
And the only thing you need back here is a tube to act as the upper shock mount. And with this tube in here, we can go ahead and set our wheel base and start planning our four link.
We could probably go up a couple of inches if we want.
It's called just one inch
with the wheelbase set at 100 and nine inches in the rear axel on jack stands. We can start to build some links for our fourth.
We went to evolution machine and fab and got these monster rod ends. These things are just flat out huge and they're strong. These things have never failed when they've tested these things on typical testing equipment. It just maxes out the machine. You cannot break this thing. So possibly they're gonna outlive the truck, we'll just take them out and use them in another project.
And the nice thing is is if they do start to wear out, they're fully rebuildable, just break the joint down and you just have to replace these two Teflon inner sleeves and then reassemble it and it's good as new. Now, we got obviously the jam nuts and the tubing adapters for our truck. And it takes a pretty specialized piece of tubing. It needs to have an inch and three quarter inch inside diameter. And the tubing adapter just slides right in place. Once we tap that in, we can start figuring out the L
with the
ace in place, we can begin our shock mounts and normally that would require is building a bunch of little tabs. But instead we called up the guys that blue torch fab
and they grabbed us a pile of these custom laser cut tabs and brackets
including these lower shock mounts.
The design for the four L
on this truck is going to be a pretty typical double triangulated four
length with two opposing vs.
The lower links will have the rod end on one end. But on the other end, we're going to use evolution machine and fabs sage joint. It's the same design as the rod end. It just doesn't the threaded shaft coming out of the end. So the lowers won't have a lot of adjustment. The uppers will go from the center to the axle out and have opposing threads, a right hand on one side and a left hand on the other. So when you twist that link, it changes the pin angle, all we got to do now is figure out how long the lower has to be
suspension requires a spring of some sort, whether it's a coil spring or coil over shock.
Now we went with the Rancho Rx 9000 coil overs Rancho packages, their shocks with the most popular spring rates available as one package deal.
Now, we went with the 12 inch 125 pound tender spring
and the 14 inch 250 pound main spring.
The nice thing about coil shocks aside from the gas charge body that is adjustable to change how the shock performs
the adjustable ride height on the threaded body. And the variable spring rates is they actually really easy to install
with the shock mount in the lower braking.
We can measure for the upper two.
The most popular design of four link and trail trucks is the double triangulated four link set up.
We will put the lower links into place as high on the actual tube as possible.
And then on to the bottom side of the frame,
the uppers are built at 70% of the lowers length mounting them on a truss from the top of the pumpkin provides vertical separation
mounted at a slightly higher angle than the lowers and with multiple attachment points at the frame to fine tune the suspension
up next inside the most thankless job in rock crawling. We'll hit the trail and go behind the scorecard with the judges of we rock. When Xtreme 4x4 continues
competitive rock crawling tests the mental toughness of the driver, the physicality of the spotter and of course the mechanical ability of the vehicle, how all three work together, determines the winner.
But here's where it gets complicated. You lose points for backing up on the course using a winch and then of course, hitting a cone, you got bonus lines and progression points and that's where it gets tough for the We Rock judges
put up more than $10,000 for the winner. And the Wheat Rock Grand National Finals brought up this country's best rock crawlers. This is a great event. This is the biggest. It's the Super bowl of all rock crawling. You got the top teams from both coasts
going at it for a big person
with the national title on the line. Even the judges were immune to this pressure cooker. Pressure is intense. It's a lot of pressure. Yeah, it is because these guys are running for a lot of money from a hit cone to using reverse. The sport of rock crawling is all about points.
I gotta have some good math skills. You got the spotter bonus. You didn't use a strap. So that was a negative five points negates that they had two backs, but they had three progress points
ended up negative one. The judging is the key to this.
If they had an extra backup or two to our points, that could be the difference between 1st and 2nd. We want them on their game, which means close calls can get ugly
as a judge. There's always going to be friction between the driver and the judge. Judging sometimes is, is thankless. They're in competition, they're going to be heated sometimes if they think a call didn't go their way.
I
don't believe we hit this cone going up. But that's what the judges say.
I let him
get up in my face, but in the end,
I've got final say and I know that these men and women face more than verbal abuse. The level of danger I think is pretty high. We do get scars. We get hurt out here just like anybody else does. You know, you've got to watch these drivers run their horse and it puts you in some positions where if you're not on your toes, you know, you can either get run over or flipped over on
very dangerous sport. I got this in Goldendale, Washington judging.
Ok?
Away from the course, judges and drivers can have a good laugh. You guys ready come race day is all business.
I drink beers with these guys. I have fun with these guys and I know a lot of them personally and I hang out with them outside of the competition setting. But for me, as soon as I put on that judge's shirt, all bets are off. Everybody is the same to me.
It's not that hard to separate. You know, our social,
social knowings here from the judging.
No, everybody's the same. Everybody out here is fair. We all treat their
when it comes to inside info, a judge's shirt won't stop the drivers from trying, you know, they all try to get information out of you. So they're all trying to, you know, what's the best way to go, you know? Can I go up here? What can I do? This? The hardest thing about judging is
you see the lines that they need to take on your course and you can't say anything.
I'm a wheeler. I like to go wheeling and I want to say no, go left, go right. You know, I want to help him but you have to, you have to remain neutral in this colossal event. A long call would not have been funny,
but these judges met the challenges thrown their way,
never can talk good about the judges and, and they, they have done an excellent job this week.
They're real good. They're real good. I haven't heard anyone complain about the judging so far. So it
must be doing.
There is a brotherhood of judges. We stick together, we go to all these events. You know, you'll see the same judges, you know, that, you know, you're familiar with these guys. It's a really good core group of judges. I do this because I love it and I love everybody here, everybody here's friends. This is my family, this is totally my family.
There's nothing that compares to being a judge. I mean, until you've done it and experienced it once I did it. I was hooked.
Welcome back to Extreme Four by Foreigner FJ 60 back half wagon. The front end has already been taken care of with a spring over and the rear end is hanging off of a custom double triangulated falling system and some Rancho coil over shock.
Now it's time to take care of the axles. I mean, the stuff inside the axles, the gears, the shafts, the lockers, things that are really going to help this truck perform off road. And the nice thing about the Toyota is it all comes out as an assembly and this third member. So when it comes time to change a ring or opinion or a locker can do it on a bench, relax, comfortable, not laying on your back trying to work in the dirt.
Now, on this truck, we're gonna install a set of Yukon gear 529 ring and Pinion super deep gear ratio to help with our crawling. We're gonna put that on a RB air lockers, front and rear selectable locker that uses compressed air to lock the two axle shafts together.
Now, you're probably asking yourself why do I need a selectable locker? Well, here's the main reason
you think of a truck driving down the trail. When you go to make a corner, your tires take two different trips around that corner. One takes a short distance and the outside one takes the long distance. So they travel at different speeds.
If this axle is locked, when you try to take the corner, the wheels pull the whole truck completely off line, it just basically gets off the trail. Worst case scenario, you might have to back up to get it pointed down the trail. If you have a selectable locker, you can just unlock that front axle when you're making that corner, make that super duper tight turn. Get pointed straight down the trail. Lock it up. True four wheel drive away. You go
with the adjuster lock removed and the carrier bearing caps unbolted.
The carrier is removed from the house
loosen the flange nut to remove the pinion.
Tap out both bearing races with a brass drift
and now you have an empty house
with the chims under the bearing race. You can install both front and rear races with a driver and a hammer.
Remove the bearing from the old pinon to get the master shim,
install it under the new bearing on the pinion
and installed a pin into the house.
The new ring gear is bolted to the A RB,
new side bearings installed
and put back into the third member.
This crush sleeve is what controls pin bearing preload in the Toyota differential. The more you tighten the flange nut, this sleeve will actually crush or physically get shorter. Now, this will control the preload or the pressure on the bearings. And if you get it too tight, this piece here is garbage. You can't un crush it. So you gotta take it back apart and replace it. If this is your first set of gears, you may want to get your vendor to send you a couple of these.
It's a one shot deal. Now, backlash or side to side movement is controlled by adjuster nuts. When you turn this one in and obviously the other side out, the whole ring gear will move to one side giving you more backlash, do the opposite and obviously it moves in and gets tighter.
Now, the A RB unit comes with a special adjuster nut to make room for the actual seal driver that drives the locker itself. And once this differential is all set up, we can tear into the rear axle
for the rear end. We're going to be using poly performance 4340 high strength Cro
Ales,
they're made with a constant taper instead of an aggressive neck down, which is where the stock a will have a tendency to break.
They're also designed with more deflection, which means that under stress and
a twist and then un instead of breaking.
So as soon as we get these
Ale shafts in and
go ahead and get it on some
Ws and tires.
Welcome back to Xtreme 4x4. Our FJ 60 has got some beefed up axles hanging on some custom suspension. And the last thing to deal with today,
tires and wheels
with everything mounted where it's actually gonna stay, we can go ahead and finish, weld everything in and add in some support braces here for our shock tube
stas
works is one of the few companies that can custom build a set of steel, double bead lock wheels. Now, they press a custom designed center section into a steel wheel blank and that allows them to set the back spacing at whatever you desire. Now, the double bead lock feature pinches both sides of the tire to hold it steady when you're aired down. And the coolest part is you can either choose from a vast array of their choice of designs or you can even have one custom designed for. You.
Use a ratchet strap to compress the insert and place it inside the tire,
make sure it's aligned,
then place both halves of the rim together
and bolt it up.
And for the meat, we chose these pit bull 37 by 13.5 inch rockers.
They have an aggressive, deep love for easy, clean out
and they have real side wall to help keep them puncture heat and cut.
It's looking pretty sick. What do you think? I like it. It looks good, but I think right now we have two more wheels to build. Do we have to? Of course, we have to
Mr workaholic.
