Music City Trucks Featured Projects
Music City Trucks Builds
Want more content like this?
Join the PowerNation Email NewsletterEpisode Transcript
(Marc)>> You're watching Powernation!
(Eric)>> Today on Music City Trucks our '93 W-350 that we've christened as Project Nightshift is getting torn down and taken to the next level.
(Joel)>> It's all about stance, style, and stopping power as we show you guys how to put a little bit more whoa in your go. All that and more happening today on Music City Trucks. [ Music ] Nothing cooler than an old pickup, am I right? [ Music ]
(Eric)>> Underneath all this dirt there's probably a pretty good truck.
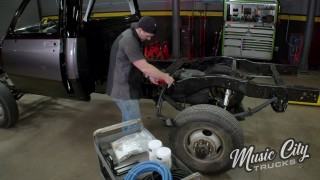
(Joel)>> We've got our Ram W-350, a-k-a Project Nightshift, up on the lift for a little bit of an attitude adjustment. We're swapping out the entire suspension system for a brand new lift kit, but before any of that happens we've got to roll these old axles out of our way. [ ratchet clicking ]
(Joel)>> Eric give me a steady baseline. [ drill humming ] [ Music ]
(Eric)>> We're gonna have to start making some plans here.
(Joel)>> Plan-C I guess.
(Eric)>> Plan "C" for Cummins?
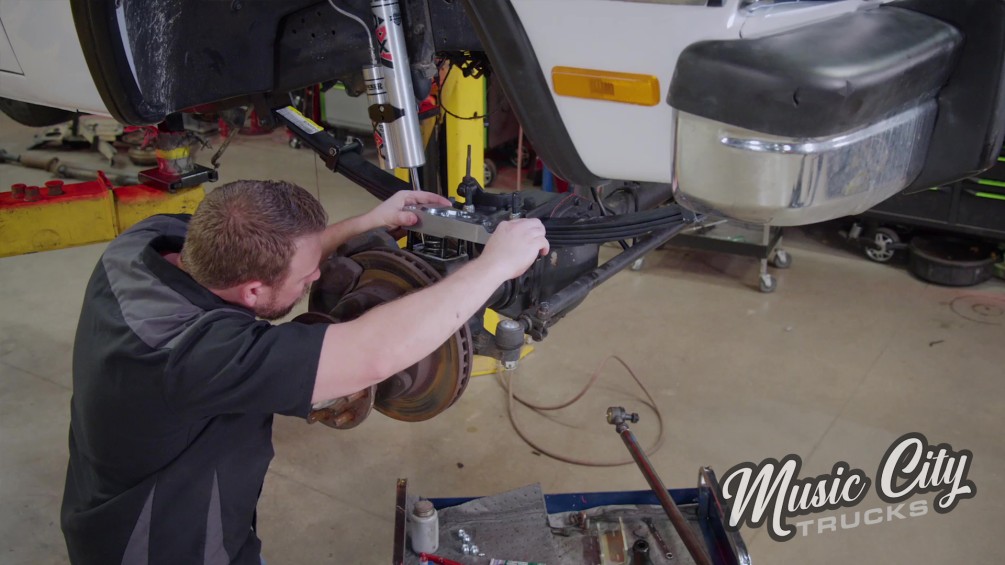
(Joel)>> That's Plan-H. With our old axles out of the way we're ready to install our new leaf springs. I've got Eric over there already installing the driver's side while I'm gonna walk you guys through the passenger side. For the most part we are swapping out the entire system but you guys don't have to get that crazy if you don't want to. One thing you can do is go ahead and swap out your factory risers for a set that is an inch or two taller. However that can come with its own set of complications. For one you're gonna be stiffening up that rear axle, and the suspension travel is just not gonna be there. So it's gonna make for one heck of a bumpy ride. To prevent that from happening to us one upgrade we're making is swapping out the factory leaf springs for this nice, curvaceous set. That's gonna do a couple of things. One, it's gonna drop that rear axle and raise the frame up to give us a nice aggressive stance as well as a much smoother ride. First things first, we've got to swap out these bushings. Now pressing in a new set of leaf spring bushings is a fairly easy and straightforward process, but it's also one of those things that it's easy to do but also easy to screw up. Main thing you don't want to do is accidentally cut the bushings or pre-crush your sleeves. Just like most things in life lubrication is key. All I'm using here is just a little bit of white lithium grease. It just kinda helps everything slide together. Then we'll go ahead and do our sleeve. We got her started there. So we'll go ahead and seat it the rest of the way with our C-clamp. If at any point you feel any extra resistance or something just doesn't feel right as you're pressing this in just go ahead and back it off and double check, make sure everything's going in correctly. Not uncommon to sometimes have to start these with a rubber mallet. [ Music ] With our shackles in place we're ready to stab in our leaf springs. This may take a little bit of mild persuasion. Now I'm using this C-clamp to kinda compress the leaf springs. What that's gonna do is bow them out so that it makes it easier to jam the front part of it up into the bolt hole.
(Eric)>> With those leaf springs finished up it's time to get our new shocks installed. These aren't just any old shocks as you can see. There's a lot of benefits to remote reservoir shocks like these ones that came with our lift kit that we got from Summit Racing. The biggest benefit is having a higher fluid capacity due to the fact that there is a separate reservoir. What that's gonna do for us is keep that fluid cooler, lead to a longer shock life, and less shock fade if we ever do end up off road. We want to make sure that this truck is as dual purpose as possible just in case we do feel like taking it off road a little bit. We're just gonna leave it hand tight for right. That way we've got some room to move around. Let's grab that axle. Looks a lot better after you gave it a bath.
(Joel)>> FYI there are a couple of leaks we'll need to fix a little later.
(Eric)>> We can take care of that after we get it back on the truck. Make sure the shocks stay out of the way. Keep going, right there! [ Music ]
(Joel)>> That looks actually pretty cool. Put the back bumper about right there. I dig it!
(Eric)>> Especially once we get the front done.
(Joel)>> She's gonna be mean! Joel you must have better knees than I do sitting down there like that.
(Joel)>> No, they're just so shot that I lost all feeling in them permanently.
(Eric)>> Tight fit.
(Joel)>> If it was easy everybody'd do it. [ drill humming ]
(Eric)>> I don't come to work to get dirty. What is this! Come on baby! [ Music ] I'm not doing this by hand. Don't try me. Get out of here. [ drill vibrating ]
(Eric)>> That's really the biggest downside to using Nylock nuts is you can't actually run stuff all the way down before you tighten it.
(Joel)>> It's almost like they don't want you to do that.
(Eric)>> Coming up, we shoot you straight on how to swap out your steering box. Turn it and count the revolutions as you get to the opposite side.
(Joel)>> Guys I think it's safe to say we've done right by old Project Nightshift by giving it quite an attitude adjustment and slapping on that lift kit. Now that we've addressed its stance time to see what we can do about improving its drivability.
(Eric)>> As far as drivability goes an old workhorse like this is always gonna have a ton of room for improvement, and the first thing we're gonna be improving on is the steering. That's something that a lot of people don't really think about but it can make a huge difference in your driving experience. The first upgrade we're gonna make to our steering system is gonna be to replace our gearbox with one that has a higher ratio. The one that's in here from the factory has a ratio of 15 to 1, meaning that for every 15 degrees you turn your steering wheel your front tires are gonna turn one degree. The one that we're installing has a 12.7 to 1 ratio, which means that the steering is gonna be a lot more responsive. Before we can install that I've got to get this old one out of the way. Cause I know there's probably gonna be some leakage out of here. This is gonna be so much fun. At least this thing's not too heavy. There we go! [ Music ]
(Joel)>> With our steering box out of the way now's a good chance for us to go ahead and inspect our frame. Over time your steering box gets exposed to a lot of pressure. There for can cause a few stress cracks here and there. You guys at home with Chevy C-10s know exactly what I'm talking about. Initial inspection on our frame looks like we've got some minor surface rust but still solid. There's a few scratches here as well, but from what I can tell this thing's in great shape. So we're good to move on to the next step.
(Eric)>> Our next step before we actually get this steering box installed is to make sure that it's centered. Now wherever you get your steering boxes from they can tell you all day that they're centered when they show up but you should always verify just to be sure. Now centering a steering box is a pretty simple process. I've got a mark here on the input shaft, or you can pick a fixed point on the steering shaft itself that you can monitor as you turn this box. Since this set screw's at the top we're gonna use that as our point to watch for how many turns we're making. What you're gonna do once it's maxed out to one side go ahead and just turn it and count the revolutions as you get to the opposite side. Two, and three. So we've got three turns from lock to lock inside of the steering box, which means that we need to go one and a half turns to have it centered. Just give it one and a half. Now that we know our steering box is centered we can go ahead and get our pitman arm put on. This part is pretty straightforward. I'm just gonna give it a couple of taps to seat it a little bit. [ Music ] Very careful not to hit your threads. Just like with anything else like this gonna make sure it goes on evenly. We're not fully installing this quite yet. We're gonna come back and torque it after we get it installed in the truck. This is just to make sure we don't have to worry about it falling off of here. We're actually gonna remove our steering shaft. That way we're not fighting with it as we try to put the box itself back into the truck. Now we're gonna pull the bracket off the old one, get it put on here, and get this thing bolted in. This is always the most fun part. Now that we've got our steering box installed it's time to get the shaft installed. Now we've already loosened up the set screws so we can get this slipped on. You just want to make sure when you're slipping the U-joint on that your set screw ends up on the flat spot of the input shaft on the steering box. Joel went ahead and put some tape on the steering wheel so I can see from out here where it sits center. That way we can make sure that everything is lined up. With that set screw in place all we've got left up here is just to tighten up the lock nut there and then we can move on to our sway bar. Why do I always get the tight spots?
(Joel)>> Up next, we'll show you how to cross over to the other side and stabilize this one ton ride.
(Joel)>> When you're installing a lift kit on your rig your selection of your swap bar definitely gonna be a factor, especially on how you're gonna tie into your steering linkage. One thing you can do is take a set of drop brackets and install them right onto your factory sway bar. That's gonna drop it down a couple of inches so you can tie into your links. Then from there you can take an adjustable drag link and tie into your steering knuckle, and then into your pitman arm. What we're gonna be installing is a crossover steering kit that we got from the guys at Offroad Design. There are many benefits to going this route. For one it significantly cuts down on the geometry needed to just simply steer the vehicle, especially in comparison to that push/pull technique that the factory used. However going this route means we have to eliminate the factory sway bar, and there are kits out there that allow you to use a crossover style sway bar if you want to go that route, but since we're installing a set of steering stabilizers a little later on it's just not gonna be necessary. Let's get this thing out of here. [ Music ] The next step is to bust the cap off of our knuckle so that we can install our new steering arm. Before you go to install your new steering arm you want to make sure that both surfaces are perfectly clean. Now since these are machined surfaces Off Road Design recommends that you use a little bit of r-t-v on the outside edges. With our r-t-v on we're gonna go ahead and install our studs. Each side of these studs have a long side and a short side. Short side goes down with some thread locker. Next step is to go ahead and drop in our kingpin spring. Since our factory one is still in good shape we'll just go ahead and use the old one. I'm just gonna tighten these nuts down in a star pattern. That's gonna evenly compress that spring all the way down to the bottom. With our steering arm seated we're good to torque these down to 110 pound feet. The next piece of the puzzle is our center link, which we need to attach to the steering knuckle on the passenger's side and then also over to the pitman arm on the driver's side. Now before you cinch down your tie rod ends you want to make sure you've got about the equal amount of threads showing on each side. On this side we're sitting at about an inch and three-sixteenths, inch and three-sixteenths on that so. So we're good to go. For right now this center link is by no stretch set in stone. We're just trying to get it set as straight as possible so we can test the throw of our steering wheel. We will definitely have to come back and do an alignment later. [ ratchet clicking ]
(Joel)>> That should work for right there. We're gonna wait to put our cotter pins in just in case we need to make a few more adjustments. Ready for our first test run on our steering linkage. Our steering wheel is centered, front hubs are straight. Let's check our revolutions. One and a half, two, three. A half, back to straight. Good to go! Last thing we're gonna be installing is a set of steering stabilizers on our front axle. Any of you guys at home that have ever driven a big, heavy truck like this know that going across a set of railroad tracks or a speed bump can be really jarring. What a steering stabilizer is designed to do is absorb a lot of that impact using these little compression springs. Putting one of these kits in is really easy, and it can really make a difference to your driving experience. We'll keep our mounting bracket a little bit loose right now until we get everything finalized. Each of these shock mounts have a little rubber bushing that just slides over a little sleeve. Easy with just a little bit of petroleum jelly. These little bushings usually do pop right into place but every once in a while you've got to use a hydraulic press or even a vice. [ Music ]
The next thing we're gonna measure is our compression of our shocks. This kit recommends that we go four and a half inches. I think we're good on that side. Need to go out a little bit on this side. Yep, that'll do it.
(Eric)>> Coming up, we break down how you can break up with your old dually drums.
(Joel)>> Alright big guy, I got the front end buttoned up. Looks like we got some fancy new toys.
(Eric)>> We've basically built a freight train between the lift kit and all the extra power we're squeezing out of that engine. So the next logical step is to make sure we can stop this.
(Joel)>> I'll tackle the passenger side if you want to get the driver. Swapping out your drum brakes for a set of discs is a really popular subject. Not even just amongst truck guys but auto enthusiasts in general. When you consider all the benefits of increased stopping power, serviceability, you can kinda see why.
(Eric)>> If you've ever had to deal with drum brakes before, especially an older set of drum brakes that hasn't been touched in a while. [ drill humming loudly ] You know how much of a pain they can be dealing with all the springs and stuff. Disc brakes eliminate all of that. Turn what could take hours into something that takes minutes.
(Joel)>> Need, a really, really, really big sockets.
(Eric)>> Gonna end up burning through all these shop towels while we do this.
(Joel)>> They come out of your check.
(Eric)>> You definitely smell that this hasn't been serviced in a while. I'm here for you Joel. I guess I could have left the brake on there since we're pulling the whole thing.
(Joel)>> The next step in our rear disc brake conversion is to put together our hub and rotor assembly. Now the guys at EGR specifically designed this thing so that you can use the factory style hub. The next step we have to do is actually put this wheel spacer on, and it just mounts right over the hub assembly, and then you just put in your brand new wheel studs. I like to put on a little bit of anti-seize just so they slide in a little bit easier. Most of the time you have to use a hydraulic press to put these in, but in all honesty if you've got a brass pin and a hammer they go in just like that as well. It'll probably take you several rounds of doing this but once you've got that nice solid metal on metal contact as well as even threads on all your lug studs and your wheel spacer doesn't have any play in it we're good to put this on the rotor. On the back side of your rotor you've got your eight studs sticking up from your wheel spacers, and with the kit it also included new flat washers and new nylon nuts. Go ahead and put all these down, cinch them up, and then they'll all get torqued in a star pattern to 100 pound feet.
(Eric)>> Now we're ready to start getting our caliper brackets installed, starting with this adapter plate that's gonna bolt in place of the backing plate from our old drum brakes. We're gonna start with some of this nice, new hardware that came with the kit. Get these T-bolts put in. Now that we've got that adapter plate on there we're ready to put the actual caliper bracket on. Now this particular kit came with four spacers. Depending on which calipers you're using you may need more or less spacers. That's really gonna come down to what you're using. The actual caliper bracket goes on the back side of all these spacers. [ ratchet clicking ]
(Eric)>> Now that we've got all that snugged up we're gonna go ahead and torque that down and then we're ready for our hub assemblies.
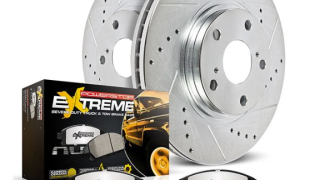
(Joel)>> Now we couldn't go through all that work of completely refurbishing our entire rear brake assembly without also addressing the fronts. When the guys at Powerstop found out we were building this big ole colossus of a Cummins they were eager to jump on the project and they sent us a brand new set of their Z-36 carbon fiber ceramic coated pads as well as a brand spanking new rotor. Even though these rotors are o-e replacements they are an upgrade. They're made from more durable steel. So they're gonna last much longer. Plus you can use your factory style wheel bearings and seals. With our bearings and a lock in place we're ready to move on to our pads. Powerstop recommends that you use a little bit of their grease on the back side of your pads to cut down on any friction. I know it seems a little counterintuitive to add some grease on your brake pads but this is actually gonna cut down on noise and road vibrations, and at the end of the day your pads actually have a little bit of play in them. So this is gonna allow for a little bit more free movement. On these old Rams they've got a little bit of a shoulder on the bottom and top side of the spindle. That allows your back side pad to sit in there nice and evenly up on your rotor. Next up is our caliper and our other pad. Now we got our caliper in place and these have a little bit of a locking tab that sit in between the spindle and the back side of the caliper. They're kinda tricky to get in there but if you lift up the back side of your caliper you kinda just slide it in there. Any time you're doing your brakes, whether it's the calipers, pads, rotors, doesn't matter, always inspect your brake lines. Ours turned out to be a little dry rotted. So we decided to go ahead and swap them out. Alright, all we've got to do now is get the other side on, bleed the system, install our lockers, good to go. Well buddy it's been a busy couple of days but got a lot of stuff done.
(Eric)>> Lift kit, steering stabilizers all taken care of, brakes all the way around. I mean it's shaping up to be a pretty nice truck.
(Joel)>> Better get ourselves cleaned up though. Don't want any grease on us for what's coming next.
(Eric)>> Cold one o'clock?
(Joel)>> Not exactly but you are about to get really familiar with a sanding block.
Show Full Transcript
(Eric)>> Today on Music City Trucks our '93 W-350 that we've christened as Project Nightshift is getting torn down and taken to the next level.
(Joel)>> It's all about stance, style, and stopping power as we show you guys how to put a little bit more whoa in your go. All that and more happening today on Music City Trucks. [ Music ] Nothing cooler than an old pickup, am I right? [ Music ]
(Eric)>> Underneath all this dirt there's probably a pretty good truck.
(Joel)>> We've got our Ram W-350, a-k-a Project Nightshift, up on the lift for a little bit of an attitude adjustment. We're swapping out the entire suspension system for a brand new lift kit, but before any of that happens we've got to roll these old axles out of our way. [ ratchet clicking ]
(Joel)>> Eric give me a steady baseline. [ drill humming ] [ Music ]
(Eric)>> We're gonna have to start making some plans here.
(Joel)>> Plan-C I guess.
(Eric)>> Plan "C" for Cummins?
(Joel)>> That's Plan-H. With our old axles out of the way we're ready to install our new leaf springs. I've got Eric over there already installing the driver's side while I'm gonna walk you guys through the passenger side. For the most part we are swapping out the entire system but you guys don't have to get that crazy if you don't want to. One thing you can do is go ahead and swap out your factory risers for a set that is an inch or two taller. However that can come with its own set of complications. For one you're gonna be stiffening up that rear axle, and the suspension travel is just not gonna be there. So it's gonna make for one heck of a bumpy ride. To prevent that from happening to us one upgrade we're making is swapping out the factory leaf springs for this nice, curvaceous set. That's gonna do a couple of things. One, it's gonna drop that rear axle and raise the frame up to give us a nice aggressive stance as well as a much smoother ride. First things first, we've got to swap out these bushings. Now pressing in a new set of leaf spring bushings is a fairly easy and straightforward process, but it's also one of those things that it's easy to do but also easy to screw up. Main thing you don't want to do is accidentally cut the bushings or pre-crush your sleeves. Just like most things in life lubrication is key. All I'm using here is just a little bit of white lithium grease. It just kinda helps everything slide together. Then we'll go ahead and do our sleeve. We got her started there. So we'll go ahead and seat it the rest of the way with our C-clamp. If at any point you feel any extra resistance or something just doesn't feel right as you're pressing this in just go ahead and back it off and double check, make sure everything's going in correctly. Not uncommon to sometimes have to start these with a rubber mallet. [ Music ] With our shackles in place we're ready to stab in our leaf springs. This may take a little bit of mild persuasion. Now I'm using this C-clamp to kinda compress the leaf springs. What that's gonna do is bow them out so that it makes it easier to jam the front part of it up into the bolt hole.
(Eric)>> With those leaf springs finished up it's time to get our new shocks installed. These aren't just any old shocks as you can see. There's a lot of benefits to remote reservoir shocks like these ones that came with our lift kit that we got from Summit Racing. The biggest benefit is having a higher fluid capacity due to the fact that there is a separate reservoir. What that's gonna do for us is keep that fluid cooler, lead to a longer shock life, and less shock fade if we ever do end up off road. We want to make sure that this truck is as dual purpose as possible just in case we do feel like taking it off road a little bit. We're just gonna leave it hand tight for right. That way we've got some room to move around. Let's grab that axle. Looks a lot better after you gave it a bath.
(Joel)>> FYI there are a couple of leaks we'll need to fix a little later.
(Eric)>> We can take care of that after we get it back on the truck. Make sure the shocks stay out of the way. Keep going, right there! [ Music ]
(Joel)>> That looks actually pretty cool. Put the back bumper about right there. I dig it!
(Eric)>> Especially once we get the front done.
(Joel)>> She's gonna be mean! Joel you must have better knees than I do sitting down there like that.
(Joel)>> No, they're just so shot that I lost all feeling in them permanently.
(Eric)>> Tight fit.
(Joel)>> If it was easy everybody'd do it. [ drill humming ]
(Eric)>> I don't come to work to get dirty. What is this! Come on baby! [ Music ] I'm not doing this by hand. Don't try me. Get out of here. [ drill vibrating ]
(Eric)>> That's really the biggest downside to using Nylock nuts is you can't actually run stuff all the way down before you tighten it.
(Joel)>> It's almost like they don't want you to do that.
(Eric)>> Coming up, we shoot you straight on how to swap out your steering box. Turn it and count the revolutions as you get to the opposite side.
(Joel)>> Guys I think it's safe to say we've done right by old Project Nightshift by giving it quite an attitude adjustment and slapping on that lift kit. Now that we've addressed its stance time to see what we can do about improving its drivability.
(Eric)>> As far as drivability goes an old workhorse like this is always gonna have a ton of room for improvement, and the first thing we're gonna be improving on is the steering. That's something that a lot of people don't really think about but it can make a huge difference in your driving experience. The first upgrade we're gonna make to our steering system is gonna be to replace our gearbox with one that has a higher ratio. The one that's in here from the factory has a ratio of 15 to 1, meaning that for every 15 degrees you turn your steering wheel your front tires are gonna turn one degree. The one that we're installing has a 12.7 to 1 ratio, which means that the steering is gonna be a lot more responsive. Before we can install that I've got to get this old one out of the way. Cause I know there's probably gonna be some leakage out of here. This is gonna be so much fun. At least this thing's not too heavy. There we go! [ Music ]
(Joel)>> With our steering box out of the way now's a good chance for us to go ahead and inspect our frame. Over time your steering box gets exposed to a lot of pressure. There for can cause a few stress cracks here and there. You guys at home with Chevy C-10s know exactly what I'm talking about. Initial inspection on our frame looks like we've got some minor surface rust but still solid. There's a few scratches here as well, but from what I can tell this thing's in great shape. So we're good to move on to the next step.
(Eric)>> Our next step before we actually get this steering box installed is to make sure that it's centered. Now wherever you get your steering boxes from they can tell you all day that they're centered when they show up but you should always verify just to be sure. Now centering a steering box is a pretty simple process. I've got a mark here on the input shaft, or you can pick a fixed point on the steering shaft itself that you can monitor as you turn this box. Since this set screw's at the top we're gonna use that as our point to watch for how many turns we're making. What you're gonna do once it's maxed out to one side go ahead and just turn it and count the revolutions as you get to the opposite side. Two, and three. So we've got three turns from lock to lock inside of the steering box, which means that we need to go one and a half turns to have it centered. Just give it one and a half. Now that we know our steering box is centered we can go ahead and get our pitman arm put on. This part is pretty straightforward. I'm just gonna give it a couple of taps to seat it a little bit. [ Music ] Very careful not to hit your threads. Just like with anything else like this gonna make sure it goes on evenly. We're not fully installing this quite yet. We're gonna come back and torque it after we get it installed in the truck. This is just to make sure we don't have to worry about it falling off of here. We're actually gonna remove our steering shaft. That way we're not fighting with it as we try to put the box itself back into the truck. Now we're gonna pull the bracket off the old one, get it put on here, and get this thing bolted in. This is always the most fun part. Now that we've got our steering box installed it's time to get the shaft installed. Now we've already loosened up the set screws so we can get this slipped on. You just want to make sure when you're slipping the U-joint on that your set screw ends up on the flat spot of the input shaft on the steering box. Joel went ahead and put some tape on the steering wheel so I can see from out here where it sits center. That way we can make sure that everything is lined up. With that set screw in place all we've got left up here is just to tighten up the lock nut there and then we can move on to our sway bar. Why do I always get the tight spots?
(Joel)>> Up next, we'll show you how to cross over to the other side and stabilize this one ton ride.
(Joel)>> When you're installing a lift kit on your rig your selection of your swap bar definitely gonna be a factor, especially on how you're gonna tie into your steering linkage. One thing you can do is take a set of drop brackets and install them right onto your factory sway bar. That's gonna drop it down a couple of inches so you can tie into your links. Then from there you can take an adjustable drag link and tie into your steering knuckle, and then into your pitman arm. What we're gonna be installing is a crossover steering kit that we got from the guys at Offroad Design. There are many benefits to going this route. For one it significantly cuts down on the geometry needed to just simply steer the vehicle, especially in comparison to that push/pull technique that the factory used. However going this route means we have to eliminate the factory sway bar, and there are kits out there that allow you to use a crossover style sway bar if you want to go that route, but since we're installing a set of steering stabilizers a little later on it's just not gonna be necessary. Let's get this thing out of here. [ Music ] The next step is to bust the cap off of our knuckle so that we can install our new steering arm. Before you go to install your new steering arm you want to make sure that both surfaces are perfectly clean. Now since these are machined surfaces Off Road Design recommends that you use a little bit of r-t-v on the outside edges. With our r-t-v on we're gonna go ahead and install our studs. Each side of these studs have a long side and a short side. Short side goes down with some thread locker. Next step is to go ahead and drop in our kingpin spring. Since our factory one is still in good shape we'll just go ahead and use the old one. I'm just gonna tighten these nuts down in a star pattern. That's gonna evenly compress that spring all the way down to the bottom. With our steering arm seated we're good to torque these down to 110 pound feet. The next piece of the puzzle is our center link, which we need to attach to the steering knuckle on the passenger's side and then also over to the pitman arm on the driver's side. Now before you cinch down your tie rod ends you want to make sure you've got about the equal amount of threads showing on each side. On this side we're sitting at about an inch and three-sixteenths, inch and three-sixteenths on that so. So we're good to go. For right now this center link is by no stretch set in stone. We're just trying to get it set as straight as possible so we can test the throw of our steering wheel. We will definitely have to come back and do an alignment later. [ ratchet clicking ]
(Joel)>> That should work for right there. We're gonna wait to put our cotter pins in just in case we need to make a few more adjustments. Ready for our first test run on our steering linkage. Our steering wheel is centered, front hubs are straight. Let's check our revolutions. One and a half, two, three. A half, back to straight. Good to go! Last thing we're gonna be installing is a set of steering stabilizers on our front axle. Any of you guys at home that have ever driven a big, heavy truck like this know that going across a set of railroad tracks or a speed bump can be really jarring. What a steering stabilizer is designed to do is absorb a lot of that impact using these little compression springs. Putting one of these kits in is really easy, and it can really make a difference to your driving experience. We'll keep our mounting bracket a little bit loose right now until we get everything finalized. Each of these shock mounts have a little rubber bushing that just slides over a little sleeve. Easy with just a little bit of petroleum jelly. These little bushings usually do pop right into place but every once in a while you've got to use a hydraulic press or even a vice. [ Music ]
The next thing we're gonna measure is our compression of our shocks. This kit recommends that we go four and a half inches. I think we're good on that side. Need to go out a little bit on this side. Yep, that'll do it.
(Eric)>> Coming up, we break down how you can break up with your old dually drums.
(Joel)>> Alright big guy, I got the front end buttoned up. Looks like we got some fancy new toys.
(Eric)>> We've basically built a freight train between the lift kit and all the extra power we're squeezing out of that engine. So the next logical step is to make sure we can stop this.
(Joel)>> I'll tackle the passenger side if you want to get the driver. Swapping out your drum brakes for a set of discs is a really popular subject. Not even just amongst truck guys but auto enthusiasts in general. When you consider all the benefits of increased stopping power, serviceability, you can kinda see why.
(Eric)>> If you've ever had to deal with drum brakes before, especially an older set of drum brakes that hasn't been touched in a while. [ drill humming loudly ] You know how much of a pain they can be dealing with all the springs and stuff. Disc brakes eliminate all of that. Turn what could take hours into something that takes minutes.
(Joel)>> Need, a really, really, really big sockets.
(Eric)>> Gonna end up burning through all these shop towels while we do this.
(Joel)>> They come out of your check.
(Eric)>> You definitely smell that this hasn't been serviced in a while. I'm here for you Joel. I guess I could have left the brake on there since we're pulling the whole thing.
(Joel)>> The next step in our rear disc brake conversion is to put together our hub and rotor assembly. Now the guys at EGR specifically designed this thing so that you can use the factory style hub. The next step we have to do is actually put this wheel spacer on, and it just mounts right over the hub assembly, and then you just put in your brand new wheel studs. I like to put on a little bit of anti-seize just so they slide in a little bit easier. Most of the time you have to use a hydraulic press to put these in, but in all honesty if you've got a brass pin and a hammer they go in just like that as well. It'll probably take you several rounds of doing this but once you've got that nice solid metal on metal contact as well as even threads on all your lug studs and your wheel spacer doesn't have any play in it we're good to put this on the rotor. On the back side of your rotor you've got your eight studs sticking up from your wheel spacers, and with the kit it also included new flat washers and new nylon nuts. Go ahead and put all these down, cinch them up, and then they'll all get torqued in a star pattern to 100 pound feet.
(Eric)>> Now we're ready to start getting our caliper brackets installed, starting with this adapter plate that's gonna bolt in place of the backing plate from our old drum brakes. We're gonna start with some of this nice, new hardware that came with the kit. Get these T-bolts put in. Now that we've got that adapter plate on there we're ready to put the actual caliper bracket on. Now this particular kit came with four spacers. Depending on which calipers you're using you may need more or less spacers. That's really gonna come down to what you're using. The actual caliper bracket goes on the back side of all these spacers. [ ratchet clicking ]
(Eric)>> Now that we've got all that snugged up we're gonna go ahead and torque that down and then we're ready for our hub assemblies.
(Joel)>> Now we couldn't go through all that work of completely refurbishing our entire rear brake assembly without also addressing the fronts. When the guys at Powerstop found out we were building this big ole colossus of a Cummins they were eager to jump on the project and they sent us a brand new set of their Z-36 carbon fiber ceramic coated pads as well as a brand spanking new rotor. Even though these rotors are o-e replacements they are an upgrade. They're made from more durable steel. So they're gonna last much longer. Plus you can use your factory style wheel bearings and seals. With our bearings and a lock in place we're ready to move on to our pads. Powerstop recommends that you use a little bit of their grease on the back side of your pads to cut down on any friction. I know it seems a little counterintuitive to add some grease on your brake pads but this is actually gonna cut down on noise and road vibrations, and at the end of the day your pads actually have a little bit of play in them. So this is gonna allow for a little bit more free movement. On these old Rams they've got a little bit of a shoulder on the bottom and top side of the spindle. That allows your back side pad to sit in there nice and evenly up on your rotor. Next up is our caliper and our other pad. Now we got our caliper in place and these have a little bit of a locking tab that sit in between the spindle and the back side of the caliper. They're kinda tricky to get in there but if you lift up the back side of your caliper you kinda just slide it in there. Any time you're doing your brakes, whether it's the calipers, pads, rotors, doesn't matter, always inspect your brake lines. Ours turned out to be a little dry rotted. So we decided to go ahead and swap them out. Alright, all we've got to do now is get the other side on, bleed the system, install our lockers, good to go. Well buddy it's been a busy couple of days but got a lot of stuff done.
(Eric)>> Lift kit, steering stabilizers all taken care of, brakes all the way around. I mean it's shaping up to be a pretty nice truck.
(Joel)>> Better get ourselves cleaned up though. Don't want any grease on us for what's coming next.
(Eric)>> Cold one o'clock?
(Joel)>> Not exactly but you are about to get really familiar with a sanding block.
