Music City Trucks Featured Projects
Music City Trucks Builds
Want more content like this?
Join the PowerNation Email NewsletterParts Used In This Episode
BDS Suspension
BDS Suspension Lift Kit
METHOD RACE WHEELS
Method Race Wheels 701 Matte Black
Episode Transcript
(Marc)>> You're watching Powernation!
(Eric)>> Today on Music City Trucks we're back on our Ram 1500 project and we take it up a notch with a full suspension and brake upgrade. Plus, we throw some new rubber on it... [ engine revving ]
(Eric)>> ...and take it off road. Stay in it, stay in it, stay in it! [ Music ]
(Marc)>> This has got to be the most iconic design. [ Music ]
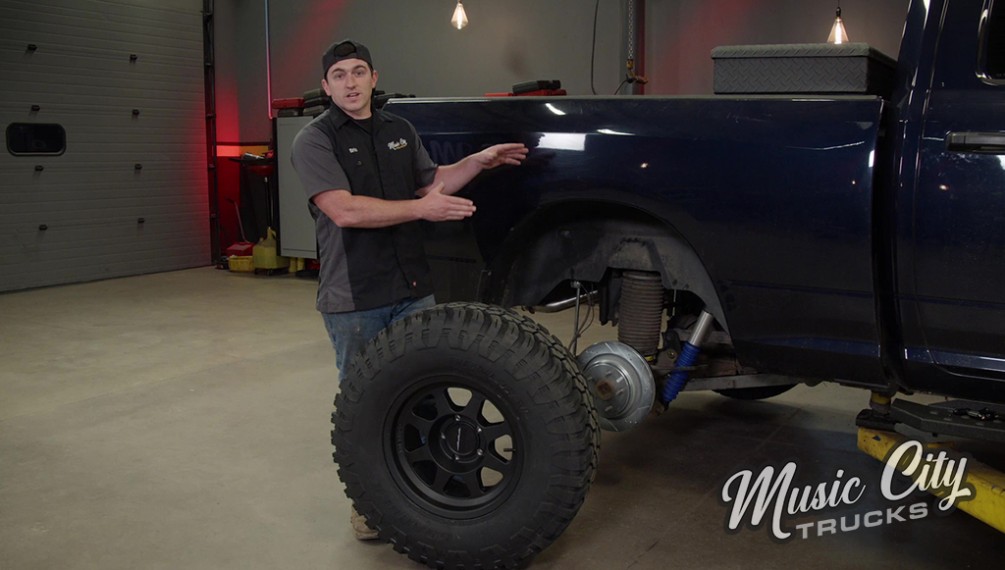
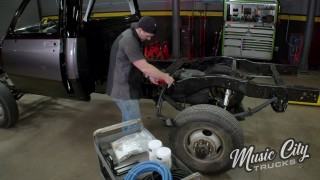
(Eric)>> Welcome to Music City Trucks. I'm Eric Smart, and we're back with our 2013 Ram 1500. The last time you saw this truck we took it next door for a dyno run and we took it out on the road to really test it out, and we found out we've got a very solid truck here. So, we did a bunch of maintenance under the hood and a bunch of cosmetic work so that it looks good and it's gonna stay reliable, but that doesn't make a build. So today we're gonna be getting started with a fresh exhaust system so that the sound matches the look, some new wheels and tires, some fresh suspension parts so that we don't break anything, a lift kit to really bring it to the next level, some upgraded brakes so that we can actually stop this thing, and a little treat from our friends over at Holley that's gonna help us pump our dyno numbers up. So, let's get that lift kit put on. Before we actually install this lift kit I want to show you why we chose what we did. This truck came factory with air ride suspension, which means it's got bags here on the rear axle and two more in the front where the shocks would be on a non-air ride truck. So, we decided that we wanted to maintain that system rather than delete it because we want good ride quality and we like being able to adjust the ride height whenever we want. So, I'm gonna show you what we picked. What you see on the table here is a BDS four inch high clearance suspension system for 2013 to 2015 Ram 1500s with factory air ride. Now this is gonna give us four inches of lift while maintaining all the functionality of our factory air system. This kit is all inclusive. It's got everything you need to get your lift put on and get right back on the road. You can clear up to 35 by 12.50 tires and these high clearance cross members are gonna make sure you don't have to worry about anything underneath you when you're off road. So, without further ado let's get it installed. The most important part of installing a lift kit is to follow the manufacturer's instructions that come with it. Before we tear it down any further... Put a line stopper on here and keep that from leaking all over the place. ...we'll install the extended brake line that we got from BDS. Get this brake line connected to this new hose, hopefully without making too big of a mess. [ ratchet clicking ] [ drill humming ]
(Eric)>> With the brake line installed, we can finish tearing down the front suspension. Some of the parts take a little persuasion. Let's get this air bag disconnected. [ Music ] [ compressed air hissing ]
(Eric)>> Let that bleed out of there. [ compressed air hissing ] [ ratchet clicking ] [ hammer banging ] [ Music ] [ hammer banging ]
(Eric)>> The driveshaft is next... At least it's not rust. [ Music ]
(Eric)>> ...followed by the rear crossmember and front differential. [ metal clanging ]
(Eric)>> First I'll unplug the harness. Leave these in just a little bit until we get our jack under there. Then remove the differential. [ Music ] [ ratchet clicking ]
(Eric)>> One more bolt to pull out of there. There we go. [ Music ] Now before we start putting this front end back together we need to do some trimming here to make sure the new crossmember will fit. Now we'll just connect these two lines across right here. [ Music ] [ torch hissing ]
(Eric)>> Whenever you're cutting or welding on any vehicle make sure you disconnect the battery. I think that just about does it for our disassembly up front. So, I'm gonna clean all this mess up and we'll start putting it back together. Coming up next, we bring this project to a halt with some new upgraded brakes.
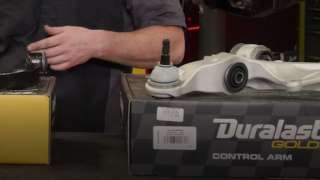
(Eric)>> Well we've almost got our front half of this lift kit installed on our 2013 Ram 1500, but before we can finish it we need to get our suspension components reinstalled. So, we went to the AutoZone Pro website and picked up these Duralast Gold control arms and hub assemblies to make sure that all our parts under there are new. Now these Duralast Gold parts are rigorously control tested to make sure that you get the highest quality parts possible. They also come with corrosion resistant coating to make sure that they're not gonna rust on you. Now all these parts are o-e direct replacements, and they're gonna make sure to provide you with safe, reliable performance both on and off road for as long as they possibly can. Let's get them put on. [ Music ] [ ratchet clicking ]
(Eric)>> We're gonna start with the upper control arms. [ Music ] Get this air springs reinstalled. [ drill humming ]
(Eric)>> These new steering knuckles that came with the lift kit are no joke! There's upper! [ Music ] [ drill humming ] [ ratchet clicking ]
(Eric)>> Before we get this reconnected we've got to make a little bit of an adjustment to our inner tie rod. We don't need that. Because the mounting point is higher on the knuckle, the inner tie rod needs to be shortened about five-eights of an inch. [ saw buzzing ] [ Music ] [ saw buzzing ]
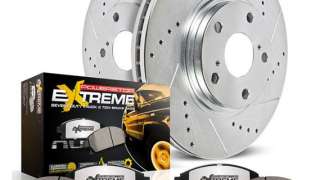
(Eric)>> Get this new tie rod end put on here. We're getting pretty close now. Now we're gonna be reusing our factory sway bar links with an extension that was provided with the lift kit. It's just gonna bolt right back into place. [ Music ] Our lift kit and our suspension is back in. So, all that's left to get done up on the front before we get to the back is to get our new brakes put on. Now we've upgraded everything else under the front of this truck, and the brakes are no different. So, we headed over to PowerStop and we picked up their Z-36 Truck and Tow brake upgrade kit. Now it comes with drilled and slotted rotors for better heat dissipation, zinc coated to make sure they're not gonna rust super fast, and we got low dust carbon fiber ceramic Z-36 brake pads to help give us maximum stopping power. Now what's notice about these pads is they send you the break in procedure. That way you can ensure you're gonna get the longest possible life out of this brake system. Now we're gonna start with the front. [ drill humming ]
(Eric)>> I already got everything good and greased up. So, this should slip right together. [ Music ] [ ratchet clicking ]
(Eric)>> Get this routed out of the way later on. That's looking better already. Let's go do the rear. [ Music ] Our bracket with our new pads on here. [ Music ] [ ratchet clicking ] [ Music ] That looks awesome! So, we're starting to run short on parts for this lift kit, which means it's just about done. All we've got left is to finish up the rear, but we still have a bunch of other work to do to the truck before we call it finished. So, we brought Frankie back over. He's gonna help me get this exhaust kit put on.
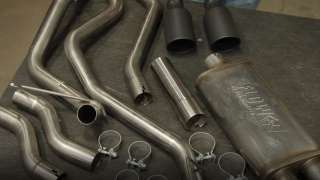
(Frankie)>> We're trying to improve the flow a little bit, but also really give this truck a cool sound. So, we got this Flowmaster cat-back exhaust system from Holley. It's a full stainless kit, which is gonna be great because it's not gonna rust out or corrode. It comes with all new clamps. It's a slip together system. So, it's really easy to do. It's gonna use all the factory hangers. So should be pretty short work, and we got these new cool black tips to match the rest of our truck and get rid of some of that chrome.
(Eric)>> I need to access the fitting on the top of our air springs. So, we're gonna remove the wheel well liner. With the old exhaust removed and the remaining pipe cleaned up Frankie can install the new Flowmaster cat-back kit. Before final tightening make sure your exhaust tips are lined up where you want them. [ drill humming ]
(Eric)>> That's looking pretty good!
(Frankie)>> I am actually done. Everything is tight. I got aligned the best we could up in the air. I'm actually pretty excited to hear this thing now, cause I think it's gonna sound pretty sweet!
(Eric)>> Awesome, thanks for your help. I'll come get you later.
(Frankie)>> This is all too complicated for me, and it looks like you have it under control. Let me know if you need help with anything else.
(Eric)>> Time to get these new shocks installed that BDS sent us with the kit. [ Music ] Time to get our bags installed. Be very careful here. Make sure we got it oriented the right way cause these only install one way. Just like that. Make sure all your clips are in and get these track bar brackets on. First we've got to drill a hole. [ drill humming ] [ Music ] [ hammer banging ]
(Eric)>> Just like that. [ drill humming ]
(Eric)>> Well all we've got we left before this lift kit is officially done is to torque everything down, and I think you know what comes after a lift kit. Next up, we get this truck rolling. Then tune in to some horsepower gains.
(Eric)>> If you guessed that wheels and tires were the next step on our Ram 1500 with the lift kit being finished you would be correct. So, we headed over to Method Race Wheels and picked up a set of their 701s, and we got a hold of Continental Tire and picked up a set of these General Grabber X-3s. Now we think these are really gonna round out the build nice, especially with everything else being blacked out. So, let's get them mounted. [ Music ] Nice and easy! [ Music ] [ air hissing ] [ Music ]
(Eric)>> We got all the tires mounted on the wheels, which means just about ready to get them on the truck. But before I put the last one I want to talk about these tires that we got from Continental. Now these are the General Grabber X-3s, and these tires are designed for both on-road performance and off-road traction. Now just because they give you a good ride on the road doesn't mean they sacrifice off-road performance. You've got nice, deep tread, good sidewall lugs, and it looks awesome. Like I said, this isn't just for looks though. You're gonna get great performance in mud, dirt, as well as wet and winter conditions. So, we know that this truck is gonna stay safe no matter where we drive. [ Music ] [ drill humming ]
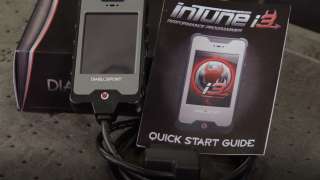
(Eric)>> Now it's torquing time. We're gonna torque everything down to the lift kit manufacturer's specifications. Well that just about does it for getting everything torqued down there, and we are almost ready to take it next door again but we've still got to start it up. We should really put something here. [ Music ] Oh no, that won't do! We don't feel like replacing these nasty seats. So we're gonna cover them up. [ Music ] Much better thanks to these CoverCraft seat covers. Well we're back over here in Engine Power with our Ram 1500, and it is strapped up and ready to go on the dyno, but before we run it we're gonna go ahead and install one more thing. That's gonna be this DiabloSport inTune i3 tuner that we got from Holley. Now it comes pre-loaded with tunes that are dyno tested and proven to increase your performance, and it can also help you custom tune things like rev limiters, speed limiters, timing, and a whole lot more. Now this is a simple plug and play system. They even send you a quick start guide. So pretty much anybody can grab this and squeeze more power out of any vehicle that they have. Let's get it in. [ Music ] Now that we've got it hooked up to the truck we've just got a few buttons we need to press, load in our new tune, and we're ready to give this thing a run. Since we dynoed the truck last time with 87 octane in it and it still has that same fuel we're gonna load the 87-octane tune that comes pre-loaded with this tuner. If you ever feel like going back to your stock tune this tuner does save a copy of what it pulls off. So you can always restore it if you ever need to go back. Well I think we're all good and set up here. Obviously we're trying to beat what we had last time, which was 268 horsepower and 275-pound feet. Frankie, I think with what we did we should be able to beat that.
(Frankie)>> We should see some gains. I'm not sure how much. Hopefully 10, 15? I would be really happy with that. Give her a rip and we'll find out.
(Pat)>> Do you remember how to do it?
(Eric)>> We're gonna find out.
(Frankie)>> Back up! [ engine revving ]
(Pat)>> Power is now 278.
(Frankie)>> That's a bump up. 278 for power, 291 for torque.
(Pat)>> That's pretty good at the tower.
(Frankie)>> I'd say back it up. Let's do another one. We'll back it up and see what it puts for numbers.
(Eric)>> Let's go again!
(Frankie)>> One more!
(Eric)>> Coming up, we head out to the woods and see what this truck can really do.
(Eric)>> Well our Ram 1500's first run here on Engine Power's chassis dyno did show some gains with a result of 278 horsepower and 291 pound feet of torque, but we're gonna give it another go and see how much more we can get out of this freshly tuned Hemi. [ engine revving ] [ engine winding down ]
(Pat)>> A little bit better.
(Eric)>> That felt better.
(Frankie)>> 284 and 297 for torque. Stepped right up. That's pretty solid. That's huge gains. Now the engine's probably gonna get hot. We probably won't get any more out of it, but I think for the tuner, and the easy exhaust, and the easy cold air that's pretty serious gains for a basically stock engine.
(Eric)>> Especially one with 167 and a half thousand miles on it that's not bad at all.
(Frankie)>> I think that's awesome. That's measured gains. The truck look awesome. I'd call that a success.
(Eric)>> You know what we've got to do now. We've got to go drive it. You coming?
(Pat)>> He's got work to do.
(Eric)>> You need him back here now?
(Pat)>> I'm gonna shut that one down. He was actually liking working on the truck but we've got a long laundry list of stuff we've got to do here. So I'm gonna commandeer him back.
(Frankie)>> We'll help you get unstrapped and that's as far as we'll go!
(Eric)>>> Alright!
(Marc)>> Whoa!
(Eric)>> Welcome back.
(Marc)>> Glad to be back. It looks like you did all the work already.
(Eric)>> You showed up just intime. I've got a fun day planned. You want to hop in?
(Marc)>> Absolutely! [ engine revving ]
(Eric)>> In my opinion it turned out pretty good but what do you think?
(Marc)>> I think it looks great. This is one of those things that it was a little weird for me to just like hand everything over to you and say, take it from here bud, but you did a fantastic job. The truck looks awesome.
(Eric)>> It was a little bit weird not having you around for it, but I think it was good, and Frankie was a huge help getting everything finished on here. It came out a lot nicer than I expected.
(Marc)>> I just need to know how does that make you feel?
(Eric)>> I'm not really a Dodge guy usually, but I think I like this one. It still rides really well. I'm glad that we found that lift kit from BDS because keeping the air ride on here, it rides like a normal truck but we've got that extra four inches and a lot better presence here on the road. I wouldn't be too hurt to be seen driving this. That's a lot coming from me because I've been stuck on Chevys my whole life.
(Marc)>> I think de-chroming it, de-badging it, and all that was a good call. So you got a new fender. I knew the fender was missing and the tailgate was trashed.
(Eric)>> Pretty much a full visual transformation. Lots of maintenance work to make sure that it's still gonna be reliable 50,000 miles from now. Of course the lift kit, and with the lift kit you have to do wheels and tires.
(Marc)>> The real question is what can this thing do off road?
(Eric)>> What better place to get a little mud on the tires than out at Woolys. There's some pretty solid trails out here.
(Marc)>> You should come after it rains.
(Eric)>> Let's see just how high clearance this high clearance suspension system is.
(Marc)>> Woo Hoo, I forgot to roll my window back up! It's always a good day when you need to use the wipers. [ Music ]
(Marc)>> Woo Hoo! [ Music ]
(Eric)>> I can't believe you've been hiding this place from me. This takes me back man! This looks like this could definitely be fun. [ door ajar beeping ]
(Marc)>> This thing is muddy!
(Eric)>> What'd you think?
(Marc)>> It's awesome! Look at that thing. You got it all dressed up now.
(Eric)>> It's ready to go out and party.
(Marc)>> Speaking of partying, I think we need to get back to the shop and get to work because I don't have any grease under my fingernails.
(Eric)>> We can't stay out here all day. We've got to get back. [ engine revving ] [ Music ]
(Marc)>> Stay in it, stay in it, stay in it. [ engine revving ]
(Marc)>> There you go, now we're talking! [ Music ]
Show Full Transcript
(Eric)>> Today on Music City Trucks we're back on our Ram 1500 project and we take it up a notch with a full suspension and brake upgrade. Plus, we throw some new rubber on it... [ engine revving ]
(Eric)>> ...and take it off road. Stay in it, stay in it, stay in it! [ Music ]
(Marc)>> This has got to be the most iconic design. [ Music ]
(Eric)>> Welcome to Music City Trucks. I'm Eric Smart, and we're back with our 2013 Ram 1500. The last time you saw this truck we took it next door for a dyno run and we took it out on the road to really test it out, and we found out we've got a very solid truck here. So, we did a bunch of maintenance under the hood and a bunch of cosmetic work so that it looks good and it's gonna stay reliable, but that doesn't make a build. So today we're gonna be getting started with a fresh exhaust system so that the sound matches the look, some new wheels and tires, some fresh suspension parts so that we don't break anything, a lift kit to really bring it to the next level, some upgraded brakes so that we can actually stop this thing, and a little treat from our friends over at Holley that's gonna help us pump our dyno numbers up. So, let's get that lift kit put on. Before we actually install this lift kit I want to show you why we chose what we did. This truck came factory with air ride suspension, which means it's got bags here on the rear axle and two more in the front where the shocks would be on a non-air ride truck. So, we decided that we wanted to maintain that system rather than delete it because we want good ride quality and we like being able to adjust the ride height whenever we want. So, I'm gonna show you what we picked. What you see on the table here is a BDS four inch high clearance suspension system for 2013 to 2015 Ram 1500s with factory air ride. Now this is gonna give us four inches of lift while maintaining all the functionality of our factory air system. This kit is all inclusive. It's got everything you need to get your lift put on and get right back on the road. You can clear up to 35 by 12.50 tires and these high clearance cross members are gonna make sure you don't have to worry about anything underneath you when you're off road. So, without further ado let's get it installed. The most important part of installing a lift kit is to follow the manufacturer's instructions that come with it. Before we tear it down any further... Put a line stopper on here and keep that from leaking all over the place. ...we'll install the extended brake line that we got from BDS. Get this brake line connected to this new hose, hopefully without making too big of a mess. [ ratchet clicking ] [ drill humming ]
(Eric)>> With the brake line installed, we can finish tearing down the front suspension. Some of the parts take a little persuasion. Let's get this air bag disconnected. [ Music ] [ compressed air hissing ]
(Eric)>> Let that bleed out of there. [ compressed air hissing ] [ ratchet clicking ] [ hammer banging ] [ Music ] [ hammer banging ]
(Eric)>> The driveshaft is next... At least it's not rust. [ Music ]
(Eric)>> ...followed by the rear crossmember and front differential. [ metal clanging ]
(Eric)>> First I'll unplug the harness. Leave these in just a little bit until we get our jack under there. Then remove the differential. [ Music ] [ ratchet clicking ]
(Eric)>> One more bolt to pull out of there. There we go. [ Music ] Now before we start putting this front end back together we need to do some trimming here to make sure the new crossmember will fit. Now we'll just connect these two lines across right here. [ Music ] [ torch hissing ]
(Eric)>> Whenever you're cutting or welding on any vehicle make sure you disconnect the battery. I think that just about does it for our disassembly up front. So, I'm gonna clean all this mess up and we'll start putting it back together. Coming up next, we bring this project to a halt with some new upgraded brakes.
(Eric)>> Well we've almost got our front half of this lift kit installed on our 2013 Ram 1500, but before we can finish it we need to get our suspension components reinstalled. So, we went to the AutoZone Pro website and picked up these Duralast Gold control arms and hub assemblies to make sure that all our parts under there are new. Now these Duralast Gold parts are rigorously control tested to make sure that you get the highest quality parts possible. They also come with corrosion resistant coating to make sure that they're not gonna rust on you. Now all these parts are o-e direct replacements, and they're gonna make sure to provide you with safe, reliable performance both on and off road for as long as they possibly can. Let's get them put on. [ Music ] [ ratchet clicking ]
(Eric)>> We're gonna start with the upper control arms. [ Music ] Get this air springs reinstalled. [ drill humming ]
(Eric)>> These new steering knuckles that came with the lift kit are no joke! There's upper! [ Music ] [ drill humming ] [ ratchet clicking ]
(Eric)>> Before we get this reconnected we've got to make a little bit of an adjustment to our inner tie rod. We don't need that. Because the mounting point is higher on the knuckle, the inner tie rod needs to be shortened about five-eights of an inch. [ saw buzzing ] [ Music ] [ saw buzzing ]
(Eric)>> Get this new tie rod end put on here. We're getting pretty close now. Now we're gonna be reusing our factory sway bar links with an extension that was provided with the lift kit. It's just gonna bolt right back into place. [ Music ] Our lift kit and our suspension is back in. So, all that's left to get done up on the front before we get to the back is to get our new brakes put on. Now we've upgraded everything else under the front of this truck, and the brakes are no different. So, we headed over to PowerStop and we picked up their Z-36 Truck and Tow brake upgrade kit. Now it comes with drilled and slotted rotors for better heat dissipation, zinc coated to make sure they're not gonna rust super fast, and we got low dust carbon fiber ceramic Z-36 brake pads to help give us maximum stopping power. Now what's notice about these pads is they send you the break in procedure. That way you can ensure you're gonna get the longest possible life out of this brake system. Now we're gonna start with the front. [ drill humming ]
(Eric)>> I already got everything good and greased up. So, this should slip right together. [ Music ] [ ratchet clicking ]
(Eric)>> Get this routed out of the way later on. That's looking better already. Let's go do the rear. [ Music ] Our bracket with our new pads on here. [ Music ] [ ratchet clicking ] [ Music ] That looks awesome! So, we're starting to run short on parts for this lift kit, which means it's just about done. All we've got left is to finish up the rear, but we still have a bunch of other work to do to the truck before we call it finished. So, we brought Frankie back over. He's gonna help me get this exhaust kit put on.
(Frankie)>> We're trying to improve the flow a little bit, but also really give this truck a cool sound. So, we got this Flowmaster cat-back exhaust system from Holley. It's a full stainless kit, which is gonna be great because it's not gonna rust out or corrode. It comes with all new clamps. It's a slip together system. So, it's really easy to do. It's gonna use all the factory hangers. So should be pretty short work, and we got these new cool black tips to match the rest of our truck and get rid of some of that chrome.
(Eric)>> I need to access the fitting on the top of our air springs. So, we're gonna remove the wheel well liner. With the old exhaust removed and the remaining pipe cleaned up Frankie can install the new Flowmaster cat-back kit. Before final tightening make sure your exhaust tips are lined up where you want them. [ drill humming ]
(Eric)>> That's looking pretty good!
(Frankie)>> I am actually done. Everything is tight. I got aligned the best we could up in the air. I'm actually pretty excited to hear this thing now, cause I think it's gonna sound pretty sweet!
(Eric)>> Awesome, thanks for your help. I'll come get you later.
(Frankie)>> This is all too complicated for me, and it looks like you have it under control. Let me know if you need help with anything else.
(Eric)>> Time to get these new shocks installed that BDS sent us with the kit. [ Music ] Time to get our bags installed. Be very careful here. Make sure we got it oriented the right way cause these only install one way. Just like that. Make sure all your clips are in and get these track bar brackets on. First we've got to drill a hole. [ drill humming ] [ Music ] [ hammer banging ]
(Eric)>> Just like that. [ drill humming ]
(Eric)>> Well all we've got we left before this lift kit is officially done is to torque everything down, and I think you know what comes after a lift kit. Next up, we get this truck rolling. Then tune in to some horsepower gains.
(Eric)>> If you guessed that wheels and tires were the next step on our Ram 1500 with the lift kit being finished you would be correct. So, we headed over to Method Race Wheels and picked up a set of their 701s, and we got a hold of Continental Tire and picked up a set of these General Grabber X-3s. Now we think these are really gonna round out the build nice, especially with everything else being blacked out. So, let's get them mounted. [ Music ] Nice and easy! [ Music ] [ air hissing ] [ Music ]
(Eric)>> We got all the tires mounted on the wheels, which means just about ready to get them on the truck. But before I put the last one I want to talk about these tires that we got from Continental. Now these are the General Grabber X-3s, and these tires are designed for both on-road performance and off-road traction. Now just because they give you a good ride on the road doesn't mean they sacrifice off-road performance. You've got nice, deep tread, good sidewall lugs, and it looks awesome. Like I said, this isn't just for looks though. You're gonna get great performance in mud, dirt, as well as wet and winter conditions. So, we know that this truck is gonna stay safe no matter where we drive. [ Music ] [ drill humming ]
(Eric)>> Now it's torquing time. We're gonna torque everything down to the lift kit manufacturer's specifications. Well that just about does it for getting everything torqued down there, and we are almost ready to take it next door again but we've still got to start it up. We should really put something here. [ Music ] Oh no, that won't do! We don't feel like replacing these nasty seats. So we're gonna cover them up. [ Music ] Much better thanks to these CoverCraft seat covers. Well we're back over here in Engine Power with our Ram 1500, and it is strapped up and ready to go on the dyno, but before we run it we're gonna go ahead and install one more thing. That's gonna be this DiabloSport inTune i3 tuner that we got from Holley. Now it comes pre-loaded with tunes that are dyno tested and proven to increase your performance, and it can also help you custom tune things like rev limiters, speed limiters, timing, and a whole lot more. Now this is a simple plug and play system. They even send you a quick start guide. So pretty much anybody can grab this and squeeze more power out of any vehicle that they have. Let's get it in. [ Music ] Now that we've got it hooked up to the truck we've just got a few buttons we need to press, load in our new tune, and we're ready to give this thing a run. Since we dynoed the truck last time with 87 octane in it and it still has that same fuel we're gonna load the 87-octane tune that comes pre-loaded with this tuner. If you ever feel like going back to your stock tune this tuner does save a copy of what it pulls off. So you can always restore it if you ever need to go back. Well I think we're all good and set up here. Obviously we're trying to beat what we had last time, which was 268 horsepower and 275-pound feet. Frankie, I think with what we did we should be able to beat that.
(Frankie)>> We should see some gains. I'm not sure how much. Hopefully 10, 15? I would be really happy with that. Give her a rip and we'll find out.
(Pat)>> Do you remember how to do it?
(Eric)>> We're gonna find out.
(Frankie)>> Back up! [ engine revving ]
(Pat)>> Power is now 278.
(Frankie)>> That's a bump up. 278 for power, 291 for torque.
(Pat)>> That's pretty good at the tower.
(Frankie)>> I'd say back it up. Let's do another one. We'll back it up and see what it puts for numbers.
(Eric)>> Let's go again!
(Frankie)>> One more!
(Eric)>> Coming up, we head out to the woods and see what this truck can really do.
(Eric)>> Well our Ram 1500's first run here on Engine Power's chassis dyno did show some gains with a result of 278 horsepower and 291 pound feet of torque, but we're gonna give it another go and see how much more we can get out of this freshly tuned Hemi. [ engine revving ] [ engine winding down ]
(Pat)>> A little bit better.
(Eric)>> That felt better.
(Frankie)>> 284 and 297 for torque. Stepped right up. That's pretty solid. That's huge gains. Now the engine's probably gonna get hot. We probably won't get any more out of it, but I think for the tuner, and the easy exhaust, and the easy cold air that's pretty serious gains for a basically stock engine.
(Eric)>> Especially one with 167 and a half thousand miles on it that's not bad at all.
(Frankie)>> I think that's awesome. That's measured gains. The truck look awesome. I'd call that a success.
(Eric)>> You know what we've got to do now. We've got to go drive it. You coming?
(Pat)>> He's got work to do.
(Eric)>> You need him back here now?
(Pat)>> I'm gonna shut that one down. He was actually liking working on the truck but we've got a long laundry list of stuff we've got to do here. So I'm gonna commandeer him back.
(Frankie)>> We'll help you get unstrapped and that's as far as we'll go!
(Eric)>>> Alright!
(Marc)>> Whoa!
(Eric)>> Welcome back.
(Marc)>> Glad to be back. It looks like you did all the work already.
(Eric)>> You showed up just intime. I've got a fun day planned. You want to hop in?
(Marc)>> Absolutely! [ engine revving ]
(Eric)>> In my opinion it turned out pretty good but what do you think?
(Marc)>> I think it looks great. This is one of those things that it was a little weird for me to just like hand everything over to you and say, take it from here bud, but you did a fantastic job. The truck looks awesome.
(Eric)>> It was a little bit weird not having you around for it, but I think it was good, and Frankie was a huge help getting everything finished on here. It came out a lot nicer than I expected.
(Marc)>> I just need to know how does that make you feel?
(Eric)>> I'm not really a Dodge guy usually, but I think I like this one. It still rides really well. I'm glad that we found that lift kit from BDS because keeping the air ride on here, it rides like a normal truck but we've got that extra four inches and a lot better presence here on the road. I wouldn't be too hurt to be seen driving this. That's a lot coming from me because I've been stuck on Chevys my whole life.
(Marc)>> I think de-chroming it, de-badging it, and all that was a good call. So you got a new fender. I knew the fender was missing and the tailgate was trashed.
(Eric)>> Pretty much a full visual transformation. Lots of maintenance work to make sure that it's still gonna be reliable 50,000 miles from now. Of course the lift kit, and with the lift kit you have to do wheels and tires.
(Marc)>> The real question is what can this thing do off road?
(Eric)>> What better place to get a little mud on the tires than out at Woolys. There's some pretty solid trails out here.
(Marc)>> You should come after it rains.
(Eric)>> Let's see just how high clearance this high clearance suspension system is.
(Marc)>> Woo Hoo, I forgot to roll my window back up! It's always a good day when you need to use the wipers. [ Music ]
(Marc)>> Woo Hoo! [ Music ]
(Eric)>> I can't believe you've been hiding this place from me. This takes me back man! This looks like this could definitely be fun. [ door ajar beeping ]
(Marc)>> This thing is muddy!
(Eric)>> What'd you think?
(Marc)>> It's awesome! Look at that thing. You got it all dressed up now.
(Eric)>> It's ready to go out and party.
(Marc)>> Speaking of partying, I think we need to get back to the shop and get to work because I don't have any grease under my fingernails.
(Eric)>> We can't stay out here all day. We've got to get back. [ engine revving ] [ Music ]
(Marc)>> Stay in it, stay in it, stay in it. [ engine revving ]
(Marc)>> There you go, now we're talking! [ Music ]
