More Raunchy Rat Rod Episodes
HorsePower Builds
Want more content like this?
Join the PowerNation Email NewsletterParts Used In This Episode
Cherry Bomb
Cherry Bomb vortex and the original glasspack.
Crane Cams
Valvetrain components for LS-1 engines.
Hypertech
Hyperpac
Pete and Jakes
Adjustable panhard bar with urethane bushings.
Pete and Jakes
Brake kit and spindle 37-48 Ford pass.car spindle 78-86 GM caliper.
Pete and Jakes
Complete 9" 11' Drum brakes and 3.00 gear.
Pete and Jakes
Hair pins and front super bell axle I-beam design 4" drop .
Pete and Jakes
Ladder bars with adjustable clevises, urethane bushings at pivot.
Pete and Jakes
Super slide spring (lowers car 3" below stock) .
Pete and Jakes
Vega steering box cross steer.
Pete and Jakes
Viper alloy gas shocks w/ six stage valving.
Episode Transcript
Today, rats rule in the horsepower shop. And why not Rat Rods have been around for a long time, but now they're more popular than ever. And this 41 Ford pickup getting ready to roll in is the perfect reason why.
And this one like any true rat Rod has a classic V8 for power,
an original real steel body, of course. And more than a few personal creative touches.
Well, like the Pepsi sign floorboards. Oh. And how about that rubber rat for a shift or boot? And the ever popular skull for a shifter knob?
Oh, and the inverted beer bottle? Well, that's the gas gauge
a
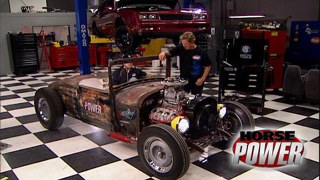
few weeks ago. We found this 2829 model a Ford at a local rod shop. And we think it's a great start for our own horsepower Rat Rod project.
The only thing now though is a frame and for that we need something that's stout safe and definitely serves a purpose.
Yeah, it's a pretty important step. So, to do our homework, we went away from home
at the annual Street Rod Nationals up in Louisville, Kentucky.
Well, that's pretty cool. Yeah. 95 grand.
Let me write a check.
Yeah,
man, if we can't get some cool ideas and a jump start on our Rat Rod project here,
something is bad wrong. Yeah. And if you've never been to the Street Rod Nationals, it's not just about rat rods. It's pre 49 American Iron. And just to let you in on it, there's a little over 11,000 of them.
Yeah, they've got an eye full of cool cars here. But Galley and I were on a mission.
They've got a little bit of everything.
You see, we had to find the right chassis for our Roadster body, one that we can channel for ride, hike.
And here inside this building loaded with vendors, we found two allies to make our project work.
The first was here at Pete and Jake's Booth.
This company has been helping out hot rodders for over 30 years, offering everything in the way of parts.
They were among the first to fill the Rat Rod craze. The popularity of them is just phenomenal. I get more and more calls on the rat rod or rat rod style.
I sell parts to guys where they want them in plane
and they take them and set them outside,
get them as rusty and as petite as possible. Then bolt them on the car.
We discovered they could hook us up with everything from a bear chassis to one that's fully tricked out like this. 32. Now, this was our choice until Jason Slover gave us a heads up.
It's one of those situations where in doing it, you typically wouldn't want to channel the body
because a 32 frame is
aesthetically pleasing in its looks. I mean, it's a very, very nice frame.
It,
it's the only frame, Henry Ford put the reveal on the side.
So most of the time, if you see a 2829 on deuce
rails,
it's usually kept up, it's kept up on the rail itself. It's not then channeled down over. Most of your channels are done with the model A frames primarily.
Ok. A model A frame that we can channel sounds good.
And for that Jason sent us over to honest Charlie's Booth where Pete and Jake's version was right on display.
It's sort of like building a house. If you start with a good foundation, you're likely to have a good result. Similarly, with an automobile, particularly a street ride,
if you, if you start off in the wrong direction, it's hard to get on track. So I think, uh particularly in this case, you started off with a good platform, you're gonna have a wonderful project
at the end of the course, we're working on a vehicle that anybody should be able to complete. Hey, you guys ought to be able to complete it too.
You think we can do it. I think that there's a good probability,
here's what we wound up with. Now. It may look like a rusty model. A original and that's exactly the idea.
But this is a brand new one from Pete and Jake's like the one you just saw. We just had our
powder coated in this natural rust that's even got texture.
Yeah, bear frame is a great way to start that way. You don't spend all your money at once and you still won't make mistakes. You see, it's got brackets already welded on and check this pilot drilled, mounting holes with nuts serves.
All right. Next up, make this thing a rolling chassis with more parts we got from Pete and Jakes.
We'll get started by hanging this nine inch rear end. Now, this thing comes with our axles, 11 inch drum brakes and a 300 rear gear.
We're gonna mount it to the frame with this ladder bar kit. It's got urethane bushings up front here and out back these adjustable crevices.
Of course, these brackets welded on to the rear end at the right angle, make this job easy and foolproof.
Next, we can bolt up a pair of these alloy gas shocks made especially for hot rods.
Now, we like these because they have a five position dampening adjuster to give us the ride we want.
Well, finally, this
pard bar is gonna keep the rear end from moving laterally. It too uses urethane bushings and it's adjustable here on the end.
Hey, guess what? That's it for the rat rods. Rear end of course, we'll finish making our chassis a roller and show you how we channel the body to sit on it. But speaking of channels don't go switching yours. We'll be back right after the break.
Hi, welcome back to the horsepower shop and our model, a rat rod build up. Now, just in case you've joined us late.
Here's what we've been up to.
We first found us a topless two seater body to start the project.
Then headed to the Street Rod Nationals where we found a frame we like from Pete and Jake's Hot Rod parts.
After getting our bear frame powder coated in natural rust,
we started building it up first with a nine inch rear end equipped with 11 inch drum brakes and 300 gear.
We hung it under the frame using ladder bars and coil over shocks and to keep it centered, we added a panhard bar
to finish making this thing a rolling chassis. We need to assemble the front end and we'll start by hanging these hairpins. Now, these things locate the front axle and they're made out of a 78 steel tubing and just like the rear ladder bars, they have adjustable crevices. We just went the extra step to have ours chrome plated,
the axle we got from Pete and Jakes is a super bill. Now, this is an I beam design with a four inch drop and it's been cross drilled. It also accepts a Ford spindle and it gets attached to the hair pins with this spring perch.
Next, we can install the lower shock mount which bolts on the bottom side of the spring perch below the axle.
Well, now we can bolt up the spring pack, which is a super slide for Posey that lowers the vehicle about three inches. And here's a cool feature that accounts for part of that,
they've rolled the pig tail upward instead of downward, which is the conventional way
it installs using shackles that attach the spring to the axle.
Then the center of the spring mounts to the bottom of the front cross member and it's held in place with this plate.
Now, the front shocks which attached down here on the spring perch
and the top
on the frame.
I just preassembled our brake kit and spindle. Now, the spindle is a 37 to 48 Ford passenger car that allows you to adapt to 78 to 86 GM passenger car caliper.
It attaches to the axle using a kingpin
which is secured with a through pin.
Hey, remember the Chevy Vega from about 1971 to 77.
They weren't very famous for much except this.
It's a steering box. It's compact, strong and very adaptable to hot rod build ups like ours. Now, this one's going to mount here on the bracket inside the frame rail.
It's a cross steering set up with a drag link that connects the steering arm of the passenger side spindle over to the steering box
and a tie rod connected to the driver side spindle.
Then to control lateral movement, we use a panhard bar to connect the axle to the frame. Now, this rat rod chassis is a true roller, but the wheels and tires are just temporary. Eventually, we're going to get a set that gives this thing a lower stance and maybe even a little bit of color.
Well, for my money, you can't go wrong with these Coco reds folks at white walls, but we got plenty of time to deal with that later.
Right now, our Pete and Jake's frame comes with this bracket designed to mount up our master cylinder, which of course has the right bore for our disk drum set up,
then we can run our brake lines using mounting holes on the frame.
Finally, we even got a brake pedal that's designed to work with our master cylinder. Well, that's it for the chassis build up
ought to be even easier next time.
That's right. This was just a mock up to make sure everything fits right. We'll have to take it all back apart. Have some of the bare metal pieces, either painted or coated and put it all back together again, but not before we get started on a rat rod body, we're gonna do some grinding a whole lot of cutting and even fit it to the frame right after the break. So stick with us.
Hey, welcome back to the horsepower Rat rod build up. We just finished mocking up a chassis for this 29 Roadster.
Now we're gonna make this well seasoned body fit onto it.
Yeah. And I'm bracing the body using some one in square tubing. Now, this is gonna keep it from flexing and twisting when we cut the floor out to channel it.
Now, what this involves is cutting the area of the floor where the body is going to sit on the frame. We're also going to lose the entire floorboard and replace it with something special. Later on.
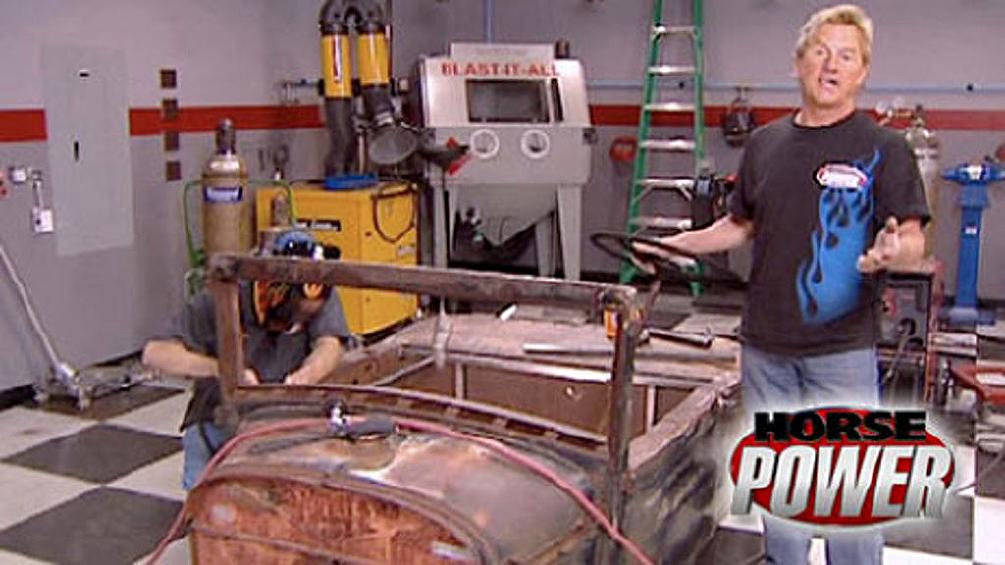
As you can see, it took several pieces of square tubing to build this structure that also doubles as a stand for the body. Now, it may look like a little overkill, but this body weighs close to 500 pounds and when we're working under it, I don't want it to fall on my skinny, but
we're sitting our body on some of the snap lock flooring to protect our black and white tiles. When we use the plasma cutter
right now, time to make some measurements on this chassis using the nut search as a reference.
This way we'll know where to make our marks on the body. So we can weld up some body mounds.
Well, we can tell now that the mounting holes on the body here about a half inch wider than the nuts are on the chassis, but it's not gonna matter because all this material is getting cut away from here
on bass.
First will plasma cut the floor pan out of the way.
By the way, any time you're cutting this much old metal with a plasma cutter, you're going to create a lot of fumes.
So a piece of equipment like this ply
vent multi fume caddy comes in real handy.
Now, we can also make our cuts along the inside of the original rail.
Now that the floor is cut out of the body. I place these mounts down here on the frame. Now, we're going to attach these using some more one inch square tubing on the inside and outside of the frame rail.
We're using more tubing to attach the two sides of the body mount frame together. Now, what this will do is keep everything squared when we weld it into the body itself and this front piece, well, it's only temporary. It's going to have to go when we drop in the engine and transmission.
Now that it's all welded up. I know it's gonna fit over the frame rails because it was built on the chassis.
Now, all we need to do is get it squared up with the body.
Once it's aligned, you can start bracing it and welding it up
with the upright supports welded in. We're ready to set this thing on the chassis, but first, we need to get the stand out of the way.
Now we need the clearance, the back of the body for the shock mounts. So after that, a little more cutting with the plasma cutter,
man, it was a lot of work, but we got the entire floor cut out of the rat rod. Not to mention most of the bracing done to support the body looks great. And where have you been with? Mikey's? I gotta tell you that brush guard on your truck comes in real handy when you're out gathering uh new floor pants.
What do you
think?
Here's my personal favorite. That is too cool. Nobody saw
do it, did they?
I don't think so.
You won't see this thing for a while, which is officially now called the raunchy rat. But we'll be back in several weeks to build the motor transmission and we're gonna have fun with all of it. Meanwhile, stay tuned because we got more horsepower coming up. What do you think about this one? That's gonna be the firewall? Yeah,
that is cool.
You know, when it comes to computer technology for your street machine, big things keep coming in smaller packages and here's a little package we just had to check out.
It's called a Hyper pack from Hyper Tech. And it's the first performance computer with five distinct programs. Look at this.
It's got a tuning program that lets you optimize power and reprogram, all kinds of features.
It's got a diagnostic program that not only detects trouble codes, but tells you exactly what they are.
This program displays engine operating conditions and either
analog
ages
or digital.
Yeah, but it's the other three programs that really got our attention. And when you think about it, it's pretty amazing.
You need an engine dyno
to test horsepower, a torque and fly wheel, a
chassis dyno
to test power, you lay down at the rear wheels,
then you need to go to the track to see what your car to do in the 84 quarter mile.
Maybe not. Essentially, all three are inside the Hyper tech. This is the drag strip mode
and you choose either pro or sportsman tree and you make a run and get an exact duplication
of a time slip just like at the strip.
Then there's the dyno
modes that tell you either engine or rear wheel horsepower and torque with correction capabilities for different atmospheric conditions. But we're not just gonna take hypertech word for it. We've got our own chassis dyno
here in the shop, right.
And we got this mercury marauder that's already loaded up with the hyper pack programming.
Let's make a little comparison.
All right, here's the unit and it's already plugged into the diagnostic port
dyno
mode
and the temperature is 86 degrees, 60% humidity.
Let's go out and find a place to make a run.
Now, I'm gonna make this run in second gear so we don't get busted by the cops, get rolling a little bit
hit start,
punch it.
I'm gonna run it up to six grand and click it.
All right. Here's what we got. Max horsepower 253.6 at 5770 RPM. Max torque 2 39.9 at 5190.
Back at the horsepower shop. After several runs on the
dyno Jet, the Mercury was making within about five horsepower of the hybrid pack pretty good.
Now, this hyper pack will give you tons of other data. You could use more than we have time for now,
but I will take time to tell you it'll cost you about 800 bucks.
Somebody dropped a couple of bombs in the horse power shop today. Of course, I'm talking about mufflers. This is the Cherry bomb vortex that's engineered for high airflow and low interior resonance. Now, inside the aluminized steel casing, you'll find fiberglass and a patented baffle design that helps absorb both high and low frequency sounds
and this is cherry bomb's original high performance glass pack that's been around since 1968. It uses a straight through design to reduce back pressure and features the same sound absorbing technology as the vortex. The result, a classic steady rumble. Now, one of these will run you about 20 bucks. The vortex 80.
Well, finally, crane's got a whole bunch of new valve train components for the popular LS one
like this ratio rocker kit and in it, you get 1.8 rock
with poly locks, screw in studs, guide plates and special in thick wall push rods. Now, the rockers themselves have a quick lift design that's gonna get the valves off their seats faster than conventional rockers. The end result they say is more rear wheel horsepower. Now, to get a kit, you're gonna have to pony up about 700 bucks.
Well, that's it for hot parts horsepower. And well, may I say again, like the old maid said to the peeping Tom. Thanks for looking in.
Show Full Transcript
And this one like any true rat Rod has a classic V8 for power,
an original real steel body, of course. And more than a few personal creative touches.
Well, like the Pepsi sign floorboards. Oh. And how about that rubber rat for a shift or boot? And the ever popular skull for a shifter knob?
Oh, and the inverted beer bottle? Well, that's the gas gauge
a
few weeks ago. We found this 2829 model a Ford at a local rod shop. And we think it's a great start for our own horsepower Rat Rod project.
The only thing now though is a frame and for that we need something that's stout safe and definitely serves a purpose.
Yeah, it's a pretty important step. So, to do our homework, we went away from home
at the annual Street Rod Nationals up in Louisville, Kentucky.
Well, that's pretty cool. Yeah. 95 grand.
Let me write a check.
Yeah,
man, if we can't get some cool ideas and a jump start on our Rat Rod project here,
something is bad wrong. Yeah. And if you've never been to the Street Rod Nationals, it's not just about rat rods. It's pre 49 American Iron. And just to let you in on it, there's a little over 11,000 of them.
Yeah, they've got an eye full of cool cars here. But Galley and I were on a mission.
They've got a little bit of everything.
You see, we had to find the right chassis for our Roadster body, one that we can channel for ride, hike.
And here inside this building loaded with vendors, we found two allies to make our project work.
The first was here at Pete and Jake's Booth.
This company has been helping out hot rodders for over 30 years, offering everything in the way of parts.
They were among the first to fill the Rat Rod craze. The popularity of them is just phenomenal. I get more and more calls on the rat rod or rat rod style.
I sell parts to guys where they want them in plane
and they take them and set them outside,
get them as rusty and as petite as possible. Then bolt them on the car.
We discovered they could hook us up with everything from a bear chassis to one that's fully tricked out like this. 32. Now, this was our choice until Jason Slover gave us a heads up.
It's one of those situations where in doing it, you typically wouldn't want to channel the body
because a 32 frame is
aesthetically pleasing in its looks. I mean, it's a very, very nice frame.
It,
it's the only frame, Henry Ford put the reveal on the side.
So most of the time, if you see a 2829 on deuce
rails,
it's usually kept up, it's kept up on the rail itself. It's not then channeled down over. Most of your channels are done with the model A frames primarily.
Ok. A model A frame that we can channel sounds good.
And for that Jason sent us over to honest Charlie's Booth where Pete and Jake's version was right on display.
It's sort of like building a house. If you start with a good foundation, you're likely to have a good result. Similarly, with an automobile, particularly a street ride,
if you, if you start off in the wrong direction, it's hard to get on track. So I think, uh particularly in this case, you started off with a good platform, you're gonna have a wonderful project
at the end of the course, we're working on a vehicle that anybody should be able to complete. Hey, you guys ought to be able to complete it too.
You think we can do it. I think that there's a good probability,
here's what we wound up with. Now. It may look like a rusty model. A original and that's exactly the idea.
But this is a brand new one from Pete and Jake's like the one you just saw. We just had our
powder coated in this natural rust that's even got texture.
Yeah, bear frame is a great way to start that way. You don't spend all your money at once and you still won't make mistakes. You see, it's got brackets already welded on and check this pilot drilled, mounting holes with nuts serves.
All right. Next up, make this thing a rolling chassis with more parts we got from Pete and Jakes.
We'll get started by hanging this nine inch rear end. Now, this thing comes with our axles, 11 inch drum brakes and a 300 rear gear.
We're gonna mount it to the frame with this ladder bar kit. It's got urethane bushings up front here and out back these adjustable crevices.
Of course, these brackets welded on to the rear end at the right angle, make this job easy and foolproof.
Next, we can bolt up a pair of these alloy gas shocks made especially for hot rods.
Now, we like these because they have a five position dampening adjuster to give us the ride we want.
Well, finally, this
pard bar is gonna keep the rear end from moving laterally. It too uses urethane bushings and it's adjustable here on the end.
Hey, guess what? That's it for the rat rods. Rear end of course, we'll finish making our chassis a roller and show you how we channel the body to sit on it. But speaking of channels don't go switching yours. We'll be back right after the break.
Hi, welcome back to the horsepower shop and our model, a rat rod build up. Now, just in case you've joined us late.
Here's what we've been up to.
We first found us a topless two seater body to start the project.
Then headed to the Street Rod Nationals where we found a frame we like from Pete and Jake's Hot Rod parts.
After getting our bear frame powder coated in natural rust,
we started building it up first with a nine inch rear end equipped with 11 inch drum brakes and 300 gear.
We hung it under the frame using ladder bars and coil over shocks and to keep it centered, we added a panhard bar
to finish making this thing a rolling chassis. We need to assemble the front end and we'll start by hanging these hairpins. Now, these things locate the front axle and they're made out of a 78 steel tubing and just like the rear ladder bars, they have adjustable crevices. We just went the extra step to have ours chrome plated,
the axle we got from Pete and Jakes is a super bill. Now, this is an I beam design with a four inch drop and it's been cross drilled. It also accepts a Ford spindle and it gets attached to the hair pins with this spring perch.
Next, we can install the lower shock mount which bolts on the bottom side of the spring perch below the axle.
Well, now we can bolt up the spring pack, which is a super slide for Posey that lowers the vehicle about three inches. And here's a cool feature that accounts for part of that,
they've rolled the pig tail upward instead of downward, which is the conventional way
it installs using shackles that attach the spring to the axle.
Then the center of the spring mounts to the bottom of the front cross member and it's held in place with this plate.
Now, the front shocks which attached down here on the spring perch
and the top
on the frame.
I just preassembled our brake kit and spindle. Now, the spindle is a 37 to 48 Ford passenger car that allows you to adapt to 78 to 86 GM passenger car caliper.
It attaches to the axle using a kingpin
which is secured with a through pin.
Hey, remember the Chevy Vega from about 1971 to 77.
They weren't very famous for much except this.
It's a steering box. It's compact, strong and very adaptable to hot rod build ups like ours. Now, this one's going to mount here on the bracket inside the frame rail.
It's a cross steering set up with a drag link that connects the steering arm of the passenger side spindle over to the steering box
and a tie rod connected to the driver side spindle.
Then to control lateral movement, we use a panhard bar to connect the axle to the frame. Now, this rat rod chassis is a true roller, but the wheels and tires are just temporary. Eventually, we're going to get a set that gives this thing a lower stance and maybe even a little bit of color.
Well, for my money, you can't go wrong with these Coco reds folks at white walls, but we got plenty of time to deal with that later.
Right now, our Pete and Jake's frame comes with this bracket designed to mount up our master cylinder, which of course has the right bore for our disk drum set up,
then we can run our brake lines using mounting holes on the frame.
Finally, we even got a brake pedal that's designed to work with our master cylinder. Well, that's it for the chassis build up
ought to be even easier next time.
That's right. This was just a mock up to make sure everything fits right. We'll have to take it all back apart. Have some of the bare metal pieces, either painted or coated and put it all back together again, but not before we get started on a rat rod body, we're gonna do some grinding a whole lot of cutting and even fit it to the frame right after the break. So stick with us.
Hey, welcome back to the horsepower Rat rod build up. We just finished mocking up a chassis for this 29 Roadster.
Now we're gonna make this well seasoned body fit onto it.
Yeah. And I'm bracing the body using some one in square tubing. Now, this is gonna keep it from flexing and twisting when we cut the floor out to channel it.
Now, what this involves is cutting the area of the floor where the body is going to sit on the frame. We're also going to lose the entire floorboard and replace it with something special. Later on.
As you can see, it took several pieces of square tubing to build this structure that also doubles as a stand for the body. Now, it may look like a little overkill, but this body weighs close to 500 pounds and when we're working under it, I don't want it to fall on my skinny, but
we're sitting our body on some of the snap lock flooring to protect our black and white tiles. When we use the plasma cutter
right now, time to make some measurements on this chassis using the nut search as a reference.
This way we'll know where to make our marks on the body. So we can weld up some body mounds.
Well, we can tell now that the mounting holes on the body here about a half inch wider than the nuts are on the chassis, but it's not gonna matter because all this material is getting cut away from here
on bass.
First will plasma cut the floor pan out of the way.
By the way, any time you're cutting this much old metal with a plasma cutter, you're going to create a lot of fumes.
So a piece of equipment like this ply
vent multi fume caddy comes in real handy.
Now, we can also make our cuts along the inside of the original rail.
Now that the floor is cut out of the body. I place these mounts down here on the frame. Now, we're going to attach these using some more one inch square tubing on the inside and outside of the frame rail.
We're using more tubing to attach the two sides of the body mount frame together. Now, what this will do is keep everything squared when we weld it into the body itself and this front piece, well, it's only temporary. It's going to have to go when we drop in the engine and transmission.
Now that it's all welded up. I know it's gonna fit over the frame rails because it was built on the chassis.
Now, all we need to do is get it squared up with the body.
Once it's aligned, you can start bracing it and welding it up
with the upright supports welded in. We're ready to set this thing on the chassis, but first, we need to get the stand out of the way.
Now we need the clearance, the back of the body for the shock mounts. So after that, a little more cutting with the plasma cutter,
man, it was a lot of work, but we got the entire floor cut out of the rat rod. Not to mention most of the bracing done to support the body looks great. And where have you been with? Mikey's? I gotta tell you that brush guard on your truck comes in real handy when you're out gathering uh new floor pants.
What do you
think?
Here's my personal favorite. That is too cool. Nobody saw
do it, did they?
I don't think so.
You won't see this thing for a while, which is officially now called the raunchy rat. But we'll be back in several weeks to build the motor transmission and we're gonna have fun with all of it. Meanwhile, stay tuned because we got more horsepower coming up. What do you think about this one? That's gonna be the firewall? Yeah,
that is cool.
You know, when it comes to computer technology for your street machine, big things keep coming in smaller packages and here's a little package we just had to check out.
It's called a Hyper pack from Hyper Tech. And it's the first performance computer with five distinct programs. Look at this.
It's got a tuning program that lets you optimize power and reprogram, all kinds of features.
It's got a diagnostic program that not only detects trouble codes, but tells you exactly what they are.
This program displays engine operating conditions and either
analog
ages
or digital.
Yeah, but it's the other three programs that really got our attention. And when you think about it, it's pretty amazing.
You need an engine dyno
to test horsepower, a torque and fly wheel, a
chassis dyno
to test power, you lay down at the rear wheels,
then you need to go to the track to see what your car to do in the 84 quarter mile.
Maybe not. Essentially, all three are inside the Hyper tech. This is the drag strip mode
and you choose either pro or sportsman tree and you make a run and get an exact duplication
of a time slip just like at the strip.
Then there's the dyno
modes that tell you either engine or rear wheel horsepower and torque with correction capabilities for different atmospheric conditions. But we're not just gonna take hypertech word for it. We've got our own chassis dyno
here in the shop, right.
And we got this mercury marauder that's already loaded up with the hyper pack programming.
Let's make a little comparison.
All right, here's the unit and it's already plugged into the diagnostic port
dyno
mode
and the temperature is 86 degrees, 60% humidity.
Let's go out and find a place to make a run.
Now, I'm gonna make this run in second gear so we don't get busted by the cops, get rolling a little bit
hit start,
punch it.
I'm gonna run it up to six grand and click it.
All right. Here's what we got. Max horsepower 253.6 at 5770 RPM. Max torque 2 39.9 at 5190.
Back at the horsepower shop. After several runs on the
dyno Jet, the Mercury was making within about five horsepower of the hybrid pack pretty good.
Now, this hyper pack will give you tons of other data. You could use more than we have time for now,
but I will take time to tell you it'll cost you about 800 bucks.
Somebody dropped a couple of bombs in the horse power shop today. Of course, I'm talking about mufflers. This is the Cherry bomb vortex that's engineered for high airflow and low interior resonance. Now, inside the aluminized steel casing, you'll find fiberglass and a patented baffle design that helps absorb both high and low frequency sounds
and this is cherry bomb's original high performance glass pack that's been around since 1968. It uses a straight through design to reduce back pressure and features the same sound absorbing technology as the vortex. The result, a classic steady rumble. Now, one of these will run you about 20 bucks. The vortex 80.
Well, finally, crane's got a whole bunch of new valve train components for the popular LS one
like this ratio rocker kit and in it, you get 1.8 rock
with poly locks, screw in studs, guide plates and special in thick wall push rods. Now, the rockers themselves have a quick lift design that's gonna get the valves off their seats faster than conventional rockers. The end result they say is more rear wheel horsepower. Now, to get a kit, you're gonna have to pony up about 700 bucks.
Well, that's it for hot parts horsepower. And well, may I say again, like the old maid said to the peeping Tom. Thanks for looking in.
