Parts Used In This Episode
Accel
Afterburner switchable coil.
AEM
Synthetic dry flow air flow.
Chevrolet Performance
ZZ502/502 DELUXE.
Dynamic Test Systems / (DTS)
Dyno cell and testing equipment.
Hotchkis
Coil springs, shocks by Bilstein, sway bars.
Master Power Brakes
12" front brake rotor upgrade with master cylinder and power booster.
Master Power Brakes
FORD 9 inch, 31 spline axels, 5x4.75 B/C, locker diff, 4.11 gear, 1/2 studs, rear disc brakes.
Matco Tools
4000 lb engine hoist.
MSD Ignition
Dash hawk information display unit, custom pods available.
O'Reilly Auto Parts
INNER AND OUTER TIE ROD ENDS
O'Reilly Auto Parts
Small block FORD 302 Reman.
Richmond Gear
Five Speed overdrive.
Summit Racing
Retro-Fit hydraulic roller lifters, springs, retainers and locks timing set, bronze distributor gear, roller rocker arms, pedestal to rocker arm stud conversion, special order push-rods.
Episode Transcript
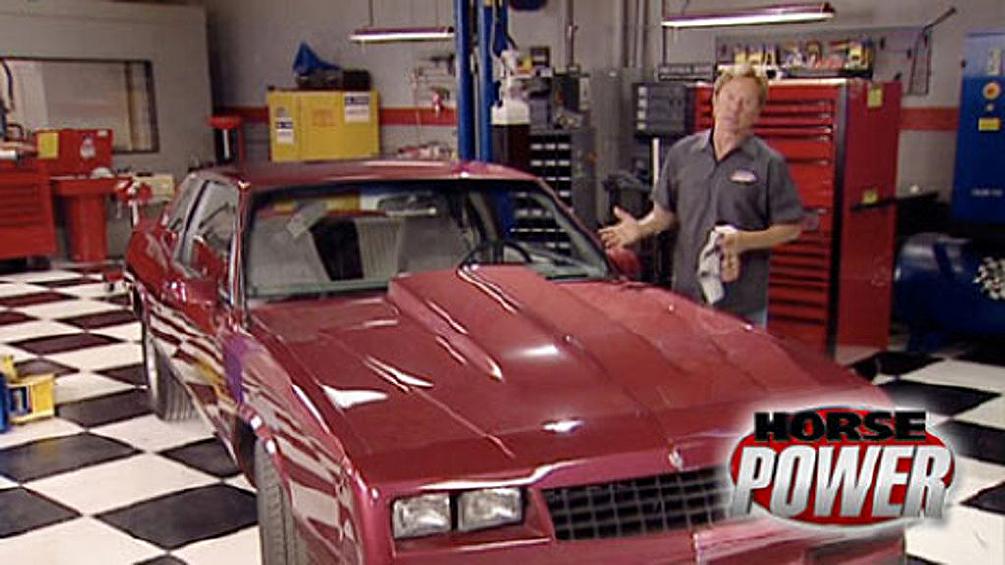
Hey, it's time again for horsepower and this time with a new project car of ours, that's a perfect prospect for some power and performance upgrades. Why is that? Well, think about it,
the Chevy Monte Carlo was the last rear driven, full frame carbureted
eight that Chevy made.
Oh, here's some other good reasons. They're plentiful these days and pretty affordable for as little as three grand.
The body was Winston cut based with a shovel nose, front end,
quad headlights, blacked out grill and monochromatic paint job.
It was called a hot ride for the eighties with an L 69 ho 305 making 100 80 horsepower.
Today, we're going to use our 86 model to show you how we think Chevy should have built the Monte Carlo for starters. The weak 180 horsepower 305 might have been all right back in the mid eighties, but just imagine over a 500 horsepower big block shod between those fender wells. Yeah, like this one.
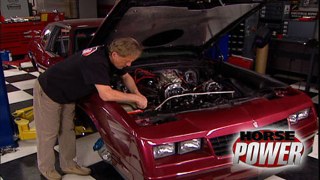
It's a GEO performance parts ZZ 502 deluxe, a crate motor that comes with everything you see here.
Now, the compression is 9.6 to 1 horsepower 502. Of course, that makes 567 ft pounds of torque,
enough power to turn our simple ss into a mighty Carlo
Monte Carlos only came with automatics. So banging gears wasn't an option but within a
fix that with a Richmond Super Street five speed like this one. Now, it's a direct replacement for Chevy Ford and Mo Parts and it's designed for higher horsepower street cars with up to 600 ft pounds of torque. Now, it's got wider cut gears, a long billet shifter and a 0.77 overdrive and fifth gear.
We know some of you have probably been thinking about an automatic to manual swap of your own. And well, during the course of this project, we'll show you how it's done using a kit we've got ordered. Meanwhile, it's time for us to tear into this tired old mouse and
give it a lift. Literally,
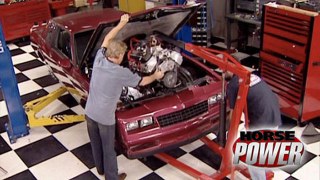
we should be able to pull this old motor out without removing the hood,
move it up a little forward a little and so on. Now, you always want to use a hoist that's rated at well over the weight you're lifting. Our Macco floor crane is rated at 4000 pounds
if you just
come on down with her.
Well, that was easy enough and just like I thought we didn't even have to remove the hood. Now, we're still waiting on some pieces and parts for our training conversion kit. So we're going to go ahead and move to another piece of the project that involves making this Monte Carlo handle and drive a lot more like a sports car.
This too is an upgrade that applies to just about any muscle car. We're going to replace the stock suspension with this inclusive TV S kit from Hotchkiss,
you know, like with engines, mixing and matching suspension components can be risky. These however, have been designed and tested to work together the system
like the front and rear coils, front and rear sway bars,
trailing arm mount braces that are adjustable and this complete adjustable rear end suspension system.
Now, we also stepped up and got some of their bill stein shocks that have been specially tuned to work with the rest of the set up.
We'll get started by supporting the rear end with our jack
and removing the rear shocks.
Then the rear springs can come out
next. We on both the upper control arms,
then the lower control arms.
Needless to say, you don't have to remove the whole rear end to do the suspension upgrade. But since we're stepping up to a big block 502 and a Richmond five speed, I don't think this little 10 bolt will withstand the power. So we're stepping up to one that'll definitely handle the abuse.
It's a nine inch rear end assembly that's brand new for master power. Now they stuffed the front of it with a Detroit locker in 411 gears, 31
spine axles work their way out to a cross drilled and slotted 11 inch rotor. And that's capped off with a set of their aluminum four piston calipers and check this out
a separate caliper for the emergency brake system
before anything else though, to prevent a rusty rear end, I'm going to apply some paint to the rear end, spare metal.
But after a quick lunch, the paint's dry and well, we're ready to bolt these upper control arms to it.
Now, it's easy to see how the new ones are a lot stronger than the stalkers to improve handling and traction. Also,
you can adjust the pinion angle to correct any drive line vibrations.
Now, to prevent any suspension squeaks, we want to apply some of this Teflon grease from the kit
to the bushing faces a
little bit, goes a long way. Now we can go ahead and bolt up this upper
and same thing goes for the lower control arm.
All right, after we get the brake lines installed, we can put this nine inch up on the lift and, oh, we won't do anything else though until you come back. So hang with us.
That's good.
Hey, we're back to finish up today's work on our latest project vehicle. It's an 86 Monte Carlo, that's gonna be a lot of fun to drive when we get it finished. Now, that's thanks to a 502 crate engine and an automatic to manual transmission conversion. But first, we've got to get this rear end suspension and brake upgrade mounted in the back end.
We just installed new Hotchkiss upper and lower control arms on our nine inch rear end for master power. Now we can bolt them to the frame.
The new front bolts are longer than the stock ones for a good reason.
They allow us to install these adjustable trailing arm mount braces.
And what these do is triangulate the control arms with frame mounts
given an extra strength for all that extra horsepower.
And we're just gonna tighten down the nuts, finger tight.
Well, now we can drop in the new springs jack, the rear end up a couple of inches
and install the shocks.
Now we can tighten the control arm nuts all the way around. Finally
install the new rear sway bar to complete the suspension upgrade along with our new crate rear rent
next time to get dirty again, up front, renewing the shots
and sway bar.
Then after separating the spindle from the upper control arm,
we can pull out the springs.
Master power is probably best known for older muscle car brake kits, but nowadays, they got one for our mighty mighty. Now, this front assembly comes with a 12 inch rotor that's cross drilled and slotted to dissipate gasses. Oh, and it's a full inch and three quarters larger than our stockman was. Now the calipers are aluminum four piston design
and back here a direct replacement spindle. Of course, the kit comes with hoses and hardware.
Now, any time you convert rear drum brakes to disc brakes, you're gonna have to step up to one of these dual diaphragm power boosters
and a master cylinder with a larger board diameter. Why? Well, quite simply the disc brakes require more pressure than the old drums do
before I install the new Hotchkiss
spring. Check out the diameter difference. The stock spring is a lot smaller in diameter and it's also a lot taller. Now, the new Hotchkiss
spring wind up giving us about a one inch drop
with the spring in place.
We need to jack up the lower control arm
that way we can bolt up our new brake assembly at the spindle. Our
Hodgkiss
kit also comes with a front sway bar that's lighter than stock, but a good bit thicker also has these polyurethane bushings that are
also greasy
or is that greasy?
Well, you get the idea
when you both these brackets up to the frame, make sure this split in the bushing here is facing forward
and finish the job by connecting the sway bar to the lower control arm with a set of end links.
One more upgrade for the front tie rod ends wear over time and this will give you steering and tracking problems. So we went to our local o'reilly store and picked up some new ends just for the added insurance.
And when they install them using a new tie rod sleeve, we got from Hotchkiss in the kit
with the old one out of the way
and use a new hardware. We bought this end to the drag link and the other end to the new spindle.
Any time you replace a bunch of suspension parts, especially on the front end including tire rod sleeves, make sure you get your car realigned. If not, you're gonna have premature tire wear. One more thing, you guys know the drill, make sure your brakes are bed in properly before you put them through any hot heat cycles.
Good advice and good start today on our new street machine
project. Next time we get it in here, of course, we'll drop in this 502 big block and show you how to swap out a boring factory, automatic trans for a gear banging five speed manual. What else would you expect from a mighty Carlo? We're coming up. We'll see how much bang for the buck we can get out of a hydraulic cam conversion.
Hey, we're back in the horsepower shop and glad you're still with us.
Everybody knows that hydraulic roller cams are the way to go. If you want to get more power and torque from your street machine, you might say that the logic
is right here in the lobes. A flat tap at cam's lobes are steeper than the hydraulic rollers. And that means the valve is going to be held open at a higher lift for longer. Of course, converting to a hydraulic roller involves more than just a cam swap.
So,
is the conversion worth the money you'll have to shell out. Well, that's what this bang for the buck is all about. We're going to use the stock 4302. We picked up at o'reilly's make the conversion and then use our DTs
dyno to measure its power gains. The conversion kit we're using comes from crane and includes of course the cam shaft
and things we need like springs and retainers,
roller rocker arms,
hydraulic lifters
and this new timing set. Well, more about this later right now though it's tear down time in the
dyno cell to begin the conversion, we need to remove the valve covers the intake manifold, the factory valve train,
the balancer water pump with the timing cover attached the timing chain and finally the camshaft,
hey, see the difference in height and the stock lifters and the hydraulic rollers. Well, that extra height could cause the stock springs to collapse and bottom out.
That's why we installed new springs that are made to match the rest of the components in the kit
and compensate for taller lifters.
The cam goes in next. By the way, the intake duration is 208
and the exhaust is 216 with 530 lift on both the intake and exhaust. Make sure you check your cam card for the proper firing order since it did change
the new cam gear and billet Tim and set go on next.
Always remember to replace the timing cover gasket. Anytime you have the timing cover on or off, good advice. So now we can go on and install these lifters that come with anti rotation guide bars
that go on the cylinder side of the block.
Now, because of the extra height of these lifters, we had to remove the heads to install them.
Now, we can bolt the heads back up. Of course, using new gaskets.
Then after installing the Rocker Armstead conversion pieces,
we can drop in these new shorter push rods
followed by the roller rockers
to reduce wear. They've got a wide contact roller tip and a heat treated push rod cup.
There's one more modification we got to make before we complete this conversion and that's installing this bronze distributor gear.
Otherwise, our billet cam would eventually destroy the stock one
that's only made of coated steel.
It installs easily by using the stock pin to keep it in place
with that handled. We can button up the rest of the small block,
change the oil and fired up
after giving the motor a good warm up, we're ready to make some pulls and we're going to do it on 87 octane fuel. Now, it'll typically take you about four hours to convert your engine to a hydraulic roller and we're about to find out whether or not it's worth the time and the money
the baseline for this 302
was 210 horsepower,
302.
Now, our small block Ford is making 248 horsepower, 325 ft pounds of torque
to recap this bang for the buck. We used a crane hydraulic roller cam conversion kit. We made 38 horsepower over our baseline and 23 more foot pounds of torque.
The price for that added power. 9 49 95 go to power block tv.com to see more details and a di
all right, we'll have a bunch more bang for the bucks for you in weeks to come.
Meanwhile, how would you like to break into serious heads up drag racing without breaking the bank? We might have the way coming right up
and a lot of times the bracket race, you have to put your brakes on to beat the guy
that's not racing.
You know, that's, you know, there's no fun in that.
Hey, let's say you're bored with bracket racing and you're ready to step up to heads up competition. Well, like an outlaw 10 5 car like this,
no problem.
Got an extra 200 grand to spare
now for less than 1/10 of the budget and a lot of help from his gearhead buddies. The driver of this car is going heads up and having the time of his life
and some of the bigger classes, the more money you got, the faster you go, the more you go in
this class keeps its, you know, everybody's got to run a small block. Everybody's got to run a single plate kit.
Everybody's got to run the same size tire.
That's John, the preacher man Connell.
Yeah, he's really a minister and he also preaches the virtues of
Ora's new modified street class. It's designed for guys that are high on going heads up while keeping the cost relatively low.
This is about as low buck as you get right here. Probably realistically counting car motor and all
not counting the oops
when you blow something up or something breaks.
We've probably got around 15 in the car.
We do this out of our pocket. There's no sponsors here. You know, nobody,
he takes off work, he takes off work and we do everything ourselves. All the modified street racers seem to tell the same story about loving the competition,
hating the cost of competing in the quicker classes
like Dustin Newborn last year. He found the easy street class, not as easy on the wallet as it used to be.
It's tough backing up from easy street,
but for the guys coming in at a great entry level and still heads up that way, you ain't gotta worry about breaking out, run his passing run.
What about your uh
overall combination here? We kind of block. It, it's a dark block. Rox
dash 12 heads, 429 inch uh Bennett racing built the motor.
They help us some. That's what it takes. You gotta help me guys, you can't do this.
It also helps to be a good driver with great reaction time.
All that helped Dustin leave the modified street points chase at mid season.
Most competitive modified street drivers are running in the mid to high fives on the eight mile strip. So if your car meets the weight requirements
has a small block that's 440 cubic inches or under
one hit of nitrous oxide. Among other rules, of course,
can run the eight mile in under six seconds.
Hey, you might be ready to dump the dial in
and step up to heads up
modified street stop.
We've never bracket raced. It's either run what you've run and hope you've run enough, you know, or you don't race.
So how would you like to drive with more fuel efficiency on the street faster on the strip and spot maintenance issues before they put you on the side of the road? Well, that's the idea behind this dash hog meter from MS D.
After you plug it into your diagnostic port, you can review over 100 parameters on 11 different screens. Well, you can see how your teenage son drives the car when he borrows it on Saturday night. Of course, you can also download it into your PC.
The price for all this information, right. At $300 reusable air filters have been around for quite some time, but most of them require oil to catch the dirt. Well, now a em has a full line of dry flow filters that are oil free. That means you spend less time cleaning them and you don't have to worry about the proper amount of oil to add.
Now, according to independent results, they have an impressive flow rate of 99.4%.
Now, they also incorporate this reinforced internal cage that's lighter and stronger than your conventional mesh. So, don't you mess around, you can go pick one of these filters up with prices starting at 44 bucks.
Well, that's all the time we have for this horsepower. We'll see you around next time.
Show Full Transcript
the Chevy Monte Carlo was the last rear driven, full frame carbureted
eight that Chevy made.
Oh, here's some other good reasons. They're plentiful these days and pretty affordable for as little as three grand.
The body was Winston cut based with a shovel nose, front end,
quad headlights, blacked out grill and monochromatic paint job.
It was called a hot ride for the eighties with an L 69 ho 305 making 100 80 horsepower.
Today, we're going to use our 86 model to show you how we think Chevy should have built the Monte Carlo for starters. The weak 180 horsepower 305 might have been all right back in the mid eighties, but just imagine over a 500 horsepower big block shod between those fender wells. Yeah, like this one.
It's a GEO performance parts ZZ 502 deluxe, a crate motor that comes with everything you see here.
Now, the compression is 9.6 to 1 horsepower 502. Of course, that makes 567 ft pounds of torque,
enough power to turn our simple ss into a mighty Carlo
Monte Carlos only came with automatics. So banging gears wasn't an option but within a
fix that with a Richmond Super Street five speed like this one. Now, it's a direct replacement for Chevy Ford and Mo Parts and it's designed for higher horsepower street cars with up to 600 ft pounds of torque. Now, it's got wider cut gears, a long billet shifter and a 0.77 overdrive and fifth gear.
We know some of you have probably been thinking about an automatic to manual swap of your own. And well, during the course of this project, we'll show you how it's done using a kit we've got ordered. Meanwhile, it's time for us to tear into this tired old mouse and
give it a lift. Literally,
we should be able to pull this old motor out without removing the hood,
move it up a little forward a little and so on. Now, you always want to use a hoist that's rated at well over the weight you're lifting. Our Macco floor crane is rated at 4000 pounds
if you just
come on down with her.
Well, that was easy enough and just like I thought we didn't even have to remove the hood. Now, we're still waiting on some pieces and parts for our training conversion kit. So we're going to go ahead and move to another piece of the project that involves making this Monte Carlo handle and drive a lot more like a sports car.
This too is an upgrade that applies to just about any muscle car. We're going to replace the stock suspension with this inclusive TV S kit from Hotchkiss,
you know, like with engines, mixing and matching suspension components can be risky. These however, have been designed and tested to work together the system
like the front and rear coils, front and rear sway bars,
trailing arm mount braces that are adjustable and this complete adjustable rear end suspension system.
Now, we also stepped up and got some of their bill stein shocks that have been specially tuned to work with the rest of the set up.
We'll get started by supporting the rear end with our jack
and removing the rear shocks.
Then the rear springs can come out
next. We on both the upper control arms,
then the lower control arms.
Needless to say, you don't have to remove the whole rear end to do the suspension upgrade. But since we're stepping up to a big block 502 and a Richmond five speed, I don't think this little 10 bolt will withstand the power. So we're stepping up to one that'll definitely handle the abuse.
It's a nine inch rear end assembly that's brand new for master power. Now they stuffed the front of it with a Detroit locker in 411 gears, 31
spine axles work their way out to a cross drilled and slotted 11 inch rotor. And that's capped off with a set of their aluminum four piston calipers and check this out
a separate caliper for the emergency brake system
before anything else though, to prevent a rusty rear end, I'm going to apply some paint to the rear end, spare metal.
But after a quick lunch, the paint's dry and well, we're ready to bolt these upper control arms to it.
Now, it's easy to see how the new ones are a lot stronger than the stalkers to improve handling and traction. Also,
you can adjust the pinion angle to correct any drive line vibrations.
Now, to prevent any suspension squeaks, we want to apply some of this Teflon grease from the kit
to the bushing faces a
little bit, goes a long way. Now we can go ahead and bolt up this upper
and same thing goes for the lower control arm.
All right, after we get the brake lines installed, we can put this nine inch up on the lift and, oh, we won't do anything else though until you come back. So hang with us.
That's good.
Hey, we're back to finish up today's work on our latest project vehicle. It's an 86 Monte Carlo, that's gonna be a lot of fun to drive when we get it finished. Now, that's thanks to a 502 crate engine and an automatic to manual transmission conversion. But first, we've got to get this rear end suspension and brake upgrade mounted in the back end.
We just installed new Hotchkiss upper and lower control arms on our nine inch rear end for master power. Now we can bolt them to the frame.
The new front bolts are longer than the stock ones for a good reason.
They allow us to install these adjustable trailing arm mount braces.
And what these do is triangulate the control arms with frame mounts
given an extra strength for all that extra horsepower.
And we're just gonna tighten down the nuts, finger tight.
Well, now we can drop in the new springs jack, the rear end up a couple of inches
and install the shocks.
Now we can tighten the control arm nuts all the way around. Finally
install the new rear sway bar to complete the suspension upgrade along with our new crate rear rent
next time to get dirty again, up front, renewing the shots
and sway bar.
Then after separating the spindle from the upper control arm,
we can pull out the springs.
Master power is probably best known for older muscle car brake kits, but nowadays, they got one for our mighty mighty. Now, this front assembly comes with a 12 inch rotor that's cross drilled and slotted to dissipate gasses. Oh, and it's a full inch and three quarters larger than our stockman was. Now the calipers are aluminum four piston design
and back here a direct replacement spindle. Of course, the kit comes with hoses and hardware.
Now, any time you convert rear drum brakes to disc brakes, you're gonna have to step up to one of these dual diaphragm power boosters
and a master cylinder with a larger board diameter. Why? Well, quite simply the disc brakes require more pressure than the old drums do
before I install the new Hotchkiss
spring. Check out the diameter difference. The stock spring is a lot smaller in diameter and it's also a lot taller. Now, the new Hotchkiss
spring wind up giving us about a one inch drop
with the spring in place.
We need to jack up the lower control arm
that way we can bolt up our new brake assembly at the spindle. Our
Hodgkiss
kit also comes with a front sway bar that's lighter than stock, but a good bit thicker also has these polyurethane bushings that are
also greasy
or is that greasy?
Well, you get the idea
when you both these brackets up to the frame, make sure this split in the bushing here is facing forward
and finish the job by connecting the sway bar to the lower control arm with a set of end links.
One more upgrade for the front tie rod ends wear over time and this will give you steering and tracking problems. So we went to our local o'reilly store and picked up some new ends just for the added insurance.
And when they install them using a new tie rod sleeve, we got from Hotchkiss in the kit
with the old one out of the way
and use a new hardware. We bought this end to the drag link and the other end to the new spindle.
Any time you replace a bunch of suspension parts, especially on the front end including tire rod sleeves, make sure you get your car realigned. If not, you're gonna have premature tire wear. One more thing, you guys know the drill, make sure your brakes are bed in properly before you put them through any hot heat cycles.
Good advice and good start today on our new street machine
project. Next time we get it in here, of course, we'll drop in this 502 big block and show you how to swap out a boring factory, automatic trans for a gear banging five speed manual. What else would you expect from a mighty Carlo? We're coming up. We'll see how much bang for the buck we can get out of a hydraulic cam conversion.
Hey, we're back in the horsepower shop and glad you're still with us.
Everybody knows that hydraulic roller cams are the way to go. If you want to get more power and torque from your street machine, you might say that the logic
is right here in the lobes. A flat tap at cam's lobes are steeper than the hydraulic rollers. And that means the valve is going to be held open at a higher lift for longer. Of course, converting to a hydraulic roller involves more than just a cam swap.
So,
is the conversion worth the money you'll have to shell out. Well, that's what this bang for the buck is all about. We're going to use the stock 4302. We picked up at o'reilly's make the conversion and then use our DTs
dyno to measure its power gains. The conversion kit we're using comes from crane and includes of course the cam shaft
and things we need like springs and retainers,
roller rocker arms,
hydraulic lifters
and this new timing set. Well, more about this later right now though it's tear down time in the
dyno cell to begin the conversion, we need to remove the valve covers the intake manifold, the factory valve train,
the balancer water pump with the timing cover attached the timing chain and finally the camshaft,
hey, see the difference in height and the stock lifters and the hydraulic rollers. Well, that extra height could cause the stock springs to collapse and bottom out.
That's why we installed new springs that are made to match the rest of the components in the kit
and compensate for taller lifters.
The cam goes in next. By the way, the intake duration is 208
and the exhaust is 216 with 530 lift on both the intake and exhaust. Make sure you check your cam card for the proper firing order since it did change
the new cam gear and billet Tim and set go on next.
Always remember to replace the timing cover gasket. Anytime you have the timing cover on or off, good advice. So now we can go on and install these lifters that come with anti rotation guide bars
that go on the cylinder side of the block.
Now, because of the extra height of these lifters, we had to remove the heads to install them.
Now, we can bolt the heads back up. Of course, using new gaskets.
Then after installing the Rocker Armstead conversion pieces,
we can drop in these new shorter push rods
followed by the roller rockers
to reduce wear. They've got a wide contact roller tip and a heat treated push rod cup.
There's one more modification we got to make before we complete this conversion and that's installing this bronze distributor gear.
Otherwise, our billet cam would eventually destroy the stock one
that's only made of coated steel.
It installs easily by using the stock pin to keep it in place
with that handled. We can button up the rest of the small block,
change the oil and fired up
after giving the motor a good warm up, we're ready to make some pulls and we're going to do it on 87 octane fuel. Now, it'll typically take you about four hours to convert your engine to a hydraulic roller and we're about to find out whether or not it's worth the time and the money
the baseline for this 302
was 210 horsepower,
302.
Now, our small block Ford is making 248 horsepower, 325 ft pounds of torque
to recap this bang for the buck. We used a crane hydraulic roller cam conversion kit. We made 38 horsepower over our baseline and 23 more foot pounds of torque.
The price for that added power. 9 49 95 go to power block tv.com to see more details and a di
all right, we'll have a bunch more bang for the bucks for you in weeks to come.
Meanwhile, how would you like to break into serious heads up drag racing without breaking the bank? We might have the way coming right up
and a lot of times the bracket race, you have to put your brakes on to beat the guy
that's not racing.
You know, that's, you know, there's no fun in that.
Hey, let's say you're bored with bracket racing and you're ready to step up to heads up competition. Well, like an outlaw 10 5 car like this,
no problem.
Got an extra 200 grand to spare
now for less than 1/10 of the budget and a lot of help from his gearhead buddies. The driver of this car is going heads up and having the time of his life
and some of the bigger classes, the more money you got, the faster you go, the more you go in
this class keeps its, you know, everybody's got to run a small block. Everybody's got to run a single plate kit.
Everybody's got to run the same size tire.
That's John, the preacher man Connell.
Yeah, he's really a minister and he also preaches the virtues of
Ora's new modified street class. It's designed for guys that are high on going heads up while keeping the cost relatively low.
This is about as low buck as you get right here. Probably realistically counting car motor and all
not counting the oops
when you blow something up or something breaks.
We've probably got around 15 in the car.
We do this out of our pocket. There's no sponsors here. You know, nobody,
he takes off work, he takes off work and we do everything ourselves. All the modified street racers seem to tell the same story about loving the competition,
hating the cost of competing in the quicker classes
like Dustin Newborn last year. He found the easy street class, not as easy on the wallet as it used to be.
It's tough backing up from easy street,
but for the guys coming in at a great entry level and still heads up that way, you ain't gotta worry about breaking out, run his passing run.
What about your uh
overall combination here? We kind of block. It, it's a dark block. Rox
dash 12 heads, 429 inch uh Bennett racing built the motor.
They help us some. That's what it takes. You gotta help me guys, you can't do this.
It also helps to be a good driver with great reaction time.
All that helped Dustin leave the modified street points chase at mid season.
Most competitive modified street drivers are running in the mid to high fives on the eight mile strip. So if your car meets the weight requirements
has a small block that's 440 cubic inches or under
one hit of nitrous oxide. Among other rules, of course,
can run the eight mile in under six seconds.
Hey, you might be ready to dump the dial in
and step up to heads up
modified street stop.
We've never bracket raced. It's either run what you've run and hope you've run enough, you know, or you don't race.
So how would you like to drive with more fuel efficiency on the street faster on the strip and spot maintenance issues before they put you on the side of the road? Well, that's the idea behind this dash hog meter from MS D.
After you plug it into your diagnostic port, you can review over 100 parameters on 11 different screens. Well, you can see how your teenage son drives the car when he borrows it on Saturday night. Of course, you can also download it into your PC.
The price for all this information, right. At $300 reusable air filters have been around for quite some time, but most of them require oil to catch the dirt. Well, now a em has a full line of dry flow filters that are oil free. That means you spend less time cleaning them and you don't have to worry about the proper amount of oil to add.
Now, according to independent results, they have an impressive flow rate of 99.4%.
Now, they also incorporate this reinforced internal cage that's lighter and stronger than your conventional mesh. So, don't you mess around, you can go pick one of these filters up with prices starting at 44 bucks.
Well, that's all the time we have for this horsepower. We'll see you around next time.
