More Road Burner Episodes
Detroit Muscle Featured Projects
Detroit Muscle Builds
Want more content like this?
Join the PowerNation Email NewsletterEpisode Transcript
(Tommy)>> You're watching Powernation!
(Tommy)>> Today on Detroit Muscle we give you some simple hacks to get you amped up about that scary road trip down electric avenue that your Detroit iron can't live without. [ Music ] [ engines revving ] [ Music ] [ scary music ]
(Joel)>> Tom? You in here? [ crackling ]
(Joel)>> Yeah that's not creepy at all. Hey Tom! Tom you in here? Tom? [ scary music ]
(Joel)>> Okay, I get it. Messing with the new guy. Come on man, it's not funny anymore. You're not gonna scare me. [ intense scary music ]
(Joel)>> Whoa, nope, doesn't count. You didn't scare me, nope, I'm not scared.
(Tommy)>> You should be.
(Joel)>> Why?
(Tommy)>> Cause we're wiring the car.
(Joel)>> Noooooo!
(Tommy)>> Hands down this next task that we're gonna tackle has to be the most intimidating part of building, restoring, or just plainly working on your projects. So why is that? Well, the electrical system usually has some form of involvement with the operations of majority of the components of your vehicle. You do something wrong and exorcist type of stuff starts happening. Or even worse, fire and smoke special effects become reality. Then there are electrical gremlins that can be caused by improper alteration, and then that can take hours upon hours to locate, troubleshoot, and repair. And whenever you talk to a shop about working on this it's gonna be very expensive because time is money, but with a plan, some simple tools, and a little bit of time wiring isn't nearly as dramatic as one might think. So, let's go through a few things that may help you with your project if you're thinking about giving this a go. On Road Burner we're starting with a clean slate. All that old stuff has been removed. The only wiring that we currently have is the engine harness. Therefore, we have to tie into that and wire everything else up.
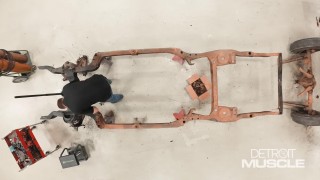
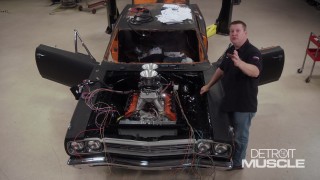
(Joel)>> All this colorful spaghetti you see spread out across the floor is our electrical system. Now before any of you guys go looking for a setup for your ride, you're gonna want to ask yourselves a couple of questions. For example, will a universal harness work for your application, or should you go for something a little more original. The answer to all that has to do with the personality of your four-wheel treasure. If everything under the hood looked as if it rolled off the assembly line you probably need something that has more of an OG appearance, but if your ride has a bit more of a hot rod vibe the tailorable unit would be more of what you're looking for. Often times guys prefer this way so that they can hide those copper core electric hoses for a much cleaner look.
(Tommy)>> Another thing to consider is how many circuits are you gonna need. Well that all depends on the power options that you plan to be running.
(Joel)>> What we're gonna be installing on our Plymouth is what you'd call a semi direct fit harness, meaning it's got a fuse block and connector assembly similar to what would have came on the car originally, but we are still gonna have to cut and terminate a few of those connections.
(Tommy)>> This allows you to move some of your wiring around with the option to connect to some of your factory components. Now we're running a late model power plant, which is way different than what that car would have came from the factory with, but we still plan to use the stock switches in our dashboard. If we would have tried to use an o-e style harness it would have taken several modifications to make it work.
(Joel)>> A setup like this can also save you a bunch of time because each wire is individually labeled, and to precisely determine which wire is which can be a lot of work, especially considering there's usually more than one red wire in a harness, and to trace and identify wires based solely on their terminals is not fun for anybody.
(Tommy)>> Our upgraded harness has another thing going for it. It has more than enough circuits than we need, which can be convenient if you're looking to do some upgrades later on.
(Joel)>> At this point you really want to just make sure that you're making the correct choice for your harness.
(Tommy)>> You don't want to max out something like this. A few extra circuits now makes additions later way easier.
(Joel)>> Coming up, we expose some secrets on the best way to strip and make a connection.
(Tommy)>> Well I bet for a few of you all you may be squirming in your seat a little bit from the looks of things. Now that pretty harness that we had stretched out over there in the floor is now kinda just strolled out into our Plymouth. Now if you're looking to do something like this there's a few things you should keep in mind.
(Joel)>> Just like in the engine bay and throughout the rest of the car, you've got a lot of moving parts in here as well. Between your pedal assembly, your shifter, and even your own two feet you've got more than enough opportunity to get tangled up in your own wiring job but taking the extra time and care to tuck everything up into the firewall will not only help keep everything nice and neat, but it'll limit that possibility of damaging your harness.
(Tommy)>> When you're ready to start finalizing those connections you're gonna need a few tools to make this process a whole lot smoother. Kinda like some crimpers, cutters, strippers, and so on. For a little wiring 101 let's talk about strippers. Now there's several different types out there but they all basically do the same thing, and that is remove the protective coating to expose the wire. However, there is a wrong way to use them. They have designated places for different size or gauge wires. If you choose the wrong one you can damage the wire. What it will do is cut into the wire, and that can lead to a poor connection. You can see a few pieces of copper here in the sheathing and you don't want this. Okay the next thing. Let's say you want to connect two wires. Let's start with the most basic way, and that is with the pigtail or rat tail splice. That's where you take two or more wires and simply twist them together. A connection like this works but it has its drawbacks. One is it's not a very strong connection unless it's soldered. If you wrap it with electrical tape moisture can still get in because of the gap, and it's not very pleasing to the eye. But one thing's for sure, it's easy. Another way you can make a connection is with crimp connectors. These are easy to use, and they're gauge specific. Let's start with the wire. You will need to remove some of the insulation. Now with that all you're trying to do is go about halfway through this connector. You don't need a bunch of wiring sticking out from the end of it. So, let's cut some off here. Now if you'll look on your connector there's a seam on it. If you're using the type of pliers with the bump on it you want to be on the opposite side of that seam. Then all you need to do is take your pliers and clamp it down. This helps to ensure a lot stronger of a crimp. Now after you're done give this thing a little bit of a tug. Don't get all He-Man on it. You're just checking to see if it's loose. If it is that can lead to a short. Alright this next thing isn't necessarily mandatory, but it is preferred by many, and that is to solder your crimp. Now to do this you can use a soldering iron or gun, or what I like to use, and that is a micro torch. This thing helps to speed up the process. Just heat things up a bit, dab with some solder. That will get it done. Now when soldering too much heat and this stuff can be a bad thing. If you throw the heat to it you can burn up the protective coating on the wire... [ Music ] ...and if you pour on the solder it will basically make the wire solid.
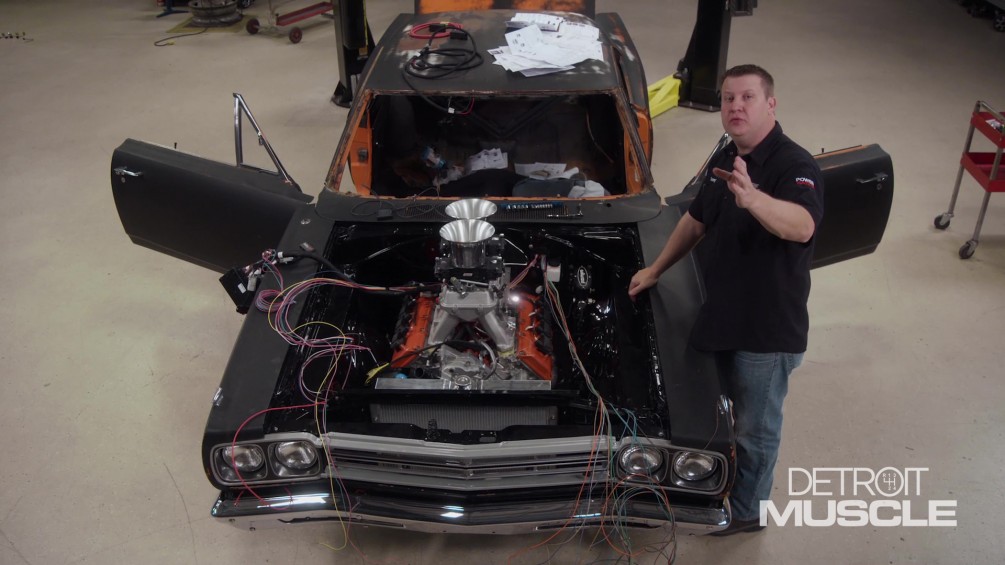
(Joel)>> You know keeping your electrical work nice and neat can really compliment your build, and if you don't believe me take a look at all these wires strung out the front of this car. Kinda rattles the nerves a little bit, doesn't it? And all we're really trying to do is help calm those nerves a little bit so that you guys aren't quite as intimidated by a task such as this. Get you a game plan, stay focused, separate the harness out into groups, and start terminating wires from there. You know what they say. The best way to eat an elephant, one bite at a time. After using some of the techniques that Tommy was just talking about over there the next thing you want to focus on is shielding your work, and you have plenty of options in that department as well. Starting off, good ole fashioned electrical vinyl tape. Now this stuff is actually a pretty good insulator when used properly, and there are a few different styles and colors to choose from that factor in heat, moisture, and vibration, and application is about as easy as it gets. Just simply wrap it around your work. However, I would not recommend it as a standalone repair to severely damaged or unspliced wires. Next up we have what is called liquid electrical tape, which I would consider more of a problem solving solution, and in terms of aesthetics there are far better alternatives, but if your trailer wires fall apart going down the road this stuff will at least get you home. For premium shielding when it comes to appearance, longevity, and weather proofing I would highly recommend heat shrink, especially the kind with the hot melt sealer. Not only does it look cool when you're applying it, it also creates a trouble free repair that looks nice to boot and makes your wiring job look professional whether you are or not. And at this point it could be really hard to gauge how much work we still have to do on this car, and the answer just might shock you. But we are getting down to the wire. All we can do is focus on the current task at hand, and as long as we don't sell ourselves short we can do it. ( )>> Epic fail!
(Tommy)>> Up next, we hook up with electrifying results.
(Joel)>> Well guys so far our eyes haven't been too big for our stomachs. As you can plainly see we've been chewing through our elephant bite by bite. Tom tackled the spaghetti up underneath the dash while I sank my teeth into the front headlight and turn signal assembly. The detailed instructions and color coded wiring made this process fairly simple and easy. However, some portions have been easier to digest than others. For example, if you've ever wired an engine harness before you will understand the complications involved, especially considering how critical each connection is. I like to compare it as being just as important to your electrical system as the blood vessels are to your body. It carries electricity from one component to the next to ensure everything is functioning in harmony. That being said it doesn't mean there wasn't a little bit of room for improvement. Using the process of elimination, we were able to trim a little fat and get rid of some of these wires we weren't using, which not only helped ease the headache but also gave our engine bay a nice, clean, and organized look. Along with that we're sticking with our hot rod and race car theme by installing the battery inside the trunk of the car. We're also gonna go ahead and put in this high output connection kit that's gonna work as a junction block between the alternator, the battery, and the starter. [ Music ] This high output connection kit assists your o-e style harness to be able to handle a high amperage alternator. A setup like this can come in a variety of different wiring, terminals, boots, and more based on your application. Detailed instructions are also included to help facilitate your installation.
(Tommy)>> with our dash finally installed we can move on to the next thing, and that is gonna be installing the steering column, and we want to show you a few tips on how to do it properly. This may sound like a straightforward task, but it would blow you mind on how many hot rods that I've worked on in the past that has what could be called a sub-par install, and I just don't get it. Why someone would want to skimp on something like this I can't even comprehend. It's kinda like your brakes. If something goes wrong well this stuff can keep you out of harms way. It's very important for the column to be mounted in a solid fashion on both ends. A column with just one location point is downright dangerous. The column that we're gonna be installing is designed to bolt right into place. It reuses the stock upper bracket. It comes with its own lower plate, and it gives us both points like the factory engineered. If you wanted to go with a universal path the column's gonna come with a smooth tube and you're gonna have to fab or buy some brackets to mount both ends properly. [ Music ] Column's in, so now let's talk about connecting it to the rack. Now to get this job done we're gonna have to use a couple of U-joints like this one and a steering shaft. We already have one of our U-joints slid onto the shaft of the rack down here, and we're gonna run up from there and connect to the input side of our steering column. Now what you're gonna be looking for is obstructions between these two points. Now another thing that you can run into is clearance problems with the motor mounts and frame rails if you're working on some custom application. And just as a rule of thumb, you want at least a half inch of clearance around any obstacle. To properly install one of these into this there's a couple of things that you need to keep in mind. One is you don't want to slide the shaft in too far because you'll bottom out and that'll mess up the innards. That's a big malfunction. This will limit the operation range of the U-joint. What you want to do is slide that shaft out until it's basically flush right there on the inside, and that gives you back the swing that you want. Second with this style joint, everything is held in place with a couple of set screws, and that's what goes in these two holes. Once you get everything dialed in perfectly you want to take and mark where that set screw's gonna come in contact with this shaft and make a dimple. [ Music ] [ drill humming ] [ Music ]
(Joel)>> Next, we toot our own horn Mopar style!
(Tommy)>> We've all probably heard that old saying, it has all the bells and whistles. Well in the case of our Road Runner this thing is pretty bare bones. However, it has to have that one piece of Mopar history that this thing came standard with, and that would be that iconic beep beep horn. This small piece of Plymouth magic only came on two of their models. That would be the Superbird and the Road Runner. The tone of this safety device sings a familiar song of that bird that was dressed for the occasion, and he wasn't planning to let any grass grow under his feet. The story behind this clever noise maker is quite interesting. Plymouth had to pay Warner Brothers a healthy sum for the rights to use the sound and likeness of our throttle junky feathered friend. As for development rumor has it a member of Mopar brass was in one of their warehouses and heard the famous note. He followed it to the source and low and behold what they were looking for was on a forklift. [ Music ] Often times if you're looking to install some form of an electrical accessory onto your ride that it didn't come from the factory with, you're gonna have to deal with some relays. A relay is basically a switch that allows you to take a low electrical input and convert it to a higher current output. They're used all the time whenever you're running stuff like electric fuel pumps and fans because they take a good bit of juice to make them run. They come in many different styles. You've got 20, 30, 40 amp ratings. You've got some with a tab, some without, and they even make a weatherproof style. To wire up one of these isn't too bad. Let's start with the larger gauge wires. You basically have a higher amperage input and output. The input goes to the battery source, and the output to whatever you're trying to run, like a fan. The relay that we're working with here is referred to as a normally open style. That means it has to be activated to complete the circuit. Relays are available as normally closed, which would operate just the opposite. Then you have your trigger wires. One is a positive input. The other is a ground and depending how you're wanting that fan to operate you're gonna have to make some decisions. If you just wanted it to come on with the toggle switch you could hook the 12-volt input to a power source, and the other wire to a ground, and it would work with the flip of a switch. With a relay you also have the option to control items on the ground side of things. On a cooling fan you can install a temperature switch. Once it gets to the trigger degree it completes the circuit and turns the fans on. This is only a small portion of the things that you can do with a relay.
(Joel)>> Well we're just about ready to test fire all the components of our electrical system, and to help feed spark to the heart of this dragon we're gonna be using a Duralast Pro Power Ultra battery that we got from AutoZone. This particular juice box is an o-e exact fit that replaces a factory original. Pro Power Ultras are known for being proven tough. Plus, the impact resistant construction minimizes damage from inevitable vibration when Tom dumps the clutch and starts whipping the tail on this fire breathing lizard. Well, I'm not seeing any sparks or blue smoke. So, we're off to a good start.
(Tommy)>> See if everything works like it's supposed to. Horn work? [ beep beep ]
(Joel)>> Horn works! Headlights?
(Tommy)>> Got headlights.
(Joel)>> We've got dash lights, left turn signal?
(Tommy)>> Yep!
(Joel)>> Right turn signal?
(Tommy)>> It's blinking.
(Joel)>> How about those taillights?
(Tommy)>> You only have two of them.
(Joel)>> Brake lights?
(Tommy)>> Oh yeah, they got brighter. Guys we know something like this is a huge task, but if you pay attention, apply some of these simple techniques, you can accomplish your goals without any hiccups.
(Joel)>> Just take it one component at a time, one wire at a time, and before you know it you'll be admiring your own handy work.
(Tommy)>> I always get nervous hooking that battery up for the first time.
(Joel)>> I know what you mean, but old Road Burner is getting dangerously close to being done.
(Tommy)>> All we really lack is some exhaust and some fuel. We could basically hit the key and bring this thing back to life. Grab them lights.
[ engine starting ]
Show Full Transcript
(Tommy)>> Today on Detroit Muscle we give you some simple hacks to get you amped up about that scary road trip down electric avenue that your Detroit iron can't live without. [ Music ] [ engines revving ] [ Music ] [ scary music ]
(Joel)>> Tom? You in here? [ crackling ]
(Joel)>> Yeah that's not creepy at all. Hey Tom! Tom you in here? Tom? [ scary music ]
(Joel)>> Okay, I get it. Messing with the new guy. Come on man, it's not funny anymore. You're not gonna scare me. [ intense scary music ]
(Joel)>> Whoa, nope, doesn't count. You didn't scare me, nope, I'm not scared.
(Tommy)>> You should be.
(Joel)>> Why?
(Tommy)>> Cause we're wiring the car.
(Joel)>> Noooooo!
(Tommy)>> Hands down this next task that we're gonna tackle has to be the most intimidating part of building, restoring, or just plainly working on your projects. So why is that? Well, the electrical system usually has some form of involvement with the operations of majority of the components of your vehicle. You do something wrong and exorcist type of stuff starts happening. Or even worse, fire and smoke special effects become reality. Then there are electrical gremlins that can be caused by improper alteration, and then that can take hours upon hours to locate, troubleshoot, and repair. And whenever you talk to a shop about working on this it's gonna be very expensive because time is money, but with a plan, some simple tools, and a little bit of time wiring isn't nearly as dramatic as one might think. So, let's go through a few things that may help you with your project if you're thinking about giving this a go. On Road Burner we're starting with a clean slate. All that old stuff has been removed. The only wiring that we currently have is the engine harness. Therefore, we have to tie into that and wire everything else up.
(Joel)>> All this colorful spaghetti you see spread out across the floor is our electrical system. Now before any of you guys go looking for a setup for your ride, you're gonna want to ask yourselves a couple of questions. For example, will a universal harness work for your application, or should you go for something a little more original. The answer to all that has to do with the personality of your four-wheel treasure. If everything under the hood looked as if it rolled off the assembly line you probably need something that has more of an OG appearance, but if your ride has a bit more of a hot rod vibe the tailorable unit would be more of what you're looking for. Often times guys prefer this way so that they can hide those copper core electric hoses for a much cleaner look.
(Tommy)>> Another thing to consider is how many circuits are you gonna need. Well that all depends on the power options that you plan to be running.
(Joel)>> What we're gonna be installing on our Plymouth is what you'd call a semi direct fit harness, meaning it's got a fuse block and connector assembly similar to what would have came on the car originally, but we are still gonna have to cut and terminate a few of those connections.
(Tommy)>> This allows you to move some of your wiring around with the option to connect to some of your factory components. Now we're running a late model power plant, which is way different than what that car would have came from the factory with, but we still plan to use the stock switches in our dashboard. If we would have tried to use an o-e style harness it would have taken several modifications to make it work.
(Joel)>> A setup like this can also save you a bunch of time because each wire is individually labeled, and to precisely determine which wire is which can be a lot of work, especially considering there's usually more than one red wire in a harness, and to trace and identify wires based solely on their terminals is not fun for anybody.
(Tommy)>> Our upgraded harness has another thing going for it. It has more than enough circuits than we need, which can be convenient if you're looking to do some upgrades later on.
(Joel)>> At this point you really want to just make sure that you're making the correct choice for your harness.
(Tommy)>> You don't want to max out something like this. A few extra circuits now makes additions later way easier.
(Joel)>> Coming up, we expose some secrets on the best way to strip and make a connection.
(Tommy)>> Well I bet for a few of you all you may be squirming in your seat a little bit from the looks of things. Now that pretty harness that we had stretched out over there in the floor is now kinda just strolled out into our Plymouth. Now if you're looking to do something like this there's a few things you should keep in mind.
(Joel)>> Just like in the engine bay and throughout the rest of the car, you've got a lot of moving parts in here as well. Between your pedal assembly, your shifter, and even your own two feet you've got more than enough opportunity to get tangled up in your own wiring job but taking the extra time and care to tuck everything up into the firewall will not only help keep everything nice and neat, but it'll limit that possibility of damaging your harness.
(Tommy)>> When you're ready to start finalizing those connections you're gonna need a few tools to make this process a whole lot smoother. Kinda like some crimpers, cutters, strippers, and so on. For a little wiring 101 let's talk about strippers. Now there's several different types out there but they all basically do the same thing, and that is remove the protective coating to expose the wire. However, there is a wrong way to use them. They have designated places for different size or gauge wires. If you choose the wrong one you can damage the wire. What it will do is cut into the wire, and that can lead to a poor connection. You can see a few pieces of copper here in the sheathing and you don't want this. Okay the next thing. Let's say you want to connect two wires. Let's start with the most basic way, and that is with the pigtail or rat tail splice. That's where you take two or more wires and simply twist them together. A connection like this works but it has its drawbacks. One is it's not a very strong connection unless it's soldered. If you wrap it with electrical tape moisture can still get in because of the gap, and it's not very pleasing to the eye. But one thing's for sure, it's easy. Another way you can make a connection is with crimp connectors. These are easy to use, and they're gauge specific. Let's start with the wire. You will need to remove some of the insulation. Now with that all you're trying to do is go about halfway through this connector. You don't need a bunch of wiring sticking out from the end of it. So, let's cut some off here. Now if you'll look on your connector there's a seam on it. If you're using the type of pliers with the bump on it you want to be on the opposite side of that seam. Then all you need to do is take your pliers and clamp it down. This helps to ensure a lot stronger of a crimp. Now after you're done give this thing a little bit of a tug. Don't get all He-Man on it. You're just checking to see if it's loose. If it is that can lead to a short. Alright this next thing isn't necessarily mandatory, but it is preferred by many, and that is to solder your crimp. Now to do this you can use a soldering iron or gun, or what I like to use, and that is a micro torch. This thing helps to speed up the process. Just heat things up a bit, dab with some solder. That will get it done. Now when soldering too much heat and this stuff can be a bad thing. If you throw the heat to it you can burn up the protective coating on the wire... [ Music ] ...and if you pour on the solder it will basically make the wire solid.
(Joel)>> You know keeping your electrical work nice and neat can really compliment your build, and if you don't believe me take a look at all these wires strung out the front of this car. Kinda rattles the nerves a little bit, doesn't it? And all we're really trying to do is help calm those nerves a little bit so that you guys aren't quite as intimidated by a task such as this. Get you a game plan, stay focused, separate the harness out into groups, and start terminating wires from there. You know what they say. The best way to eat an elephant, one bite at a time. After using some of the techniques that Tommy was just talking about over there the next thing you want to focus on is shielding your work, and you have plenty of options in that department as well. Starting off, good ole fashioned electrical vinyl tape. Now this stuff is actually a pretty good insulator when used properly, and there are a few different styles and colors to choose from that factor in heat, moisture, and vibration, and application is about as easy as it gets. Just simply wrap it around your work. However, I would not recommend it as a standalone repair to severely damaged or unspliced wires. Next up we have what is called liquid electrical tape, which I would consider more of a problem solving solution, and in terms of aesthetics there are far better alternatives, but if your trailer wires fall apart going down the road this stuff will at least get you home. For premium shielding when it comes to appearance, longevity, and weather proofing I would highly recommend heat shrink, especially the kind with the hot melt sealer. Not only does it look cool when you're applying it, it also creates a trouble free repair that looks nice to boot and makes your wiring job look professional whether you are or not. And at this point it could be really hard to gauge how much work we still have to do on this car, and the answer just might shock you. But we are getting down to the wire. All we can do is focus on the current task at hand, and as long as we don't sell ourselves short we can do it. ( )>> Epic fail!
(Tommy)>> Up next, we hook up with electrifying results.
(Joel)>> Well guys so far our eyes haven't been too big for our stomachs. As you can plainly see we've been chewing through our elephant bite by bite. Tom tackled the spaghetti up underneath the dash while I sank my teeth into the front headlight and turn signal assembly. The detailed instructions and color coded wiring made this process fairly simple and easy. However, some portions have been easier to digest than others. For example, if you've ever wired an engine harness before you will understand the complications involved, especially considering how critical each connection is. I like to compare it as being just as important to your electrical system as the blood vessels are to your body. It carries electricity from one component to the next to ensure everything is functioning in harmony. That being said it doesn't mean there wasn't a little bit of room for improvement. Using the process of elimination, we were able to trim a little fat and get rid of some of these wires we weren't using, which not only helped ease the headache but also gave our engine bay a nice, clean, and organized look. Along with that we're sticking with our hot rod and race car theme by installing the battery inside the trunk of the car. We're also gonna go ahead and put in this high output connection kit that's gonna work as a junction block between the alternator, the battery, and the starter. [ Music ] This high output connection kit assists your o-e style harness to be able to handle a high amperage alternator. A setup like this can come in a variety of different wiring, terminals, boots, and more based on your application. Detailed instructions are also included to help facilitate your installation.
(Tommy)>> with our dash finally installed we can move on to the next thing, and that is gonna be installing the steering column, and we want to show you a few tips on how to do it properly. This may sound like a straightforward task, but it would blow you mind on how many hot rods that I've worked on in the past that has what could be called a sub-par install, and I just don't get it. Why someone would want to skimp on something like this I can't even comprehend. It's kinda like your brakes. If something goes wrong well this stuff can keep you out of harms way. It's very important for the column to be mounted in a solid fashion on both ends. A column with just one location point is downright dangerous. The column that we're gonna be installing is designed to bolt right into place. It reuses the stock upper bracket. It comes with its own lower plate, and it gives us both points like the factory engineered. If you wanted to go with a universal path the column's gonna come with a smooth tube and you're gonna have to fab or buy some brackets to mount both ends properly. [ Music ] Column's in, so now let's talk about connecting it to the rack. Now to get this job done we're gonna have to use a couple of U-joints like this one and a steering shaft. We already have one of our U-joints slid onto the shaft of the rack down here, and we're gonna run up from there and connect to the input side of our steering column. Now what you're gonna be looking for is obstructions between these two points. Now another thing that you can run into is clearance problems with the motor mounts and frame rails if you're working on some custom application. And just as a rule of thumb, you want at least a half inch of clearance around any obstacle. To properly install one of these into this there's a couple of things that you need to keep in mind. One is you don't want to slide the shaft in too far because you'll bottom out and that'll mess up the innards. That's a big malfunction. This will limit the operation range of the U-joint. What you want to do is slide that shaft out until it's basically flush right there on the inside, and that gives you back the swing that you want. Second with this style joint, everything is held in place with a couple of set screws, and that's what goes in these two holes. Once you get everything dialed in perfectly you want to take and mark where that set screw's gonna come in contact with this shaft and make a dimple. [ Music ] [ drill humming ] [ Music ]
(Joel)>> Next, we toot our own horn Mopar style!
(Tommy)>> We've all probably heard that old saying, it has all the bells and whistles. Well in the case of our Road Runner this thing is pretty bare bones. However, it has to have that one piece of Mopar history that this thing came standard with, and that would be that iconic beep beep horn. This small piece of Plymouth magic only came on two of their models. That would be the Superbird and the Road Runner. The tone of this safety device sings a familiar song of that bird that was dressed for the occasion, and he wasn't planning to let any grass grow under his feet. The story behind this clever noise maker is quite interesting. Plymouth had to pay Warner Brothers a healthy sum for the rights to use the sound and likeness of our throttle junky feathered friend. As for development rumor has it a member of Mopar brass was in one of their warehouses and heard the famous note. He followed it to the source and low and behold what they were looking for was on a forklift. [ Music ] Often times if you're looking to install some form of an electrical accessory onto your ride that it didn't come from the factory with, you're gonna have to deal with some relays. A relay is basically a switch that allows you to take a low electrical input and convert it to a higher current output. They're used all the time whenever you're running stuff like electric fuel pumps and fans because they take a good bit of juice to make them run. They come in many different styles. You've got 20, 30, 40 amp ratings. You've got some with a tab, some without, and they even make a weatherproof style. To wire up one of these isn't too bad. Let's start with the larger gauge wires. You basically have a higher amperage input and output. The input goes to the battery source, and the output to whatever you're trying to run, like a fan. The relay that we're working with here is referred to as a normally open style. That means it has to be activated to complete the circuit. Relays are available as normally closed, which would operate just the opposite. Then you have your trigger wires. One is a positive input. The other is a ground and depending how you're wanting that fan to operate you're gonna have to make some decisions. If you just wanted it to come on with the toggle switch you could hook the 12-volt input to a power source, and the other wire to a ground, and it would work with the flip of a switch. With a relay you also have the option to control items on the ground side of things. On a cooling fan you can install a temperature switch. Once it gets to the trigger degree it completes the circuit and turns the fans on. This is only a small portion of the things that you can do with a relay.
(Joel)>> Well we're just about ready to test fire all the components of our electrical system, and to help feed spark to the heart of this dragon we're gonna be using a Duralast Pro Power Ultra battery that we got from AutoZone. This particular juice box is an o-e exact fit that replaces a factory original. Pro Power Ultras are known for being proven tough. Plus, the impact resistant construction minimizes damage from inevitable vibration when Tom dumps the clutch and starts whipping the tail on this fire breathing lizard. Well, I'm not seeing any sparks or blue smoke. So, we're off to a good start.
(Tommy)>> See if everything works like it's supposed to. Horn work? [ beep beep ]
(Joel)>> Horn works! Headlights?
(Tommy)>> Got headlights.
(Joel)>> We've got dash lights, left turn signal?
(Tommy)>> Yep!
(Joel)>> Right turn signal?
(Tommy)>> It's blinking.
(Joel)>> How about those taillights?
(Tommy)>> You only have two of them.
(Joel)>> Brake lights?
(Tommy)>> Oh yeah, they got brighter. Guys we know something like this is a huge task, but if you pay attention, apply some of these simple techniques, you can accomplish your goals without any hiccups.
(Joel)>> Just take it one component at a time, one wire at a time, and before you know it you'll be admiring your own handy work.
(Tommy)>> I always get nervous hooking that battery up for the first time.
(Joel)>> I know what you mean, but old Road Burner is getting dangerously close to being done.
(Tommy)>> All we really lack is some exhaust and some fuel. We could basically hit the key and bring this thing back to life. Grab them lights.
[ engine starting ]
