More ’69 Sea Foam Camaro RS/SS Episodes
Detroit Muscle Featured Projects
Detroit Muscle Builds
Want more content like this?
Join the PowerNation Email NewsletterParts Used In This Episode
General Tire
Continental Extreme Contact Sport Tire
Heidt's Hot Rod Shop
4-link suspension kit
Heidt's Hot Rod Shop
Pro-G sub-frame suspension
Matco Tools
MATCO Tools are the Official Tool Supplier to PowerNation
Sea Foam
Sea Foam High Mileage
The Industrial Depot
Tools, Hardware, Shop Supplies
Episode Transcript
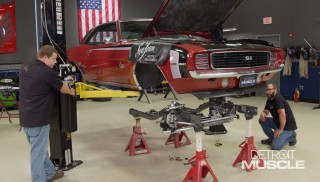
(Tommy)>> Today we take our '69 Seafoam Camaro into the modern era getting the engine out so the guys down in Engine Power can freshen up the small block.
(Marc)>> Plus we add a better handling suspension so it'll ride like it's on rails. [ Music ] [ engines revving ] [ Music ]
(Tommy)>> Hey y'all, welcome to Detroit Muscle. We've got our Camaro all ripped apart but it's all good. We've got the answer right there to solve all our problems.
(Marc)>> So the question is how long did it take you to get all that out of there?
(Tommy)>> Man it didn't take me that long cause if you shake a Camaro hard enough the stuff will basically fall right out from under it.
(Marc)>> Well let's hope that stuff falls in just as easily. Maybe add a couple of tubes of elbow grease and a few quarts of labor.
(Tommy)>> We gonna need some cause we plum out with what I got done today.
(Marc)>> So you want me to hook the forks under there and just tow all that stuff to the scrap bin?
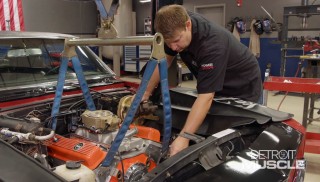
(Tommy)>> No we've got to get that engine down to Engine Power so them boys can work their magic. So if you'll get us a stand I'll go ahead and get the bolts out.
(Marc)>> Alright I'm on it. [ Music ] Got and engine stand and I got this handy little thing.
(Tommy)>> Heck yeah! Put that on there and make it a whole lot easier to get that engine out. [ Music ] [ drill humming ] [ Music ]
(Marc)>> Alright you ready for this?
(Tommy)>> Yes sir. Come on in here. A little more, a little more, little more, a little more, alright back up. No I'm kidding. [ Music ] Come on up! [ Music ]
(Marc)>> Alright tell me when.
(Tommy)>> Alright boss.
(Marc)>> Here we go.
(Tommy)>> What was the firing order on that?
(Marc)>> One, two, six, nine, four, seven, three.
(Tommy)>> Keep going, keep going! [ Music ] [ drill humming ] [ Music ]
(Marc)>> Give me a when.
(Tommy)>> When.
(Marc)>> All I do is win Tom. [ Music ]
(Tommy)>> Alright let it down buddy. There you go.
(Marc)>> Very nice. [ Music ]
(Tommy)>> I'm sure you guys recognize these two ole fellas. To say Mike and Pat know their way around an engine is a huge understatement. They definitely know what it takes to make power.
(Marc)>> These boys eat, sleep, live the combustion engine. They're always porting, torqueing, tweaking things to get every drop of horsepower out of every one of their fire breathing creations.
(Pat)>> Yes!
(Marc)>> They've worked their magic on every make and style of engine under the sun.
(Tommy)>> Like what's known as the leaning tower of power in the Mopar world, a 225 slant six. We all know to make one of these perform they had their work cut out for them. So after a few go fast parts and a good bit of their handy work they almost doubled its power.
(Marc)>> We've used them a few times and they never disappoint, like this 557 cubic inch big block Ford that made 700 horse. Then add a squirt of nitrous and you're well over 1,000 ponies.
(Mike)>> 1,080 on power, 1,119 pound feet. [ engine revving ]
(Marc)>> Oh and how could I not bring this one up, our Hellcat killer Challenger? They too the stock six-two third gen Hemi, bored and stroked it to 426 cubic inches, and when it was all said and done we had four digits of power that would shred the tires at any given moment.
(Tommy)>> You could call Mike and Pat a shoe-in for this build. [ Music ] I hope y'all like this beauty.
(Pat)>> Very excited to see that I am.
(Mike)>> Looks good. It's all complete I can say that.
(Pat)>> Complete now. When it's complete like this we're gonna run it just like this with the ram's horn on it. We're gonna stick the exhaust on it. We're gonna run this stuff too as well and see what it makes because we know what it made on the chassis dyno. We'll see what it makes on the engine dyno.
(Mike)>> How'd it run in the car?
(Tommy)>> It didn't run bad. It kinda could have used a tune up but you know with it being a four speed you can just about make it do whatever you want it to do in a way, but it wasn't no power house by any means.
(Pat)>> Alright well that being said what do you want us to do with it?
(Marc)>> This is gonna be a resto mod. So we definitely want to modernize it. We decided not to go with LS like Mike and I talked about before but we need to at least add e-f-i to this and might as well bolt on some power while you're in there.
(Pat)>> Well I think we have a good plan. We're obviously very familiar with this kind of setup, and we'll put some spiffier heads on it and a better manifold, and a carburetor style e-f-i. Not gonna set any national records but it's gonna run very, very nice.
(Marc)>> Reliable, easy to start, drive it anywhere.
(Tommy)>> Yeah that's kinda what we're looking for. We don't need anything making gobs and gobs of power. Just better than it is and reliable.
(Mike)>> It'll be a nice straight forward little deal and longevity. Somebody can get in it and just cruise.
(Marc)>> Exactly, and you don't have to have an LS to do that, and we want to show that.
(Mike)>> Nice!
(Tommy)>> I guess we'll let y'all at it.
(Marc)>> We'll go get the exhaust for you.
(Pat)>> We need the exhaust if you have it. Looks like you didn't break anything off it. So everything came apart nice but we're gonna take that exhaust and we're gonna hack it up.
(Marc)>> Sounds good!
(Tommy)>> We take handling to a new level ditching the '50's era technology with an adjustable suspension capable of anything from the street to the track.
(Tommy)>> Now I can't wait until the Engine Power guys finish up our engine for our Seafoam Camaro that we're gonna be giving away. Now when we were out driving this thing we did notice one thing that we did not really like about it and that was that it kinda handled like a school bus, and I almost want to think that I just about made Marc a little sea sick a time or two but we've got the cure for all that right over here.
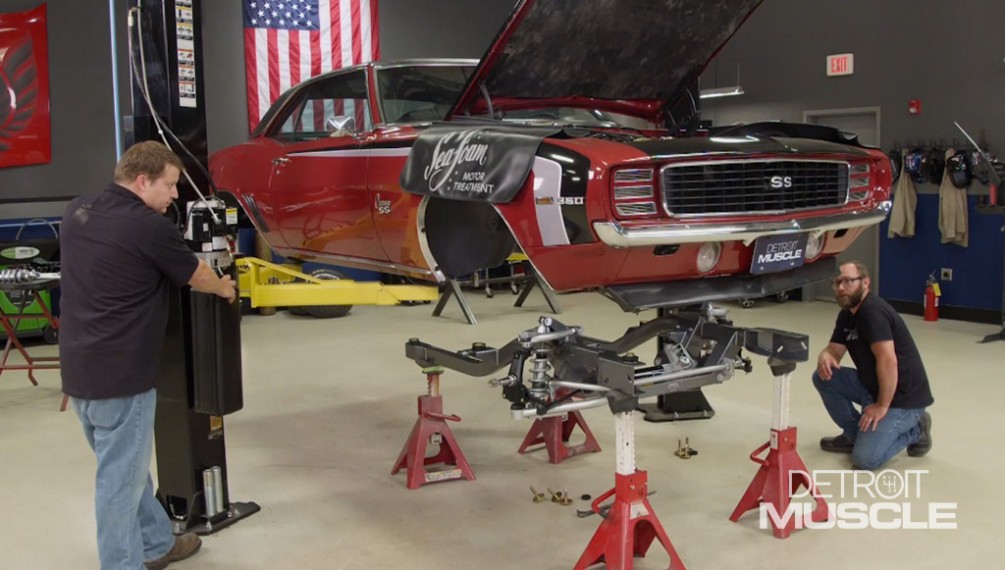
(Marc)>> Well it might have been the fact that I ate too many beef sticks or I had a belly full of those root beers, or it could have been that you were driving. Either way to be safe I'll drive next time. Actually the real solution is this Pro-G sub-frame that we got from Heidts. Other than the fact of the obvious, that it's brand new and painted up shiny, there's a lot of benefits and features that this thing has that make it better than that stock piece.
(Tommy)>> Now it's definitely easy to see that they did something with the appearance. This thing looks great but there's also a whole lot of engineering that went into this thing to improve from that old school unit, and an added benefit is to swap one of these things out is a breeze. It's only six bolts.
(Marc)>> Well when you're taking a look at this stock piece there's a bunch of problems that are built in, and that's because this is all 1950's technology here. One of the most obvious is gonna be the steering box and all of the linkage that goes along with it. It's big, and it's heavy, and it makes this thing drive like a dump truck. Not to mention where this steering box is mounted it's difficult to get long tube headers in there, especially if you're doing a big block. Big block guys know what I'm talking about. So Heidts built in the solution to all those problems, and that is rack and pinion steering. It eliminated the need for all of those steering links and the box. It's a lot lighter weight, easier to package, provides better steering geometry, and way more responsive.
(Tommy)>> And they didn't stop there. You've probably noticed that these side rails are quite a bit smaller than that stock unit. These are made of one continuous piece of tubing that's .120 wall thickness. Plus it's significantly stronger than the stock setup.
(Marc)>> And having those rails smaller, that's gonna leave you room for those long tube headers and big blocks like we were talking about. Depending on which engine you want to go with well they've got mounts to accommodate. Small block, big block, LS, and they've even got an adjustable transmission cross member here. So you can run just about any engine and transmission combo you can think of.
(Tommy)>> Now let's talk about the meat and potatoes of this front end. Heidts has pulled back all the stops to develop one trick piece. This setup has tubular control arms with an adjustable upper, dropped spindles, adjustable coil overs, and one beefy sway bar.
(Marc)>> Now with all of those additions they actually managed to shed about 80 pounds off the weight.
(Tommy)>> You ready to put this thing up under there boss?
(Marc)>> Yep let's go. You got that side?
(Tommy)>> Let me grab a jack.
(Marc)>> Alright I'll get the mounts and the bolts.
(Tommy)>> I can't believe this. [ Music ]
(Marc)>> Looks good right there. Alright about two more inches Tommy.
(Tommy)>> The back one on this side's touching.
(Marc)>> Yep I'm touching in the back. You want to go ahead and get those in?
(Tommy)>> Sure! [ Music ] [ drill humming ]
(Marc)>> Thank you sir.
(Tommy)>> Yes sir, yes sir. [ drill humming ]
(Marc)>> Alright they're tight. I'm going up with it.
(Tommy)>> Alright then. [ mechanical humming ]
(Marc)>> Nice! [ Music ]
(Tommy)>> Man that thing looks sweet up under there and I tell you I can't hardly wait to take you for another ride in this thing. I bet I can slosh you up real good now.
(Marc)>> Nope I'm gonna be driving. We've still got to do the rear. I'm gonna go get the parts.
(Tommy)>> As soon as I get my mood all good you want to talk about more work.
(Marc)>> Coming up we tackle the rear suspension adding a popular rear end and a four link setup.
(Tommy)>> Well we're making some pretty good progress on our Seafoam giveaway Camaro, and the next thing I'm gonna do is assemble this rear axle. We got all these goodies from Summit Racing, and all this setup is designed to work with our Heidts rear suspension. Now with what we're gonna be doing is this is a nine inch setup that's got 31 spline axles, a pos unit, and that good gravy. Once I get this thing assembled, well it'll bolt right up under that car, but if you didn't want to buy a rear axle well Heidts has you covered there as well. All you've got to do is buy a set of these brackets, skin down your housing, weld these in place, and you're good to go. Now the next thing I've got to do is drop in this big chunk of metal. So I need to grab a gasket real quick. It's a good idea to add a little gasket maker to the housing and to your gasket before dropping in the chunk. It doesn't take much, just a little bead. Doing this will make sure our differential is sealed tight. The reason these things are strong is because they're heavy. [ Music ] With the diff dropped in we can add our fasteners and get them tight, and then torque them down to 45 foot pounds.
(Marc)>> Now we switched that front end over to that Pro-G suspension and we could leave that alone but we want the rear to compliment it. So we're gonna do that with this four link kit that also came from Heidts. Now it comes with the links, lower and upper control arms. Also a pan hard rod, coil overs, and then all the bracketry to get it installed. That's what Tommy was talking about the brackets on the rear end. That's to attach all these mounting points. Now you think this would be pretty invasive but it's not as bad as you'd think. There's actually some brackets that are gonna attach to the factory frame rails. We do have to drill some holes, but there's no cutting or welding required. I'm gonna start with this one right here. [ Music ] Okay that's got to be 18 and three quarter inches from that mounting hole for the shackle to the back of this bracket and it's right on it. [ Music ] Once the rear bolt is holding that in place we can install the upper link bracket. Now it's time to drill some holes. [ drill buzzing ]
(Marc)>> Well the next thing we're gonna do is install this little piece right here. This does several things. One, it's a cross member that bolts between the two frame rails and those holes I just drilled. The second thing it does is it's gonna provide us with the frame mount of our pan hard rod. The third thing, these tabs right here are to mount our anti-roll bar or sway bar. So this is a handy little piece and it's super lightweight. Just need to get it bolted in and I can move on to drilling some more holes. [ Music ] [ drill buzzing ]
(Marc)>> Well now that we have those holes drilled we need to get this bracket bolted through here to the floor, but that's just one piece of sheet metal. So we need to sandwich it and that's what these brackets are for. These need to go inside the car under the rear seat, but I'm gonna need a hand to get that done. So I'm gonna see if I can find Tommy.
(Tommy)>> Give me a second jeez. You don't have to yell. I'm just standing right over there.
(Marc)>> I need to get in the car. So I need to let it down. Will you hold that, and that, and that? See if you can juggle them.
(Tommy)>> I ain't holding these under the car jeez. [ Music ] [ drill clicking ]
(Marc)>> Alright let's do the other side. Oh yeah! [ drill clicking ]
(Marc)>> With those in place I can finish drilling the holes and installing the upper control arm brackets. These bolt through the frame rail with a backing plate for strength. [ Music ] Then it's time for our links. Well now it's time to install the lower control arms, and we've got them bolted to the leaf spring front mount here. We just had to drill them out to five-eighths and install them with the spacers that came with the kit. Now we get these up into place and we can get that rear end housing in. [ Music ] [ drill humming ] [ Music ] Oh yeah, see how that fourth bar lined up perfectly on its own? I didn't have to fight it? That's how you know you've got everything lined up perfectly. If that didn't go in, you had to try and man handle it, you know something's wrong. [ Music ] Well that's it for the suspension, at least getting it in the car. We'll have to do some adjustments later once we get the brakes, wheels, and tires, on it. We'll get the weight of the car down, set ride height, pinion angle. Then we'll be able to tighten all those bolts.
(Tommy)>> We've told you guys before how we use Rock Auto dot com on our projects whether we're looking for budget minded components or o-e-m parts, but did you know that they have high performance parts? This is Bilstein's B-12 Pro kit for S-197 Mustangs. It's a significant upgrade over stock with performance plus dampeners and Eibach pro kit springs. They're tuned for each specific application and will lower your ride an inch or two depending on your application. To find out what Rock Auto has for your ride just go to the website and enter your year, make, and model. Brakes, wheels, and tires!
(Marc)>> And the Seafoam Camaro will look ready to hit the road.
(Tommy)>> Well we're making some pretty good progress upgrading our first gen Camaro. We got the suspension all up under it and the next thing we're gonna be doing is tackling the brakes. Now if ole Marc thought he was shook up a lot on that first ride well he hasn't seen anything yet. The kit we got is from Summit Racing and it's really gonna do the trick whenever we throw out the anchor. It's basically got a 13 inch rotor for the front and rear. These are 12.88 in diameter. We've got a 6 piston caliper on the front and a 4 piston for the back side. Now I've been asked in the past, do I really need to upgrade my brake system? Well if you think of it this way. People always put more power up under the hood. They put an overdrive in it to get better fuel mileage, and you put sticky tires on the back to get plenty of traction. Well why in the world wouldn't you put better brakes under your ride, and doing a kit like this has a lot of benefits. Whenever you apply the brakes the caliper clamps the pad down onto the rotor, thus generating heat. Having a larger rotor gives you more surface area to absorb that heat. After applying the brakes several times, or with a good bit of force, things can really heat up. With a smaller rotor the temp goes up at a much faster rate. Also the larger the brake system the bigger the components. Water pads and multi piston calipers cover more surface area. This creates better braking with less effort. Another benefit is when the caliper brake surface is further away from the center of the wheel. This gives you a mechanical advantage. This added leverage to the brakes makes them not have to work as hard to slow things down. [ Music ] [ wrench clicking ] [ Music ] [ drill humming ] [ Music ] [ drill humming ] [ Music ] [ drill humming ] [ Music ]
(Marc)>> Well while Tommy's getting the brakes buttoned up I figured I'd go ahead and get our tires mounted on our wheels. Now when we picked out a wheel and tire combo we wanted to do something modern because this is a resto mod. The problem with a lot of modern wheels is it can date your build. You want something that's gonna hang around in another 5, 10, 20 years and still be cool, and those Weld RTS' right here do the trick because of the five spoke design. We got these from Summit Racing. We did a staggered setup with 18 x 8 in the front, 20 x 9.5 in the rear. Now as for tires we went with Continental Extreme Contact Sports. We've used these on other builds. It's a great looking tire but it also provides great traction both wet and dry conditions. Now whoever is gonna get this car will probably be driving more than leaving it parked. So this will be the perfect setup for them. [ Music ] [ drill humming ]
(Tommy)>> With that big ole goofy grin on your face and the twinkle in your eye I think we did something right.
(Marc)>> Yeah I think it looks amazing.
(Tommy)>> Man the wheel selection on this thing that you did, man you knocked it out of the park on this one.
(Marc)>> I thought you ordered the wheels?
(Tommy)>> You know I technically placed the order and all that but you know, you said order those.
(Marc)>> Okay, well I'll take credit for the tires then.
(Tommy)>> That's good too man. That's like compliment after compliment you're making me give you.
(Marc)>> I was worried about the red calipers on the red paint cause they're not the same color but I think it looks good.
(Tommy)>> Oh man yeah. The stance of this thing, the wheel/tire combo, the big gnarly brakes sticking through. Yep I hope I can win it.
(Marc)>> First glance this car means business. There's no question that we've done everything that we needed to do to bring it into the modern era.
(Tommy)>> When we started on it it kinda looked like your grandad's ride but now that old man is a whole lot more hip.
(Marc)>> Yes he is. He's gonna handle a lot better and probably go a lot faster but we need an engine to do that.
(Tommy)>> Man after we were talking about what we accomplished today.
(Marc)>> And a transmission, and fuel system, cooling system, electrical system!
Show Full Transcript
(Marc)>> Plus we add a better handling suspension so it'll ride like it's on rails. [ Music ] [ engines revving ] [ Music ]
(Tommy)>> Hey y'all, welcome to Detroit Muscle. We've got our Camaro all ripped apart but it's all good. We've got the answer right there to solve all our problems.
(Marc)>> So the question is how long did it take you to get all that out of there?
(Tommy)>> Man it didn't take me that long cause if you shake a Camaro hard enough the stuff will basically fall right out from under it.
(Marc)>> Well let's hope that stuff falls in just as easily. Maybe add a couple of tubes of elbow grease and a few quarts of labor.
(Tommy)>> We gonna need some cause we plum out with what I got done today.
(Marc)>> So you want me to hook the forks under there and just tow all that stuff to the scrap bin?
(Tommy)>> No we've got to get that engine down to Engine Power so them boys can work their magic. So if you'll get us a stand I'll go ahead and get the bolts out.
(Marc)>> Alright I'm on it. [ Music ] Got and engine stand and I got this handy little thing.
(Tommy)>> Heck yeah! Put that on there and make it a whole lot easier to get that engine out. [ Music ] [ drill humming ] [ Music ]
(Marc)>> Alright you ready for this?
(Tommy)>> Yes sir. Come on in here. A little more, a little more, little more, a little more, alright back up. No I'm kidding. [ Music ] Come on up! [ Music ]
(Marc)>> Alright tell me when.
(Tommy)>> Alright boss.
(Marc)>> Here we go.
(Tommy)>> What was the firing order on that?
(Marc)>> One, two, six, nine, four, seven, three.
(Tommy)>> Keep going, keep going! [ Music ] [ drill humming ] [ Music ]
(Marc)>> Give me a when.
(Tommy)>> When.
(Marc)>> All I do is win Tom. [ Music ]
(Tommy)>> Alright let it down buddy. There you go.
(Marc)>> Very nice. [ Music ]
(Tommy)>> I'm sure you guys recognize these two ole fellas. To say Mike and Pat know their way around an engine is a huge understatement. They definitely know what it takes to make power.
(Marc)>> These boys eat, sleep, live the combustion engine. They're always porting, torqueing, tweaking things to get every drop of horsepower out of every one of their fire breathing creations.
(Pat)>> Yes!
(Marc)>> They've worked their magic on every make and style of engine under the sun.
(Tommy)>> Like what's known as the leaning tower of power in the Mopar world, a 225 slant six. We all know to make one of these perform they had their work cut out for them. So after a few go fast parts and a good bit of their handy work they almost doubled its power.
(Marc)>> We've used them a few times and they never disappoint, like this 557 cubic inch big block Ford that made 700 horse. Then add a squirt of nitrous and you're well over 1,000 ponies.
(Mike)>> 1,080 on power, 1,119 pound feet. [ engine revving ]
(Marc)>> Oh and how could I not bring this one up, our Hellcat killer Challenger? They too the stock six-two third gen Hemi, bored and stroked it to 426 cubic inches, and when it was all said and done we had four digits of power that would shred the tires at any given moment.
(Tommy)>> You could call Mike and Pat a shoe-in for this build. [ Music ] I hope y'all like this beauty.
(Pat)>> Very excited to see that I am.
(Mike)>> Looks good. It's all complete I can say that.
(Pat)>> Complete now. When it's complete like this we're gonna run it just like this with the ram's horn on it. We're gonna stick the exhaust on it. We're gonna run this stuff too as well and see what it makes because we know what it made on the chassis dyno. We'll see what it makes on the engine dyno.
(Mike)>> How'd it run in the car?
(Tommy)>> It didn't run bad. It kinda could have used a tune up but you know with it being a four speed you can just about make it do whatever you want it to do in a way, but it wasn't no power house by any means.
(Pat)>> Alright well that being said what do you want us to do with it?
(Marc)>> This is gonna be a resto mod. So we definitely want to modernize it. We decided not to go with LS like Mike and I talked about before but we need to at least add e-f-i to this and might as well bolt on some power while you're in there.
(Pat)>> Well I think we have a good plan. We're obviously very familiar with this kind of setup, and we'll put some spiffier heads on it and a better manifold, and a carburetor style e-f-i. Not gonna set any national records but it's gonna run very, very nice.
(Marc)>> Reliable, easy to start, drive it anywhere.
(Tommy)>> Yeah that's kinda what we're looking for. We don't need anything making gobs and gobs of power. Just better than it is and reliable.
(Mike)>> It'll be a nice straight forward little deal and longevity. Somebody can get in it and just cruise.
(Marc)>> Exactly, and you don't have to have an LS to do that, and we want to show that.
(Mike)>> Nice!
(Tommy)>> I guess we'll let y'all at it.
(Marc)>> We'll go get the exhaust for you.
(Pat)>> We need the exhaust if you have it. Looks like you didn't break anything off it. So everything came apart nice but we're gonna take that exhaust and we're gonna hack it up.
(Marc)>> Sounds good!
(Tommy)>> We take handling to a new level ditching the '50's era technology with an adjustable suspension capable of anything from the street to the track.
(Tommy)>> Now I can't wait until the Engine Power guys finish up our engine for our Seafoam Camaro that we're gonna be giving away. Now when we were out driving this thing we did notice one thing that we did not really like about it and that was that it kinda handled like a school bus, and I almost want to think that I just about made Marc a little sea sick a time or two but we've got the cure for all that right over here.
(Marc)>> Well it might have been the fact that I ate too many beef sticks or I had a belly full of those root beers, or it could have been that you were driving. Either way to be safe I'll drive next time. Actually the real solution is this Pro-G sub-frame that we got from Heidts. Other than the fact of the obvious, that it's brand new and painted up shiny, there's a lot of benefits and features that this thing has that make it better than that stock piece.
(Tommy)>> Now it's definitely easy to see that they did something with the appearance. This thing looks great but there's also a whole lot of engineering that went into this thing to improve from that old school unit, and an added benefit is to swap one of these things out is a breeze. It's only six bolts.
(Marc)>> Well when you're taking a look at this stock piece there's a bunch of problems that are built in, and that's because this is all 1950's technology here. One of the most obvious is gonna be the steering box and all of the linkage that goes along with it. It's big, and it's heavy, and it makes this thing drive like a dump truck. Not to mention where this steering box is mounted it's difficult to get long tube headers in there, especially if you're doing a big block. Big block guys know what I'm talking about. So Heidts built in the solution to all those problems, and that is rack and pinion steering. It eliminated the need for all of those steering links and the box. It's a lot lighter weight, easier to package, provides better steering geometry, and way more responsive.
(Tommy)>> And they didn't stop there. You've probably noticed that these side rails are quite a bit smaller than that stock unit. These are made of one continuous piece of tubing that's .120 wall thickness. Plus it's significantly stronger than the stock setup.
(Marc)>> And having those rails smaller, that's gonna leave you room for those long tube headers and big blocks like we were talking about. Depending on which engine you want to go with well they've got mounts to accommodate. Small block, big block, LS, and they've even got an adjustable transmission cross member here. So you can run just about any engine and transmission combo you can think of.
(Tommy)>> Now let's talk about the meat and potatoes of this front end. Heidts has pulled back all the stops to develop one trick piece. This setup has tubular control arms with an adjustable upper, dropped spindles, adjustable coil overs, and one beefy sway bar.
(Marc)>> Now with all of those additions they actually managed to shed about 80 pounds off the weight.
(Tommy)>> You ready to put this thing up under there boss?
(Marc)>> Yep let's go. You got that side?
(Tommy)>> Let me grab a jack.
(Marc)>> Alright I'll get the mounts and the bolts.
(Tommy)>> I can't believe this. [ Music ]
(Marc)>> Looks good right there. Alright about two more inches Tommy.
(Tommy)>> The back one on this side's touching.
(Marc)>> Yep I'm touching in the back. You want to go ahead and get those in?
(Tommy)>> Sure! [ Music ] [ drill humming ]
(Marc)>> Thank you sir.
(Tommy)>> Yes sir, yes sir. [ drill humming ]
(Marc)>> Alright they're tight. I'm going up with it.
(Tommy)>> Alright then. [ mechanical humming ]
(Marc)>> Nice! [ Music ]
(Tommy)>> Man that thing looks sweet up under there and I tell you I can't hardly wait to take you for another ride in this thing. I bet I can slosh you up real good now.
(Marc)>> Nope I'm gonna be driving. We've still got to do the rear. I'm gonna go get the parts.
(Tommy)>> As soon as I get my mood all good you want to talk about more work.
(Marc)>> Coming up we tackle the rear suspension adding a popular rear end and a four link setup.
(Tommy)>> Well we're making some pretty good progress on our Seafoam giveaway Camaro, and the next thing I'm gonna do is assemble this rear axle. We got all these goodies from Summit Racing, and all this setup is designed to work with our Heidts rear suspension. Now with what we're gonna be doing is this is a nine inch setup that's got 31 spline axles, a pos unit, and that good gravy. Once I get this thing assembled, well it'll bolt right up under that car, but if you didn't want to buy a rear axle well Heidts has you covered there as well. All you've got to do is buy a set of these brackets, skin down your housing, weld these in place, and you're good to go. Now the next thing I've got to do is drop in this big chunk of metal. So I need to grab a gasket real quick. It's a good idea to add a little gasket maker to the housing and to your gasket before dropping in the chunk. It doesn't take much, just a little bead. Doing this will make sure our differential is sealed tight. The reason these things are strong is because they're heavy. [ Music ] With the diff dropped in we can add our fasteners and get them tight, and then torque them down to 45 foot pounds.
(Marc)>> Now we switched that front end over to that Pro-G suspension and we could leave that alone but we want the rear to compliment it. So we're gonna do that with this four link kit that also came from Heidts. Now it comes with the links, lower and upper control arms. Also a pan hard rod, coil overs, and then all the bracketry to get it installed. That's what Tommy was talking about the brackets on the rear end. That's to attach all these mounting points. Now you think this would be pretty invasive but it's not as bad as you'd think. There's actually some brackets that are gonna attach to the factory frame rails. We do have to drill some holes, but there's no cutting or welding required. I'm gonna start with this one right here. [ Music ] Okay that's got to be 18 and three quarter inches from that mounting hole for the shackle to the back of this bracket and it's right on it. [ Music ] Once the rear bolt is holding that in place we can install the upper link bracket. Now it's time to drill some holes. [ drill buzzing ]
(Marc)>> Well the next thing we're gonna do is install this little piece right here. This does several things. One, it's a cross member that bolts between the two frame rails and those holes I just drilled. The second thing it does is it's gonna provide us with the frame mount of our pan hard rod. The third thing, these tabs right here are to mount our anti-roll bar or sway bar. So this is a handy little piece and it's super lightweight. Just need to get it bolted in and I can move on to drilling some more holes. [ Music ] [ drill buzzing ]
(Marc)>> Well now that we have those holes drilled we need to get this bracket bolted through here to the floor, but that's just one piece of sheet metal. So we need to sandwich it and that's what these brackets are for. These need to go inside the car under the rear seat, but I'm gonna need a hand to get that done. So I'm gonna see if I can find Tommy.
(Tommy)>> Give me a second jeez. You don't have to yell. I'm just standing right over there.
(Marc)>> I need to get in the car. So I need to let it down. Will you hold that, and that, and that? See if you can juggle them.
(Tommy)>> I ain't holding these under the car jeez. [ Music ] [ drill clicking ]
(Marc)>> Alright let's do the other side. Oh yeah! [ drill clicking ]
(Marc)>> With those in place I can finish drilling the holes and installing the upper control arm brackets. These bolt through the frame rail with a backing plate for strength. [ Music ] Then it's time for our links. Well now it's time to install the lower control arms, and we've got them bolted to the leaf spring front mount here. We just had to drill them out to five-eighths and install them with the spacers that came with the kit. Now we get these up into place and we can get that rear end housing in. [ Music ] [ drill humming ] [ Music ] Oh yeah, see how that fourth bar lined up perfectly on its own? I didn't have to fight it? That's how you know you've got everything lined up perfectly. If that didn't go in, you had to try and man handle it, you know something's wrong. [ Music ] Well that's it for the suspension, at least getting it in the car. We'll have to do some adjustments later once we get the brakes, wheels, and tires, on it. We'll get the weight of the car down, set ride height, pinion angle. Then we'll be able to tighten all those bolts.
(Tommy)>> We've told you guys before how we use Rock Auto dot com on our projects whether we're looking for budget minded components or o-e-m parts, but did you know that they have high performance parts? This is Bilstein's B-12 Pro kit for S-197 Mustangs. It's a significant upgrade over stock with performance plus dampeners and Eibach pro kit springs. They're tuned for each specific application and will lower your ride an inch or two depending on your application. To find out what Rock Auto has for your ride just go to the website and enter your year, make, and model. Brakes, wheels, and tires!
(Marc)>> And the Seafoam Camaro will look ready to hit the road.
(Tommy)>> Well we're making some pretty good progress upgrading our first gen Camaro. We got the suspension all up under it and the next thing we're gonna be doing is tackling the brakes. Now if ole Marc thought he was shook up a lot on that first ride well he hasn't seen anything yet. The kit we got is from Summit Racing and it's really gonna do the trick whenever we throw out the anchor. It's basically got a 13 inch rotor for the front and rear. These are 12.88 in diameter. We've got a 6 piston caliper on the front and a 4 piston for the back side. Now I've been asked in the past, do I really need to upgrade my brake system? Well if you think of it this way. People always put more power up under the hood. They put an overdrive in it to get better fuel mileage, and you put sticky tires on the back to get plenty of traction. Well why in the world wouldn't you put better brakes under your ride, and doing a kit like this has a lot of benefits. Whenever you apply the brakes the caliper clamps the pad down onto the rotor, thus generating heat. Having a larger rotor gives you more surface area to absorb that heat. After applying the brakes several times, or with a good bit of force, things can really heat up. With a smaller rotor the temp goes up at a much faster rate. Also the larger the brake system the bigger the components. Water pads and multi piston calipers cover more surface area. This creates better braking with less effort. Another benefit is when the caliper brake surface is further away from the center of the wheel. This gives you a mechanical advantage. This added leverage to the brakes makes them not have to work as hard to slow things down. [ Music ] [ wrench clicking ] [ Music ] [ drill humming ] [ Music ] [ drill humming ] [ Music ] [ drill humming ] [ Music ]
(Marc)>> Well while Tommy's getting the brakes buttoned up I figured I'd go ahead and get our tires mounted on our wheels. Now when we picked out a wheel and tire combo we wanted to do something modern because this is a resto mod. The problem with a lot of modern wheels is it can date your build. You want something that's gonna hang around in another 5, 10, 20 years and still be cool, and those Weld RTS' right here do the trick because of the five spoke design. We got these from Summit Racing. We did a staggered setup with 18 x 8 in the front, 20 x 9.5 in the rear. Now as for tires we went with Continental Extreme Contact Sports. We've used these on other builds. It's a great looking tire but it also provides great traction both wet and dry conditions. Now whoever is gonna get this car will probably be driving more than leaving it parked. So this will be the perfect setup for them. [ Music ] [ drill humming ]
(Tommy)>> With that big ole goofy grin on your face and the twinkle in your eye I think we did something right.
(Marc)>> Yeah I think it looks amazing.
(Tommy)>> Man the wheel selection on this thing that you did, man you knocked it out of the park on this one.
(Marc)>> I thought you ordered the wheels?
(Tommy)>> You know I technically placed the order and all that but you know, you said order those.
(Marc)>> Okay, well I'll take credit for the tires then.
(Tommy)>> That's good too man. That's like compliment after compliment you're making me give you.
(Marc)>> I was worried about the red calipers on the red paint cause they're not the same color but I think it looks good.
(Tommy)>> Oh man yeah. The stance of this thing, the wheel/tire combo, the big gnarly brakes sticking through. Yep I hope I can win it.
(Marc)>> First glance this car means business. There's no question that we've done everything that we needed to do to bring it into the modern era.
(Tommy)>> When we started on it it kinda looked like your grandad's ride but now that old man is a whole lot more hip.
(Marc)>> Yes he is. He's gonna handle a lot better and probably go a lot faster but we need an engine to do that.
(Tommy)>> Man after we were talking about what we accomplished today.
(Marc)>> And a transmission, and fuel system, cooling system, electrical system!
