Carcass Featured Projects
Carcass Builds
Want more content like this?
Join the PowerNation Email NewsletterEpisode Transcript
(Jeremy)>> You're watching Powernation!
(Jeremy)>> Today on Carcass we take our clapped out C-1,500's exterior back to o-e-m standards. We'll replace some sheet metal and clean up some dents.
(Jimmy)>> Then we'll get in the booth and restore the popular factory paint. Plus replace some worn and faded parts to get our Chevy back on the road to redemption. [ Music ] [ engine revving ] [ Music ]
(Jimmy)>> Hey guys, welcome to Carcass! Jeremy and I are well under way on our mini restoration for our C-1,500 Silverado project, and we've gotten the engine and transmission in it. This thing obviously runs and drives, and now we're on to the cosmetic side of things and we're gonna give it a respray.
(Jeremy)>> So we're down here in the prep booth and it's time to give this thing a good once over. So, we're gonna start the processes of doing some body work. We are gonna paint the truck the exact same color but at least we want it to look pretty shiny. I'm gonna go grab a bunch of stuff and then we'll get started.
(Jimmy)>> On the door here we have a couple of areas we're gonna have to take care of. This one's pretty bad, a tiny one. Even one up on the pillar, but these are all pretty simple to take care of. We'll pull them out a little bit, fill them, and sand them smooth. However, on the fender here there's eight or ten spots that we would have to fix. That's just not really worth our time. So, we will be putting new sheet metal on this thing.
(Jeremy)>> Now for as much body work as our other fender needs, and for the sheer price point of a new one, it just makes sense to replace these things. For under $100 dollars you can pick up a new fender versus spending five or six hours trying to straighten out our other fender. So, what we did is went to RockAuto dot com, typed in our '96 Chevy Silverado, and scrolled down to the body section and we picked out our fender. Now for the fender itself these things come brand new, and they're stamped "replacement parts", and they come with an E-coat, which is kinda like a primer. So, I have to prep that before I get into paint. So, with a red scotch brite pad away we go. [ pad scraping ]
(Jeremy)>> The reason why we're scuffing the inside of our new fender is because we're gonna be painting it the same color as the outside of the truck. This is called jamming. Jamming is the process of painting the inside of complete body panels or door jambs before you lay down the color on the outside of the vehicle. [ Music ] [ spray gun hissing ]
(Jeremy)>> Before we spray body color, we'll seal the inside of the panel. Then apply a couple of coats of color allowing it to flash. [ spray gun hissing ] [ Music ] [ spray gun hissing ]
(Jeremy)>> Lastly, we'll throw down two coats of clear. [ spray gun hissing ] [ Music ] [ spray gun hissing ] [ Music ]
(Jimmy)>> Alright, so Jeremy's finishing up the fender. I pulled some of these dents out. So, I'm gonna go ahead and get some filler on them. [ Music ]
[ sander buzzing ]
(Jimmy)>> Once the filler sets up, I'll sand it and match the contour of the truck. [ sander buzzing ] [ Music ]
(Jeremy)>> I got the fender all done here.
(Jimmy)>> I think we're in pretty good shape. Just kinda doing my final sand here, and then move on to the rest of the truck.
(Jeremy)>> We'll get this thing on here. I'll bolt it down, and we'll get the hood on it, and keep moving on. [ Music ]
[ drill humming ]
(Jimmy)>> Let's get the hood on and then we can keep sanding away. Get this thing ready to spray.
(Jeremy)>> Get her in the booth and lay down some color here shortly. [ Music ] Our Chevy gets some more t-l-c on the body before it finally goes into the paint booth for some color. We'll bring back the o-e-m shine to a classic Chevy paint choice.
(Jimmy)>> Hey guys, welcome back. We've got a couple of d/a's with 320 grit sandpaper on it and we'll get this thing ready to spray. [ d/a buzzing ]
(Jeremy)>> We're using 320 grit to sand the entire truck down to give our sealer and our color a mechanical bond. [ d/a buzzing ]
(Jeremy)>> This can be quite time consuming, but you have to make sure you don't leave any shiny areas because we want to make sure the paint stays on the truck for a long time. [ d/a buzzing ]
(Jeremy)>> This may include using a d/a and some hand sanding in the hard to reach areas. [ d/a buzzing ] [ Music ] [ d/a buzzing ] [ Music ] [ compressed air hissing ] [ Music ]
(Jeremy)>> We'll take our time masking off the entire truck. [ Music ] And finally, we'll wipe it down with some wax and grease remover to get rid of any contaminants that may be left on the original paint. [ Music ] [ spray gun hissing ]
(Jimmy)>> Because we want our truck to be as straight as possible and there's quite a few places with body work already on it, we'll spray it with a few coats of 2-K high build primer. This way we can go back to sand it one more time and make it as smooth as possible. [ spray gun hissing ] [ Music ] [ spray gun hissing ] [ Music ]
(Jeremy)>> Once the primer has had enough time to flash we'll go ahead and hit it with a d/a one last time to really smooth this thing out. [ d/a buzzing ] [ Music ]
(Jeremy)>> This turned out super straight.
(Jimmy)>> Yeah, it should look really good. We'll get some sealant on it and then spray it the color.
(Jeremy)>> It'll look really good when we're done. [ Music ]
[ spray gun hissing ]
(Jimmy)>> First up is two coats of primer/sealer with a 50/50 overlap to give our truck a uniform color to lay down our paint on. [ spray gun hissing ] [ Music ] [ spray gun hissing ] [ Music ] [spray gun hissing ]
(Jeremy)>> Alright well you guys have seen me spray color before cause you saw me jam the fender, and there's really no secret that we are spraying this truck the original color, which is a popular color that GM used in the mid '90's. [ Music ]
[ Music ]
(Jimmy)>> For our color I'll lay down five coats to make sure we get good coverage and a deep color. [ Music ] [ spray gun hissing ] [ Music ]
(Jimmy)>> If you were ever curious where you can find the paint code for your vehicle often times it's on a tag inside the glovebox like on our truck, but there are also multiple online resources available to find out what you need as well. Our code is WA-9794, which is bright teal metallic, and that's one of my favorite colors that Chevy had for these trucks. [ spray gun hissing ] [ Music ] [ spray gun hissing ] [ Music ] [ spray gun hissing ]
(Jimmy)>> With the clear coat I'll lay down three coats. Trying to lay it down heavy enough to give it that nice, shiny look. [ spray gun hissing ] [ Music ] [ spray gun hissing ] [ Music ]
(Jimmy)>> Coming up, the truck is coming together but first we have to add some new brakes and rotors to help our C-1,500 perform safely on the road.
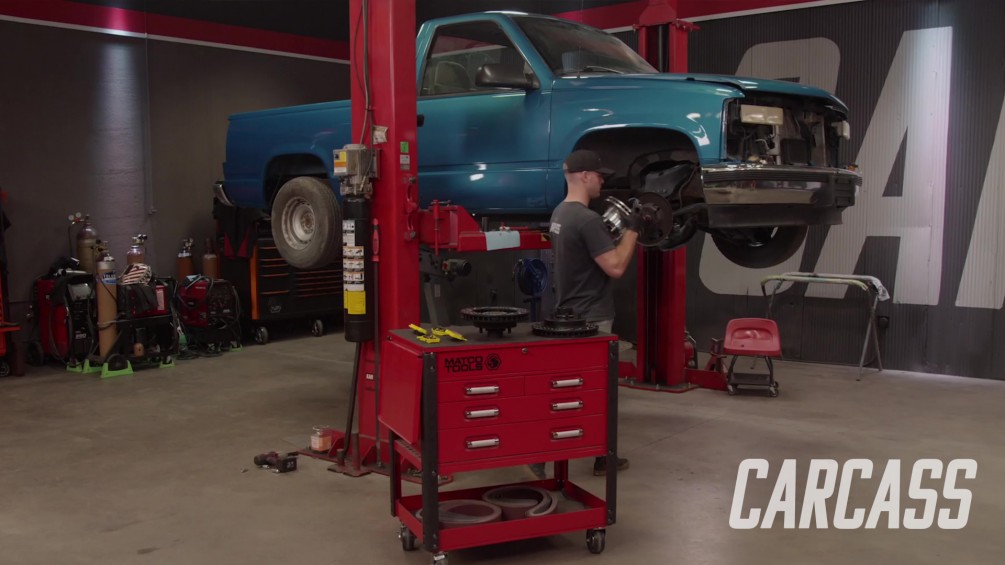
(Jimmy)>> We've got our truck painted, and it's back on the lift because we have to take care of a few things underneath, starting with the brakes. As you can see, the rotor that I took off is actually a six lug, but we will be going back to more of the stock style equipment, but we will be upgrading the rotors. So, we've gone with EBC's GD Sport series. These are awesome because they have the tone ring and the bearing races installed already, and a couple of other features. These are slotted and dimpled. So, for a daily driven pickup this thing's gonna be a little bit quicker than stock and we want to make sure we can stop it, and these will be more than enough. I've got to take apart the other side but Jeremy's gonna show you a couple of other parts we need to put this together.
(Jeremy)>> To go along with our one piece hub and rotor assembly we needed a set of wheel bearings. So, we went to AutoZone and picked up a set of Duralast wheel bearings and we also have their wheel seals. Now before I install these onto the rotor what I have to do is pack them with some wheel bearing grease. So that's where we're gonna get started. Now these Duralast bearings are manufactured for o-e fit, form, and function, and they're designed to meet s-a-e standards. These bearings did come as a kit. So, there is a race with the kit as well, but since we have them already installed into our rotors we're not too worried about those. All I'm trying to do here is pack the bottom side of the bearing and push this wheel bearing grease up into the top side here so it kinda comes out. You guys can see that, and when we're done getting these packed we'll get them into the rotor, and we'll also put in the wheel seals so we can make sure we keep all of that grease inside. This one is basically done. I've got grease all the way around it. So, I'll move on to the next. Alright, that basically wraps up that one. We'll go ahead and grab one of the bearings here, one of the seals, not make a mess, and we'll go get these installed. Bearing in the back, get the seals on there and then we'll have to tap that in with a hammer. [ tapping metal ]
(Jeremy)>> Get this in there and seated. You can hear that all the way around it. Clean this up a little bit and we can make sure we don't get any grease on the rotor. I'll go ahead and get these installed. [ Music ]
Once we have the outer bearing and washer installed, we'll tighten down the castle nut, making sure we install the cotter key when we're done. [ Music ]
[ metal tapping ]
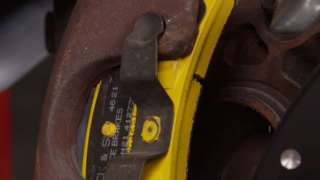
(Jeremy)>> Now to go along with our EBC rotors we're also gonna be pairing them up with a set of EBC Yellow Stuff truck and s-u-v performance pads. Now these yellow stuff brake pads have extremely good cold bite, which means it'll be great for a street driven truck like this. Plus, they'll decrease your stopping distance over an o-e pad. [ Music ]
(Jeremy)>> Alright, well now that we have new pads and rotors installed, we're gonna make sure that when we drive this thing for the first time we're gonna bed the two together. That basically means we're gonna make the pad and the rotor work together, and that's just doing a bunch of starts and stops from specific speeds. So now that we got these pretty much setup we can throw on the wheels and the tires. [ Music ]
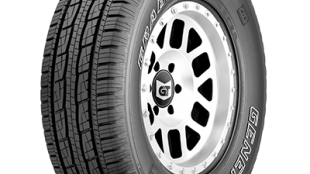
(Jimmy)>> Alright for our wheels and tires we've got some General Grabber HTS. Just a basic highway tire that'll get us down the road. We've got some steel rallyes that we got from Summit Racing along with a nice hub cap. So, we'll get these on. Got just a couple more things to do and then we'll be ready to hit the road.
(Jeremy)>> We have a few more details to finish up before we take our Chevy for a little cruise in the country.
(Jimmy)>> Alright, we are super close to getting our truck on the road. We have a few things to take care of. Some other things we've already done. We put the side trim on the truck, got the wheels and tires on it with the hub caps, new door handles, things like that just to make it look really nice, and to match everything in the front and the back we want to replace some lights. Our old taillight assemblies are super old and dingy, just faded out. They're not gonna match the new fresh paint and everything. So, we went to RockAuto and picked up some new assemblies that are going to look great back here, and Jeremy also has a few parts up front that'll make it look just as good. [ Music ]
[ Music ]
(Jeremy)>> Like Jimmy said in the back, we're gonna be replacing our new headlight and marker light assemblies from one set we picked up from RockAuto. As far as the marker lights go these are all faded, and this one's even cracked. Then our headlights, they're basically the same thing that's on the truck. These are all brand new and nice and shiny. So, I'm gonna get these installed into the truck. we'll get the grille on it, and then we'll hit the road and take this thing for a test drive. [ Music ]
Assembling these are pretty straight forward but remember, this is plastic. So don't get carried away when you tighten stuff down. [ Music ] [ drill humming ] [ Music ]
(Jeremy)>> The headlights come as one complete assembly. So, all we have to do is plug in the bulbs and tighten them down. [ drill humming ] [ Music ]
(Jeremy)>> And at the end we'll wrap the whole thing up by installing the grille. [ Music ] Alright guys well it's test drive day. We are sitting in the '96 Silverado, our abandoned project. It's got an LS swap. It's got fresh paint on it. It's got a bunch of goodies, and we're actually out driving the truck, and I would have to say I'm enjoying being in the passenger seat that's for sure.
(Jimmy)>> It's fun to drive too. This engine, it's got at least 100, maybe 120 or 130 horsepower over what was in this, and in a 4,000 pound truck like this that feels like a huge boost.
(Jeremy)>> It's a rocket ship at this point. They're not the most popular things yet. Not quite like a square body is, but they're super close. This is the next platform. I think we did this truck a whole lot of justice with what we did as far as the ease of doing a salvage yard LS swap. We painted it the same color. So, we didn't have to worry about door jams, or the box and where the cab meet. Where that little hidden piece is between there. Those little things keeping costs down and having a very nice running and driving truck that actually is turning quite a few heads.
(Jimmy)>> I'd say so. And otherwise, we could still go do some other things to this truck. It's mostly cosmetic I would say. Like the rear bumper's kinda jacked. Someone tried to tow with it and bent it like crazy. So, there's some cosmetic things but overall this is a truck that you can literally hop in. It's not crazy loud. It's still got kinda that nice flowy, not bouncy suspension, but it gives when you hit a big bump on the freeway. It just feels good. So, this to me is like the ultimate driver.
(Jeremy)>> And really should get better fuel mileage than what was in the truck. What wasn't in the truck when we got, but what it came with stock.
(Jimmy)>> I bet this thing would get close to 20 on the highway.
(Jeremy)>> And it's super peppy, like super peppy!
(Jimmy)>> You can actually accelerate around people if you need to pass somebody.
(Jeremy)>> Get into it, get out of it. I think we did it justice really to put this whole truck back on the road and just enjoy it for a while, and possibly bring it back and add some power later. Something in a turbo. We can get into different harnesses so we can do better tuning. This is a great platform for us to just have fun. Really the truck is super close to being a restored truck.
(Jimmy)>> Totally!
(Jeremy)>> We're definitely knocking on the door of having a fully restored truck at this point, and a great running and driving one. Why stop!
(Jimmy)>> This hobby is a disease.
(Jeremy)>> You can say that again. If you want any more information on what you've seen on the show check us out at Powernation TV.
Show Full Transcript
(Jeremy)>> Today on Carcass we take our clapped out C-1,500's exterior back to o-e-m standards. We'll replace some sheet metal and clean up some dents.
(Jimmy)>> Then we'll get in the booth and restore the popular factory paint. Plus replace some worn and faded parts to get our Chevy back on the road to redemption. [ Music ] [ engine revving ] [ Music ]
(Jimmy)>> Hey guys, welcome to Carcass! Jeremy and I are well under way on our mini restoration for our C-1,500 Silverado project, and we've gotten the engine and transmission in it. This thing obviously runs and drives, and now we're on to the cosmetic side of things and we're gonna give it a respray.
(Jeremy)>> So we're down here in the prep booth and it's time to give this thing a good once over. So, we're gonna start the processes of doing some body work. We are gonna paint the truck the exact same color but at least we want it to look pretty shiny. I'm gonna go grab a bunch of stuff and then we'll get started.
(Jimmy)>> On the door here we have a couple of areas we're gonna have to take care of. This one's pretty bad, a tiny one. Even one up on the pillar, but these are all pretty simple to take care of. We'll pull them out a little bit, fill them, and sand them smooth. However, on the fender here there's eight or ten spots that we would have to fix. That's just not really worth our time. So, we will be putting new sheet metal on this thing.
(Jeremy)>> Now for as much body work as our other fender needs, and for the sheer price point of a new one, it just makes sense to replace these things. For under $100 dollars you can pick up a new fender versus spending five or six hours trying to straighten out our other fender. So, what we did is went to RockAuto dot com, typed in our '96 Chevy Silverado, and scrolled down to the body section and we picked out our fender. Now for the fender itself these things come brand new, and they're stamped "replacement parts", and they come with an E-coat, which is kinda like a primer. So, I have to prep that before I get into paint. So, with a red scotch brite pad away we go. [ pad scraping ]
(Jeremy)>> The reason why we're scuffing the inside of our new fender is because we're gonna be painting it the same color as the outside of the truck. This is called jamming. Jamming is the process of painting the inside of complete body panels or door jambs before you lay down the color on the outside of the vehicle. [ Music ] [ spray gun hissing ]
(Jeremy)>> Before we spray body color, we'll seal the inside of the panel. Then apply a couple of coats of color allowing it to flash. [ spray gun hissing ] [ Music ] [ spray gun hissing ]
(Jeremy)>> Lastly, we'll throw down two coats of clear. [ spray gun hissing ] [ Music ] [ spray gun hissing ] [ Music ]
(Jimmy)>> Alright, so Jeremy's finishing up the fender. I pulled some of these dents out. So, I'm gonna go ahead and get some filler on them. [ Music ]
[ sander buzzing ]
(Jimmy)>> Once the filler sets up, I'll sand it and match the contour of the truck. [ sander buzzing ] [ Music ]
(Jeremy)>> I got the fender all done here.
(Jimmy)>> I think we're in pretty good shape. Just kinda doing my final sand here, and then move on to the rest of the truck.
(Jeremy)>> We'll get this thing on here. I'll bolt it down, and we'll get the hood on it, and keep moving on. [ Music ]
[ drill humming ]
(Jimmy)>> Let's get the hood on and then we can keep sanding away. Get this thing ready to spray.
(Jeremy)>> Get her in the booth and lay down some color here shortly. [ Music ] Our Chevy gets some more t-l-c on the body before it finally goes into the paint booth for some color. We'll bring back the o-e-m shine to a classic Chevy paint choice.
(Jimmy)>> Hey guys, welcome back. We've got a couple of d/a's with 320 grit sandpaper on it and we'll get this thing ready to spray. [ d/a buzzing ]
(Jeremy)>> We're using 320 grit to sand the entire truck down to give our sealer and our color a mechanical bond. [ d/a buzzing ]
(Jeremy)>> This can be quite time consuming, but you have to make sure you don't leave any shiny areas because we want to make sure the paint stays on the truck for a long time. [ d/a buzzing ]
(Jeremy)>> This may include using a d/a and some hand sanding in the hard to reach areas. [ d/a buzzing ] [ Music ] [ d/a buzzing ] [ Music ] [ compressed air hissing ] [ Music ]
(Jeremy)>> We'll take our time masking off the entire truck. [ Music ] And finally, we'll wipe it down with some wax and grease remover to get rid of any contaminants that may be left on the original paint. [ Music ] [ spray gun hissing ]
(Jimmy)>> Because we want our truck to be as straight as possible and there's quite a few places with body work already on it, we'll spray it with a few coats of 2-K high build primer. This way we can go back to sand it one more time and make it as smooth as possible. [ spray gun hissing ] [ Music ] [ spray gun hissing ] [ Music ]
(Jeremy)>> Once the primer has had enough time to flash we'll go ahead and hit it with a d/a one last time to really smooth this thing out. [ d/a buzzing ] [ Music ]
(Jeremy)>> This turned out super straight.
(Jimmy)>> Yeah, it should look really good. We'll get some sealant on it and then spray it the color.
(Jeremy)>> It'll look really good when we're done. [ Music ]
[ spray gun hissing ]
(Jimmy)>> First up is two coats of primer/sealer with a 50/50 overlap to give our truck a uniform color to lay down our paint on. [ spray gun hissing ] [ Music ] [ spray gun hissing ] [ Music ] [spray gun hissing ]
(Jeremy)>> Alright well you guys have seen me spray color before cause you saw me jam the fender, and there's really no secret that we are spraying this truck the original color, which is a popular color that GM used in the mid '90's. [ Music ]
[ Music ]
(Jimmy)>> For our color I'll lay down five coats to make sure we get good coverage and a deep color. [ Music ] [ spray gun hissing ] [ Music ]
(Jimmy)>> If you were ever curious where you can find the paint code for your vehicle often times it's on a tag inside the glovebox like on our truck, but there are also multiple online resources available to find out what you need as well. Our code is WA-9794, which is bright teal metallic, and that's one of my favorite colors that Chevy had for these trucks. [ spray gun hissing ] [ Music ] [ spray gun hissing ] [ Music ] [ spray gun hissing ]
(Jimmy)>> With the clear coat I'll lay down three coats. Trying to lay it down heavy enough to give it that nice, shiny look. [ spray gun hissing ] [ Music ] [ spray gun hissing ] [ Music ]
(Jimmy)>> Coming up, the truck is coming together but first we have to add some new brakes and rotors to help our C-1,500 perform safely on the road.
(Jimmy)>> We've got our truck painted, and it's back on the lift because we have to take care of a few things underneath, starting with the brakes. As you can see, the rotor that I took off is actually a six lug, but we will be going back to more of the stock style equipment, but we will be upgrading the rotors. So, we've gone with EBC's GD Sport series. These are awesome because they have the tone ring and the bearing races installed already, and a couple of other features. These are slotted and dimpled. So, for a daily driven pickup this thing's gonna be a little bit quicker than stock and we want to make sure we can stop it, and these will be more than enough. I've got to take apart the other side but Jeremy's gonna show you a couple of other parts we need to put this together.
(Jeremy)>> To go along with our one piece hub and rotor assembly we needed a set of wheel bearings. So, we went to AutoZone and picked up a set of Duralast wheel bearings and we also have their wheel seals. Now before I install these onto the rotor what I have to do is pack them with some wheel bearing grease. So that's where we're gonna get started. Now these Duralast bearings are manufactured for o-e fit, form, and function, and they're designed to meet s-a-e standards. These bearings did come as a kit. So, there is a race with the kit as well, but since we have them already installed into our rotors we're not too worried about those. All I'm trying to do here is pack the bottom side of the bearing and push this wheel bearing grease up into the top side here so it kinda comes out. You guys can see that, and when we're done getting these packed we'll get them into the rotor, and we'll also put in the wheel seals so we can make sure we keep all of that grease inside. This one is basically done. I've got grease all the way around it. So, I'll move on to the next. Alright, that basically wraps up that one. We'll go ahead and grab one of the bearings here, one of the seals, not make a mess, and we'll go get these installed. Bearing in the back, get the seals on there and then we'll have to tap that in with a hammer. [ tapping metal ]
(Jeremy)>> Get this in there and seated. You can hear that all the way around it. Clean this up a little bit and we can make sure we don't get any grease on the rotor. I'll go ahead and get these installed. [ Music ]
Once we have the outer bearing and washer installed, we'll tighten down the castle nut, making sure we install the cotter key when we're done. [ Music ]
[ metal tapping ]
(Jeremy)>> Now to go along with our EBC rotors we're also gonna be pairing them up with a set of EBC Yellow Stuff truck and s-u-v performance pads. Now these yellow stuff brake pads have extremely good cold bite, which means it'll be great for a street driven truck like this. Plus, they'll decrease your stopping distance over an o-e pad. [ Music ]
(Jeremy)>> Alright, well now that we have new pads and rotors installed, we're gonna make sure that when we drive this thing for the first time we're gonna bed the two together. That basically means we're gonna make the pad and the rotor work together, and that's just doing a bunch of starts and stops from specific speeds. So now that we got these pretty much setup we can throw on the wheels and the tires. [ Music ]
(Jimmy)>> Alright for our wheels and tires we've got some General Grabber HTS. Just a basic highway tire that'll get us down the road. We've got some steel rallyes that we got from Summit Racing along with a nice hub cap. So, we'll get these on. Got just a couple more things to do and then we'll be ready to hit the road.
(Jeremy)>> We have a few more details to finish up before we take our Chevy for a little cruise in the country.
(Jimmy)>> Alright, we are super close to getting our truck on the road. We have a few things to take care of. Some other things we've already done. We put the side trim on the truck, got the wheels and tires on it with the hub caps, new door handles, things like that just to make it look really nice, and to match everything in the front and the back we want to replace some lights. Our old taillight assemblies are super old and dingy, just faded out. They're not gonna match the new fresh paint and everything. So, we went to RockAuto and picked up some new assemblies that are going to look great back here, and Jeremy also has a few parts up front that'll make it look just as good. [ Music ]
[ Music ]
(Jeremy)>> Like Jimmy said in the back, we're gonna be replacing our new headlight and marker light assemblies from one set we picked up from RockAuto. As far as the marker lights go these are all faded, and this one's even cracked. Then our headlights, they're basically the same thing that's on the truck. These are all brand new and nice and shiny. So, I'm gonna get these installed into the truck. we'll get the grille on it, and then we'll hit the road and take this thing for a test drive. [ Music ]
Assembling these are pretty straight forward but remember, this is plastic. So don't get carried away when you tighten stuff down. [ Music ] [ drill humming ] [ Music ]
(Jeremy)>> The headlights come as one complete assembly. So, all we have to do is plug in the bulbs and tighten them down. [ drill humming ] [ Music ]
(Jeremy)>> And at the end we'll wrap the whole thing up by installing the grille. [ Music ] Alright guys well it's test drive day. We are sitting in the '96 Silverado, our abandoned project. It's got an LS swap. It's got fresh paint on it. It's got a bunch of goodies, and we're actually out driving the truck, and I would have to say I'm enjoying being in the passenger seat that's for sure.
(Jimmy)>> It's fun to drive too. This engine, it's got at least 100, maybe 120 or 130 horsepower over what was in this, and in a 4,000 pound truck like this that feels like a huge boost.
(Jeremy)>> It's a rocket ship at this point. They're not the most popular things yet. Not quite like a square body is, but they're super close. This is the next platform. I think we did this truck a whole lot of justice with what we did as far as the ease of doing a salvage yard LS swap. We painted it the same color. So, we didn't have to worry about door jams, or the box and where the cab meet. Where that little hidden piece is between there. Those little things keeping costs down and having a very nice running and driving truck that actually is turning quite a few heads.
(Jimmy)>> I'd say so. And otherwise, we could still go do some other things to this truck. It's mostly cosmetic I would say. Like the rear bumper's kinda jacked. Someone tried to tow with it and bent it like crazy. So, there's some cosmetic things but overall this is a truck that you can literally hop in. It's not crazy loud. It's still got kinda that nice flowy, not bouncy suspension, but it gives when you hit a big bump on the freeway. It just feels good. So, this to me is like the ultimate driver.
(Jeremy)>> And really should get better fuel mileage than what was in the truck. What wasn't in the truck when we got, but what it came with stock.
(Jimmy)>> I bet this thing would get close to 20 on the highway.
(Jeremy)>> And it's super peppy, like super peppy!
(Jimmy)>> You can actually accelerate around people if you need to pass somebody.
(Jeremy)>> Get into it, get out of it. I think we did it justice really to put this whole truck back on the road and just enjoy it for a while, and possibly bring it back and add some power later. Something in a turbo. We can get into different harnesses so we can do better tuning. This is a great platform for us to just have fun. Really the truck is super close to being a restored truck.
(Jimmy)>> Totally!
(Jeremy)>> We're definitely knocking on the door of having a fully restored truck at this point, and a great running and driving one. Why stop!
(Jimmy)>> This hobby is a disease.
(Jeremy)>> You can say that again. If you want any more information on what you've seen on the show check us out at Powernation TV.
