Carcass Featured Projects
Carcass Builds
Want more content like this?
Join the PowerNation Email NewsletterParts Used In This Episode
American Powertrain Systems
Tremec T56 Magnum Transmission with Hydromax Hydraulic Clutch Kit
The Industrial Depot
Tools, Hardware, Shop Supplies
Episode Transcript
(Jeremy)>> You're watching Powernation!
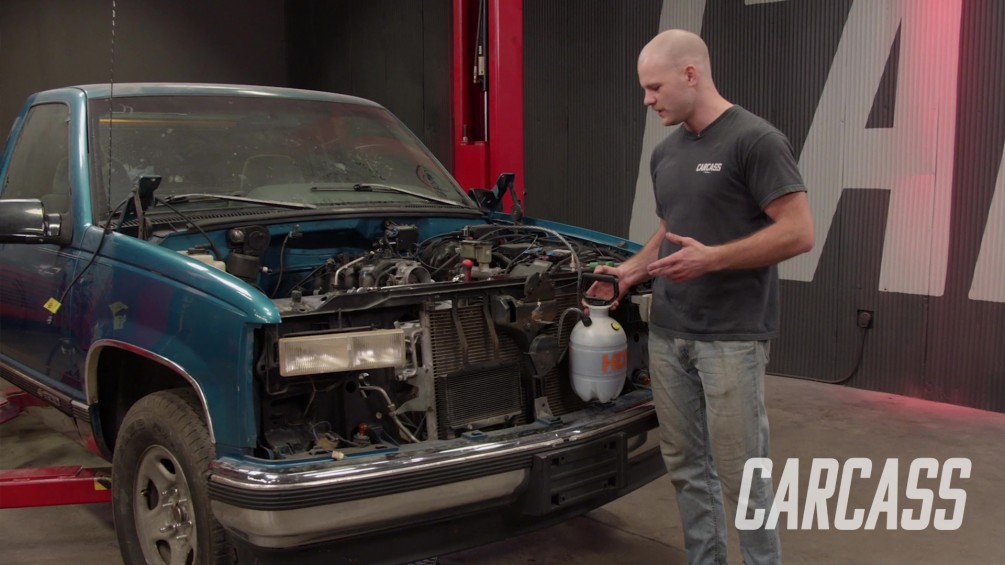
(Jimmy)>> Today on Carcass our '96 Chevy Silverado is getting close to hitting the road. We'll take care of some wiring and show you a trick to prime your engine before start up.
(Jeremy)>> We'll also take care of some transmission maintenance and build a simple and custom exhaust system. [ Music ] [ engine revving ] [ Music ]
(Jimmy)>> Hey guys, welcome to Carcass. So, Jeremy and I are well under way on our abandoned Silverado project. We've got our junkyard LS and transmission sitting in this thing already, but we have quite a bit of work to do before we can actually fire it up. I'm gonna be working on priming the engine with oil and getting the rest of the accessory drive installed on the front.
(Jeremy)>> And what I'm gonna be working on is the wiring side of things. Now I've already gone ahead and stripped down the wiring harness that's inside the truck, and that just pretty much consists of taking a lot of the connectors, cutting them out of the harness, taping it all back up, and these things just go right into the garbage. Now on the LS side of things or the engine side of things this is actually pretty cool because the LS has its own specific engine harness. So, if you guys go out to the salvage yard to grab something to do your engine swap don't forget to grab this as well. The unique thing about this harness is that it all unbolts. So, you've got the two big connectors here that go into the back of the computer, or the e-c-u. You also have this big black connection that goes into the back of the stock fuse box. Now you guys can choose to run this setup if you want to, or the unique thing about this connector is if you take all these pink wires out of the back here that's all just key-on-hot power sources. You can wire that into a smaller fuse box and your engine will run just fine. So, what do I have to do? I'm gonna strip down most of this harness because I've got to get rid of some of the circuits we're not gonna be using. I'm gonna unpin them from these two big connectors, and that's all extremely boring stuff that you guys don't want to watch. So, I'm gonna go ahead and dive into this cause it's quite a bit of work, and Jimmy's actually got a pretty cool way to prime the oil system in that engine. So, you guys can go see how he's gonna do that.
(Jimmy)>> With this engine being a refresh build, or if you have a brand new engine, it's a great idea to go ahead and prime the oiling system. This engine particular, the block and the heads have been cleaned completely and there's no oil in the engine whatsoever. On these LS blocks it's pretty easy to prime it because there's a plug on the side of the block and you just need a few things to do this. The first being an adapter fitting that goes from a 16 by 1.5 to an eighth inch n-p-t and then a quarter inch barb on the end. If you go to your local hardware store you can get one of these pump sprayers to spray weeds and stuff like that, and if you cut the sprayer part off the i-d of these hoses is generally about quarter of an inch. So, you can slide it onto the barb. So, what we're looking for here is getting oil to the top end of the engine, and if we take the oil fill cap off the valve cover we can actually see onto the rocker arms, and the push rods, and you can see oil come out some of the holes. So that's what were looking for. I'll get the plug out of the block, put this fitting in there, and we'll get going. [ Music ] Hook this up, and then we'll start to pressurize. [ Music ] Got the hose on it. So now we can start to pressurize this engine. Because it doesn't have any oil in it it'll probably take six quarts or so. And as the fluid level is going down in this tank I'll start to rotate the engine over a little bit. We'll just kinda do that throughout this thing taking on fluid, and then we'll just check the top end and make sure we've got fluid up there and that'll be it. So, it's just kind of a waiting game at this point. Once you pressurize it you've just got to let it do it's thing. [ Music ] What's pretty neat about this too, and this is actually a tank that I've used on an engine I built, is I had a mechanical gauge in the truck that I was building. So, I hooked it all up and actually got almost 20 pounds of oil pressure just from this tank. So, it's really forcing the oil through everything, and it works out really good, and in total everything costs about $20 bucks. So pretty cheap way, pretty easy way to do it, and as soon as the engine gets the rest of this oil we'll be good. [ Music ] It's a good idea to turn the engine over while doing this to ensure that everything is properly lubricated. [ ratchet clicking ] [ Music ]
(Jimmy)>> That's six quarts of oil in this engine, and we got oil all the way up in the valvetrain. So, I'll get the rest of the accessory drive on this thing and once Jeremy throws the harness on we'll be in pretty good shape.
(Jeremy)>> Alright guys, well I'm deep into the wiring harness, and I've got some of the wires laid out that we're gonna end up keeping. Now it's a really good idea for you guys to label these so you know where they go once you get into this. Like one of these is for the check engine light. I've got one for the brake light switch and the o-b-d-2 port, but for the wires that you guys are gonna de-pin or that you're gonna get rid of I figured I'd show you guys how to do that. It's really quite simple. All you've got to do is have a small screwdriver and I'll show you how to do that. Okay so once you guys get the little gray cover off of the back here that holds all the wires in, and you take the other blue cover off of this side you can get down to the actual pins. Now you've got a bunch of these little white tabs that you have to pick up. So, we're gonna pull out this black wire here. All you do is pick up the tab a little bit and put a little pressure on the wire. Then you can actually pick up the pin and pull the wire out of the way. Now once you're done with that you can go ahead and put the cover back on like that, and then put the cover on the back, and then you'll be all set. So, once you've got all the pins pulled out that you're not gonna be using what you want to do is wrap the entire harness back up in the wire loom, and then we'll get this put back into the truck, and that pretty much takes care of the wiring side of things. I do have a couple more things to do. That'll get us one step closer to bringing this truck back to life. We'll jump back into the engine bay and finish up the steering and cooling system.
(Jimmy)>> We're getting really close to firing this engine up. Jeremy's got the harness all back in the truck and it's all hooked up. I'm gonna be working on getting the power steering system and the cooling system all together, and what's nice about these older GM trucks and the newer GM trucks is that they use the same power steering pump. So, these hoses are for this truck, but all the fittings and everything are the same. For the cooling system I'm gonna be using the hoses from the truck that this engine came out of, and this is all just really simple because you can buy all these parts at the part store. So, I'm just gonna get these hoses hooked up and we'll get this thing finished out. [ Music ] Once we get our power steering hoses installed, we'll move on to installing our radiator that we got from RockAuto. [ Music ] [ drill humming ]
(Jimmy)>> To go along with that we'll put in the shroud, which is actually the original that came with the truck. [ drill humming ]
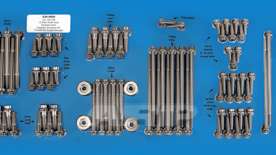
(Jimmy)>> Then we can install the radiator hoses, which fit the Yukon that this engine came from. [ Music ] Along with our radiator we also got our alternator from RockAuto. This is a Remy 105-amp remanufactured unit, and the beautiful thing about RockAuto is you have a lot of options. We could have gotten the heavy duty 145-amp option, and we could also get a remanufactured or a new one of those as well, but for our truck we're gonna try to keep it on the cheaper side of things. So, this will do just fine. [ Music ] Alright this pretty much wraps it up aside from a belt. And you may have noticed, we are using all the stock hardware but if you wanted to dress up something like this there is a solution for you too. ARP offers a full line of hardware from many different types of engines. This kit in particular is their external hardware kit for the LS series engine. They also make internal engine fasteners as well. So, if you're building some super high horsepower engine that just needs to stay together they've got you covered there. This kit in particular features their 12-point polished stainless steel options but they also make black oxide coatings and your traditional hex head, and above anything else this hardware just looks awesome. Coming up, our junkyard transmission needs some attention before we put our Chevy on the road.
(Jeremy)>> With the top side of the engine pretty much buttoned up it's time to focus our attention underneath the truck. We're gonna be hooking up these transmission cooler lines. Then we also have to do a transmission service, and eventually we'll move on to the exhaust, but for now we're gonna focus on these cooler lines and we'll get these under the truck. These are the stock cooler lines from our donor vehicle. This side goes to the transmission, this side goes up front to the cooler. [ Music ] These just slide in, and they use some c-clip connectors. [ Music ] Get the connectors in it. Then we'll just slide these two little c-clips on here, which are teeny tiny. Don't drop them. [ Music ] Then we'll move toward the front and install our hoses and our hose clamps. [ Music ] There! Alright, now because we got our engine and transmission from the salvage yard, they drain the fluid out of them before they set them in the yard. Easy way they do that on the engine side is they pull the drain plug, but on the transmission side they don't pull the drain plug. They actually poke a giant hole in the bottom to drain the fluid. So, we have to replace the transmission pan, and since we're gonna have this down and we'll be right next to the filter we're gonna go ahead and replace that too. [ Music ] [ drill humming ] [ Music ]
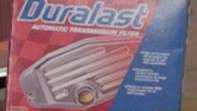
(Jeremy)>> I'm gonna try not to make a big mess here and get this out. Alright for the filter and for the pan we went to AutoZone and picked up some Duralast parts. Now it's a really good idea, especially on higher mileage vehicles, to do a service on your engine and on the transmission here as well. Now their Duralast kits come with a filter and with a gasket. They're super simple to install. These meet or exceed all o-e-m requirements, and they take harmful contaminants out the inside of your transmission, especially with the filter change. So, they're super simple to put in here. Just slap the filter into place and we'll keep moving on. [ Music ] Get this nice, new, shiny pan up in here with the gasket in it and we'll tighten everybody down. [ Music ] [ drill humming ]
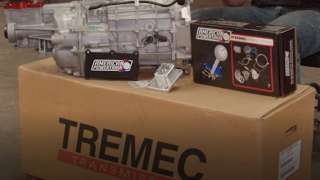
(Jeremy)>> Alright, well that buttons up the transmission service in our truck. Now we just opted to go with an automatic transmission cause that's what we found in the salvage yard, but you guys can run a different transmission in this. You guys can actually run a manual as well. Now Tremec transmissions makes a couple different options if you guys want to put a manual transmission inside your pickup truck. They make a TKO five speed and a T-56 6-speed. Now American Powertrain takes that one step further by putting this all together as a kit. They'll send you the transmission. They'll send you a bell housing, and they even send you a driveshaft. Plus, you get this HydraMax hydraulic clutch kit setup that comes with your slave cylinder, your master cylinder, and everything you guys need to put this inside of your truck. So, if you're looking to put a manual transmission in your '88 to '98 Chevy pickup truck, or any one of your projects, why don't you guys check out American Powertrain. We're close to firing up our junkyard LS but first we need to build a custom exhaust system.
(Jimmy)>> One of the last things we need to do before we fire this thing up is get the exhaust on it so we can hook up the O-2 sensors. We got these cast manifolds from Summit Racing. These are universal fit and should go pretty easily into our truck. [ Music ] [ mechanical humming ]
(Jeremy)>> How'd everything go up top?
(Jimmy)>> It was smooth. They fit really nice.
(Jeremy)>> I'm gonna go ahead and get the collectors on underneath here, and then we'll just start heading out the back.
(Jimmy)>> Just do single exit probably?
(Jeremy)>> I think so. We'll wind up putting a catalytic converter and a muffler in it. So, we'll go from two to one and we'll get out the back somewhere.
(Jimmy)>> Let me know if you need any help.
(Jeremy)>> I definitely will. These collectors came with the manifolds and already heave the bungs for the O-2 sensors welded in. [ Music ] [ drill humming ] [ Music ]
(Jeremy)>> Now because our LS didn't come stock in our pickup we're gonna have to build our own exhaust. So, we went to Summit Racing and picked up this two and a half inch diameter exhaust builders kit. It comes with everything you guys need to get started. It's got a bunch of straight pieces. We've got some 45's, we've got some 90-degree bends, and a couple of 180-degree bends. Now since this truck is gonna be a street legal truck we also picked up a catalytic converted that we got from Flowmaster, and a single-in, single-out muffler that we got from Hooker. Now the first place I need to start underneath the truck here is with a 90 degree cause we've got to get under the transmission. Alright, first piece is gonna go in here. We're gonna try to cross underneath the transmission here, but this piece of pipe's quite a bit too long. So, we'll head over to the chop saw. Take about four or five inches out of it, and we'll see how we land. [ saw buzzing ]
(Jeremy)>> Alright, this should fit. Let's go ahead and get it tacked in. [ welder crackling ]
(Jeremy)>> Alright, now we'll just have to do some trimming and fitting on this side, and it's just rinse and repeat all the way back. [ saw buzzing ] [ welder crackling ] [ Music ] [ welder crackling ]
(Jeremy)>> Alright so now we have the two pipes coming from the manifolds and we've got to head towards the back, but we're gonna go down to a single pipe. So, here's the idea. We're gonna take a straight section and one of the 45's and put it together like this. We'll end up cutting here a little bit, essentially creating a Y-pipe, and then we'll start heading towards the back and get the catalytic converter and the muffler in here. This one, get a rough idea of where to trim it to first. Something like that, and then we'll cut it up. [ saw buzzing ] [ grinder buzzing ] [ Music ]
(Jeremy)>> That's pretty close! [ Music ] Alright that should work perfectly. Now I just need to cut a hole in the long piece of pipe. [ saw buzzing ] [ grinder buzzing ]
(Jeremy)>> Alright, so I have the hole cut in here for the Y-pipe and I also cut this pipe a little bit shorter cause I do know where I want the catalytic converter to land. So, we're gonna go ahead and slide this stuff up and in here. Get it all lined up with our marks that we made. Then we'll go ahead and throw and throw a couple of tacks in, and then we'll put that catalytic converter in as well. [ Music ] [ welder crackling ] [ Music ] [ welder crackling ]
(Jeremy)>> After we tack the converter and muffler in place I'll come back and cut the tacks by the converter. Then weld the entire exhaust system up on the table. This is the easiest way to make sure we have an entirely leak free system. [ welder crackling ]
(Jeremy)>> Then once it's welded up, we'll put the exhaust back in and clamp the last joint together. [ drill humming ] [ Music ]
(Jeremy)>> Well what do you think? Exhaust is in it. We've got the air intake made. Everything basically fits. I think this should fire right up.
(Jimmy)>> What I love about this swap in particular, because we did this with another o-b-s, but this one the fan and radiator hoses are stock to the engine but the shroud is stock to the truck. So, it really looks like this thing belongs here.
(Jeremy)>> It's scary how everything works out here. Let's see if it starts. I don't see why it wouldn't. Go ahead and give her a fire up. [ engine starts ]
(Jeremy)>> Hey, there you go! Man, that thing purrs even!
(Jimmy)>> Good job on the wiring.
(Jeremy)>> That's not bad for a salvage yard engine. Don't know if the transmission shifts but it's running.
(Jimmy)>> No noise!
(Jeremy)>> It fits in here very well.
(Jimmy)>> The wiring's all tidied up. Obviously, nothing's wrong with it cause it runs.
(Jeremy)>> Well that pretty much takes care of everything under the hood. I say from here we've got to focus on some body work, but let's check some fluids and just make sure everything's ready to go. If you like anything you've seen on the show today check out Powernation TV.
Show Full Transcript
(Jimmy)>> Today on Carcass our '96 Chevy Silverado is getting close to hitting the road. We'll take care of some wiring and show you a trick to prime your engine before start up.
(Jeremy)>> We'll also take care of some transmission maintenance and build a simple and custom exhaust system. [ Music ] [ engine revving ] [ Music ]
(Jimmy)>> Hey guys, welcome to Carcass. So, Jeremy and I are well under way on our abandoned Silverado project. We've got our junkyard LS and transmission sitting in this thing already, but we have quite a bit of work to do before we can actually fire it up. I'm gonna be working on priming the engine with oil and getting the rest of the accessory drive installed on the front.
(Jeremy)>> And what I'm gonna be working on is the wiring side of things. Now I've already gone ahead and stripped down the wiring harness that's inside the truck, and that just pretty much consists of taking a lot of the connectors, cutting them out of the harness, taping it all back up, and these things just go right into the garbage. Now on the LS side of things or the engine side of things this is actually pretty cool because the LS has its own specific engine harness. So, if you guys go out to the salvage yard to grab something to do your engine swap don't forget to grab this as well. The unique thing about this harness is that it all unbolts. So, you've got the two big connectors here that go into the back of the computer, or the e-c-u. You also have this big black connection that goes into the back of the stock fuse box. Now you guys can choose to run this setup if you want to, or the unique thing about this connector is if you take all these pink wires out of the back here that's all just key-on-hot power sources. You can wire that into a smaller fuse box and your engine will run just fine. So, what do I have to do? I'm gonna strip down most of this harness because I've got to get rid of some of the circuits we're not gonna be using. I'm gonna unpin them from these two big connectors, and that's all extremely boring stuff that you guys don't want to watch. So, I'm gonna go ahead and dive into this cause it's quite a bit of work, and Jimmy's actually got a pretty cool way to prime the oil system in that engine. So, you guys can go see how he's gonna do that.
(Jimmy)>> With this engine being a refresh build, or if you have a brand new engine, it's a great idea to go ahead and prime the oiling system. This engine particular, the block and the heads have been cleaned completely and there's no oil in the engine whatsoever. On these LS blocks it's pretty easy to prime it because there's a plug on the side of the block and you just need a few things to do this. The first being an adapter fitting that goes from a 16 by 1.5 to an eighth inch n-p-t and then a quarter inch barb on the end. If you go to your local hardware store you can get one of these pump sprayers to spray weeds and stuff like that, and if you cut the sprayer part off the i-d of these hoses is generally about quarter of an inch. So, you can slide it onto the barb. So, what we're looking for here is getting oil to the top end of the engine, and if we take the oil fill cap off the valve cover we can actually see onto the rocker arms, and the push rods, and you can see oil come out some of the holes. So that's what were looking for. I'll get the plug out of the block, put this fitting in there, and we'll get going. [ Music ] Hook this up, and then we'll start to pressurize. [ Music ] Got the hose on it. So now we can start to pressurize this engine. Because it doesn't have any oil in it it'll probably take six quarts or so. And as the fluid level is going down in this tank I'll start to rotate the engine over a little bit. We'll just kinda do that throughout this thing taking on fluid, and then we'll just check the top end and make sure we've got fluid up there and that'll be it. So, it's just kind of a waiting game at this point. Once you pressurize it you've just got to let it do it's thing. [ Music ] What's pretty neat about this too, and this is actually a tank that I've used on an engine I built, is I had a mechanical gauge in the truck that I was building. So, I hooked it all up and actually got almost 20 pounds of oil pressure just from this tank. So, it's really forcing the oil through everything, and it works out really good, and in total everything costs about $20 bucks. So pretty cheap way, pretty easy way to do it, and as soon as the engine gets the rest of this oil we'll be good. [ Music ] It's a good idea to turn the engine over while doing this to ensure that everything is properly lubricated. [ ratchet clicking ] [ Music ]
(Jimmy)>> That's six quarts of oil in this engine, and we got oil all the way up in the valvetrain. So, I'll get the rest of the accessory drive on this thing and once Jeremy throws the harness on we'll be in pretty good shape.
(Jeremy)>> Alright guys, well I'm deep into the wiring harness, and I've got some of the wires laid out that we're gonna end up keeping. Now it's a really good idea for you guys to label these so you know where they go once you get into this. Like one of these is for the check engine light. I've got one for the brake light switch and the o-b-d-2 port, but for the wires that you guys are gonna de-pin or that you're gonna get rid of I figured I'd show you guys how to do that. It's really quite simple. All you've got to do is have a small screwdriver and I'll show you how to do that. Okay so once you guys get the little gray cover off of the back here that holds all the wires in, and you take the other blue cover off of this side you can get down to the actual pins. Now you've got a bunch of these little white tabs that you have to pick up. So, we're gonna pull out this black wire here. All you do is pick up the tab a little bit and put a little pressure on the wire. Then you can actually pick up the pin and pull the wire out of the way. Now once you're done with that you can go ahead and put the cover back on like that, and then put the cover on the back, and then you'll be all set. So, once you've got all the pins pulled out that you're not gonna be using what you want to do is wrap the entire harness back up in the wire loom, and then we'll get this put back into the truck, and that pretty much takes care of the wiring side of things. I do have a couple more things to do. That'll get us one step closer to bringing this truck back to life. We'll jump back into the engine bay and finish up the steering and cooling system.
(Jimmy)>> We're getting really close to firing this engine up. Jeremy's got the harness all back in the truck and it's all hooked up. I'm gonna be working on getting the power steering system and the cooling system all together, and what's nice about these older GM trucks and the newer GM trucks is that they use the same power steering pump. So, these hoses are for this truck, but all the fittings and everything are the same. For the cooling system I'm gonna be using the hoses from the truck that this engine came out of, and this is all just really simple because you can buy all these parts at the part store. So, I'm just gonna get these hoses hooked up and we'll get this thing finished out. [ Music ] Once we get our power steering hoses installed, we'll move on to installing our radiator that we got from RockAuto. [ Music ] [ drill humming ]
(Jimmy)>> To go along with that we'll put in the shroud, which is actually the original that came with the truck. [ drill humming ]
(Jimmy)>> Then we can install the radiator hoses, which fit the Yukon that this engine came from. [ Music ] Along with our radiator we also got our alternator from RockAuto. This is a Remy 105-amp remanufactured unit, and the beautiful thing about RockAuto is you have a lot of options. We could have gotten the heavy duty 145-amp option, and we could also get a remanufactured or a new one of those as well, but for our truck we're gonna try to keep it on the cheaper side of things. So, this will do just fine. [ Music ] Alright this pretty much wraps it up aside from a belt. And you may have noticed, we are using all the stock hardware but if you wanted to dress up something like this there is a solution for you too. ARP offers a full line of hardware from many different types of engines. This kit in particular is their external hardware kit for the LS series engine. They also make internal engine fasteners as well. So, if you're building some super high horsepower engine that just needs to stay together they've got you covered there. This kit in particular features their 12-point polished stainless steel options but they also make black oxide coatings and your traditional hex head, and above anything else this hardware just looks awesome. Coming up, our junkyard transmission needs some attention before we put our Chevy on the road.
(Jeremy)>> With the top side of the engine pretty much buttoned up it's time to focus our attention underneath the truck. We're gonna be hooking up these transmission cooler lines. Then we also have to do a transmission service, and eventually we'll move on to the exhaust, but for now we're gonna focus on these cooler lines and we'll get these under the truck. These are the stock cooler lines from our donor vehicle. This side goes to the transmission, this side goes up front to the cooler. [ Music ] These just slide in, and they use some c-clip connectors. [ Music ] Get the connectors in it. Then we'll just slide these two little c-clips on here, which are teeny tiny. Don't drop them. [ Music ] Then we'll move toward the front and install our hoses and our hose clamps. [ Music ] There! Alright, now because we got our engine and transmission from the salvage yard, they drain the fluid out of them before they set them in the yard. Easy way they do that on the engine side is they pull the drain plug, but on the transmission side they don't pull the drain plug. They actually poke a giant hole in the bottom to drain the fluid. So, we have to replace the transmission pan, and since we're gonna have this down and we'll be right next to the filter we're gonna go ahead and replace that too. [ Music ] [ drill humming ] [ Music ]
(Jeremy)>> I'm gonna try not to make a big mess here and get this out. Alright for the filter and for the pan we went to AutoZone and picked up some Duralast parts. Now it's a really good idea, especially on higher mileage vehicles, to do a service on your engine and on the transmission here as well. Now their Duralast kits come with a filter and with a gasket. They're super simple to install. These meet or exceed all o-e-m requirements, and they take harmful contaminants out the inside of your transmission, especially with the filter change. So, they're super simple to put in here. Just slap the filter into place and we'll keep moving on. [ Music ] Get this nice, new, shiny pan up in here with the gasket in it and we'll tighten everybody down. [ Music ] [ drill humming ]
(Jeremy)>> Alright, well that buttons up the transmission service in our truck. Now we just opted to go with an automatic transmission cause that's what we found in the salvage yard, but you guys can run a different transmission in this. You guys can actually run a manual as well. Now Tremec transmissions makes a couple different options if you guys want to put a manual transmission inside your pickup truck. They make a TKO five speed and a T-56 6-speed. Now American Powertrain takes that one step further by putting this all together as a kit. They'll send you the transmission. They'll send you a bell housing, and they even send you a driveshaft. Plus, you get this HydraMax hydraulic clutch kit setup that comes with your slave cylinder, your master cylinder, and everything you guys need to put this inside of your truck. So, if you're looking to put a manual transmission in your '88 to '98 Chevy pickup truck, or any one of your projects, why don't you guys check out American Powertrain. We're close to firing up our junkyard LS but first we need to build a custom exhaust system.
(Jimmy)>> One of the last things we need to do before we fire this thing up is get the exhaust on it so we can hook up the O-2 sensors. We got these cast manifolds from Summit Racing. These are universal fit and should go pretty easily into our truck. [ Music ] [ mechanical humming ]
(Jeremy)>> How'd everything go up top?
(Jimmy)>> It was smooth. They fit really nice.
(Jeremy)>> I'm gonna go ahead and get the collectors on underneath here, and then we'll just start heading out the back.
(Jimmy)>> Just do single exit probably?
(Jeremy)>> I think so. We'll wind up putting a catalytic converter and a muffler in it. So, we'll go from two to one and we'll get out the back somewhere.
(Jimmy)>> Let me know if you need any help.
(Jeremy)>> I definitely will. These collectors came with the manifolds and already heave the bungs for the O-2 sensors welded in. [ Music ] [ drill humming ] [ Music ]
(Jeremy)>> Now because our LS didn't come stock in our pickup we're gonna have to build our own exhaust. So, we went to Summit Racing and picked up this two and a half inch diameter exhaust builders kit. It comes with everything you guys need to get started. It's got a bunch of straight pieces. We've got some 45's, we've got some 90-degree bends, and a couple of 180-degree bends. Now since this truck is gonna be a street legal truck we also picked up a catalytic converted that we got from Flowmaster, and a single-in, single-out muffler that we got from Hooker. Now the first place I need to start underneath the truck here is with a 90 degree cause we've got to get under the transmission. Alright, first piece is gonna go in here. We're gonna try to cross underneath the transmission here, but this piece of pipe's quite a bit too long. So, we'll head over to the chop saw. Take about four or five inches out of it, and we'll see how we land. [ saw buzzing ]
(Jeremy)>> Alright, this should fit. Let's go ahead and get it tacked in. [ welder crackling ]
(Jeremy)>> Alright, now we'll just have to do some trimming and fitting on this side, and it's just rinse and repeat all the way back. [ saw buzzing ] [ welder crackling ] [ Music ] [ welder crackling ]
(Jeremy)>> Alright so now we have the two pipes coming from the manifolds and we've got to head towards the back, but we're gonna go down to a single pipe. So, here's the idea. We're gonna take a straight section and one of the 45's and put it together like this. We'll end up cutting here a little bit, essentially creating a Y-pipe, and then we'll start heading towards the back and get the catalytic converter and the muffler in here. This one, get a rough idea of where to trim it to first. Something like that, and then we'll cut it up. [ saw buzzing ] [ grinder buzzing ] [ Music ]
(Jeremy)>> That's pretty close! [ Music ] Alright that should work perfectly. Now I just need to cut a hole in the long piece of pipe. [ saw buzzing ] [ grinder buzzing ]
(Jeremy)>> Alright, so I have the hole cut in here for the Y-pipe and I also cut this pipe a little bit shorter cause I do know where I want the catalytic converter to land. So, we're gonna go ahead and slide this stuff up and in here. Get it all lined up with our marks that we made. Then we'll go ahead and throw and throw a couple of tacks in, and then we'll put that catalytic converter in as well. [ Music ] [ welder crackling ] [ Music ] [ welder crackling ]
(Jeremy)>> After we tack the converter and muffler in place I'll come back and cut the tacks by the converter. Then weld the entire exhaust system up on the table. This is the easiest way to make sure we have an entirely leak free system. [ welder crackling ]
(Jeremy)>> Then once it's welded up, we'll put the exhaust back in and clamp the last joint together. [ drill humming ] [ Music ]
(Jeremy)>> Well what do you think? Exhaust is in it. We've got the air intake made. Everything basically fits. I think this should fire right up.
(Jimmy)>> What I love about this swap in particular, because we did this with another o-b-s, but this one the fan and radiator hoses are stock to the engine but the shroud is stock to the truck. So, it really looks like this thing belongs here.
(Jeremy)>> It's scary how everything works out here. Let's see if it starts. I don't see why it wouldn't. Go ahead and give her a fire up. [ engine starts ]
(Jeremy)>> Hey, there you go! Man, that thing purrs even!
(Jimmy)>> Good job on the wiring.
(Jeremy)>> That's not bad for a salvage yard engine. Don't know if the transmission shifts but it's running.
(Jimmy)>> No noise!
(Jeremy)>> It fits in here very well.
(Jimmy)>> The wiring's all tidied up. Obviously, nothing's wrong with it cause it runs.
(Jeremy)>> Well that pretty much takes care of everything under the hood. I say from here we've got to focus on some body work, but let's check some fluids and just make sure everything's ready to go. If you like anything you've seen on the show today check out Powernation TV.
