Carcass Featured Projects
Carcass Builds
Want more content like this?
Join the PowerNation Email NewsletterEpisode Transcript
(Jeremy)>> You're watching Powernation!
(Jeremy)>> Today on Carcass we have a new project in our shop. We'll give you a helpful formula to maintain the drivetrain in a high mileage vehicle.
(Jimmy)>> Then we start tearing into our crime busting cruiser preparing for its next adventure as a weekend warrior on the track. Plus show you an easy way to firm up the shifts in your transmission. [ Music ] [ engine revving ] [ Music ]
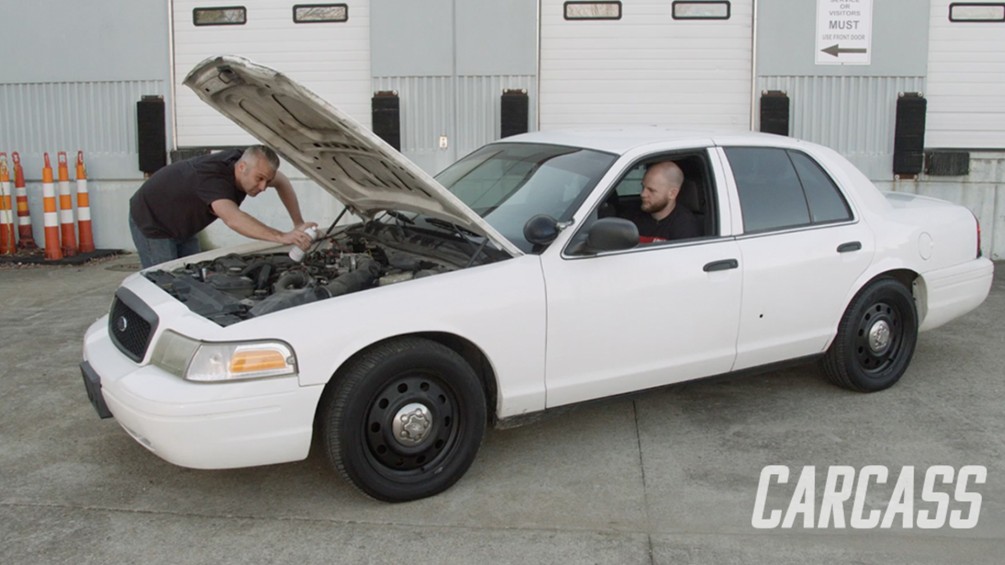
(Jimmy)>> What's up everybody? Welcome to Carcass. We're about to start on a new project, and as you can see this is a Ford Crown Victoria ex-police car. These things are great because they're super cheap, they're extremely durable. You can beat on them and they'll pretty much take the abuse without much issue. However, when we get new projects we like to do a few things to them just to stay on top of the maintenance, and so we have a combination of products we're gonna use to keep this thing in good working condition, and that starts under the hood. [ clicking ]
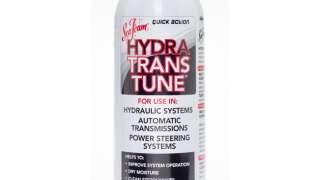
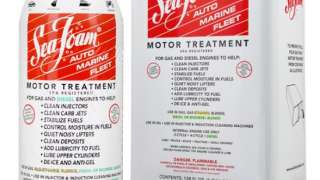
(Jeremy)>> So like Jimmy said we're gonna be using a combination of products that mechanics and technicians have trusted for years, and the first one is Sea Foam Motor Treatment, and this goes directly into the crankcase. For the crankcase we'll be adding one ounce for each quart of oil. So, in our case we'll be adding six ounces. Alright, well that takes care of the crankcase side of things. Now another product we're gonna be using is their Hydra Trans Tune. We're actually gonna be putting a little bit of this in the transmission and in the power steering as well. [ Music ] For the transmission we'll be adding one pint, which is the entire can, to the filler tube. [ Music ] And on the power steering side we'll be adding four to six ounces. [ Music ]
(Jimmy)>> And now third we have Sea Foam's High Mileage Motor Treatment, which is designed for vehicles with over 75,000 miles, which our Crown Vic falls into. For the fuel tank we'll add one ounce per gallon of gasoline. So, we'll add in about a half a can.
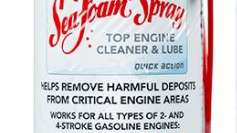
(Jeremy)>> Now the fourth product we're gonna be using is this Sea Foam Top Engine Cleaner and Lube. Now we had to do one thing to apply this. We had to put the supplied straw into the intake boot here. So, I'm gonna go ahead and hook this up. We're gonna start the engine up and rev it up to 2,000 r-p-m, and then I'm gonna spray the entire can into the intake. Alright Jimmy, fire it up. [ engine starting ]
(Jeremy)>> 2,000? [ engine revving ] [ engine idling ] [ Music ]
(Jeremy)>> Alright Jimmy, what do you say we go drive this thing?
(Jimmy)>> Let's do it.
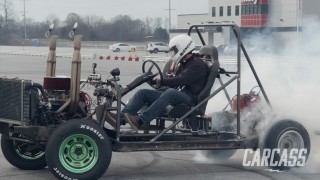
Alright guys, so we're out giving the Crown Vic a little bit of a test drive trying to get the Sea Foam worked through all the fluids and through the engine, and so we want to tell you guys what we're doing with this car, what the purpose of the build is, and it pretty much revolves around having cheap fun cause this car is the Panther chassis, which includes the Crown Vic, the Marauder, and the Grand Marquis. So those three cars, they have a class called the Spec Panther class, which is part of the Auto Interest Group. They do these high-performance driving days, and a bunch of guys have gotten these cars because they're so cheap, and they kinda compete against one another trying to lay down the fastest times on the track. So, this is our platform to go out and run with those guys.
(Jeremy)>> We got lucky enough to actually ride in one of these cars with Rick Hoback when ran up to NCM and hooked up with the Auto Interest guys and let me tell you something. "A", Rick can drive the car, and it's unbelievable how this platform, this Panther platform, handles out on a track. You would think you're in a legit race car at that point. Jimmy got to sit in the front. I got to sit in the back, and I got super sick. If you watch real close my demeanor completely changes a couple of laps around, and I was so close to putting the window down because I was gonna have to let it all go out the window, but that just kinda tells you something. "A", a good instructor and a good driver can do wonders on a track and "B", a good platform or chassis makes it just enjoyable for whoever's driving, not whoever's riding.
(Jimmy)>> So for $2,000 to $5000, depending on what you want to spend, you can pick up one of these cars, which especially if you get a police interceptor it will have a lot of heavy-duty equipment already on them because they are made to go out and just jump curbs, hit cars, or whatever you want to do with it. So, it's a full chassis car. They have pretty good brakes to begin with, but that is something we can upgrade.
(Jeremy)>> That's on the safety side of things.
(Jimmy)>> The police interceptor specifically has a heavy-duty cooling system, and they're a big heavy car but they've got a big V-8. They're pretty quick, they stop and turn really well. Within the spec class we can't do a whole lot of modifications because the point of this is to keep it cheap, and you don't want to go out and spend a bunch of money on building a race car, or all these fancy parts. So, we're pretty limited on what we can do, but one thing on the safety side are brakes. So, we can upgrade the brakes a little bit because when you're out on the track you're really demanding a lot from your brake system. The fluid can boil, all that kind of stuff, and so that just comes down to strictly safety. So, we will be doing some of that but there are a few other things we can do.
(Jeremy)>> I think with all the things we can do a lot of it either plays off of safety, or just the things to keep costs down. So, I think we've got a good handle on what we have to do. What do you think we just take this back to the shop, and we can just get started on it?
(Jimmy)>> Let's do it!
(Jeremy)>> Coming up, we tear out our transmission so we can prep it for more abuse.
[ mechanical humming ]
(Jeremy)>> Alright guys, well we have the Crown Vic up on the hoist, and like we said when we were driving this car there's only a couple of things that we can do to it per the spec rules, and one of those is to improve the shift points on the transmission.
(Jimmy)>> So we're gonna put a shift kit in there, and this is a good performance upgrade because it'll give us firmer full throttle shifts, which is a good benefit to have on the track. So now we're gonna take the transmission out of here, which you don't have to do to install this kit, but for the sake of showing you guys what we're doing we're gonna get this thing out of here and get it on the table.
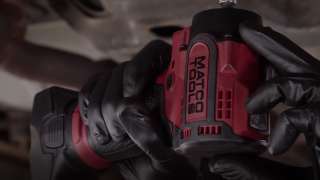
(Jeremy)>> Now a lot of you guys probably don't have a hoist in your garage, and you're doing this work on the floor and you don't have a lot of room. Well, this Matco Tools quarter inch stubby impact wrench measures in at under five inches. It's got plenty of power. Take all the bolts off of the pan here, but it's also gonna come in really handy when we've got to get up in here and take the starter out of the way so we can get this transmission out of the way. This 16-volt impact has a powerful brushless motor that provides high torque and a longer durability. It has a patented hammer mechanism that reduces vibration, and it's got dual l-e-d elements that light up poorly lit shop environments. It's got a variable speed trigger that allows you to control the power output so you don't damage small fasteners. These stubby impacts come in quarter inch, three-eighths, and half inch drives, and they also come in a bunch of different colors. Jimmy, you want to put your hand up here. We'll pull the rest of the bolts here and we'll drain the fluid. Is that gonna come out of there or need a little? Oh, there it goes! [ Music ] Wow, look how dirty that is. [ Music ] Alright the pan's back on. We've got all the fluid drained out, and we're just gonna keep moving on the parts and pieces to get the transmission out of here, but I am gonna spray the exhaust manifold, studs here, and the exhaust back here with some of this Sea Foam Deep Creep. We're just gonna kind of let that set in, and then we're gonna move on to taking some of the other stuff out. We get back to taking the exhaust out, and it should come out pretty simple. [ Music ] We'll get the starter out of the way and follow that up with the lower flywheel cover, and then we'll remove the driveshaft. [ Music ] [ drill humming ]
(Jeremy)>> Next comes the exhaust. [ drill humming ]
(Jeremy)>> Nice, they didn't break! [ Music ] And then we'll move the jack into place and get rid of the stubborn crossmember. [ drill humming ] [ Music ]
(Jeremy)>> That's really, really in there! [ Music ] That's amazing how tight that is. [ metal clanging ]
(Jeremy)>> That's unbelievable. Never had a crossmember in there so tight. Ready?
(Jimmy)>> Yeah!
(Jeremy)>> I can't believe that. You got it. Then the last thing we'll remove are the bell housing bolts. Coming down, we clear?
(Jimmy)>> Yeah.
(Jeremy)>> It kinda takes a little while but that didn't come out too terribly difficult, did it?
(Jimmy)>> It is what is. Pulling a transmission isn't the most fun thing.
(Jeremy)>> We'll go get this on the bench, and then we can start working on the internals. [ Music ]
(Jimmy)>> We firm up the shift points in our transmission, giving us better performance.
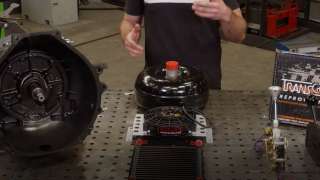
(Jimmy)>> Hey guys, welcome back. When you're wanting to put a transmission in your vehicle there's a lot to consider. First and foremost is the transmission itself, and at Summit Racing they have a wide variety of transmissions to choose from, whether that be Ford, GM, or Mopar and everything from an o-e style replacement all the way up to high horsepower drag racing applications. After that you want to start looking at your torque converter. It's kind of the same thing. Everything from o-e style replacements, mild street driven cars, all the way to drag race vehicles that you need very specific stall speed to fine tune your run down the track. And if you are doing racing or any kind of spirited driving it's a good idea to have a transmission cooler on your car, and there's two ways to go about that. One of them being just the heat exchanger by itself where you'd mount this in front of your radiator or another place where you have a lot of air flow to carry that heat away, or you can go with something like this one where it has a little fan on top, and that's good for a rock crawler or something that's slow moving. There's not a lot of air flow, or if you just don't have any other place to put it you can mount it underneath your vehicle. So that's a good option as well. Now on the shifters what you need really depends on the transmission type. If you're using a non-electronically controlled transmission something like this B&M Pro Gate Shifter works well cause it's operated by a cable, and you can put the shifter wherever you want as long as the cable reaches. Maybe somewhere on the floor, or you see it in trophy trucks sometimes, they mount it high on the console. Now if you have an electronically controlled transmission, you can use something like this from Lokar where it has the wires for your transmission control unit, and this one in particular is really cool because it has the option for a sport mode, and it allows you to manually shift through the gears, and one last thing to consider is just your basic shift kit. This is a nice mild performance upgrade for your stock transmission just to give it a little more firm positive shift, and as far as our Crown Vic goes there's two things we can do. One of them being install a transmission cooler and the other being a shift kit, but because this car is so heavy duty anyways it actually has a cooler on it already. So, we are only going to install the shift kit.
(Jeremy)>> To get this installed is pretty basic, especially because we have the transmission off the car already. So, we'll get this all opened up and dive inside. [ drill humming ]
(Jeremy)>> Now this TransCo kit comes with everything we need to put the shift kit inside of our transmission. Now it comes with some very detailed instructions, and it covers transmissions from Ford from 1992 to 2011. So, there's a bunch of different parts and pieces in here that we may or may not use. To figure all that out I have to get rid of the filter first, and then we'll dive down and get rid of the valve body as well. [ Music ] Alright well now that we've got the valve body out of the way we can go ahead and start installing the pieces from our shift kit, and per the instructions the first place to start is right here at the second accumulator. [ Music ] With the cover out of the way we'll remove the old springs and replace them with the new color coated springs per the instructions. [ Music ] Okay so for the third accumulator all we have to do is pop this retainer out and check to see if we have a steel piston down inside here, and we do. So, I'll reassemble all of this, and then we'll install the slide spacer. [ Music ] Now that takes care of accumulator two and three, and for accumulator four the instructions specifically tell us do not take it apart unless the entire transmission is disassembled. So, all we can do is a visual check. So, we have to look at the two tabs of the snap ring here to make sure they're not broken off or missing, which they aren't. So that's gonna wrap up this side of the transmission. Now we're gonna move on to the valve body. [ Music ] Okay so now on to the valve body. We have to take this plate off the bottom here cause we're gonna end up drilling some specific holes in that plate. Now the kit comes with some drill bits, and you choose the size of the drill bit per the way you want your transmission to shift. So, we'll get this plate off of here and start drilling some holes. [ drill humming ]
(Jeremy)>> We'll be using our supplied number 44 drill it to oversize five holes in this plate. [ Music ] Next, we'll remove a couple of the valves and replace the springs with the ones included in the kit. [ Music ] Okay with the three valves on this side done and the two valves on this side done, I'm gonna go ahead and replace the new manual valve, and then we're actually gonna pull a check ball here to give us a firmer two-three shift. [ Music ] [ drill humming ]
(Jeremy)>> Okay, that wraps up the bottom side. Got a couple of more things to do here on the top side. I've got to remove this plate. I've got to drill a couple of holes, and then we'll add a relief valve as well. [ Music ] Alright guys, well that buttons up our shift kit install. Now like we said, you don't have to pull the transmission out to do this, but we did it just to show you guys how easy it was. The instructions are extremely thorough, and it came with everything we needed to install the kit. From here I've just got to get the pan on it. Then we're gonna put the transmission back under the car. [ Music ] We address a few leaks underneath and give our engine some much needed attention.
(Jimmy)>> Hey guys, welcome back. Jeremy and I got the transmission back up in the car, and now it's time to take care of a few things just to give it a little bit of a tune up. The first is replacing the oil cooler lines because the ones that are up under here, they look like they've been leaking for quite a while, and then we'll go up top and replace the spark plugs. I've already dropped the oil out of this thing. So, I've just got to take a couple of bolts out and replace the lines. I'll take the lines off at the cooler first, and then take them off at the engine. [ Music ] Let's go in reverse order here. Make sure you put some oil on the oil rings before you put them in here. [ Music ] Takes care of that. [ Music ] Alright one last thing we're gonna do here is change out the spark plugs. Then we'll fill it with fluids and fire it up. [ Music ] To give me some room I'll start by taking off the intake assembly and throttle body. [ drill humming ]
(Jimmy)>> Then I'll take off the fuel rails and the coil packs to access the spark plugs. [ Music ] Those don't look too bad but best to replace them. [ Music ] After checking the spark plug gap I'll put in the new ones and put everything back together. [ Music ] [ drill humming ]
(Jeremy)>> Cool man, looks like you're almost buttoned up.
(Jimmy)>> Yep, got the plugs in it. Just getting everything back together. So, I think we're ready. Get fluids in it and fire it up.
(Jeremy)>> I got this cool little funnel. This is gonna make our lives a whole lot easier. This FlexAll funnel from Tec Products is a heavy-duty funnel, which is made up of a chemical resistant nitrile rubber to hold up to various oils and fuels. It's flexible design allows you to squish or bend the funnel into tight places for your convenience. It has an integrated handle to help you hold the funnel comfortably. It comes in multiple sizes and colors to meet your needs. This FlexAll funnel is also suitable for gas and diesel and several other fluids you find underneath the hood of your car or your truck.
(Jimmy)>> Looks like we got it all wrapped up.
(Jeremy)>> I think we're good. Why don't you fire this thing up? We'll check for fluids and if we've got any leaks here.
(Jimmy)>> Here we go! [ engine starting ]
(Jimmy)>> If you like anything you've seen in today's show be sure to check out Powernation TV.
Show Full Transcript
(Jeremy)>> Today on Carcass we have a new project in our shop. We'll give you a helpful formula to maintain the drivetrain in a high mileage vehicle.
(Jimmy)>> Then we start tearing into our crime busting cruiser preparing for its next adventure as a weekend warrior on the track. Plus show you an easy way to firm up the shifts in your transmission. [ Music ] [ engine revving ] [ Music ]
(Jimmy)>> What's up everybody? Welcome to Carcass. We're about to start on a new project, and as you can see this is a Ford Crown Victoria ex-police car. These things are great because they're super cheap, they're extremely durable. You can beat on them and they'll pretty much take the abuse without much issue. However, when we get new projects we like to do a few things to them just to stay on top of the maintenance, and so we have a combination of products we're gonna use to keep this thing in good working condition, and that starts under the hood. [ clicking ]
(Jeremy)>> So like Jimmy said we're gonna be using a combination of products that mechanics and technicians have trusted for years, and the first one is Sea Foam Motor Treatment, and this goes directly into the crankcase. For the crankcase we'll be adding one ounce for each quart of oil. So, in our case we'll be adding six ounces. Alright, well that takes care of the crankcase side of things. Now another product we're gonna be using is their Hydra Trans Tune. We're actually gonna be putting a little bit of this in the transmission and in the power steering as well. [ Music ] For the transmission we'll be adding one pint, which is the entire can, to the filler tube. [ Music ] And on the power steering side we'll be adding four to six ounces. [ Music ]
(Jimmy)>> And now third we have Sea Foam's High Mileage Motor Treatment, which is designed for vehicles with over 75,000 miles, which our Crown Vic falls into. For the fuel tank we'll add one ounce per gallon of gasoline. So, we'll add in about a half a can.
(Jeremy)>> Now the fourth product we're gonna be using is this Sea Foam Top Engine Cleaner and Lube. Now we had to do one thing to apply this. We had to put the supplied straw into the intake boot here. So, I'm gonna go ahead and hook this up. We're gonna start the engine up and rev it up to 2,000 r-p-m, and then I'm gonna spray the entire can into the intake. Alright Jimmy, fire it up. [ engine starting ]
(Jeremy)>> 2,000? [ engine revving ] [ engine idling ] [ Music ]
(Jeremy)>> Alright Jimmy, what do you say we go drive this thing?
(Jimmy)>> Let's do it.
Alright guys, so we're out giving the Crown Vic a little bit of a test drive trying to get the Sea Foam worked through all the fluids and through the engine, and so we want to tell you guys what we're doing with this car, what the purpose of the build is, and it pretty much revolves around having cheap fun cause this car is the Panther chassis, which includes the Crown Vic, the Marauder, and the Grand Marquis. So those three cars, they have a class called the Spec Panther class, which is part of the Auto Interest Group. They do these high-performance driving days, and a bunch of guys have gotten these cars because they're so cheap, and they kinda compete against one another trying to lay down the fastest times on the track. So, this is our platform to go out and run with those guys.
(Jeremy)>> We got lucky enough to actually ride in one of these cars with Rick Hoback when ran up to NCM and hooked up with the Auto Interest guys and let me tell you something. "A", Rick can drive the car, and it's unbelievable how this platform, this Panther platform, handles out on a track. You would think you're in a legit race car at that point. Jimmy got to sit in the front. I got to sit in the back, and I got super sick. If you watch real close my demeanor completely changes a couple of laps around, and I was so close to putting the window down because I was gonna have to let it all go out the window, but that just kinda tells you something. "A", a good instructor and a good driver can do wonders on a track and "B", a good platform or chassis makes it just enjoyable for whoever's driving, not whoever's riding.
(Jimmy)>> So for $2,000 to $5000, depending on what you want to spend, you can pick up one of these cars, which especially if you get a police interceptor it will have a lot of heavy-duty equipment already on them because they are made to go out and just jump curbs, hit cars, or whatever you want to do with it. So, it's a full chassis car. They have pretty good brakes to begin with, but that is something we can upgrade.
(Jeremy)>> That's on the safety side of things.
(Jimmy)>> The police interceptor specifically has a heavy-duty cooling system, and they're a big heavy car but they've got a big V-8. They're pretty quick, they stop and turn really well. Within the spec class we can't do a whole lot of modifications because the point of this is to keep it cheap, and you don't want to go out and spend a bunch of money on building a race car, or all these fancy parts. So, we're pretty limited on what we can do, but one thing on the safety side are brakes. So, we can upgrade the brakes a little bit because when you're out on the track you're really demanding a lot from your brake system. The fluid can boil, all that kind of stuff, and so that just comes down to strictly safety. So, we will be doing some of that but there are a few other things we can do.
(Jeremy)>> I think with all the things we can do a lot of it either plays off of safety, or just the things to keep costs down. So, I think we've got a good handle on what we have to do. What do you think we just take this back to the shop, and we can just get started on it?
(Jimmy)>> Let's do it!
(Jeremy)>> Coming up, we tear out our transmission so we can prep it for more abuse.
[ mechanical humming ]
(Jeremy)>> Alright guys, well we have the Crown Vic up on the hoist, and like we said when we were driving this car there's only a couple of things that we can do to it per the spec rules, and one of those is to improve the shift points on the transmission.
(Jimmy)>> So we're gonna put a shift kit in there, and this is a good performance upgrade because it'll give us firmer full throttle shifts, which is a good benefit to have on the track. So now we're gonna take the transmission out of here, which you don't have to do to install this kit, but for the sake of showing you guys what we're doing we're gonna get this thing out of here and get it on the table.
(Jeremy)>> Now a lot of you guys probably don't have a hoist in your garage, and you're doing this work on the floor and you don't have a lot of room. Well, this Matco Tools quarter inch stubby impact wrench measures in at under five inches. It's got plenty of power. Take all the bolts off of the pan here, but it's also gonna come in really handy when we've got to get up in here and take the starter out of the way so we can get this transmission out of the way. This 16-volt impact has a powerful brushless motor that provides high torque and a longer durability. It has a patented hammer mechanism that reduces vibration, and it's got dual l-e-d elements that light up poorly lit shop environments. It's got a variable speed trigger that allows you to control the power output so you don't damage small fasteners. These stubby impacts come in quarter inch, three-eighths, and half inch drives, and they also come in a bunch of different colors. Jimmy, you want to put your hand up here. We'll pull the rest of the bolts here and we'll drain the fluid. Is that gonna come out of there or need a little? Oh, there it goes! [ Music ] Wow, look how dirty that is. [ Music ] Alright the pan's back on. We've got all the fluid drained out, and we're just gonna keep moving on the parts and pieces to get the transmission out of here, but I am gonna spray the exhaust manifold, studs here, and the exhaust back here with some of this Sea Foam Deep Creep. We're just gonna kind of let that set in, and then we're gonna move on to taking some of the other stuff out. We get back to taking the exhaust out, and it should come out pretty simple. [ Music ] We'll get the starter out of the way and follow that up with the lower flywheel cover, and then we'll remove the driveshaft. [ Music ] [ drill humming ]
(Jeremy)>> Next comes the exhaust. [ drill humming ]
(Jeremy)>> Nice, they didn't break! [ Music ] And then we'll move the jack into place and get rid of the stubborn crossmember. [ drill humming ] [ Music ]
(Jeremy)>> That's really, really in there! [ Music ] That's amazing how tight that is. [ metal clanging ]
(Jeremy)>> That's unbelievable. Never had a crossmember in there so tight. Ready?
(Jimmy)>> Yeah!
(Jeremy)>> I can't believe that. You got it. Then the last thing we'll remove are the bell housing bolts. Coming down, we clear?
(Jimmy)>> Yeah.
(Jeremy)>> It kinda takes a little while but that didn't come out too terribly difficult, did it?
(Jimmy)>> It is what is. Pulling a transmission isn't the most fun thing.
(Jeremy)>> We'll go get this on the bench, and then we can start working on the internals. [ Music ]
(Jimmy)>> We firm up the shift points in our transmission, giving us better performance.
(Jimmy)>> Hey guys, welcome back. When you're wanting to put a transmission in your vehicle there's a lot to consider. First and foremost is the transmission itself, and at Summit Racing they have a wide variety of transmissions to choose from, whether that be Ford, GM, or Mopar and everything from an o-e style replacement all the way up to high horsepower drag racing applications. After that you want to start looking at your torque converter. It's kind of the same thing. Everything from o-e style replacements, mild street driven cars, all the way to drag race vehicles that you need very specific stall speed to fine tune your run down the track. And if you are doing racing or any kind of spirited driving it's a good idea to have a transmission cooler on your car, and there's two ways to go about that. One of them being just the heat exchanger by itself where you'd mount this in front of your radiator or another place where you have a lot of air flow to carry that heat away, or you can go with something like this one where it has a little fan on top, and that's good for a rock crawler or something that's slow moving. There's not a lot of air flow, or if you just don't have any other place to put it you can mount it underneath your vehicle. So that's a good option as well. Now on the shifters what you need really depends on the transmission type. If you're using a non-electronically controlled transmission something like this B&M Pro Gate Shifter works well cause it's operated by a cable, and you can put the shifter wherever you want as long as the cable reaches. Maybe somewhere on the floor, or you see it in trophy trucks sometimes, they mount it high on the console. Now if you have an electronically controlled transmission, you can use something like this from Lokar where it has the wires for your transmission control unit, and this one in particular is really cool because it has the option for a sport mode, and it allows you to manually shift through the gears, and one last thing to consider is just your basic shift kit. This is a nice mild performance upgrade for your stock transmission just to give it a little more firm positive shift, and as far as our Crown Vic goes there's two things we can do. One of them being install a transmission cooler and the other being a shift kit, but because this car is so heavy duty anyways it actually has a cooler on it already. So, we are only going to install the shift kit.
(Jeremy)>> To get this installed is pretty basic, especially because we have the transmission off the car already. So, we'll get this all opened up and dive inside. [ drill humming ]
(Jeremy)>> Now this TransCo kit comes with everything we need to put the shift kit inside of our transmission. Now it comes with some very detailed instructions, and it covers transmissions from Ford from 1992 to 2011. So, there's a bunch of different parts and pieces in here that we may or may not use. To figure all that out I have to get rid of the filter first, and then we'll dive down and get rid of the valve body as well. [ Music ] Alright well now that we've got the valve body out of the way we can go ahead and start installing the pieces from our shift kit, and per the instructions the first place to start is right here at the second accumulator. [ Music ] With the cover out of the way we'll remove the old springs and replace them with the new color coated springs per the instructions. [ Music ] Okay so for the third accumulator all we have to do is pop this retainer out and check to see if we have a steel piston down inside here, and we do. So, I'll reassemble all of this, and then we'll install the slide spacer. [ Music ] Now that takes care of accumulator two and three, and for accumulator four the instructions specifically tell us do not take it apart unless the entire transmission is disassembled. So, all we can do is a visual check. So, we have to look at the two tabs of the snap ring here to make sure they're not broken off or missing, which they aren't. So that's gonna wrap up this side of the transmission. Now we're gonna move on to the valve body. [ Music ] Okay so now on to the valve body. We have to take this plate off the bottom here cause we're gonna end up drilling some specific holes in that plate. Now the kit comes with some drill bits, and you choose the size of the drill bit per the way you want your transmission to shift. So, we'll get this plate off of here and start drilling some holes. [ drill humming ]
(Jeremy)>> We'll be using our supplied number 44 drill it to oversize five holes in this plate. [ Music ] Next, we'll remove a couple of the valves and replace the springs with the ones included in the kit. [ Music ] Okay with the three valves on this side done and the two valves on this side done, I'm gonna go ahead and replace the new manual valve, and then we're actually gonna pull a check ball here to give us a firmer two-three shift. [ Music ] [ drill humming ]
(Jeremy)>> Okay, that wraps up the bottom side. Got a couple of more things to do here on the top side. I've got to remove this plate. I've got to drill a couple of holes, and then we'll add a relief valve as well. [ Music ] Alright guys, well that buttons up our shift kit install. Now like we said, you don't have to pull the transmission out to do this, but we did it just to show you guys how easy it was. The instructions are extremely thorough, and it came with everything we needed to install the kit. From here I've just got to get the pan on it. Then we're gonna put the transmission back under the car. [ Music ] We address a few leaks underneath and give our engine some much needed attention.
(Jimmy)>> Hey guys, welcome back. Jeremy and I got the transmission back up in the car, and now it's time to take care of a few things just to give it a little bit of a tune up. The first is replacing the oil cooler lines because the ones that are up under here, they look like they've been leaking for quite a while, and then we'll go up top and replace the spark plugs. I've already dropped the oil out of this thing. So, I've just got to take a couple of bolts out and replace the lines. I'll take the lines off at the cooler first, and then take them off at the engine. [ Music ] Let's go in reverse order here. Make sure you put some oil on the oil rings before you put them in here. [ Music ] Takes care of that. [ Music ] Alright one last thing we're gonna do here is change out the spark plugs. Then we'll fill it with fluids and fire it up. [ Music ] To give me some room I'll start by taking off the intake assembly and throttle body. [ drill humming ]
(Jimmy)>> Then I'll take off the fuel rails and the coil packs to access the spark plugs. [ Music ] Those don't look too bad but best to replace them. [ Music ] After checking the spark plug gap I'll put in the new ones and put everything back together. [ Music ] [ drill humming ]
(Jeremy)>> Cool man, looks like you're almost buttoned up.
(Jimmy)>> Yep, got the plugs in it. Just getting everything back together. So, I think we're ready. Get fluids in it and fire it up.
(Jeremy)>> I got this cool little funnel. This is gonna make our lives a whole lot easier. This FlexAll funnel from Tec Products is a heavy-duty funnel, which is made up of a chemical resistant nitrile rubber to hold up to various oils and fuels. It's flexible design allows you to squish or bend the funnel into tight places for your convenience. It has an integrated handle to help you hold the funnel comfortably. It comes in multiple sizes and colors to meet your needs. This FlexAll funnel is also suitable for gas and diesel and several other fluids you find underneath the hood of your car or your truck.
(Jimmy)>> Looks like we got it all wrapped up.
(Jeremy)>> I think we're good. Why don't you fire this thing up? We'll check for fluids and if we've got any leaks here.
(Jimmy)>> Here we go! [ engine starting ]
(Jimmy)>> If you like anything you've seen in today's show be sure to check out Powernation TV.
