More Budget Buggy Episodes
Xtreme 4x4 Builds
Want more content like this?
Join the PowerNation Email NewsletterParts Used In This Episode
A&A Manufacturing
Body mount tabs.
Ballistic Fabrication
Ballistic Hybrid Coilover/Air Shock and coil springs.
Branik Motorsports
7075 Aluminum Long Arm Links, Available in 1-1/2", 1-3/4" & 2".
O'Reilly Auto Parts
Exhaust Tubing
O'Reilly Auto Parts
Torch kit
PSC Motorsports
Steering Control Valve (Orbital), HD Double Ended Cylinder Link Kit, Rear Steer Directional Valve, Double End Steering Cylinders, Performance Pump Kit, Power Steering Pulley.
Ruffstuff Specialties
Custom battery relocate box
Sniper Fabworks LLC
Mounting bracket for orbital valve.
Trail Gear Inc.
All new parts, no used housings or internal parts. Ready to drop into your axle. Third members feature top quality ring & pinion gears and lockers. V6 units feature larger OEM style V6 gear sets with longer pinion gear. Each unit is setup with solid pinion spacers for long gear life. Triple drilled flanges included covers common driveshaft patterns.
Trail Gear Inc.
Creeper GussetsTM, Upper Axle Gusset.
Trail Gear Inc.
Dirty 30's - 30 Spline Birfield/Axle Kit.
Trail Gear Inc.
TG High Pinion Housing, Ring & Pinion Set 5.29 ratio, Detroit Locker V6 & High Pinion.
Episode Transcript
Today, we're playing with toys axles. That is, we'll get the pair ready to handle 40 twos by adding some beefy components, plus axle, flipped the rear. So it sits right and see how this slightly modified Jeep translates into a national championship.
So drop the Ramo
Xtreme 4x4 starts. Now
today on Xtreme 4x4, we're back underneath our mezzanine in a space. We're calling our small two car garage fab shop. Now, if you guys remember not long ago, we gutted this part of the shop completely out, filled it with minimal hand tools and showed you guys what you could build. If you spent your money on parts instead of tools, then we flipped the coin gutted it out again and filled it with awesome
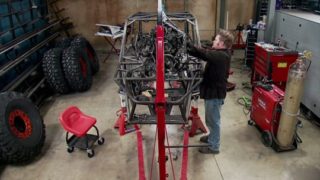
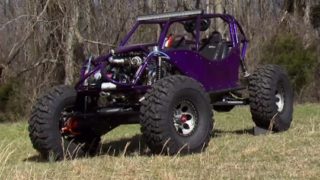
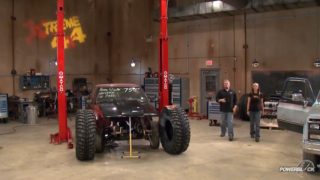
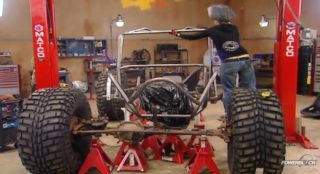
ab tools to build a full on crawler project. But this time on a budget now, we've got less than five grand so far in this little single seat, four wheel steer buggy and we almost have a rolling chassis today. That's what we're gonna finish up. We're gonna take care of our Toyota axles, get this thing sitting on some springs, do a little bit of fab work and then we'll have it sitting up at ride height. See how it looks.
The nice thing about using the Toyota steering axle is that they're relatively cheap. But more importantly, we've been wheeling these things in the dirt for years. So we know exactly what we need to upgrade to make them stronger
trail gear makes parts to remove almost any weak link in the Toyota axle. And we'll start at the wheel and move our way in. We're gonna be installing a set of their trail gear drive fangs.
Now, this will remove the free wheeling hub at the end of the axle that has a tendency to break when the tire is bound up, going in a little bit. The brakes will be upgraded as well to the V6 style caliber and rotor which is vented. So it runs a little bit cooler. Obviously, we're gonna rebuild all the knuckles during this overhaul at the same time, but we're not gonna install the factory knuckle assembly. The steering arm on those factory knuckles is only held on with four studs and bolts has a tendency to break trail gear recently came out with this series of knuckles and high steer arms right here. This is called a six shooter knuckle where they've added two extra studs to the top of the knuckle. It makes them a lot stronger inside the axle will be upgrading as well to a set of their chrome Molly axle shafts and their Burfield joints. Now, these are what are called dirty 30 burfield joints. They've upped the spine count on the inside of the bur field to 30 spines to give us more contact area and therefore make the axle stronger. The third member, you can get it in two different ways. You can get it completely blown apart piece by piece. If you like to do the work yourself or you can get a complete replacement unit like this one here, it's ready to just drop in. Now, either way these are rather unique set up. This is new for trail gear and it's a brand new casting. That's a high pinion gear set, how to keep your drive shaft out of the way of trail obstacles. And I'll save you from having to go to the dealer or a junk yard to hunt around and find one. At the same time. We're gonna toss in some 529 gears and a Detroit locker and we also have them send us some of their knuckle gussets as well as one of their large trusses for the top of the axle assembly. All we have to do now is take all of these parts and put them in our old axle.
Three things can destroy an axle, vehicle weight,
horsepower and tire size.
If you have all three of those maxed out,
no axle is gonna survive under your rig.
Our little buggy, it's relatively light. We have large tires but not a lot of horsepower.
So since we only have one part of that equation on our buggy, upgrading our Toyotas is the right thing to do.
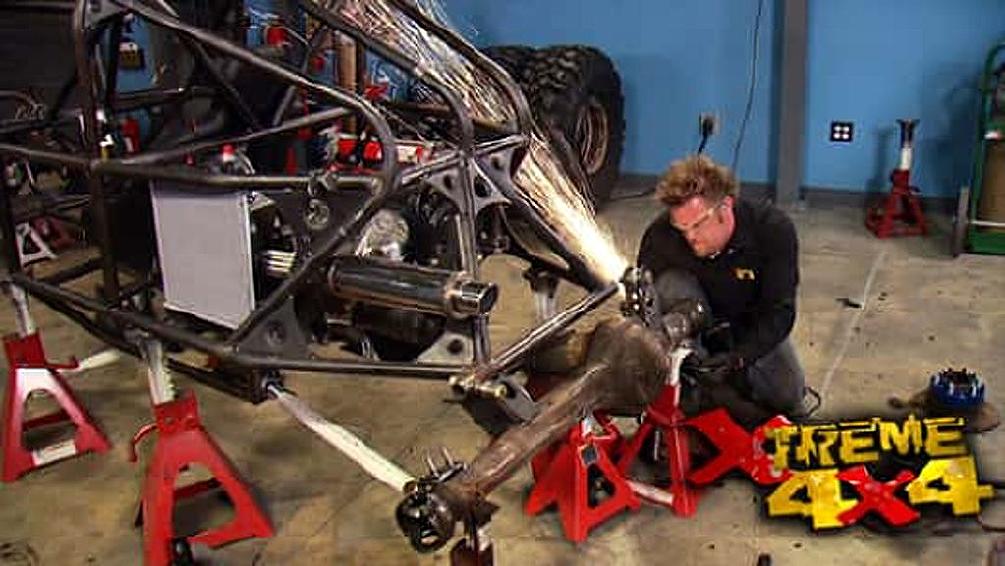
Now, the rear axle in this project, we have a rather unique situation. We had to install it upside down underneath the chassis
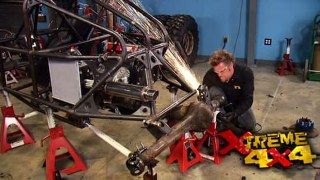
in order to get the axle input on the right hand side of the buggy to match the output from our transaxle. Now, the problem with that is when you put an axle underneath your buggy upside down, it turns in the opposite direction and we don't need that with this particular engine package, we need it to turn in the correct orientation. So to solve this problem, we need to flip every single part of this axle 180 degrees. So the drop stays on the right hand side, but the gear set turns the right way.
No.
Mhm.
First things first, the weld that holds the outer ball onto the axle needs to be cut.
Then with the axle held in place, we heat it up and rotate that ball 180 degrees. This is done to keep our camber angle correct.
Now, the rear pan of the housing needs to be cut off and flipped 100 and 80 degrees as well.
Four studs in the housing do not line up with our new center section. So we'll drill four holes to a larger size so it can bolt in place.
Then after a pile of finished welding,
we'll clean it up, give it a coat of paint,
then rebuild the axle using all the same parts we used up front,
more budget buggy ahead with links, steering and more. But up next you'll flip when you see how these competitors push their rigs at the all stock nationals.
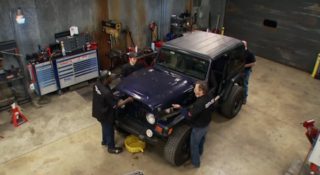
Having swept the East coast stock class, Kurt
Remo and spotter, Chris Walton cemented their beast of the East nicknames me and Chris took off first place at every event winning some by as much as 80 points. He's a lot of hard work to get to this point. A lot of training, a lot of all season work. A lot of many hours spent working in his garage,
tweaking this out, tweaking that out. The New Jersey natives arrived at the Stark Nationals as the team to beat.
They're really the one to place your money on. It feels great to come here knowing your top dog knocking off, the big dog would almost guarantee the world title,
but some drivers had added incentives
to deal them a knockout blow.
If I can beat Kirk,
I get a free uh Trent fabrication hood from a buddy of mine. So
I don't know if that will happen.
There's a lot of stress on your back friends that are all competitors to family calling, you think, bring it home, bring it home. If they were stressing,
it didn't show on their opening run.
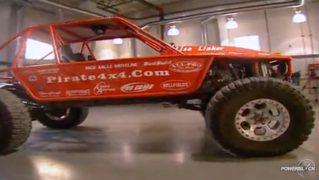
Kurt guided the TJ to what would be a course F
minus 13, we build our rig, we built it for those courses. Some of these rigs are more treatable. Ours was built from the ground up just for competing
and it proves to be a top notch competition rig.
The rigs in this class have plenty of stock hardware and over the counterparts
restrictions are, it's got like two seats side by side in the vehicle and stock location,
full bodied rig frame
tub, all remains stock fiberglass hood, fiberglass grill on air shocks in the front, stock type coil in the back. With all the rules. Kurt altered the design of his truck to give him a winning advantage. We're restricted
to be within three inches of our stock drive train.
We actually chose to go a little shorter, helped it fit in the courses better turn tighter. We're a lot narrower.
Front axles are a little bit wider than most people run to get. The more tearing out without rubbing on the frame round. The key was just keep every, keep the vehicle low, keep it stable and that's been the case
on a course full of tough obstacles. The 20 point bonus rock stood out and mocked the drivers all weekend.
It's an adrenaline rush to try and get it. And at this level of competition, you gotta go for it,
you never know it might bounce just right and something might work in your favor. And if you're not there to take advantage of it. It won't happen with a 100% failure rate for Kirk. The rock wasn't about 20 points.
It was about being the man
CCC to
cool and collected. That wouldn't be enough to get over the rock.
I tried to back out of it but when you're at such an angle and the things growing that way I could try to back all I want and just plant the body in the dirt and probably make things worse than they are.
But
it's not the first time. It will be the last time I'm going over over seven courses. The team nailed an amazing seven negative scores.
He drives phenomenal when he's under pressure. When he gets down to a minute, he knows what he's got to do and he gets the job done. Well, we could just keep where we're at and hopefully the people aren't getting as many bonuses as are possible and
we get to hold some ground
come out with the win. Then on the final run before the shoot out
his day got a little bit more challenging
pops. We got parts. That's why we carry spare parts and that's why we got a pit crew and I don't care if I gotta run that shoot out with a rear without an axle in there, I'll run it without an axle that wouldn't be necessary
repaired. Kurt and Chris were ready to put this one away.
Finished the course. We finished the course, we got the event, they aced it
and finished the season
undefeated. Whoever thought we'd do this at the All Stock course.
Thanks. Great job, man.
Great job.
So far today we've made really good headway on our single seated buggy. Both of our axles are rebuilt and they're ready to bolt up to our chassis to give us a rolling buggy in our small two car garage fab shop. Now, if you remember when we mocked everything in place, we used this white PV C tubing for link material and that was so we could measure and have aluminum links made for this particular project. Now, I know what you guys are thinking. This is supposed to be a budget buggy and you're gonna throw high dollar aluminum lens under it. Well, it's all about the math at this point. It's not that much different than steel, large oversized hem
joints like these ones here require oversized tubing adapters and these cost around $20 a piece. So that's $40 per link. Now, the material that we use is gonna be all dom tubing quarter wall or two sticks of eighth wall, slid inside each other to sleeve them, get the strength that we need. Now, that's gonna be $6 a foot. So if you have a 4 ft link on this buggy, it's gonna float you around 70 to $75 if you include all the welding material.
Now, an aluminum link like this from Brannock machine. It costs just over $100 flat. Now, that is a good deal because they drill and tap the ends for the hem
joints of your choice as well as include the wrench flats to make, tightening the jam nut a lot easier. The 7075 aluminum is a lot lighter than the steel and it's also stronger, but more importantly, it doesn't bend, it actually deflects because it's a memory alloy. If we're to load up this link on the trail, it's gonna deflect a little bit and return to its natural state. Now, that means that we get a better quality link material just a little bit more money and it'll last the life of the buggy
four wheel steer buggy like this will obviously be getting full hydraulic steering and we'll start by mounting the PSC orbital valve onto a bracket that we got from sniper fabrication.
When you're putting together a full hydraulic steering kit for a four wheel steer buggy like ours, it's important that it's designed to work together. The components aren't fighting each other because they're not spec to match. Now, the guys at PSE took down a ton of information about our little buggy, everything from tire size, axle choice, even possible pump RPM off of our small engine to develop a kit that will work together as one complete unit. The orbital valve that's up attached to the steering wheel is specifically designed for the Toyota axle as well as the rear steer valve that will mount up by the driver seat to divert power to our rear ramp. Now, the rams themselves, they're specifically designed for a Toyota axle. They are a six inch stroke, but the size is designed to handle our 42 inch tall pitbull tires and they come with everything we need from the weldon brackets, even the hem
joints and the bolts and nuts. Now, the power steering pump pulley has also been set up to handle a V belt coming off of our small Acura engine. Now, the pump is a different story. The Honda motor never had a power steering pump mounted on it. Those cars actually believe it or not use a small electric pump to power the power steering
and we've told you many times that engine is a reverse rotation. Engine, power steering pumps are not designed to turn in a backwards rotation. They actually burn up and fail prematurely. But we have a plan
by mounting the pump with the pulley facing the engine. The belt will turn it in the opposite direction
or in our case, the correct rotation,
the rams bolt to the high steer arms on her six shooter knuckles and attached to the axle.
Adding a skid plate will keep them from getting damaged by the rocks on the trail.
The rear steer valve will be mounted right beside the driver's seat with the joystick within easy reach of the driver.
Then all we have to do
is measure for fluid liner.
Now, the whole point of today is to get all of the heavy fab work done on our crawler, get it sitting up on some shops and springs and see what it looks like at finished ride height. I'm sure you guys have figured out by now, we are not gonna install an Acura engine into a crawler and not install a rice burner style exhaust. Now, with the muffler on this buggy is gonna be a Magna Flow import series muffler and this is a full polished stainless steel muffler and it is a flow through design. So it'll help with our power. It has an integrated stainless steel tip with a rolled edge for good looks. Now, the accurate motor mounts are pretty loose. This thing's gonna flop around in here like a dead sailor. So to keep the exhaust from breaking loose from the motor, we're gonna install one of these flex pipes.
Now, spring rates for our buggy are single, one fifties in the rear and some single one hundreds up front. And while we're throwing the shocks at this rig, we'll go ahead and put in this rough stuff, specialties, battery box, a gas pedal that we got from summit racing and a bunch of these little body mount tabs into specific spots in the roll cage. So our body panels have something to bolt to.
Are you,
you know, there's nothing quite like the feeling
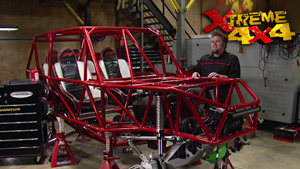
of getting all the jack stands out from underneath your project and getting it sitting on its tires and wheels. You can really get a feeling of what the car is actually gonna look like when there's not a big sea of red underneath it, you get an idea of what your belly pan is gonna be as well as the overall height. Now, as you guys know, we're not done, we stuff tear this whole buggy down, do all the finished welding and then paint this chassis before we can reassemble the whole thing back to this point to do the plumbing and wiring. But right now you're at a point where you have to do the most important thing when you're building a buggy like this. Let's get in it and make some engine noises.
Oh, yeah,
I forgot my steering wheel. That's all right. I got rear Steer
bbbbb.
Show Full Transcript
So drop the Ramo
Xtreme 4x4 starts. Now
today on Xtreme 4x4, we're back underneath our mezzanine in a space. We're calling our small two car garage fab shop. Now, if you guys remember not long ago, we gutted this part of the shop completely out, filled it with minimal hand tools and showed you guys what you could build. If you spent your money on parts instead of tools, then we flipped the coin gutted it out again and filled it with awesome
ab tools to build a full on crawler project. But this time on a budget now, we've got less than five grand so far in this little single seat, four wheel steer buggy and we almost have a rolling chassis today. That's what we're gonna finish up. We're gonna take care of our Toyota axles, get this thing sitting on some springs, do a little bit of fab work and then we'll have it sitting up at ride height. See how it looks.
The nice thing about using the Toyota steering axle is that they're relatively cheap. But more importantly, we've been wheeling these things in the dirt for years. So we know exactly what we need to upgrade to make them stronger
trail gear makes parts to remove almost any weak link in the Toyota axle. And we'll start at the wheel and move our way in. We're gonna be installing a set of their trail gear drive fangs.
Now, this will remove the free wheeling hub at the end of the axle that has a tendency to break when the tire is bound up, going in a little bit. The brakes will be upgraded as well to the V6 style caliber and rotor which is vented. So it runs a little bit cooler. Obviously, we're gonna rebuild all the knuckles during this overhaul at the same time, but we're not gonna install the factory knuckle assembly. The steering arm on those factory knuckles is only held on with four studs and bolts has a tendency to break trail gear recently came out with this series of knuckles and high steer arms right here. This is called a six shooter knuckle where they've added two extra studs to the top of the knuckle. It makes them a lot stronger inside the axle will be upgrading as well to a set of their chrome Molly axle shafts and their Burfield joints. Now, these are what are called dirty 30 burfield joints. They've upped the spine count on the inside of the bur field to 30 spines to give us more contact area and therefore make the axle stronger. The third member, you can get it in two different ways. You can get it completely blown apart piece by piece. If you like to do the work yourself or you can get a complete replacement unit like this one here, it's ready to just drop in. Now, either way these are rather unique set up. This is new for trail gear and it's a brand new casting. That's a high pinion gear set, how to keep your drive shaft out of the way of trail obstacles. And I'll save you from having to go to the dealer or a junk yard to hunt around and find one. At the same time. We're gonna toss in some 529 gears and a Detroit locker and we also have them send us some of their knuckle gussets as well as one of their large trusses for the top of the axle assembly. All we have to do now is take all of these parts and put them in our old axle.
Three things can destroy an axle, vehicle weight,
horsepower and tire size.
If you have all three of those maxed out,
no axle is gonna survive under your rig.
Our little buggy, it's relatively light. We have large tires but not a lot of horsepower.
So since we only have one part of that equation on our buggy, upgrading our Toyotas is the right thing to do.
Now, the rear axle in this project, we have a rather unique situation. We had to install it upside down underneath the chassis
in order to get the axle input on the right hand side of the buggy to match the output from our transaxle. Now, the problem with that is when you put an axle underneath your buggy upside down, it turns in the opposite direction and we don't need that with this particular engine package, we need it to turn in the correct orientation. So to solve this problem, we need to flip every single part of this axle 180 degrees. So the drop stays on the right hand side, but the gear set turns the right way.
No.
Mhm.
First things first, the weld that holds the outer ball onto the axle needs to be cut.
Then with the axle held in place, we heat it up and rotate that ball 180 degrees. This is done to keep our camber angle correct.
Now, the rear pan of the housing needs to be cut off and flipped 100 and 80 degrees as well.
Four studs in the housing do not line up with our new center section. So we'll drill four holes to a larger size so it can bolt in place.
Then after a pile of finished welding,
we'll clean it up, give it a coat of paint,
then rebuild the axle using all the same parts we used up front,
more budget buggy ahead with links, steering and more. But up next you'll flip when you see how these competitors push their rigs at the all stock nationals.
Having swept the East coast stock class, Kurt
Remo and spotter, Chris Walton cemented their beast of the East nicknames me and Chris took off first place at every event winning some by as much as 80 points. He's a lot of hard work to get to this point. A lot of training, a lot of all season work. A lot of many hours spent working in his garage,
tweaking this out, tweaking that out. The New Jersey natives arrived at the Stark Nationals as the team to beat.
They're really the one to place your money on. It feels great to come here knowing your top dog knocking off, the big dog would almost guarantee the world title,
but some drivers had added incentives
to deal them a knockout blow.
If I can beat Kirk,
I get a free uh Trent fabrication hood from a buddy of mine. So
I don't know if that will happen.
There's a lot of stress on your back friends that are all competitors to family calling, you think, bring it home, bring it home. If they were stressing,
it didn't show on their opening run.
Kurt guided the TJ to what would be a course F
minus 13, we build our rig, we built it for those courses. Some of these rigs are more treatable. Ours was built from the ground up just for competing
and it proves to be a top notch competition rig.
The rigs in this class have plenty of stock hardware and over the counterparts
restrictions are, it's got like two seats side by side in the vehicle and stock location,
full bodied rig frame
tub, all remains stock fiberglass hood, fiberglass grill on air shocks in the front, stock type coil in the back. With all the rules. Kurt altered the design of his truck to give him a winning advantage. We're restricted
to be within three inches of our stock drive train.
We actually chose to go a little shorter, helped it fit in the courses better turn tighter. We're a lot narrower.
Front axles are a little bit wider than most people run to get. The more tearing out without rubbing on the frame round. The key was just keep every, keep the vehicle low, keep it stable and that's been the case
on a course full of tough obstacles. The 20 point bonus rock stood out and mocked the drivers all weekend.
It's an adrenaline rush to try and get it. And at this level of competition, you gotta go for it,
you never know it might bounce just right and something might work in your favor. And if you're not there to take advantage of it. It won't happen with a 100% failure rate for Kirk. The rock wasn't about 20 points.
It was about being the man
CCC to
cool and collected. That wouldn't be enough to get over the rock.
I tried to back out of it but when you're at such an angle and the things growing that way I could try to back all I want and just plant the body in the dirt and probably make things worse than they are.
But
it's not the first time. It will be the last time I'm going over over seven courses. The team nailed an amazing seven negative scores.
He drives phenomenal when he's under pressure. When he gets down to a minute, he knows what he's got to do and he gets the job done. Well, we could just keep where we're at and hopefully the people aren't getting as many bonuses as are possible and
we get to hold some ground
come out with the win. Then on the final run before the shoot out
his day got a little bit more challenging
pops. We got parts. That's why we carry spare parts and that's why we got a pit crew and I don't care if I gotta run that shoot out with a rear without an axle in there, I'll run it without an axle that wouldn't be necessary
repaired. Kurt and Chris were ready to put this one away.
Finished the course. We finished the course, we got the event, they aced it
and finished the season
undefeated. Whoever thought we'd do this at the All Stock course.
Thanks. Great job, man.
Great job.
So far today we've made really good headway on our single seated buggy. Both of our axles are rebuilt and they're ready to bolt up to our chassis to give us a rolling buggy in our small two car garage fab shop. Now, if you remember when we mocked everything in place, we used this white PV C tubing for link material and that was so we could measure and have aluminum links made for this particular project. Now, I know what you guys are thinking. This is supposed to be a budget buggy and you're gonna throw high dollar aluminum lens under it. Well, it's all about the math at this point. It's not that much different than steel, large oversized hem
joints like these ones here require oversized tubing adapters and these cost around $20 a piece. So that's $40 per link. Now, the material that we use is gonna be all dom tubing quarter wall or two sticks of eighth wall, slid inside each other to sleeve them, get the strength that we need. Now, that's gonna be $6 a foot. So if you have a 4 ft link on this buggy, it's gonna float you around 70 to $75 if you include all the welding material.
Now, an aluminum link like this from Brannock machine. It costs just over $100 flat. Now, that is a good deal because they drill and tap the ends for the hem
joints of your choice as well as include the wrench flats to make, tightening the jam nut a lot easier. The 7075 aluminum is a lot lighter than the steel and it's also stronger, but more importantly, it doesn't bend, it actually deflects because it's a memory alloy. If we're to load up this link on the trail, it's gonna deflect a little bit and return to its natural state. Now, that means that we get a better quality link material just a little bit more money and it'll last the life of the buggy
four wheel steer buggy like this will obviously be getting full hydraulic steering and we'll start by mounting the PSC orbital valve onto a bracket that we got from sniper fabrication.
When you're putting together a full hydraulic steering kit for a four wheel steer buggy like ours, it's important that it's designed to work together. The components aren't fighting each other because they're not spec to match. Now, the guys at PSE took down a ton of information about our little buggy, everything from tire size, axle choice, even possible pump RPM off of our small engine to develop a kit that will work together as one complete unit. The orbital valve that's up attached to the steering wheel is specifically designed for the Toyota axle as well as the rear steer valve that will mount up by the driver seat to divert power to our rear ramp. Now, the rams themselves, they're specifically designed for a Toyota axle. They are a six inch stroke, but the size is designed to handle our 42 inch tall pitbull tires and they come with everything we need from the weldon brackets, even the hem
joints and the bolts and nuts. Now, the power steering pump pulley has also been set up to handle a V belt coming off of our small Acura engine. Now, the pump is a different story. The Honda motor never had a power steering pump mounted on it. Those cars actually believe it or not use a small electric pump to power the power steering
and we've told you many times that engine is a reverse rotation. Engine, power steering pumps are not designed to turn in a backwards rotation. They actually burn up and fail prematurely. But we have a plan
by mounting the pump with the pulley facing the engine. The belt will turn it in the opposite direction
or in our case, the correct rotation,
the rams bolt to the high steer arms on her six shooter knuckles and attached to the axle.
Adding a skid plate will keep them from getting damaged by the rocks on the trail.
The rear steer valve will be mounted right beside the driver's seat with the joystick within easy reach of the driver.
Then all we have to do
is measure for fluid liner.
Now, the whole point of today is to get all of the heavy fab work done on our crawler, get it sitting up on some shops and springs and see what it looks like at finished ride height. I'm sure you guys have figured out by now, we are not gonna install an Acura engine into a crawler and not install a rice burner style exhaust. Now, with the muffler on this buggy is gonna be a Magna Flow import series muffler and this is a full polished stainless steel muffler and it is a flow through design. So it'll help with our power. It has an integrated stainless steel tip with a rolled edge for good looks. Now, the accurate motor mounts are pretty loose. This thing's gonna flop around in here like a dead sailor. So to keep the exhaust from breaking loose from the motor, we're gonna install one of these flex pipes.
Now, spring rates for our buggy are single, one fifties in the rear and some single one hundreds up front. And while we're throwing the shocks at this rig, we'll go ahead and put in this rough stuff, specialties, battery box, a gas pedal that we got from summit racing and a bunch of these little body mount tabs into specific spots in the roll cage. So our body panels have something to bolt to.
Are you,
you know, there's nothing quite like the feeling
of getting all the jack stands out from underneath your project and getting it sitting on its tires and wheels. You can really get a feeling of what the car is actually gonna look like when there's not a big sea of red underneath it, you get an idea of what your belly pan is gonna be as well as the overall height. Now, as you guys know, we're not done, we stuff tear this whole buggy down, do all the finished welding and then paint this chassis before we can reassemble the whole thing back to this point to do the plumbing and wiring. But right now you're at a point where you have to do the most important thing when you're building a buggy like this. Let's get in it and make some engine noises.
Oh, yeah,
I forgot my steering wheel. That's all right. I got rear Steer
bbbbb.
