More S10 Truggy Episodes
Xtreme 4x4 Builds
Want more content like this?
Join the PowerNation Email NewsletterParts Used In This Episode
Ballistic Fabrication
Laser Cut Brackets.
Bowler Performance Transmissions
4L80E Transmission.
Clausen
Rust Defender Polyester Primer.
Hooker Headers
Super Competition Block Headers.
JB Conversions
NP205 Case and LoMax 3:1 Kit.
Off Road Design
Doubler Kit and Triple Stick Shifters.
Painless Performance
Off-Road Switch Kit.
Poison Spyder Customs
20" Spyderlock Wheels.
Russell Performance
Cloth Braided Fuel Hose and Black/Silver AN Fittings.
Episode Transcript
Want to know what's happening on extreme today. Not much except bending, cutting, designing a four L repairing bullet holes, installing a doubler 20 inch beads, building custom exhaust trick both sides fa repair, applying filler block, sanding, mixing primer and laying it down.
Is that it?
Welcome
to Xtreme 4x4 where today we're working on our
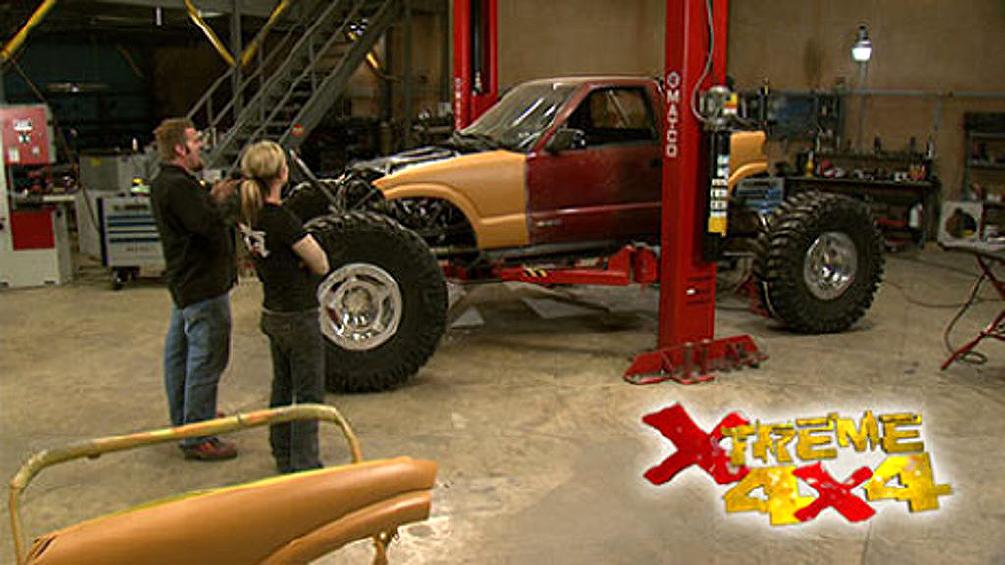
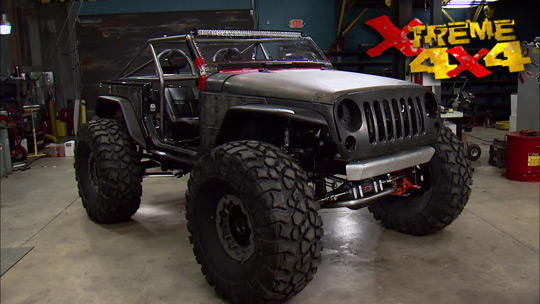
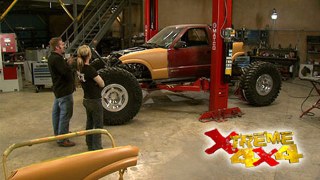
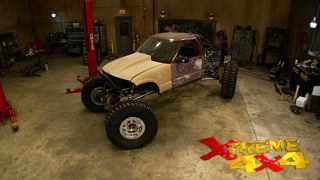
10 project building, what we like to call a high end off road show crawler. This truck has undergone a huge transformation from an old worn out
10.
It seen better days to a fully to frame tr
but it wasn't as easy as it sounds,
but the body lifted up the frame. The process of building a new custom to frame started with some two by three rectangular.
Once the new body mounts were built, the body was lowered on to its new frame and the rest of the tube work could be completed
to help keep the
10 looking like one. The sheet metal was gently massaged with some stretch in the front fenders and the bedside narrow.
Finally, the new heart for the beast was stuffed under the hood. A killer 502 Ram jet big block.
Today, we're gonna be doing some body work, dealing with the rest of the drive train, getting some exhaust on that big block and hopefully firing it up. It all starts with this four LAE transmission. Now, this is a custom unit built by the guys down at Boulder transmission
and it's specifically spec for this vehicle and it can handle up to 800 ft pounds of torque. Now, they do that by upgrading to a five planet
carrier assembly using 300 hardened shafts and as well as an updated boost valve that'll raise pressure for firmer shifts. Now, the nice thing about this is not only did they paint the outside of our case, clear coated and airbrush our logo on it for that custom touch. They took care of this transmission on the inside specific for our project. They took down all the information about what we're building
from engine size tire size right down to final drive ratio
and made specific suggestions for our transmission
like a low stall speed lockup converter that'll lock up at around 1500 to 1600 RPM and allow us to take care of the low end grunt on the big block. Now, one other thing they did is they prep this transmission with engine braking in both 1st and 2nd gear
engine braking will help this truck when going down hills by using the compression of the engine to bring it to a stop.
High end truck is going to need a high end paint job. And even though the metal work has been started, there's still a lot of work that needs to be done before we can start throwing down some paint. For example, on this fender here, we're going to need to bring up this piece so we can meet up with this piece and then go ahead and fill in this gap. You can go ahead and fill in the antenna hole here and same right here. But on this piece, we're going to do a relief cut. So to bring this metal down and maybe hammer stretch this right.
So those can meet up over on this fender. There's three holes right here that I'm gonna need to cut out and completely replace that with the flat panel. We're trying to get these panels as level as possible because you don't want any of the filler to be over 1/16 of an inch. If you get thicker than that, it's gonna have a tendency to crack. And for as much as this truck is probably gonna be seeing those
trees and the sides of cliffs, it's definitely important that we don't go thicker than required.
And you probably recognize these two items on the bench from a transfer case show that we did not too long ago. This one right here started life as a new process 205 out of an old Ford, basically stripped it down and put all the guts into this new case that we got from JB conversions along with their Lomax 3 to 1 kit. Now, this will be going in our
10 behind a 203 range box that has been mounted onto an off road designs doubler kit. Now, this box has been stripped down and all the gears were out of it. So I could go ahead drill and tap the six bolt round mounting flange to match the back of our transmission. And while I cleaned it up, I just gave it a coat of paint and there's no gears in here right now. But since we're just mocking this up, it's no big deal.
You may be wondering why I'm both
take welding and big welding on this panel. Why I prefer to take, well, because it's considered a softer metal making it actually easier to manipulate. Where right here in this section, I had to make well to fill a gap that I couldn't with the T
well. But what that does is leave a higher deposition, meaning I have to grind more which puts more heat in the panel, making it more liable for it to actually work,
which is why I prefer to take over.
Now with the triple stick shifters, we got from off road designs bolted up to the back of the transmission. We have a bunch of different ranges to choose from everything from a 1 to 1 high range all the way down to a 6 to 1 with everything in low. Now, we also have the ability to shift either axle independently of each other so we can do front and rear digs. Now, with everything mounted and we know that it's in a good spot. We can go ahead and build the rest of the cross members as well as the skid plating for this drive train.
After the break, our female fabricator gets busy with fender repair, including how to fix some common bullet holes. Stay tuned.
Hey
guys, welcome back to Xtreme 4x4. As you can see, it took a break from the metal work to put some filler on this panel, but don't have a whole another fender on the other side to play catch up with.
And then all we have to do is make some amounts for them and then it's off to the paint booth for some primer.
Now with our drive train in place and mounted, we can start to work on our exhaust. And since this truck is being built to not only work good off road but also look good while doing it, we're gonna install a full stainless steel exhaust kit that we got from Magna Flow and this is a universal kit and I got a couple of
2.5 inch straights and then some three inch elbows. Now, the whole thing is polished and the nice thing is it's never gonna rust because stainless steel, the muffler is a fully welded design and also polished so it looks good. Plus it is a flow through design so it is gonna sound awesome behind our big block
at the engine.
We'll start with a set of hooker super competition block hugger headers.
And of course for this truck chrome plating was a must
to eliminate issues with the front drive shaft. The 2.5 inch Magne flow exhaust pipe will travel under the oil pan and then down the driver's side under the skid plate
into a 2.5 inch to three inch Y pipe.
Then 245 degree pipes will travel up behind the cab and into our mufflers. Then the entire exhaust can be removed and fully tig welded for that finished look
pretty much all the metal work and all the body work is done on the 10 truck
except for this one fender.
And right here in this area, we need to fix some bullet holes. Now, a lot of guys will say, well, why don't I just come in and put in one big patch panel.
Well, what that does is you create a giant he area from your welding. He creates distortion. And that's the last thing that you need when you're doing body work. So what needs to be done is treat each hole individually,
the
end of the hammer will knock down the edges of the hole. But since it's split, I'll cut out the pucker area and the torn edges and weld in a filler piece.
Now, you can use this technique to shave door handles, side mirrors or rust repair,
just be sure to take the time between the welds. So the metal doesn't work.
Yeah,
body mounts will hold our sheet metal to the tube structure underneath
on the rear. A few simple tabs will be welded to both the bedside and the top rail of the chassis
on the front. The hood needs to be in place for the fender location and
just like the rear using some left over exhaust tubing
and some 316 inch plate,
the ends of the panel can be held in place.
Now, the term high end crawler can mean a lot of different things. It can mean spending a lot of money on rare, hard to find drive train components, but it can also just mean labor and a lot of it spent on custom touches like body work cage, gussets and wild tube work. But it can also mean just paying attention to the details
like turning an ordinary both side into something pretty special
with our logo traced onto a piece of 316 steel and a steady hand and some patience with the plasma cutter.
A simple skin plate becomes a custom piece that'll look great on any high end crawler.
It'll be tacked in place for now
and then fully welded when we tear this truck apart for paint powder coat and chrome
Hey guys, welcome back to Extreme four by Foreigner S 10 Trey
Bills. So far today, we've installed the rest of the drive train, pulled the body panels off to do some body work, built a custom exhaust as well as some skid plates. And right now it's time to install some axles in this truck. And you guessed it,
Rockwell.
The
last step in our body work before primer is to spread the plastic filler
that will produce a level surface that in the end will match the original contours of the panel.
I'm prepping the area by removing the paint with 36 grit, sandpaper
filler is known to not completely adhere otherwise,
typically, more filler is applied than needed and allowed to set up
and the excess is sanded down leaving what's necessary to fill any low spots in the middle.
The goal is not to go over 1/16 of an inch thick,
but it's ok to go up to a quarter of an inch if absolutely necessary.
Now, obviously for this truck, we needed a pretty wild set of wheels. So we got these from Poison Spider Customs. They're a 20 inch by 10 inch aluminum bead lock rim with some pretty unique technology specifically designed for trail riding.
The inner bead retaining lip is actually machined with a sharp edge to help hold that inner bead in place. The outer rock ring itself is three quarters of an inch thick and plus has extra material machine into it to make it stiffer. The outer clamping lip has striations cut into it to help hold the tire in place and keep it from spinning on the rim itself. Now, the grade eight nickel plated allen head bolts are actually recessed inside this ring to protect them when you're on the trail.
Finding 20 inch bead locks can be a challenge. Most wheel manufacturers stop at 18.
But since this is our high end trie
it's got to be rolling on dugs.
Now, not only does the valve stem come pre installed for you, it's recessed really far back into the rim itself, so it's protected when you're out on the trail. Now, let's head on over to the paint booth to Jessi and check on the weather.
It's
no just kidding. Go ahead and kill that fan.
Now, for a paint job that as,
as glass, the layers of primer underneath have to be just as smooth.
We're using Clason
render polyester primer.
It's basically a sprayable plastic filler
that lays down super high build to fill any little imperfections.
It contains a building that
allows it to stick to bare metal fiberglass, old paint
and body filler making it perfect for a hood and fenders.
This is a very thick primer will be using a spray gun with a 2.3 fluid tip. So it won't.
Now, if there axle tire and wheels sitting in the back of the truck, we can start to build a suspension for this beast. Now, obviously, that means we're going to have to be building a lot of custom brackets and tabs to get everything mattered in place. And that means a lot of equipment and as you guys know, at home, that equipment can cost money.
There is a way to have a high end crawler without having all that equipment in your shop.
Fabrication makes these great pre cut and set up brackets specific for your actual application. Not only are they laser cut and keyed. So when you weld them together, they're perfectly lined up, but they also have little custom features like their logo, laser cut out of the side.
Not only will this save you time, but it'll save you money because you don't need all this equipment to have a high end bracket.
Now, if you're wondering why we're using tubing with no hi joints,
it's because these are just mock up joints that will be later replaced with some blinging 7075 aluminum links from summer machine.
We'll be using a combination of ballistic fab brackets
as well as ones that we make right here in extreme
to hang both rock wells off a double triangulated four
length front and rear
after the break. Starting a great motor out of the box doesn't always go as planned
when Xtreme 4x4 continues.
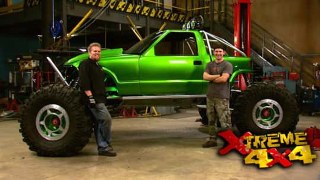
Ok, guys, the primer is dry and the fenders make the truck look totally different. Let's think with a stretch in the front and the beds shortened and nailed in the rear. This thing finally has the stance. It truly earns it. The name. Hardcore Truckie kinda looks like a,
you know, maybe a little kids RC car on performance enhancement drugs.
Now, we've made a lot of headway on our S 10 project, but there's one thing that we want to do and I know you guys want to hear it too and that is fire up our 502 and hear that thing run. Now for that, we're gonna need some wiring and obviously some plumbing.
Now to handle all the wiring in this truck, we're gonna be using a painless performance products off road switch panel kit. Now, we're not gonna be using all of this kit, just certain pieces mounted up inside the stock dash. We'll use the circuit breakers and the toggle switch as well as the harness itself. That'll keep the wire
really simple and really clean. We won't even use this ignition switch because we're using the stock one that's matter to the column to keep things neat. Now, for the plumbing, we're gonna be using Russell cloth braided dash six fuel hose, it's just a little bit easier to manipulate than the steel braided line. And since our fuel pump only runs at about 100 P si, it'll be able to handle that, no problem. Now, at the end of the hose, we're gonna be using Russell's New Black and silver a
fittings. Since we're gonna be painting this truck green and pearl white, the whole blue red thing just wasn't gonna look right.
The Ram Jet 502 truly is a great motor that has everything necessary to make it run.
The ECU is mounted underneath of the Ram jet intake and the harness requires 2, 12 volt power sources, one for the ground and one for the switch and it's ready to run
and with all the fuel lines hooked up and some gas in the fuel cell, it's time to hear this thing scream. Now we're not fully wired, but the battery is hot wired which will send us enough juice to get a run in.
Ready. Chris ready
everybody ready.
WW. Who
seems to be a problem.
Check that out
ready, Chris ready. Watch out, man.
Who
looks to me like a loose ground somewhere
so it should be enough to go ahead and start the engine, Chris, you wanna do the honors?
Just kidding. You ready
next time, we'll do more stuff. See you later.
Show Full Transcript
Is that it?
Welcome
to Xtreme 4x4 where today we're working on our
10 project building, what we like to call a high end off road show crawler. This truck has undergone a huge transformation from an old worn out
10.
It seen better days to a fully to frame tr
but it wasn't as easy as it sounds,
but the body lifted up the frame. The process of building a new custom to frame started with some two by three rectangular.
Once the new body mounts were built, the body was lowered on to its new frame and the rest of the tube work could be completed
to help keep the
10 looking like one. The sheet metal was gently massaged with some stretch in the front fenders and the bedside narrow.
Finally, the new heart for the beast was stuffed under the hood. A killer 502 Ram jet big block.
Today, we're gonna be doing some body work, dealing with the rest of the drive train, getting some exhaust on that big block and hopefully firing it up. It all starts with this four LAE transmission. Now, this is a custom unit built by the guys down at Boulder transmission
and it's specifically spec for this vehicle and it can handle up to 800 ft pounds of torque. Now, they do that by upgrading to a five planet
carrier assembly using 300 hardened shafts and as well as an updated boost valve that'll raise pressure for firmer shifts. Now, the nice thing about this is not only did they paint the outside of our case, clear coated and airbrush our logo on it for that custom touch. They took care of this transmission on the inside specific for our project. They took down all the information about what we're building
from engine size tire size right down to final drive ratio
and made specific suggestions for our transmission
like a low stall speed lockup converter that'll lock up at around 1500 to 1600 RPM and allow us to take care of the low end grunt on the big block. Now, one other thing they did is they prep this transmission with engine braking in both 1st and 2nd gear
engine braking will help this truck when going down hills by using the compression of the engine to bring it to a stop.
High end truck is going to need a high end paint job. And even though the metal work has been started, there's still a lot of work that needs to be done before we can start throwing down some paint. For example, on this fender here, we're going to need to bring up this piece so we can meet up with this piece and then go ahead and fill in this gap. You can go ahead and fill in the antenna hole here and same right here. But on this piece, we're going to do a relief cut. So to bring this metal down and maybe hammer stretch this right.
So those can meet up over on this fender. There's three holes right here that I'm gonna need to cut out and completely replace that with the flat panel. We're trying to get these panels as level as possible because you don't want any of the filler to be over 1/16 of an inch. If you get thicker than that, it's gonna have a tendency to crack. And for as much as this truck is probably gonna be seeing those
trees and the sides of cliffs, it's definitely important that we don't go thicker than required.
And you probably recognize these two items on the bench from a transfer case show that we did not too long ago. This one right here started life as a new process 205 out of an old Ford, basically stripped it down and put all the guts into this new case that we got from JB conversions along with their Lomax 3 to 1 kit. Now, this will be going in our
10 behind a 203 range box that has been mounted onto an off road designs doubler kit. Now, this box has been stripped down and all the gears were out of it. So I could go ahead drill and tap the six bolt round mounting flange to match the back of our transmission. And while I cleaned it up, I just gave it a coat of paint and there's no gears in here right now. But since we're just mocking this up, it's no big deal.
You may be wondering why I'm both
take welding and big welding on this panel. Why I prefer to take, well, because it's considered a softer metal making it actually easier to manipulate. Where right here in this section, I had to make well to fill a gap that I couldn't with the T
well. But what that does is leave a higher deposition, meaning I have to grind more which puts more heat in the panel, making it more liable for it to actually work,
which is why I prefer to take over.
Now with the triple stick shifters, we got from off road designs bolted up to the back of the transmission. We have a bunch of different ranges to choose from everything from a 1 to 1 high range all the way down to a 6 to 1 with everything in low. Now, we also have the ability to shift either axle independently of each other so we can do front and rear digs. Now, with everything mounted and we know that it's in a good spot. We can go ahead and build the rest of the cross members as well as the skid plating for this drive train.
After the break, our female fabricator gets busy with fender repair, including how to fix some common bullet holes. Stay tuned.
Hey
guys, welcome back to Xtreme 4x4. As you can see, it took a break from the metal work to put some filler on this panel, but don't have a whole another fender on the other side to play catch up with.
And then all we have to do is make some amounts for them and then it's off to the paint booth for some primer.
Now with our drive train in place and mounted, we can start to work on our exhaust. And since this truck is being built to not only work good off road but also look good while doing it, we're gonna install a full stainless steel exhaust kit that we got from Magna Flow and this is a universal kit and I got a couple of
2.5 inch straights and then some three inch elbows. Now, the whole thing is polished and the nice thing is it's never gonna rust because stainless steel, the muffler is a fully welded design and also polished so it looks good. Plus it is a flow through design so it is gonna sound awesome behind our big block
at the engine.
We'll start with a set of hooker super competition block hugger headers.
And of course for this truck chrome plating was a must
to eliminate issues with the front drive shaft. The 2.5 inch Magne flow exhaust pipe will travel under the oil pan and then down the driver's side under the skid plate
into a 2.5 inch to three inch Y pipe.
Then 245 degree pipes will travel up behind the cab and into our mufflers. Then the entire exhaust can be removed and fully tig welded for that finished look
pretty much all the metal work and all the body work is done on the 10 truck
except for this one fender.
And right here in this area, we need to fix some bullet holes. Now, a lot of guys will say, well, why don't I just come in and put in one big patch panel.
Well, what that does is you create a giant he area from your welding. He creates distortion. And that's the last thing that you need when you're doing body work. So what needs to be done is treat each hole individually,
the
end of the hammer will knock down the edges of the hole. But since it's split, I'll cut out the pucker area and the torn edges and weld in a filler piece.
Now, you can use this technique to shave door handles, side mirrors or rust repair,
just be sure to take the time between the welds. So the metal doesn't work.
Yeah,
body mounts will hold our sheet metal to the tube structure underneath
on the rear. A few simple tabs will be welded to both the bedside and the top rail of the chassis
on the front. The hood needs to be in place for the fender location and
just like the rear using some left over exhaust tubing
and some 316 inch plate,
the ends of the panel can be held in place.
Now, the term high end crawler can mean a lot of different things. It can mean spending a lot of money on rare, hard to find drive train components, but it can also just mean labor and a lot of it spent on custom touches like body work cage, gussets and wild tube work. But it can also mean just paying attention to the details
like turning an ordinary both side into something pretty special
with our logo traced onto a piece of 316 steel and a steady hand and some patience with the plasma cutter.
A simple skin plate becomes a custom piece that'll look great on any high end crawler.
It'll be tacked in place for now
and then fully welded when we tear this truck apart for paint powder coat and chrome
Hey guys, welcome back to Extreme four by Foreigner S 10 Trey
Bills. So far today, we've installed the rest of the drive train, pulled the body panels off to do some body work, built a custom exhaust as well as some skid plates. And right now it's time to install some axles in this truck. And you guessed it,
Rockwell.
The
last step in our body work before primer is to spread the plastic filler
that will produce a level surface that in the end will match the original contours of the panel.
I'm prepping the area by removing the paint with 36 grit, sandpaper
filler is known to not completely adhere otherwise,
typically, more filler is applied than needed and allowed to set up
and the excess is sanded down leaving what's necessary to fill any low spots in the middle.
The goal is not to go over 1/16 of an inch thick,
but it's ok to go up to a quarter of an inch if absolutely necessary.
Now, obviously for this truck, we needed a pretty wild set of wheels. So we got these from Poison Spider Customs. They're a 20 inch by 10 inch aluminum bead lock rim with some pretty unique technology specifically designed for trail riding.
The inner bead retaining lip is actually machined with a sharp edge to help hold that inner bead in place. The outer rock ring itself is three quarters of an inch thick and plus has extra material machine into it to make it stiffer. The outer clamping lip has striations cut into it to help hold the tire in place and keep it from spinning on the rim itself. Now, the grade eight nickel plated allen head bolts are actually recessed inside this ring to protect them when you're on the trail.
Finding 20 inch bead locks can be a challenge. Most wheel manufacturers stop at 18.
But since this is our high end trie
it's got to be rolling on dugs.
Now, not only does the valve stem come pre installed for you, it's recessed really far back into the rim itself, so it's protected when you're out on the trail. Now, let's head on over to the paint booth to Jessi and check on the weather.
It's
no just kidding. Go ahead and kill that fan.
Now, for a paint job that as,
as glass, the layers of primer underneath have to be just as smooth.
We're using Clason
render polyester primer.
It's basically a sprayable plastic filler
that lays down super high build to fill any little imperfections.
It contains a building that
allows it to stick to bare metal fiberglass, old paint
and body filler making it perfect for a hood and fenders.
This is a very thick primer will be using a spray gun with a 2.3 fluid tip. So it won't.
Now, if there axle tire and wheels sitting in the back of the truck, we can start to build a suspension for this beast. Now, obviously, that means we're going to have to be building a lot of custom brackets and tabs to get everything mattered in place. And that means a lot of equipment and as you guys know, at home, that equipment can cost money.
There is a way to have a high end crawler without having all that equipment in your shop.
Fabrication makes these great pre cut and set up brackets specific for your actual application. Not only are they laser cut and keyed. So when you weld them together, they're perfectly lined up, but they also have little custom features like their logo, laser cut out of the side.
Not only will this save you time, but it'll save you money because you don't need all this equipment to have a high end bracket.
Now, if you're wondering why we're using tubing with no hi joints,
it's because these are just mock up joints that will be later replaced with some blinging 7075 aluminum links from summer machine.
We'll be using a combination of ballistic fab brackets
as well as ones that we make right here in extreme
to hang both rock wells off a double triangulated four
length front and rear
after the break. Starting a great motor out of the box doesn't always go as planned
when Xtreme 4x4 continues.
Ok, guys, the primer is dry and the fenders make the truck look totally different. Let's think with a stretch in the front and the beds shortened and nailed in the rear. This thing finally has the stance. It truly earns it. The name. Hardcore Truckie kinda looks like a,
you know, maybe a little kids RC car on performance enhancement drugs.
Now, we've made a lot of headway on our S 10 project, but there's one thing that we want to do and I know you guys want to hear it too and that is fire up our 502 and hear that thing run. Now for that, we're gonna need some wiring and obviously some plumbing.
Now to handle all the wiring in this truck, we're gonna be using a painless performance products off road switch panel kit. Now, we're not gonna be using all of this kit, just certain pieces mounted up inside the stock dash. We'll use the circuit breakers and the toggle switch as well as the harness itself. That'll keep the wire
really simple and really clean. We won't even use this ignition switch because we're using the stock one that's matter to the column to keep things neat. Now, for the plumbing, we're gonna be using Russell cloth braided dash six fuel hose, it's just a little bit easier to manipulate than the steel braided line. And since our fuel pump only runs at about 100 P si, it'll be able to handle that, no problem. Now, at the end of the hose, we're gonna be using Russell's New Black and silver a
fittings. Since we're gonna be painting this truck green and pearl white, the whole blue red thing just wasn't gonna look right.
The Ram Jet 502 truly is a great motor that has everything necessary to make it run.
The ECU is mounted underneath of the Ram jet intake and the harness requires 2, 12 volt power sources, one for the ground and one for the switch and it's ready to run
and with all the fuel lines hooked up and some gas in the fuel cell, it's time to hear this thing scream. Now we're not fully wired, but the battery is hot wired which will send us enough juice to get a run in.
Ready. Chris ready
everybody ready.
WW. Who
seems to be a problem.
Check that out
ready, Chris ready. Watch out, man.
Who
looks to me like a loose ground somewhere
so it should be enough to go ahead and start the engine, Chris, you wanna do the honors?
Just kidding. You ready
next time, we'll do more stuff. See you later.
