More Bottom Drawer Buggy Episodes
Xtreme 4x4 Builds
Want more content like this?
Join the PowerNation Email NewsletterParts Used In This Episode
Copperhead Fab
Custom Wheel Centers will allow the use of our original beadlocked wheels for a different axle with different bolt patterns.
Summit Racing
Dual master cylinders and pedal assemblies to allow for individual use between front and rear axles.
Teraflex
Heavy Duty output Shaft and 4:1 Low Gear Kit to double the low range gearing in the transfer case.
Episode Transcript
No axle is tougher on the rocks than rocks. Today on Xtreme 4x4, the bottom drawer buggy gets rockwells front and rear plus pinion breaks, transfer case gearing and more. And you'll get to find out what caused this
damn
c
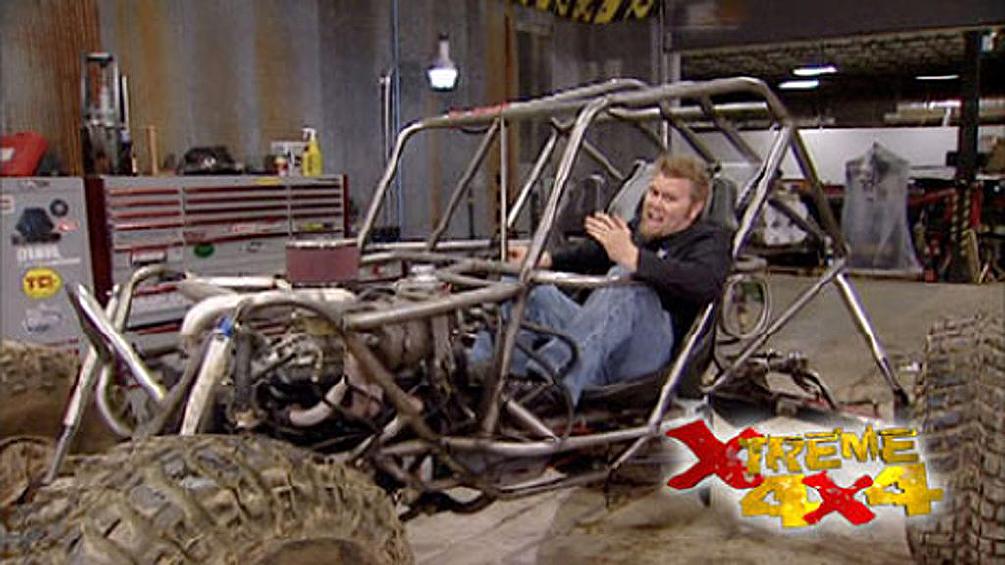
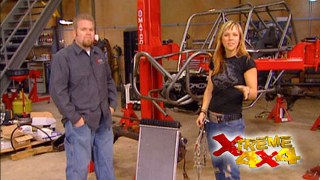
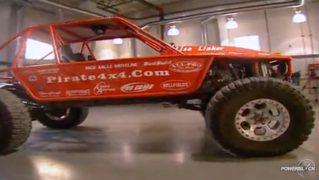
Hey everybody, welcome to Xtreme 4x4. Surely you remember our bottom drawer buggy that we built earlier this year. Well, today it's back for its much needed axle upgrade. Now, the idea for this project started when we realized that we had enough used parts laying around our shop to put together an entire four wheel steer buggy drive train.
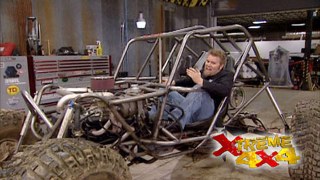
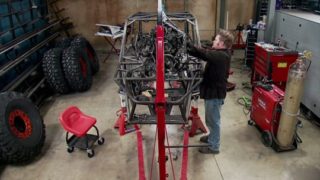
So we grabbed just over 100 ft of tubing and bent up. A super small two seater chassis
dropped in a rebuilt 350 left over from the suburban Gorilla
and topped it with a gut propane fuel delivery system,
swapped the output shaft in the turbo 400
bolted up at Dana 300 transfer case.
Then with a four L kit from blue to
fab and some Fox Air shops,
we had a rolling four wheel steer chassis sitting on some 46 inch Mickey Thompson Baha
claws mounted on steel bead locks.
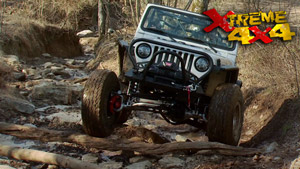
Then we headed out on the trail to see how it all works.
And with a grand total of 7983 bucks spent it turned out great.
We always knew that we had two weak links in our drive train and that being the axles themselves, especially this front 10 bolts, basically a half ton axle. It's got very small axle shafts and very small axle joints out on the stub shafts. These were certainly not meant to handle 46 inch tall tires and definitely not off road. But for this buggy, we got something special.
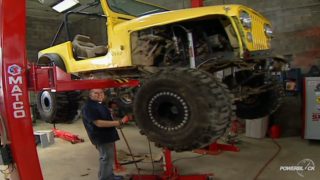
Now, these are 2.5 ton top loading. Rockwell axles often referred to as rocks. And today we're going to tear into these things from one end to the other and then install them underneath our bottom drawer buggy to say that these things are indestructible is an understatement. But to really understand the mystery of this top double reduction housing, you have to have a look inside
to obtain a 6.72 to 1 gear ratio. The rock well uses a double reduction gear set.
The first part of the gear set is a typical ring and pinion with nine teeth on the pinion and 22 on the ring. This gives us a 2.44 to 1 initial reduction.
The power is then transferred from the ring gear to a separate smaller spur gear that then drives the larger B
gear
inside the ball gear, you'll find the side gear
that is flying onto the 1.62 inch sixteens flying axles as well as the spider gears that allow those axles to travel at different speeds while cornering.
The cool thing about the top loading Rockwell is that we can turn the reduction housing 180 degrees to center the drive shaft input so we can install it into the rear of the buggy.
Now, if you remember, we kept track of all the money it took to build our bottom drawer buggy and we're gonna do the same today. So far, we spent 1500 bucks on two steering, 2.5 ton rockwells. Now, before we start anything today, we're gonna tear these all apart.
Who
who
now ground clearance can be an issue with the Rockwell because it's got this huge sump on the bottom side to store all the gear oil to keep the gears cool. But because we're running on the trail, we don't need this much fluid. So we're gonna go ahead and shave this rock well up
measuring up one inch from the factory. Well,
we mark two half circles and continue up the middle to make room for the bow
gear.
Then we cut and grind
with both housings prepped. We'll use quarter inch plate to rebuild the bottom section
before final welding,
drop the center section back in and check for clearance.
Then we could burn it in for good.
Now, inside the bowl gear, you'll find the spider assembly. Now, the spider gears are what allows the axles
to turn different speeds when you go around a corner and basically walking around the side gears. Now, we don't want that. We want this axle locked up. So we're gonna go ahead and weld this assembly to the axle is full lock all the time, kind of like a spool. Now, you can buy a locker for the Rockwell axle. There's a couple of different models. The cheapest one is around 500 bucks. But if you remember, we're watching our wallet here. So we're gonna spend at least that we can. It's the cheapest way.
Now, later on, if we want to put a locker in here, we'd have to take the spider assembly out and replace it. So either way we're ahead of the game,
I need a welder
with the side gear and half of the housing.
We'll drop the cross and spiders back in and tack them together,
then flip them over and tack weld the opposite side
and all we have to do is add the other side gear
and make sure it all still fits in the carrier,
pull it out
and weld it soft
afterwards, put it all back together
and reinstall it into the reduction.
One of the issues that always comes up with the Rockwell axle is the brakes. Now, if you remember we pulled off this monster brake drum, when we tore our axle apart. We don't want to reuse that because the drum brake is just gonna fill up with water and mud and we're in the trail and most rims aren't even gonna fit around that thing. Now, there are companies that make disc brake conversions for the Rockwell and if this was going on a street truck that would be a must. But because this is just going in our fun buggy, you can do what's called a pin break. Now, the Rockwell housing has two inputs. So by using a rotor from the local parts store
and a typical brake caliper, we can go ahead and break the axle before it goes into the reduction housing. Now, this may look small, but we're gonna be breaking this thing before the gear reduction, it's gonna give us a 7 to 1 advantage over our tires. So when you hit that brake pedal, it's almost gonna throw you through the windshield.
We grabbed a ton of brake rotors from our local part stores and found that a 95 mercury rotor fit inside our drive flan.
Now we'll make a pattern on some cardboard,
trace it on to some plate to make a bracket for our new caliber.
Now, we went with this Toyota caliper because it's a fixed unit, it's got pistons on both sides of the rotor. So it's easier to mount, it can be fixed to this bracket with just a couple of bolts and then after the break, we're gonna go ahead and put these axles underneath the b
later on the bottom drawer, buggy leaves the shop for one of our most outrageous payoffs yet.
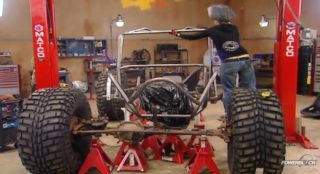
Welcome back to Xtreme 4x4. Now that we have our rockwells ready to go underneath our buggy, we can pull out this old Dana 50 that was in the rear and the 10 bolt that we stuffed up front and all we have to do is modify our four
length to fit our new 2.5 tons
with the actual housing in place. We can build a new removable trust system for the upper links
and the tabs are welded and the links bolted up,
followed by some new shocked out.
Now, we could have left the master cylinder that's in our buggy alone and it would control our opinion breaks wouldn't be an issue.
But we did this in one of our other projects and it turned out really nice. We're gonna install two pedal assemblies and master cylinders that we got from summit racing right beside each other. That way we will be able to use them together to control brakes, front and rear or we can break the front axle or the rear axle independent of each other. And since we're running with the front welded D
we're gonna be doing a lot of front digs. This will make it a lot easier.
Now, with the brakes taken care of, we can deal with something that we consider a little more serious. And that's our crawl ratio. Now, our turbo 400 has a 2.5 to 1 1st gear ratio
and the da 300 in stock form has a 2 to 1 low range that gives us about a 5 to 1 at the output shop. If you do the math on our 6.72 Rockwells, you end up with a crawl ratio of about 33 to 1.
That's not bad, but we got 46 inch tall tires. We gotta change that.
So we're gonna install a Terra
Flex 4 to 1 low gear kit as well as their heavy duty output shaft. Now, what that's gonna do is basically double the low range gearing in the transfer case and double the output shaft that of course will double our crawl ratio taking up to about 66 to 1.
That's a little bit more respectable off road.
This really is no harder than rebuilding a stock transfer case.
Once you have the key
completely stripped down,
replace the gears that are pressed onto the input and output shaft,
you will need to clearance the inspection cover in order for the new idler gear to fit into the case,
then replace the output housing with the new piece designed to clear the larger output shaft,
reinstall the front bearing retainer and shift tower assembly.
Then the case is ready to go back into our buggy.
We're back on Xtreme 4x4 and our bottom drawer buggy is just about ready to hit the trail. So far today, we've swapped out these weak link axles the day in a 50 that was in the back and the 10 bolt up front for these monster 2.5 ton rockwells. We built a low dollar pin break to control them and adapted our four length to fit and put a 4 to 1 gear set into our transfer case. Now, all we got to do is get it on some tires and wheels. Now, the problem is our wheels will not bolt up to our Rockwell hub. This bolt pattern is very distinctive and obviously only a six luck. But for that, we have a solution.
Now reentering a set of steel wheels is not a new idea. Guys do it to Hummer H one bead locks they buy used all the time,
but we already have a good set of steel bead locks on our buggy.
So we called up the guys at Copperhead fab and they made us a custom set of wheel centers to fit and then they even cut our logo in it just for fun. So all we gotta do now is cut the old wheel center out and weld in this new one
with the tires off the rim.
They cut out the old centers,
grind the inside of the rim smooth
and our new pieces can be tacked into place
after the backspacing is checked,
but pretty much everything on the rock well, can be turned around and used the other way. That's how they're designed and that goes for the wheel hub as well. If you remember stock, it holds the brake drum to the back side
and goes on like this. But since you got to pull the studs out and remove the drum, if you want to save some wood, you can actually install this hub backwards. Now, if you do this, change the wheel bearings, front and back as well because they will be worn into the race. But since we're not worried about wid, we're gonna go ahead and run it the
stock location,
then all we have to do
is cut our other three rims up, weld in the new centers, check the back spacing,
sing ready for the trail
and that's exactly where we'll take you after the break. Stay tuned.
We're back on Xtreme 4x4. We pulled Tommy out of the tech center to ride shotgun
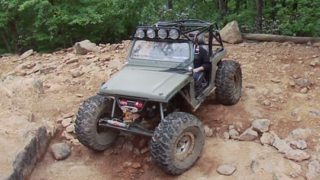
and we're building the tape bottom door buggy version 2.0 into the trails. And the last time we took this thing out, we had two weak links. Those would be our axles. Now with 2.5 ton Rockwell's front rear, we know that we can feed this thing some serious trails and we won't have to worry. So we're heading into a nice deep trench that always rolls one of our buggies over, but it's ok, because it rolls it over on Tommy's side.
Now, if you remember we four linked this buggy, both front and rear to give us some great articulation
and that certainly didn't change with our new axles.
I want to stay on that log just because I can.
00. Now the extra width really pays off in a trench like that. It is a little wide to fit through the trees, but with a four wheel steer, you can sort of pick your line. It keeps you a lot more level. Now we'll go somewhere and really twist this thing up.
46 inch tall tires are truly a commitment.
You give up a lot of gearing to get that extra ground clearance.
But thanks to our 7 to 1 Rockwell ratios
gunk
and the 4 to 1 Tao
gears in the case,
we're able to get some of that low speed crawl back.
Another potent modification felt on the trail. No, didn't come from this empty beer can. It's right here. The Shaved Rockwell.
It takes a ton of work to get a rockwell into your rig.
Don't go halfway shave the bottom. If you don't, you're gonna get hung up on every other rock.
Here we go.
Oh Damn
Hill is considered a serious trail because halfway up, you got to bounce over some serious rocks that have a tendency to put your rig on its lid.
Picking the right line when rock crawling is just as important as getting on the gas when needed every now and then it's more important to stop at the right time.
And it's surprising how well opinion breaks will hold,
hold on.
So,
thing
cost is just over 2500 bucks swapping these axles. But even being able to do something like this without worrying about breaking an axle. Huh? Well worth the money.
Hold on.
That's Rockwells for you, baby.
Now, this buggy was not built to be a mud
bog truck. Here we go.
But Rockwells can handle just about anything. And the true test of that is full throttle deep and sticky.
Damn. That was hard,
man. We almost made it.
We're about 2 ft from making it. You gotta admit it. Only a Rockwell could handle getting fed in the throttle for like 10 minutes.
I really think we should have put a roof on the buggy.
I feel like an iced doughnut. Check it out here.
Oh, I almost got you
who I almost felt I would have got dirty.
Show Full Transcript
damn
c
Hey everybody, welcome to Xtreme 4x4. Surely you remember our bottom drawer buggy that we built earlier this year. Well, today it's back for its much needed axle upgrade. Now, the idea for this project started when we realized that we had enough used parts laying around our shop to put together an entire four wheel steer buggy drive train.
So we grabbed just over 100 ft of tubing and bent up. A super small two seater chassis
dropped in a rebuilt 350 left over from the suburban Gorilla
and topped it with a gut propane fuel delivery system,
swapped the output shaft in the turbo 400
bolted up at Dana 300 transfer case.
Then with a four L kit from blue to
fab and some Fox Air shops,
we had a rolling four wheel steer chassis sitting on some 46 inch Mickey Thompson Baha
claws mounted on steel bead locks.
Then we headed out on the trail to see how it all works.
And with a grand total of 7983 bucks spent it turned out great.
We always knew that we had two weak links in our drive train and that being the axles themselves, especially this front 10 bolts, basically a half ton axle. It's got very small axle shafts and very small axle joints out on the stub shafts. These were certainly not meant to handle 46 inch tall tires and definitely not off road. But for this buggy, we got something special.
Now, these are 2.5 ton top loading. Rockwell axles often referred to as rocks. And today we're going to tear into these things from one end to the other and then install them underneath our bottom drawer buggy to say that these things are indestructible is an understatement. But to really understand the mystery of this top double reduction housing, you have to have a look inside
to obtain a 6.72 to 1 gear ratio. The rock well uses a double reduction gear set.
The first part of the gear set is a typical ring and pinion with nine teeth on the pinion and 22 on the ring. This gives us a 2.44 to 1 initial reduction.
The power is then transferred from the ring gear to a separate smaller spur gear that then drives the larger B
gear
inside the ball gear, you'll find the side gear
that is flying onto the 1.62 inch sixteens flying axles as well as the spider gears that allow those axles to travel at different speeds while cornering.
The cool thing about the top loading Rockwell is that we can turn the reduction housing 180 degrees to center the drive shaft input so we can install it into the rear of the buggy.
Now, if you remember, we kept track of all the money it took to build our bottom drawer buggy and we're gonna do the same today. So far, we spent 1500 bucks on two steering, 2.5 ton rockwells. Now, before we start anything today, we're gonna tear these all apart.
Who
who
now ground clearance can be an issue with the Rockwell because it's got this huge sump on the bottom side to store all the gear oil to keep the gears cool. But because we're running on the trail, we don't need this much fluid. So we're gonna go ahead and shave this rock well up
measuring up one inch from the factory. Well,
we mark two half circles and continue up the middle to make room for the bow
gear.
Then we cut and grind
with both housings prepped. We'll use quarter inch plate to rebuild the bottom section
before final welding,
drop the center section back in and check for clearance.
Then we could burn it in for good.
Now, inside the bowl gear, you'll find the spider assembly. Now, the spider gears are what allows the axles
to turn different speeds when you go around a corner and basically walking around the side gears. Now, we don't want that. We want this axle locked up. So we're gonna go ahead and weld this assembly to the axle is full lock all the time, kind of like a spool. Now, you can buy a locker for the Rockwell axle. There's a couple of different models. The cheapest one is around 500 bucks. But if you remember, we're watching our wallet here. So we're gonna spend at least that we can. It's the cheapest way.
Now, later on, if we want to put a locker in here, we'd have to take the spider assembly out and replace it. So either way we're ahead of the game,
I need a welder
with the side gear and half of the housing.
We'll drop the cross and spiders back in and tack them together,
then flip them over and tack weld the opposite side
and all we have to do is add the other side gear
and make sure it all still fits in the carrier,
pull it out
and weld it soft
afterwards, put it all back together
and reinstall it into the reduction.
One of the issues that always comes up with the Rockwell axle is the brakes. Now, if you remember we pulled off this monster brake drum, when we tore our axle apart. We don't want to reuse that because the drum brake is just gonna fill up with water and mud and we're in the trail and most rims aren't even gonna fit around that thing. Now, there are companies that make disc brake conversions for the Rockwell and if this was going on a street truck that would be a must. But because this is just going in our fun buggy, you can do what's called a pin break. Now, the Rockwell housing has two inputs. So by using a rotor from the local parts store
and a typical brake caliper, we can go ahead and break the axle before it goes into the reduction housing. Now, this may look small, but we're gonna be breaking this thing before the gear reduction, it's gonna give us a 7 to 1 advantage over our tires. So when you hit that brake pedal, it's almost gonna throw you through the windshield.
We grabbed a ton of brake rotors from our local part stores and found that a 95 mercury rotor fit inside our drive flan.
Now we'll make a pattern on some cardboard,
trace it on to some plate to make a bracket for our new caliber.
Now, we went with this Toyota caliper because it's a fixed unit, it's got pistons on both sides of the rotor. So it's easier to mount, it can be fixed to this bracket with just a couple of bolts and then after the break, we're gonna go ahead and put these axles underneath the b
later on the bottom drawer, buggy leaves the shop for one of our most outrageous payoffs yet.
Welcome back to Xtreme 4x4. Now that we have our rockwells ready to go underneath our buggy, we can pull out this old Dana 50 that was in the rear and the 10 bolt that we stuffed up front and all we have to do is modify our four
length to fit our new 2.5 tons
with the actual housing in place. We can build a new removable trust system for the upper links
and the tabs are welded and the links bolted up,
followed by some new shocked out.
Now, we could have left the master cylinder that's in our buggy alone and it would control our opinion breaks wouldn't be an issue.
But we did this in one of our other projects and it turned out really nice. We're gonna install two pedal assemblies and master cylinders that we got from summit racing right beside each other. That way we will be able to use them together to control brakes, front and rear or we can break the front axle or the rear axle independent of each other. And since we're running with the front welded D
we're gonna be doing a lot of front digs. This will make it a lot easier.
Now, with the brakes taken care of, we can deal with something that we consider a little more serious. And that's our crawl ratio. Now, our turbo 400 has a 2.5 to 1 1st gear ratio
and the da 300 in stock form has a 2 to 1 low range that gives us about a 5 to 1 at the output shop. If you do the math on our 6.72 Rockwells, you end up with a crawl ratio of about 33 to 1.
That's not bad, but we got 46 inch tall tires. We gotta change that.
So we're gonna install a Terra
Flex 4 to 1 low gear kit as well as their heavy duty output shaft. Now, what that's gonna do is basically double the low range gearing in the transfer case and double the output shaft that of course will double our crawl ratio taking up to about 66 to 1.
That's a little bit more respectable off road.
This really is no harder than rebuilding a stock transfer case.
Once you have the key
completely stripped down,
replace the gears that are pressed onto the input and output shaft,
you will need to clearance the inspection cover in order for the new idler gear to fit into the case,
then replace the output housing with the new piece designed to clear the larger output shaft,
reinstall the front bearing retainer and shift tower assembly.
Then the case is ready to go back into our buggy.
We're back on Xtreme 4x4 and our bottom drawer buggy is just about ready to hit the trail. So far today, we've swapped out these weak link axles the day in a 50 that was in the back and the 10 bolt up front for these monster 2.5 ton rockwells. We built a low dollar pin break to control them and adapted our four length to fit and put a 4 to 1 gear set into our transfer case. Now, all we got to do is get it on some tires and wheels. Now, the problem is our wheels will not bolt up to our Rockwell hub. This bolt pattern is very distinctive and obviously only a six luck. But for that, we have a solution.
Now reentering a set of steel wheels is not a new idea. Guys do it to Hummer H one bead locks they buy used all the time,
but we already have a good set of steel bead locks on our buggy.
So we called up the guys at Copperhead fab and they made us a custom set of wheel centers to fit and then they even cut our logo in it just for fun. So all we gotta do now is cut the old wheel center out and weld in this new one
with the tires off the rim.
They cut out the old centers,
grind the inside of the rim smooth
and our new pieces can be tacked into place
after the backspacing is checked,
but pretty much everything on the rock well, can be turned around and used the other way. That's how they're designed and that goes for the wheel hub as well. If you remember stock, it holds the brake drum to the back side
and goes on like this. But since you got to pull the studs out and remove the drum, if you want to save some wood, you can actually install this hub backwards. Now, if you do this, change the wheel bearings, front and back as well because they will be worn into the race. But since we're not worried about wid, we're gonna go ahead and run it the
stock location,
then all we have to do
is cut our other three rims up, weld in the new centers, check the back spacing,
sing ready for the trail
and that's exactly where we'll take you after the break. Stay tuned.
We're back on Xtreme 4x4. We pulled Tommy out of the tech center to ride shotgun
and we're building the tape bottom door buggy version 2.0 into the trails. And the last time we took this thing out, we had two weak links. Those would be our axles. Now with 2.5 ton Rockwell's front rear, we know that we can feed this thing some serious trails and we won't have to worry. So we're heading into a nice deep trench that always rolls one of our buggies over, but it's ok, because it rolls it over on Tommy's side.
Now, if you remember we four linked this buggy, both front and rear to give us some great articulation
and that certainly didn't change with our new axles.
I want to stay on that log just because I can.
00. Now the extra width really pays off in a trench like that. It is a little wide to fit through the trees, but with a four wheel steer, you can sort of pick your line. It keeps you a lot more level. Now we'll go somewhere and really twist this thing up.
46 inch tall tires are truly a commitment.
You give up a lot of gearing to get that extra ground clearance.
But thanks to our 7 to 1 Rockwell ratios
gunk
and the 4 to 1 Tao
gears in the case,
we're able to get some of that low speed crawl back.
Another potent modification felt on the trail. No, didn't come from this empty beer can. It's right here. The Shaved Rockwell.
It takes a ton of work to get a rockwell into your rig.
Don't go halfway shave the bottom. If you don't, you're gonna get hung up on every other rock.
Here we go.
Oh Damn
Hill is considered a serious trail because halfway up, you got to bounce over some serious rocks that have a tendency to put your rig on its lid.
Picking the right line when rock crawling is just as important as getting on the gas when needed every now and then it's more important to stop at the right time.
And it's surprising how well opinion breaks will hold,
hold on.
So,
thing
cost is just over 2500 bucks swapping these axles. But even being able to do something like this without worrying about breaking an axle. Huh? Well worth the money.
Hold on.
That's Rockwells for you, baby.
Now, this buggy was not built to be a mud
bog truck. Here we go.
But Rockwells can handle just about anything. And the true test of that is full throttle deep and sticky.
Damn. That was hard,
man. We almost made it.
We're about 2 ft from making it. You gotta admit it. Only a Rockwell could handle getting fed in the throttle for like 10 minutes.
I really think we should have put a roof on the buggy.
I feel like an iced doughnut. Check it out here.
Oh, I almost got you
who I almost felt I would have got dirty.
