Truck Tech Builds
Want more content like this?
Join the PowerNation Email NewsletterParts Used In This Episode
JLT Performance
https://www.jlttruecoldair.com/
Matco Tools
MATCO Tools are the Official Tool Supplier to PowerNation
The Industrial Depot
Tools, Hardware, Shop Supplies
Episode Transcript
(Austin)>> Bigger turbos!
(LT)>> Hotter cam!
(Austin)>> Just a few of many performance goodies.
(LT)>> In store for our muscle trucks. The build off kicks into high gear.
(Austin)>> Right now on Truck Tech. [ MUSIC ] [ engine revving ]
(LT)>> Yeah baby!
(Austin)>> Woo hoo! [ MUSIC ]
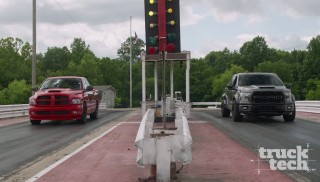
(LT)>> We've got a great looking pair of trucks in the shop today, which means it's time to make progress on our Muscle Trux Shootout, and the concept is simple. We were each given the same budget to go out and purchase whatever kind of truck we wanted, and then we were given the same budget to modify them in whichever way we chose.
(Austin)>> Now obviously we are comparing apples to oranges here but it doesn't really matter cause they're gonna be judged in a few different categories. That'll include style, appearance, performance, and obviously just which one you'd rather have in your garage, but it's all about how competitive we can actually make them and just have fun with it.
(LT)>> So naturally the truck that I chose is the 2005 Dodge Ram SRT 10 quad cab. This thing comes with an 8.3 liter V-10 under the hood. It puts down 505 horsepower and I mean just look at it. It's probably one of the best looking pickups ever to roll off the assembly line.
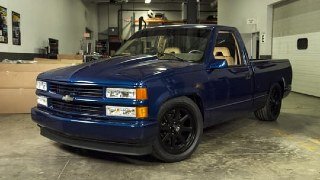
(Austin)>> And I picked the 2015 Ford F-150, and this is rocking the 3.5 liter Eco-Boost. So obviously we're gonna need to throw some muscle at it. Now so far we went ahead and lowered it three inches in the front, four in the rear, added a rear sway bar, gonna tighten up that body roll, and lastly put a True Trac that'll give us some good traction.
(LT)>> The Ram got more or less the same treatment. We lowered it three inches in the front and five inches in the rear. Now the difference is I completely rebuilt my front suspension to kind of tighten up the handling, and out back I re-geared the axle to a 4.30. Now since we are sticking to a budget why don't you tell them what we spent so far?
(Austin)>> For the F-150 the Detroit True Trac limited slip ate $539 dollars out of my budget. Lowering kit and high performance window tint gave me a grand total of $2,065 dollars spent with just under $13,000 dollars left in the bank.
(LT)>> On the Ram I spent $721 dollars on re-gearing and the fluids for the rear end, $788 bucks on the lowering kit and traction bars, and another $985 on suspension rebuild parts for a grand total of $2,494 bucks, which means I've got a healthy $12,506 left to spend.
(Austin)>> Today we're both under the hood with high performance enhancements that'll get our power numbers up. For starters bigger turbos mean more power, along with a larger intercooler, injectors, and blow off valve to relieve boost pressure when the throttle is closed. A fuel pump voltage booster will add more fuel delivery, and lastly a cold air kit and oil separator that will keep oil vapors out of the engine.
(LT)>> And since the Viper truck is already off to a great start with 8.3 liters and 10 cylinders I'll be increasing the power primarily with air flow upgrades, like a larger cam and updated lifters, a pair of long tube headers, and a full three inch exhaust from Magnaflow. Plus I'll round out the upgrades with some new hotter ignition coils and plug wires. Everything you see here we got from Summit Racing dot com. So I am very interested to see how well these two trucks are gonna stack up to one another when we're all done cause we're basically playing to the strengths that each truck already has. We've got a large naturally aspirated engine versus a smaller forced induction one.
(Austin)>> And thankfully this guy is not installing any turbos to give a fella a fighting chance you know.
(LT)>> I'm going easy on you this time.
(Austin)>> I'll get you two more jack stands buddy. [ MUSIC ]
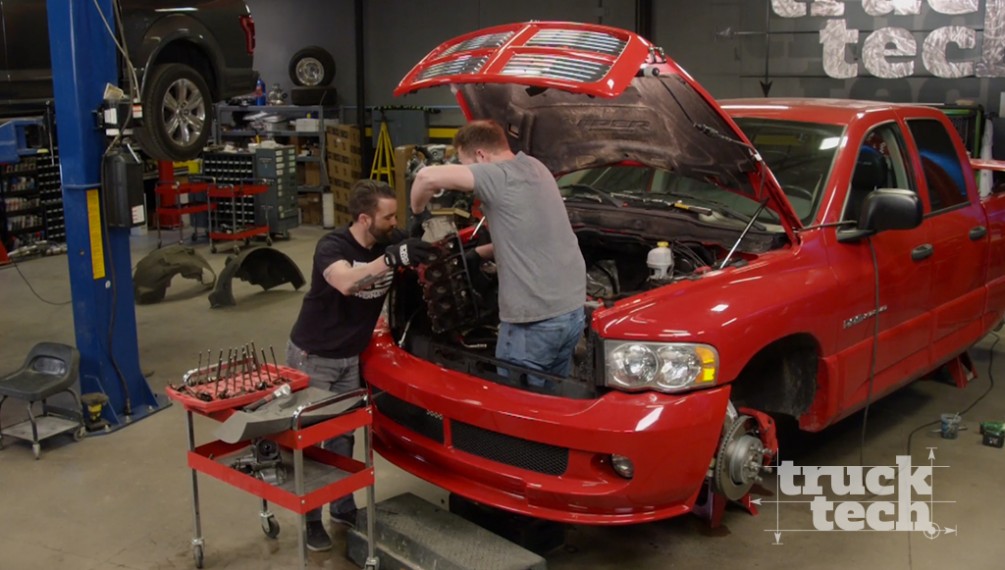
(LT)>> Before I get to the engine work I need to get the wheels off the truck because I have something planned for later, which will improve the looks and handling of the SRT since the tires that came on the truck are pretty well used up. So basically doing a cam swap and a lifter change I need to get the cylinder heads off, intake manifold, the exhaust manifolds, and to get the cam out because it's so long I need to get all this cooling stuff out of the way. So that's my first order of business. [ MUSIC ] It's time for the coolant to be drained out, and by using the drain valve instead of disconnecting the lower hose the floors are kept much cleaner. The one thing a lot of people don't think about when they're working on engines, especially large ones like 8.3 liters, is how much coolant actually has to flow through the engine to keep this thing at normal operating conditions. I mean if you're used to working on Honda Civics, or even like a small Chevy LS engine the upper radiator hose is pretty small, but this guy, that's got to be two inches or larger. That's massive! The upper core support bar is next. Then with a little help the cooling package can be removed from the truck giving plenty of access to the front of the engine. For some reason they decided to put a hydraulic cooling fan on the front of this. Tip you end up a little bit. So there's about 42 different connections you've got to undo. Alright there we go! [ MUSIC ]
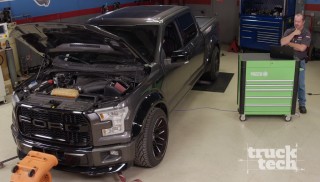
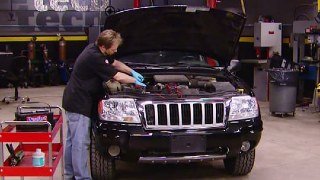
(Austin)>> With all the performance mods we're gonna throw at this little EcoBoost it just makes sense to totally disassembly everything, get it out of the way before we start throwing new parts at it. Now we'll have to get to that intake manifold cause we're gonna put some new fuel injectors. Probably throw some new spark plugs, and then lastly these turbos at the bottom might be a little difficult to get to. Probably put the truck up on the lift, remove these inner fender wells, and hopefully make the job a little easier. Now I'll be the first to admit. You give me some wiring harness plastic connectors I'm probably gonna break every one of them, but after being careful, slowly taking them apart, and all the hoses out of the way we can actually access this intake manifold. Grab a blow gun, blow all this debris and dust off. Something so simple eliminate problems such as if anything falls in there, you don't want that going in your turbos. It can jack them up pretty good. [ compressed air hissing ] [ MUSIC ]
(Austin)>> Success! You might be wondering why I'm draining some coolant lines but these turbos are actually oil and water cooled. So got to drain the system, flush it out.
(LT)>> Coming up surprises inside the V-10.
(LT)>> With the front cover off the engine we finally have access to the timing chain and the cam shaft, which is basically what we're trying to get at. Now on some engines you can actually just remove the rocker arms and spin the cam shaft around a couple of times, and the lifters will pop up in their retainers and they'll stay there so you can remove the cam shaft without tearing down the engine further. However we are actually gonna be swapping out our lifters for a slow bleed style, which will work better with our high lift cam shaft and the stiffer valve springs. Now to get to the lifters and replace them we've got to remove the cylinder head, which means the intake, the rest of the valvetrain, and the exhaust all has to come off.
(Austin)>> Well been making some good progress on the teardown, and we have the top side completely disassembled, ready to throw in some new parts, but we didn't get there yet. Obviously just to get to the fuel injectors I had to get to these fuel rails and get them out of the way, and it was not an easy task. That wiring harness goes and wraps all around it so tight I couldn't really even get a camera in there to show you. For the bottom all we've really got to do is remove this intercooler, pop some boots off, and then for the fun stuff, turbo time. Get them old rusty bolts off. Yanking the stock intercooler out cause it'll be replaced with one that's able to handle the increased air flow. There we go, baby intercooler. Tubes, tubes, and more tubes! [ MUSIC ]
(LT)>> So where's that little hamster wheel go? Somewhere on top there?
(Austin)>> Aren't you a character.
(LT)>> So how's it going? What you got going on?
(Austin)>> It's going man. Everything pretty much ripped off. About to yank some turbos from the side. Just gotta do the rest of this piping.
(LT)>> You know it blows that mind how little those turbos are, but that's where these get their response from. It's just instant spool up. So you've got your injectors out. What's the first thing you're putting in?
(Austin)>> Slap some injectors back in. Get this top end buttoned up so no debris or nothing gets in there.
(LT)>> You know it makes me sad though cause you're putting in all this effort and you could have had a V-8.
(Austin)>> Coulda, shoulda, woulda! It'd be too easy.
(LT)>> If you're working on an engine that you're unfamiliar with you want to make sure you pay attention to how the wiring harness is routed. On this V-10 the main harness runs underneath and through the intake manifold, and once it's unbolted and the fuel line is disconnected I'll tip the intake up and get the wires out of the way. [ MUSIC ]
(Austin)>> With all the boots disconnected from the turbo we can yank these hot and cold side pipes out of the way cause they'll get replaced too. That wasn't the easiest thing to get to.
(LT)>> Progress continues on the Viper truck teardown, and the exhaust manifold is next to go, followed by the spark plug wires and heat shields. Big mess of spaghetti right there. The valve cover pops off, and I can disconnect the rocker arm assemblies in pairs along with the push rods. A tray like this makes it easy to keep track of the parts and where they came from so you can put them back in the same exact place. Now it's just a matter of 12 more bolts, which hold the heads onto the block. Coolant left in there. Not too much.
(Austin)>> Let me give you a hand with that one.
(LT)>> Look at that, right in time.
(Austin)>> Looks like you've got everything pretty much tore down. Any surprises?
(LT)>> Well yeah everything came off pretty smoothly but the only thing I found, the push rods and the rockers are like severely worn. So I'm gonna have to get a new set on the way. Something I didn't account for in the budget but I've got plenty left. So I'm not worried about it.
(Austin)>> You ain't lying. They're pretty ground down hard huh?
(LT)>> You know from what I can tell it just looks like the pushrod wasn't spinning around cause normally they'll rotate a little bit on their own. So I don't know if it was lack of lubrication, or something was out of adjustment, or just plain wear and tear but either way I can't reuse them but it's a perfect opportunity for an upgrade.
(Austin)>> That's alright, I've got some surprise parts I've got to order too.
(LT)>> Well that's all part of building trucks. So for me lifters and cam out, and my teardown is done.
(Austin)>> Hop to it.
(LT)>> The stock lifters are next to go and the very last thing to come off is the timing set and the cam shaft itself. Now you notice that the end of this cam shaft is coming fairly close to this crash beam down here. Now we've got just enough room to get it all the way out but if you happen to be working on a truck that has a Cummins in it well you're gonna have to take this crash beam out of the way, or some people just cut it in half and re-weld it. But anything with a longer cam like a V-10 or an inline six cylinder just be very patient as you wiggle the cam out. It takes a minute but you'll get it.
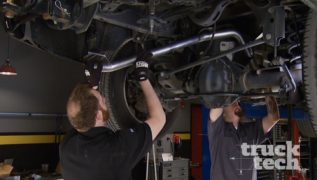
(Austin)>> We're back on the old Ford and the last thing we've got to do for disassembly is yank off this exhaust, and it turns out I just may have enough budget to even replace these down pipes. After that cross member's out looks like the rest of this is going to the scrap yard. [ metal clanging ]
(Austin)>> Later!
(LT)>> Next closer to hearing her fire up again.
(Austin)>> Now it just makes sense to start with installing these fuel injectors on the top end, get that intake back on, close up them intake tubes that way no dirt and debris gets up in it. Now Summit Racing sent us over these Dietchwerk 1,700cc fuel injectors. They're gonna flow about 30 percent over stock, which will support all the way up to 1,000 horse, and this thing won't be doing anywhere near that. So it'll be no problem at all, and this is the first step of our fuel upgrades with more to come. Now it's always a good idea to grease or lubricate any O-rings pretty much on anything. That goes for seals too, and on this we're using some synthetic grease but some good ole fashion motor oil will do the trick too.
(LT)>> I've got the engine all cleaned up in the SRT Ram, which means it's time to install the cam shaft that is gonna help me win the muscle trux shootout. Now from the factory these engines use a hydraulic roller design cam shaft, and we're gonna stick with that, but the cam that I'm going to be installing is made by Comp and the specs measure in at 218 degrees of duration on the intake and 224 degrees of duration on the exhaust, and is ground with a 114 degree lobe separation angle, which means it's gonna work well in an e-f-i application like ours. So the only thing we've got to do is apply a little bit of assembly lube to the journals and we're ready to install it into the block. The reason the cam shaft is such a popular upgrade is it lets more air into and out of the cylinders, and when you mix more fuel with that extra air you get more horsepower, and this is true whether your engine is naturally aspirated or uses forced induction. [ torque wrench clicking ]
(LT)>> The head gasket seals combustion pressure inside the engine and keeps it out of the coolant and crank case, and our cylinder head is held in place with some ARP studs, which get torqued in three equal steps to 120 foot pounds. [ torque wrench clicking ]
(LT)>> Next the headers slide up in from below.
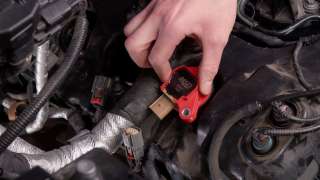
(Austin)>> We're obviously knee deep in the build on this little EcoBoost, and since it has a little bit higher miles, such as just over 130,000, it makes sense to do a quick little tune up. So MSD sent us over these new coil packs that are o-e-m replacement, drop right in, and provide that reliability and spark we'll be looking for. Ah I see you're literally half way done huh?
(LT)>> Well at the moment I've got a five cylinder engine, which probably has got enough horsepower to take on that little baby turbo EcoBoost you got.
(Austin)>> I would not disagree there, and I've got to say those long tube headers, that's what's gonna make this thing. That looks cool!
(LT)>> You know when you combine that with a different cam shaft it's absolutely gonna sound amazing. As far as the engine goes though I've still got to get the other cylinder head put together. Put the valve springs in it, put the other header on, but from there I'm waiting on some rocker arms but I can at least move on to the exhaust. How's the EcoBoost coming?
(Austin)>> Dude good! I got the top end kinda sorted out. I'm about to put it up, turbo time!
(LT)>> So are those like the same size or are they smaller than before?
(Austin)>> Physically same size, slightly bigger on the internals.
(LT)>> That's the sound of confidence right there folks. [ MUSIC ] [ engine revving ]
(LT)>> When your engine is operating near its red line the valves are gonna be opening and closing thousands of times a minute, and there's a lot of mass that's moving around, and the valve spring is the only thing that's responsible for pushing the valve, the rocker arm, the push rod, and the lifter back down onto the base circle of the cam shaft so it can all be opened back up again the next time the engine turns around. Now when you install a performance cam shaft like we've done here often times the stock valve springs won't be able to keep up with the increased lift and duration that the aftermarket cam shaft has. We're gonna be installing some Comp 918 Bee Hive springs that we picked up from Summit Racing, and they are a direct replacement from the stock valve spring. They'll work with the existing keepers and the retainers. [ MUSIC ]
(Austin)>> So it's out with the old and in with the new. Summit Racing sent us over a set of Ford Performance turbos, which are gonna spice things up. Now physically and dimensionally on the outside they're exactly the same, but it's the inside that counts. These upgraded turbos have a 39 millimeter inducer wheel compared to the old stock 37. Now I know it's a measly two millimeters but these little dudes will still support up to 300 horse a piece, and can't really go wrong if you ask me. Now I've already oiled up. Time to squeeze them on in. This turbo setup is quite unique in the fact that it uses oil cooling during operation and after engine shutdown it uses thermal passive syphoning, which pulls that coolant in and cools it down nice and slow. This direct fit factory replacement intercooler will increase cooling capacity since we're forcing all that air from these upgraded turbos.
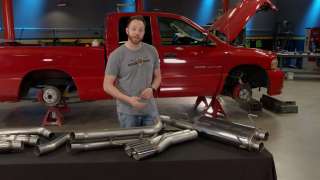
(LT)>> You may be a bit surprised to learn that the stock exhaust system on the SRT 10 Ram only measures in at 2.5 inches, which is a little on the small side especially considering this truck came with 500 horsepower and we're looking to raise that even further. Now our long tube header kit actually came with a pair of high flow cats and a mid-pipe that's three inches. So all we need is a cat back to complete the installation, and naturally we went to Magnaflow. This system is made from stainless steel. So we know it'll last a lifetime, and it's specific to the SRT 10 Rams as opposed to a regular Ram 1,500 because it has the dual exits on the passenger side where there's a nice cutout in the bumper. Now the muffler is polished. So it looks great and it's a straight through design. So it's gonna sound even better, and our installation starts up front with the cats. The system easily installs by sliding one pipe into another, and the connections are secured with a band clamp. Finally the chrome tip fits perfectly in the cutout in the bumper.
(Austin)>> That little bity V-10 sporting some three inch exhaust. Might as well put it on the EcoBoost. What better way to finish off these turbos than with some stainless three inch high flow cat down pipes and stainless exhaust all the way to the back. Finishing it up with some clean black tips.
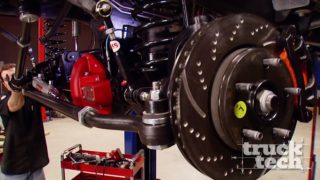
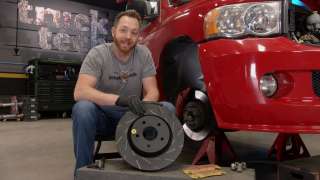
(LT)>> Now the brakes on the SRT 10 Ram are impressive even by today's standards. The rotors measure in at 15 inches and they have massive four piston calipers up front. Even so this truck does have some miles on it, and Austin's F-150 was able to stop in a shorter distance. So naturally I've got an upgrade. I went to EBC Brakes and picked up a Stage 9 kit, which comes with some u-s-r slotted rotors which will help the braking surface run a little bit cooler, and I picked their most aggressive pad, the yellow stuff. Now together this will give the truck a 30 percent improvement in stopping power, and it's a direct bolt in replacement. With this style of caliper the pads can come out first, and then the caliper unbolts from the spindle, which allows the old disc to be swapped with the u-s-r slotted rotor. And with the caliper back on the Yellow Stuff pads slide into their new home.
(Austin)>> Well here we are all assembled. JLT Performance helped us finish up this engine bay. We installed this catch can. It'll eliminate all the oil vapors coming from the crank case before it goes back in that intake tube. Then we wrapped it up nicely with this cold air intake. It fits seamlessly and it's gonna feed these turbos all the air they're gonna need to make that power. I'm about wrapped up man. Where are you at?
(LT)>> Pretty much in the same boat. I've got the cam in, the headers on, the exhaust is done, and I upgraded the brakes. So the truck's just about ready to fire up.
(Austin)>> Alright so how much money you spent so far?
(LT)>> Well I've got some notes here. So the last time I spent $2,494 dollars on the chassis. Today I spent $5,199 dollars on the engine, $1,158 on the brakes. So that means out of our original $15,000 budget I've got $6,149 dollars left. How about you?
(Austin)>> Okay so last time on suspension alone I spent $1,890 dollars. Today just on performance parts in total $7,315 dollars. That leaves me with right at $5,800 left. So we'll be going places.
(LT)>> Well you're definitely gonna need it to take on the SRT, but we can't finish the day without at least hearing one of these trucks. So let's fire this thing up.
(Austin)>> Crank this dude up. [ engine starting and revving ]
(Austin)>> Okay bro, I'11 give you this. This thing sounds pretty gnarly, I like it.
(LT)>> It is definitely unique. If you guys have any questions about any of the things you saw us build today check us out at Powernation TV dot com. [ engine revving ]
Show Full Transcript
(LT)>> Hotter cam!
(Austin)>> Just a few of many performance goodies.
(LT)>> In store for our muscle trucks. The build off kicks into high gear.
(Austin)>> Right now on Truck Tech. [ MUSIC ] [ engine revving ]
(LT)>> Yeah baby!
(Austin)>> Woo hoo! [ MUSIC ]
(LT)>> We've got a great looking pair of trucks in the shop today, which means it's time to make progress on our Muscle Trux Shootout, and the concept is simple. We were each given the same budget to go out and purchase whatever kind of truck we wanted, and then we were given the same budget to modify them in whichever way we chose.
(Austin)>> Now obviously we are comparing apples to oranges here but it doesn't really matter cause they're gonna be judged in a few different categories. That'll include style, appearance, performance, and obviously just which one you'd rather have in your garage, but it's all about how competitive we can actually make them and just have fun with it.
(LT)>> So naturally the truck that I chose is the 2005 Dodge Ram SRT 10 quad cab. This thing comes with an 8.3 liter V-10 under the hood. It puts down 505 horsepower and I mean just look at it. It's probably one of the best looking pickups ever to roll off the assembly line.
(Austin)>> And I picked the 2015 Ford F-150, and this is rocking the 3.5 liter Eco-Boost. So obviously we're gonna need to throw some muscle at it. Now so far we went ahead and lowered it three inches in the front, four in the rear, added a rear sway bar, gonna tighten up that body roll, and lastly put a True Trac that'll give us some good traction.
(LT)>> The Ram got more or less the same treatment. We lowered it three inches in the front and five inches in the rear. Now the difference is I completely rebuilt my front suspension to kind of tighten up the handling, and out back I re-geared the axle to a 4.30. Now since we are sticking to a budget why don't you tell them what we spent so far?
(Austin)>> For the F-150 the Detroit True Trac limited slip ate $539 dollars out of my budget. Lowering kit and high performance window tint gave me a grand total of $2,065 dollars spent with just under $13,000 dollars left in the bank.
(LT)>> On the Ram I spent $721 dollars on re-gearing and the fluids for the rear end, $788 bucks on the lowering kit and traction bars, and another $985 on suspension rebuild parts for a grand total of $2,494 bucks, which means I've got a healthy $12,506 left to spend.
(Austin)>> Today we're both under the hood with high performance enhancements that'll get our power numbers up. For starters bigger turbos mean more power, along with a larger intercooler, injectors, and blow off valve to relieve boost pressure when the throttle is closed. A fuel pump voltage booster will add more fuel delivery, and lastly a cold air kit and oil separator that will keep oil vapors out of the engine.
(LT)>> And since the Viper truck is already off to a great start with 8.3 liters and 10 cylinders I'll be increasing the power primarily with air flow upgrades, like a larger cam and updated lifters, a pair of long tube headers, and a full three inch exhaust from Magnaflow. Plus I'll round out the upgrades with some new hotter ignition coils and plug wires. Everything you see here we got from Summit Racing dot com. So I am very interested to see how well these two trucks are gonna stack up to one another when we're all done cause we're basically playing to the strengths that each truck already has. We've got a large naturally aspirated engine versus a smaller forced induction one.
(Austin)>> And thankfully this guy is not installing any turbos to give a fella a fighting chance you know.
(LT)>> I'm going easy on you this time.
(Austin)>> I'll get you two more jack stands buddy. [ MUSIC ]
(LT)>> Before I get to the engine work I need to get the wheels off the truck because I have something planned for later, which will improve the looks and handling of the SRT since the tires that came on the truck are pretty well used up. So basically doing a cam swap and a lifter change I need to get the cylinder heads off, intake manifold, the exhaust manifolds, and to get the cam out because it's so long I need to get all this cooling stuff out of the way. So that's my first order of business. [ MUSIC ] It's time for the coolant to be drained out, and by using the drain valve instead of disconnecting the lower hose the floors are kept much cleaner. The one thing a lot of people don't think about when they're working on engines, especially large ones like 8.3 liters, is how much coolant actually has to flow through the engine to keep this thing at normal operating conditions. I mean if you're used to working on Honda Civics, or even like a small Chevy LS engine the upper radiator hose is pretty small, but this guy, that's got to be two inches or larger. That's massive! The upper core support bar is next. Then with a little help the cooling package can be removed from the truck giving plenty of access to the front of the engine. For some reason they decided to put a hydraulic cooling fan on the front of this. Tip you end up a little bit. So there's about 42 different connections you've got to undo. Alright there we go! [ MUSIC ]
(Austin)>> With all the performance mods we're gonna throw at this little EcoBoost it just makes sense to totally disassembly everything, get it out of the way before we start throwing new parts at it. Now we'll have to get to that intake manifold cause we're gonna put some new fuel injectors. Probably throw some new spark plugs, and then lastly these turbos at the bottom might be a little difficult to get to. Probably put the truck up on the lift, remove these inner fender wells, and hopefully make the job a little easier. Now I'll be the first to admit. You give me some wiring harness plastic connectors I'm probably gonna break every one of them, but after being careful, slowly taking them apart, and all the hoses out of the way we can actually access this intake manifold. Grab a blow gun, blow all this debris and dust off. Something so simple eliminate problems such as if anything falls in there, you don't want that going in your turbos. It can jack them up pretty good. [ compressed air hissing ] [ MUSIC ]
(Austin)>> Success! You might be wondering why I'm draining some coolant lines but these turbos are actually oil and water cooled. So got to drain the system, flush it out.
(LT)>> Coming up surprises inside the V-10.
(LT)>> With the front cover off the engine we finally have access to the timing chain and the cam shaft, which is basically what we're trying to get at. Now on some engines you can actually just remove the rocker arms and spin the cam shaft around a couple of times, and the lifters will pop up in their retainers and they'll stay there so you can remove the cam shaft without tearing down the engine further. However we are actually gonna be swapping out our lifters for a slow bleed style, which will work better with our high lift cam shaft and the stiffer valve springs. Now to get to the lifters and replace them we've got to remove the cylinder head, which means the intake, the rest of the valvetrain, and the exhaust all has to come off.
(Austin)>> Well been making some good progress on the teardown, and we have the top side completely disassembled, ready to throw in some new parts, but we didn't get there yet. Obviously just to get to the fuel injectors I had to get to these fuel rails and get them out of the way, and it was not an easy task. That wiring harness goes and wraps all around it so tight I couldn't really even get a camera in there to show you. For the bottom all we've really got to do is remove this intercooler, pop some boots off, and then for the fun stuff, turbo time. Get them old rusty bolts off. Yanking the stock intercooler out cause it'll be replaced with one that's able to handle the increased air flow. There we go, baby intercooler. Tubes, tubes, and more tubes! [ MUSIC ]
(LT)>> So where's that little hamster wheel go? Somewhere on top there?
(Austin)>> Aren't you a character.
(LT)>> So how's it going? What you got going on?
(Austin)>> It's going man. Everything pretty much ripped off. About to yank some turbos from the side. Just gotta do the rest of this piping.
(LT)>> You know it blows that mind how little those turbos are, but that's where these get their response from. It's just instant spool up. So you've got your injectors out. What's the first thing you're putting in?
(Austin)>> Slap some injectors back in. Get this top end buttoned up so no debris or nothing gets in there.
(LT)>> You know it makes me sad though cause you're putting in all this effort and you could have had a V-8.
(Austin)>> Coulda, shoulda, woulda! It'd be too easy.
(LT)>> If you're working on an engine that you're unfamiliar with you want to make sure you pay attention to how the wiring harness is routed. On this V-10 the main harness runs underneath and through the intake manifold, and once it's unbolted and the fuel line is disconnected I'll tip the intake up and get the wires out of the way. [ MUSIC ]
(Austin)>> With all the boots disconnected from the turbo we can yank these hot and cold side pipes out of the way cause they'll get replaced too. That wasn't the easiest thing to get to.
(LT)>> Progress continues on the Viper truck teardown, and the exhaust manifold is next to go, followed by the spark plug wires and heat shields. Big mess of spaghetti right there. The valve cover pops off, and I can disconnect the rocker arm assemblies in pairs along with the push rods. A tray like this makes it easy to keep track of the parts and where they came from so you can put them back in the same exact place. Now it's just a matter of 12 more bolts, which hold the heads onto the block. Coolant left in there. Not too much.
(Austin)>> Let me give you a hand with that one.
(LT)>> Look at that, right in time.
(Austin)>> Looks like you've got everything pretty much tore down. Any surprises?
(LT)>> Well yeah everything came off pretty smoothly but the only thing I found, the push rods and the rockers are like severely worn. So I'm gonna have to get a new set on the way. Something I didn't account for in the budget but I've got plenty left. So I'm not worried about it.
(Austin)>> You ain't lying. They're pretty ground down hard huh?
(LT)>> You know from what I can tell it just looks like the pushrod wasn't spinning around cause normally they'll rotate a little bit on their own. So I don't know if it was lack of lubrication, or something was out of adjustment, or just plain wear and tear but either way I can't reuse them but it's a perfect opportunity for an upgrade.
(Austin)>> That's alright, I've got some surprise parts I've got to order too.
(LT)>> Well that's all part of building trucks. So for me lifters and cam out, and my teardown is done.
(Austin)>> Hop to it.
(LT)>> The stock lifters are next to go and the very last thing to come off is the timing set and the cam shaft itself. Now you notice that the end of this cam shaft is coming fairly close to this crash beam down here. Now we've got just enough room to get it all the way out but if you happen to be working on a truck that has a Cummins in it well you're gonna have to take this crash beam out of the way, or some people just cut it in half and re-weld it. But anything with a longer cam like a V-10 or an inline six cylinder just be very patient as you wiggle the cam out. It takes a minute but you'll get it.
(Austin)>> We're back on the old Ford and the last thing we've got to do for disassembly is yank off this exhaust, and it turns out I just may have enough budget to even replace these down pipes. After that cross member's out looks like the rest of this is going to the scrap yard. [ metal clanging ]
(Austin)>> Later!
(LT)>> Next closer to hearing her fire up again.
(Austin)>> Now it just makes sense to start with installing these fuel injectors on the top end, get that intake back on, close up them intake tubes that way no dirt and debris gets up in it. Now Summit Racing sent us over these Dietchwerk 1,700cc fuel injectors. They're gonna flow about 30 percent over stock, which will support all the way up to 1,000 horse, and this thing won't be doing anywhere near that. So it'll be no problem at all, and this is the first step of our fuel upgrades with more to come. Now it's always a good idea to grease or lubricate any O-rings pretty much on anything. That goes for seals too, and on this we're using some synthetic grease but some good ole fashion motor oil will do the trick too.
(LT)>> I've got the engine all cleaned up in the SRT Ram, which means it's time to install the cam shaft that is gonna help me win the muscle trux shootout. Now from the factory these engines use a hydraulic roller design cam shaft, and we're gonna stick with that, but the cam that I'm going to be installing is made by Comp and the specs measure in at 218 degrees of duration on the intake and 224 degrees of duration on the exhaust, and is ground with a 114 degree lobe separation angle, which means it's gonna work well in an e-f-i application like ours. So the only thing we've got to do is apply a little bit of assembly lube to the journals and we're ready to install it into the block. The reason the cam shaft is such a popular upgrade is it lets more air into and out of the cylinders, and when you mix more fuel with that extra air you get more horsepower, and this is true whether your engine is naturally aspirated or uses forced induction. [ torque wrench clicking ]
(LT)>> The head gasket seals combustion pressure inside the engine and keeps it out of the coolant and crank case, and our cylinder head is held in place with some ARP studs, which get torqued in three equal steps to 120 foot pounds. [ torque wrench clicking ]
(LT)>> Next the headers slide up in from below.
(Austin)>> We're obviously knee deep in the build on this little EcoBoost, and since it has a little bit higher miles, such as just over 130,000, it makes sense to do a quick little tune up. So MSD sent us over these new coil packs that are o-e-m replacement, drop right in, and provide that reliability and spark we'll be looking for. Ah I see you're literally half way done huh?
(LT)>> Well at the moment I've got a five cylinder engine, which probably has got enough horsepower to take on that little baby turbo EcoBoost you got.
(Austin)>> I would not disagree there, and I've got to say those long tube headers, that's what's gonna make this thing. That looks cool!
(LT)>> You know when you combine that with a different cam shaft it's absolutely gonna sound amazing. As far as the engine goes though I've still got to get the other cylinder head put together. Put the valve springs in it, put the other header on, but from there I'm waiting on some rocker arms but I can at least move on to the exhaust. How's the EcoBoost coming?
(Austin)>> Dude good! I got the top end kinda sorted out. I'm about to put it up, turbo time!
(LT)>> So are those like the same size or are they smaller than before?
(Austin)>> Physically same size, slightly bigger on the internals.
(LT)>> That's the sound of confidence right there folks. [ MUSIC ] [ engine revving ]
(LT)>> When your engine is operating near its red line the valves are gonna be opening and closing thousands of times a minute, and there's a lot of mass that's moving around, and the valve spring is the only thing that's responsible for pushing the valve, the rocker arm, the push rod, and the lifter back down onto the base circle of the cam shaft so it can all be opened back up again the next time the engine turns around. Now when you install a performance cam shaft like we've done here often times the stock valve springs won't be able to keep up with the increased lift and duration that the aftermarket cam shaft has. We're gonna be installing some Comp 918 Bee Hive springs that we picked up from Summit Racing, and they are a direct replacement from the stock valve spring. They'll work with the existing keepers and the retainers. [ MUSIC ]
(Austin)>> So it's out with the old and in with the new. Summit Racing sent us over a set of Ford Performance turbos, which are gonna spice things up. Now physically and dimensionally on the outside they're exactly the same, but it's the inside that counts. These upgraded turbos have a 39 millimeter inducer wheel compared to the old stock 37. Now I know it's a measly two millimeters but these little dudes will still support up to 300 horse a piece, and can't really go wrong if you ask me. Now I've already oiled up. Time to squeeze them on in. This turbo setup is quite unique in the fact that it uses oil cooling during operation and after engine shutdown it uses thermal passive syphoning, which pulls that coolant in and cools it down nice and slow. This direct fit factory replacement intercooler will increase cooling capacity since we're forcing all that air from these upgraded turbos.
(LT)>> You may be a bit surprised to learn that the stock exhaust system on the SRT 10 Ram only measures in at 2.5 inches, which is a little on the small side especially considering this truck came with 500 horsepower and we're looking to raise that even further. Now our long tube header kit actually came with a pair of high flow cats and a mid-pipe that's three inches. So all we need is a cat back to complete the installation, and naturally we went to Magnaflow. This system is made from stainless steel. So we know it'll last a lifetime, and it's specific to the SRT 10 Rams as opposed to a regular Ram 1,500 because it has the dual exits on the passenger side where there's a nice cutout in the bumper. Now the muffler is polished. So it looks great and it's a straight through design. So it's gonna sound even better, and our installation starts up front with the cats. The system easily installs by sliding one pipe into another, and the connections are secured with a band clamp. Finally the chrome tip fits perfectly in the cutout in the bumper.
(Austin)>> That little bity V-10 sporting some three inch exhaust. Might as well put it on the EcoBoost. What better way to finish off these turbos than with some stainless three inch high flow cat down pipes and stainless exhaust all the way to the back. Finishing it up with some clean black tips.
(LT)>> Now the brakes on the SRT 10 Ram are impressive even by today's standards. The rotors measure in at 15 inches and they have massive four piston calipers up front. Even so this truck does have some miles on it, and Austin's F-150 was able to stop in a shorter distance. So naturally I've got an upgrade. I went to EBC Brakes and picked up a Stage 9 kit, which comes with some u-s-r slotted rotors which will help the braking surface run a little bit cooler, and I picked their most aggressive pad, the yellow stuff. Now together this will give the truck a 30 percent improvement in stopping power, and it's a direct bolt in replacement. With this style of caliper the pads can come out first, and then the caliper unbolts from the spindle, which allows the old disc to be swapped with the u-s-r slotted rotor. And with the caliper back on the Yellow Stuff pads slide into their new home.
(Austin)>> Well here we are all assembled. JLT Performance helped us finish up this engine bay. We installed this catch can. It'll eliminate all the oil vapors coming from the crank case before it goes back in that intake tube. Then we wrapped it up nicely with this cold air intake. It fits seamlessly and it's gonna feed these turbos all the air they're gonna need to make that power. I'm about wrapped up man. Where are you at?
(LT)>> Pretty much in the same boat. I've got the cam in, the headers on, the exhaust is done, and I upgraded the brakes. So the truck's just about ready to fire up.
(Austin)>> Alright so how much money you spent so far?
(LT)>> Well I've got some notes here. So the last time I spent $2,494 dollars on the chassis. Today I spent $5,199 dollars on the engine, $1,158 on the brakes. So that means out of our original $15,000 budget I've got $6,149 dollars left. How about you?
(Austin)>> Okay so last time on suspension alone I spent $1,890 dollars. Today just on performance parts in total $7,315 dollars. That leaves me with right at $5,800 left. So we'll be going places.
(LT)>> Well you're definitely gonna need it to take on the SRT, but we can't finish the day without at least hearing one of these trucks. So let's fire this thing up.
(Austin)>> Crank this dude up. [ engine starting and revving ]
(Austin)>> Okay bro, I'11 give you this. This thing sounds pretty gnarly, I like it.
(LT)>> It is definitely unique. If you guys have any questions about any of the things you saw us build today check us out at Powernation TV dot com. [ engine revving ]
