Truck Tech Builds
Want more content like this?
Join the PowerNation Email NewsletterParts Used In This Episode
Edelbrock
Performer RPM
Matco Tools
MATCO Tools are the Official Tool Supplier to PowerNation
Shacklett Automotive Machine
Machine Shop
The Industrial Depot
Tools, Hardware, Shop Supplies
Episode Transcript
(LT)>> Big power begins
with race ready parts.
(Austin)>> And today our diesel Denali gets machined, then built.
(LT)>> Plus simple customizing tips to make your truck stand out from the crowd.
(Austin)>> Voila! [ MUSIC ] [ engine revving ]
(LT)>> Yeah baby!
(Austin)>> Woo hoo! [ MUSIC ]
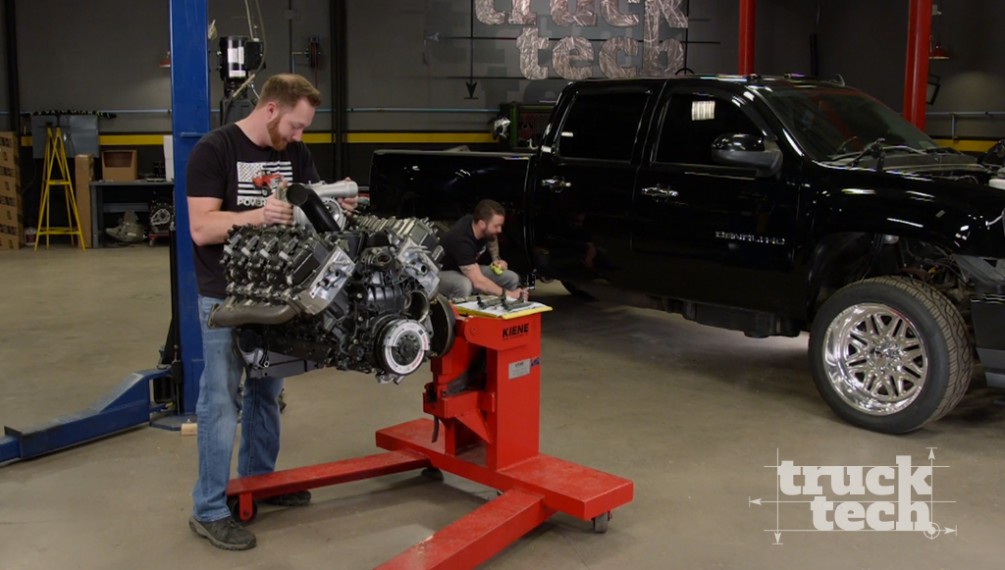
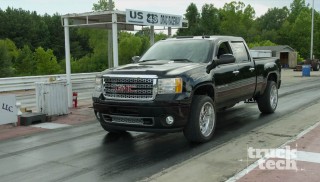
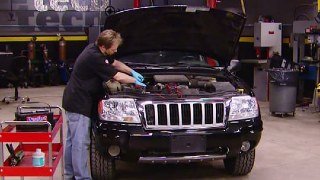
(LT)>> You guys probably remember Dragonali. It's our 2011 GMC Sierra Denali HD, and based on the amount of parts we have in the bed you probably guessed that we've torn it down. A couple of weeks ago it was driving under its own power with this under the hood, a 6.6 liter LML Duramax V-8. Now we do have some pretty high power goals for this truck, and the stock parts that we're inside just won't hold up. So we had to take it apart.
(Austin)>> Best part about this is though we'll still get to use the stock block to rebuild it. We stripped it down, went through it. All the seals and the walls are in great condition. There's nothing even remotely wrong with this block besides it being a little grungy and a little dirty. Get it cleaned up and we'll be in business.
(LT)>> It all comes down to this right here, the stock piston and connecting rod. Now this does look fairly sturdy, especially when you compare it side by side to one that came out of a small block Chevy. However a diesel engine, especially when you hop it up with bigger injectors, bigger injection pump, and massive turbos, can put so much heat and cylinder pressure inside the stock pistons would crack or even melt, and the connecting rods, well they'd look like a banana. So we had to take it all apart and start over.
(Austin)>> Then you look at this crank and you think well, that's not a problem at all, and it wouldn't be if we were only going, I hope it don't fall on my foot, to about 600 or 700 horse, but we plan on going way north of that and this would honestly shatter into a million pieces and we'd be starting all over with a brand new block.
(LT)>> So we picked up an entirely new rotating assembly but we can't just drop it into this block first. There are a few machining processes that we have to do first. So let's load up our parts and hit the road.
(Austin)>> Off to the machine shop buddy.
(LT)>> I don't think even if I had a cylinder hone. You know free reign of the shop. Someone said alright, go ahead, do the machine work on your engine I honestly wouldn't know where to start.
(Austin)>> Nah, I bet if I throw you a book you'd have it figured out by the end of the day.
(LT)>> Our buddies at Shacklett Auto Machine are just up the road in Nashville. They have the proper equipment and skills to prepare our LML short block for final assembly. Let's get this thing out of the rain.
(John)>> Here at Shacklett Automotive Machine we're a full service machine shop. We specialize in any automotive internal engine machining. Crank shaft balancing, block work, head work, crank grinding, crank balancing. We do a little bit of import, domestic, diesel, light duty diesel. We can pretty much do any of your machining needs.
(LT)>> So we brought you a factory block and we brought you a whole bunch of new parts for the rotating assembly. What are some of the steps that you're gonna have to do so we can assemble all of our parts together?
(John)>> So we're gonna start with the housing bore. We put the ARP fasteners in, and we're gonna align hone to achieve the proper size and diameter. The cylinders, we'll hone those to accommodate the new pistons you guys supplied, and on the rotating assembly we'll balance it completely with all the new components.
(LT)>> What would happen if we tried to put this thing together without going through the proper machine steps?
(John)>> So if you started to put this engine together without having the housing bore checked it's a very good possibility the housing bore would be the improper size, causing bearing failure or the crank not to spin at all. You guys are gonna have an engine that's gonna be completely machined, new cam bearings, the cylinders finished, the rotating assembly will be balanced. Everything will be check. It'll be ready for you guys to assemble. Everything should go together smoothly for you.
(LT)>> What do you think of taking a big, giant heavy truck with a diesel engine that's designed for working and trying to make that fast? You think we're crazy or what?
(John)>> No I think it's a cool concept. We've done some of this in the past with other customers, and the finished result is very interesting.
(Austin)>> So it's gonna be a hot minute before we get that engine back from the machine shop, and that just means we've got time to add a little more pizazz to this ole girl. Now I already smoked out them rear taillights and probably gonna add some l-e-d's or smoked ones to the front. Since I'm up here, well you guessed it. We're slapping on some cab lights. Now I know it's a love it or hate it thing. This is single rear and you're probably saying hey, they only belong on a dually. You might be right but there's really no rules. So before we really get cranking on the top we've got to get down there, undo a few bolts, and drop that headliner cause we'll be passing a drill bit clean through this sheet metal and don't want to see it from the inside. Pull it down enough. Shove a little guy in there to hold it. Works for me.
(LT)>> With the engine back time to get to work!
(LT)>> We've got our Duramax block back from the machine shop. It's freshly honed, align honed, and they threw in some new cam bearings and stuck it in the jet washer, but the rest of the cleanup, well that's on us, and the deck surface is one of the most important things that you want to make sure is clean and flat. Now a lot of guys are tempted to go out and grab an angle grinder with a scotchbrite pad on the back of it. Now this will make the deck surface nice and shiny, and it removes a lot more material than people give it credit for. So you do not want to use this on a deck surface. You can use it on the back of the block to get some rust off, the bell housing flange, or anything like that, but for a deck I like to use a flat piece of aluminum and some 180 grit sticky back sandpaper. Spray the deck surface with WD-40 and just kinda go to town flat to make sure that this deck surface gets nice and clean. That way the head gasket will seal and there's no chance your combustion pressure is gonna escape. From there I grabbed a wire wheel and I cleaned up some of the rust, loose dirt, and paint off the side of the block, and I wiped everything down with lacquer thinner to make sure there's no residual oil left. Now a fresh coat of paint is really not going to make your engine perform any better but it does make it look better, and that's where we're gonna start. I'm using regular ole masking tape to keep the deck surfaces nice and clean since I spent so much time preparing them earlier, and once the tape is laid down a sharp razor blade makes for a nice clean edge. Once everything is protected I'm throwing down some high temp engine paint, and the color I chose is black pearl. [ MUSIC ] I took some time earlier to clean and paint all the cast aluminum accessories that are gonna seal up the outside of our LML Duramax, but before I bolt any of this on I've got to bolt all of this in. Now the rotating assembly that you choose for your engine is kind of important because these are the parts that support the amount of horsepower that you'd like to make. Now we have a goal of somewhere around 1,000 horsepower. I don't know if we're gonna make it but on paper we've got the fuel and we've got the air to get us there. So we're gonna do our best, but none of the stock parts from the rotating assembly are going to withstand that much power. So we went to Summit Racing and we picked up a completely new bottom end, and it all starts with this guy right here. This is a Callies 43-40 forged steel crank shaft. Now this thing is much much stronger than the stock crank. As far as pistons are concerned you might be expecting us to go with a forged piston, but they're really not gonna give us much longevity on the street. So instead we've got a Mahle cast piston. This is actually a steel ring land that's cast inside an aluminum piston. These will hold up to 1,000 horsepower and they're much more durable for long term street use. As far as connecting rods are concerned well these will do way more than we're gonna ask of them. These are Oliver forged I-beam connecting rods, and the very last thing we got is a new set of bearings, and before we bolt any of these parts in I've got to check the main bearing clearance over at the block. [ drill buzzing ] [ MUSIC ] [ hammer tapping ] [ MUSIC ]
(LT)>> So checking bearing clearance is a very important step but it requires some tools that measure very precisely down to the ten thousandths of an inch, and I don't have those tools. So we're gonna borrow Pat's.
(Pat)>> Alright so you're all torqued up, ready to go?
(LT)>> Yeah she's all set. Here's the crank, and I don't know what to do from here.
(Pat)>> Well first thing we do, we have to measure the crank to make sure we set our gauge right so we can measure that hole properly. So what we're gonna do is get our mic out, and we're gonna mic a journal. So we're gonna go on here, very carefully measure, and I'll just take it around and put it on each journal, and if it feels the same they're the same size. Now we're mic'ing it for size. We're not mic'ing it for roundness or anything like that because it's a new crank. They're very accurate. This is a very accurate crank shaft. I can already tell by the first three that I've done.
(LT)>> So basically what you're doing is you're measuring the exact size of the crank shaft. Then you're gonna calibrate your other tool, which is called a what?
(Pat)>> It's a dial bore gauge.
(LT)>> So you're gonna calibrate the dial bore gauge to that exact size, and what are we shooting for in terms of like clearance because. You've got a rule of thumb right? What's your rule of thumb?
(Pat)>> Rule of thumb on race engines is one thousandths of clearance per inch of shaft diameter. Now we have over a three inch main journal. So that means we need a minimum of three thousandths of vertical oil clearance for the thing to live at a big power. I'm wanting to believe that this is gonna be a big power level?
(LT)>> You never know what will happen. We've got some lofty ambitions. That's all I'm gonna say.
(Pat)>> Okay so I have a measurement now on the micrometer and this is 3.1464. So what we're gonna do. We're gonna set this dial bore gauge to exactly what this is, and then what that will be is a direct reference from the journal size when we put this in and measure inside the actual housing with the bearing torqued in it will be a direct measurement.
(LT)>> So I know I've seen this part before.
(Pat)>> Right, I mean this is pretty common. It doesn't matter if it's diesel, gas, and everything being correct these will all be equal. Yeah it's really nice right there. [ MUSIC ] Second one, 3.334. The align hone on this is extremely accurate. [ MUSIC ] 3.5, 3.4, 3.5. Alright you're good to go. The crank is accurate. The align hone, the bearings, everything is great. Come get me when you need to do the rods because it needs to be done.
(LT)>> I thought he was at least gonna put it together for me. That's actually my job and I'll take you through it next.
[ MUSIC ] [ drill buzzing ]
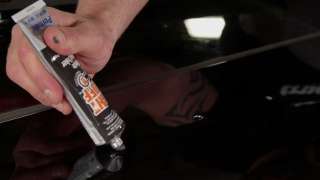
(Austin)>> Now for you weary fellas out there you might be a little concerned about drilling holes in the roof but not to worry. How do you think the factory puts cab lights up there? It's just metal. If it's drilled and sealed properly you'll never have a leak, and with these cab lights from Summit Racing they already come with a weather strip backing on them and that'll ensure a proper seal, but just to add a little extra precaution we're gonna clean it real good, add some of the Right Stuff Permatex gasket maker, and well we'll never have a problem. [ MUSIC ]
(LT)>> Just about every piston kit that you buy will come with a set of rings that require some fine tuning on the gap. Now depending on your application, whether it's naturally aspirated, or forced induction, or even if the engine runs on gas or diesel, well that gap will be different. So they leave you enough room to work with them all. For this application we're looking for about .0024 of an inch and right now it's much too tight. So we've got some work to do to correct that. There are many tools that you could use to fine tune the ring gap, like a wet stone, a diamond sharpening card, or even sand paper, and they'll all do the job just the same, but it is more efficient to use a dedicated grinder. Ours has a fixture the ring clamps into, and it uses a dial indicator, which allows you to quickly and accurately dial in the gap. If you're doing this for the first time just remember to take it slow, and don't try to nail it the first time around. You'll have to put the ring in the bore once or twice to check progress, and just sneak up on the finished size. Also remember the top and second ring have different specs. So adjust your methods accordingly. So one thing to keep in when you're assembling your pistons, connecting rods, and your rings all together is positioning is important because there's a very specific way each of these parts has to go together. First thing you want to pay attention to on the bottom of the piston is there's a hole for the oil squirter. Now this thing bolts to the block and it kinda lines up right in that little groove. So orientation with the piston is important and they help you out with a little mark that's imprinted on the top of each piston. This goes toward the center of the valley. Now the same thing holds true on the connecting rod. On one side there's a heavy chamfer that's ground into the bearing surface. On the other side it's flat. Now the reason for this is because when you have a pair of connecting rods that are mated together on the same journal the chamfers go out to mate with the radius of the crank shaft, and finally the rings. Now you can spin these things 360 degrees around on the top of the piston but there's a very specific orientation that the gaps have to be staggered at. Now there's a chart that's included that'll show you where to put it if you're not sure. So the first thing we've got to do is load this piston up with some ring. The first thing to go on the piston is the oil spring, followed by the oil scraper. Then the second ring, followed by the top. Next I'll install the first snap ring and clean the small end of the connecting rod. With the chamfer on the correct side I'll lubricate and install the wrist pin. It gets held into place with the other snap ring, and now all you've got to do is repeat the process seven more times. Over at the block the main bearings get a coat of assembly lube to help keep things protected on initial fire up.
(Austin)>> Coming through Kemosabe.
(LT)>> And the crank is carefully lowered into place with some assistance. Alright touch down. Alright perfect fit, I love it.
(Austin)>> Alright there hoopty. You don't need me anymore. You've just got to throw some caps on, torque them down, and move on.
(LT)>> Yeah a few more step to go and this will be running before you know it.
(Austin)>> Sweet, I've almost got the cab lights wired up. So we'll be in business.
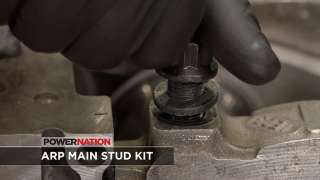
(LT)>> Alright where's my torque wrench? The other half of the bearing is lubed. The main caps are tapped into place, and the studs are threaded into the block. The strength of the fastener that you choose and the level that it is torqued to play a huge role in the strength of your bottom end cause basically when this thing is running you don't want any of these parts moving around at all. That's why we're using ARP fasteners. Now the final torque value is gonna 175 pound feet on the main studs and 90 pound feet on the side bolts, and we're gonna get there in three equal steps. With the main and side bolts tight the last thing to check on the crank shaft is end play, and ours measures in at five thousand. Back at the table the rod bearing gets assembly lube and the piston rings get hit with some engine break in oil, and then I'll slid over a tapered ring compressor. The rod is slid down into the cylinder until the ring compressor sits flat on the deck, and a few gentle taps from the hammer will push the piston into the bore until the rod bearing makes contact with the crank. The cap goes on and the bolts are threaded in, and the process is repeated until all eight are installed.
(Austin)>> Badges, we don't need no stinking badges.
(LT)>> One step I always take after installing each piston and rod assembly is to crank the motor over a couple of times just to make sure there's nothing bound up. You can fix any problems you have right away. Now this thing spins over perfectly and the rotating assembly is pretty much done. Now I still do need to torque the caps for the rods but I'm gonna wait until I get the cam shaft and lifters and just so I don't have to flip the motor over 100 times. It'll just save me a few steps. Now as far as a cam shaft upgrade is concerned a lot of people don't think of it as a first modification when you're building a diesel engine, but when you're chasing really high power levels it's just as important as it is upgrading a cam in a gasoline engine. Now we picked up this Hamilton cam from Summit Racing, and it measures in at 192 degrees of duration at .0050 lift on the intake side and 200 degrees on the exhaust. Now this will do a couple of different things for us. Number one, it'll reduce the spool up time of the turbocharger. Number two, of course it's gonna add horsepower, and number three, it's gonna reduce the exhaust gas temperature in the engine because it gets more air into and out of the cylinders. Once the cam gear's in place and the bolt is torqued to spec the lifters also get a coat of assembly lube and slide down into the bores. They're held into place by a retaining plate and a hold down clamp, which finishes up the bottom end of our LML Duramax. [ MUSIC ]
(Austin)>> Now obviously it's not wired up permanently. Once we got all the wire harnesses in the truck put back together I'll tap into the parking lights. That way when you're running lights or park lights they'll come on with everything else, but in the meantime I just wanted to show you what it looked like, and now I still have another thing or two to do that'll clean up the outside of this truck and make it look sharp.
(LT)>> In order to safely make the most amount of power you can from a diesel engine extra air flow is the name of the game. Now normally you'll take care of that with things like larger turbochargers, freer flowing exhaust manifolds, a bigger intercooler, and stuff like that, but you can't forget about the cylinder heads either. Now we're gonna be installing a set of Edelbrock Performer RPM heads onto our LML. Now these things flow a lot more air than our stock heads and they come ready to assemble right out of the box. So the first thing that we're gonna do is transfer all the old parts from our original head onto the new ones. [ MUSIC ] Just as important as the strength of the stud is the method of torqueing, and it's critical to apply a lubricant like ARP Ultra Torque on the threads of the stud so the most accurate clamp load is applied to the fastener as the nut is turned. With the head gasket in place on the right side of the engine I'll install two studs to help guide our Edelbrock cylinder heads carefully onto the block. Then the remaining studs are dropped into place and threaded down, and the washers and nuts also get a coat of Ultra Torque. The final torque specs for the 625 head studs is 150 pound feet but I'll get there in three equal steps.
(Austin)>> Now I know a lot of you would want to black this truck completely out and I can't say I blame you, but we already got some polished 22's and after all it's a Denali. So this Denali HD lettering, that's staying. These chrome door handles, that's gonna stay. This big ole chunky rub rail, we're ripping that off. We'll clean the side of this truck way up. There's also a Z-71 sticker in the back. De-badge it, clean that off as well. If you ask me it's gonna be pretty slick looking. [ MUSIC ] Hey bro it looks like you've got that looking like a complete engine huh?
(LT)>> Yeah the long block's pretty much done. Got the whole valvetrain in, valve lash is set, push rods are in. Basically ready to run.
(Austin)>> Slap a few injectors in and call it a day.
(LT)>> Yeah you know we picked these up from Summit Racing and they're made by Dynamite Diesel Products, and they'll flow enough fuel to support 1,000 horsepower. It's kind of that magic number we're shooting for.
(Austin)>> Hope so man.
(LT)>> But the other cool thing is these have been balanced to within two percent of each other. So we'll have a nice smooth running engine. Each cylinder will be contributing exactly the same amount of power even though we're making a ton of it.
(Austin)>> That big ole 67 looks beautiful sitting in the valley too.
(LT)>> Yeah and then we'll get that 485 off to the side. I just can't wait to feel this thing spooling up, but the truck it looks great. Way shinier than it was before.
(Austin)>> Yeah I didn't realize how bad the paint was until I started polishing out where the rub rails were, and I just got carried away. I couldn't help it.
(LT)>> Alright well we've still got some work ahead of us, and if you guys have any questions about anything you've seen on the show today, or you want Austin to polish your truck be sure and check us out at Powernation TV dot com.
(Austin)>> Thanks for watching, catch us next week! [ MUSIC ]
Show Full Transcript
(Austin)>> And today our diesel Denali gets machined, then built.
(LT)>> Plus simple customizing tips to make your truck stand out from the crowd.
(Austin)>> Voila! [ MUSIC ] [ engine revving ]
(LT)>> Yeah baby!
(Austin)>> Woo hoo! [ MUSIC ]
(LT)>> You guys probably remember Dragonali. It's our 2011 GMC Sierra Denali HD, and based on the amount of parts we have in the bed you probably guessed that we've torn it down. A couple of weeks ago it was driving under its own power with this under the hood, a 6.6 liter LML Duramax V-8. Now we do have some pretty high power goals for this truck, and the stock parts that we're inside just won't hold up. So we had to take it apart.
(Austin)>> Best part about this is though we'll still get to use the stock block to rebuild it. We stripped it down, went through it. All the seals and the walls are in great condition. There's nothing even remotely wrong with this block besides it being a little grungy and a little dirty. Get it cleaned up and we'll be in business.
(LT)>> It all comes down to this right here, the stock piston and connecting rod. Now this does look fairly sturdy, especially when you compare it side by side to one that came out of a small block Chevy. However a diesel engine, especially when you hop it up with bigger injectors, bigger injection pump, and massive turbos, can put so much heat and cylinder pressure inside the stock pistons would crack or even melt, and the connecting rods, well they'd look like a banana. So we had to take it all apart and start over.
(Austin)>> Then you look at this crank and you think well, that's not a problem at all, and it wouldn't be if we were only going, I hope it don't fall on my foot, to about 600 or 700 horse, but we plan on going way north of that and this would honestly shatter into a million pieces and we'd be starting all over with a brand new block.
(LT)>> So we picked up an entirely new rotating assembly but we can't just drop it into this block first. There are a few machining processes that we have to do first. So let's load up our parts and hit the road.
(Austin)>> Off to the machine shop buddy.
(LT)>> I don't think even if I had a cylinder hone. You know free reign of the shop. Someone said alright, go ahead, do the machine work on your engine I honestly wouldn't know where to start.
(Austin)>> Nah, I bet if I throw you a book you'd have it figured out by the end of the day.
(LT)>> Our buddies at Shacklett Auto Machine are just up the road in Nashville. They have the proper equipment and skills to prepare our LML short block for final assembly. Let's get this thing out of the rain.
(John)>> Here at Shacklett Automotive Machine we're a full service machine shop. We specialize in any automotive internal engine machining. Crank shaft balancing, block work, head work, crank grinding, crank balancing. We do a little bit of import, domestic, diesel, light duty diesel. We can pretty much do any of your machining needs.
(LT)>> So we brought you a factory block and we brought you a whole bunch of new parts for the rotating assembly. What are some of the steps that you're gonna have to do so we can assemble all of our parts together?
(John)>> So we're gonna start with the housing bore. We put the ARP fasteners in, and we're gonna align hone to achieve the proper size and diameter. The cylinders, we'll hone those to accommodate the new pistons you guys supplied, and on the rotating assembly we'll balance it completely with all the new components.
(LT)>> What would happen if we tried to put this thing together without going through the proper machine steps?
(John)>> So if you started to put this engine together without having the housing bore checked it's a very good possibility the housing bore would be the improper size, causing bearing failure or the crank not to spin at all. You guys are gonna have an engine that's gonna be completely machined, new cam bearings, the cylinders finished, the rotating assembly will be balanced. Everything will be check. It'll be ready for you guys to assemble. Everything should go together smoothly for you.
(LT)>> What do you think of taking a big, giant heavy truck with a diesel engine that's designed for working and trying to make that fast? You think we're crazy or what?
(John)>> No I think it's a cool concept. We've done some of this in the past with other customers, and the finished result is very interesting.
(Austin)>> So it's gonna be a hot minute before we get that engine back from the machine shop, and that just means we've got time to add a little more pizazz to this ole girl. Now I already smoked out them rear taillights and probably gonna add some l-e-d's or smoked ones to the front. Since I'm up here, well you guessed it. We're slapping on some cab lights. Now I know it's a love it or hate it thing. This is single rear and you're probably saying hey, they only belong on a dually. You might be right but there's really no rules. So before we really get cranking on the top we've got to get down there, undo a few bolts, and drop that headliner cause we'll be passing a drill bit clean through this sheet metal and don't want to see it from the inside. Pull it down enough. Shove a little guy in there to hold it. Works for me.
(LT)>> With the engine back time to get to work!
(LT)>> We've got our Duramax block back from the machine shop. It's freshly honed, align honed, and they threw in some new cam bearings and stuck it in the jet washer, but the rest of the cleanup, well that's on us, and the deck surface is one of the most important things that you want to make sure is clean and flat. Now a lot of guys are tempted to go out and grab an angle grinder with a scotchbrite pad on the back of it. Now this will make the deck surface nice and shiny, and it removes a lot more material than people give it credit for. So you do not want to use this on a deck surface. You can use it on the back of the block to get some rust off, the bell housing flange, or anything like that, but for a deck I like to use a flat piece of aluminum and some 180 grit sticky back sandpaper. Spray the deck surface with WD-40 and just kinda go to town flat to make sure that this deck surface gets nice and clean. That way the head gasket will seal and there's no chance your combustion pressure is gonna escape. From there I grabbed a wire wheel and I cleaned up some of the rust, loose dirt, and paint off the side of the block, and I wiped everything down with lacquer thinner to make sure there's no residual oil left. Now a fresh coat of paint is really not going to make your engine perform any better but it does make it look better, and that's where we're gonna start. I'm using regular ole masking tape to keep the deck surfaces nice and clean since I spent so much time preparing them earlier, and once the tape is laid down a sharp razor blade makes for a nice clean edge. Once everything is protected I'm throwing down some high temp engine paint, and the color I chose is black pearl. [ MUSIC ] I took some time earlier to clean and paint all the cast aluminum accessories that are gonna seal up the outside of our LML Duramax, but before I bolt any of this on I've got to bolt all of this in. Now the rotating assembly that you choose for your engine is kind of important because these are the parts that support the amount of horsepower that you'd like to make. Now we have a goal of somewhere around 1,000 horsepower. I don't know if we're gonna make it but on paper we've got the fuel and we've got the air to get us there. So we're gonna do our best, but none of the stock parts from the rotating assembly are going to withstand that much power. So we went to Summit Racing and we picked up a completely new bottom end, and it all starts with this guy right here. This is a Callies 43-40 forged steel crank shaft. Now this thing is much much stronger than the stock crank. As far as pistons are concerned you might be expecting us to go with a forged piston, but they're really not gonna give us much longevity on the street. So instead we've got a Mahle cast piston. This is actually a steel ring land that's cast inside an aluminum piston. These will hold up to 1,000 horsepower and they're much more durable for long term street use. As far as connecting rods are concerned well these will do way more than we're gonna ask of them. These are Oliver forged I-beam connecting rods, and the very last thing we got is a new set of bearings, and before we bolt any of these parts in I've got to check the main bearing clearance over at the block. [ drill buzzing ] [ MUSIC ] [ hammer tapping ] [ MUSIC ]
(LT)>> So checking bearing clearance is a very important step but it requires some tools that measure very precisely down to the ten thousandths of an inch, and I don't have those tools. So we're gonna borrow Pat's.
(Pat)>> Alright so you're all torqued up, ready to go?
(LT)>> Yeah she's all set. Here's the crank, and I don't know what to do from here.
(Pat)>> Well first thing we do, we have to measure the crank to make sure we set our gauge right so we can measure that hole properly. So what we're gonna do is get our mic out, and we're gonna mic a journal. So we're gonna go on here, very carefully measure, and I'll just take it around and put it on each journal, and if it feels the same they're the same size. Now we're mic'ing it for size. We're not mic'ing it for roundness or anything like that because it's a new crank. They're very accurate. This is a very accurate crank shaft. I can already tell by the first three that I've done.
(LT)>> So basically what you're doing is you're measuring the exact size of the crank shaft. Then you're gonna calibrate your other tool, which is called a what?
(Pat)>> It's a dial bore gauge.
(LT)>> So you're gonna calibrate the dial bore gauge to that exact size, and what are we shooting for in terms of like clearance because. You've got a rule of thumb right? What's your rule of thumb?
(Pat)>> Rule of thumb on race engines is one thousandths of clearance per inch of shaft diameter. Now we have over a three inch main journal. So that means we need a minimum of three thousandths of vertical oil clearance for the thing to live at a big power. I'm wanting to believe that this is gonna be a big power level?
(LT)>> You never know what will happen. We've got some lofty ambitions. That's all I'm gonna say.
(Pat)>> Okay so I have a measurement now on the micrometer and this is 3.1464. So what we're gonna do. We're gonna set this dial bore gauge to exactly what this is, and then what that will be is a direct reference from the journal size when we put this in and measure inside the actual housing with the bearing torqued in it will be a direct measurement.
(LT)>> So I know I've seen this part before.
(Pat)>> Right, I mean this is pretty common. It doesn't matter if it's diesel, gas, and everything being correct these will all be equal. Yeah it's really nice right there. [ MUSIC ] Second one, 3.334. The align hone on this is extremely accurate. [ MUSIC ] 3.5, 3.4, 3.5. Alright you're good to go. The crank is accurate. The align hone, the bearings, everything is great. Come get me when you need to do the rods because it needs to be done.
(LT)>> I thought he was at least gonna put it together for me. That's actually my job and I'll take you through it next.
[ MUSIC ] [ drill buzzing ]
(Austin)>> Now for you weary fellas out there you might be a little concerned about drilling holes in the roof but not to worry. How do you think the factory puts cab lights up there? It's just metal. If it's drilled and sealed properly you'll never have a leak, and with these cab lights from Summit Racing they already come with a weather strip backing on them and that'll ensure a proper seal, but just to add a little extra precaution we're gonna clean it real good, add some of the Right Stuff Permatex gasket maker, and well we'll never have a problem. [ MUSIC ]
(LT)>> Just about every piston kit that you buy will come with a set of rings that require some fine tuning on the gap. Now depending on your application, whether it's naturally aspirated, or forced induction, or even if the engine runs on gas or diesel, well that gap will be different. So they leave you enough room to work with them all. For this application we're looking for about .0024 of an inch and right now it's much too tight. So we've got some work to do to correct that. There are many tools that you could use to fine tune the ring gap, like a wet stone, a diamond sharpening card, or even sand paper, and they'll all do the job just the same, but it is more efficient to use a dedicated grinder. Ours has a fixture the ring clamps into, and it uses a dial indicator, which allows you to quickly and accurately dial in the gap. If you're doing this for the first time just remember to take it slow, and don't try to nail it the first time around. You'll have to put the ring in the bore once or twice to check progress, and just sneak up on the finished size. Also remember the top and second ring have different specs. So adjust your methods accordingly. So one thing to keep in when you're assembling your pistons, connecting rods, and your rings all together is positioning is important because there's a very specific way each of these parts has to go together. First thing you want to pay attention to on the bottom of the piston is there's a hole for the oil squirter. Now this thing bolts to the block and it kinda lines up right in that little groove. So orientation with the piston is important and they help you out with a little mark that's imprinted on the top of each piston. This goes toward the center of the valley. Now the same thing holds true on the connecting rod. On one side there's a heavy chamfer that's ground into the bearing surface. On the other side it's flat. Now the reason for this is because when you have a pair of connecting rods that are mated together on the same journal the chamfers go out to mate with the radius of the crank shaft, and finally the rings. Now you can spin these things 360 degrees around on the top of the piston but there's a very specific orientation that the gaps have to be staggered at. Now there's a chart that's included that'll show you where to put it if you're not sure. So the first thing we've got to do is load this piston up with some ring. The first thing to go on the piston is the oil spring, followed by the oil scraper. Then the second ring, followed by the top. Next I'll install the first snap ring and clean the small end of the connecting rod. With the chamfer on the correct side I'll lubricate and install the wrist pin. It gets held into place with the other snap ring, and now all you've got to do is repeat the process seven more times. Over at the block the main bearings get a coat of assembly lube to help keep things protected on initial fire up.
(Austin)>> Coming through Kemosabe.
(LT)>> And the crank is carefully lowered into place with some assistance. Alright touch down. Alright perfect fit, I love it.
(Austin)>> Alright there hoopty. You don't need me anymore. You've just got to throw some caps on, torque them down, and move on.
(LT)>> Yeah a few more step to go and this will be running before you know it.
(Austin)>> Sweet, I've almost got the cab lights wired up. So we'll be in business.
(LT)>> Alright where's my torque wrench? The other half of the bearing is lubed. The main caps are tapped into place, and the studs are threaded into the block. The strength of the fastener that you choose and the level that it is torqued to play a huge role in the strength of your bottom end cause basically when this thing is running you don't want any of these parts moving around at all. That's why we're using ARP fasteners. Now the final torque value is gonna 175 pound feet on the main studs and 90 pound feet on the side bolts, and we're gonna get there in three equal steps. With the main and side bolts tight the last thing to check on the crank shaft is end play, and ours measures in at five thousand. Back at the table the rod bearing gets assembly lube and the piston rings get hit with some engine break in oil, and then I'll slid over a tapered ring compressor. The rod is slid down into the cylinder until the ring compressor sits flat on the deck, and a few gentle taps from the hammer will push the piston into the bore until the rod bearing makes contact with the crank. The cap goes on and the bolts are threaded in, and the process is repeated until all eight are installed.
(Austin)>> Badges, we don't need no stinking badges.
(LT)>> One step I always take after installing each piston and rod assembly is to crank the motor over a couple of times just to make sure there's nothing bound up. You can fix any problems you have right away. Now this thing spins over perfectly and the rotating assembly is pretty much done. Now I still do need to torque the caps for the rods but I'm gonna wait until I get the cam shaft and lifters and just so I don't have to flip the motor over 100 times. It'll just save me a few steps. Now as far as a cam shaft upgrade is concerned a lot of people don't think of it as a first modification when you're building a diesel engine, but when you're chasing really high power levels it's just as important as it is upgrading a cam in a gasoline engine. Now we picked up this Hamilton cam from Summit Racing, and it measures in at 192 degrees of duration at .0050 lift on the intake side and 200 degrees on the exhaust. Now this will do a couple of different things for us. Number one, it'll reduce the spool up time of the turbocharger. Number two, of course it's gonna add horsepower, and number three, it's gonna reduce the exhaust gas temperature in the engine because it gets more air into and out of the cylinders. Once the cam gear's in place and the bolt is torqued to spec the lifters also get a coat of assembly lube and slide down into the bores. They're held into place by a retaining plate and a hold down clamp, which finishes up the bottom end of our LML Duramax. [ MUSIC ]
(Austin)>> Now obviously it's not wired up permanently. Once we got all the wire harnesses in the truck put back together I'll tap into the parking lights. That way when you're running lights or park lights they'll come on with everything else, but in the meantime I just wanted to show you what it looked like, and now I still have another thing or two to do that'll clean up the outside of this truck and make it look sharp.
(LT)>> In order to safely make the most amount of power you can from a diesel engine extra air flow is the name of the game. Now normally you'll take care of that with things like larger turbochargers, freer flowing exhaust manifolds, a bigger intercooler, and stuff like that, but you can't forget about the cylinder heads either. Now we're gonna be installing a set of Edelbrock Performer RPM heads onto our LML. Now these things flow a lot more air than our stock heads and they come ready to assemble right out of the box. So the first thing that we're gonna do is transfer all the old parts from our original head onto the new ones. [ MUSIC ] Just as important as the strength of the stud is the method of torqueing, and it's critical to apply a lubricant like ARP Ultra Torque on the threads of the stud so the most accurate clamp load is applied to the fastener as the nut is turned. With the head gasket in place on the right side of the engine I'll install two studs to help guide our Edelbrock cylinder heads carefully onto the block. Then the remaining studs are dropped into place and threaded down, and the washers and nuts also get a coat of Ultra Torque. The final torque specs for the 625 head studs is 150 pound feet but I'll get there in three equal steps.
(Austin)>> Now I know a lot of you would want to black this truck completely out and I can't say I blame you, but we already got some polished 22's and after all it's a Denali. So this Denali HD lettering, that's staying. These chrome door handles, that's gonna stay. This big ole chunky rub rail, we're ripping that off. We'll clean the side of this truck way up. There's also a Z-71 sticker in the back. De-badge it, clean that off as well. If you ask me it's gonna be pretty slick looking. [ MUSIC ] Hey bro it looks like you've got that looking like a complete engine huh?
(LT)>> Yeah the long block's pretty much done. Got the whole valvetrain in, valve lash is set, push rods are in. Basically ready to run.
(Austin)>> Slap a few injectors in and call it a day.
(LT)>> Yeah you know we picked these up from Summit Racing and they're made by Dynamite Diesel Products, and they'll flow enough fuel to support 1,000 horsepower. It's kind of that magic number we're shooting for.
(Austin)>> Hope so man.
(LT)>> But the other cool thing is these have been balanced to within two percent of each other. So we'll have a nice smooth running engine. Each cylinder will be contributing exactly the same amount of power even though we're making a ton of it.
(Austin)>> That big ole 67 looks beautiful sitting in the valley too.
(LT)>> Yeah and then we'll get that 485 off to the side. I just can't wait to feel this thing spooling up, but the truck it looks great. Way shinier than it was before.
(Austin)>> Yeah I didn't realize how bad the paint was until I started polishing out where the rub rails were, and I just got carried away. I couldn't help it.
(LT)>> Alright well we've still got some work ahead of us, and if you guys have any questions about anything you've seen on the show today, or you want Austin to polish your truck be sure and check us out at Powernation TV dot com.
(Austin)>> Thanks for watching, catch us next week! [ MUSIC ]
