More '86 Ford Mustang "Dark Horse" Episodes
MuscleCar Builds
Want more content like this?
Join the PowerNation Email NewsletterParts Used In This Episode
Edelbrock
Carburetor, Performer, 750 cfm, 4-Barrel, Square Bore, Manual Choke, Single Inlet, Silver, Each
Edelbrock
Intake Manifold, Victor Jr,, Single Plane, Aluminum, Natural, 4-Barrel, Square Bore, Ford, 4.7L, 5.0L, Each
Flowmaster
Muffler, American Thunder 40 Series, 2 1/2 in. Inlet/2 1/2 in. Outlet, Steel, Aluminized, Each
Pertronix
Distributor, Flame-Thrower, Magnetic Pickup, Vacuum Advance, Black Cap, Ford, 289-302, Each
Pertronix
Spark Plug Wires, Flame-Thrower, RFI Suppression, 8mm, Black, Stock Boots, Ford, Small Block, V8, Kit
Summit Racing
Catalytic Converter, Stainless Steel, Universal, 2.5 in. Inlet/Outlet, 16 in. Length, Each
Summit Racing
Headers, Full-Length, Steel, Painted, Ford, Mercury, Mustang, Capri, 5.0L, Pair
Tuff Stuff Performance
Alternator, Black Powdercoated, 140 Amps, Serpentine, Buick, Chevy, GMC, Oldsmobile, Pontiac
Weld Racing LLC
These Weld Racing RTS forged aluminum polished wheels feature 3-piece forgings that are assembled by welding, for application flexibility. They are manufactured using primary forging-grade aluminum alloys to create maximum strength and durability. Weld Racing RTS forged aluminum polished wheels are available in 15 in. to 18 in. diameters and are tested with F.E.A. and in-house destructive testing to ensure safety.
RockAuto.com
Aftermarket replacement auto parts for domestic and import vehicles
Episode Transcript
Today on muscle car. It's Mustang mania. Tommy and Rick do some exhausting work on our Fox body flashback goes into the history of the Mustang and just what is the difference between cast and forged wheels?
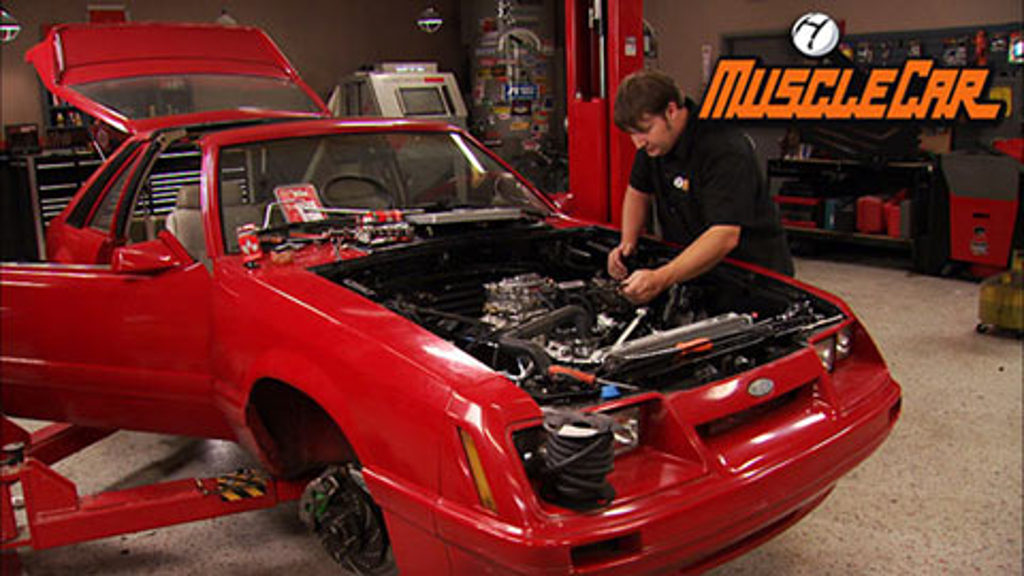
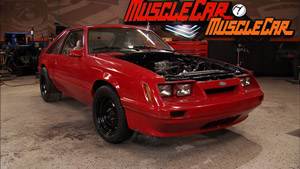
Hey, y'all, welcome to muscle car. We've been pretty busy on our Fox body Mustang project. Dark Horse last go around. We dropped in this 331 Stroker into it
and upgraded with an aftermarket K member and brakes.
We also hung the Posi
rear end here, the Tommy rebuilt. After that, we stabbed in our T 55 speed transmission. It kept it from falling out the bottom
using a G force cross member from Summit. This thing is designed to accommodate future exhaust upgrades and in keeping with our low buck theme,
it only ran us about 100 and 50 bucks. We're gonna keep moving on this thing starting with the intake Edelbrock Sinister Victor Junior Manifold. This thing is designed to make power in the mid to high RPM range. So it'll complement those 410 gears we got out back plus look good when we pop the hood,
this lock tight gray gasket maker should give our intake, a nice seal.
I'll use some A RP bolts to button it up, nice and tight torque on the spec
and drop on our Elder Brock for Barrel.
Our Fox spot is not about the latest high tech gadgets we want to run parts that we know are going to work. So we decided to go with the OEM type parts because this system, what's been cool and Fox body mustangs for over 30 years. So we placed an order for everything from the radiator, the gaskets and even the Thermostat Rock auto.com,
a little more lock tight to ensure the water ports are sealed and on goes the water pump.
After that, I'll run on the balancer with an impact
bolt on the crank pulley and then the water pump pulley.
And for the charging system, we did away with the factory externally regulated system and went with this GM style one wire internally regulated. It's a whole lot easier to install. We don't have to try to figure out the factory wiring.
We wanted the alternator to match the theme of the car.
So we talked to tough stuff and they sent us this nice black and chrome unit.
Well, now it's time to measure for the belt and there's a really easy way to do that using the old six cylinder one.
All you have to do is wrap it around the pulleys,
overlap it a little bit
dry it up tight,
mark it
and then just measure the overall length of your mark. That'll tell you the length of your belt.
We'll install the thermostat in housing and the bypass hose then slip in the radiator, followed by the cooling hoses.
Next, we're gonna install a set of the summit long tube headers. They're manual
bent for better flow, which means more power and they're made of a heavy 18 gauge steel and at a price tag at a little over 100 bucks
don't get much better than that.
These headers also come with all the goodies. You need to install them including the gaskets and bolts.
With dark horse being a late model running. A set of catalytic converters is mandatory from the get go. We said we wanted this car to pass a sniff test
but installing a set of converters, you need to get it as close as possible to the heads on ours. We're gonna cut the header flange off to move it forward about six or eight inches.
I
wanna cut off a couple inches of the inlet of the converter
trim down my header collector as short as possible.
Then weld the two together,
leaving the flange loose on the header allows me to wiggle the converter around to give me some clearance. Then I'll just tack it in place
and there you go. One catalytic converter
still ahead. A budget minded way to shorten your drive shaft ouch and everything you ever wanted to know about. Ford's prize pony cars
and we've got most of the exhaust hung on dark horse. We've got the headers, the catalytic converters and the lead pipes here already in place. Now, we want this thing to sound aggressive on the street because like I've said before, the show is called Muscle Car, not weenie car and it, Flowmaster Muffler should do the trick. Now, we're using the original 40 series design because they're an aggressive street and strip Muffler. Plus they'll make our little pony sound like a real beast.
I remember before you finish. Well, anything you gotta make sure you got clearance all the way around. And one important thing
is the drive shaft.
So you don't want the drive shaft moving around as the suspension compresses and smash your exhaust.
You on the drive shaft. You also want to be aware of anything else, especially when you're working on a car that already has
lines that you're gonna be reusing. Make sure you have enough clearance between your fuel lines and your exhaust because this stuff does get hot and we're not getting too fancy on the tail end of our exhaust here. We're just gonna run a couple of dumps, kind of aim them at the sides a little bit. So the droning doesn't get too bad. I can mark it, pull it off, weld it up.
I'll line my marks back up and tack it together,
then burn it in.
That's about it.
Now, I can bolt, the collector back on. It helps to have something like a screw jack to hold the tubes up.
I'll mount a set of universal hangers to keep the back end in place.
There you go. Now, she can exhale with no restrictions.
You guys may remember the K member we installed into our Mustang had the option of moving the engine back for better weight distribution. So that's what we went with. Well doing that cause the dry shaft to be a little bit too long. I've got a cheap and easy way to shorten it,
build on a budget muscle car projects that save you time and money.
Now, we've already determined that we needed to shorten the dry shaft right at an inch. Your first cut needs to be on the tube side of this welded joint using a roll of tape
that's one inch in width.
This gives you your other cut. If you keep it pulled tight,
not too far forward, you can see how it bunches up.
I actually show you the
I mark you a good true cut
before you get too cut. Happy. Draw a line from the yoke onto the tube. What this does is give you a reference point
to match them back up.
You
wanna do is run the edge of the blade right across the edge of the tape.
Make sure that you cut all the way through the tube all the way around.
That was pretty easy.
See you can do this at home.
I like to file this with a little bit of a taper that'll help the yolk start.
All right. Now, I want to grind out a small groove in this joint to ensure a strong wel.
Then I'll clean the welding surface because welding on top of rust just doesn't cut it.
Now before you get too trigger happy and weld this thing all the way up, put a few tacks equally spaced to keep this thing from pulling as you weld it up.
Once you get it taxed,
you can burn it together.
Try to keep each welding pass the same as the other. This will help keep it balanced.
We think
I
get a whole
on the way the history of the Mustang learn all about an American icon. Plus all aluminum wheels aren't created equal. Stick around
today's flashback. The history of the Ford Mustang.
Mustang,
the original
Mustang three new ways to answer the call of Mustang.
It's hard to imagine the car world without it. Ever since it hit the ground in 1964 the stampede hasn't let up
and the Mustang of today still captures the style, the power and the spirit of the pony car that kicked it all off. 45 years ago
when the Mustang debuted on April 17th, 1964 more than 22,000 were sold that day.
By the end of the second year, more than a million were on the road,
but the Mustang may have never left the stable without the vision of one man
in 1962 Ford was still fresh off the Etzel disaster. Ford. VP Lee Iaccoca saw a way to revive the blue oval brand with his total performance concept.
It first took shape in the Mustang one, a futuristic looking mid engine two seater roach
here, but
IOA
knew it was too impractical and he'd never get it approved for production.
So he pushed for a low price sports car, small and fun to drive. But roomy enough for three of your friends to keep down costs. It had to be designed on the same frame as the falcon and reach showrooms in less than 18 months,
the designers went back to the drawing board and came up with something a lot like the classic Mustang. We know today
with some more refinements. It was unveiled at the New York World's fair and the country went, wow,
it could be any car you wanted it to be a sleek coop, sporty rag top or killer fast back. You could get a six banger or a high powered V8
bucket seats, a four on the floor and a laundry list of options. All with a price tag starting at just 2400 bucks.
The first GTs came late in 65 and included things like fog lights, rally pack gauges and 271 horses under the hood.
The man, Carol Shelby, engineer, race driver,
the car, the Shelby Mustang, GT
Ford teamed up with Shelby all through the six to create a limited edition series of race ready Mustangs.
The GT 350 was a two seater sporting racing stripes and horsepower ramped up to over 300
67 was a turning point.
The year it got its first big block. Shelby dropped in a 428 that made over 400 horse known as the GT 500
regular Mustangs got a 390 V8 making 320 horse to help compete against a brand new Camaro.
The original Mustang, it opened up a whole new way to swing.
Now get ready to swing again.
Mustang, 69
the little pony got bigger and badder as the sixties came to a close trans Am racing spawned the Boss 302 and the Boss 429 it was so big. They had to modify the suspension.
The Mustang muscled its way into the seventies but gradually the oil crisis and EPA regulations took their toll on performance in 74. It was stripped down to an economy gas zipper called the Mustang too.
And sport versions had more bark than by
five years later,
the Mustang was resurrected with a fresh look on Ford's new Fox body
ushering in a new era of performance.
The GT package returned in 82 and the 83 models got a 5 L engine with 175 horses the most since the 71 Boss. 351
for the fourth generation Ford brought back the classic styling cues of the original like side scoops, three element tail lights and the signature long hood and short deck.
When the pony car turned 40 it was time for another revamp and this time Ford really went retro bringing all the elements of the original design into the 21st century.
It was an instant hit with the public reigniting muscle car fever and Spurring Chevy and Dodge to play catch up
not to be outdone. Ford unleashed a bold new version for 2010 1 that added a more aggressive stance to that iconic style
for almost half a century. The Mustang has been proven that it's one wild horse that won't be broken.
Still ahead. They may both be shiny but the similarities end there.
You're watching muscle car for a DVD copy of this episode. Just go to Power Block tv.com and order your copy for just 595 plus shipping and handling. Start your own muscle car collection delivered right to your door from the power block.
Well, dark horse here has been looking pretty thirsty.
So I've been working on bending in some fuel lines to help feed the fire.
I'm going with 38 stainless steel just to make sure that there's no restriction in the new line.
And then if we ever want to upgrade the factory 56, 10 line. These will already be in place since we plugged in that T five transmission, those two pedals aren't gonna cut it anymore. So we had to install a clutch pedal assembly, which we picked up from a local salvage yard for about 20 bucks.
The next thing we need to do is install the shifter. We decided to go with the Hirsch
Pro billet model because it's got shorter throws for quicker shifts. Plus it's tailor fit to fit our mustang.
So, installing it should be a breeze.
Not only does it look nice, but it's also a piece of insurance that keeps you from missing gears and redlining your motor.
Sir,
to light the fire on dark horse, we decided to go with the patrons
flame thrower distributor. It's got a special module and coil combo to keep from breaking down in the high RPM level.
This is a GM style distributor which we decided to go with because of its simple design. It only has a single wire hook up
easy as pie.
We're also gonna plug in a set of flamethrower wires and that should just about do it.
We've got a few loose ends, we got to tie up like the starter, some wiring and adding some fluids before we're ready to hit the road. But we still got a good ways to go before we can do a big smoky burnout.
Now, everybody knows that Bolton on a set of custom wheels will dramatically improve the look of your ride but not all aluminum wheels were created equal. Now, these 2 may look stylish, but when it comes down to strength,
there's no comparison. Now, this wheel is cast in one piece for molten aluminum. It's more affordable, but it's not the strongest or the lightest way to make a performance wheel. It requires a lot of material in the rim area, the spokes and the center making it heavier. Now, even with that under aggressive loads, the more brittle casting can fail just like the center here that broke out. The crystallized random grain is porous and not near as dense or strong as it needed to be. The other option, a forged multi piece wheel like this one from world racing, its strength comes from extreme compression during the forging process ensuring the grain is consistent. Now, this is welds, new lightweight Rt S race wheel which has three forged components, an outer rim, inner rim and a center which are all welded together and that's always stronger than a wheel that's been bolted together. Now, another nice thing about this design is that weld in Kansas City where they can change the design of the spokes
or the rim individually and that can give you more room for things like oversized calipers or rotors. The bottom line is that when it comes to aluminum wheels, they may look similar, but there's a huge difference between cast, one piece and forged multi piece wheels. If you have any questions about anything you saw on the show today, you can check it all out at Power Block tv.com. Well, for this week, we're out of time. So until next time we're out of here.
Show Full Transcript
Hey, y'all, welcome to muscle car. We've been pretty busy on our Fox body Mustang project. Dark Horse last go around. We dropped in this 331 Stroker into it
and upgraded with an aftermarket K member and brakes.
We also hung the Posi
rear end here, the Tommy rebuilt. After that, we stabbed in our T 55 speed transmission. It kept it from falling out the bottom
using a G force cross member from Summit. This thing is designed to accommodate future exhaust upgrades and in keeping with our low buck theme,
it only ran us about 100 and 50 bucks. We're gonna keep moving on this thing starting with the intake Edelbrock Sinister Victor Junior Manifold. This thing is designed to make power in the mid to high RPM range. So it'll complement those 410 gears we got out back plus look good when we pop the hood,
this lock tight gray gasket maker should give our intake, a nice seal.
I'll use some A RP bolts to button it up, nice and tight torque on the spec
and drop on our Elder Brock for Barrel.
Our Fox spot is not about the latest high tech gadgets we want to run parts that we know are going to work. So we decided to go with the OEM type parts because this system, what's been cool and Fox body mustangs for over 30 years. So we placed an order for everything from the radiator, the gaskets and even the Thermostat Rock auto.com,
a little more lock tight to ensure the water ports are sealed and on goes the water pump.
After that, I'll run on the balancer with an impact
bolt on the crank pulley and then the water pump pulley.
And for the charging system, we did away with the factory externally regulated system and went with this GM style one wire internally regulated. It's a whole lot easier to install. We don't have to try to figure out the factory wiring.
We wanted the alternator to match the theme of the car.
So we talked to tough stuff and they sent us this nice black and chrome unit.
Well, now it's time to measure for the belt and there's a really easy way to do that using the old six cylinder one.
All you have to do is wrap it around the pulleys,
overlap it a little bit
dry it up tight,
mark it
and then just measure the overall length of your mark. That'll tell you the length of your belt.
We'll install the thermostat in housing and the bypass hose then slip in the radiator, followed by the cooling hoses.
Next, we're gonna install a set of the summit long tube headers. They're manual
bent for better flow, which means more power and they're made of a heavy 18 gauge steel and at a price tag at a little over 100 bucks
don't get much better than that.
These headers also come with all the goodies. You need to install them including the gaskets and bolts.
With dark horse being a late model running. A set of catalytic converters is mandatory from the get go. We said we wanted this car to pass a sniff test
but installing a set of converters, you need to get it as close as possible to the heads on ours. We're gonna cut the header flange off to move it forward about six or eight inches.
I
wanna cut off a couple inches of the inlet of the converter
trim down my header collector as short as possible.
Then weld the two together,
leaving the flange loose on the header allows me to wiggle the converter around to give me some clearance. Then I'll just tack it in place
and there you go. One catalytic converter
still ahead. A budget minded way to shorten your drive shaft ouch and everything you ever wanted to know about. Ford's prize pony cars
and we've got most of the exhaust hung on dark horse. We've got the headers, the catalytic converters and the lead pipes here already in place. Now, we want this thing to sound aggressive on the street because like I've said before, the show is called Muscle Car, not weenie car and it, Flowmaster Muffler should do the trick. Now, we're using the original 40 series design because they're an aggressive street and strip Muffler. Plus they'll make our little pony sound like a real beast.
I remember before you finish. Well, anything you gotta make sure you got clearance all the way around. And one important thing
is the drive shaft.
So you don't want the drive shaft moving around as the suspension compresses and smash your exhaust.
You on the drive shaft. You also want to be aware of anything else, especially when you're working on a car that already has
lines that you're gonna be reusing. Make sure you have enough clearance between your fuel lines and your exhaust because this stuff does get hot and we're not getting too fancy on the tail end of our exhaust here. We're just gonna run a couple of dumps, kind of aim them at the sides a little bit. So the droning doesn't get too bad. I can mark it, pull it off, weld it up.
I'll line my marks back up and tack it together,
then burn it in.
That's about it.
Now, I can bolt, the collector back on. It helps to have something like a screw jack to hold the tubes up.
I'll mount a set of universal hangers to keep the back end in place.
There you go. Now, she can exhale with no restrictions.
You guys may remember the K member we installed into our Mustang had the option of moving the engine back for better weight distribution. So that's what we went with. Well doing that cause the dry shaft to be a little bit too long. I've got a cheap and easy way to shorten it,
build on a budget muscle car projects that save you time and money.
Now, we've already determined that we needed to shorten the dry shaft right at an inch. Your first cut needs to be on the tube side of this welded joint using a roll of tape
that's one inch in width.
This gives you your other cut. If you keep it pulled tight,
not too far forward, you can see how it bunches up.
I actually show you the
I mark you a good true cut
before you get too cut. Happy. Draw a line from the yoke onto the tube. What this does is give you a reference point
to match them back up.
You
wanna do is run the edge of the blade right across the edge of the tape.
Make sure that you cut all the way through the tube all the way around.
That was pretty easy.
See you can do this at home.
I like to file this with a little bit of a taper that'll help the yolk start.
All right. Now, I want to grind out a small groove in this joint to ensure a strong wel.
Then I'll clean the welding surface because welding on top of rust just doesn't cut it.
Now before you get too trigger happy and weld this thing all the way up, put a few tacks equally spaced to keep this thing from pulling as you weld it up.
Once you get it taxed,
you can burn it together.
Try to keep each welding pass the same as the other. This will help keep it balanced.
We think
I
get a whole
on the way the history of the Mustang learn all about an American icon. Plus all aluminum wheels aren't created equal. Stick around
today's flashback. The history of the Ford Mustang.
Mustang,
the original
Mustang three new ways to answer the call of Mustang.
It's hard to imagine the car world without it. Ever since it hit the ground in 1964 the stampede hasn't let up
and the Mustang of today still captures the style, the power and the spirit of the pony car that kicked it all off. 45 years ago
when the Mustang debuted on April 17th, 1964 more than 22,000 were sold that day.
By the end of the second year, more than a million were on the road,
but the Mustang may have never left the stable without the vision of one man
in 1962 Ford was still fresh off the Etzel disaster. Ford. VP Lee Iaccoca saw a way to revive the blue oval brand with his total performance concept.
It first took shape in the Mustang one, a futuristic looking mid engine two seater roach
here, but
IOA
knew it was too impractical and he'd never get it approved for production.
So he pushed for a low price sports car, small and fun to drive. But roomy enough for three of your friends to keep down costs. It had to be designed on the same frame as the falcon and reach showrooms in less than 18 months,
the designers went back to the drawing board and came up with something a lot like the classic Mustang. We know today
with some more refinements. It was unveiled at the New York World's fair and the country went, wow,
it could be any car you wanted it to be a sleek coop, sporty rag top or killer fast back. You could get a six banger or a high powered V8
bucket seats, a four on the floor and a laundry list of options. All with a price tag starting at just 2400 bucks.
The first GTs came late in 65 and included things like fog lights, rally pack gauges and 271 horses under the hood.
The man, Carol Shelby, engineer, race driver,
the car, the Shelby Mustang, GT
Ford teamed up with Shelby all through the six to create a limited edition series of race ready Mustangs.
The GT 350 was a two seater sporting racing stripes and horsepower ramped up to over 300
67 was a turning point.
The year it got its first big block. Shelby dropped in a 428 that made over 400 horse known as the GT 500
regular Mustangs got a 390 V8 making 320 horse to help compete against a brand new Camaro.
The original Mustang, it opened up a whole new way to swing.
Now get ready to swing again.
Mustang, 69
the little pony got bigger and badder as the sixties came to a close trans Am racing spawned the Boss 302 and the Boss 429 it was so big. They had to modify the suspension.
The Mustang muscled its way into the seventies but gradually the oil crisis and EPA regulations took their toll on performance in 74. It was stripped down to an economy gas zipper called the Mustang too.
And sport versions had more bark than by
five years later,
the Mustang was resurrected with a fresh look on Ford's new Fox body
ushering in a new era of performance.
The GT package returned in 82 and the 83 models got a 5 L engine with 175 horses the most since the 71 Boss. 351
for the fourth generation Ford brought back the classic styling cues of the original like side scoops, three element tail lights and the signature long hood and short deck.
When the pony car turned 40 it was time for another revamp and this time Ford really went retro bringing all the elements of the original design into the 21st century.
It was an instant hit with the public reigniting muscle car fever and Spurring Chevy and Dodge to play catch up
not to be outdone. Ford unleashed a bold new version for 2010 1 that added a more aggressive stance to that iconic style
for almost half a century. The Mustang has been proven that it's one wild horse that won't be broken.
Still ahead. They may both be shiny but the similarities end there.
You're watching muscle car for a DVD copy of this episode. Just go to Power Block tv.com and order your copy for just 595 plus shipping and handling. Start your own muscle car collection delivered right to your door from the power block.
Well, dark horse here has been looking pretty thirsty.
So I've been working on bending in some fuel lines to help feed the fire.
I'm going with 38 stainless steel just to make sure that there's no restriction in the new line.
And then if we ever want to upgrade the factory 56, 10 line. These will already be in place since we plugged in that T five transmission, those two pedals aren't gonna cut it anymore. So we had to install a clutch pedal assembly, which we picked up from a local salvage yard for about 20 bucks.
The next thing we need to do is install the shifter. We decided to go with the Hirsch
Pro billet model because it's got shorter throws for quicker shifts. Plus it's tailor fit to fit our mustang.
So, installing it should be a breeze.
Not only does it look nice, but it's also a piece of insurance that keeps you from missing gears and redlining your motor.
Sir,
to light the fire on dark horse, we decided to go with the patrons
flame thrower distributor. It's got a special module and coil combo to keep from breaking down in the high RPM level.
This is a GM style distributor which we decided to go with because of its simple design. It only has a single wire hook up
easy as pie.
We're also gonna plug in a set of flamethrower wires and that should just about do it.
We've got a few loose ends, we got to tie up like the starter, some wiring and adding some fluids before we're ready to hit the road. But we still got a good ways to go before we can do a big smoky burnout.
Now, everybody knows that Bolton on a set of custom wheels will dramatically improve the look of your ride but not all aluminum wheels were created equal. Now, these 2 may look stylish, but when it comes down to strength,
there's no comparison. Now, this wheel is cast in one piece for molten aluminum. It's more affordable, but it's not the strongest or the lightest way to make a performance wheel. It requires a lot of material in the rim area, the spokes and the center making it heavier. Now, even with that under aggressive loads, the more brittle casting can fail just like the center here that broke out. The crystallized random grain is porous and not near as dense or strong as it needed to be. The other option, a forged multi piece wheel like this one from world racing, its strength comes from extreme compression during the forging process ensuring the grain is consistent. Now, this is welds, new lightweight Rt S race wheel which has three forged components, an outer rim, inner rim and a center which are all welded together and that's always stronger than a wheel that's been bolted together. Now, another nice thing about this design is that weld in Kansas City where they can change the design of the spokes
or the rim individually and that can give you more room for things like oversized calipers or rotors. The bottom line is that when it comes to aluminum wheels, they may look similar, but there's a huge difference between cast, one piece and forged multi piece wheels. If you have any questions about anything you saw on the show today, you can check it all out at Power Block tv.com. Well, for this week, we're out of time. So until next time we're out of here.
