More '86 Ford Mustang "Dark Horse" Episodes
MuscleCar Builds
Want more content like this?
Join the PowerNation Email NewsletterParts Used In This Episode
Anest-Iwata Usa Inc.
Air Brush, Custom Micron CM-C Plus, Gravity Feed, 9 ml Cup, Nickel Body, Each
Anest-Iwata Usa Inc.
Spray Gun, HVLP, LPH400-LV, Gravity Feed, 1.3mm Nozzle, 1,000ml Aluminum Cup, Nickel Body, Each
ARP
Flywheel Bolts, High Performance, Chromemoly, Black Oxide, 12-point, 7/16 x 1 in., Chevy, Ford, Set of 6
EBC Brakes
Brake Pads, Greenstuff, Organic, Front, Ford, Mercury, Cougar, Mustang, Thunderbird, Set
EBC Brakes
Brake Rotors, Slotted, Dimpled, Iron, Black Zinc Plated, Front, Ford, Mustang, Pair
Ford Performance Parts
Differential Rebuild Kit, Traction-Lok, Clutch Pack, Clutch Shims, Friction Modifier, Ford, 8.8 in., Kit
Ford Performance Parts
Flywheel, Cast Iron,Exact replacement for 1986-1995 Mustang. Accepts 10.5 in. diaphragm clutch pattern.
Granatelli Motorsports
Frame Crossmember; K-Member Kit; Incl. Crossmember;A-Arms; Coil-Over Strut Conversion Kit w/ 300 lb Springs
Hays
Clutch Kit, Sintered Metallic, 1 1/16 in.- 10-Spline, 10 in. Diameter Disc, Ford, Mustang, 4.6, 5.0L, Kit
Loctite
Primerless Medium Strength Blue Threadlocker is designed for the locking and sealing of threaded fasteners between 1/4" and 3/4"" (6 to 20 mm)
Randy's Ring & Pinion
High performance Yukon Ring & Pinion gear set for Ford 8.8"
Episode Transcript
Today on muscle car, the guys begin rebuilding project Dark Horse by working up a small block Stroker, Tommy rebuilds a Ford battery posse unit and Rick takes a trip to the Candy Kingdom in an all new paint.
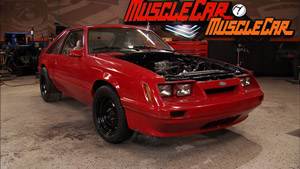
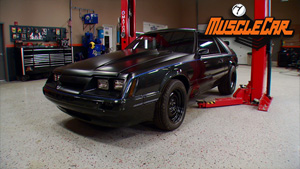
Hey guys, we've been keeping the delivery people pretty busy dropping off parts for our latest project. The Fox Body Mustang that we're calling Dark Horse. Now, obviously, this isn't all the parts that we're gonna need. So that's a pretty good start. We're trying to keep the budget on our Mustang as low as possible. We still want a good daily driver,
plenty of performance to spare to do that. The first thing we had to do was lose that old lazy six cylinder that our car came with.
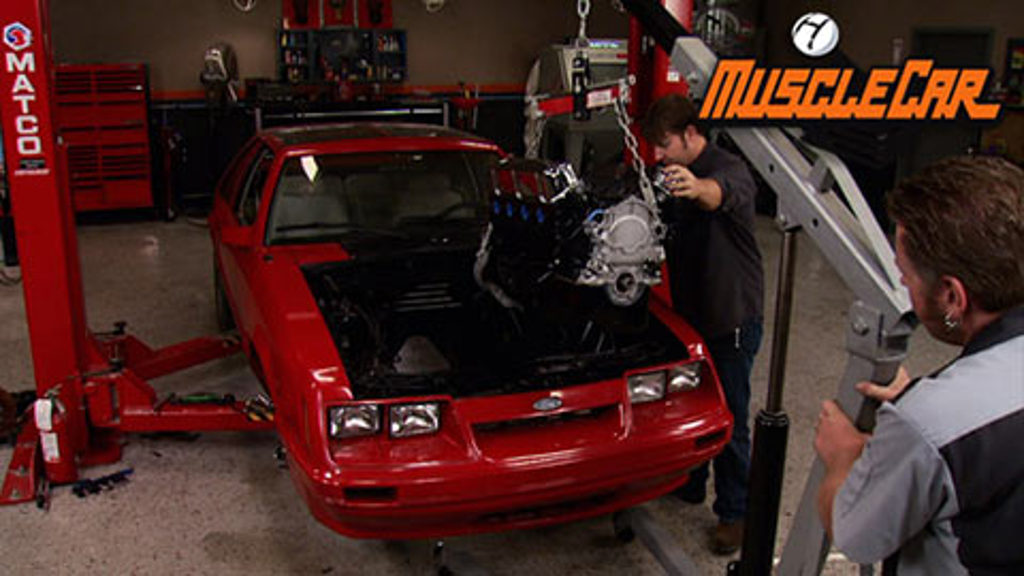
So we gave summit racing a call and they shipped us this blueprint 331 Stroker. These long blocks are assembled and ready to ship. That means you don't have to camp outside your machine shop waiting on your engine
and you may be wondering what's gonna keep the motor from dropping through that big old hole. Well, some that also hooked us up with the granite tubular K member this thing saves weight, makes it way easier to wrench on your motor and helps the line lower vehicles. So sit back, relax and check it out because we got some work to do.
This is a stock style fly where we picked up from Ford racing. I use a dab a lot tight on these A RP boats just to keep everything where they need to be.
I'm gonna torque all of these to 40 pounds and then again to 85
I'll knock in the pilot bearing, clean off the flywheel and made up our haze clutch and pressure plate. We went with our ceramic clutch to reduce slippage.
Before you tighten down the pressure plate, you got to align the clutch disk using your alignment tool, slide it into the clutch,
get it into the pilot bushing,
lift up on it just to taste
and then tighten the pressure plate down equally
so that you don't tighten it down one sided.
You want the clutch alignment tool to slide in and out. No drag,
nothing on it.
I torque these to 35 pounds. Then move on.
We decided to mount the K member from the bottom first,
then lower the motor in from the top.
We picked up a set of tubular control arms from summit. These will help to improve steering response and it knocked a few more pounds off the nose
and we're using spindles from a 94 through 98 mustang. It's an easy conversion to get five lug.
And plus they come with larger factory brakes
and they're cheap.
A
good cost effective upgrade over your stock brakes is E BCE rodders.
They're slotted and dimpled and this not only helps cooling but it also helps to even out your pad wear. And we're also gonna use the green stuff, brake pads. They work a lot better when they're cold. Help reduce brake fade and cut way down on the dust.
Now, for calipers, we are going to stick with OEM parts, but we're gonna upgrade to 99 to 04 type calipers. That's because these come factory with a dual piston. Whereas the original 94 to 98 had a single, little bit more stopping power.
Our K member has an extra motor mount hole. What that's for is to move the engine back a little over an inch for better weight transfer. And that's the one we're going to go with.
Don't scratch that firewall up.
It is.
That was too easy. I'm scared
with that. Can remember in there you can reach engine mounts,
all kinds of stuff a whole lot easier.
We save some more money going with a used transmission and pedal assembly. You can pretty much find these anywhere that's got mustang parts. I've got to get the car back up in the air to get this thing installed. And after that, I'm gonna do
on a rear
coming up how to make a sad, slippery old posse unit. Get up and grab like brand new, plus how to fine tune your spray gun settings.
You'll end up with a whole bunch of material coming out.
Hey, guys, you can have all the power in the world and not being able to put it to the ground.
It's kind of useless on our mustang project. We're gonna use a 94 to 98 rear.
This thing comes factory with a pause unit, but it's got a boat load of miles. It's kind of weak
and I'm gonna show you how to fix it
for the rebuild kit in this junkyard unit and have all of it for under 500 bucks. If you were to buy it all new, it'd be well over a grand
build on a budget muscle car projects that save you time and money.
I,
I'll start by removing the rotor and the brake assembly.
Then I gotta pull the main cabs and back out the carrier pin bolt.
I'll snatch out the carrier pin, poke out the sea cliffs with a screwdriver
and clear out the axles. Here. She comes
a lot of times the ring gear can get all up in your way.
So I'm removing this one for now,
the s clip holds the axle gears in place. Once you pull it, they're ready to come out
a little bit of scrubbing and she's ready to put back together.
We got our paws unit all tore down, cleaned up and ready to start reassembly Ford racing, sent their rebuild kit with shims, steels clutches and a bottle of their friction modified.
I'm gonna prep the clutches by soaking them in some royal purple gear oil for at least 15 minutes.
When you're disassembling and cleaning this thing, you wanna stay organized that way, you know what goes where left side, right side also keep the clutch packs together. That way you'll know what order
the rebuild kit came with several shins for setting the clearance of the spider gears. They determined the clearance between the housing and the gears.
I started with the biggest one in the kit.
So now let's see if the small gears can be seated with them in there.
It won't go in
no big deal. Just pull them back out and swap in the next thinner shins.
Now, let's see if it fits, looking pretty good.
Put the pin in to keep the spiders from moving around.
The next step is installing the S spring. Now, these things get a bad rep for being a bear to install and sometimes they are. But I got a little trick for you sit it in there and make sure that you sit it on two teeth, not just one. So it's kind of got a place to sit
and take a grease rag,
lay over it. Grease rag keeps all the dirt and gunk from falling off. This thing,
we use a hammer driving in the spot.
I'll knock it in to seat it
and slip in the carrier pin and the carrier bolt.
Now, all I gotta do is tighten this and that's all it is too. Rebuilding the pas
unit. I'm gonna go ahead and get started putting this rear axle back together. Well, I got it apart. It's the perfect time to swap in a new gear set. We're gonna install a set of four elevens that we got from Randy's ring opinion to give us plenty of that. Get up and go power at the green lights and we're really not concerned about running 200 mile an hour on the street.
Stick around. Rick's got a gun full of candy and he's not afraid to use it. Find out how you can lay down some dynamite graphics on your ride.
Hey, guys, you know, one of the most misunderstood things in car building is candy apple paint. About 50% of the time when somebody says, hey, check out that candy apple red paint job. They're talking about a color, not a type of finish.
There's also a lot of confusion about application layering and spraying candy apples. So today we're gonna try to shed a little bit of light on the subject.
I'm gonna split this hood up into four different sections. That way you can see what the candy looks like over four different base coats and I'll throw down a few graphics just so you can see how candy can make graphics look about 10 miles deep.
I'm gonna lay down some gold first because it's common to be used as a base for candy.
I'm also hosing down some red base.
Then on half the red, I'm using a large gold hurl to demonstrate a four stage look
then blue to show the variety of colors you can get just by changing your base color.
It's looking very patriotic.
I'm laying out a graphic on the pure red. I wanna show you how candy can add depth to a two dimensional design.
As usual. I'm asking the other parts of the surface to keep them clean.
Next, I'm gonna do
is layout just a quick flame design in the center of this. And then I'm gonna cover up the center graphic, the flame graphic and then lay in a background graphic. And then when I unmask it and put the candy over it, it'll look like really cool. Trust me.
If you're just starting out, you don't have any of this auto mask and paper mask and tape will do the same job. It's just a little bit more time
for the background graphic. I'm just using a little tap cloth and you can pretty much use anything you want to see the real low pressure and just kind of let the paint fall through it. You're not really trying to push it.
Here we go.
I'm busting out my iwata Micro to lay the drop shadows, but in a pinch, I've even used my LP H 400 base gun for the shadows.
You can unmask this whole thing and see what kind of a weird looking mess we got going.
I'm gonna lay down one more effect here that you can do
real easy with candies. It's basically just a series of stripes done in pearls that fade the further back they go.
The trick is
you get heavier up here in the front
and just kind of let it fade off
since I've got the material
opened up pretty much all the way and I control how much is coming out.
I just think it's easier like this. I like to have the control of my hand. I don't like the gun telling me what I'm doing
and if you want to soften up the transition on the backside there,
all you have to do is take some of the blue base coat
over, reduce it
and dust it back in over your tail.
Well, guys, we have a nice variety of base coats laid out here that we can put our candies down over the top of. And I really think you're gonna be impressed at how much of a difference that candy coat really makes
after the break, Rick gives lessons on how to set your spray gun upright.
You're watching Muscle Car for a DVD copy of this episode, just go to Power Block tv.com and order your copy for just 595 plus shipping and handling, start your own muscle car collection delivered right to your door from the power block.
Ok. Now we're ready to mix up some candy for the hood. There's a little bit of confusion as to what a true candy paint job is.
And part of that is because I've seen some pearl paint jobs that can mimic a candy. But
one of the aspects of a true candy
is that it will actually turn black when you get it thick enough. So it looks black in the cup,
you can mix it up,
but it actually turns red
if you look at it through the light.
All right, we got the candy loaded. Now it's time to talk about gun set up. Now, any time you're painting anything, it's important to have this thing set up correctly. But when you're shooting candies, you can multiply that importance by about 10.
Now, let me show you what I'm talking about. One of the biggest mistakes I've seen guys do in spring candies is they leave the pattern too narrow.
If you're trying to spray candy and you got a pattern out wide,
you're gonna end up with a whole bunch of tiger stripes. Normally, when I'm spraying a candy, I try to get the widest pattern I possibly can
without going too much on the pressure
and get it to where you have a nice even pattern.
See, I got a little bit heavier down there in the bottom. That means that the tip of my gun
it's dirty. So I gotta fix that.
That's exactly why you will always spray a test pattern
and make sure everything is spraying correctly.
See how heavy that one is on the bottom,
one back and clean the tip just a little bit.
Now, I have a nice even pattern all the way across. Now, we got our gun clean. Let me show you what these knobs here do this right here is your inlet pressure,
that'll adjust it up or down, whichever way you got to go with it. Now, the wider your spray pattern is the more air pressure you have to bring in. Now, this knob up here actually adjust your spray width.
So you can go from a real narrow pattern,
which obviously is not a good thing to do.
We can widen it out
all the way out and that's all done with that knob right there. Now, this one down here is actually the stop for the needle. That's the one that I was referring to earlier. I call it the throttle. And what it does is it brings that stop in and doesn't let the needle come back as far
out of that tip because when that needle pulls back, it lets the paint come down through the gun and the air actually pulls it out the tip. And if you crank this thing, all the way out,
you'll end up with a whole bunch of material coming out and then you can end up with sags and all kinds of stuff. One of these is off just a little bit. It'll mess up the whole combination.
A tiger stripe can occur with candy even easier than pretty much any other finish. And if you don't keep your
pattern consistent,
say, for instance, you're running across there a couple of times and, oh, wait, I'm listening to the radio and not really paying attention to what I'm doing. Oh, that's ok.
I run it back over there. You're gonna end up
with a dark stripe all the way through it. Since it's transparent, you're always seeing what's underneath it. So if we have these dark spots and these stripes in there,
it doesn't matter how many times you go over that area,
all you're gonna accomplish
is just darkening up what's already dark making your tiger stripes even worse.
Yeah, we got a graphics laid down our gun set up. Now we're ready to lay down some candy
with the standard base coat. I like to do about a 50% overlap with candy. I usually do about a 75% overlap. It helps me keep my pattern more.
We brought the hood out here in the sun so you can see what it looks like with a little bit of daylight on them.
Your final color is a combination of the base and candy colors. Now, this blue base turned purple with red candy on it.
The reds got deeper and the graphics did too.
The gold being the lightest base gave us the brightest final color.
The heavy gold pearl lightens the candy and adds a larger metallic in the light.
Well, you can see candy is not the easiest thing in the world to spray, but it can really bring you right to the next level. If you have any questions about anything you saw on the show today, you can check it all out at Power Block tv.com. Well, for this week we're out of time. So
next time
we're out of here.
Show Full Transcript
Hey guys, we've been keeping the delivery people pretty busy dropping off parts for our latest project. The Fox Body Mustang that we're calling Dark Horse. Now, obviously, this isn't all the parts that we're gonna need. So that's a pretty good start. We're trying to keep the budget on our Mustang as low as possible. We still want a good daily driver,
plenty of performance to spare to do that. The first thing we had to do was lose that old lazy six cylinder that our car came with.
So we gave summit racing a call and they shipped us this blueprint 331 Stroker. These long blocks are assembled and ready to ship. That means you don't have to camp outside your machine shop waiting on your engine
and you may be wondering what's gonna keep the motor from dropping through that big old hole. Well, some that also hooked us up with the granite tubular K member this thing saves weight, makes it way easier to wrench on your motor and helps the line lower vehicles. So sit back, relax and check it out because we got some work to do.
This is a stock style fly where we picked up from Ford racing. I use a dab a lot tight on these A RP boats just to keep everything where they need to be.
I'm gonna torque all of these to 40 pounds and then again to 85
I'll knock in the pilot bearing, clean off the flywheel and made up our haze clutch and pressure plate. We went with our ceramic clutch to reduce slippage.
Before you tighten down the pressure plate, you got to align the clutch disk using your alignment tool, slide it into the clutch,
get it into the pilot bushing,
lift up on it just to taste
and then tighten the pressure plate down equally
so that you don't tighten it down one sided.
You want the clutch alignment tool to slide in and out. No drag,
nothing on it.
I torque these to 35 pounds. Then move on.
We decided to mount the K member from the bottom first,
then lower the motor in from the top.
We picked up a set of tubular control arms from summit. These will help to improve steering response and it knocked a few more pounds off the nose
and we're using spindles from a 94 through 98 mustang. It's an easy conversion to get five lug.
And plus they come with larger factory brakes
and they're cheap.
A
good cost effective upgrade over your stock brakes is E BCE rodders.
They're slotted and dimpled and this not only helps cooling but it also helps to even out your pad wear. And we're also gonna use the green stuff, brake pads. They work a lot better when they're cold. Help reduce brake fade and cut way down on the dust.
Now, for calipers, we are going to stick with OEM parts, but we're gonna upgrade to 99 to 04 type calipers. That's because these come factory with a dual piston. Whereas the original 94 to 98 had a single, little bit more stopping power.
Our K member has an extra motor mount hole. What that's for is to move the engine back a little over an inch for better weight transfer. And that's the one we're going to go with.
Don't scratch that firewall up.
It is.
That was too easy. I'm scared
with that. Can remember in there you can reach engine mounts,
all kinds of stuff a whole lot easier.
We save some more money going with a used transmission and pedal assembly. You can pretty much find these anywhere that's got mustang parts. I've got to get the car back up in the air to get this thing installed. And after that, I'm gonna do
on a rear
coming up how to make a sad, slippery old posse unit. Get up and grab like brand new, plus how to fine tune your spray gun settings.
You'll end up with a whole bunch of material coming out.
Hey, guys, you can have all the power in the world and not being able to put it to the ground.
It's kind of useless on our mustang project. We're gonna use a 94 to 98 rear.
This thing comes factory with a pause unit, but it's got a boat load of miles. It's kind of weak
and I'm gonna show you how to fix it
for the rebuild kit in this junkyard unit and have all of it for under 500 bucks. If you were to buy it all new, it'd be well over a grand
build on a budget muscle car projects that save you time and money.
I,
I'll start by removing the rotor and the brake assembly.
Then I gotta pull the main cabs and back out the carrier pin bolt.
I'll snatch out the carrier pin, poke out the sea cliffs with a screwdriver
and clear out the axles. Here. She comes
a lot of times the ring gear can get all up in your way.
So I'm removing this one for now,
the s clip holds the axle gears in place. Once you pull it, they're ready to come out
a little bit of scrubbing and she's ready to put back together.
We got our paws unit all tore down, cleaned up and ready to start reassembly Ford racing, sent their rebuild kit with shims, steels clutches and a bottle of their friction modified.
I'm gonna prep the clutches by soaking them in some royal purple gear oil for at least 15 minutes.
When you're disassembling and cleaning this thing, you wanna stay organized that way, you know what goes where left side, right side also keep the clutch packs together. That way you'll know what order
the rebuild kit came with several shins for setting the clearance of the spider gears. They determined the clearance between the housing and the gears.
I started with the biggest one in the kit.
So now let's see if the small gears can be seated with them in there.
It won't go in
no big deal. Just pull them back out and swap in the next thinner shins.
Now, let's see if it fits, looking pretty good.
Put the pin in to keep the spiders from moving around.
The next step is installing the S spring. Now, these things get a bad rep for being a bear to install and sometimes they are. But I got a little trick for you sit it in there and make sure that you sit it on two teeth, not just one. So it's kind of got a place to sit
and take a grease rag,
lay over it. Grease rag keeps all the dirt and gunk from falling off. This thing,
we use a hammer driving in the spot.
I'll knock it in to seat it
and slip in the carrier pin and the carrier bolt.
Now, all I gotta do is tighten this and that's all it is too. Rebuilding the pas
unit. I'm gonna go ahead and get started putting this rear axle back together. Well, I got it apart. It's the perfect time to swap in a new gear set. We're gonna install a set of four elevens that we got from Randy's ring opinion to give us plenty of that. Get up and go power at the green lights and we're really not concerned about running 200 mile an hour on the street.
Stick around. Rick's got a gun full of candy and he's not afraid to use it. Find out how you can lay down some dynamite graphics on your ride.
Hey, guys, you know, one of the most misunderstood things in car building is candy apple paint. About 50% of the time when somebody says, hey, check out that candy apple red paint job. They're talking about a color, not a type of finish.
There's also a lot of confusion about application layering and spraying candy apples. So today we're gonna try to shed a little bit of light on the subject.
I'm gonna split this hood up into four different sections. That way you can see what the candy looks like over four different base coats and I'll throw down a few graphics just so you can see how candy can make graphics look about 10 miles deep.
I'm gonna lay down some gold first because it's common to be used as a base for candy.
I'm also hosing down some red base.
Then on half the red, I'm using a large gold hurl to demonstrate a four stage look
then blue to show the variety of colors you can get just by changing your base color.
It's looking very patriotic.
I'm laying out a graphic on the pure red. I wanna show you how candy can add depth to a two dimensional design.
As usual. I'm asking the other parts of the surface to keep them clean.
Next, I'm gonna do
is layout just a quick flame design in the center of this. And then I'm gonna cover up the center graphic, the flame graphic and then lay in a background graphic. And then when I unmask it and put the candy over it, it'll look like really cool. Trust me.
If you're just starting out, you don't have any of this auto mask and paper mask and tape will do the same job. It's just a little bit more time
for the background graphic. I'm just using a little tap cloth and you can pretty much use anything you want to see the real low pressure and just kind of let the paint fall through it. You're not really trying to push it.
Here we go.
I'm busting out my iwata Micro to lay the drop shadows, but in a pinch, I've even used my LP H 400 base gun for the shadows.
You can unmask this whole thing and see what kind of a weird looking mess we got going.
I'm gonna lay down one more effect here that you can do
real easy with candies. It's basically just a series of stripes done in pearls that fade the further back they go.
The trick is
you get heavier up here in the front
and just kind of let it fade off
since I've got the material
opened up pretty much all the way and I control how much is coming out.
I just think it's easier like this. I like to have the control of my hand. I don't like the gun telling me what I'm doing
and if you want to soften up the transition on the backside there,
all you have to do is take some of the blue base coat
over, reduce it
and dust it back in over your tail.
Well, guys, we have a nice variety of base coats laid out here that we can put our candies down over the top of. And I really think you're gonna be impressed at how much of a difference that candy coat really makes
after the break, Rick gives lessons on how to set your spray gun upright.
You're watching Muscle Car for a DVD copy of this episode, just go to Power Block tv.com and order your copy for just 595 plus shipping and handling, start your own muscle car collection delivered right to your door from the power block.
Ok. Now we're ready to mix up some candy for the hood. There's a little bit of confusion as to what a true candy paint job is.
And part of that is because I've seen some pearl paint jobs that can mimic a candy. But
one of the aspects of a true candy
is that it will actually turn black when you get it thick enough. So it looks black in the cup,
you can mix it up,
but it actually turns red
if you look at it through the light.
All right, we got the candy loaded. Now it's time to talk about gun set up. Now, any time you're painting anything, it's important to have this thing set up correctly. But when you're shooting candies, you can multiply that importance by about 10.
Now, let me show you what I'm talking about. One of the biggest mistakes I've seen guys do in spring candies is they leave the pattern too narrow.
If you're trying to spray candy and you got a pattern out wide,
you're gonna end up with a whole bunch of tiger stripes. Normally, when I'm spraying a candy, I try to get the widest pattern I possibly can
without going too much on the pressure
and get it to where you have a nice even pattern.
See, I got a little bit heavier down there in the bottom. That means that the tip of my gun
it's dirty. So I gotta fix that.
That's exactly why you will always spray a test pattern
and make sure everything is spraying correctly.
See how heavy that one is on the bottom,
one back and clean the tip just a little bit.
Now, I have a nice even pattern all the way across. Now, we got our gun clean. Let me show you what these knobs here do this right here is your inlet pressure,
that'll adjust it up or down, whichever way you got to go with it. Now, the wider your spray pattern is the more air pressure you have to bring in. Now, this knob up here actually adjust your spray width.
So you can go from a real narrow pattern,
which obviously is not a good thing to do.
We can widen it out
all the way out and that's all done with that knob right there. Now, this one down here is actually the stop for the needle. That's the one that I was referring to earlier. I call it the throttle. And what it does is it brings that stop in and doesn't let the needle come back as far
out of that tip because when that needle pulls back, it lets the paint come down through the gun and the air actually pulls it out the tip. And if you crank this thing, all the way out,
you'll end up with a whole bunch of material coming out and then you can end up with sags and all kinds of stuff. One of these is off just a little bit. It'll mess up the whole combination.
A tiger stripe can occur with candy even easier than pretty much any other finish. And if you don't keep your
pattern consistent,
say, for instance, you're running across there a couple of times and, oh, wait, I'm listening to the radio and not really paying attention to what I'm doing. Oh, that's ok.
I run it back over there. You're gonna end up
with a dark stripe all the way through it. Since it's transparent, you're always seeing what's underneath it. So if we have these dark spots and these stripes in there,
it doesn't matter how many times you go over that area,
all you're gonna accomplish
is just darkening up what's already dark making your tiger stripes even worse.
Yeah, we got a graphics laid down our gun set up. Now we're ready to lay down some candy
with the standard base coat. I like to do about a 50% overlap with candy. I usually do about a 75% overlap. It helps me keep my pattern more.
We brought the hood out here in the sun so you can see what it looks like with a little bit of daylight on them.
Your final color is a combination of the base and candy colors. Now, this blue base turned purple with red candy on it.
The reds got deeper and the graphics did too.
The gold being the lightest base gave us the brightest final color.
The heavy gold pearl lightens the candy and adds a larger metallic in the light.
Well, you can see candy is not the easiest thing in the world to spray, but it can really bring you right to the next level. If you have any questions about anything you saw on the show today, you can check it all out at Power Block tv.com. Well, for this week we're out of time. So
next time
we're out of here.
