Detroit Muscle Featured Projects
Detroit Muscle Builds
Want more content like this?
Join the PowerNation Email NewsletterParts Used In This Episode
Design Engineering, Inc. (DEI)
Boom Mat
Matco Tools
MATCO Tools are the Official Tool Supplier to Detroit Muscle
The Industrial Depot
Tools, Hardware, Shop Supplies
Episode Transcript
(Tommy)>> You're watching Powernation.
(Josh)>> Today on Detroit Muscle, our '70 Mustang, takes another step closer to the finish line. We fab up a custom exhaust, the interior goes in, plus tech on rear discs.
[engines revving]
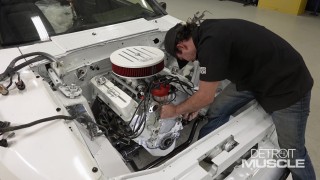
(Tommy)>> Hey Guys, welcome to Detroit Muscle. Today we've got some pretty big plans. We're continuing on our EBC brakes, supercharged '70 Mustang. That we're going to be giving away to one of you all. Now you know with those resto mods, it's all about the conveniences and we're add so of those up there in the interior. But before we get into all that, it's time to set the tone on that coyote. You guys may remember this cat, he came in and helped us out with that front suspension install on our Mustang. He's got a welding skill set that is above and beyond. Josh, I'm glad that you accepted the challenge.
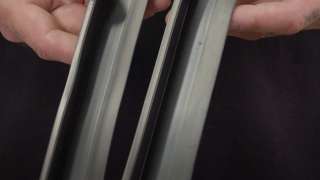
(Josh)>> Absolutely! Now that Tommy's got the headers on the car, I can take it over by bringing the exhaust from the headers to the back of the car. Now we're going to be tig welding this exhaust and it may be a mystery to some, but I'm here to demystify it in three different ways. First, we'll break down the machine setup and tungsten prep. Next, we'll talk about material and filler rod. Then we'll break down in detail the process of back purging. All right guys, before we can start the process, we got to set up the machine. With the machine off, we're gonna go ahead and select DC negative. Now that we got DC negative, we can power on the machine. I'm going to leave the AC balance at around sixty percent range, our pulse feature will remain off & our post flow gas will remain at fifteen. But as far as our amperage, a good general rule of thumb is one thousandth per one amp. Now since the material we're working with is around sixty thousandths, we're going to start at sixty amps. But that may vary depending on how fast or slow I am during the welding process. Now that our machine is set, we can go ahead and turn on the gas. After we get the gas turned on, we got to go ahead and set out flow rate at the torch. Which, I can blip the throttle of the torch, activating it, showing our gas flow at the torch, which is now twenty. That's an ideal c-f-m for this application. Next, we got to prep our tungsten. The material I'm going to be burning up calls for a red colored coated, one sixteenth size tungsten. Now, we've got to sharpen this tungsten. Since our material is so thin, I've got to sharpen the tungsten at a fifteen degree angle because the sharper it is, the wider the weld bead will be as well as, I'm not going to be putting too much penetration to our thin material, which will eliminate blowouts. Now that we've sharpened our tungsten, those of you may be wondering... how far does the tungsten need to protrude out of the torch? Now a good general rule of thumb, the inside diameter of the torch, also will be the same distance that the tungsten needs to stick out. Now guys it's real important to know the material you're working with. Those of you at home may be thinking that this is mild steel. It's actually stainless. There are several different types of stainless. But also, there are several different types of filler rod even though they look the same. So it's real important to know the material you're working with, so you can select the right filler rod to get the job done properly. All right guys, now that we're on part three of welding stainless steel, we're going to demystify a process called back purging. Back purging is where you remove all the oxygen or air, out of our tube and we flood it with a separate bottle here that is filled with argon. Argon displaces oxygen from the tube. Now, if we have oxygen inside of our tubes as we're welding, it does this... here's two examples. Can't really tell which one is the bad one. But, when we flip these over, here's where the problem lies. As you can see, big difference. This is all gray, oxidized and contaminated. That's what we call sugaring. This is what we want to achieve. We want to see nice and shiny, uncontaminated weld. But this is on a small level, but any level of sugaring is bad. So, to eliminate that, here's what I'm going to do. I'm actually going to mask off one end of our tube here and I'm going to get it nice and sealed to where it's somewhat airtight. I'm also gonna poke a couple of holes in this end. That side set up. Then I'm going to take our gas line here, stick her into this end, get this all nice and sealed. Now we're not trying to create a one hundred percent airtight seal, but we want to get some good positive pressure by the argon gas flowing in so that it removes all of that oxygen. Now we're pretty much ready to go. All I really got to do, turn the bottle on, regulate our pressure to around ten to seven c-f-m, give it a couple of minutes to flood that oxygen out because like you saw before, where I poked the holes in this end. That oxygen is going to come out here. Once it's flooded we're good to go to make a successful weld.
(Daniel)>> You know as we get older there's a lucky few who get away without having to wear a pair of these to see little things like the numbers on the sides of our sockets. As for the rest of us, we could all use something like these socket labels from socket labels dot com. These have easy to read labels that stick right to the side of your sockets. These come in metric, which are in red and the s-a-e ones are the black ones. They have a permanent adhesive so they'll be stuck for good. Plus these labels are oil resistant so you don't have to worry about them breaking down over time. Now you can go out and grab yourself a pack for your sockets for only five bucks at socket labels dot com.
(Josh)>> Coming up on Detroit Muscle... we finish our custom fabricated exhaust then then interior.
(Tommy)>> Hey guys welcome back. Well, we've got our exhaust pipe made all the way back here to the muffler. Now we're in a bit of a discussion if you will, how to get the tailpipe all the way to the back of the car.
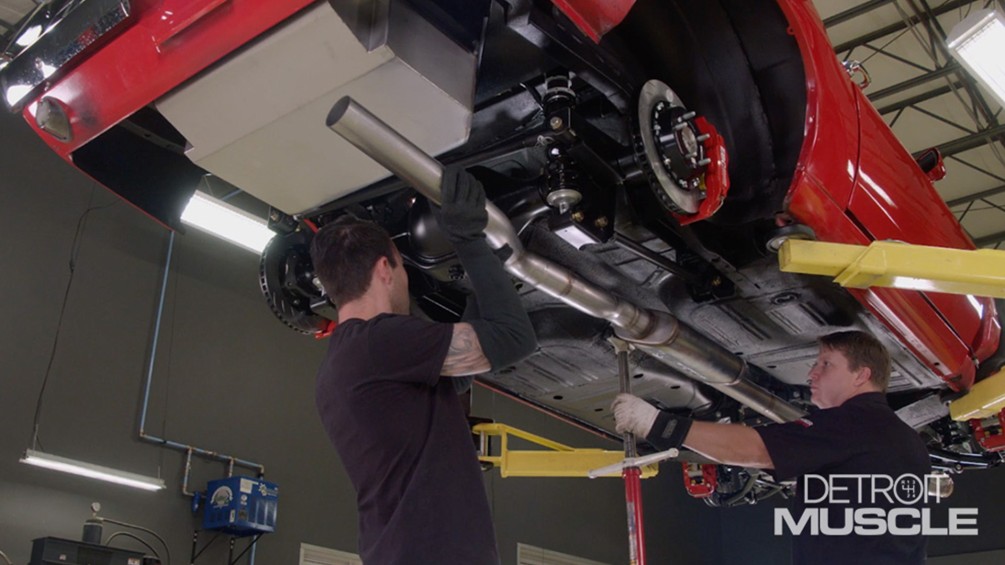
(Josh)>> Now to accomplish that we can go up and over the axle or under the axle. I've got a test piece here to see if we can actually make it from the muffler and get our tubing above the axle.
(Tommy)>> Now neither one of these are right or wrong, it's just kind of seeing it which way we can go.
(Josh)>> As you can see, we've got our three inch tube up here, just to give us an idea where we can route this big ole thing but with the suspension at full droop, we have a lot of room. But when it comes to being at ride height or at full compression, we're going to run out of that room real quick. (Tommy)... You also don't want to run the exhaust around anything that's temperature sensitive like the fuel tank or the brake lines. I'm thinking from where we're at, just need to run the exhaust below the rear axle. But the complicated thing of doing it this way is it has to look like something. It doesn't need to look like you're dragging something out under the car.
(Josh)>> No definitely not. It looks like we actually have the ground clearance but you know what? By putting these pipes going out the back the way we're doing it, that's going to be some west coast blast pipe style.
(Tommy)>> Bro! ♪
(Josh)>> Building this custom exhaust guys... isn't really a tube that's just all one tube. There's multiple pieces to the puzzle, as you can see that I'm mocking up right here, test fitting to make sure that they're not getting in the way of everything or they're going to be heating up anything. So once everything is fit, I can do the final tack welds and do a full weld to complete our task. ♪
(Tommy)>> You know with what we're doing here, there's a lot of pieces to the puzzle and a whole lot of obstacles that we have to work around. More so, we want this thing to look like we know what we're doing. Because the way these pipes are going to be exposed from the back side of the car, well the looks is important to us. And I have to say... I think we're pretty close.
(Josh)>> Close but no cigar Tommy. I think we've got to get this exhaust lined up with the body line here... It's pretty flat. Now to make that fix, I'm going to have to put a cut somewhere around right here. Clock it a little bit and we should be good to go.
(Tommy)>> Where we're going to make our cut is right here and it can be made technically either here, anywhere to about here in this straight section of the pipe. If you would to get into the curve, when you rotate it, this and this would clock up or clock down. And all we're looking to do is clock this side of the pipe up.
(Josh)>> Now that we've got our pipe marked, we're going to see if we can put a mark all way around the pipe that I can follow with the band saw. There's a couple of different advance tools that can make that mark but we're going to go ahead and use some simple masking tape. Now this is just like third grade. Where the teacher told you to follow the lines. Now we have the line on the tube that we can line up with the masking tape so that I have a good visual straight line here that I can follow from front to back when I run the tube through the band saw. ♪ As you can see it's simple. But it works. ♪
(Tommy)>> We've got to come down with that then.
(Josh)>> I like it where's it's at. ♪ Now that it's tacked, we can burn it up on the welding table. But before I can start welding, we'll have to purge all of the oxygen out of the tube like we did earlier. ♪ Here's a tig tip. Always make sure your arms are in a comfortable position and you can see clearly. It doesn't hurt to move the part where you want it to be comfortable. ♪
(Tommy)>> Well we've got our passenger side exhaust all fabbed up and I can't wait to hear that supercharged coyote sing through that Flowmaster exhaust. You guys don't run off. ♪
(Josh)>> Coming up next... We give our giveaway mustang a fresh new interior
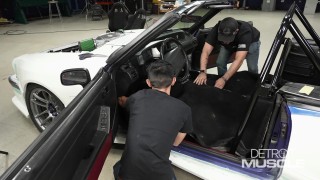
(Tommy)>> Hey guys! Welcome back to the shop. We're steadily checking off the things on our to do list with our EBC Mustang that we're going to be giving away to one of you all. The next task at hand... is the interior. With our mustang, we want this thing to have performance throughout and that includes the upholstery. Now we also want it be comfortable to ride in and there are a few things you that can do that will go a long ways. Kind of like... adding a tilt column like that one that we picked up from Summit Racing. Now we also have a couple of obstacles that we're gonna have to work through. We've got a pick chrome shifter sticking through the hump from going from an automatic to a manual and we widened those rear wheel tubs. But we'll get to all that as we go along. For our interior renovation, we went to TMI for a full interior setup. Including front and rear seats, console and door panels and carpet. Now this is going to elevate our resto mod quite considerably. First part of this install is starting with the foundation. Before we get too carried away with installing our carpet, we're going to lay down some Boom Mat form DEI. This helps to reduce unwanted temperature and noise from the road, engine and so on. To install it, it's super easy. You just peel it back, stick it on the surface. Now we've already laid it down in a couple of spots. We've got a couple more and then we can glue in our interior. To trim these down to size a basic utility knife does the trick. ♪ When applying the material, you want the surface to be clean. And I did all that before I started. Our floor is definitely not a flat surface. So at first, I massage it into place by hand and then follow it up with a roller to conform it into all the nooks and crannies. Now with our carpet setup, it's a bit different than the normal, fuzzy stuff that just goes into the floor. With ours, it's far more of a custom fit. It's kind of tailored to the car. It comes in several pieces and it has to be bonded to the floor. We going to be using some Landau top glue. Once I get it all mixed up, we can pour it in the gun and we're ready to move on. [gun hissing] You want to spray the adhesive on both the floor and the carpet. After it's dried a touch, you're good to go. We're going to start with the tunnel and then move to the sides. [gun hissing] Making sure to press each piece down and you want to pay attention to all the lines. ♪ That turned out pretty nice. Now I mentioned earlier those rear wheel tubs is going to give us a bit of a fit. Well, this was my solution. This interior panel kind of interfered with it. So I notched this thing out as a relief cut. Not what's going to be exposed on that wheel tub, I'm going to cover with some material. It's that simple. ♪ Now it did take a little widdleling on this panel to get it to look that good but almost looks factory. Now the meat and potatoes of the interior has to be the front seats. And it's easy to see with comparison to that old stock unit, the benefits of the TMI interior. Not only have they knocked it out of the park when it comes to style and design. Because it's brought our car from yesterday into modern times. If you'll notice that stock seat is rather flat. Our new one, has the bolstered sides on it, that not only help to keep you on your side of the vehicle, whenever you're kind of carving out some corners. And the support of the foam, helps to keep you comfortable on those long rides. Plus, it's a bolt in swap. ♪ You guys know it's hard to find good help when we have to bring this old boy in. But there again, he does get the job done. ♪ Compared with what we started with, this interior has made quite the transformation. Now with its' updated style and aggressive good looks, our new interior compliments all of our hard work. Man! I can't wait to be sitting behind the wheel with some seat time out on the highway.
(Josh)>> Looks good Tommy, but we're not finished just yet and some of us are guilty of this. We can spend countless hour if not years on our project and forget weather stripping. Thankfully the guys at Steele Rubber Products have all types of components to protect your interior from the outside elements. Eliminate road noise and most importantly ensure your windows and doors stay sealed. And for you one off custom guys, Steele Rubber Products offer components that are universal to your custom build. [engine revving] Up next... remember that scene from My Cousin Vinny about rear posis? Well, Tommy talks rear ends. [engine revving]
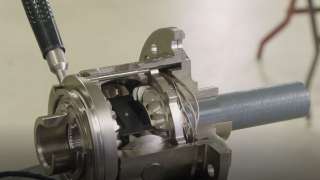
(Tommy)>> Hey Guys! Welcome back to the shop. With your backside planted in the seat, well I'm going to talk about rear ends. Now we've all seen someone or even possibly been the person that was out showing off a little bit in our pride and joy. [tires squealing] And when the smoke cleared, all that was produced was a single tire fire. The culprit is an open diff like this stock unit that we pulled from our mustang. They've used this design for many years and they're very common. Open diffs are designed to let each wheel operate independently, which is fine with normal driving. But throw a little performance under the hood and all of those efforts can be kind of a waste. Because all your forward push will go through the wheel with the least amount of grip. Whether it be because of an uneven surface or a slippery road. You may be thinking that if you locked the axles together that this would solve the problem. In the application of drag racing, this is a pretty common practice. Guys install a spool or even go the budget route and weld the spider gears to the carrier to make everything solid. Doing it this way does make both wheels spin at the same rate no matter what the grip surface or even if the wheel is touching the ground. But it does create another problem. Not all roads are straight. At some point you're going to have to turn the wheel. Basically, whenever you take a curve, one wheel kind of speeds up and the inside one slows down. With a locked unit, there's no moving parts to allow all that to happen. So, a solid setup is dangerous on the street. It causes excessive tire wear and it's hard on parts. A better solution for any application, whether you're on the pavement, in the dirt, out on the highway or even at the track... Eaton's got you covered. Folks in the off road world, have relied on Eaton's Elocker for conquering hills, rock, mud and everything in between for years. With the simple push of a button, you have a fully selectable locker with no air hoses or a compressor needed. If you're into circle track racing or have any interest in off roading, then the legendary Detroit locker could be right up your ally. This automatic, mechanical locker is engineered for strength and durability that's maintenance free. Then there's the original Eaton Positive Traction Differential. If you're into classic muscle, you've probably seen one of these. Especially you GM guys. With carbon fiber clutch coatings and limited-slip design, this makes for a popular choice in street and strip applications as well as modern muscle. Now with our mustang resto mod, we're not really holding anything back. We spent a lot of time enhancing the performance with modern technology. So an Eaton Detroit Truetrac Differential just makes sense. We've used this setup in several of our projects like our pro luxury build, street Regal. This hopped up Buick had the goods. Performance from front to back and we had to get all that power to the ground. There's a lot of technology that goes into a limited slip differential. The Eaton, patented, helical design limits the amount of wheel spin by transmitting an equal amount of torque to both wheels while moving straight. The quiet and smooth operation of Eaton's Truetrac can transfer three and a half times more torque to the high traction wheel than the conventional clutch driven limited slip. So if your building muscle or upgrading for bigger performance, you've got an entire family of overachievers. Whether you're on the pavement, playing in the dirt, at the track or out on the highway. Eaton's got you covered. You know today's been a pretty good day. We've checked off a few more of the boxes, of building our mustang, that we're going to be giving away to one of you guys. You can go to Powernation tv dot com and enter to win our EBC Mustang. You can also check out our project pages. There you'll find current build status, before and after pics, parts used on all of our projects. And ladies and gentlemen... I have to say... I'm leaving the building. My rear end's tired.
Show Full Transcript
(Josh)>> Today on Detroit Muscle, our '70 Mustang, takes another step closer to the finish line. We fab up a custom exhaust, the interior goes in, plus tech on rear discs.
[engines revving]
(Tommy)>> Hey Guys, welcome to Detroit Muscle. Today we've got some pretty big plans. We're continuing on our EBC brakes, supercharged '70 Mustang. That we're going to be giving away to one of you all. Now you know with those resto mods, it's all about the conveniences and we're add so of those up there in the interior. But before we get into all that, it's time to set the tone on that coyote. You guys may remember this cat, he came in and helped us out with that front suspension install on our Mustang. He's got a welding skill set that is above and beyond. Josh, I'm glad that you accepted the challenge.
(Josh)>> Absolutely! Now that Tommy's got the headers on the car, I can take it over by bringing the exhaust from the headers to the back of the car. Now we're going to be tig welding this exhaust and it may be a mystery to some, but I'm here to demystify it in three different ways. First, we'll break down the machine setup and tungsten prep. Next, we'll talk about material and filler rod. Then we'll break down in detail the process of back purging. All right guys, before we can start the process, we got to set up the machine. With the machine off, we're gonna go ahead and select DC negative. Now that we got DC negative, we can power on the machine. I'm going to leave the AC balance at around sixty percent range, our pulse feature will remain off & our post flow gas will remain at fifteen. But as far as our amperage, a good general rule of thumb is one thousandth per one amp. Now since the material we're working with is around sixty thousandths, we're going to start at sixty amps. But that may vary depending on how fast or slow I am during the welding process. Now that our machine is set, we can go ahead and turn on the gas. After we get the gas turned on, we got to go ahead and set out flow rate at the torch. Which, I can blip the throttle of the torch, activating it, showing our gas flow at the torch, which is now twenty. That's an ideal c-f-m for this application. Next, we got to prep our tungsten. The material I'm going to be burning up calls for a red colored coated, one sixteenth size tungsten. Now, we've got to sharpen this tungsten. Since our material is so thin, I've got to sharpen the tungsten at a fifteen degree angle because the sharper it is, the wider the weld bead will be as well as, I'm not going to be putting too much penetration to our thin material, which will eliminate blowouts. Now that we've sharpened our tungsten, those of you may be wondering... how far does the tungsten need to protrude out of the torch? Now a good general rule of thumb, the inside diameter of the torch, also will be the same distance that the tungsten needs to stick out. Now guys it's real important to know the material you're working with. Those of you at home may be thinking that this is mild steel. It's actually stainless. There are several different types of stainless. But also, there are several different types of filler rod even though they look the same. So it's real important to know the material you're working with, so you can select the right filler rod to get the job done properly. All right guys, now that we're on part three of welding stainless steel, we're going to demystify a process called back purging. Back purging is where you remove all the oxygen or air, out of our tube and we flood it with a separate bottle here that is filled with argon. Argon displaces oxygen from the tube. Now, if we have oxygen inside of our tubes as we're welding, it does this... here's two examples. Can't really tell which one is the bad one. But, when we flip these over, here's where the problem lies. As you can see, big difference. This is all gray, oxidized and contaminated. That's what we call sugaring. This is what we want to achieve. We want to see nice and shiny, uncontaminated weld. But this is on a small level, but any level of sugaring is bad. So, to eliminate that, here's what I'm going to do. I'm actually going to mask off one end of our tube here and I'm going to get it nice and sealed to where it's somewhat airtight. I'm also gonna poke a couple of holes in this end. That side set up. Then I'm going to take our gas line here, stick her into this end, get this all nice and sealed. Now we're not trying to create a one hundred percent airtight seal, but we want to get some good positive pressure by the argon gas flowing in so that it removes all of that oxygen. Now we're pretty much ready to go. All I really got to do, turn the bottle on, regulate our pressure to around ten to seven c-f-m, give it a couple of minutes to flood that oxygen out because like you saw before, where I poked the holes in this end. That oxygen is going to come out here. Once it's flooded we're good to go to make a successful weld.
(Daniel)>> You know as we get older there's a lucky few who get away without having to wear a pair of these to see little things like the numbers on the sides of our sockets. As for the rest of us, we could all use something like these socket labels from socket labels dot com. These have easy to read labels that stick right to the side of your sockets. These come in metric, which are in red and the s-a-e ones are the black ones. They have a permanent adhesive so they'll be stuck for good. Plus these labels are oil resistant so you don't have to worry about them breaking down over time. Now you can go out and grab yourself a pack for your sockets for only five bucks at socket labels dot com.
(Josh)>> Coming up on Detroit Muscle... we finish our custom fabricated exhaust then then interior.
(Tommy)>> Hey guys welcome back. Well, we've got our exhaust pipe made all the way back here to the muffler. Now we're in a bit of a discussion if you will, how to get the tailpipe all the way to the back of the car.
(Josh)>> Now to accomplish that we can go up and over the axle or under the axle. I've got a test piece here to see if we can actually make it from the muffler and get our tubing above the axle.
(Tommy)>> Now neither one of these are right or wrong, it's just kind of seeing it which way we can go.
(Josh)>> As you can see, we've got our three inch tube up here, just to give us an idea where we can route this big ole thing but with the suspension at full droop, we have a lot of room. But when it comes to being at ride height or at full compression, we're going to run out of that room real quick. (Tommy)... You also don't want to run the exhaust around anything that's temperature sensitive like the fuel tank or the brake lines. I'm thinking from where we're at, just need to run the exhaust below the rear axle. But the complicated thing of doing it this way is it has to look like something. It doesn't need to look like you're dragging something out under the car.
(Josh)>> No definitely not. It looks like we actually have the ground clearance but you know what? By putting these pipes going out the back the way we're doing it, that's going to be some west coast blast pipe style.
(Tommy)>> Bro! ♪
(Josh)>> Building this custom exhaust guys... isn't really a tube that's just all one tube. There's multiple pieces to the puzzle, as you can see that I'm mocking up right here, test fitting to make sure that they're not getting in the way of everything or they're going to be heating up anything. So once everything is fit, I can do the final tack welds and do a full weld to complete our task. ♪
(Tommy)>> You know with what we're doing here, there's a lot of pieces to the puzzle and a whole lot of obstacles that we have to work around. More so, we want this thing to look like we know what we're doing. Because the way these pipes are going to be exposed from the back side of the car, well the looks is important to us. And I have to say... I think we're pretty close.
(Josh)>> Close but no cigar Tommy. I think we've got to get this exhaust lined up with the body line here... It's pretty flat. Now to make that fix, I'm going to have to put a cut somewhere around right here. Clock it a little bit and we should be good to go.
(Tommy)>> Where we're going to make our cut is right here and it can be made technically either here, anywhere to about here in this straight section of the pipe. If you would to get into the curve, when you rotate it, this and this would clock up or clock down. And all we're looking to do is clock this side of the pipe up.
(Josh)>> Now that we've got our pipe marked, we're going to see if we can put a mark all way around the pipe that I can follow with the band saw. There's a couple of different advance tools that can make that mark but we're going to go ahead and use some simple masking tape. Now this is just like third grade. Where the teacher told you to follow the lines. Now we have the line on the tube that we can line up with the masking tape so that I have a good visual straight line here that I can follow from front to back when I run the tube through the band saw. ♪ As you can see it's simple. But it works. ♪
(Tommy)>> We've got to come down with that then.
(Josh)>> I like it where's it's at. ♪ Now that it's tacked, we can burn it up on the welding table. But before I can start welding, we'll have to purge all of the oxygen out of the tube like we did earlier. ♪ Here's a tig tip. Always make sure your arms are in a comfortable position and you can see clearly. It doesn't hurt to move the part where you want it to be comfortable. ♪
(Tommy)>> Well we've got our passenger side exhaust all fabbed up and I can't wait to hear that supercharged coyote sing through that Flowmaster exhaust. You guys don't run off. ♪
(Josh)>> Coming up next... We give our giveaway mustang a fresh new interior
(Tommy)>> Hey guys! Welcome back to the shop. We're steadily checking off the things on our to do list with our EBC Mustang that we're going to be giving away to one of you all. The next task at hand... is the interior. With our mustang, we want this thing to have performance throughout and that includes the upholstery. Now we also want it be comfortable to ride in and there are a few things you that can do that will go a long ways. Kind of like... adding a tilt column like that one that we picked up from Summit Racing. Now we also have a couple of obstacles that we're gonna have to work through. We've got a pick chrome shifter sticking through the hump from going from an automatic to a manual and we widened those rear wheel tubs. But we'll get to all that as we go along. For our interior renovation, we went to TMI for a full interior setup. Including front and rear seats, console and door panels and carpet. Now this is going to elevate our resto mod quite considerably. First part of this install is starting with the foundation. Before we get too carried away with installing our carpet, we're going to lay down some Boom Mat form DEI. This helps to reduce unwanted temperature and noise from the road, engine and so on. To install it, it's super easy. You just peel it back, stick it on the surface. Now we've already laid it down in a couple of spots. We've got a couple more and then we can glue in our interior. To trim these down to size a basic utility knife does the trick. ♪ When applying the material, you want the surface to be clean. And I did all that before I started. Our floor is definitely not a flat surface. So at first, I massage it into place by hand and then follow it up with a roller to conform it into all the nooks and crannies. Now with our carpet setup, it's a bit different than the normal, fuzzy stuff that just goes into the floor. With ours, it's far more of a custom fit. It's kind of tailored to the car. It comes in several pieces and it has to be bonded to the floor. We going to be using some Landau top glue. Once I get it all mixed up, we can pour it in the gun and we're ready to move on. [gun hissing] You want to spray the adhesive on both the floor and the carpet. After it's dried a touch, you're good to go. We're going to start with the tunnel and then move to the sides. [gun hissing] Making sure to press each piece down and you want to pay attention to all the lines. ♪ That turned out pretty nice. Now I mentioned earlier those rear wheel tubs is going to give us a bit of a fit. Well, this was my solution. This interior panel kind of interfered with it. So I notched this thing out as a relief cut. Not what's going to be exposed on that wheel tub, I'm going to cover with some material. It's that simple. ♪ Now it did take a little widdleling on this panel to get it to look that good but almost looks factory. Now the meat and potatoes of the interior has to be the front seats. And it's easy to see with comparison to that old stock unit, the benefits of the TMI interior. Not only have they knocked it out of the park when it comes to style and design. Because it's brought our car from yesterday into modern times. If you'll notice that stock seat is rather flat. Our new one, has the bolstered sides on it, that not only help to keep you on your side of the vehicle, whenever you're kind of carving out some corners. And the support of the foam, helps to keep you comfortable on those long rides. Plus, it's a bolt in swap. ♪ You guys know it's hard to find good help when we have to bring this old boy in. But there again, he does get the job done. ♪ Compared with what we started with, this interior has made quite the transformation. Now with its' updated style and aggressive good looks, our new interior compliments all of our hard work. Man! I can't wait to be sitting behind the wheel with some seat time out on the highway.
(Josh)>> Looks good Tommy, but we're not finished just yet and some of us are guilty of this. We can spend countless hour if not years on our project and forget weather stripping. Thankfully the guys at Steele Rubber Products have all types of components to protect your interior from the outside elements. Eliminate road noise and most importantly ensure your windows and doors stay sealed. And for you one off custom guys, Steele Rubber Products offer components that are universal to your custom build. [engine revving] Up next... remember that scene from My Cousin Vinny about rear posis? Well, Tommy talks rear ends. [engine revving]
(Tommy)>> Hey Guys! Welcome back to the shop. With your backside planted in the seat, well I'm going to talk about rear ends. Now we've all seen someone or even possibly been the person that was out showing off a little bit in our pride and joy. [tires squealing] And when the smoke cleared, all that was produced was a single tire fire. The culprit is an open diff like this stock unit that we pulled from our mustang. They've used this design for many years and they're very common. Open diffs are designed to let each wheel operate independently, which is fine with normal driving. But throw a little performance under the hood and all of those efforts can be kind of a waste. Because all your forward push will go through the wheel with the least amount of grip. Whether it be because of an uneven surface or a slippery road. You may be thinking that if you locked the axles together that this would solve the problem. In the application of drag racing, this is a pretty common practice. Guys install a spool or even go the budget route and weld the spider gears to the carrier to make everything solid. Doing it this way does make both wheels spin at the same rate no matter what the grip surface or even if the wheel is touching the ground. But it does create another problem. Not all roads are straight. At some point you're going to have to turn the wheel. Basically, whenever you take a curve, one wheel kind of speeds up and the inside one slows down. With a locked unit, there's no moving parts to allow all that to happen. So, a solid setup is dangerous on the street. It causes excessive tire wear and it's hard on parts. A better solution for any application, whether you're on the pavement, in the dirt, out on the highway or even at the track... Eaton's got you covered. Folks in the off road world, have relied on Eaton's Elocker for conquering hills, rock, mud and everything in between for years. With the simple push of a button, you have a fully selectable locker with no air hoses or a compressor needed. If you're into circle track racing or have any interest in off roading, then the legendary Detroit locker could be right up your ally. This automatic, mechanical locker is engineered for strength and durability that's maintenance free. Then there's the original Eaton Positive Traction Differential. If you're into classic muscle, you've probably seen one of these. Especially you GM guys. With carbon fiber clutch coatings and limited-slip design, this makes for a popular choice in street and strip applications as well as modern muscle. Now with our mustang resto mod, we're not really holding anything back. We spent a lot of time enhancing the performance with modern technology. So an Eaton Detroit Truetrac Differential just makes sense. We've used this setup in several of our projects like our pro luxury build, street Regal. This hopped up Buick had the goods. Performance from front to back and we had to get all that power to the ground. There's a lot of technology that goes into a limited slip differential. The Eaton, patented, helical design limits the amount of wheel spin by transmitting an equal amount of torque to both wheels while moving straight. The quiet and smooth operation of Eaton's Truetrac can transfer three and a half times more torque to the high traction wheel than the conventional clutch driven limited slip. So if your building muscle or upgrading for bigger performance, you've got an entire family of overachievers. Whether you're on the pavement, playing in the dirt, at the track or out on the highway. Eaton's got you covered. You know today's been a pretty good day. We've checked off a few more of the boxes, of building our mustang, that we're going to be giving away to one of you guys. You can go to Powernation tv dot com and enter to win our EBC Mustang. You can also check out our project pages. There you'll find current build status, before and after pics, parts used on all of our projects. And ladies and gentlemen... I have to say... I'm leaving the building. My rear end's tired.
