Detroit Muscle Featured Projects
Detroit Muscle Builds
Want more content like this?
Join the PowerNation Email NewsletterParts Used In This Episode
Matco Tools
MATCO Tools are the Official Tool Supplier to Detroit Muscle
Power By The Hour
Belt Drive System
The Industrial Depot
Tools, Hardware, Shop Supplies
Episode Transcript
(Tommy)>> You're watching Powernation.
(Tommy)>> Today we're gonna need a big metric shoehorn to mount our supercharged Coyote into this EBC Mustang, and while we're at it this ground pounder's gonna get a gear grabbing five speed. Have mercy! ♪ ♪ [ engines revving ] ♪ ♪
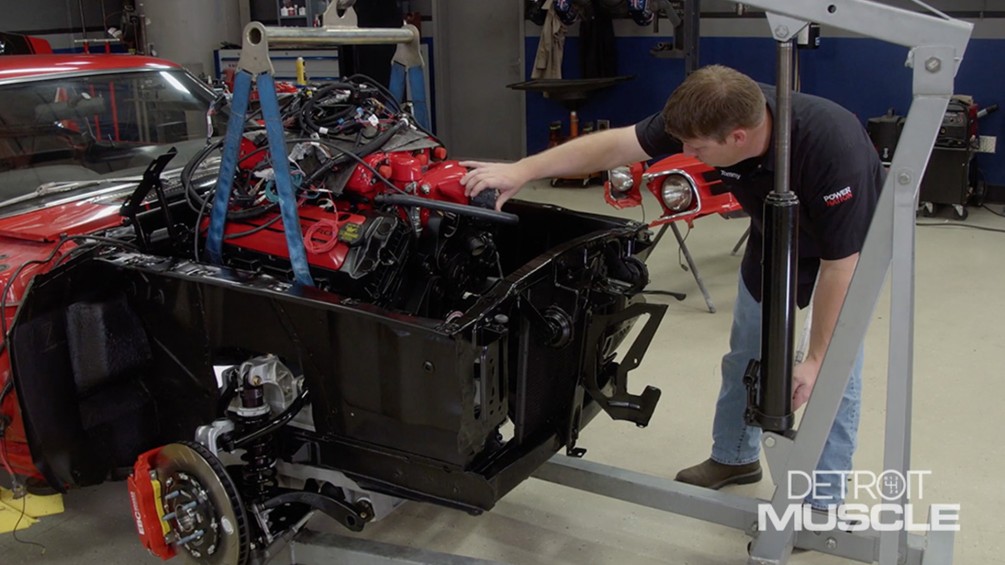
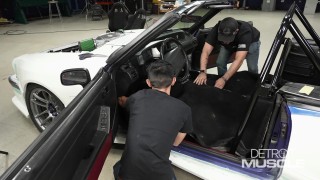
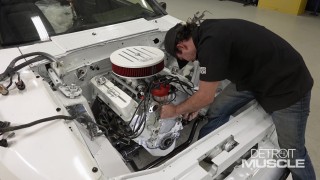
(Tommy)>> Hey guys, welcome to Detroit Muscle. Today's subject matter is a popular one. Some people love it, the purists seem cringe, and if you're a throttle loving gearhead it's probably right up your alley. What I'm referring to is a Coyote swap. It has a lot of benefits, but not all of them come so easy. There's quite a bit that goes into this conversion if you're considering it. First off let's talk about the car that you're planning to shoehorn one of those late model meals into. If you have something rare like a Shelby, 428 car, or even a K-code it's probably not a good idea. Those are high dollar cars and you would really be defacing the holy grail of Mustangs with this type of swap, but if you have something kinda like what we started with, a six cylinder, or a standard ole small block car I'm gonna say let those sparks fly because they made thousands of these things, and increasing a car's desirability usually means more money, making it more sought after because you know the old saying. Something's only worth what someone else is willing to pay you for it. So you may be asking, what's the big deal with the Coyote? What makes them so good? For one thing other than reliability is they make good power straight out of the box. From about 350 up to the mid 400's in stock form, and all of this is done running pump gas. Whenever you try to make that kind of power with an old school engine normally they're a bit more temperamental. It requires higher octane fuel and the drivability normally goes down. Another thing that is great about one of these engines is the ease of making big power. If you bolt on a power adder like a supercharger it can fetch some serious numbers, and I'm talking about hundreds of more. To have an engine with a power output in the 700 range doesn't take much work at all. Okay so if you like those numbers and you're into modern technology here's where things can get a bit troublesome. First off this isn't a bolt in swap. The engine mounts are completely different and stock suspension doesn't play well with that new engine. Also with that Coyote being so wide well the factory shock towers have to be reduced in size or completely removed just for it to drop in the hole. There are several companies that offer kits to help with the conversion but be prepared for some work because it takes several hours and a lot of cutting and welding for proper installation. Another thing that you're gonna have to tackle is the brakes. Now normally sitting back over here is a big round booster and that interferes with the engine. So you're gonna have to remove it. Now you could mount up a master cylinder straight to the firewall and run manual brakes, but most people prefer power assist. There is the option for hydra-boost and it's fed by a power steering pump mounted on the engine. That itself is an issue. From the factory the Ford Coyote doesn't have a hydraulic pump in the accessory drive. So that means you're gonna have to mount one. We're gonna be running a power rack under our car. So a pump is in our near future. This is only a few of the obstacles that you're gonna have to overcome if you're looking to do a Coyote swap into an early model Mustang. You have to remember you still have the other engine operating systems that you're gonna have to terminate like cooling, fuel, and exhaust. We're gonna touch on those here shortly but as for right now I'm gonna work on getting that gasoline powered air compressor off into our Mustang, and this has been a long time coming. ♪ ♪ Something else that you can run into, which is pretty common with an engine swap, is oil pan clearance. So while we're solving our issue we're gonna do an upgrade. This one is considerably shorter than that stock unit, which gains us some ground clearance. Also here on the inside are four trap doors. That helps to minimize oil starvation of your pickup tube. That's something that you definitely don't want, and as far as the install on this thing it's pretty much straight forward. ♪ ♪ Of course you've got to drain the fluids and snatch out those bolts before you can remove that stock pan. ♪ ♪ The new pickup tube we're using matches our new oil pan. So no measuring is required. Make sure you get all the bolts started before you cinch them down. I prefer to run them up with a wrench. Then torque them to spec. These are aftermarket mounts that accommodate our Coyote. ♪ ♪ It's just more parts that came along in our suspension kit. So there's no cutting or fabbing required. ♪ ♪ A whole lot of motor. Easy, easy here. We don't want to bounce this thing off the crossmember. ♪ ♪ Well it's finally in there and I have to say that went a whole lot smoother than I was anticipating. We've still got quite a bit to do. The next thing we're gonna jump on is gonna be the transmission and I'll bet you we need to get started on those headers relatively quickly as well. I bet the proud new owner of this EBC Mustang is gonna like the look under the hood just as much as I do. Gear snatching is in our future and we'll spell performance with three letters, TKX.
(Tommy)>> Well we got our engine in and it's off to the transmission. Whenever we picked up our Mustang it had an automatic in it but with the direction that we're going that's just not gonna cut it. For the fun factor we're going with a stick cause you know there's just something about that third pedal and running through the gears that just seems to put a smile on your face, and that's what these old rides are all about. Along with this conversion, other than a good time, well we're looking for some benefits like overdrive. So we're using a TKX from Tremec. We picked this, all the goodies up for the conversions from American Powertrain, but the first order of business for getting this goodie installed is pounding in this pilot bearing. [ mechanical humming ]
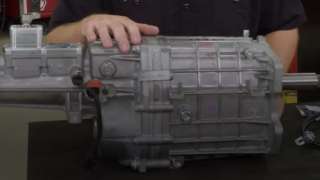
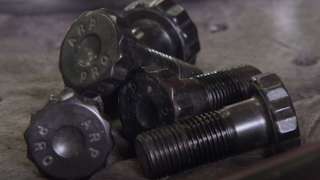
(Tommy)>> This isn't too big of a deal. Just a whack or two. ♪ ♪ And we're done. Next is a mid plate, followed by the flywheel. Once we have it in place it's time to bolt it up with some ARP hardware. They have a unique 12 point head design and a slightly larger shank to help with alignment. Plus being chro-moly they're much stronger than stock. So with us making way more than stock power this is a no brainer of an upgrade. With that torqued down the clutch and pressure plate can be installed using a few nuts from ARP. ♪ ♪ Now it's time to bolt in our bell housing, and then we can move on to the transmission. I just finished setting the clearance on our hydraulic kit that we got from American Powertrain. So that means our new TKX can go into place. This new transmission has a lot of benefits to it. One of those would have to be the much smaller case. How that's beneficial is if you're looking to do a conversion in an old school ride normally you've got to whittle on the transmission hump. This smaller case gives you added clearance and can reduce that fab work. Also it has a 26 spline input, a 31 spline output. It's available in several different gear ratios depending on your application or your needs. Plus it's capable of 7,500 r-p-m shifts. That's a big deal. I need to go grab a transmission jack because that's that old man wisdom kicking in. These things are a bit heavy and I just don't want to wrestle it. ♪ ♪ Before we get too carried away we're gonna slide in the hose and our hydraulic release bearing. This simply slips onto the input shaft housing and takes a little bit of wiggling to hit that sweet spot. With the transmission married to the bell we can cinch it down with the hardware. Now we're ready to move on and mount our crossmember. We're gonna leave our mount here a little loose. I've got a little bit of adjustment. Now with our crossmember what's really nice about it is it goes in using the factory locations. Also it's got a notch here on both sides to help accommodate running exhaust. ♪ ♪ This is just one of the many parts that American Powertrain offers. These guys are all about standard shift conversions. ♪ ♪ So if you have an automatic or an old school stick and you're looking to upgrade to a five or six speed manual you may want to check them out. ♪ ♪ We have a few more connections that need to be made to finish our installation. We have some connections in the electrical department that we're gonna be doing, kinda like a reverse switch here on the side so that our back up lights work. Plus our neutral safety here on the side of the tail housing. The way this one works is the shifter selector has to be in neutral for the engine to start. Also to wire this thing up you want to do that through a relay. Don't try running the trigger wire from the starter solenoid through here because you'll end up smoking that sensor. Also this transmission has two different options for the speedo. You either have electronic here on the right or a mechanical here on the left. After we get all that taken care of we can let the car down and get on the inside. We have the hydraulics we need to take care of. Plus we need to add this third pedal. Now I'll tell you guys I can't wait to be powering into second gear. Up next we pump up our jam with an accessory drive.
(Tommy)>> Well we're about waste deep in our Coyote conversion we're installing into our '70 Mustang that we're gonna be giving away to one of you guys with EBC Brakes. If you're looking to do this late model swap one snag that you're probably gonna hit is a power steering pump. That's because those engines don't have one mounted off to the side because the vehicles that they came in had electric assist not hydraulic assist. So you're more than likely gonna be in the market for a belt drive like this one that we picked up from Power by the Hour. Our kit includes many parts like the pump, pulley, idler, tensioners, hardware, and brackets. If you're working on a Coyote these guys have many solutions for a multitude of combinations. [ drill humming ]
(Tommy)>> First step is gonna involve slinging quite a few slivers of aluminum into the floor. We're doing this so that we can make some clearance for an accessory that is gonna be positioned in an unorthodox manner. [ compressed air hissing ]
(Tommy)>> Well we got our clearance modifications taken care of, and this is something that often times scares people because of the grinding on the engine block but whenever you're doing a modification like we are it's kinda par for the course. Just make sure to double check your instructions cause you really can't back up from here without replacing some big parts. With this kit there's gonna be several brackets and pieces of hardware to install. These have a specific location with a machined fit. With an accessory drive it's got to be accurate and precise. So make sure to pay attention to each piece. ♪ ♪ You know often time anti-seize and thread locker is suggested whenever you're doing something like this. Now our bolt is a mild steel bolt, and you're installing it in an aluminum hole. Now anti-seize can be your friend. If you're working with stainless trust me, you want to use some of that stuff. ♪ ♪ We're ready to start bolting up our alternator, and if you're gonna order one of these kits they're gonna ask you do you have a standard or clutch style alternator, and what that refers to is this pulley here on the front of the unit. Now if I take my screwdriver here and kinda block that fan on the inside you'll notice that this pulley allows it to turn backwards without turning the internal parts of the alternator. What that's designed to do is to give the belt a longer life and help to stabilize it, but in our application we're going something a bit different. We're actually gonna mount this thing backwards. If we left it alone like that the alternator won't work properly cause it's gonna free spin. ♪ ♪ I know this may look a little bit weird but we're working in some confined spaces. The alternator itself doesn't mind where it goes as long as it's spun by the belt. ♪ ♪ We're finally to the solution when it comes to mounting the power steering pump, and it's in the form of this small bracket. Where it attaches is the stock location of the alternator as it would have been built coming from the factory. We just need a couple of pieces of hardware and then we can bolt up this pump. With the two married together it simply slides into place. ♪ ♪ All it takes is a couple of pieces of hardware and you've just got to snug it up. ♪ ♪ After that it takes a few minutes to route the belt through each pulley. Then we can pull back on the tensioner and call it done. ♪ ♪ We got our belt drive assembly installed on the front side of our Coyote. This thing's impressive and there's a bunch going on, and we're also one step closer to riding in that driver's seat. Next this EBC beast needs to breathe. Plus it's time for tap school.
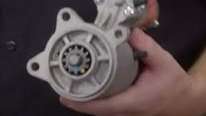
(Tommy)>> Well I just finished cinching down the passenger side header, and you know there's a lot of options out there when it comes to exhaust. For those of you who are using a previously used power plant if you got something out of a Mustang it may work in one of these late model conversions, however if you've got something out of a pickup truck you might as well throw that stuff off to the side. What we decided to use is a set of DSC headers that we picked up from Summit Racing. They're made from stainless steel. They're nice and compact. They have an O-2 sensor bung already installed and a V-band clamp here on the collector. We went this route because it's a direct fit. There's no cutting or fab work required. They basically bolt into place. Before I get too carried away on this driver's side I'm gonna finish up on the passenger and go ahead and bolt up our Duralast starter. This Duralast starter is a perfect fit for our application. Designed to deliver the torque output that meets or exceeds the original starter. Triple tested with a limited lifetime warranty, all Duralast wear components are 100 percent new. Well I have a few more electrical connections that I need to take care of on that starter but before I jump into all that wiring I'm gonna finish up the exhaust.
Well we got our headers bolted into place and the next thing I'm gonna be doing is fashioning up a bracket that I'm gonna use on our Coyote conversion, and this is just about anything that comes along with hot rodding cause you're trying to make a square peg fit in a round hole, and with that gonna end up probably having to do some drilling and tapping. There's a few tips and tricks to doing this properly that can make things go a whole lot smoother. A drill and tap chart can be your friend. It gives you the exact drill size that you need for the hole that you're trying to tap. We're gonna be doing a 3/8 16 so we need a five sixteenths bit. Drilling a precise hole is extremely important, and that's easy to do with Matco's hyperstep drill bit set. ♪ ♪ This Matco exclusive tip design cuts 45 percent faster and stays sharp four times longer. These cobalt drill bits act like step drill spreading the job of cutting across multiple levels, keeping the drill bit cool with no need for a pilot hole. Once you're ready to start tapping one thing that you need to keep in mind is you're gonna need some lube, some thread cutting oil. That goes a long way here on the tap itself cause that helps so that the cutter makes threads a whole lot smoother. Also you want to position the tap perpendicular to the surface. If you lean it off to one side as you could imagine it's gonna cut diagonally or crooked. Once you have positioned where you want it put a little bit of down pressure on it and then rotate the "T" clockwise. ♪ ♪ Another tip for you. About every half turn of rotation of your tap back it up a quarter turn and you'll break off the little chip inside of there. That helps to relieve the pressure on the tap and helps to prevent from breaking it. ♪ ♪ I've got one hole done, two more to do. Overall today it's been a great day. We've got the bracket made, headers are on, tranny's in but most of all that supercharged Coyote is sitting in the hole. We've still got some work to do like wiring, cooling, and so on, but I guess it's time for me to head to the house and I'm gonna go celebrate a bit.
Show Full Transcript
(Tommy)>> Today we're gonna need a big metric shoehorn to mount our supercharged Coyote into this EBC Mustang, and while we're at it this ground pounder's gonna get a gear grabbing five speed. Have mercy! ♪ ♪ [ engines revving ] ♪ ♪
(Tommy)>> Hey guys, welcome to Detroit Muscle. Today's subject matter is a popular one. Some people love it, the purists seem cringe, and if you're a throttle loving gearhead it's probably right up your alley. What I'm referring to is a Coyote swap. It has a lot of benefits, but not all of them come so easy. There's quite a bit that goes into this conversion if you're considering it. First off let's talk about the car that you're planning to shoehorn one of those late model meals into. If you have something rare like a Shelby, 428 car, or even a K-code it's probably not a good idea. Those are high dollar cars and you would really be defacing the holy grail of Mustangs with this type of swap, but if you have something kinda like what we started with, a six cylinder, or a standard ole small block car I'm gonna say let those sparks fly because they made thousands of these things, and increasing a car's desirability usually means more money, making it more sought after because you know the old saying. Something's only worth what someone else is willing to pay you for it. So you may be asking, what's the big deal with the Coyote? What makes them so good? For one thing other than reliability is they make good power straight out of the box. From about 350 up to the mid 400's in stock form, and all of this is done running pump gas. Whenever you try to make that kind of power with an old school engine normally they're a bit more temperamental. It requires higher octane fuel and the drivability normally goes down. Another thing that is great about one of these engines is the ease of making big power. If you bolt on a power adder like a supercharger it can fetch some serious numbers, and I'm talking about hundreds of more. To have an engine with a power output in the 700 range doesn't take much work at all. Okay so if you like those numbers and you're into modern technology here's where things can get a bit troublesome. First off this isn't a bolt in swap. The engine mounts are completely different and stock suspension doesn't play well with that new engine. Also with that Coyote being so wide well the factory shock towers have to be reduced in size or completely removed just for it to drop in the hole. There are several companies that offer kits to help with the conversion but be prepared for some work because it takes several hours and a lot of cutting and welding for proper installation. Another thing that you're gonna have to tackle is the brakes. Now normally sitting back over here is a big round booster and that interferes with the engine. So you're gonna have to remove it. Now you could mount up a master cylinder straight to the firewall and run manual brakes, but most people prefer power assist. There is the option for hydra-boost and it's fed by a power steering pump mounted on the engine. That itself is an issue. From the factory the Ford Coyote doesn't have a hydraulic pump in the accessory drive. So that means you're gonna have to mount one. We're gonna be running a power rack under our car. So a pump is in our near future. This is only a few of the obstacles that you're gonna have to overcome if you're looking to do a Coyote swap into an early model Mustang. You have to remember you still have the other engine operating systems that you're gonna have to terminate like cooling, fuel, and exhaust. We're gonna touch on those here shortly but as for right now I'm gonna work on getting that gasoline powered air compressor off into our Mustang, and this has been a long time coming. ♪ ♪ Something else that you can run into, which is pretty common with an engine swap, is oil pan clearance. So while we're solving our issue we're gonna do an upgrade. This one is considerably shorter than that stock unit, which gains us some ground clearance. Also here on the inside are four trap doors. That helps to minimize oil starvation of your pickup tube. That's something that you definitely don't want, and as far as the install on this thing it's pretty much straight forward. ♪ ♪ Of course you've got to drain the fluids and snatch out those bolts before you can remove that stock pan. ♪ ♪ The new pickup tube we're using matches our new oil pan. So no measuring is required. Make sure you get all the bolts started before you cinch them down. I prefer to run them up with a wrench. Then torque them to spec. These are aftermarket mounts that accommodate our Coyote. ♪ ♪ It's just more parts that came along in our suspension kit. So there's no cutting or fabbing required. ♪ ♪ A whole lot of motor. Easy, easy here. We don't want to bounce this thing off the crossmember. ♪ ♪ Well it's finally in there and I have to say that went a whole lot smoother than I was anticipating. We've still got quite a bit to do. The next thing we're gonna jump on is gonna be the transmission and I'll bet you we need to get started on those headers relatively quickly as well. I bet the proud new owner of this EBC Mustang is gonna like the look under the hood just as much as I do. Gear snatching is in our future and we'll spell performance with three letters, TKX.
(Tommy)>> Well we got our engine in and it's off to the transmission. Whenever we picked up our Mustang it had an automatic in it but with the direction that we're going that's just not gonna cut it. For the fun factor we're going with a stick cause you know there's just something about that third pedal and running through the gears that just seems to put a smile on your face, and that's what these old rides are all about. Along with this conversion, other than a good time, well we're looking for some benefits like overdrive. So we're using a TKX from Tremec. We picked this, all the goodies up for the conversions from American Powertrain, but the first order of business for getting this goodie installed is pounding in this pilot bearing. [ mechanical humming ]
(Tommy)>> This isn't too big of a deal. Just a whack or two. ♪ ♪ And we're done. Next is a mid plate, followed by the flywheel. Once we have it in place it's time to bolt it up with some ARP hardware. They have a unique 12 point head design and a slightly larger shank to help with alignment. Plus being chro-moly they're much stronger than stock. So with us making way more than stock power this is a no brainer of an upgrade. With that torqued down the clutch and pressure plate can be installed using a few nuts from ARP. ♪ ♪ Now it's time to bolt in our bell housing, and then we can move on to the transmission. I just finished setting the clearance on our hydraulic kit that we got from American Powertrain. So that means our new TKX can go into place. This new transmission has a lot of benefits to it. One of those would have to be the much smaller case. How that's beneficial is if you're looking to do a conversion in an old school ride normally you've got to whittle on the transmission hump. This smaller case gives you added clearance and can reduce that fab work. Also it has a 26 spline input, a 31 spline output. It's available in several different gear ratios depending on your application or your needs. Plus it's capable of 7,500 r-p-m shifts. That's a big deal. I need to go grab a transmission jack because that's that old man wisdom kicking in. These things are a bit heavy and I just don't want to wrestle it. ♪ ♪ Before we get too carried away we're gonna slide in the hose and our hydraulic release bearing. This simply slips onto the input shaft housing and takes a little bit of wiggling to hit that sweet spot. With the transmission married to the bell we can cinch it down with the hardware. Now we're ready to move on and mount our crossmember. We're gonna leave our mount here a little loose. I've got a little bit of adjustment. Now with our crossmember what's really nice about it is it goes in using the factory locations. Also it's got a notch here on both sides to help accommodate running exhaust. ♪ ♪ This is just one of the many parts that American Powertrain offers. These guys are all about standard shift conversions. ♪ ♪ So if you have an automatic or an old school stick and you're looking to upgrade to a five or six speed manual you may want to check them out. ♪ ♪ We have a few more connections that need to be made to finish our installation. We have some connections in the electrical department that we're gonna be doing, kinda like a reverse switch here on the side so that our back up lights work. Plus our neutral safety here on the side of the tail housing. The way this one works is the shifter selector has to be in neutral for the engine to start. Also to wire this thing up you want to do that through a relay. Don't try running the trigger wire from the starter solenoid through here because you'll end up smoking that sensor. Also this transmission has two different options for the speedo. You either have electronic here on the right or a mechanical here on the left. After we get all that taken care of we can let the car down and get on the inside. We have the hydraulics we need to take care of. Plus we need to add this third pedal. Now I'll tell you guys I can't wait to be powering into second gear. Up next we pump up our jam with an accessory drive.
(Tommy)>> Well we're about waste deep in our Coyote conversion we're installing into our '70 Mustang that we're gonna be giving away to one of you guys with EBC Brakes. If you're looking to do this late model swap one snag that you're probably gonna hit is a power steering pump. That's because those engines don't have one mounted off to the side because the vehicles that they came in had electric assist not hydraulic assist. So you're more than likely gonna be in the market for a belt drive like this one that we picked up from Power by the Hour. Our kit includes many parts like the pump, pulley, idler, tensioners, hardware, and brackets. If you're working on a Coyote these guys have many solutions for a multitude of combinations. [ drill humming ]
(Tommy)>> First step is gonna involve slinging quite a few slivers of aluminum into the floor. We're doing this so that we can make some clearance for an accessory that is gonna be positioned in an unorthodox manner. [ compressed air hissing ]
(Tommy)>> Well we got our clearance modifications taken care of, and this is something that often times scares people because of the grinding on the engine block but whenever you're doing a modification like we are it's kinda par for the course. Just make sure to double check your instructions cause you really can't back up from here without replacing some big parts. With this kit there's gonna be several brackets and pieces of hardware to install. These have a specific location with a machined fit. With an accessory drive it's got to be accurate and precise. So make sure to pay attention to each piece. ♪ ♪ You know often time anti-seize and thread locker is suggested whenever you're doing something like this. Now our bolt is a mild steel bolt, and you're installing it in an aluminum hole. Now anti-seize can be your friend. If you're working with stainless trust me, you want to use some of that stuff. ♪ ♪ We're ready to start bolting up our alternator, and if you're gonna order one of these kits they're gonna ask you do you have a standard or clutch style alternator, and what that refers to is this pulley here on the front of the unit. Now if I take my screwdriver here and kinda block that fan on the inside you'll notice that this pulley allows it to turn backwards without turning the internal parts of the alternator. What that's designed to do is to give the belt a longer life and help to stabilize it, but in our application we're going something a bit different. We're actually gonna mount this thing backwards. If we left it alone like that the alternator won't work properly cause it's gonna free spin. ♪ ♪ I know this may look a little bit weird but we're working in some confined spaces. The alternator itself doesn't mind where it goes as long as it's spun by the belt. ♪ ♪ We're finally to the solution when it comes to mounting the power steering pump, and it's in the form of this small bracket. Where it attaches is the stock location of the alternator as it would have been built coming from the factory. We just need a couple of pieces of hardware and then we can bolt up this pump. With the two married together it simply slides into place. ♪ ♪ All it takes is a couple of pieces of hardware and you've just got to snug it up. ♪ ♪ After that it takes a few minutes to route the belt through each pulley. Then we can pull back on the tensioner and call it done. ♪ ♪ We got our belt drive assembly installed on the front side of our Coyote. This thing's impressive and there's a bunch going on, and we're also one step closer to riding in that driver's seat. Next this EBC beast needs to breathe. Plus it's time for tap school.
(Tommy)>> Well I just finished cinching down the passenger side header, and you know there's a lot of options out there when it comes to exhaust. For those of you who are using a previously used power plant if you got something out of a Mustang it may work in one of these late model conversions, however if you've got something out of a pickup truck you might as well throw that stuff off to the side. What we decided to use is a set of DSC headers that we picked up from Summit Racing. They're made from stainless steel. They're nice and compact. They have an O-2 sensor bung already installed and a V-band clamp here on the collector. We went this route because it's a direct fit. There's no cutting or fab work required. They basically bolt into place. Before I get too carried away on this driver's side I'm gonna finish up on the passenger and go ahead and bolt up our Duralast starter. This Duralast starter is a perfect fit for our application. Designed to deliver the torque output that meets or exceeds the original starter. Triple tested with a limited lifetime warranty, all Duralast wear components are 100 percent new. Well I have a few more electrical connections that I need to take care of on that starter but before I jump into all that wiring I'm gonna finish up the exhaust.
Well we got our headers bolted into place and the next thing I'm gonna be doing is fashioning up a bracket that I'm gonna use on our Coyote conversion, and this is just about anything that comes along with hot rodding cause you're trying to make a square peg fit in a round hole, and with that gonna end up probably having to do some drilling and tapping. There's a few tips and tricks to doing this properly that can make things go a whole lot smoother. A drill and tap chart can be your friend. It gives you the exact drill size that you need for the hole that you're trying to tap. We're gonna be doing a 3/8 16 so we need a five sixteenths bit. Drilling a precise hole is extremely important, and that's easy to do with Matco's hyperstep drill bit set. ♪ ♪ This Matco exclusive tip design cuts 45 percent faster and stays sharp four times longer. These cobalt drill bits act like step drill spreading the job of cutting across multiple levels, keeping the drill bit cool with no need for a pilot hole. Once you're ready to start tapping one thing that you need to keep in mind is you're gonna need some lube, some thread cutting oil. That goes a long way here on the tap itself cause that helps so that the cutter makes threads a whole lot smoother. Also you want to position the tap perpendicular to the surface. If you lean it off to one side as you could imagine it's gonna cut diagonally or crooked. Once you have positioned where you want it put a little bit of down pressure on it and then rotate the "T" clockwise. ♪ ♪ Another tip for you. About every half turn of rotation of your tap back it up a quarter turn and you'll break off the little chip inside of there. That helps to relieve the pressure on the tap and helps to prevent from breaking it. ♪ ♪ I've got one hole done, two more to do. Overall today it's been a great day. We've got the bracket made, headers are on, tranny's in but most of all that supercharged Coyote is sitting in the hole. We've still got some work to do like wiring, cooling, and so on, but I guess it's time for me to head to the house and I'm gonna go celebrate a bit.
