Detroit Muscle Featured Projects
Detroit Muscle Builds
Want more content like this?
Join the PowerNation Email NewsletterParts Used In This Episode
Matco Tools
MATCO Tools are the Official Tool Supplier to Detroit Muscle
The Industrial Depot
Tools, Hardware, Shop Supplies
Episode Transcript
(Tommy)>> You're watching Powernation.
(Tommy)>> Today on Detroit Muscle we ditch the engine in our EBC giveaway car, and make a huge incision to make room for fancy new suspension. ♪ ♪ [ engines revving ] ♪ ♪
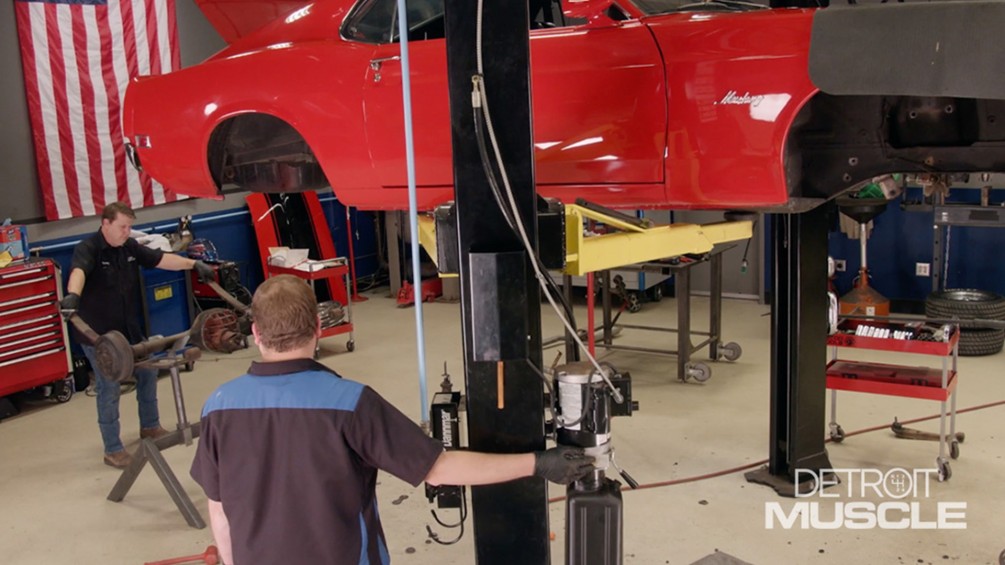
(Tommy)>> Hey guys, welcome to the shop. From where you're sitting you've got the view of some sweet American muscle. Now we're feeling a bit ambitious today and we have some big plans for our EBC Mustang that we're planning to give away to one of you guys. And like the old saying goes, sometimes things have to get worse before they can get better. That's the case on our Stang here. It's time for us to disassemble this piece of Detroit muscle. ♪ ♪
(Tommy)>> It's like changing you're new baby boy. Alright we'll let your momma clean you up.
(Daniel)>> On these old cars you'll find a lot of what we'll call d-i-y improvements.
(Tommy)>> One fancy homemade bracket. It's got plenty of holes for adjustability.
(Daniel)>> That's right!
(Tommy)>> And versatility. ♪ ♪ You know I think taking these headers off sucks but I bet it sucks even worse putting them on. ♪ ♪
(Daniel)>> Some of these parts we won't be reusing and will be inventory for the scrap bin. However some of these things do have some worth to them. Enough to fetch a few beers at the end of the day. Go ahead!
(Tommy)>> Now we're using a fork lift just because we have one. A cherry picker will do the same thing but it requires a lot more pumping.
(Daniel)>> It's pouring fluid. Alright forward. The trans made a mess as they usually do. Other than that it came out without a hitch.
(Tommy)>> You didn't get any Ford on you did you?
(Daniel)>> I got a little bit on me but it'll be alright cause we're almost done now.
(Tommy)>> Well we're partially there aren't we.
(Daniel)>> Now all we've got to do is finish taking the rest of it apart.
(Tommy)>> Well I'm gonna put away your collection of gold coins over here.
(Daniel)>> You never know what you're gonna need. So always come prepared.
(Tommy)>> Well if I put these away I'm gonna let you clean up that crime scene down there.
(Daniel)>> Well I am the dirtiest of the two us. I ain't figured that one out yet either.
(Tommy)>> Well with age comes wisdom. I don't know, I'm at a loss. I don't know where to go.
(Daniel)>> You've got plenty of wisdom.
(Tommy)>> Good luck.
[ drill humming ]
(Tommy)>> Well we finally got the mess cleaned up and now it's time to snatch this front suspension out from under it. [ ratchet clicking ]
(Daniel)>> For you guys sitting on the couch wondering why we're taking apart a perfectly good car. Well it's because we're making room for innovation, and the plans we have for this car doesn't include old school technology. [ ratchet clicking ] [ drill humming ]
(Tommy)>> That's a serious sway bar right there buddy.
(Daniel)>> That's for high speed cornering. [ drill humming ] ♪ ♪ [ drill humming ] ♪ ♪
(Daniel)>> Okay guys, now that we've got the front suspension completely removed and the engine and transmission sitting in the floor we've got to do the same thing out back by removing all the rear suspension. First thing we're gonna do is jump on our shocks. [ drill humming ]
(Tommy)>> Zipping out these shocks will open up some room for us, but getting rid of this old exhaust gives us even more. Heck yeah! ♪ ♪ [ ratchet clicking ]
(Tommy)>> What do you think the chances are that these shackles are gonna slide right out of the eyelets?
(Daniel)>> Is slim an option?
(Tommy)>> I think you're probably accurate. That's what I was thinking. ♪ ♪
(Daniel)>> These were trouble but with a little muscle and a handy pry bar these leaf spring hangers slip loose from their home.
(Tommy)>> Yes sir. Come on up with it. [ mechanical humming ]
(Tommy)>> That's not nearly as heavy as I thought it was gonna be.
(Daniel)>> Well you wrestled it like it was.
(Tommy)>> Well I have to say apparently you've been doing some pretty good work too. This old fella here's broke a sweat.
(Daniel)>> That's right.
(Tommy)>> Now we've still got more to do. We've got to get that interior out. What do you say we take a break for a minute?
(Daniel)>> I think we need to.
(Tommy)>> Cool, I'll let you buy the first round of soft drinks.
(Daniel)>> Alright, how about a cheeseburger? Up next, cutting for days.
(Tommy)>> And burning wire for hours on in.
(Daniel)>> A challenging task but it'll be worth it.
(Tommy)>> Hey guys, welcome back to the shop. Now we've got quite a bit of Mustang laying here in the floor. Some of it is what I'm gonna call used to be with all the old parts here. The other is the gonna be. Now to do the upgrade that we're planning to do, that's the reason we stripped this thing down. Motor, transmission, rear suspension, front suspension, and even the interior because we're gonna have to cut in on this old thing, but it's all good because when we're all said and done this thing is gonna be above and beyond, and to help with that I brought in a skilled surgeon. Well Matt you've been studying the back side of this carcass if you will of a Mustang. You got your plan of attack together?
(Matt)>> We've got a lot of cutting we've got to do on this thing. We've got to get these wheel tubs out of the way, carve out a section of floor. Then we're gonna replace a section of the frame rail one side at a time.
(Tommy)>> That's right, all in preparation for those big tires that's going up under there. Well you're gonna have to make some marks I assume, throw a few sparks. I know we're gonna have to drill out quite a few spot welds and go grab a tool for that if you want to go ahead and get busy.
(Matt)>> You got it.
(Tommy)>> Let me get out of your way. ♪ ♪ Matt's a friend of ours and the last time we were catching up he said man, you need anything just call us. So we took him up on his offer. [ saw buzzing ]
(Tommy)>> On a big task like this it's nice to have an extra set of hands to help with the job.
(Daniel)>> And this is a big job. There are plenty of incisions that need to be carefully laid out with consideration for each step that follows. [ saw buzzing ]
(Daniel)>> Cut after cut Matt makes progress on prepping the rear end for the new tubs, and the frame rail is no exception. Those bump stops, they have to go. [ saw buzzing ] ♪ ♪
(Matt)>> The factory frame rail in our Mustang runs along the inner wheel tub and tapers toward the outside of the car giving us more wheel clearance in the front than there is in the rear. The new frame rail section from Detroit Speed fixes that issue by straightening out the frame rail, giving us more wheel clearance in the rear. Now to install this we have to remove a section of the factory frame rail. To do that we have to trim away some more sheet metal however it's spot welded to the old frame. Now there's a number of ways to remove these old spot welds. One method is to use a wide disc grinder like this one. It's gonna make some pretty quick work of running out your weld to separate your two panels but it's gonna leave your surface pretty rough if you're gonna reweld those holes back up, and with that being said it's not gonna work for us. We're gonna use a spot weld cutter. It's kinda like a mini hole saw. It cuts around the spot weld leaving a nice, clean hole to weld our trunk floor to our new frame rail. Taking the tortoise approach is the best method for this. You definitely don't want to cut too deep, especially if you're gonna be reusing your inner panel.
(Tommy)>> Once the upper trunk pan is detached from the rail it's time for more cutting. Pay attention to what you're cutting here. Think about it. You're slicing into the main structure of the car. You know that old saying, measure twice, cut once. ♪ ♪ [ welder crackling ]
(Tommy)>> Well Matt's been making some really good progress doing the upgrade here on the tail end of our Mustang. Now doing this conversion has a whole lot going for it. One of them is it's obvious that you guys can tell that we're gonna be able to fit a significantly wider tire under the tail end of our Mustang, and with the power output that we're looking to make that's gonna help get all that power to the ground. The other one is we're converting from that old school leaf spring setup to now a coil over and four link. Now that alone is gonna make this car ride and drive daylight and dark difference, but there's a few things if you're looking to do this type of conversion that you need to consider. One of them is your skill set. We had to cut into the frame rail on this car and that alone scares people to death, and two is the time to do this type of thing. Now this alone can take you 40 plus hours to do it. This isn't really a job that you can take and tear the car down on a Friday night and be back driving this thing to work Monday morning. So just make sure you do your research before you make your decision.
(Daniel)>> The good thing about having one side done is that you're half way there. So Matt just repeated the process on the passenger side.
(Tommy)>> So that means we have to section the frame on this side as well and burn it in. [ welder crackling ] [ grinder buzzing ]
(Tommy)>> Man yeah Matt, you have made some pretty good progress, and man I want to say thank you for all your hard work.
(Matt)>> Hey I know how busy you guys are here. Anything I can do to help out. I'd love to stick around and help with the Quadralink kit but I've got to head back home. Think you can take it from here?
(Tommy)>> Oh yeah man, I can handle this. Now you guys don't run off. We've still got more to do, and I have to say I can't wait to see this thing when it's done. Huge tire now.
(Matt)>> Easily two, three more inches out of these.
(Tommy)>> Coming up, a little welding tech. Some tips for those rosette welds next on Detroit Muscle.
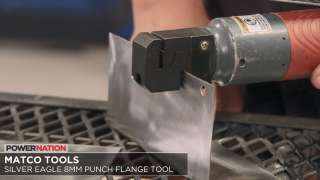
(Tommy)>> Well we're about waist deep in the mini tub and rear suspension install on our ole Mustang. Now if you're looking to do something like this, or even a panel replacement on your ride, there's one thing you're definitely gonna run into and that would be spot welds. Now them things can be a pain to remove and even difficult to simulate, but there's a few tips and tricks that you can apply to up your welding game. The goal is to attach two or more panels, and there are a couple of common practices. A spot weld is where using a welder you direct an arc to penetrate both pieces, or a plug weld where you drill or punch your hole and weld through that to weld the two pieces together. I prefer to plug weld and to punch instead of drill where I can, and using the Silver Eagle punch and flange tool from Matco sure does get a lot of work done in a hurry. Here we're gonna punch out four eight millimeter holes to attach our panel, and like I said it does it in a hurry. That was easy and this is a two in one tool. It'll save you time and give you professional results. Now the next thing we need to do is clamp these two panels together.
What you're looking for is a nice, tight gap like this in here. If it's kinda spread apart well that's gonna compromise the strength of your weld joint. Well we're pretty much ready to start burning some wire and getting our welder dialed in. Now I'd recommend you guys doing this if you were preparing to weld a panel in on your car because it'll save you some time as opposed to screwing your panel up. Trust me, been there, done that. Now there's pretty much two different ways that guys like to do rosette style welds. Some of them build a puddle in the middle and then go around the perimeter, and others do vice versa. Start on the outside and then just fill up the center. Let's turn this machine on and see what we got. Most welders have a convenient chart with the predetermined settings. You just need to know a few things like wire size, gas, and the material you'll be working with. Once you have all that you just dial in your voltage and wire speed and you're ready to pull the trigger. [ welder crackling ]
(Tommy)>> That's not good at all. It's too cold. A little goes a long way here. We just need a little more heat for a better weld. [ welder crackling ] ♪ ♪
(Tommy)>> That ain't too bad. To get it to perfection some times it takes a little more of this and a little less of that to get it just right. [ welder crackling ]
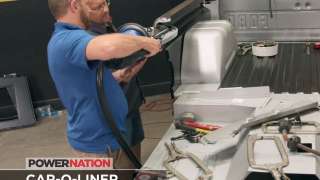
(Tommy)>> Oh yeah, that one's nice. That's pretty much what you're looking for. A nice blue heat ring and a flat weld. Now this is kinda the tried and true method. It has been done this way for many years but if you're a professional shop and looking for superior results we have a tool for you. A Car-o-liner CTR-9 is a great time saving tool when it comes to spot welding. A single weld can take up to 30 seconds with a mig but with the CTR-9 each weld takes approximately one second, which drastically reduces the amount of heat you're putting into the panel. It can weld up to a maximum combined thickness of 10 millimeters in full automatic mode. Also this thing self calibrates when you start it up. It's lightweight and ergonomic, which means less fatigue on those long work days, and I have to say when we start our next big project I can't wait to give Car-o-liner a try. Up next!
(Daniel)>> The Mustang got new legs Lieutenant Dan.
(Daniel)>> We're back to work prepping on our EBC Mustang for the trick suspension kit we got from Summit Racing. Tommy's had to do quite a bit of whittling and trimming to make room for that upgraded back end. ♪ ♪ We've had to burn a good bit of wire installing all the bracketry and reinforcements making way for this superior suspension. [ welder crackling ]
(Tommy)>> We went ahead and sprayed the under side of our Mustang with some undercoating. This cuts down on road noise and prevents rust. The next thing we need to do is install our links and sway bar. This is pretty much straight forward and just nut and bolt action. With some grade eight hardware we can attach our upper and lower links. ♪ ♪ With a few more pieces we can cinch down the rear sway bar.
(Daniel)>> While Tommy's over there installing those rear control arms I'm gonna start putting our coil over assemblies together. Now these came with the rear suspension kit. They're JRI double adjustable shocks that have been tuned to Detroit Speed's specifications, and they use Torrington bearings which allow for easy adjustment during pre-loading. Now the nice thing about these is they don't use any special tools for assembly. They don't even use snap ring pliers. All they have is a stainless steel retaining ring that can be removed by hand, but before we go any further I just wanted to show you a really cool feature of these shocks and the way they're designed. With this ring removed the upper spring seat comes off. When we put it all back together, the spring seat and the retaining ring, you'll notice there's an interference fit. Believe it or not that little ole bity ring and three of his buddies are all that's holding the car up. Boy that's some engineering right there. Well enough of the small talk. I've got to get these springs on before cousin over there fires me. Now for pre-assembly the spanner and the jam nut need to be run all the way to bottom of the body. Then we can get to greasing the Torrington bearing. Detroit Speed recommends using an extreme pressure grease on each bearing and thrust washer. When you go to slip these bearings over the body be sure and have all your excess grease wiped off because the less mess the better. ♪ ♪ And with the upper spring seats in place simply flip over the shock and cinch down the adjustment nut to hold everything in place. Voila!
(Tommy)>> Man look at that accomplishment.
(Daniel)>> I know. Look good don't they?
(Tommy)>> With a couple more bolts we can hang our coil overs and cinch them down. [ drill humming ]
(Tommy)>> Then we'll slide in our housing... ♪ ♪ ...line everything up... ♪ ♪ ...and slide in a few more bolts. ♪ ♪ [ drill humming ]
(Tommy)>> A couple of these may take a little wrestling to get them in there but nothing a tool of persuasion can't handle. Before we put this chunk in I'm gonna let you do the honors of leaving these people a little note if you will. Maybe some sweet nothings or something.
(Daniel)>> I think I can handle that. ♪ ♪
(Tommy)>> So what'd you write?
(Daniel)>> Lifters are losers, making reference to lifting off that skinny pedal too early in the race. When you lift too soon you lose every time. We're getting ready to install the rear differential on our Mustang here, and there's a couple of things we need to pay attention to before we do so. These pumpkin style rear ends like our Ford nine inch here all have a common problem, they leak! There's a couple of ways to address that whether it be with a gasket, sealant, or both. Now let me show you the problem. These lower studs are in what I like to call the reservoir of the differential, meaning they are submerged in oil when the car is parked. I do two things for preventative strategy. First I like to apply a small amount of sealant to the back side of all of the studs to lower the chances of leaks. Also with a quality gasket I like to add more sealant to the threads for good insurance. With that leak prevention in place we can add the chunk and cinch down the bolts. [ drill humming ]
(Daniel)>> For the rear axle seal I like to go the extra mile here as well. This may seem a little excessive but I've seen these things leak before. So a small amount around the flange will do the trick. ♪ ♪ [ metal clanging ]
(Daniel)>> Get in there you turkey. Well that about tops off our upgrades to the tail end of our car here, and I hope some of those tips we talked about earlier will help keep those greasy spots out of your floor.
(Tommy)>> We've made some really good progress for today just getting the suspension finished here on the back side. We've still got a long road to ho if you will with the front suspension, engine and tranny, and so on. I'm gonna call it. I've had my fill for the day and I'm ready to go to the house.
(Daniel)>> Me too, I think it's time to go get a milkshake.
(Tommy)>> If you like what you saw on today's show or have any questions you should go to Powernation TV dot com and check out our project pages. There you will find current build status, before and after picks, lists to the parts used, and links to all the shows. Y'all have a good one.
Show Full Transcript
(Tommy)>> Today on Detroit Muscle we ditch the engine in our EBC giveaway car, and make a huge incision to make room for fancy new suspension. ♪ ♪ [ engines revving ] ♪ ♪
(Tommy)>> Hey guys, welcome to the shop. From where you're sitting you've got the view of some sweet American muscle. Now we're feeling a bit ambitious today and we have some big plans for our EBC Mustang that we're planning to give away to one of you guys. And like the old saying goes, sometimes things have to get worse before they can get better. That's the case on our Stang here. It's time for us to disassemble this piece of Detroit muscle. ♪ ♪
(Tommy)>> It's like changing you're new baby boy. Alright we'll let your momma clean you up.
(Daniel)>> On these old cars you'll find a lot of what we'll call d-i-y improvements.
(Tommy)>> One fancy homemade bracket. It's got plenty of holes for adjustability.
(Daniel)>> That's right!
(Tommy)>> And versatility. ♪ ♪ You know I think taking these headers off sucks but I bet it sucks even worse putting them on. ♪ ♪
(Daniel)>> Some of these parts we won't be reusing and will be inventory for the scrap bin. However some of these things do have some worth to them. Enough to fetch a few beers at the end of the day. Go ahead!
(Tommy)>> Now we're using a fork lift just because we have one. A cherry picker will do the same thing but it requires a lot more pumping.
(Daniel)>> It's pouring fluid. Alright forward. The trans made a mess as they usually do. Other than that it came out without a hitch.
(Tommy)>> You didn't get any Ford on you did you?
(Daniel)>> I got a little bit on me but it'll be alright cause we're almost done now.
(Tommy)>> Well we're partially there aren't we.
(Daniel)>> Now all we've got to do is finish taking the rest of it apart.
(Tommy)>> Well I'm gonna put away your collection of gold coins over here.
(Daniel)>> You never know what you're gonna need. So always come prepared.
(Tommy)>> Well if I put these away I'm gonna let you clean up that crime scene down there.
(Daniel)>> Well I am the dirtiest of the two us. I ain't figured that one out yet either.
(Tommy)>> Well with age comes wisdom. I don't know, I'm at a loss. I don't know where to go.
(Daniel)>> You've got plenty of wisdom.
(Tommy)>> Good luck.
[ drill humming ]
(Tommy)>> Well we finally got the mess cleaned up and now it's time to snatch this front suspension out from under it. [ ratchet clicking ]
(Daniel)>> For you guys sitting on the couch wondering why we're taking apart a perfectly good car. Well it's because we're making room for innovation, and the plans we have for this car doesn't include old school technology. [ ratchet clicking ] [ drill humming ]
(Tommy)>> That's a serious sway bar right there buddy.
(Daniel)>> That's for high speed cornering. [ drill humming ] ♪ ♪ [ drill humming ] ♪ ♪
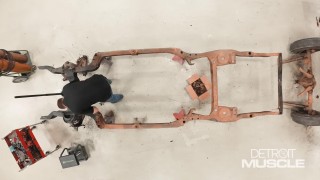
(Daniel)>> Okay guys, now that we've got the front suspension completely removed and the engine and transmission sitting in the floor we've got to do the same thing out back by removing all the rear suspension. First thing we're gonna do is jump on our shocks. [ drill humming ]
(Tommy)>> Zipping out these shocks will open up some room for us, but getting rid of this old exhaust gives us even more. Heck yeah! ♪ ♪ [ ratchet clicking ]
(Tommy)>> What do you think the chances are that these shackles are gonna slide right out of the eyelets?
(Daniel)>> Is slim an option?
(Tommy)>> I think you're probably accurate. That's what I was thinking. ♪ ♪
(Daniel)>> These were trouble but with a little muscle and a handy pry bar these leaf spring hangers slip loose from their home.
(Tommy)>> Yes sir. Come on up with it. [ mechanical humming ]
(Tommy)>> That's not nearly as heavy as I thought it was gonna be.
(Daniel)>> Well you wrestled it like it was.
(Tommy)>> Well I have to say apparently you've been doing some pretty good work too. This old fella here's broke a sweat.
(Daniel)>> That's right.
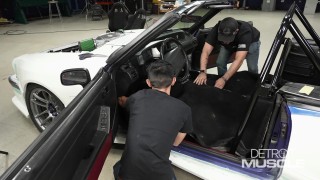
(Tommy)>> Now we've still got more to do. We've got to get that interior out. What do you say we take a break for a minute?
(Daniel)>> I think we need to.
(Tommy)>> Cool, I'll let you buy the first round of soft drinks.
(Daniel)>> Alright, how about a cheeseburger? Up next, cutting for days.
(Tommy)>> And burning wire for hours on in.
(Daniel)>> A challenging task but it'll be worth it.
(Tommy)>> Hey guys, welcome back to the shop. Now we've got quite a bit of Mustang laying here in the floor. Some of it is what I'm gonna call used to be with all the old parts here. The other is the gonna be. Now to do the upgrade that we're planning to do, that's the reason we stripped this thing down. Motor, transmission, rear suspension, front suspension, and even the interior because we're gonna have to cut in on this old thing, but it's all good because when we're all said and done this thing is gonna be above and beyond, and to help with that I brought in a skilled surgeon. Well Matt you've been studying the back side of this carcass if you will of a Mustang. You got your plan of attack together?
(Matt)>> We've got a lot of cutting we've got to do on this thing. We've got to get these wheel tubs out of the way, carve out a section of floor. Then we're gonna replace a section of the frame rail one side at a time.
(Tommy)>> That's right, all in preparation for those big tires that's going up under there. Well you're gonna have to make some marks I assume, throw a few sparks. I know we're gonna have to drill out quite a few spot welds and go grab a tool for that if you want to go ahead and get busy.
(Matt)>> You got it.
(Tommy)>> Let me get out of your way. ♪ ♪ Matt's a friend of ours and the last time we were catching up he said man, you need anything just call us. So we took him up on his offer. [ saw buzzing ]
(Tommy)>> On a big task like this it's nice to have an extra set of hands to help with the job.
(Daniel)>> And this is a big job. There are plenty of incisions that need to be carefully laid out with consideration for each step that follows. [ saw buzzing ]
(Daniel)>> Cut after cut Matt makes progress on prepping the rear end for the new tubs, and the frame rail is no exception. Those bump stops, they have to go. [ saw buzzing ] ♪ ♪
(Matt)>> The factory frame rail in our Mustang runs along the inner wheel tub and tapers toward the outside of the car giving us more wheel clearance in the front than there is in the rear. The new frame rail section from Detroit Speed fixes that issue by straightening out the frame rail, giving us more wheel clearance in the rear. Now to install this we have to remove a section of the factory frame rail. To do that we have to trim away some more sheet metal however it's spot welded to the old frame. Now there's a number of ways to remove these old spot welds. One method is to use a wide disc grinder like this one. It's gonna make some pretty quick work of running out your weld to separate your two panels but it's gonna leave your surface pretty rough if you're gonna reweld those holes back up, and with that being said it's not gonna work for us. We're gonna use a spot weld cutter. It's kinda like a mini hole saw. It cuts around the spot weld leaving a nice, clean hole to weld our trunk floor to our new frame rail. Taking the tortoise approach is the best method for this. You definitely don't want to cut too deep, especially if you're gonna be reusing your inner panel.
(Tommy)>> Once the upper trunk pan is detached from the rail it's time for more cutting. Pay attention to what you're cutting here. Think about it. You're slicing into the main structure of the car. You know that old saying, measure twice, cut once. ♪ ♪ [ welder crackling ]
(Tommy)>> Well Matt's been making some really good progress doing the upgrade here on the tail end of our Mustang. Now doing this conversion has a whole lot going for it. One of them is it's obvious that you guys can tell that we're gonna be able to fit a significantly wider tire under the tail end of our Mustang, and with the power output that we're looking to make that's gonna help get all that power to the ground. The other one is we're converting from that old school leaf spring setup to now a coil over and four link. Now that alone is gonna make this car ride and drive daylight and dark difference, but there's a few things if you're looking to do this type of conversion that you need to consider. One of them is your skill set. We had to cut into the frame rail on this car and that alone scares people to death, and two is the time to do this type of thing. Now this alone can take you 40 plus hours to do it. This isn't really a job that you can take and tear the car down on a Friday night and be back driving this thing to work Monday morning. So just make sure you do your research before you make your decision.
(Daniel)>> The good thing about having one side done is that you're half way there. So Matt just repeated the process on the passenger side.
(Tommy)>> So that means we have to section the frame on this side as well and burn it in. [ welder crackling ] [ grinder buzzing ]
(Tommy)>> Man yeah Matt, you have made some pretty good progress, and man I want to say thank you for all your hard work.
(Matt)>> Hey I know how busy you guys are here. Anything I can do to help out. I'd love to stick around and help with the Quadralink kit but I've got to head back home. Think you can take it from here?
(Tommy)>> Oh yeah man, I can handle this. Now you guys don't run off. We've still got more to do, and I have to say I can't wait to see this thing when it's done. Huge tire now.
(Matt)>> Easily two, three more inches out of these.
(Tommy)>> Coming up, a little welding tech. Some tips for those rosette welds next on Detroit Muscle.
(Tommy)>> Well we're about waist deep in the mini tub and rear suspension install on our ole Mustang. Now if you're looking to do something like this, or even a panel replacement on your ride, there's one thing you're definitely gonna run into and that would be spot welds. Now them things can be a pain to remove and even difficult to simulate, but there's a few tips and tricks that you can apply to up your welding game. The goal is to attach two or more panels, and there are a couple of common practices. A spot weld is where using a welder you direct an arc to penetrate both pieces, or a plug weld where you drill or punch your hole and weld through that to weld the two pieces together. I prefer to plug weld and to punch instead of drill where I can, and using the Silver Eagle punch and flange tool from Matco sure does get a lot of work done in a hurry. Here we're gonna punch out four eight millimeter holes to attach our panel, and like I said it does it in a hurry. That was easy and this is a two in one tool. It'll save you time and give you professional results. Now the next thing we need to do is clamp these two panels together.
What you're looking for is a nice, tight gap like this in here. If it's kinda spread apart well that's gonna compromise the strength of your weld joint. Well we're pretty much ready to start burning some wire and getting our welder dialed in. Now I'd recommend you guys doing this if you were preparing to weld a panel in on your car because it'll save you some time as opposed to screwing your panel up. Trust me, been there, done that. Now there's pretty much two different ways that guys like to do rosette style welds. Some of them build a puddle in the middle and then go around the perimeter, and others do vice versa. Start on the outside and then just fill up the center. Let's turn this machine on and see what we got. Most welders have a convenient chart with the predetermined settings. You just need to know a few things like wire size, gas, and the material you'll be working with. Once you have all that you just dial in your voltage and wire speed and you're ready to pull the trigger. [ welder crackling ]
(Tommy)>> That's not good at all. It's too cold. A little goes a long way here. We just need a little more heat for a better weld. [ welder crackling ] ♪ ♪
(Tommy)>> That ain't too bad. To get it to perfection some times it takes a little more of this and a little less of that to get it just right. [ welder crackling ]
(Tommy)>> Oh yeah, that one's nice. That's pretty much what you're looking for. A nice blue heat ring and a flat weld. Now this is kinda the tried and true method. It has been done this way for many years but if you're a professional shop and looking for superior results we have a tool for you. A Car-o-liner CTR-9 is a great time saving tool when it comes to spot welding. A single weld can take up to 30 seconds with a mig but with the CTR-9 each weld takes approximately one second, which drastically reduces the amount of heat you're putting into the panel. It can weld up to a maximum combined thickness of 10 millimeters in full automatic mode. Also this thing self calibrates when you start it up. It's lightweight and ergonomic, which means less fatigue on those long work days, and I have to say when we start our next big project I can't wait to give Car-o-liner a try. Up next!
(Daniel)>> The Mustang got new legs Lieutenant Dan.
(Daniel)>> We're back to work prepping on our EBC Mustang for the trick suspension kit we got from Summit Racing. Tommy's had to do quite a bit of whittling and trimming to make room for that upgraded back end. ♪ ♪ We've had to burn a good bit of wire installing all the bracketry and reinforcements making way for this superior suspension. [ welder crackling ]
(Tommy)>> We went ahead and sprayed the under side of our Mustang with some undercoating. This cuts down on road noise and prevents rust. The next thing we need to do is install our links and sway bar. This is pretty much straight forward and just nut and bolt action. With some grade eight hardware we can attach our upper and lower links. ♪ ♪ With a few more pieces we can cinch down the rear sway bar.
(Daniel)>> While Tommy's over there installing those rear control arms I'm gonna start putting our coil over assemblies together. Now these came with the rear suspension kit. They're JRI double adjustable shocks that have been tuned to Detroit Speed's specifications, and they use Torrington bearings which allow for easy adjustment during pre-loading. Now the nice thing about these is they don't use any special tools for assembly. They don't even use snap ring pliers. All they have is a stainless steel retaining ring that can be removed by hand, but before we go any further I just wanted to show you a really cool feature of these shocks and the way they're designed. With this ring removed the upper spring seat comes off. When we put it all back together, the spring seat and the retaining ring, you'll notice there's an interference fit. Believe it or not that little ole bity ring and three of his buddies are all that's holding the car up. Boy that's some engineering right there. Well enough of the small talk. I've got to get these springs on before cousin over there fires me. Now for pre-assembly the spanner and the jam nut need to be run all the way to bottom of the body. Then we can get to greasing the Torrington bearing. Detroit Speed recommends using an extreme pressure grease on each bearing and thrust washer. When you go to slip these bearings over the body be sure and have all your excess grease wiped off because the less mess the better. ♪ ♪ And with the upper spring seats in place simply flip over the shock and cinch down the adjustment nut to hold everything in place. Voila!
(Tommy)>> Man look at that accomplishment.
(Daniel)>> I know. Look good don't they?
(Tommy)>> With a couple more bolts we can hang our coil overs and cinch them down. [ drill humming ]
(Tommy)>> Then we'll slide in our housing... ♪ ♪ ...line everything up... ♪ ♪ ...and slide in a few more bolts. ♪ ♪ [ drill humming ]
(Tommy)>> A couple of these may take a little wrestling to get them in there but nothing a tool of persuasion can't handle. Before we put this chunk in I'm gonna let you do the honors of leaving these people a little note if you will. Maybe some sweet nothings or something.
(Daniel)>> I think I can handle that. ♪ ♪
(Tommy)>> So what'd you write?
(Daniel)>> Lifters are losers, making reference to lifting off that skinny pedal too early in the race. When you lift too soon you lose every time. We're getting ready to install the rear differential on our Mustang here, and there's a couple of things we need to pay attention to before we do so. These pumpkin style rear ends like our Ford nine inch here all have a common problem, they leak! There's a couple of ways to address that whether it be with a gasket, sealant, or both. Now let me show you the problem. These lower studs are in what I like to call the reservoir of the differential, meaning they are submerged in oil when the car is parked. I do two things for preventative strategy. First I like to apply a small amount of sealant to the back side of all of the studs to lower the chances of leaks. Also with a quality gasket I like to add more sealant to the threads for good insurance. With that leak prevention in place we can add the chunk and cinch down the bolts. [ drill humming ]
(Daniel)>> For the rear axle seal I like to go the extra mile here as well. This may seem a little excessive but I've seen these things leak before. So a small amount around the flange will do the trick. ♪ ♪ [ metal clanging ]
(Daniel)>> Get in there you turkey. Well that about tops off our upgrades to the tail end of our car here, and I hope some of those tips we talked about earlier will help keep those greasy spots out of your floor.
(Tommy)>> We've made some really good progress for today just getting the suspension finished here on the back side. We've still got a long road to ho if you will with the front suspension, engine and tranny, and so on. I'm gonna call it. I've had my fill for the day and I'm ready to go to the house.
(Daniel)>> Me too, I think it's time to go get a milkshake.
(Tommy)>> If you like what you saw on today's show or have any questions you should go to Powernation TV dot com and check out our project pages. There you will find current build status, before and after picks, lists to the parts used, and links to all the shows. Y'all have a good one.
