Detroit Muscle Featured Projects
Detroit Muscle Builds
Want more content like this?
Join the PowerNation Email NewsletterParts Used In This Episode
Holley
850 CFM Street HP Carburetor
Holley
Hydramat
Holley
QuickFuel 175 Fuel Pump
Magnaflow
Side Pipe Muffler Builder Series
Matco Tools
MATCO Tools are the Official Tool Supplier to PowerNation
NOS
Nitrous Oxide System Kit
The Industrial Depot
Tools, Hardware, Shop Supplies
Episode Transcript
(Tommy)>> You're watching Powernation!
(Tommy)>> Today on Detroit Muscle our Caddy hearse gets an exhaust that will wake the dead.
(Marc)>> Plus we add cooling and fuel systems to keep our 500 Caddy engine running right.
(Tommy)>> Then top it all off with some boost juice to take Overtaker to horsepower heaven. [ engines revving ]
(Tommy)>> I do believe that green paint is a little brighter than the cap.
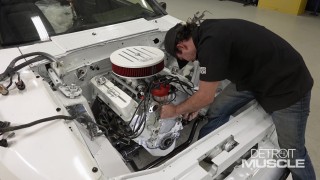
(Marc)>> Yeah it doesn't match the car at all but that's what makes it cool. It looks like a crate engine and it's not. This is the same boat anchor that Tommy pulled out of this thing a while back and then we upgraded. Ported heads, cam, intake, and that's gonna add quite a bit of power but that's not gonna double the power like we want to do. We're actually going for over 500 horse with this thing.
(Tommy)>> Now to ensure that big number we're gonna be spraying this thing with about 150, maybe a 200 shot.
(Marc)>> Maybe 300.
(Tommy)>> Well either way to get this thing to make that kind of power we also have to address the other systems on this thing, and one of them would be the exhaust.
(Marc)>> Right, I'm gonna go grab the headers.
(Tommy)>> Now with the exhaust on this it isn't gonna be just some old twin sticks sticking out the back with your paw-paw tips. It's gonna be a little bit different. It's gonna add some style, and possibly even allow us to burp some fire.
(Marc)>> Well you'd think it'd be kinda difficult to find a set of headers for a 1975 Cadillac hearse but Summit Racing had exactly what we needed with these headers by Sanderson. These are mid-length. So they're gonna lend themselves to what Tommy has planned for the rest of the exhaust system, but other than that they've got a lot of other benefits. They're gonna free up power over those factory exhaust manifolds. They're lighter weight, and they've got inch and seven-eighths primaries, three inch collectors, and a nice ceramic coating. We've got plenty of room to get these things on here we just need to get them bolted on and we can move on to the rest of that system. It's not uncommon to fight with a set of headers during install but working with big bodies, they fall right into place. [ MUSIC ]
(Tommy)>> Now it's easy to say that our ole Cadillac hearse makes quite a statement. I want to do the same thing with our exhaust. So today I'm gonna be fabbing up some side pipe mufflers. Now we picked up all this stuff from Magnaflow, and they offer several components in their builder series. The first thing that we need to do to get started is do a bit of measuring on the car. [ mechanical humming ]
(Tommy)>> Here we're trying to get this thing as close as possible to the front side of the rocker near the wheel. With a couple of bends and some tack welds we hit the sweet spot. [ welder crackling ]
(Tommy)>> Well I got my lead pipe on my exhaust basically where I want it. Now the next thing I need to do is throw up that big ole pipe, and then the inlet tube to it to see exactly where we're at. I'm probably gonna have to do some trimming but that's no big deal. [ MUSIC ] Our main tube is four inches and our inner is three. [ MUSIC ] Yeah we're gonna have to cut that off. I like the height right there though. That transition doesn't bother me. I need to do some marking. [ MUSIC ] [ saw buzzing ] [ MUSIC ]
(Tommy)>> The tube coming off our header is two and a half inches. So I fabbed up an adapter to connect it to our 90. Now back here on the rear it's a little bit more of aesthetics than I would call functions cause basically the exhaust is gonna come out of this thing and it's gonna be in the direction that you point it. Now normally people mount a tip kinda horizontal or they kick them down a bit, and y'all've probably seen that kick up some dust. Now what I'm gonna do is I'm actually gonna turn it up and then cut it out in kind of a C-shape, and that'll give it a bit more of a Munster feel to it. Then after I draw that out we're gonna remove this thing, get over to the table, and then we can build the innards. [ MUSIC ] Now this next step is gonna convert our side pipe in a bit more of muffler direction, and what we're gonna be doing is adding these baffles that we got. Now what I need is 87 and five-eighths from this tab to that little mark right there. So we're gonna have to weld a couple of these tubes together. That's no big deal. [ welder crackling ]
(Tommy)>> Alright that'll work. That's good enough. We'll slide on these stamped rings that will help locate and support our baffle tube. [ welder crackling ]
(Tommy)>> Once it's all tacked up we can slide our baffle inside our exhaust tube and tap her in. [ saw buzzing ]
(Tommy)>> The body saw makes light work of carving up our custom tip, and we'll smooth out the edges. [ welder crackling ]
(Tommy)>> A small amount of massaging and burning in some wire, and we're almost to the finish line. [ welder crackling ]
(Tommy)>> Now we just need to fab up some hangers to keep these side pipes in place. Don't have to get too elaborate here. We're just using flat stock with a few cuts, drill a hole, an isolator, a little bit of welding, bolt it in. [ MUSIC ]
(Marc)>> Wow, that wasn't what I expected but I like it.
(Tommy)>> It's pretty impressive isn't it?
(Marc)>> That is the biggest muffler I think I've ever seen.
(Tommy)>> Well the wheel base had a whole lot to do with that.
(Marc)>> Is it gonna be loud?
(Tommy)>> Oh brother it's probably gonna be plenty loud.
(Marc)>> We ditch the mechanical fan for an electric one to save horsepower and keep our engine running cool.
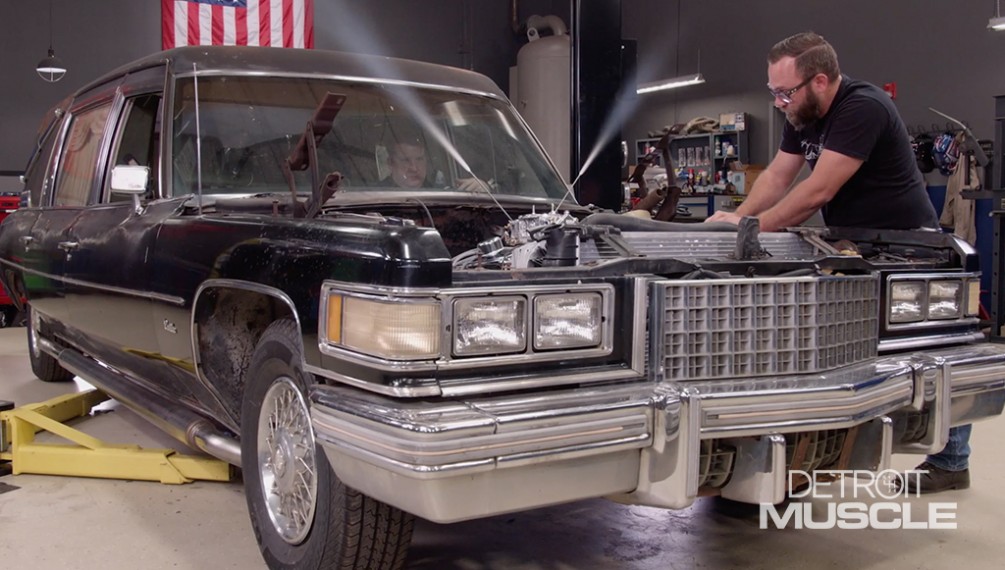
(Marc)>> We're plugging away on our Cadillac hearse that we're calling Overtaker, and we're trying to make this thing scream down the drag strip. Now when you're talking about making a car quicker there's a couple of things you can do, say low hanging fruit, to do that. One would be shed weight and the other is gonna be to free up horsepower, and we're doing both here under the hood on our Caddy. One thing we've done is completely eliminated the a/c compressor. That's the original one. It was big and heavy. That along with the condenser is about 40 pounds that we saved, and when you're talking about shedding weight a pound or two here and there is good. 40, well that's pretty significant. Another we've done is eliminated that manual fan. This is a 500 cubic inch engine from the factory. Big, heavy car. There's a lot of strain on that cooling system. So that required a big fan that had a lot of drag to it, and that sucked power from the engine, maybe 10 or 15 horsepower. So we got rid of that. The next thing we're gonna do is fill this big void here, and that's gonna be yet another way for us to save some weight. Well you probably could have guessed we were doing an aluminum radiator swap, but why is this such a popular upgrade? Well when you take a look at this factory radiator that came out of our Cadillac there's a lot to be desired here. This is a copper and brass style. It's got copper tubes and fins with brass tanks. It is leaking but that's not the only drawback to this. These are super heavy and they're expensive to repair, and even more expensive to replace. So if you were doing a chalk mark style restoration on an old Caddy or any other old car you might want to keep this, but other than that you've got aftermarket radiators that are readily available. As a matter of fact we got this aluminum one from Rock Auto dot com. It's a lot lighter, and it's even thinner. When you talk about the design radiators have increased in efficiency over the years. This is a single core at inch and a quarter thick. Just as efficient as that original radiator, which is a three core at two inches thick. Now we talked about weight savings. The original one was almost 30 pounds. The new aluminum, 10 pounds. So we've got almost a 20 pound savings. [ MUSIC ] [ drill buzzing ] [ MUSIC ]
(Marc)>> Well because we eliminated that mechanical fan we had to replace it with some electric ones. Now there's not a lot of aftermarket support for these old Caddies. So we had to go with something universal, and we got this kit from Frostbite. Just need to get it mounted to the radiator, get it wired up. [ MUSIC ] We're gonna hold this in place with a panel clamp, and we're just gonna mount it using some regular tech screws and washers. Alright time for some hoses. [ MUSIC ] When we were on Rock Auto dot com ordering that radiator we got these o-e-m replacement hoses as well. [ MUSIC ] [ drill buzzing ]
(Marc)>> Just need to add some water and a cap and that's good to go. Now when you're doing an electric fan conversion like we did you want to make sure that your alternator is gonna handle it. Now it maybe just be that this is a hearse or all Cadillacs had it. This is a big enough alternator to handle that. We just need to put a relay in there to run those fans, which we'll do after we install the fuel system, and that's next.
(Tommy)>> We'll tuck our tank in Overtaker adding an upgraded fuel system.
(Tommy)>> Well I guess you could say we're about six feet deep with our makeover on our old Cadillac. The next thing we're gonna dig into is the fuel system. We did a little bit of some detective work and we realized that the factory tank that was up under this car had some corrosion in it. So the next thing we're gonna have to do is swap in a fuel cell. That's the best solution we've got.
(Marc)>> So you gonna just like throw it in there and mount it with those, what do you call those?
(Tommy)>> Anchors, that would be a killer idea but we need to be a bit more safe than that.
(Marc)>> So where do we need to start?
(Tommy)>> Well I know after looking under the car there's a big gnarly brace that runs across the back side here. So we're gonna have to move forward, cut a big square hole, and I want to recess the tank so it's nice and flush. Kinda looks like it belongs.
(Marc)>> I like it. What do you want me to do?
(Tommy)>> Get out of the way. I'm gonna get to tearing into it. I need a screwdriver. [ MUSIC ] Don't really know what to call these things but we'll start by taking out the casket clamp plates and rollers. [ MUSIC ] That brace I mentioned earlier is 19 inches from the bumper in toward the car. So that's why I made my mark. I'm gonna have to measure from left to right to find center, and then I'm gonna cut me a hole that's 18 and a quarter by 16 and three quarter I think. [ MUSIC ] With everything square these two lines are gonna match up. Close enough we can cut it. [ drill buzzing ] [ saw buzzing ] [ MUSIC ]
(Tommy)>> Well that's the first hole through the top floor and now we've got to make another cut on the second floor. It's no big deal. We'll use a plumb bob on all four corners, draw a couple of lines, make a couple cuts. [ MUSIC ] Not really climb in the back of a hearse but once. This is for good times. [ saw buzzing ]
(Tommy)>> Now if everything goes right this little tank here should fall right into place. Oh yeah! Now I've still got a few things to do. I need to remove these bolts so that I can anchor it to the floor. I need to make a plate to cover up from where them rollers were, and also I've got to execute my plumbing. Now with this tank the cap doesn't breathe and this port here is how this thing is gonna let the air in and out. So I'm gonna run this outside of the car. That way whenever you're sitting in here you won't be smelling fuel.
(Marc)>> Well while Tommy's getting the fuel cell mounted I'm tackling the rest of the fuel system including the fuel system including the carburetor here. It's an 850 c-f-m Holley Street HP with mechanical secondaries, and it's gonna plenty for what our Cadillac 500 will need. Now I didn't mount it permanently yet because we've got some spice we're gonna sprinkle on there a little bit later. As for the rest of the fuel system we're using what's here on the table. It's pretty straight forward. We've got a pickup. We've got a fuel pump and regulator assembly, post filter, and all the hose to get it connected. I'm gonna take these to the back, get them installed. We'll see how this turned out.
(Tommy)>> What do you think?
(Marc)>> Wow!
(Tommy)>> Even you can do things when you apply yourself.
(Marc)>> I like it.
(Tommy)>> It don't look too bad.
(Marc)>> I'm all for it. I got to thinking about you were gonna gut all of this out of here to save weight. What happened with that?
(Tommy)>> You talked me into it.
(Marc)>> Smart man.
(Tommy)>> I'm gonna get out of your way. I'm gonna grab me a snack. You got any change? [ MUSIC ]
(Marc)>> For our pickup we're using Holley's Hydromat. This stuff helps prevent pump starvation during fuel slosh, and it also acts as a 100 micron pre-filter for your pump. [ MUSIC ] Alright now I just need to get this thing in the air and get that pump mounted. [ MUSIC ] Alright when you're mounting a fuel pump like the one we're going with you want to make sure of a few things. One, you want to make sure it's close to the tank because these pumps like to push and not pull. On that note you want to make sure also that it's not mounted above the tank because then it's gonna have to draw the fuel out and it doesn't like doing that. Another thing you want to make sure you're away from any moving parts. We're plenty clear from our leaf spring here, and also the exhaust, which with our new side pipes we don't have to worry about back here. So we found the perfect spot here. Got the bracket in place. I just need to mount the pump to it, get it plumbed up. We're using this Quick Fuel Technologies 175. It's a pump and regulator combo, and it'll support 175 gallons per hour. With the pump mounted it's time to move on to the hoses, and what we decided to go with is this Earl's super stock. It's a little different than what you normally see us use. This is actually a push on hose. That makes installation nice and easy, and it'll handle up to 250 p-s-i. [ MUSIC ] And it's that quick and simple. All I need to do is get these hoses made, get the fuel lines run to the front of the car, we'll have ourselves a fuel system. We have one more surprise to give Overtaker a lethal injection.
(Marc)>> Well exhaust system is complete. Cooling system, that's done too, and the fuel system we just have one more termination to make but we're not gonna do that just yet because we've got something special up our sleeves.
(Tommy)>> This next upgrade that we're gonna be doing is basically bolting on 150 horse plus or minus.
(Marc)>> Maybe like 300 horse I'm hoping. What we're talking about is a power adder.
(Tommy)>> Now normally power adders come in three different categories, and the first one I'm gonna talk about is kinda my favorite, and it's mainly because it'll look so cool. Blowers, huffers, or whatever you want to call them have the goods. Plus these big hunks of aluminum make power. It doesn't really matter if they're on an old school big block or late model muscle. And they make some impressive sound.
(Marc)>> Now there is absolutely nothing wrong with the whine of a blower, but when it comes to cool noises my absolute favorite has to be the whistle of a turbo. Turbochargers are a great way to add plenty of cool factor to just about any hot rod or muscle car. You'll find them as singles or twins, and since they're driven off the exhaust you can mount them just about anywhere. You know these things mean business since they have to have their own horsepower relief valve.
(Tommy)>> Both of those have their benefits but they can be pricey and kinda complicated to install. For us working on that obscure Cadillac we knew it'd be difficult. Finding an application for a 500 Cadillac. Plus we wanted our dollars to make sense. So our plan of attack is to be spraying this thing with some nitrous. It doesn't take but a couple of hours to install. Plus it's economical. Don't forget that allure of power at the push of a button. Come here baby! Oh yeah!
(Marc)>> On a wet nitrous system the nitrous, or N-2-O, and fuel are injected into the engine by way of solenoids and regulated by orifices, or jets. The precise amount of fuel and nitrous enter the combustion chamber causing a more dense air/fuel mixture. That mixture gets ignited creating greater cylinder pressure and ultimately more horsepower. This particular kit we're using is called a plate system that we got from NOS. It sandwiches between your carburetor and your intake manifold. With the plate in place the carburetor can sit on top of it and get bolted down. Well here's why we didn't terminate the fuel feed earlier. We've got to "T" into the fuel line because one line has to go to the fuel solenoid of the nitrous system, and the other line has to feed the carburetor. Once we figured out the best routing we just need to get these lines cut, installed, and clamped down tight. That's it for the fuel feed. Now we just need to get some switches installed, get it wired up, and run the nitrous feed, which you really don't want to do until Tommy figures out where he's gonna mount the bottom.
(Tommy)>> To mount a nitrous bottle it's really basic. It comes with some brackets. You've got to make a couple of holes, and you want to make sure that you mount it onto a solid foundation. We're gonna put ours here on the floor. Now we could try to hide this thing a little bit but what's the point in that. Look at this car. [ MUSIC ] [ drill buzzing ]
(Tommy)>> You know Marc I wonder how many people in this world has put a nitrous setup on a hearse. [ MUSIC ]
(Marc)>> Probably very few.
(Tommy)>> Probably wouldn't hurt if there were a few more out there. [ MUSIC ] I got my end finished up, what about you?
(Marc)>> Yeah I got it connected. Now I've got this purge solenoid all plumbed up with the little rabbit ears. So don't mind that. We'll fix it up later where we get the hood on it and come up with something fancy. Alright so I guess all that's left now is just to push the button. Go ahead, make sure it ain't gonna leak.
(Tommy)>> Here we go. [ hissing ]
(Tommy)>> Dude that looks pretty cool on this end.
(Marc)>> That was awesome.
(Tommy)>> Now we've only got brakes, suspension, wheels and tires, maybe a couple of other things and we'll be out breathing fire and disturbing the peace in this old thing.
(Marc)>> I can't wait. Well for more information on what you saw in the show today be sure to go to Powernation TV dot com. Call that mission accomplished.
(Tommy)>> We should go celebrate.
(Marc)>> You buying the first round?
(Tommy)>> Nah I'll let you.
Show Full Transcript
(Tommy)>> Today on Detroit Muscle our Caddy hearse gets an exhaust that will wake the dead.
(Marc)>> Plus we add cooling and fuel systems to keep our 500 Caddy engine running right.
(Tommy)>> Then top it all off with some boost juice to take Overtaker to horsepower heaven. [ engines revving ]
(Tommy)>> I do believe that green paint is a little brighter than the cap.
(Marc)>> Yeah it doesn't match the car at all but that's what makes it cool. It looks like a crate engine and it's not. This is the same boat anchor that Tommy pulled out of this thing a while back and then we upgraded. Ported heads, cam, intake, and that's gonna add quite a bit of power but that's not gonna double the power like we want to do. We're actually going for over 500 horse with this thing.
(Tommy)>> Now to ensure that big number we're gonna be spraying this thing with about 150, maybe a 200 shot.
(Marc)>> Maybe 300.
(Tommy)>> Well either way to get this thing to make that kind of power we also have to address the other systems on this thing, and one of them would be the exhaust.
(Marc)>> Right, I'm gonna go grab the headers.
(Tommy)>> Now with the exhaust on this it isn't gonna be just some old twin sticks sticking out the back with your paw-paw tips. It's gonna be a little bit different. It's gonna add some style, and possibly even allow us to burp some fire.
(Marc)>> Well you'd think it'd be kinda difficult to find a set of headers for a 1975 Cadillac hearse but Summit Racing had exactly what we needed with these headers by Sanderson. These are mid-length. So they're gonna lend themselves to what Tommy has planned for the rest of the exhaust system, but other than that they've got a lot of other benefits. They're gonna free up power over those factory exhaust manifolds. They're lighter weight, and they've got inch and seven-eighths primaries, three inch collectors, and a nice ceramic coating. We've got plenty of room to get these things on here we just need to get them bolted on and we can move on to the rest of that system. It's not uncommon to fight with a set of headers during install but working with big bodies, they fall right into place. [ MUSIC ]
(Tommy)>> Now it's easy to say that our ole Cadillac hearse makes quite a statement. I want to do the same thing with our exhaust. So today I'm gonna be fabbing up some side pipe mufflers. Now we picked up all this stuff from Magnaflow, and they offer several components in their builder series. The first thing that we need to do to get started is do a bit of measuring on the car. [ mechanical humming ]
(Tommy)>> Here we're trying to get this thing as close as possible to the front side of the rocker near the wheel. With a couple of bends and some tack welds we hit the sweet spot. [ welder crackling ]
(Tommy)>> Well I got my lead pipe on my exhaust basically where I want it. Now the next thing I need to do is throw up that big ole pipe, and then the inlet tube to it to see exactly where we're at. I'm probably gonna have to do some trimming but that's no big deal. [ MUSIC ] Our main tube is four inches and our inner is three. [ MUSIC ] Yeah we're gonna have to cut that off. I like the height right there though. That transition doesn't bother me. I need to do some marking. [ MUSIC ] [ saw buzzing ] [ MUSIC ]
(Tommy)>> The tube coming off our header is two and a half inches. So I fabbed up an adapter to connect it to our 90. Now back here on the rear it's a little bit more of aesthetics than I would call functions cause basically the exhaust is gonna come out of this thing and it's gonna be in the direction that you point it. Now normally people mount a tip kinda horizontal or they kick them down a bit, and y'all've probably seen that kick up some dust. Now what I'm gonna do is I'm actually gonna turn it up and then cut it out in kind of a C-shape, and that'll give it a bit more of a Munster feel to it. Then after I draw that out we're gonna remove this thing, get over to the table, and then we can build the innards. [ MUSIC ] Now this next step is gonna convert our side pipe in a bit more of muffler direction, and what we're gonna be doing is adding these baffles that we got. Now what I need is 87 and five-eighths from this tab to that little mark right there. So we're gonna have to weld a couple of these tubes together. That's no big deal. [ welder crackling ]
(Tommy)>> Alright that'll work. That's good enough. We'll slide on these stamped rings that will help locate and support our baffle tube. [ welder crackling ]
(Tommy)>> Once it's all tacked up we can slide our baffle inside our exhaust tube and tap her in. [ saw buzzing ]
(Tommy)>> The body saw makes light work of carving up our custom tip, and we'll smooth out the edges. [ welder crackling ]
(Tommy)>> A small amount of massaging and burning in some wire, and we're almost to the finish line. [ welder crackling ]
(Tommy)>> Now we just need to fab up some hangers to keep these side pipes in place. Don't have to get too elaborate here. We're just using flat stock with a few cuts, drill a hole, an isolator, a little bit of welding, bolt it in. [ MUSIC ]
(Marc)>> Wow, that wasn't what I expected but I like it.
(Tommy)>> It's pretty impressive isn't it?
(Marc)>> That is the biggest muffler I think I've ever seen.
(Tommy)>> Well the wheel base had a whole lot to do with that.
(Marc)>> Is it gonna be loud?
(Tommy)>> Oh brother it's probably gonna be plenty loud.
(Marc)>> We ditch the mechanical fan for an electric one to save horsepower and keep our engine running cool.
(Marc)>> We're plugging away on our Cadillac hearse that we're calling Overtaker, and we're trying to make this thing scream down the drag strip. Now when you're talking about making a car quicker there's a couple of things you can do, say low hanging fruit, to do that. One would be shed weight and the other is gonna be to free up horsepower, and we're doing both here under the hood on our Caddy. One thing we've done is completely eliminated the a/c compressor. That's the original one. It was big and heavy. That along with the condenser is about 40 pounds that we saved, and when you're talking about shedding weight a pound or two here and there is good. 40, well that's pretty significant. Another we've done is eliminated that manual fan. This is a 500 cubic inch engine from the factory. Big, heavy car. There's a lot of strain on that cooling system. So that required a big fan that had a lot of drag to it, and that sucked power from the engine, maybe 10 or 15 horsepower. So we got rid of that. The next thing we're gonna do is fill this big void here, and that's gonna be yet another way for us to save some weight. Well you probably could have guessed we were doing an aluminum radiator swap, but why is this such a popular upgrade? Well when you take a look at this factory radiator that came out of our Cadillac there's a lot to be desired here. This is a copper and brass style. It's got copper tubes and fins with brass tanks. It is leaking but that's not the only drawback to this. These are super heavy and they're expensive to repair, and even more expensive to replace. So if you were doing a chalk mark style restoration on an old Caddy or any other old car you might want to keep this, but other than that you've got aftermarket radiators that are readily available. As a matter of fact we got this aluminum one from Rock Auto dot com. It's a lot lighter, and it's even thinner. When you talk about the design radiators have increased in efficiency over the years. This is a single core at inch and a quarter thick. Just as efficient as that original radiator, which is a three core at two inches thick. Now we talked about weight savings. The original one was almost 30 pounds. The new aluminum, 10 pounds. So we've got almost a 20 pound savings. [ MUSIC ] [ drill buzzing ] [ MUSIC ]
(Marc)>> Well because we eliminated that mechanical fan we had to replace it with some electric ones. Now there's not a lot of aftermarket support for these old Caddies. So we had to go with something universal, and we got this kit from Frostbite. Just need to get it mounted to the radiator, get it wired up. [ MUSIC ] We're gonna hold this in place with a panel clamp, and we're just gonna mount it using some regular tech screws and washers. Alright time for some hoses. [ MUSIC ] When we were on Rock Auto dot com ordering that radiator we got these o-e-m replacement hoses as well. [ MUSIC ] [ drill buzzing ]
(Marc)>> Just need to add some water and a cap and that's good to go. Now when you're doing an electric fan conversion like we did you want to make sure that your alternator is gonna handle it. Now it maybe just be that this is a hearse or all Cadillacs had it. This is a big enough alternator to handle that. We just need to put a relay in there to run those fans, which we'll do after we install the fuel system, and that's next.
(Tommy)>> We'll tuck our tank in Overtaker adding an upgraded fuel system.
(Tommy)>> Well I guess you could say we're about six feet deep with our makeover on our old Cadillac. The next thing we're gonna dig into is the fuel system. We did a little bit of some detective work and we realized that the factory tank that was up under this car had some corrosion in it. So the next thing we're gonna have to do is swap in a fuel cell. That's the best solution we've got.
(Marc)>> So you gonna just like throw it in there and mount it with those, what do you call those?
(Tommy)>> Anchors, that would be a killer idea but we need to be a bit more safe than that.
(Marc)>> So where do we need to start?
(Tommy)>> Well I know after looking under the car there's a big gnarly brace that runs across the back side here. So we're gonna have to move forward, cut a big square hole, and I want to recess the tank so it's nice and flush. Kinda looks like it belongs.
(Marc)>> I like it. What do you want me to do?
(Tommy)>> Get out of the way. I'm gonna get to tearing into it. I need a screwdriver. [ MUSIC ] Don't really know what to call these things but we'll start by taking out the casket clamp plates and rollers. [ MUSIC ] That brace I mentioned earlier is 19 inches from the bumper in toward the car. So that's why I made my mark. I'm gonna have to measure from left to right to find center, and then I'm gonna cut me a hole that's 18 and a quarter by 16 and three quarter I think. [ MUSIC ] With everything square these two lines are gonna match up. Close enough we can cut it. [ drill buzzing ] [ saw buzzing ] [ MUSIC ]
(Tommy)>> Well that's the first hole through the top floor and now we've got to make another cut on the second floor. It's no big deal. We'll use a plumb bob on all four corners, draw a couple of lines, make a couple cuts. [ MUSIC ] Not really climb in the back of a hearse but once. This is for good times. [ saw buzzing ]
(Tommy)>> Now if everything goes right this little tank here should fall right into place. Oh yeah! Now I've still got a few things to do. I need to remove these bolts so that I can anchor it to the floor. I need to make a plate to cover up from where them rollers were, and also I've got to execute my plumbing. Now with this tank the cap doesn't breathe and this port here is how this thing is gonna let the air in and out. So I'm gonna run this outside of the car. That way whenever you're sitting in here you won't be smelling fuel.
(Marc)>> Well while Tommy's getting the fuel cell mounted I'm tackling the rest of the fuel system including the fuel system including the carburetor here. It's an 850 c-f-m Holley Street HP with mechanical secondaries, and it's gonna plenty for what our Cadillac 500 will need. Now I didn't mount it permanently yet because we've got some spice we're gonna sprinkle on there a little bit later. As for the rest of the fuel system we're using what's here on the table. It's pretty straight forward. We've got a pickup. We've got a fuel pump and regulator assembly, post filter, and all the hose to get it connected. I'm gonna take these to the back, get them installed. We'll see how this turned out.
(Tommy)>> What do you think?
(Marc)>> Wow!
(Tommy)>> Even you can do things when you apply yourself.
(Marc)>> I like it.
(Tommy)>> It don't look too bad.
(Marc)>> I'm all for it. I got to thinking about you were gonna gut all of this out of here to save weight. What happened with that?
(Tommy)>> You talked me into it.
(Marc)>> Smart man.
(Tommy)>> I'm gonna get out of your way. I'm gonna grab me a snack. You got any change? [ MUSIC ]
(Marc)>> For our pickup we're using Holley's Hydromat. This stuff helps prevent pump starvation during fuel slosh, and it also acts as a 100 micron pre-filter for your pump. [ MUSIC ] Alright now I just need to get this thing in the air and get that pump mounted. [ MUSIC ] Alright when you're mounting a fuel pump like the one we're going with you want to make sure of a few things. One, you want to make sure it's close to the tank because these pumps like to push and not pull. On that note you want to make sure also that it's not mounted above the tank because then it's gonna have to draw the fuel out and it doesn't like doing that. Another thing you want to make sure you're away from any moving parts. We're plenty clear from our leaf spring here, and also the exhaust, which with our new side pipes we don't have to worry about back here. So we found the perfect spot here. Got the bracket in place. I just need to mount the pump to it, get it plumbed up. We're using this Quick Fuel Technologies 175. It's a pump and regulator combo, and it'll support 175 gallons per hour. With the pump mounted it's time to move on to the hoses, and what we decided to go with is this Earl's super stock. It's a little different than what you normally see us use. This is actually a push on hose. That makes installation nice and easy, and it'll handle up to 250 p-s-i. [ MUSIC ] And it's that quick and simple. All I need to do is get these hoses made, get the fuel lines run to the front of the car, we'll have ourselves a fuel system. We have one more surprise to give Overtaker a lethal injection.
(Marc)>> Well exhaust system is complete. Cooling system, that's done too, and the fuel system we just have one more termination to make but we're not gonna do that just yet because we've got something special up our sleeves.
(Tommy)>> This next upgrade that we're gonna be doing is basically bolting on 150 horse plus or minus.
(Marc)>> Maybe like 300 horse I'm hoping. What we're talking about is a power adder.
(Tommy)>> Now normally power adders come in three different categories, and the first one I'm gonna talk about is kinda my favorite, and it's mainly because it'll look so cool. Blowers, huffers, or whatever you want to call them have the goods. Plus these big hunks of aluminum make power. It doesn't really matter if they're on an old school big block or late model muscle. And they make some impressive sound.
(Marc)>> Now there is absolutely nothing wrong with the whine of a blower, but when it comes to cool noises my absolute favorite has to be the whistle of a turbo. Turbochargers are a great way to add plenty of cool factor to just about any hot rod or muscle car. You'll find them as singles or twins, and since they're driven off the exhaust you can mount them just about anywhere. You know these things mean business since they have to have their own horsepower relief valve.
(Tommy)>> Both of those have their benefits but they can be pricey and kinda complicated to install. For us working on that obscure Cadillac we knew it'd be difficult. Finding an application for a 500 Cadillac. Plus we wanted our dollars to make sense. So our plan of attack is to be spraying this thing with some nitrous. It doesn't take but a couple of hours to install. Plus it's economical. Don't forget that allure of power at the push of a button. Come here baby! Oh yeah!
(Marc)>> On a wet nitrous system the nitrous, or N-2-O, and fuel are injected into the engine by way of solenoids and regulated by orifices, or jets. The precise amount of fuel and nitrous enter the combustion chamber causing a more dense air/fuel mixture. That mixture gets ignited creating greater cylinder pressure and ultimately more horsepower. This particular kit we're using is called a plate system that we got from NOS. It sandwiches between your carburetor and your intake manifold. With the plate in place the carburetor can sit on top of it and get bolted down. Well here's why we didn't terminate the fuel feed earlier. We've got to "T" into the fuel line because one line has to go to the fuel solenoid of the nitrous system, and the other line has to feed the carburetor. Once we figured out the best routing we just need to get these lines cut, installed, and clamped down tight. That's it for the fuel feed. Now we just need to get some switches installed, get it wired up, and run the nitrous feed, which you really don't want to do until Tommy figures out where he's gonna mount the bottom.
(Tommy)>> To mount a nitrous bottle it's really basic. It comes with some brackets. You've got to make a couple of holes, and you want to make sure that you mount it onto a solid foundation. We're gonna put ours here on the floor. Now we could try to hide this thing a little bit but what's the point in that. Look at this car. [ MUSIC ] [ drill buzzing ]
(Tommy)>> You know Marc I wonder how many people in this world has put a nitrous setup on a hearse. [ MUSIC ]
(Marc)>> Probably very few.
(Tommy)>> Probably wouldn't hurt if there were a few more out there. [ MUSIC ] I got my end finished up, what about you?
(Marc)>> Yeah I got it connected. Now I've got this purge solenoid all plumbed up with the little rabbit ears. So don't mind that. We'll fix it up later where we get the hood on it and come up with something fancy. Alright so I guess all that's left now is just to push the button. Go ahead, make sure it ain't gonna leak.
(Tommy)>> Here we go. [ hissing ]
(Tommy)>> Dude that looks pretty cool on this end.
(Marc)>> That was awesome.
(Tommy)>> Now we've only got brakes, suspension, wheels and tires, maybe a couple of other things and we'll be out breathing fire and disturbing the peace in this old thing.
(Marc)>> I can't wait. Well for more information on what you saw in the show today be sure to go to Powernation TV dot com. Call that mission accomplished.
(Tommy)>> We should go celebrate.
(Marc)>> You buying the first round?
(Tommy)>> Nah I'll let you.
