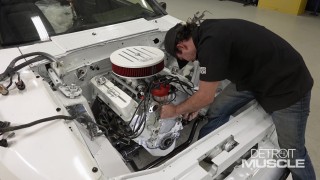
Detroit Muscle Featured Projects
Detroit Muscle Builds
Want more content like this?
Join the PowerNation Email NewsletterParts Used In This Episode
ARP
Head Studs
CRC Industries
CRC Heavy Duty Pro-Strength Degreaser
JW Performance
Heads, Valves, Rocker Arm Assembly
Matco Tools
MATCO Tools are the Official Tool Supplier to PowerNation
The Industrial Depot
Tools, Hardware, Shop Supplies
Episode Transcript
(Tommy)>> You're watching Powernation!
(Marc)>> Today on Detroit Muscle we dive into the heart of our hearse upgrading our 500 cubic inch engine with a new cam and better flowing induction.
(Tommy)>> We'll give our 500 Caddy a face lift with new paint and accessories. Then head out to look for a rear end that can transfer all that power to the track. [ MUSIC ] [ engines revving ] [ MUSIC ]
(Tommy)>> Hey y'all, welcome to Detroit Muscle. Whenever it comes to sheer American horsepower one thing that probably doesn't cross your mind is a Cadillac. We've got one here in the shop and to call it tons of fun, that's kind of an understatement. Now we've already pulled the engine out from under the hood and today our chore is taking that, applying a recipe to make some serious heavy horsepower. This is 500 cubic inches of Detroit engineering, and I know it doesn't look like a whole lot right now, and the power output isn't all that impressive either. It makes somewhere in the neighborhood of 200 horse, but after swapping out a couple of parts, pulling some wrenches, this thing's gonna make right at one horsepower per cubic inch. So that's 500, and the torque number is pretty impressive as well. Try 700 of them. To achieve those numbers we'll start by disassembling the accessories on our engine. We're gonna be removing all the heavy old parts like the alternator, followed by the clunky air compressor. Then we'll unbolt our power steering and fuel pump. [ MUSIC ] A small portion of these pieces we will be reusing but several you could say are past their prime. So they're heading to the scrap bin. [ drill buzzing ] [ MUSIC ] With all of our trinkets removed off of our power plant it's time for us to do a bit of some scrapping and some spraying cause I can't put this decrepit looking thing back into that fine specimen of a Cadillac. We're removing over 44 years of crud that has built up on this old work horse. It takes a little bit of elbow grease and finesse but once we've scrapped the dirt and grime off... [ MUSIC ] ...we'll spray it down with a little degreaser. Time to spray. We're using CRC's Heavy Duty Pro Strength degreaser. It's a water based biodegradable foam that penetrates heavy oils and fluids. We sprayed this thing down, let it set for a few minutes, and boy did it melt that grease away. [ MUSIC ] After a bit of this scrubbing and some lovin' we're pretty much ready to go ahead and tear this thing down. It looks pretty good. [ drill buzzing ]
(Tommy)>> I'll bet that thing's gonna be crazy heavy. [ drill buzzing ]
(Tommy)>> I hope that ol' intake ain't so heavy I need a cherry picker. Could be I bet it's heavy. A few of you guys may have heard the old saying a cheaper way to go faster is to unload the truck. That means simply get lighter. Now with this ole big Cadillac this thing weighs north of 600 pounds fully dressed. Now we're gonna try to lighten this thing up some. Now with our intake it's made out of cast iron. So it's got to go. They make an aluminum one that's gonna flow a lot better, and so that's what we're after. Now they're gonna be a few other things we're gonna get rid of but first let's get this intake off. I ain't looking forward to this. It ain't too bad, ain't too good though. Jeez! I'm just kinda curious. Let's see what this thing weighs. [ MUSIC ] Dang almost 50 pounds. Yeah that other one's gonna be a lot lighter than that. Now let's get this valley pan off and let's hope we don't find any treasures. Come on baby! It's not too bad. That's actually pretty clean. There's a little crud right here around the hot spots of the head. Other than that this old motor ain't bad at all. [ drill buzzing ] [ MUSIC ]
(Tommy)>> Got him! [ drill buzzing ] [ MUSIC ] [ drill buzzing ]
(Tommy)>> Turn me loose! Whenever you're pulling out push rods that's usually pretty easy but whenever you go to snatch out those lifters, well them things can be a pain some times and here's why. If you'll notice there's some crud built up here on the bottom side of that lifter. Whenever you try to pull that back through all that gunk binds up inside that bored surface. That's what keeps you from pulling it out. A quick trick to getting these out is to spray a little solvent or lubricant onto the lifter to help dissolve that crud. Finally now we can take them heads off. [ drill buzzing ]
(Tommy)>> Now normally we would be taking off those exhaust manifolds but we're really not in the market for boat anchors. So we're just leaving them on there. [ MUSIC ] Bend with your back not with your knees. Jeez Louise! [ MUSIC ] Come on! [ MUSIC ] 75 pounds worth. Yep, that's heavy. Now Marc gives me a hard time about being such a fan of big bodies like this big belemoth of a car behind me, and the reason I really enjoy them is because normally they come with big cubic inch up under the hood, and this is the perfect example. I've got a piston out of a small block Chevy. It's a 350 flat top. Check this thing out inside the bore of this thing. This thing is almost three-eighths of an inch smaller than the hole in this engine. Now that's why someone coined the phrase there's no replacement for displacement. [ MUSIC ] We're planning to swap out our bump stick on our Caddy. So a bit more teardown is in order. We've got to get this timing cover off... [ MUSIC ] ...the distributor out of the way. [ MUSIC ] Oh can't forget all these ooey gooey innards. [ MUSIC ] Cam shaft's out, I've got a little bit more cleaning to do but I can tell you we're just about ready to exorcise the demons.
(Marc)>> With the engine stripped down now it's time to install our upgrades, making this Caddy 500 a torque monster.
(Tommy)>> Well we're about elbow deep into adding some motivation back into our Cadillac. We've got the intake and heads removed, cam and lifters, and it's all cleaned up. So it's time for some new parts. Now one key component to making a Cadillac breathe fire is all in the heads. I've got a friend of mine here. It's John Walker. He's what I call a Cadillac connoisseur, and he brought along a table full of goodies. What's up with those heads?
(John)>> A set of 425 heads that we baked and blasted, cleaned them all up. They're five axis c-n-c ported and we opened them up for larger valves. On the combustion chamber side you can see where we've opened up the seat to accept 110 thousandths larger valve, and then we opened up the ports. From the factory Cadillac heads are known to be restrictive in performance application. These were c-n-c ported for both port volume and air flow.
(Tommy)>> And we both know that means power. Is there anything special about the valves?
(John)>> These valves were originally for a 455 Pontiac and work great for a Cadillac.
(Tommy)>> Now I also looked at these rocker arm assemblies. These things are pretty impressive, especially compared to that junk that we pulled out of that thing.
(John)>> They're a full length shaft system made for us by Harlan Sharp. The come in a 1.7 ratio both adjustable and non-adjustable.
(Tommy)>> Those are snazzy and I can't wait to get all these goodies bolted on to that 500 over there and out playing around in my hearse. Do you have any suggestions for us?
(John)>> Hit the nitrous button and hold on.
(Tommy)>> Firmly?
(John)>> Firmly.
(Tommy)>> Alright I'll take that into consideration. I've got to get to work. Let me let you out buddy.
(Marc)>> Well those cylinder heads are definitely gonna improve the performance on our Cadillac, and there's not that many parts available on the market for these things, but thankfully there are a few including this cam shaft and timing set that we got from Summit Racing. This thing's got more lift, more duration. It's gonna really compliment those heads nicely. [ MUSIC ] We'll add a little assembly lube to our cam. Then slide it in. Lift on this cam is 520 thousandths on the intake and 504 on the exhaust. The duration at 50 thousandths lift is 234 degrees on the intake side and 249 degrees on the exhaust side. Now we're ready to install our timing chain assembly and we'll torque it to spec. [ MUSIC ] [ torque wrench clicking ]
(Marc)>> Now it's time for our oil pump and filter housing. [ MUSIC ] It's actually a really nice design, and we'll want to torque these as well. [ torque wrench clicking ]
(Marc)>> Our timing cover gasket is next, and we're going to use a little r-t-v on both sides of our gasket to make sure it doesn't leak. [ MUSIC ] Then we can add our cover and install the water pump gasket, followed by the water pump. [ MUSIC ] We got the water pump along with the gasket set from Rock Auto dot com. Now all that's left is to torque it down. [ drill buzzing ] [ torque wrench clicking ]
(Marc)>> With the new seal and our timing cover it's time to install the crank hub. This is an uncommon design where the harmonic balancer bolts to the hub, which is a press fit. [ MUSIC ] Now we can roll the 500 Caddy over so we can install the oil pan, but first we want to clean up the surface, and then we can install it with a new gasket and bolt it down. [ MUSIC ]
(Marc)>> Now we're torqueing these bolts for the oil pan working our way from the inside out, and the reason we're doing that is because we want to make sure they're all tightened the same. That way it's gonna keep it from leaking over time. [ torque wrench clicking ]
(Marc)>> Well we've got ourselves a short block. Now we just need a pair of cylinder heads and maybe even a fresh coat of paint. This thing will be like brand new. We finish upgrading our Caddy 500.
(Tommy)>> And show you a tip on how to correctly measure your push rod.
(Tommy)>> Well we're making some pretty good progress. We've got the bottom end of our Caddy all assembled. I'm gonna slap our gasket in place, and then I get the joy of picking up this giant piece of iron.
(Marc)>> You got it?
(Tommy)>> I got most of it.
(Marc)>> Well I got the easy job, and that's prepping these ARP head studs. These things are great because they come as a kit directly fit for our Cadillac, and then also these things are gonna hold more than we could possibly throw at this thing. I mean we are gonna be spraying it and this is one of the precautions you take, and it's an easy one to do. [ MUSIC ]
(Tommy)>> You excited!
(Marc)>> So excited. [ MUSIC ] You know the torque sequence?
(Tommy)>> No, you know the torque spec?
(Marc)>> I can get it.
(Tommy)>> I bet we're gonna need a cheater pipe. [ MUSIC ]
(Marc)>> Got it dialed in for you for the first round.
(Tommy)>> Alrighty! [ MUSIC ] We're gonna torque these down at three different settings using the same sequence ending at 110. With those all torqued down now it's time to spray on a splash of color. Jeez that thing's heavy. Excuse me, excuse me. [ MUSIC ] [ rattle can clicking ]
(Marc)>> Look at that! [ MUSIC ]
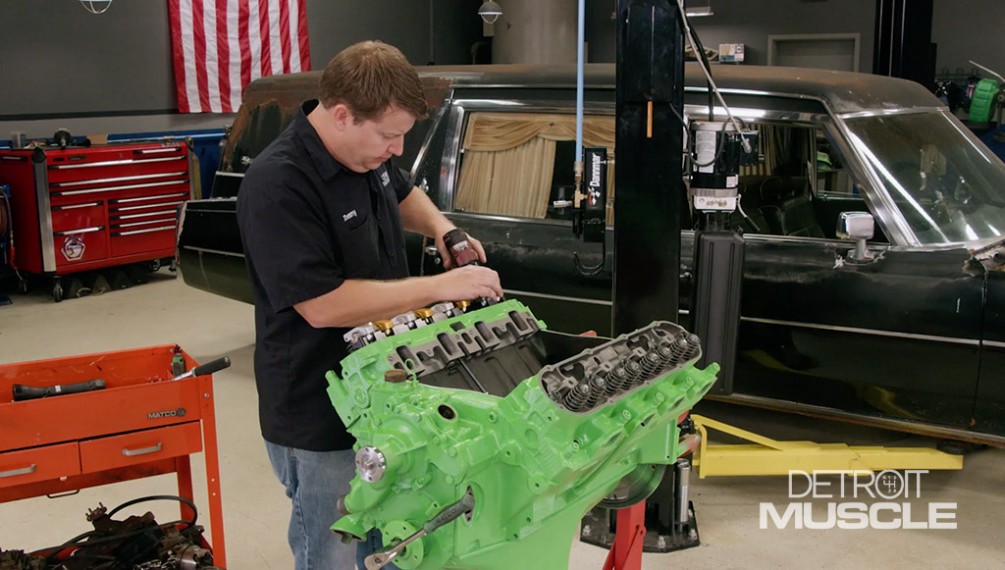
(Tommy)>> Beep, beep, beep. [ MUSIC ] What do you guys think about that electric green paint? I wanted that Cadillac to get attention even with the hood up. Now the next thing that we need to do is measure for push rod length, and this is a high performance application but even with a stock rebuild it's a good idea because what happens sometimes is the heads can be milled or the block can be decked, and that messes with the length of the push rod. The first thing that you need to do to get started is bring the lifter that you're gonna start adjusting with on base circle. We're gonna start with these two because they're easy to see. This is the intake lift. So to get it where we need it we're gonna rotate the motor over until the exhaust lifter just starts to come up. Now we need to drop on our rocker shaft assembly and check out the contact point of our roller tip to the top of the valve. Ideal operating contact is in the center third of the valve stem tip. You want to start at the top third, and roll down, and then back up. [ MUSIC ] With our application we have to torque these down for an accurate reading. Now I want to check out the tip and see exactly where it's at, and then we'll use this little marker to tell me the story. I'll scribble a little of this stuff on there, and tap the roller on it. That line indicates our contact point. It's on the upper third just like we need. Now to do a task like this it's handy to have the right stuff. Kinda like these push rod measuring tools that we got from Summit Racing. Now we're gonna be needing this big ole long one for this big ole Cadillac but they have them in different lengths for different applications, and how it works. You basically just unscrew one end of it and that makes it longer. Let's slap this thing in, see where we're at. [ MUSIC ] You want to make sure the push rod is seated on both ends, and you just keep unscrewing it until you just feel some pressure. You don't want to keep cranking on it and depress the plunger inside that lifter. That's us. Now I need to pull off this rocker assembly to get that rod out, and then we can measure. [ drill buzzing ] [ MUSIC ]
(Tommy)>> To get our exact length I like to use a set of calipers. You just slide those in there, clamp her down, and that gives us the length of this push rod. This number is at zero lash, and since we don't have any adjustable rockers on this one we're gonna have to add 50 thousandths to give us a pre-load. The next thing we need to do is slap on that intake and we're getting dangerously close to having this thing ready to drop in our Caddy. Before we drop on our intake we'll add a little bit of r-t-v and a new gasket to make sure everything seals properly. We're gonna top off this Cadillac with this aluminum intake that we got from Summit Racing. Now it's gonna really add quite a bit of power to it because it's less restrictive than that factory unit. Plus it's a whole lot lighter. That original one was almost 50. This one is less than 20. [ MUSIC ] [ torque wrench clicking ]
(Marc)>> I know we can bolt these in yet but I want to see how it looks. Look at that, the baby one! I can't wait to see that in the car.
(Tommy)>> One man's junk is another man's treasure. We head out to an all Ford salvage yard to look for some parts for our Cadillac?
(Tommy)>> Well we've been making some really good progress on our hearse, and I'm out here today kinda scrounging around trying to work on our next upgrade. It's easy to say that with the Caddy it's an obscure car, and the aftermarket support is kinda minimal, and what I'm wanting to do is kinda fix up the rear end. Now with that hearse it's got airplane gears under it and I want something with a little bit more grit to it. Something that's gonna peel back the pavement. So hopefully I can find something out here in all these old carcasses. [ MUSIC ] What got me to thinking about digging around in a Ford salvage yard is one of these, the 8.8 rear axle. They come in everything under the sun, from Mustangs, to pickup trucks, to even s-u-v's, and they have a lot going for them and that's pretty much why it makes them so popular with the hot rodders. One is since they're plentiful that means they're cheap. Also the gear ratios in them is a vast array from low to even airplane gears, and also these things come from the factory often times with a pos unit. Now this thing isn't gonna work for our application cause it's a little bit narrow and it's probably too small, but luckily for us this thing does have a big brother. So what I'm looking for is the 9-7-5, and what that refers to is the diameter of the ring gear, and it comes in the large s-u-v's and the pickup trucks. Now their gear ratios are the 3.55, the 3.73, and 4.11. For our application this 3.73 will be sweeter than honey. This rear axle's got a lot going for it. It's got that ratio that we're looking for, it's got the pos unit, and this thing's got factory rear disc brakes. So let's tally that up. Alright, alright, and alright! Let's get this thing out from under there. [ MUSIC ] [ torch hissing ] [ MUSIC ]
(Tommy)>> That's plenty heavy enough. ( )>> No kidding! [ MUSIC ]
(Tommy)>> Well I got me a rusty gem. I'm gonna have to do some modifying but that's just a stone for a stepper.
Show Full Transcript
(Marc)>> Today on Detroit Muscle we dive into the heart of our hearse upgrading our 500 cubic inch engine with a new cam and better flowing induction.
(Tommy)>> We'll give our 500 Caddy a face lift with new paint and accessories. Then head out to look for a rear end that can transfer all that power to the track. [ MUSIC ] [ engines revving ] [ MUSIC ]
(Tommy)>> Hey y'all, welcome to Detroit Muscle. Whenever it comes to sheer American horsepower one thing that probably doesn't cross your mind is a Cadillac. We've got one here in the shop and to call it tons of fun, that's kind of an understatement. Now we've already pulled the engine out from under the hood and today our chore is taking that, applying a recipe to make some serious heavy horsepower. This is 500 cubic inches of Detroit engineering, and I know it doesn't look like a whole lot right now, and the power output isn't all that impressive either. It makes somewhere in the neighborhood of 200 horse, but after swapping out a couple of parts, pulling some wrenches, this thing's gonna make right at one horsepower per cubic inch. So that's 500, and the torque number is pretty impressive as well. Try 700 of them. To achieve those numbers we'll start by disassembling the accessories on our engine. We're gonna be removing all the heavy old parts like the alternator, followed by the clunky air compressor. Then we'll unbolt our power steering and fuel pump. [ MUSIC ] A small portion of these pieces we will be reusing but several you could say are past their prime. So they're heading to the scrap bin. [ drill buzzing ] [ MUSIC ] With all of our trinkets removed off of our power plant it's time for us to do a bit of some scrapping and some spraying cause I can't put this decrepit looking thing back into that fine specimen of a Cadillac. We're removing over 44 years of crud that has built up on this old work horse. It takes a little bit of elbow grease and finesse but once we've scrapped the dirt and grime off... [ MUSIC ] ...we'll spray it down with a little degreaser. Time to spray. We're using CRC's Heavy Duty Pro Strength degreaser. It's a water based biodegradable foam that penetrates heavy oils and fluids. We sprayed this thing down, let it set for a few minutes, and boy did it melt that grease away. [ MUSIC ] After a bit of this scrubbing and some lovin' we're pretty much ready to go ahead and tear this thing down. It looks pretty good. [ drill buzzing ]
(Tommy)>> I'll bet that thing's gonna be crazy heavy. [ drill buzzing ]
(Tommy)>> I hope that ol' intake ain't so heavy I need a cherry picker. Could be I bet it's heavy. A few of you guys may have heard the old saying a cheaper way to go faster is to unload the truck. That means simply get lighter. Now with this ole big Cadillac this thing weighs north of 600 pounds fully dressed. Now we're gonna try to lighten this thing up some. Now with our intake it's made out of cast iron. So it's got to go. They make an aluminum one that's gonna flow a lot better, and so that's what we're after. Now they're gonna be a few other things we're gonna get rid of but first let's get this intake off. I ain't looking forward to this. It ain't too bad, ain't too good though. Jeez! I'm just kinda curious. Let's see what this thing weighs. [ MUSIC ] Dang almost 50 pounds. Yeah that other one's gonna be a lot lighter than that. Now let's get this valley pan off and let's hope we don't find any treasures. Come on baby! It's not too bad. That's actually pretty clean. There's a little crud right here around the hot spots of the head. Other than that this old motor ain't bad at all. [ drill buzzing ] [ MUSIC ]
(Tommy)>> Got him! [ drill buzzing ] [ MUSIC ] [ drill buzzing ]
(Tommy)>> Turn me loose! Whenever you're pulling out push rods that's usually pretty easy but whenever you go to snatch out those lifters, well them things can be a pain some times and here's why. If you'll notice there's some crud built up here on the bottom side of that lifter. Whenever you try to pull that back through all that gunk binds up inside that bored surface. That's what keeps you from pulling it out. A quick trick to getting these out is to spray a little solvent or lubricant onto the lifter to help dissolve that crud. Finally now we can take them heads off. [ drill buzzing ]
(Tommy)>> Now normally we would be taking off those exhaust manifolds but we're really not in the market for boat anchors. So we're just leaving them on there. [ MUSIC ] Bend with your back not with your knees. Jeez Louise! [ MUSIC ] Come on! [ MUSIC ] 75 pounds worth. Yep, that's heavy. Now Marc gives me a hard time about being such a fan of big bodies like this big belemoth of a car behind me, and the reason I really enjoy them is because normally they come with big cubic inch up under the hood, and this is the perfect example. I've got a piston out of a small block Chevy. It's a 350 flat top. Check this thing out inside the bore of this thing. This thing is almost three-eighths of an inch smaller than the hole in this engine. Now that's why someone coined the phrase there's no replacement for displacement. [ MUSIC ] We're planning to swap out our bump stick on our Caddy. So a bit more teardown is in order. We've got to get this timing cover off... [ MUSIC ] ...the distributor out of the way. [ MUSIC ] Oh can't forget all these ooey gooey innards. [ MUSIC ] Cam shaft's out, I've got a little bit more cleaning to do but I can tell you we're just about ready to exorcise the demons.
(Marc)>> With the engine stripped down now it's time to install our upgrades, making this Caddy 500 a torque monster.
(Tommy)>> Well we're about elbow deep into adding some motivation back into our Cadillac. We've got the intake and heads removed, cam and lifters, and it's all cleaned up. So it's time for some new parts. Now one key component to making a Cadillac breathe fire is all in the heads. I've got a friend of mine here. It's John Walker. He's what I call a Cadillac connoisseur, and he brought along a table full of goodies. What's up with those heads?
(John)>> A set of 425 heads that we baked and blasted, cleaned them all up. They're five axis c-n-c ported and we opened them up for larger valves. On the combustion chamber side you can see where we've opened up the seat to accept 110 thousandths larger valve, and then we opened up the ports. From the factory Cadillac heads are known to be restrictive in performance application. These were c-n-c ported for both port volume and air flow.
(Tommy)>> And we both know that means power. Is there anything special about the valves?
(John)>> These valves were originally for a 455 Pontiac and work great for a Cadillac.
(Tommy)>> Now I also looked at these rocker arm assemblies. These things are pretty impressive, especially compared to that junk that we pulled out of that thing.
(John)>> They're a full length shaft system made for us by Harlan Sharp. The come in a 1.7 ratio both adjustable and non-adjustable.
(Tommy)>> Those are snazzy and I can't wait to get all these goodies bolted on to that 500 over there and out playing around in my hearse. Do you have any suggestions for us?
(John)>> Hit the nitrous button and hold on.
(Tommy)>> Firmly?
(John)>> Firmly.
(Tommy)>> Alright I'll take that into consideration. I've got to get to work. Let me let you out buddy.
(Marc)>> Well those cylinder heads are definitely gonna improve the performance on our Cadillac, and there's not that many parts available on the market for these things, but thankfully there are a few including this cam shaft and timing set that we got from Summit Racing. This thing's got more lift, more duration. It's gonna really compliment those heads nicely. [ MUSIC ] We'll add a little assembly lube to our cam. Then slide it in. Lift on this cam is 520 thousandths on the intake and 504 on the exhaust. The duration at 50 thousandths lift is 234 degrees on the intake side and 249 degrees on the exhaust side. Now we're ready to install our timing chain assembly and we'll torque it to spec. [ MUSIC ] [ torque wrench clicking ]
(Marc)>> Now it's time for our oil pump and filter housing. [ MUSIC ] It's actually a really nice design, and we'll want to torque these as well. [ torque wrench clicking ]
(Marc)>> Our timing cover gasket is next, and we're going to use a little r-t-v on both sides of our gasket to make sure it doesn't leak. [ MUSIC ] Then we can add our cover and install the water pump gasket, followed by the water pump. [ MUSIC ] We got the water pump along with the gasket set from Rock Auto dot com. Now all that's left is to torque it down. [ drill buzzing ] [ torque wrench clicking ]
(Marc)>> With the new seal and our timing cover it's time to install the crank hub. This is an uncommon design where the harmonic balancer bolts to the hub, which is a press fit. [ MUSIC ] Now we can roll the 500 Caddy over so we can install the oil pan, but first we want to clean up the surface, and then we can install it with a new gasket and bolt it down. [ MUSIC ]
(Marc)>> Now we're torqueing these bolts for the oil pan working our way from the inside out, and the reason we're doing that is because we want to make sure they're all tightened the same. That way it's gonna keep it from leaking over time. [ torque wrench clicking ]
(Marc)>> Well we've got ourselves a short block. Now we just need a pair of cylinder heads and maybe even a fresh coat of paint. This thing will be like brand new. We finish upgrading our Caddy 500.
(Tommy)>> And show you a tip on how to correctly measure your push rod.
(Tommy)>> Well we're making some pretty good progress. We've got the bottom end of our Caddy all assembled. I'm gonna slap our gasket in place, and then I get the joy of picking up this giant piece of iron.
(Marc)>> You got it?
(Tommy)>> I got most of it.
(Marc)>> Well I got the easy job, and that's prepping these ARP head studs. These things are great because they come as a kit directly fit for our Cadillac, and then also these things are gonna hold more than we could possibly throw at this thing. I mean we are gonna be spraying it and this is one of the precautions you take, and it's an easy one to do. [ MUSIC ]
(Tommy)>> You excited!
(Marc)>> So excited. [ MUSIC ] You know the torque sequence?
(Tommy)>> No, you know the torque spec?
(Marc)>> I can get it.
(Tommy)>> I bet we're gonna need a cheater pipe. [ MUSIC ]
(Marc)>> Got it dialed in for you for the first round.
(Tommy)>> Alrighty! [ MUSIC ] We're gonna torque these down at three different settings using the same sequence ending at 110. With those all torqued down now it's time to spray on a splash of color. Jeez that thing's heavy. Excuse me, excuse me. [ MUSIC ] [ rattle can clicking ]
(Marc)>> Look at that! [ MUSIC ]
(Tommy)>> Beep, beep, beep. [ MUSIC ] What do you guys think about that electric green paint? I wanted that Cadillac to get attention even with the hood up. Now the next thing that we need to do is measure for push rod length, and this is a high performance application but even with a stock rebuild it's a good idea because what happens sometimes is the heads can be milled or the block can be decked, and that messes with the length of the push rod. The first thing that you need to do to get started is bring the lifter that you're gonna start adjusting with on base circle. We're gonna start with these two because they're easy to see. This is the intake lift. So to get it where we need it we're gonna rotate the motor over until the exhaust lifter just starts to come up. Now we need to drop on our rocker shaft assembly and check out the contact point of our roller tip to the top of the valve. Ideal operating contact is in the center third of the valve stem tip. You want to start at the top third, and roll down, and then back up. [ MUSIC ] With our application we have to torque these down for an accurate reading. Now I want to check out the tip and see exactly where it's at, and then we'll use this little marker to tell me the story. I'll scribble a little of this stuff on there, and tap the roller on it. That line indicates our contact point. It's on the upper third just like we need. Now to do a task like this it's handy to have the right stuff. Kinda like these push rod measuring tools that we got from Summit Racing. Now we're gonna be needing this big ole long one for this big ole Cadillac but they have them in different lengths for different applications, and how it works. You basically just unscrew one end of it and that makes it longer. Let's slap this thing in, see where we're at. [ MUSIC ] You want to make sure the push rod is seated on both ends, and you just keep unscrewing it until you just feel some pressure. You don't want to keep cranking on it and depress the plunger inside that lifter. That's us. Now I need to pull off this rocker assembly to get that rod out, and then we can measure. [ drill buzzing ] [ MUSIC ]
(Tommy)>> To get our exact length I like to use a set of calipers. You just slide those in there, clamp her down, and that gives us the length of this push rod. This number is at zero lash, and since we don't have any adjustable rockers on this one we're gonna have to add 50 thousandths to give us a pre-load. The next thing we need to do is slap on that intake and we're getting dangerously close to having this thing ready to drop in our Caddy. Before we drop on our intake we'll add a little bit of r-t-v and a new gasket to make sure everything seals properly. We're gonna top off this Cadillac with this aluminum intake that we got from Summit Racing. Now it's gonna really add quite a bit of power to it because it's less restrictive than that factory unit. Plus it's a whole lot lighter. That original one was almost 50. This one is less than 20. [ MUSIC ] [ torque wrench clicking ]
(Marc)>> I know we can bolt these in yet but I want to see how it looks. Look at that, the baby one! I can't wait to see that in the car.
(Tommy)>> One man's junk is another man's treasure. We head out to an all Ford salvage yard to look for some parts for our Cadillac?
(Tommy)>> Well we've been making some really good progress on our hearse, and I'm out here today kinda scrounging around trying to work on our next upgrade. It's easy to say that with the Caddy it's an obscure car, and the aftermarket support is kinda minimal, and what I'm wanting to do is kinda fix up the rear end. Now with that hearse it's got airplane gears under it and I want something with a little bit more grit to it. Something that's gonna peel back the pavement. So hopefully I can find something out here in all these old carcasses. [ MUSIC ] What got me to thinking about digging around in a Ford salvage yard is one of these, the 8.8 rear axle. They come in everything under the sun, from Mustangs, to pickup trucks, to even s-u-v's, and they have a lot going for them and that's pretty much why it makes them so popular with the hot rodders. One is since they're plentiful that means they're cheap. Also the gear ratios in them is a vast array from low to even airplane gears, and also these things come from the factory often times with a pos unit. Now this thing isn't gonna work for our application cause it's a little bit narrow and it's probably too small, but luckily for us this thing does have a big brother. So what I'm looking for is the 9-7-5, and what that refers to is the diameter of the ring gear, and it comes in the large s-u-v's and the pickup trucks. Now their gear ratios are the 3.55, the 3.73, and 4.11. For our application this 3.73 will be sweeter than honey. This rear axle's got a lot going for it. It's got that ratio that we're looking for, it's got the pos unit, and this thing's got factory rear disc brakes. So let's tally that up. Alright, alright, and alright! Let's get this thing out from under there. [ MUSIC ] [ torch hissing ] [ MUSIC ]
(Tommy)>> That's plenty heavy enough. ( )>> No kidding! [ MUSIC ]
(Tommy)>> Well I got me a rusty gem. I'm gonna have to do some modifying but that's just a stone for a stepper.
