Detroit Muscle Featured Projects
Detroit Muscle Builds
Want more content like this?
Join the PowerNation Email NewsletterParts Used In This Episode
Auto Power
Roll Bar
Corbeau
Sportline RRS Reclining Bucket Seats
Design Engineering, Inc. (DEI)
Boom Mat
Matco Tools
MATCO Tools are the Official Tool Supplier to PowerNation
National Parts Depot
Doors Seals & Handles, Seal Plates, T-Tops
The Industrial Depot
Tools, Hardware, Shop Supplies
Episode Transcript
(Tommy)>> You're
watching Powernation.
(Marc)>> Today on Detroit Muscle we're getting down and dirty to finish up project Sydewinder.
(Tommy)>> Then it's off to the track for a perfect pony payoff! [ engine revving ] [ Music ] [ engines revving ] [ Music ]
(Tommy)>> Hey y'all welcome to Detroit Muscle. Today we've got our '81 Cobra, Project Sydewinder, back in the shop for some upgrades. What we're planning to do is stiffen this old car up a bit, making riding in it a whole lot more comfortable and improve the appearance of it.
(Marc)>> Now what Tommy's talking about specifically is the interior. As you can see by this big pile of stuff behind me here the car already puked it all out already. So half the work's over. Now we're not gonna put all this stuff back in. Actually most of it is gonna go in the trash cause we've got some restoration parts and some performance goodies.
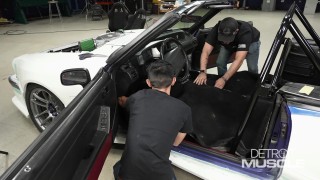
(Tommy)>> The first order of business is gonna be installing this four point roll bar that we got from Auto Power. It's made of inch and three quarter .120 wall d-o-m tubing. It's always easier on a job like this to have an extra set of hands to catch the roll bar as it goes into the car. With it in place we'll mark where the mounting pads will need to attach to the floor. Because there's a seam running through there that's sticking up and it's full of seam sealer we'll scrap the seam sealer out. Then we can hammer it down flat. [ hammer banging ]
(Tommy)>> And then the roll bar can go back into place. I guess we need to drill.
(Marc)>> We'll drill one hole and drop in a bolt in each of the four mounting plates. That will keep it from moving so we can drill the rest of the holes and get all the bolts installed. Hey Tommy will you push that bottom bolt through. And on the outside these plates get put on, which will sandwich the car's sheet metal making this a strong and permanent installation. Earlier I mentioned restoration parts. Well this is all of it right here that we got from NPD Link dot com, National Parts Depot's website. We got all the seals for the doors and the hatch as well as the T-tops, which that stuff's kinda hard to find, seal plates, door handles and the rivets to install them, interior screw kit, and a bunch of miscellaneous stuff that you're not gonna find at your local parts store. We even got the dash pad. Now they've been in business for over four decades and they've got Fox body Mustang stuff but other Ford vehicles as well, Mopar, and GM, and they've got four locations throughout the US and they keep all this stuff in stock. So when you order it you know you're gonna get it in just a couple of days. Another thing is a attention to detail like this headliner that's actually made for T-top car like ours. It's got the correct upholstery on it as well. So if you're doing a restoration you know you're gonna get the right thing, as well as the visors. Now one more thing we got from them for the interior and that's this rug here. We're gonna put that in next but Tommy's got something to show you over at the car first.
(Tommy)>> Before we get too slap happy and install that carpet we're gonna put in some Boom Mat from DEI. This is a thermal accoustic control mat, and it's pretty easy to install. Pretty much all you have to do is make sure that the surface that you're applying it is dust free, and then you just peel of the back and you stick it on. We'll cut the Boom Mat to fit and roll it down with one of these wooden rollers that they offer. We're going to apply one single layer on the floor, front and back. We're not covering every square inch and that's okay. It's still gonna do the job. [ Music ]
(Marc)>> That looks nice. It's a shame we've got to cover it up.
(Tommy)>> The cost of doing business. [ Music ] You're scaring me boss.
(Marc)>> Think I'm gonna cut myself? That time I didn't a few cuts to get it fit and look at that. Not bad!
(Tommy)>> This stuff is made to fit directly into our Fox body, but depending on whether or not you run carpet or you have other modifications like our roll bar, or just because no two of these cars were built exactly the same, some trimming is usually necessary.
(Marc)>> Once we get it fit we'll use a piece of masking tape to mark the top edge of our delete panel so we know where to install our support brackets to the quarter trim. They get riveted into place and the tape can be removed. [ Music ] [ drill buzzing ]
(Marc)>> Now if you'll notice we're using the clecos here. You don't really need to use these. If you just use sheet metal screws that'll help you get everything fit, and then you can take them out and put the rivets in.
(Tommy)>> We'll use just enough clecos to keep it from moving around so that we can drill the rest of our holes. Then we can remove the masking tape and start installing the rivets. Now we'll move onto the trunk floor panels, which we'll install using the same method, holes, clecos, and then the rivets. [ Music ]
(Marc)>> To meet the needs in the cockpit of our Mustang we went to Corbeau for a set of its sport line RRS buckets. These have a lot of the same benefits and features that you'd find in a race seat like side bolstering for better support. Also holes here for your racing harnesses to go through. Well the seats are universal but these brackets are not. Corbeau makes these for a lot of different makes and models. So chances are they have the ones for your ride. These are specifically for Mustang. Now we just need to get them bolted in.
(Tommy)>> While Marc's busy attaching the brackets to the seats I'm gonna go ahead and install our belts. Now to attach the lap belts we're gonna use the factory location here on the sides and for the ones that run up over your shoulders we're gonna loop around this bar here on the roll cage. We're gonna bolt these lap belts in along with the factory seat belts so that we can use either one. [ Music ]
(Marc)>> Now the driver's seat can go in and with it in place we'll get all of the hardware started by hand first, and then tighten them all down. As for the passenger seat well it's gonna get the same treatment. [ Music ] Up next we're gauging performance all the way from the dash to the Nascar exhaust.
(Marc)>> Hey folks welcome back. We're busy working on the interior of our '81 Cobra project and we just about got it licked except for the instrument cluster. This is the original cluster that came out of our Mustang including the bezel, and it's probably good if your car is still stock but we wanted to upgrade ours. Give it a little more of a racy look and to be a little more accurate. So we went with this gauge set that we got from Summit Racing. With the bezel and lens out of the way we can disassemble our stock gauge cluster. Let's see how this fits. I like that! [ Music ] Well these two look really nice. Now I need to find a way to mount our other gauges and I think I'm not gonna be able to mount them the same way because the way this bezel mounts right up tight up against the face of that cluster. I'm just gonna have to mount them directly to the bezel and then hollow out the face of the cluster back there, but this isn't gonna fit in here. Just a little too big. So I need to open these holes up first. Oh yeah! [ Music ] We'll get the other three holes opened up the same way, and with those gauges installed we'll trim out the face of that factory housing. [ grinder buzzing ]
(Marc)>> That looks good! We got these switch panels from Summit Racing and once we've figured out where we want to install them we can make a couple of cuts in the bezel. Since we want the two switch panels to overlap we'll clamp them together, drill a couple of holes, and install two bolts. [ Music ] With them in place on the bezel we can then drill out the four remaining holes and install the hardware. [ Music ] And I've got to say man this interior turned out great. [ mechanical humming ]
(Marc)>> Well since this is a Fox body Mustang most of you probably already know that there's just about any exhaust system that you can think of available in the aftermarket for this car. Probably more than any other car that's on the road. Here they are folks. These are boom tubes, and in case you don't know what they are this is kinda like what they run in Nascar. It's a muffler and a tip kinda all in one. We got these from Summit Racing. What's nice about these is they have a three inch inlet here, which is nice and big, but also the tip you can just run it straight out of the side just like that or you can actually come out at an angle and then make a cut here. Well I've got my mufflers under the Mustang here and as you can see I've got them in different locations, but I do have them both at about a 45 degree angle because that's the way I want them to come out. That way I can make a nice long cut against the rocker panel there, but if you notice I put them in different locations front to back. This one's further forward. It's actually really close to the transmission crossmember here, and it's gonna dump out just about where the driver is over here. It's gonna be pretty loud. If you want extra cool factor and you want it super loud that'd be a good way to go. Over here I've got it exiting back just in front of the right rear tire. It's gonna dump out behind any occupants that are in the vehicle. So it's gonna be a little bit quieter, not a whole lot, but what this really does is give me room here to put a mid pipe. I can put an "X" or an "H" in here. I really want to put an "X". Besides if I come out of the "X" it might be able to just go straight into the inlet here and that's what I'm going for. So I want to go with this one right here I just need to make sure it's not hanging down too low. So I'm gonna use the level here against the collector and that's actually almost perfectly level. So I know it's not hanging too low. That'll work just right. [ saw buzzing ]
(Marc)>> Alright well we've got our exhaust system all fabbed up and mocked up in place, and I do have to go back and tack all these joints in here, make a couple of mounts, and then I can pull the whole system out, take it over to the table, weld up the joints. Now we can weld up all those seams. And then cut through those boom tubes with a big cutoff wheel. [ Music ] Moment of truth. [ Music ] [ drill humming ]
(Marc)>> And with our hardware in and tight we can behold the beauty of the boom tubes. They're gonna be loud but who cares right? They really compliment the looks of our Mustang, and before you know it this thing's gonna be screaming.
(Tommy)>> Coming up we'll need some aero to help our pony hug the track. Plus some surprise paint tricks.
(Tommy)>> Hey guys welcome back. We're definitely moving in the right direction and this Mustang's starting to look pretty good.
(Marc)>> And we could leave it just like this, it's pretty much done, except remember earlier I said we've got some aero for it? Well that's next. The first thing we need to do is size it up.
(Tommy)>> So how far you want that to stick out?
(Marc)>> I don't know, as far as it'll stick out.
(Tommy)>> We're gonna use some vice grips to hold it, and then we can take some measurements. [ Music ]
(Marc)>> I like that! What do you think?
(Tommy)>> I think that dog will hunt.
(Marc)>> Let's get it back up and get it mounted. Now we need to mark and drill our holes that we're gonna use to mount the splitter to the front fascia. [ drill humming ]
(Marc)>> We'll use quarter-20 bolts and put plenty of them in there. [ Music ] Well we've got the splitter all mounted nice and solid and that's good. If we hadn't mounted it out so far we probably wouldn't need the support but because this is plastic at speed that thing's gonna move around quite a bit. So we want to make sure we keep it from doing that, and I've got two different lengths here. I've got the shorter one here and a longer one. Now the shorter ones I want to put here on the outside and maybe angle out just a bit, just like that, and if I take the longer one and move it here on the inside I think I can mount it like that, and I think that will look good even though they are at different heights. I think it's still gonna work out just fine, but I can't wish them into place. I need to drill some holes.
(Tommy)>> We're using some masking tape here on the bumper so we don't mark directly onto the paint, and then use the support rods to help us figure out where we need to drill the holes. All that's left is to drill them out and bolt them up. [ drill humming ]
(Tommy)>> The same steps apply to the other three and before you know it we're done. [ Music ]
(Marc)>> Well here's what we started with today on the nose of our Fox body and here's what we have now. Man what a difference!
(Tommy)>> Now we're dangerously close to having it 100 percent finished up but the next thing we're gonna do is over in the booth. We've got a paint project that we're wanting to do on our hood scoop. If you'll remember back our Mustang came with a big Cobra decal and we're wanting to replicate that. Our car also has that patina paint job. So we're gonna follow that theme with our art work. Let's lay down a couple of pieces of tape so we can mark the center of our hood scoop. Then we can add our graphic, line it up, and tape it down. [ Music ]
(Marc)>> This is a negative of the decal.
(Tommy)>> Oh yeah, don't worry, it'll be cool. Try to keep it tight. [ Music ] I've got a special surprise for you Marc.
(Marc)>> Apparently. I like the design.
(Tommy)>> I think you'll be rather pleased. If you like the patina paint we did I think you'll really dig on this one. [ Music ]
(Marc)>> There you go.
(Tommy)>> We can peel off the cover... [ Music ] ...scratch up the surface with a scuff pad, and give it another wipe down with our cleaner. Now we're ready for paint. We've got 3 colors that we're gonna be using. We've got a medium orange, a red oxide, and a funky red. First one we're gonna be applying is this orange color. I know that using an air brush seems kinda slow and takes more time, but it saves me the hassle of taping each color we're gonna use. Now I know you're probably sitting there going man that doesn't look that good. Well by no means am I a pro with the air brush but I actually did this for a reason. Since we're going for that distressed patina look you know paint deteriorates at different rates, leaving some areas thinner than others. With our orange dry we can move on to the red oxide. We'll use the same method on this as we did before. Alright now it's time for us to apply our third color and I know in the mixing cups it looked completely different than those other two. What we're gonna do is spray it here on the eyes and the fangs and it's gonna give us just a subtle difference. [ Music ] We're gonna apply our clear coat first. It helps with the movement of the crackle paint we're gonna use. Now it's time for the crackle. This stuff sprays on and instantly starts adding that aged effect that I'm going after. That effect turned out killer. The last thing we're gonna do is spray on a coat of Dupli-Color clear coat. This has a matte finish to it, and once it dries we can unmask it and see what it's all gonna look like. [ spray can hissing ] [ Music ]
(Tommy)>> Hey big man I did some painting on your hood scoop and I hope you dig it. You ready?
(Marc)>> Yeah I'm excited. Wow, dude that looks awesome. It looks like it's aged, like it's a sticker that was aged. Can I touch it?
(Tommy)>> Yeah you can touch it. So I did alright?
(Marc)>> Yeah is that two different colors under there?
(Tommy)>> We actually used three different colors. Got the red, the orange, and I did something around the fangs but you can't really tell it much, but that means you did it right.
(Marc)>> Now it's complete right?
(Tommy)>> All we need a couple of drivers and rider and we'll be ready to roll.
(Marc)>> Up next we're out of the shop and onto the track for the Sydewinder shakedown.
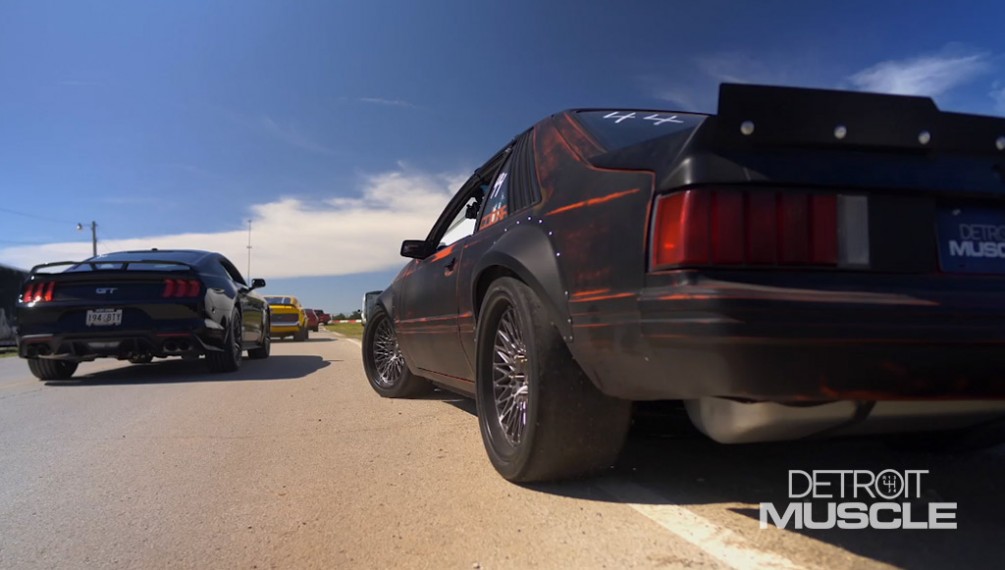
(Marc)>> We picked up this 1981 Mustang Cobra a while back with the idea of building a track capable street car with all the goodies to give it the right attitude like a roll bar, a sheet metal interior, racing seats, harnesses, gauges, and a switch panel, and what started as this concept is now a reality, and we're getting ready to put our hard work to the test. After a quick drivers meeting and going through tech it was time to fuel her up, get suited up because safety first, and the only thing still not upgraded on this car is this Christmas tree. It's time for a fresh one. [ Music ] [ engine revving ] [ Music ] [ engine revving ]
(Marc)>> When we started this build it was a basically stock 1981 Cobra. Basically it was a clean slate. I mean we could have built a drag car. We could have built street car only, but instead we decided to build a max effort street car that could also come out on the track like this, hang with the big boys. Not only that, she looks good doing it. [ Music ] [ engine revving ] [ Music ]
(Marc)>> Project Sydewinder has been one of those that's been near and dear to me personally, not only because I'm a Ford guy but just because I got to pour my heart and soul into this build. I got to decide every single little detail that was on it. What started off as a concept on a computer screen turned into a... [ engine revving ]
(Marc)>> ...labor of love for me. [ engine revving ]
(Marc)>> There's just something about being able to take a parts list and a concept and turning it into something that you can take out and truly enjoy. I've got all the power I need, all the braking I need, all the handling. [ engine revving ]
(Marc)>> You've heard the phrase drive it like you stole it. That's what I'm doing. [ engine revving ]
(Marc)>> And she just keeps taking every bit of it. Well we're here in the winner's circle, not because we won a race but because we feel like we won big time at this event. We had a lot of fun. There were some great activities, we met some amazing people, and we got Sydewinder out on the open track to strut her stuff and show that she can do exactly what she was built to do, and that makes me proud. Now I get to load her back on the trailer. She's gonna drive right on on her own because nothing broke, and that's awesome because we get back to the shop I'm gonna start a new Ford project because this one right here, she's done.
Show Full Transcript
(Marc)>> Today on Detroit Muscle we're getting down and dirty to finish up project Sydewinder.
(Tommy)>> Then it's off to the track for a perfect pony payoff! [ engine revving ] [ Music ] [ engines revving ] [ Music ]
(Tommy)>> Hey y'all welcome to Detroit Muscle. Today we've got our '81 Cobra, Project Sydewinder, back in the shop for some upgrades. What we're planning to do is stiffen this old car up a bit, making riding in it a whole lot more comfortable and improve the appearance of it.
(Marc)>> Now what Tommy's talking about specifically is the interior. As you can see by this big pile of stuff behind me here the car already puked it all out already. So half the work's over. Now we're not gonna put all this stuff back in. Actually most of it is gonna go in the trash cause we've got some restoration parts and some performance goodies.
(Tommy)>> The first order of business is gonna be installing this four point roll bar that we got from Auto Power. It's made of inch and three quarter .120 wall d-o-m tubing. It's always easier on a job like this to have an extra set of hands to catch the roll bar as it goes into the car. With it in place we'll mark where the mounting pads will need to attach to the floor. Because there's a seam running through there that's sticking up and it's full of seam sealer we'll scrap the seam sealer out. Then we can hammer it down flat. [ hammer banging ]
(Tommy)>> And then the roll bar can go back into place. I guess we need to drill.
(Marc)>> We'll drill one hole and drop in a bolt in each of the four mounting plates. That will keep it from moving so we can drill the rest of the holes and get all the bolts installed. Hey Tommy will you push that bottom bolt through. And on the outside these plates get put on, which will sandwich the car's sheet metal making this a strong and permanent installation. Earlier I mentioned restoration parts. Well this is all of it right here that we got from NPD Link dot com, National Parts Depot's website. We got all the seals for the doors and the hatch as well as the T-tops, which that stuff's kinda hard to find, seal plates, door handles and the rivets to install them, interior screw kit, and a bunch of miscellaneous stuff that you're not gonna find at your local parts store. We even got the dash pad. Now they've been in business for over four decades and they've got Fox body Mustang stuff but other Ford vehicles as well, Mopar, and GM, and they've got four locations throughout the US and they keep all this stuff in stock. So when you order it you know you're gonna get it in just a couple of days. Another thing is a attention to detail like this headliner that's actually made for T-top car like ours. It's got the correct upholstery on it as well. So if you're doing a restoration you know you're gonna get the right thing, as well as the visors. Now one more thing we got from them for the interior and that's this rug here. We're gonna put that in next but Tommy's got something to show you over at the car first.
(Tommy)>> Before we get too slap happy and install that carpet we're gonna put in some Boom Mat from DEI. This is a thermal accoustic control mat, and it's pretty easy to install. Pretty much all you have to do is make sure that the surface that you're applying it is dust free, and then you just peel of the back and you stick it on. We'll cut the Boom Mat to fit and roll it down with one of these wooden rollers that they offer. We're going to apply one single layer on the floor, front and back. We're not covering every square inch and that's okay. It's still gonna do the job. [ Music ]
(Marc)>> That looks nice. It's a shame we've got to cover it up.
(Tommy)>> The cost of doing business. [ Music ] You're scaring me boss.
(Marc)>> Think I'm gonna cut myself? That time I didn't a few cuts to get it fit and look at that. Not bad!
(Tommy)>> This stuff is made to fit directly into our Fox body, but depending on whether or not you run carpet or you have other modifications like our roll bar, or just because no two of these cars were built exactly the same, some trimming is usually necessary.
(Marc)>> Once we get it fit we'll use a piece of masking tape to mark the top edge of our delete panel so we know where to install our support brackets to the quarter trim. They get riveted into place and the tape can be removed. [ Music ] [ drill buzzing ]
(Marc)>> Now if you'll notice we're using the clecos here. You don't really need to use these. If you just use sheet metal screws that'll help you get everything fit, and then you can take them out and put the rivets in.
(Tommy)>> We'll use just enough clecos to keep it from moving around so that we can drill the rest of our holes. Then we can remove the masking tape and start installing the rivets. Now we'll move onto the trunk floor panels, which we'll install using the same method, holes, clecos, and then the rivets. [ Music ]
(Marc)>> To meet the needs in the cockpit of our Mustang we went to Corbeau for a set of its sport line RRS buckets. These have a lot of the same benefits and features that you'd find in a race seat like side bolstering for better support. Also holes here for your racing harnesses to go through. Well the seats are universal but these brackets are not. Corbeau makes these for a lot of different makes and models. So chances are they have the ones for your ride. These are specifically for Mustang. Now we just need to get them bolted in.
(Tommy)>> While Marc's busy attaching the brackets to the seats I'm gonna go ahead and install our belts. Now to attach the lap belts we're gonna use the factory location here on the sides and for the ones that run up over your shoulders we're gonna loop around this bar here on the roll cage. We're gonna bolt these lap belts in along with the factory seat belts so that we can use either one. [ Music ]
(Marc)>> Now the driver's seat can go in and with it in place we'll get all of the hardware started by hand first, and then tighten them all down. As for the passenger seat well it's gonna get the same treatment. [ Music ] Up next we're gauging performance all the way from the dash to the Nascar exhaust.
(Marc)>> Hey folks welcome back. We're busy working on the interior of our '81 Cobra project and we just about got it licked except for the instrument cluster. This is the original cluster that came out of our Mustang including the bezel, and it's probably good if your car is still stock but we wanted to upgrade ours. Give it a little more of a racy look and to be a little more accurate. So we went with this gauge set that we got from Summit Racing. With the bezel and lens out of the way we can disassemble our stock gauge cluster. Let's see how this fits. I like that! [ Music ] Well these two look really nice. Now I need to find a way to mount our other gauges and I think I'm not gonna be able to mount them the same way because the way this bezel mounts right up tight up against the face of that cluster. I'm just gonna have to mount them directly to the bezel and then hollow out the face of the cluster back there, but this isn't gonna fit in here. Just a little too big. So I need to open these holes up first. Oh yeah! [ Music ] We'll get the other three holes opened up the same way, and with those gauges installed we'll trim out the face of that factory housing. [ grinder buzzing ]
(Marc)>> That looks good! We got these switch panels from Summit Racing and once we've figured out where we want to install them we can make a couple of cuts in the bezel. Since we want the two switch panels to overlap we'll clamp them together, drill a couple of holes, and install two bolts. [ Music ] With them in place on the bezel we can then drill out the four remaining holes and install the hardware. [ Music ] And I've got to say man this interior turned out great. [ mechanical humming ]
(Marc)>> Well since this is a Fox body Mustang most of you probably already know that there's just about any exhaust system that you can think of available in the aftermarket for this car. Probably more than any other car that's on the road. Here they are folks. These are boom tubes, and in case you don't know what they are this is kinda like what they run in Nascar. It's a muffler and a tip kinda all in one. We got these from Summit Racing. What's nice about these is they have a three inch inlet here, which is nice and big, but also the tip you can just run it straight out of the side just like that or you can actually come out at an angle and then make a cut here. Well I've got my mufflers under the Mustang here and as you can see I've got them in different locations, but I do have them both at about a 45 degree angle because that's the way I want them to come out. That way I can make a nice long cut against the rocker panel there, but if you notice I put them in different locations front to back. This one's further forward. It's actually really close to the transmission crossmember here, and it's gonna dump out just about where the driver is over here. It's gonna be pretty loud. If you want extra cool factor and you want it super loud that'd be a good way to go. Over here I've got it exiting back just in front of the right rear tire. It's gonna dump out behind any occupants that are in the vehicle. So it's gonna be a little bit quieter, not a whole lot, but what this really does is give me room here to put a mid pipe. I can put an "X" or an "H" in here. I really want to put an "X". Besides if I come out of the "X" it might be able to just go straight into the inlet here and that's what I'm going for. So I want to go with this one right here I just need to make sure it's not hanging down too low. So I'm gonna use the level here against the collector and that's actually almost perfectly level. So I know it's not hanging too low. That'll work just right. [ saw buzzing ]
(Marc)>> Alright well we've got our exhaust system all fabbed up and mocked up in place, and I do have to go back and tack all these joints in here, make a couple of mounts, and then I can pull the whole system out, take it over to the table, weld up the joints. Now we can weld up all those seams. And then cut through those boom tubes with a big cutoff wheel. [ Music ] Moment of truth. [ Music ] [ drill humming ]
(Marc)>> And with our hardware in and tight we can behold the beauty of the boom tubes. They're gonna be loud but who cares right? They really compliment the looks of our Mustang, and before you know it this thing's gonna be screaming.
(Tommy)>> Coming up we'll need some aero to help our pony hug the track. Plus some surprise paint tricks.
(Tommy)>> Hey guys welcome back. We're definitely moving in the right direction and this Mustang's starting to look pretty good.
(Marc)>> And we could leave it just like this, it's pretty much done, except remember earlier I said we've got some aero for it? Well that's next. The first thing we need to do is size it up.
(Tommy)>> So how far you want that to stick out?
(Marc)>> I don't know, as far as it'll stick out.
(Tommy)>> We're gonna use some vice grips to hold it, and then we can take some measurements. [ Music ]
(Marc)>> I like that! What do you think?
(Tommy)>> I think that dog will hunt.
(Marc)>> Let's get it back up and get it mounted. Now we need to mark and drill our holes that we're gonna use to mount the splitter to the front fascia. [ drill humming ]
(Marc)>> We'll use quarter-20 bolts and put plenty of them in there. [ Music ] Well we've got the splitter all mounted nice and solid and that's good. If we hadn't mounted it out so far we probably wouldn't need the support but because this is plastic at speed that thing's gonna move around quite a bit. So we want to make sure we keep it from doing that, and I've got two different lengths here. I've got the shorter one here and a longer one. Now the shorter ones I want to put here on the outside and maybe angle out just a bit, just like that, and if I take the longer one and move it here on the inside I think I can mount it like that, and I think that will look good even though they are at different heights. I think it's still gonna work out just fine, but I can't wish them into place. I need to drill some holes.
(Tommy)>> We're using some masking tape here on the bumper so we don't mark directly onto the paint, and then use the support rods to help us figure out where we need to drill the holes. All that's left is to drill them out and bolt them up. [ drill humming ]
(Tommy)>> The same steps apply to the other three and before you know it we're done. [ Music ]
(Marc)>> Well here's what we started with today on the nose of our Fox body and here's what we have now. Man what a difference!
(Tommy)>> Now we're dangerously close to having it 100 percent finished up but the next thing we're gonna do is over in the booth. We've got a paint project that we're wanting to do on our hood scoop. If you'll remember back our Mustang came with a big Cobra decal and we're wanting to replicate that. Our car also has that patina paint job. So we're gonna follow that theme with our art work. Let's lay down a couple of pieces of tape so we can mark the center of our hood scoop. Then we can add our graphic, line it up, and tape it down. [ Music ]
(Marc)>> This is a negative of the decal.
(Tommy)>> Oh yeah, don't worry, it'll be cool. Try to keep it tight. [ Music ] I've got a special surprise for you Marc.
(Marc)>> Apparently. I like the design.
(Tommy)>> I think you'll be rather pleased. If you like the patina paint we did I think you'll really dig on this one. [ Music ]
(Marc)>> There you go.
(Tommy)>> We can peel off the cover... [ Music ] ...scratch up the surface with a scuff pad, and give it another wipe down with our cleaner. Now we're ready for paint. We've got 3 colors that we're gonna be using. We've got a medium orange, a red oxide, and a funky red. First one we're gonna be applying is this orange color. I know that using an air brush seems kinda slow and takes more time, but it saves me the hassle of taping each color we're gonna use. Now I know you're probably sitting there going man that doesn't look that good. Well by no means am I a pro with the air brush but I actually did this for a reason. Since we're going for that distressed patina look you know paint deteriorates at different rates, leaving some areas thinner than others. With our orange dry we can move on to the red oxide. We'll use the same method on this as we did before. Alright now it's time for us to apply our third color and I know in the mixing cups it looked completely different than those other two. What we're gonna do is spray it here on the eyes and the fangs and it's gonna give us just a subtle difference. [ Music ] We're gonna apply our clear coat first. It helps with the movement of the crackle paint we're gonna use. Now it's time for the crackle. This stuff sprays on and instantly starts adding that aged effect that I'm going after. That effect turned out killer. The last thing we're gonna do is spray on a coat of Dupli-Color clear coat. This has a matte finish to it, and once it dries we can unmask it and see what it's all gonna look like. [ spray can hissing ] [ Music ]
(Tommy)>> Hey big man I did some painting on your hood scoop and I hope you dig it. You ready?
(Marc)>> Yeah I'm excited. Wow, dude that looks awesome. It looks like it's aged, like it's a sticker that was aged. Can I touch it?
(Tommy)>> Yeah you can touch it. So I did alright?
(Marc)>> Yeah is that two different colors under there?
(Tommy)>> We actually used three different colors. Got the red, the orange, and I did something around the fangs but you can't really tell it much, but that means you did it right.
(Marc)>> Now it's complete right?
(Tommy)>> All we need a couple of drivers and rider and we'll be ready to roll.
(Marc)>> Up next we're out of the shop and onto the track for the Sydewinder shakedown.
(Marc)>> We picked up this 1981 Mustang Cobra a while back with the idea of building a track capable street car with all the goodies to give it the right attitude like a roll bar, a sheet metal interior, racing seats, harnesses, gauges, and a switch panel, and what started as this concept is now a reality, and we're getting ready to put our hard work to the test. After a quick drivers meeting and going through tech it was time to fuel her up, get suited up because safety first, and the only thing still not upgraded on this car is this Christmas tree. It's time for a fresh one. [ Music ] [ engine revving ] [ Music ] [ engine revving ]
(Marc)>> When we started this build it was a basically stock 1981 Cobra. Basically it was a clean slate. I mean we could have built a drag car. We could have built street car only, but instead we decided to build a max effort street car that could also come out on the track like this, hang with the big boys. Not only that, she looks good doing it. [ Music ] [ engine revving ] [ Music ]
(Marc)>> Project Sydewinder has been one of those that's been near and dear to me personally, not only because I'm a Ford guy but just because I got to pour my heart and soul into this build. I got to decide every single little detail that was on it. What started off as a concept on a computer screen turned into a... [ engine revving ]
(Marc)>> ...labor of love for me. [ engine revving ]
(Marc)>> There's just something about being able to take a parts list and a concept and turning it into something that you can take out and truly enjoy. I've got all the power I need, all the braking I need, all the handling. [ engine revving ]
(Marc)>> You've heard the phrase drive it like you stole it. That's what I'm doing. [ engine revving ]
(Marc)>> And she just keeps taking every bit of it. Well we're here in the winner's circle, not because we won a race but because we feel like we won big time at this event. We had a lot of fun. There were some great activities, we met some amazing people, and we got Sydewinder out on the open track to strut her stuff and show that she can do exactly what she was built to do, and that makes me proud. Now I get to load her back on the trailer. She's gonna drive right on on her own because nothing broke, and that's awesome because we get back to the shop I'm gonna start a new Ford project because this one right here, she's done.
