Detroit Muscle Featured Projects
Detroit Muscle Builds
Want more content like this?
Join the PowerNation Email NewsletterParts Used In This Episode
Lincoln Electric
Lincoln Electric is the Official Welding Supplier to Detroit Muscle
Matco Tools
MATCO Tools are the Official Tool Supplier to Detroit Muscle
The Industrial Depot
Tools, Hardware, and Shop Supplies
Episode Transcript
(Narrator)>> Today on Detroit Muscle Tommy and Marc get a little help from a professor of upholstery tackling the rag top on our Pontiac project, adding all new trim. Plus Marc tests out some new toys for the shop and Tommy takes a trip out west for LS Fest. [ music ]
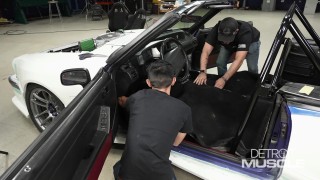
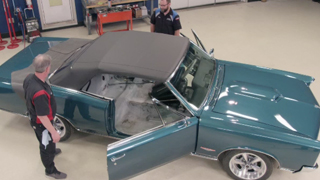
(Marc)>> Hey everybody, welcome to Detroit Muscle. Recently we teamed up with Original Parts Group to help them out on a project that they're working on, this beautiful 1966 Pontiac convertible. Now last time we did a bunch of shiny stuff. Installed the grille, emblems, bumpers, and trim, and I've got to say it's looking really good, but as you can see we still have a ways to go.
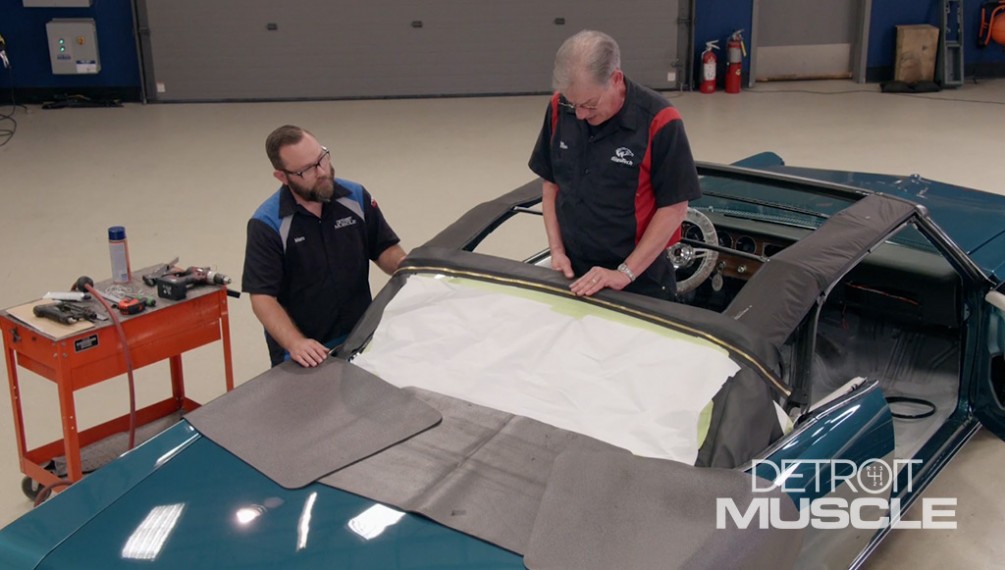
(Tommy)>> The next job that we're gonna be doing could be considered one of the most intimidating tasks to do, and that would be installing this convertible top. Now with Marc and myself we've never done this type of work. So we brought ourselves in a hired gun.
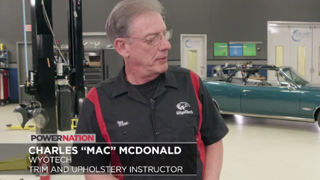
(Marc)>> Well that expert is this gentleman right. His name's Mac and he's an instructor in the trim and upholstery department at Wyotech. Now Wyotech is my alma mater but I didn't take this course. So I have no idea what to do with all these parts on the table. Well thankfully OPGI offers everything we need to get it installed on the car but it's not quite that easy, right Mac?
(Mac)>> It's not. You need some skills, you need some experience, and if you don't have the experience you might want to hire a professional.
(Marc)>> Now you've been that guy before right? Somebody's hired you to install one of these?
(Mac)>> I've been hired to install a few, probably 1,200 or so.
(Marc)>> 1,200? That's the right guy for the job. Okay, so where do we start, what do we do first?
(Mac)>> Well I need to take a measurement and then we can start putting parts on.
(Marc)>> Let's do it. Alright so what do I need the string for?
(Mac)>> Well what we're gonna do is tie off this bow. It's important to have the bow height correct. So I'm gonna set this at 20 and a half, and I'd like you to tie that string to one of the bolts and tie it to this bow.
(Marc)>> Alright got it. This is the only bow that needs to be secured in the right location before we go any further.
(Mac)>> So far so good. [ music ]
(Marc)>> Alright you good? Try that. [ music ]
(Mac)>> What we're gonna do now is lay the pad in place, open it up. I'm gonna anchor the front. [ staple gun popping ]
(Mac)>> Then come to the back with some longer staples, anchor the back. Then we'll anchor the center bows with staples and the rear bow here with screws. What I'm gonna do is glue this over. Use this splash board. [ aerosol gun hissing ]
(Marc)>> Now you may be wondering why this pad is so important to have in place before we install the top.
(Mac)>> What the padding does is it helps protect the convertible top from getting pinched within the frame and getting holes in it.
(Marc)>> Now he can trim the excess.
(Mac)>> And then we'll end up finally pulling this over and doing a finish staple onto it. [ music ]
(Marc)>> So what made a guy like Mac, who's a fourth generation upholstery, who started working for his dad at a very young age, owned his own upholstery shop, and has a wealth of knowledge and experience, decide to become an instructor at Wyotech?
(Mac)>> Well since it is kind of a lost art I really appreciate the satisfaction I get from seeing a student come in on day one, basically all thumbs, and leave three months later able to do a lot of the things I've done all my life. It's rewarding! How we looking back there, pretty good?
(Marc)>> It looks pretty good right there.
(Mac)>> My advice to a young person wanting to get into the field is if you can't find someone that's willing to work with you as an apprentice and take the time that it really takes to teach you properly how to do things take a course. Wyotech is a prime example. I think we're an excellent school. We're down sized, and with the downsizing along comes instructors that care. So our instructors do care about your future. We want you to succeed, and we're gonna do everything we can to put you in the right situation. To teach the tools that you need to go out and have a career. [ music ] And with that little bit done we can remove the strings, take the trim stick out. We're ready to put the curtain and the top on. We're on the downhill slide.
(Narrator)>> Don't go away as we finish slipping on our convertible top.
(Marc)>> Hey folks welcome back. While you were gone we got this trim stick removed from the car and we got the string out of the way cause we don't need that any more. It's not going anywhere. We've got to get some stuff attached to this so we can go back to the car. What's first here Mac?
(Mac)>> This is our well liner.
(Marc)>> Okay.
(Mac)>> This is going to cover the area in the back seat, closes off the trunk from the passenger compartment.
(Marc)>> Oh so just like a package tray on a coupe or hard top?
(Mac)>> Pretty much where a package tray would be, yes.
(Marc)>> And then something else has to attach to this as well right?
(Mac)>> We have to attach the rear curtain, which is basically the back window. What's unique about this era GM car is the well liner gets attached to the trim stick first and then the curtain attaches to it.
(Marc)>> Cool, well let's do it. [ staple gun popping ]
(Mac)>> Now that I've got this tacked on I'm gonna go ahead and cut the holes out for the mounting bolts. There's a specific way I want to do this, especially when I get to the rear curtain and the convertible top. It's important not to cut it too tall so that water would seep in over the top of this. It has to collect in a specific gutter in the car. So I'm gonna just take these sheers and go around the hole, to the top of the hole, and back down. Make some little "U" cuts in there.
(Marc)>> Alright Mac I've got your curtain here. Which way does it go?
(Mac)>> Just like you've got it. We're gonna lift it up here and lay it over the top. This particular top actually has marks where the bolt holes are. So I'm gonna align those bolt holes up and staple it on. In the mean time I adjusted my staple length in the staple gun to a three-eighths inch staple for this trim stick.
(Marc)>> If you notice Mac's not stapling all the way across here. Just on either side of the hole because once he gets that cut out around the holes we're gonna get this over to the car, get it fit, and then make sure everything lines up, and then he can finish stapling.
(Mac)>> Here we go.
(Marc)>> Alright. Now we can get the trim stick re-installed, and you can now see this is what holds the rear of the convertible top in the car.
(Mac)>> Okay.
(Marc)>> Alright what do we do now?
(Mac)>> Now we're gonna bring this plastic window up to do a little test fit.
(Marc)>> Alright cool.
(Mac)>> And right now we're just checking to see if this is gonna lay down nice. It looks like it's gonna work out pretty well.
(Marc)>> This is an important step then?
(Mac)>> This is very important. This is what holds this bow at a correct height. So from center what I'm gonna do is work my way out to each edge. We only have a certain amount of width here, approximately a half an inch wide. What I'm gonna try to do with my row of staples is keep them a little bit towards the front edge of that tack strip. When I put the top on I'll actually center up on it. So we're not stacking staples one on top of the other. I basically tell my students, because I have brought in apprentices from off the street and taught them the trade, and it takes two to three years before I would allow them to be on a sewing machine. Whereas at Wyotech I put them on a sewing machine on the very second day they are there. So they pretty much come out of that three month course with approximately two years of practical experience in the field. [ music ] One of the problems that I see or notice is when people put the tops on they have a tendency to want to put them on tight so that there's no puckers or wrinkles in the rear quarter. You have to really follow the guidelines that the manufacturer gave to you, and in reality the quarter area should come out fairly loose in the beginning. We keep in mind that the material does shrink over time now if we're installing a canvas top instead of a vinyl top the opposite is true. It needs to be put on tight and then it'll stretch over time. We always have to follow the manufacturer's recommendations though. How they mark the top is how we need to put it on, and not try to make adjustments to make it tighter.
(Marc)>> Mac can now re-install the weather stripping and tighten it down.
(Mac)>> Alright Marc we're ready to close the top up.
(Marc)>> Alright cool, final time?
(Mac)>> Final time! [ mechanical humming ]
(Marc)>> Moment of truth.
(Mac)>> Here we go.
(Marc)>> Alright, and that looks really good.
(Mac)>> It didn't come out too bad did it?
(Marc)>> No it looks like you've done this before.
(Mac)>> A couple of times.
(Marc)>> And I don't know what to tell you other than I need to go back to Wyotech and take your course.
(Mac)>> Well we'd love to have you. Maybe you could learn a couple things.
(Marc)>> What's that supposed to mean?
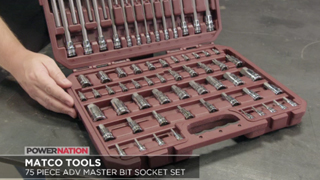
(Tommy)>> Most of us use our standard hand tools like sockets, ratchets, and wrenches all of the time but whenever it comes to a more specialty tool like a torx or even a hex well they're a little more difficult to come up with, and we have to search high and low in our box to even find one. Well Matco Tools offers this 75 piece master bit set. It comes with Torx bits from TEight to T-60, Hex from eighth inch all the way up to this massive three quarter, and a large variety of metric, inverted torx, and long reach bits. It comes in this nice, durable case and you'll be able to find them when you need them.
(Narrator)>> Coming up Marc has some new goodies for the shop.
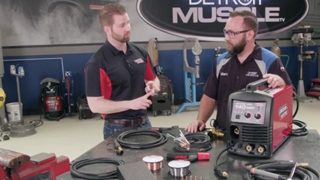
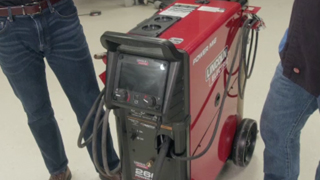
(Marc)>> Hey folks, welcome back. You guys know we use Lincoln Electric for all of our welding needs here in the shop. We've got several machines here that we use quite often, and about a year ago they brought in their brand new stuff, including this Power Mig 210 MP. What's great about this is it just not only mig welds but it'll tig and stick. It's actually one of my favorite tools here in the shop, but they've got some even newer stuff. I'm excited to show you that now. You guys might remember Joe from Lincoln.
(Joe)>> Good to see you again.
(Marc)>> Thanks for coming in.
(Joe)>> Thanks for having me.
(Marc)>> What is this machine you've got here?
(Joe)>> This is our new Power Mig 260, and what we like to say is it simplifies the fabrication process.
(Marc)>> It's a big welder. This is for heavy duty stuff?
(Joe)>> Exactly yeah, so this is gonna be able to weld up to a half an inch material.
(Marc)>> Like frames, bumpers, things we normally don't do in here.
(Joe)>> Yep.
(Marc)>> Show me how it works. [ music ] This looks just like the 2010 MP screen.
(Joe)>> Right we implemented the same ready, set, weld technology on this machine. So let's walk through it again. you select your process, your material, wire diameter, your gas mix, and your thickness, confirm your polarity, and you're ready to weld.
(Marc)>> Oh that's cool.
(Joe)>> Another feature that's exclusive to us is Arc Effects technology. So if you pay attention to this weld puddle right here we're gonna show you visually how your settings affect the weld.
(Marc)>> Oh that's awesome man. It takes a lot of the guess work out.
(Joe)>> Right we're really excited about this machine.
(Marc)>> Well you know what I want to see. It's over here.
(Joe)>> Let's go check it out.
(Marc)>> Alright so Joe you've got to tell me what is all this on the table here?
(Joe)>> This is our latest edition of the Power Mig lineup. So this is a Power Mig 140 MP. It's a multi-process machine that can stick weld, d/c tig weld, and mig weld.
(Marc)>> So a lot like the 210 MP then?
(Joe)>> Exactly, this one's just more compact. 34 and a half pounds, it can run off of 120 volt power.
(Marc)>> Cool, well let's set it up and see what it'll do.
(Joe)>> I know this is a mig welder but I'd really love to show you how it tig welds.
(Marc)>> Perfect, alright I'll go get a bottle.
(Joe)>> Sure. [ music ]
(Marc)>> Alright I've got a bottle. What do we need to do?
(Joe)>> Alright let's hook up the gas regulator. [ music ]
(Marc)>> Alright so it's on, ready to go. We need to put it in tig. It's already there.
(Joe)>> Right so there's an auto detect feature. As soon as you plug in that foot pedal it'll slip you into tig mod.
(Marc)>> Awesome, alright let's do this. [ music ] So you have to touch it on there to get it to start right?
(Joe)>> Right. [ music ]
(Marc)>> That's amazing. It does that like it's it only job.
(Joe)>> Yeah we didn't sacrifice performance on any of three processes.
(Marc)>> Yeah that's like butter, and I haven't done that in a while. So that says a lot. Hey so you're gonna leave this?
(Joe)>> Of course, it's all yours.
(Marc)>> I'll play with the other settings later.
(Narrator)>> Stay tuned as Tommy gives us the sights and sounds from LS Fest West.
(Tommy)>> Hey y'all welcome back to Detroit Muscle. We're out here at one heck-acious shin dig called LS Fest West, watching these people have a really good time. Woo that looks like fun. ( )>> LS! [ music ] [ engine revving ] [ music ]
(Tommy)>> LS Fest West was started three years ago and has grown into quite the event. Now some of the things here you can participate in, and others well you just grab a seat and check out the fun. LS Fest started in Bowling Green, Kentucky, nearly 10 years ago, and after great success it was expanded to Las Vegas. It embraced the west coast flavor and was an instant hit. [ engine revving ]
(Tommy)>> Holley's the host of the event, and they're doing a great job of keeping up the excitement.
(Bill)>> So LS Fest is like a three ring circus. That's what we're all about, and you know everybody's a-d-d now days. So it's sensory overload when you come here. We've got off road racers hucking their trucks over a table top. We cut out the middle of the table top. So that's super exciting. We've got drifters going on multiple times a day. Drag racing, car show, autocross, road course, and we even added a side show last year actually and it's basically a burnout pit where these guys can legally burn their tires off and have all the fun they want to have. We do burnout contests also. So it's just one thing after another, and most of the time it's everything going on at the same time most parts of the day. So it's really, really what people want to see. Super young crowd that's here, which is what we want to see, and get to know new people. It's been great for us.
(Robert)>> Oh yeah, I never miss it now that I've been. It's like I have to make it every year. It's too much fun. What other event do you know of that puts on this many different things at the same time? There's something for everybody here.
(Tommy)>> One of the most popular events here at LS Fest would have to be the autocross. This is where you get to whip your car around the track testing the vehicle's handling, braking, and acceleration. So it doesn't matter what level of car you have. This event is all about quick reflexes and the drive to finish fast. Another crowd pleaser here is the off road event. Now we don't get to play in the mud a whole lot but it's a whole lot of fun, and being able to grab some air while doing it, well that takes it to a whole nother level. Off road participants never disappoint with high flying aerial assaults and action packed racing that keeps the crowd on the edge of their seats. Woo! Now with the name LS Fest it's obvious to see that your vehicle's got to have that late model power plant, and you can tell as well that it's a very popular swap.
(Bill)>> It's all about just coming and having fun with your car. Whether you're brand new in this, you never drag raced, or you're a really good drag racer. We've got something for everybody whether you've never autocrossed or you're one of the best in the country. They come here too, but everybody gets along. We give out prizes but you know it's not that serious. The drifters love it because it's not that serious. It's one of their favorite events. So it's just the mood in the air you know. It's just the party that's all centered around that LS engine and everybody brought together by that one common thread. [ music ]
(Tommy)>> Now walking around here at the show you never know what you'll find. I want to introduce you guys to Phil. He's the owner of this beautiful little Pacer back here. Why in the world did you go LS on this thing?
(Phil)>> Well mostly Tommy to be able to be smog compliant in California. Anything after 1975 in California has to be smog compliant. The 304 V-eight that came in it was tired, and was having trouble getting it to pass smog. So we found this GM E-rod connect and cruise motor. Came with the engine, transmission, all the computers, the cats, everything, and that California car b-o sticker. The magic sticker that says I can have it.
(Tommy)>> I understand. Now to put it in there I'm sure it was just a breeze right?
(Phil)>> It was breezy for two years. It took us two years. I had a friend, Allen, at AD Fabrication in La Verne, and we had it in his shop, and had to fabricate everything. Not like a Camaro where I can go out and buy motor mounts, or sub-frame, or anything like that. If it's in there we made it.
(Tommy)>> That's pretty cool. Do you have any regrets? Sometimes guys have regrets on builds.
(Phil)>> I regret that I spent so much money.
(Tommy)>> You can't take it with you though can you?
(Phil)>> Spending my kids inheritance and I'm glad we did it actually.
(Tommy)>> So you're having fun with it?
(Phil)>> Absolutely, we've been to three or four car shows, and we've won an award at almost everyone so far.
(Tommy)>> Cool, now here at the show we had a car grab our attention, and it'd be this orange AMX. Bob tell us a little about it.
(Bob)>> Sure this is a 1968 AMX. It's built for a track car and having fun. It's got an LS Seven engine in it, Racing Turbo 400 transmission, IRS differential and suspension in the back, Gen two Camaro suspension in the front, and it's a fun car to drive. I've had it four years.
(Tommy)>> What made you put something like this together?
(Bob)>> Well I was kinda inspired by the race director, Jimmy Day. He has one. I've been around for a while and back in the day I never had an AMX. I like Jimmy's and I went ahead kind of did my only thing here with this car.
(Tommy)>> Under the hood, what exactly do you have up under there? Well kind of.
(Bob)>> It's a modified LS Seven. It has 675-80 horsepower, which is pretty common for modified LS Sevens. It has a lot of torque cause the transmission's an automatic. So a few things we changed for that.
(Tommy)>> I'll let you get back at it. I appreciate your time for sure sir.
(Bob)>> Alright well thank you.
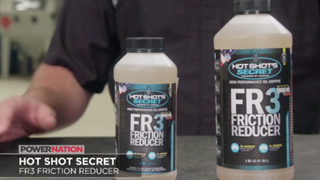
(Marc)>> We all know that as engine oil breaks down it cause added friction and heat, silently stealing power and fuel economy. Well Hot Shots Secret's FRThree is a friction reducer and lubrication enhancing oil additive that could help improve your engine's performance. FRThree uses patented lubricants to help reduce friction and wear and tear on your engine's components. Improving your engine's efficiency equals more horsepower and more m-p-g's. So if you've noticed a drop in your engine's performance you may want to give FRThree a try. Well that's all the time we have for today folks. So until next time go to Powernation TV dot com to see more tech like you saw today.
Show Full Transcript
(Marc)>> Hey everybody, welcome to Detroit Muscle. Recently we teamed up with Original Parts Group to help them out on a project that they're working on, this beautiful 1966 Pontiac convertible. Now last time we did a bunch of shiny stuff. Installed the grille, emblems, bumpers, and trim, and I've got to say it's looking really good, but as you can see we still have a ways to go.
(Tommy)>> The next job that we're gonna be doing could be considered one of the most intimidating tasks to do, and that would be installing this convertible top. Now with Marc and myself we've never done this type of work. So we brought ourselves in a hired gun.
(Marc)>> Well that expert is this gentleman right. His name's Mac and he's an instructor in the trim and upholstery department at Wyotech. Now Wyotech is my alma mater but I didn't take this course. So I have no idea what to do with all these parts on the table. Well thankfully OPGI offers everything we need to get it installed on the car but it's not quite that easy, right Mac?
(Mac)>> It's not. You need some skills, you need some experience, and if you don't have the experience you might want to hire a professional.
(Marc)>> Now you've been that guy before right? Somebody's hired you to install one of these?
(Mac)>> I've been hired to install a few, probably 1,200 or so.
(Marc)>> 1,200? That's the right guy for the job. Okay, so where do we start, what do we do first?
(Mac)>> Well I need to take a measurement and then we can start putting parts on.
(Marc)>> Let's do it. Alright so what do I need the string for?
(Mac)>> Well what we're gonna do is tie off this bow. It's important to have the bow height correct. So I'm gonna set this at 20 and a half, and I'd like you to tie that string to one of the bolts and tie it to this bow.
(Marc)>> Alright got it. This is the only bow that needs to be secured in the right location before we go any further.
(Mac)>> So far so good. [ music ]
(Marc)>> Alright you good? Try that. [ music ]
(Mac)>> What we're gonna do now is lay the pad in place, open it up. I'm gonna anchor the front. [ staple gun popping ]
(Mac)>> Then come to the back with some longer staples, anchor the back. Then we'll anchor the center bows with staples and the rear bow here with screws. What I'm gonna do is glue this over. Use this splash board. [ aerosol gun hissing ]
(Marc)>> Now you may be wondering why this pad is so important to have in place before we install the top.
(Mac)>> What the padding does is it helps protect the convertible top from getting pinched within the frame and getting holes in it.
(Marc)>> Now he can trim the excess.
(Mac)>> And then we'll end up finally pulling this over and doing a finish staple onto it. [ music ]
(Marc)>> So what made a guy like Mac, who's a fourth generation upholstery, who started working for his dad at a very young age, owned his own upholstery shop, and has a wealth of knowledge and experience, decide to become an instructor at Wyotech?
(Mac)>> Well since it is kind of a lost art I really appreciate the satisfaction I get from seeing a student come in on day one, basically all thumbs, and leave three months later able to do a lot of the things I've done all my life. It's rewarding! How we looking back there, pretty good?
(Marc)>> It looks pretty good right there.
(Mac)>> My advice to a young person wanting to get into the field is if you can't find someone that's willing to work with you as an apprentice and take the time that it really takes to teach you properly how to do things take a course. Wyotech is a prime example. I think we're an excellent school. We're down sized, and with the downsizing along comes instructors that care. So our instructors do care about your future. We want you to succeed, and we're gonna do everything we can to put you in the right situation. To teach the tools that you need to go out and have a career. [ music ] And with that little bit done we can remove the strings, take the trim stick out. We're ready to put the curtain and the top on. We're on the downhill slide.
(Narrator)>> Don't go away as we finish slipping on our convertible top.
(Marc)>> Hey folks welcome back. While you were gone we got this trim stick removed from the car and we got the string out of the way cause we don't need that any more. It's not going anywhere. We've got to get some stuff attached to this so we can go back to the car. What's first here Mac?
(Mac)>> This is our well liner.
(Marc)>> Okay.
(Mac)>> This is going to cover the area in the back seat, closes off the trunk from the passenger compartment.
(Marc)>> Oh so just like a package tray on a coupe or hard top?
(Mac)>> Pretty much where a package tray would be, yes.
(Marc)>> And then something else has to attach to this as well right?
(Mac)>> We have to attach the rear curtain, which is basically the back window. What's unique about this era GM car is the well liner gets attached to the trim stick first and then the curtain attaches to it.
(Marc)>> Cool, well let's do it. [ staple gun popping ]
(Mac)>> Now that I've got this tacked on I'm gonna go ahead and cut the holes out for the mounting bolts. There's a specific way I want to do this, especially when I get to the rear curtain and the convertible top. It's important not to cut it too tall so that water would seep in over the top of this. It has to collect in a specific gutter in the car. So I'm gonna just take these sheers and go around the hole, to the top of the hole, and back down. Make some little "U" cuts in there.
(Marc)>> Alright Mac I've got your curtain here. Which way does it go?
(Mac)>> Just like you've got it. We're gonna lift it up here and lay it over the top. This particular top actually has marks where the bolt holes are. So I'm gonna align those bolt holes up and staple it on. In the mean time I adjusted my staple length in the staple gun to a three-eighths inch staple for this trim stick.
(Marc)>> If you notice Mac's not stapling all the way across here. Just on either side of the hole because once he gets that cut out around the holes we're gonna get this over to the car, get it fit, and then make sure everything lines up, and then he can finish stapling.
(Mac)>> Here we go.
(Marc)>> Alright. Now we can get the trim stick re-installed, and you can now see this is what holds the rear of the convertible top in the car.
(Mac)>> Okay.
(Marc)>> Alright what do we do now?
(Mac)>> Now we're gonna bring this plastic window up to do a little test fit.
(Marc)>> Alright cool.
(Mac)>> And right now we're just checking to see if this is gonna lay down nice. It looks like it's gonna work out pretty well.
(Marc)>> This is an important step then?
(Mac)>> This is very important. This is what holds this bow at a correct height. So from center what I'm gonna do is work my way out to each edge. We only have a certain amount of width here, approximately a half an inch wide. What I'm gonna try to do with my row of staples is keep them a little bit towards the front edge of that tack strip. When I put the top on I'll actually center up on it. So we're not stacking staples one on top of the other. I basically tell my students, because I have brought in apprentices from off the street and taught them the trade, and it takes two to three years before I would allow them to be on a sewing machine. Whereas at Wyotech I put them on a sewing machine on the very second day they are there. So they pretty much come out of that three month course with approximately two years of practical experience in the field. [ music ] One of the problems that I see or notice is when people put the tops on they have a tendency to want to put them on tight so that there's no puckers or wrinkles in the rear quarter. You have to really follow the guidelines that the manufacturer gave to you, and in reality the quarter area should come out fairly loose in the beginning. We keep in mind that the material does shrink over time now if we're installing a canvas top instead of a vinyl top the opposite is true. It needs to be put on tight and then it'll stretch over time. We always have to follow the manufacturer's recommendations though. How they mark the top is how we need to put it on, and not try to make adjustments to make it tighter.
(Marc)>> Mac can now re-install the weather stripping and tighten it down.
(Mac)>> Alright Marc we're ready to close the top up.
(Marc)>> Alright cool, final time?
(Mac)>> Final time! [ mechanical humming ]
(Marc)>> Moment of truth.
(Mac)>> Here we go.
(Marc)>> Alright, and that looks really good.
(Mac)>> It didn't come out too bad did it?
(Marc)>> No it looks like you've done this before.
(Mac)>> A couple of times.
(Marc)>> And I don't know what to tell you other than I need to go back to Wyotech and take your course.
(Mac)>> Well we'd love to have you. Maybe you could learn a couple things.
(Marc)>> What's that supposed to mean?
(Tommy)>> Most of us use our standard hand tools like sockets, ratchets, and wrenches all of the time but whenever it comes to a more specialty tool like a torx or even a hex well they're a little more difficult to come up with, and we have to search high and low in our box to even find one. Well Matco Tools offers this 75 piece master bit set. It comes with Torx bits from TEight to T-60, Hex from eighth inch all the way up to this massive three quarter, and a large variety of metric, inverted torx, and long reach bits. It comes in this nice, durable case and you'll be able to find them when you need them.
(Narrator)>> Coming up Marc has some new goodies for the shop.
(Marc)>> Hey folks, welcome back. You guys know we use Lincoln Electric for all of our welding needs here in the shop. We've got several machines here that we use quite often, and about a year ago they brought in their brand new stuff, including this Power Mig 210 MP. What's great about this is it just not only mig welds but it'll tig and stick. It's actually one of my favorite tools here in the shop, but they've got some even newer stuff. I'm excited to show you that now. You guys might remember Joe from Lincoln.
(Joe)>> Good to see you again.
(Marc)>> Thanks for coming in.
(Joe)>> Thanks for having me.
(Marc)>> What is this machine you've got here?
(Joe)>> This is our new Power Mig 260, and what we like to say is it simplifies the fabrication process.
(Marc)>> It's a big welder. This is for heavy duty stuff?
(Joe)>> Exactly yeah, so this is gonna be able to weld up to a half an inch material.
(Marc)>> Like frames, bumpers, things we normally don't do in here.
(Joe)>> Yep.
(Marc)>> Show me how it works. [ music ] This looks just like the 2010 MP screen.
(Joe)>> Right we implemented the same ready, set, weld technology on this machine. So let's walk through it again. you select your process, your material, wire diameter, your gas mix, and your thickness, confirm your polarity, and you're ready to weld.
(Marc)>> Oh that's cool.
(Joe)>> Another feature that's exclusive to us is Arc Effects technology. So if you pay attention to this weld puddle right here we're gonna show you visually how your settings affect the weld.
(Marc)>> Oh that's awesome man. It takes a lot of the guess work out.
(Joe)>> Right we're really excited about this machine.
(Marc)>> Well you know what I want to see. It's over here.
(Joe)>> Let's go check it out.
(Marc)>> Alright so Joe you've got to tell me what is all this on the table here?
(Joe)>> This is our latest edition of the Power Mig lineup. So this is a Power Mig 140 MP. It's a multi-process machine that can stick weld, d/c tig weld, and mig weld.
(Marc)>> So a lot like the 210 MP then?
(Joe)>> Exactly, this one's just more compact. 34 and a half pounds, it can run off of 120 volt power.
(Marc)>> Cool, well let's set it up and see what it'll do.
(Joe)>> I know this is a mig welder but I'd really love to show you how it tig welds.
(Marc)>> Perfect, alright I'll go get a bottle.
(Joe)>> Sure. [ music ]
(Marc)>> Alright I've got a bottle. What do we need to do?
(Joe)>> Alright let's hook up the gas regulator. [ music ]
(Marc)>> Alright so it's on, ready to go. We need to put it in tig. It's already there.
(Joe)>> Right so there's an auto detect feature. As soon as you plug in that foot pedal it'll slip you into tig mod.
(Marc)>> Awesome, alright let's do this. [ music ] So you have to touch it on there to get it to start right?
(Joe)>> Right. [ music ]
(Marc)>> That's amazing. It does that like it's it only job.
(Joe)>> Yeah we didn't sacrifice performance on any of three processes.
(Marc)>> Yeah that's like butter, and I haven't done that in a while. So that says a lot. Hey so you're gonna leave this?
(Joe)>> Of course, it's all yours.
(Marc)>> I'll play with the other settings later.
(Narrator)>> Stay tuned as Tommy gives us the sights and sounds from LS Fest West.
(Tommy)>> Hey y'all welcome back to Detroit Muscle. We're out here at one heck-acious shin dig called LS Fest West, watching these people have a really good time. Woo that looks like fun. ( )>> LS! [ music ] [ engine revving ] [ music ]
(Tommy)>> LS Fest West was started three years ago and has grown into quite the event. Now some of the things here you can participate in, and others well you just grab a seat and check out the fun. LS Fest started in Bowling Green, Kentucky, nearly 10 years ago, and after great success it was expanded to Las Vegas. It embraced the west coast flavor and was an instant hit. [ engine revving ]
(Tommy)>> Holley's the host of the event, and they're doing a great job of keeping up the excitement.
(Bill)>> So LS Fest is like a three ring circus. That's what we're all about, and you know everybody's a-d-d now days. So it's sensory overload when you come here. We've got off road racers hucking their trucks over a table top. We cut out the middle of the table top. So that's super exciting. We've got drifters going on multiple times a day. Drag racing, car show, autocross, road course, and we even added a side show last year actually and it's basically a burnout pit where these guys can legally burn their tires off and have all the fun they want to have. We do burnout contests also. So it's just one thing after another, and most of the time it's everything going on at the same time most parts of the day. So it's really, really what people want to see. Super young crowd that's here, which is what we want to see, and get to know new people. It's been great for us.
(Robert)>> Oh yeah, I never miss it now that I've been. It's like I have to make it every year. It's too much fun. What other event do you know of that puts on this many different things at the same time? There's something for everybody here.
(Tommy)>> One of the most popular events here at LS Fest would have to be the autocross. This is where you get to whip your car around the track testing the vehicle's handling, braking, and acceleration. So it doesn't matter what level of car you have. This event is all about quick reflexes and the drive to finish fast. Another crowd pleaser here is the off road event. Now we don't get to play in the mud a whole lot but it's a whole lot of fun, and being able to grab some air while doing it, well that takes it to a whole nother level. Off road participants never disappoint with high flying aerial assaults and action packed racing that keeps the crowd on the edge of their seats. Woo! Now with the name LS Fest it's obvious to see that your vehicle's got to have that late model power plant, and you can tell as well that it's a very popular swap.
(Bill)>> It's all about just coming and having fun with your car. Whether you're brand new in this, you never drag raced, or you're a really good drag racer. We've got something for everybody whether you've never autocrossed or you're one of the best in the country. They come here too, but everybody gets along. We give out prizes but you know it's not that serious. The drifters love it because it's not that serious. It's one of their favorite events. So it's just the mood in the air you know. It's just the party that's all centered around that LS engine and everybody brought together by that one common thread. [ music ]
(Tommy)>> Now walking around here at the show you never know what you'll find. I want to introduce you guys to Phil. He's the owner of this beautiful little Pacer back here. Why in the world did you go LS on this thing?
(Phil)>> Well mostly Tommy to be able to be smog compliant in California. Anything after 1975 in California has to be smog compliant. The 304 V-eight that came in it was tired, and was having trouble getting it to pass smog. So we found this GM E-rod connect and cruise motor. Came with the engine, transmission, all the computers, the cats, everything, and that California car b-o sticker. The magic sticker that says I can have it.
(Tommy)>> I understand. Now to put it in there I'm sure it was just a breeze right?
(Phil)>> It was breezy for two years. It took us two years. I had a friend, Allen, at AD Fabrication in La Verne, and we had it in his shop, and had to fabricate everything. Not like a Camaro where I can go out and buy motor mounts, or sub-frame, or anything like that. If it's in there we made it.
(Tommy)>> That's pretty cool. Do you have any regrets? Sometimes guys have regrets on builds.
(Phil)>> I regret that I spent so much money.
(Tommy)>> You can't take it with you though can you?
(Phil)>> Spending my kids inheritance and I'm glad we did it actually.
(Tommy)>> So you're having fun with it?
(Phil)>> Absolutely, we've been to three or four car shows, and we've won an award at almost everyone so far.
(Tommy)>> Cool, now here at the show we had a car grab our attention, and it'd be this orange AMX. Bob tell us a little about it.
(Bob)>> Sure this is a 1968 AMX. It's built for a track car and having fun. It's got an LS Seven engine in it, Racing Turbo 400 transmission, IRS differential and suspension in the back, Gen two Camaro suspension in the front, and it's a fun car to drive. I've had it four years.
(Tommy)>> What made you put something like this together?
(Bob)>> Well I was kinda inspired by the race director, Jimmy Day. He has one. I've been around for a while and back in the day I never had an AMX. I like Jimmy's and I went ahead kind of did my only thing here with this car.
(Tommy)>> Under the hood, what exactly do you have up under there? Well kind of.
(Bob)>> It's a modified LS Seven. It has 675-80 horsepower, which is pretty common for modified LS Sevens. It has a lot of torque cause the transmission's an automatic. So a few things we changed for that.
(Tommy)>> I'll let you get back at it. I appreciate your time for sure sir.
(Bob)>> Alright well thank you.
(Marc)>> We all know that as engine oil breaks down it cause added friction and heat, silently stealing power and fuel economy. Well Hot Shots Secret's FRThree is a friction reducer and lubrication enhancing oil additive that could help improve your engine's performance. FRThree uses patented lubricants to help reduce friction and wear and tear on your engine's components. Improving your engine's efficiency equals more horsepower and more m-p-g's. So if you've noticed a drop in your engine's performance you may want to give FRThree a try. Well that's all the time we have for today folks. So until next time go to Powernation TV dot com to see more tech like you saw today.
