Xtreme 4x4 Builds
Want more content like this?
Join the PowerNation Email NewsletterParts Used In This Episode
EFI Engine Supply
Specializing in Used Late Model Drivetrain Components
EFILive
EFILive Tuning Tool
Episode Transcript
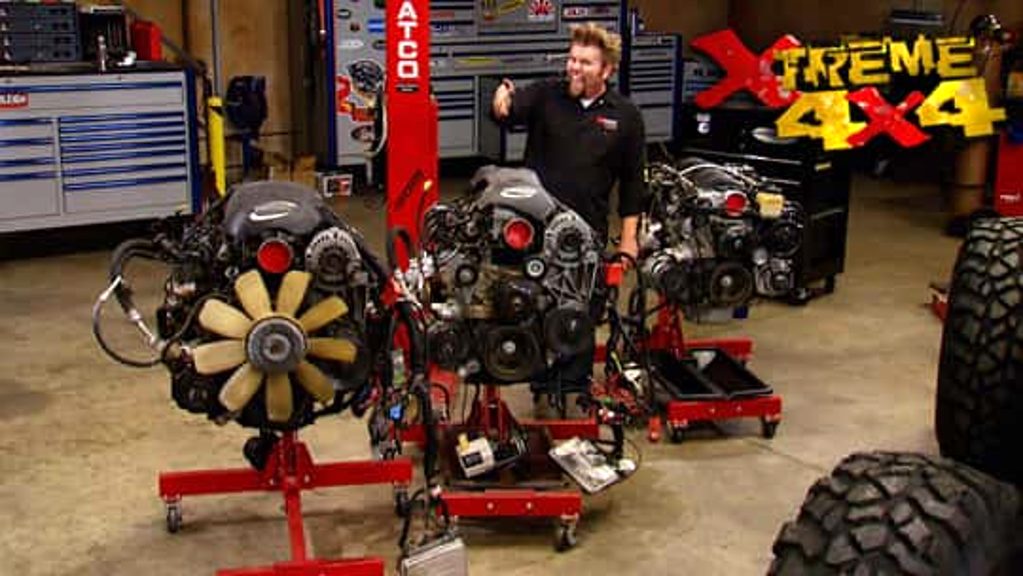
It was the engine that revolutionized the small block Chevy. We're talking about the LS Series from General Motors today on Xtreme 4x4. Why? These are a great option for your trail rig low on cost, high on performance. Plus where and how to buy one and get it running, right? Like
this that we got from,
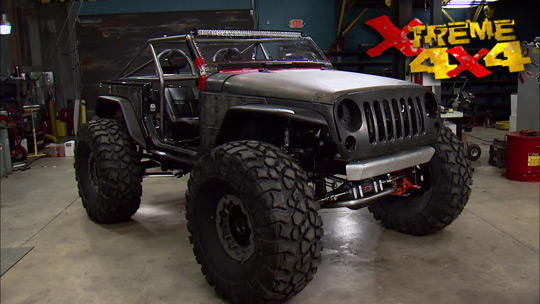
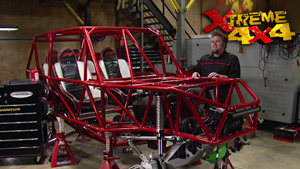
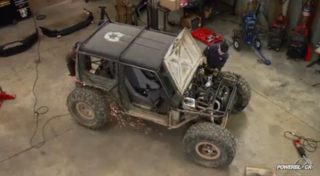
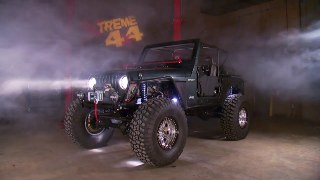
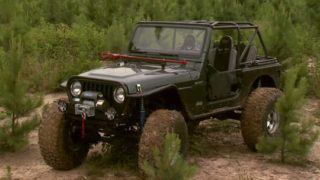
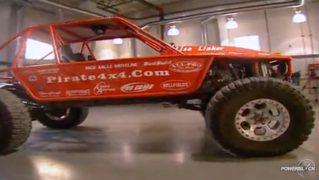
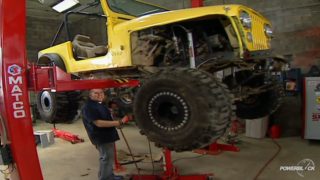
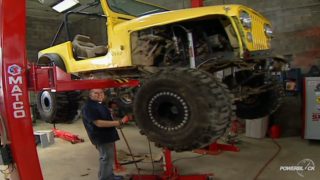
if you guys don't recognize this buggy. Well, it's for good reason. This is my own personal ride. It's something that I've been building at home in my garage after working on weekends, just like you guys do at home and it is almost finished after two years of work. But that's not why it's here today. It's here today because under the hood of this rig is an engine that has become immensely popular when you're talking about power in your buggy.
And every now and then we like to take one topic and explore it in extreme detail. And one thing that we've noticed a lot of lately is the genre
four engines showing up in build threads all over the internet. So that's what we're gonna talk about today. The LS series of engines, all the different models. A couple of tips and tricks to help install it one in your ride a little bit easier as well as what you have to do with the electronics to get it running once you have it mounted to your rig.
Now, it all started with this engine right here. This is an LS one generation three engine and GM first put this in the 1997 Corvette to replace the LT one engine when it wouldn't deliver the fuel economy or power numbers that they were after. They basically threw out the entire engine program and started from scratch to build this an all aluminum 5.7 L push rod V8 which has changed the term small block Chevy. Now, how much did it change the term?
The best thing to do is to compare this and an old engine side by side.
This is what we think of when we use the term small block Chevy, an engine that has served General Motors well for over 50 years. Push rod 5.7 L V8.
But when you see it sitting side by side with a generation three Ls one, you can tell there are major differences, starts with just the construction of the engine. The LS series engine is all aluminum from oil pan to the top of the cylinder head. Whereas the old school Chevy small block was cast iron from the factory. The firing order of this engine was 18436572. They changed that in the LS to 18726543. Now that tend to take some vibration out of the engine allowed you to rev it a little bit higher, get a little bit more power. The plastic intake manifold was lower than the cast
iron unit that was put onto the small blocks. It allowed for the heads to be cast a little bit taller and huge intake ports that are referred to as cathedral ports. But probably the most noticeable change is the individual coil packs one for each cylinder instead of a distributor. Now, there are some other subtle differences between the two, but this engine has really changed the word small block when you're talking. But an engine swap and what it boils down to is numbers, these LS series engines, you can knock them up to four, even 500 horsepower, which is not unheard of on an old school small block. But it's the fuel economy that gets you an LS Series engine delivering that kind of power can still pull down 25 to 30
MPG. And they did that by making a couple changes when they introduced the generation four.
Although the engine itself may look the exact same in 2005. When GM released the generation four engine program, some new models came into play the Ls two Ls four Ls six and the monster Ls seven that you find in the 06 Corvette. Now, most of the changes to these motors were all in the electronics and it starts right at the front with a throttle body. No more throttle cables. Entire system is drive by wire with a computer controlled throttle blade.
There are still eight coil packs, one per cylinder, but the biggest changes in the cylinder head, some models came equipped with three valves per cylinder and the ability to run what's called variable valve timing. And that meant you could have good low end torque as well as high RPM, scream and horsepower depending on which valves you opened at which time. But the biggest news had to be with the displacement on demand technology.
That means that these engines can run as eight cylinders or as small as a four cylinder by turning off some of the coil packs. That's how you get those monster 545 horsepower numbers and still get those fuel economy numbers in the upper twenties. If there's one downfall to the LS series of engines, it's going to be the cost pulling these motors out of
yards means you're getting them out of high end expensive vehicles like Camaros or Firebirds or even Corvettes. A generation three Ls one. It's gonna cost you about 1500 bucks and Ls two like this one here, it can be almost $5000. And if you're lucky enough even to find an Ls Seven with everything you need computer wiring harness and complete motor. It's probably gonna cost you almost 10 grand.
But
there is a cheaper way.
Why go all aluminum when cast iron will do up next, we've got the line on an LS alternative that won't break the bank. Stay tuned
after the success of the genre, LS One engines. GM took the same platform and build a bunch of truck engines with codes like LR 59 LM nine LM seven like this 5.3 L Vortec. Now, what does that mean to you? Really? Well, it's the cost. See underneath everything, this is basically a cast iron version of the LS one that they had in the Corvette. The cylinder heads are the same, the oil pan similar, all the engine internals are almost the exact same, just a little different compression ratio, but the block is made of cast iron. You can even take the intake manifold off this engine and replace it with an LS One style intake manifold to get more power. Now. Really? What does that do for you? Well,
these engines were available in almost any pickup truck or SUV from 1999 to 2007. There is literally hundreds of thousands of these engines in the wrecking yard, meaning they're really cheap. How cheap? Well, this engine as it sits right now complete in take out form, wiring harness, computer, all the accessories under 750 bucks,
if you're willing to spend some time searching through the junk yards, looking for the best truck motor for your buggy. This is what you're after. This is an LQ nine engine and it's a Vortec 6 L that came available in a lot of the high end suvs as well as the high output option in a lot of the pickup trucks. Now, it has a 10 to 1 compression ratio, 350 horsepower and 380 pound feet of torque from the factory. But just like the 5.3 at its heart, it's a cast iron block
one engine which means you can do a lot of upgrades to it for a very little bit of money and build a nice motor. As a matter of fact, most recently the guys down on horsepower took this exact same engine, put an intake on it camshaft and a couple computer upgrades and they were able to pull over 500 horsepower out of this motor. Now, what does that mean? Well, it's simply a bang for the buck. This engine out of a junkyard is gonna cost you about $1200 1200 dollar motor with fuel injection, everything and 500 horsepower. That's a steal.
So now that you're armed with all the knowledge about the generation three generation four engine program, I'm sure a lot of you guys are sitting at home and you're thinking, man, I want an LS type engine in my rock Crawler Jeep, or maybe even your hot rod. Now, you have to make a decision. Where do you get that engine? Well, you have a couple different options. You can go straight to the source, write to GM performance parts and order a crate engine that they will basically crate up, pull off the assembly line and shipped right to your house. Now, the one thing you do need to remember most of the GM crate engines for this series of motor do not come with electronics or a computer. You're on the hook for that. You have to do a little bit of research and find somebody who will build that harness for you. You got to add that cost into the engine. Another option is to go to another supplier. Turnkey engine supply takes those GM crate motors, puts a wiring harness computer and sometimes even exhaust on it.
They will
dyno test that engine, crate it up and ship it to you. But you do pay for that service usually takes the cost of a crane engine adds about three or $4000. The benefit of that is you're getting brand new engines, but you do pay the premium for that. Now, we as off roaders by nature were pretty cheap. We're always in junk yards looking for axles, transfer cases and transmissions. So why not head there for your engine? But what you're looking for is this right here? It's called Take Out Engine. It's stripped from the car with everything you need to transplant. It comes with all the accessories, all the sensors, the harness, it even comes with the computer.
Good take out engines. They'll ship you the fuel pump as well that you can adapt to fit in your fuel cell. And if it's a drive by wire assembly like we have here, it'll come with the throttle pedal that you can then mount in your rig. Now, these are obviously a lot
cheaper. You're gonna save a pile of money and it's the best option to go with all these take out engines. We got from a company called EF I Engine Supply. They specialize in this, set up all the engines with the computer and everything shipped right to your door. LS one like this, they sell for just over $2000 and it's ready to stuff right in your rank. Now, we have to deal with some of the tips and tricks to how to get this vehicle running better. Once it's in your crawler,
once you've got your LS engine stuffed into your project, there's a couple of things you have to do to make it run and there's a couple of things that are gonna make your life a lot easier. Now, we're gonna start by just a couple of tips to make your life easier. The LS engine is what's called modular and that means it was designed to be installed in a bunch of
from vehicles. We're going to take advantage of one of those modular designs and change the location of the air inlet. See in an off road rig like this, there's a chance a lot of water, dirt rocks and debris can get up into the throttle blades or the mass airflow sensor. We're going to stop that from happening by performing an intake flip
since the upper intake plenum is not indexed front or rear. All you have to do is unbolt it and spin it 180 degrees.
Now, the throttle body assembly mass airflow sensor and air cleaner are safely housed inside the passenger compartment.
Today, we've been taking a close up look at the genre
four General Motors engines that first came out in 1997. We looked at all the different models and now we're covering a couple of tips and tricks to make installing one of those engines into your buggy a lot easier. Now, so far we've flipped the intake on this LS one to get the air inlet inside the passenger compartment. And now we're going to deal with something called the steam ports on the top of either head, there's a small tube that uh is a coolant bypass crossover tube. It has a small outlet that travels through the throttle body and then has to return to the radiator. Now, the problem with that in a rear radiator buggy like this is you'd have to run a tube all the way back to the very back of the buggy. But there is a way to clean up that installation
drill a hole in the top of the water pump near the water neck coat the drill bit with a bunch of grease to keep the shavings from falling into the water pump,
then tap the hole,
put in a pipe thread adapter
and attach the crossover vent tube
to the top of the water pump.
One of the most difficult jobs when installing a late model engine in your project is gonna be plumbing the fuel system. Now, you can honestly sit down with a catalog and spend all day making a list of all the specialized fittings you think you're gonna need, but you're always gonna forget just one and that's gonna sideline your project for the whole weekend. A better option is to get a complete fuel system like we have here from Russell performance plumbing. Now, this one is specifically designed for the LS series engine and it comes with everything we're going to need
all dash six A N fittings as well as the specialty fittings to adapt it to the fuel rail. A brand new fuel pump, new braided line, a relay to run that pump and all the cushion clamps to secure everything to our frame rail. Now, the LS engine does have one unique feature and that's the fuel rail only has a hook up for a single fuel line and these old style electric fuel pumps, they need a feed and return
or the pump will overheat. So to solve that, Russell includes a Corvette style filter. Now, this is a filter and regulator built into one fuel travels into the filter and out to the fuel rail, but it's capped at 90 P si which is what the LS engine runs off of anything above 90 P si is returned back to the fuel cell that you mount in the back of your car. It's a great way to adapt a modern style fuel cell to an LS engine.
Another area very unique to the LS. One has to do with monitoring the oil pressure. Sure. The ECU does it to keep track of the fuel table on the engine, but you wanna keep an eye on it yourself, especially in an off road rig like this in heavy off camera situations. That means you need to mount a fuel pressure sensor somewhere in the engine. Luckily, the LS one makes it very easy.
Above the oil filter on the engine block is a small aluminum boss. You simply have to unbolt it from the block
and then drill it out,
tap the upper portion for your oil pressure center
and install it.
If there's one drawback to the genre
four engine family, it's with the oil pan from the factory. All the engines came equipped with a cast aluminum oil pan. Now, that's great for the street, but when you're out there doing some serious wheeling and you hit an obstacle with that pan or maybe a rock that's trapped up between your link bar and the pan. It's gonna break,
make it not bend it. So the best solution is to replace that pan with a steel one like this that we got from summit racing. Now, this is a nice low profile design with kickouts designed to hold a little bit extra oil. But the best thing is because it's stamped steel instead of aluminum. If anything hits it, it's gonna bend, not break.
You're watching Xtreme 4x4 for a DVD copy of this episode. Just go to Power Block tv.com and order your copy for just 595 plus shipping and handling. Start your own Xtreme 4x4 collection delivered right to your door from the power block.
Today, we're taking a look at the GM Gen 34 engine program, the car motors as well as a bunch of the truck engines and a few tips and tricks to make installing one into your project a lot easier. Now, we've already dealt with some plumbing and now we're gonna focus on some electronics.
Now, we've already shown you guys how to protect the throttle body as well as the mass airflow sensor by flipping the intake 180 degrees and getting the air inlet inside the passenger compartment. But what about all these ignition coils if you remember there's one per cylinder? So that's eight in total. If you get any water on this assembly, you run the chance of burning them all out. And that will be very expensive. The best thing to do is to relocate the entire assembly, but that means you'd have to cut up the factory harness. Well, not anymore painless performance. Now offers these small jumper pig tails. They have two connections, one to go in the factory harness and one to hook up to the new coal pack. You'd simply plug it into the buggy and then you can relocate the coils anywhere you want as long as it's within 2 ft. Now, the best thing is if you're gonna see any mud or water with your buggy, these are a must, your coal packs will stay safe.
Now, no matter which one of these engines you choose for your project, you're still gonna need an engine harness as well as a computer to make them run. That's why they're called electronic fuel injection engines. Now, there's three ways to do it. The first one is the easiest and obviously the most expensive you buy a whole new engine harness and a brand new computer, hook it up and your project is ready to run, just turn the key and start wheeling. The second version is going to save you a little bit of money, but it means a little bit to work for you. You need to find what's called an ECU pin out chart. You can usually find these on the internet or sometimes get them straight from the dealer. You need to go in and cut up the factory harness that came with your take out engine. You're looking for all the power feeds and the grounds for the factory ECU and once you have that engine harness built, you're not 100% done. You need to still have the factory computer cracked. You do that by taking the whole project to a tuner. Someone who's special
in
chassis dyno
tuning, they'll go into that factory ECU and remove any security features that were installed into it from the factory. They'll also tune your engine to work the best in your project by adjusting the fuel and time and curve. Now, the third option is where you do everything yourself. You still cut up that factory harness and build your own. But you buy a software package from a company like this at EF I live. It'll come with a small handheld device that you plug into the assembly line diagnostic link and download that factory tune. Then you upload it into a computer program that you put on your computer at home. You can go in there and change everything. You can remove all those security features, turn off things like downstream oxygen sensors and even adjust all the fuel and timing curves. If you're gonna install more than one take out engine in your lifetime. This is the best option for you because you're gonna use it over and over.
So there you go guys, as you can see, you don't need to think badly of junkyard engines. You can get some great motors out there with brand new modern technology. You just need to know those little tips and tricks to get them working underneath the hood of your rig. All we have to do with this ride is a little bit more wiring and some plumbing
and it's almost ready for the trail.
Show Full Transcript
this that we got from,
if you guys don't recognize this buggy. Well, it's for good reason. This is my own personal ride. It's something that I've been building at home in my garage after working on weekends, just like you guys do at home and it is almost finished after two years of work. But that's not why it's here today. It's here today because under the hood of this rig is an engine that has become immensely popular when you're talking about power in your buggy.
And every now and then we like to take one topic and explore it in extreme detail. And one thing that we've noticed a lot of lately is the genre
four engines showing up in build threads all over the internet. So that's what we're gonna talk about today. The LS series of engines, all the different models. A couple of tips and tricks to help install it one in your ride a little bit easier as well as what you have to do with the electronics to get it running once you have it mounted to your rig.
Now, it all started with this engine right here. This is an LS one generation three engine and GM first put this in the 1997 Corvette to replace the LT one engine when it wouldn't deliver the fuel economy or power numbers that they were after. They basically threw out the entire engine program and started from scratch to build this an all aluminum 5.7 L push rod V8 which has changed the term small block Chevy. Now, how much did it change the term?
The best thing to do is to compare this and an old engine side by side.
This is what we think of when we use the term small block Chevy, an engine that has served General Motors well for over 50 years. Push rod 5.7 L V8.
But when you see it sitting side by side with a generation three Ls one, you can tell there are major differences, starts with just the construction of the engine. The LS series engine is all aluminum from oil pan to the top of the cylinder head. Whereas the old school Chevy small block was cast iron from the factory. The firing order of this engine was 18436572. They changed that in the LS to 18726543. Now that tend to take some vibration out of the engine allowed you to rev it a little bit higher, get a little bit more power. The plastic intake manifold was lower than the cast
iron unit that was put onto the small blocks. It allowed for the heads to be cast a little bit taller and huge intake ports that are referred to as cathedral ports. But probably the most noticeable change is the individual coil packs one for each cylinder instead of a distributor. Now, there are some other subtle differences between the two, but this engine has really changed the word small block when you're talking. But an engine swap and what it boils down to is numbers, these LS series engines, you can knock them up to four, even 500 horsepower, which is not unheard of on an old school small block. But it's the fuel economy that gets you an LS Series engine delivering that kind of power can still pull down 25 to 30
MPG. And they did that by making a couple changes when they introduced the generation four.
Although the engine itself may look the exact same in 2005. When GM released the generation four engine program, some new models came into play the Ls two Ls four Ls six and the monster Ls seven that you find in the 06 Corvette. Now, most of the changes to these motors were all in the electronics and it starts right at the front with a throttle body. No more throttle cables. Entire system is drive by wire with a computer controlled throttle blade.
There are still eight coil packs, one per cylinder, but the biggest changes in the cylinder head, some models came equipped with three valves per cylinder and the ability to run what's called variable valve timing. And that meant you could have good low end torque as well as high RPM, scream and horsepower depending on which valves you opened at which time. But the biggest news had to be with the displacement on demand technology.
That means that these engines can run as eight cylinders or as small as a four cylinder by turning off some of the coil packs. That's how you get those monster 545 horsepower numbers and still get those fuel economy numbers in the upper twenties. If there's one downfall to the LS series of engines, it's going to be the cost pulling these motors out of
yards means you're getting them out of high end expensive vehicles like Camaros or Firebirds or even Corvettes. A generation three Ls one. It's gonna cost you about 1500 bucks and Ls two like this one here, it can be almost $5000. And if you're lucky enough even to find an Ls Seven with everything you need computer wiring harness and complete motor. It's probably gonna cost you almost 10 grand.
But
there is a cheaper way.
Why go all aluminum when cast iron will do up next, we've got the line on an LS alternative that won't break the bank. Stay tuned
after the success of the genre, LS One engines. GM took the same platform and build a bunch of truck engines with codes like LR 59 LM nine LM seven like this 5.3 L Vortec. Now, what does that mean to you? Really? Well, it's the cost. See underneath everything, this is basically a cast iron version of the LS one that they had in the Corvette. The cylinder heads are the same, the oil pan similar, all the engine internals are almost the exact same, just a little different compression ratio, but the block is made of cast iron. You can even take the intake manifold off this engine and replace it with an LS One style intake manifold to get more power. Now. Really? What does that do for you? Well,
these engines were available in almost any pickup truck or SUV from 1999 to 2007. There is literally hundreds of thousands of these engines in the wrecking yard, meaning they're really cheap. How cheap? Well, this engine as it sits right now complete in take out form, wiring harness, computer, all the accessories under 750 bucks,
if you're willing to spend some time searching through the junk yards, looking for the best truck motor for your buggy. This is what you're after. This is an LQ nine engine and it's a Vortec 6 L that came available in a lot of the high end suvs as well as the high output option in a lot of the pickup trucks. Now, it has a 10 to 1 compression ratio, 350 horsepower and 380 pound feet of torque from the factory. But just like the 5.3 at its heart, it's a cast iron block
one engine which means you can do a lot of upgrades to it for a very little bit of money and build a nice motor. As a matter of fact, most recently the guys down on horsepower took this exact same engine, put an intake on it camshaft and a couple computer upgrades and they were able to pull over 500 horsepower out of this motor. Now, what does that mean? Well, it's simply a bang for the buck. This engine out of a junkyard is gonna cost you about $1200 1200 dollar motor with fuel injection, everything and 500 horsepower. That's a steal.
So now that you're armed with all the knowledge about the generation three generation four engine program, I'm sure a lot of you guys are sitting at home and you're thinking, man, I want an LS type engine in my rock Crawler Jeep, or maybe even your hot rod. Now, you have to make a decision. Where do you get that engine? Well, you have a couple different options. You can go straight to the source, write to GM performance parts and order a crate engine that they will basically crate up, pull off the assembly line and shipped right to your house. Now, the one thing you do need to remember most of the GM crate engines for this series of motor do not come with electronics or a computer. You're on the hook for that. You have to do a little bit of research and find somebody who will build that harness for you. You got to add that cost into the engine. Another option is to go to another supplier. Turnkey engine supply takes those GM crate motors, puts a wiring harness computer and sometimes even exhaust on it.
They will
dyno test that engine, crate it up and ship it to you. But you do pay for that service usually takes the cost of a crane engine adds about three or $4000. The benefit of that is you're getting brand new engines, but you do pay the premium for that. Now, we as off roaders by nature were pretty cheap. We're always in junk yards looking for axles, transfer cases and transmissions. So why not head there for your engine? But what you're looking for is this right here? It's called Take Out Engine. It's stripped from the car with everything you need to transplant. It comes with all the accessories, all the sensors, the harness, it even comes with the computer.
Good take out engines. They'll ship you the fuel pump as well that you can adapt to fit in your fuel cell. And if it's a drive by wire assembly like we have here, it'll come with the throttle pedal that you can then mount in your rig. Now, these are obviously a lot
cheaper. You're gonna save a pile of money and it's the best option to go with all these take out engines. We got from a company called EF I Engine Supply. They specialize in this, set up all the engines with the computer and everything shipped right to your door. LS one like this, they sell for just over $2000 and it's ready to stuff right in your rank. Now, we have to deal with some of the tips and tricks to how to get this vehicle running better. Once it's in your crawler,
once you've got your LS engine stuffed into your project, there's a couple of things you have to do to make it run and there's a couple of things that are gonna make your life a lot easier. Now, we're gonna start by just a couple of tips to make your life easier. The LS engine is what's called modular and that means it was designed to be installed in a bunch of
from vehicles. We're going to take advantage of one of those modular designs and change the location of the air inlet. See in an off road rig like this, there's a chance a lot of water, dirt rocks and debris can get up into the throttle blades or the mass airflow sensor. We're going to stop that from happening by performing an intake flip
since the upper intake plenum is not indexed front or rear. All you have to do is unbolt it and spin it 180 degrees.
Now, the throttle body assembly mass airflow sensor and air cleaner are safely housed inside the passenger compartment.
Today, we've been taking a close up look at the genre
four General Motors engines that first came out in 1997. We looked at all the different models and now we're covering a couple of tips and tricks to make installing one of those engines into your buggy a lot easier. Now, so far we've flipped the intake on this LS one to get the air inlet inside the passenger compartment. And now we're going to deal with something called the steam ports on the top of either head, there's a small tube that uh is a coolant bypass crossover tube. It has a small outlet that travels through the throttle body and then has to return to the radiator. Now, the problem with that in a rear radiator buggy like this is you'd have to run a tube all the way back to the very back of the buggy. But there is a way to clean up that installation
drill a hole in the top of the water pump near the water neck coat the drill bit with a bunch of grease to keep the shavings from falling into the water pump,
then tap the hole,
put in a pipe thread adapter
and attach the crossover vent tube
to the top of the water pump.
One of the most difficult jobs when installing a late model engine in your project is gonna be plumbing the fuel system. Now, you can honestly sit down with a catalog and spend all day making a list of all the specialized fittings you think you're gonna need, but you're always gonna forget just one and that's gonna sideline your project for the whole weekend. A better option is to get a complete fuel system like we have here from Russell performance plumbing. Now, this one is specifically designed for the LS series engine and it comes with everything we're going to need
all dash six A N fittings as well as the specialty fittings to adapt it to the fuel rail. A brand new fuel pump, new braided line, a relay to run that pump and all the cushion clamps to secure everything to our frame rail. Now, the LS engine does have one unique feature and that's the fuel rail only has a hook up for a single fuel line and these old style electric fuel pumps, they need a feed and return
or the pump will overheat. So to solve that, Russell includes a Corvette style filter. Now, this is a filter and regulator built into one fuel travels into the filter and out to the fuel rail, but it's capped at 90 P si which is what the LS engine runs off of anything above 90 P si is returned back to the fuel cell that you mount in the back of your car. It's a great way to adapt a modern style fuel cell to an LS engine.
Another area very unique to the LS. One has to do with monitoring the oil pressure. Sure. The ECU does it to keep track of the fuel table on the engine, but you wanna keep an eye on it yourself, especially in an off road rig like this in heavy off camera situations. That means you need to mount a fuel pressure sensor somewhere in the engine. Luckily, the LS one makes it very easy.
Above the oil filter on the engine block is a small aluminum boss. You simply have to unbolt it from the block
and then drill it out,
tap the upper portion for your oil pressure center
and install it.
If there's one drawback to the genre
four engine family, it's with the oil pan from the factory. All the engines came equipped with a cast aluminum oil pan. Now, that's great for the street, but when you're out there doing some serious wheeling and you hit an obstacle with that pan or maybe a rock that's trapped up between your link bar and the pan. It's gonna break,
make it not bend it. So the best solution is to replace that pan with a steel one like this that we got from summit racing. Now, this is a nice low profile design with kickouts designed to hold a little bit extra oil. But the best thing is because it's stamped steel instead of aluminum. If anything hits it, it's gonna bend, not break.
You're watching Xtreme 4x4 for a DVD copy of this episode. Just go to Power Block tv.com and order your copy for just 595 plus shipping and handling. Start your own Xtreme 4x4 collection delivered right to your door from the power block.
Today, we're taking a look at the GM Gen 34 engine program, the car motors as well as a bunch of the truck engines and a few tips and tricks to make installing one into your project a lot easier. Now, we've already dealt with some plumbing and now we're gonna focus on some electronics.
Now, we've already shown you guys how to protect the throttle body as well as the mass airflow sensor by flipping the intake 180 degrees and getting the air inlet inside the passenger compartment. But what about all these ignition coils if you remember there's one per cylinder? So that's eight in total. If you get any water on this assembly, you run the chance of burning them all out. And that will be very expensive. The best thing to do is to relocate the entire assembly, but that means you'd have to cut up the factory harness. Well, not anymore painless performance. Now offers these small jumper pig tails. They have two connections, one to go in the factory harness and one to hook up to the new coal pack. You'd simply plug it into the buggy and then you can relocate the coils anywhere you want as long as it's within 2 ft. Now, the best thing is if you're gonna see any mud or water with your buggy, these are a must, your coal packs will stay safe.
Now, no matter which one of these engines you choose for your project, you're still gonna need an engine harness as well as a computer to make them run. That's why they're called electronic fuel injection engines. Now, there's three ways to do it. The first one is the easiest and obviously the most expensive you buy a whole new engine harness and a brand new computer, hook it up and your project is ready to run, just turn the key and start wheeling. The second version is going to save you a little bit of money, but it means a little bit to work for you. You need to find what's called an ECU pin out chart. You can usually find these on the internet or sometimes get them straight from the dealer. You need to go in and cut up the factory harness that came with your take out engine. You're looking for all the power feeds and the grounds for the factory ECU and once you have that engine harness built, you're not 100% done. You need to still have the factory computer cracked. You do that by taking the whole project to a tuner. Someone who's special
in
chassis dyno
tuning, they'll go into that factory ECU and remove any security features that were installed into it from the factory. They'll also tune your engine to work the best in your project by adjusting the fuel and time and curve. Now, the third option is where you do everything yourself. You still cut up that factory harness and build your own. But you buy a software package from a company like this at EF I live. It'll come with a small handheld device that you plug into the assembly line diagnostic link and download that factory tune. Then you upload it into a computer program that you put on your computer at home. You can go in there and change everything. You can remove all those security features, turn off things like downstream oxygen sensors and even adjust all the fuel and timing curves. If you're gonna install more than one take out engine in your lifetime. This is the best option for you because you're gonna use it over and over.
So there you go guys, as you can see, you don't need to think badly of junkyard engines. You can get some great motors out there with brand new modern technology. You just need to know those little tips and tricks to get them working underneath the hood of your rig. All we have to do with this ride is a little bit more wiring and some plumbing
and it's almost ready for the trail.
