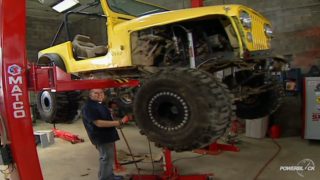
Xtreme 4x4 Builds
Want more content like this?
Join the PowerNation Email NewsletterParts Used In This Episode
Warn Industries
9.5ti Thermometric, Self-Recovery Winch, 9500 lb./4310 kg, 12V DC Motor w/Roller Fairlead, 125 ft. Wire Rope.
4-Wheelers Supply
4Wheelers Supplys Fiberglass Jeep Hood nicknamed "The Rock Crawler Hood" replaces your stock hood and fenders and adds an average of 5.5 inches of front tire clearance without lifting your Jeep.
MasterCraft Safety
Custom rear bench seat and harnesses.
Episode Transcript
Buying a used trail rig today on Xtreme 4x4, what to look for and how to avoid breakage on the trail with some basic maintenance, plus budget tips for bending flat steel and our spider gets a makeover or should we say roll over
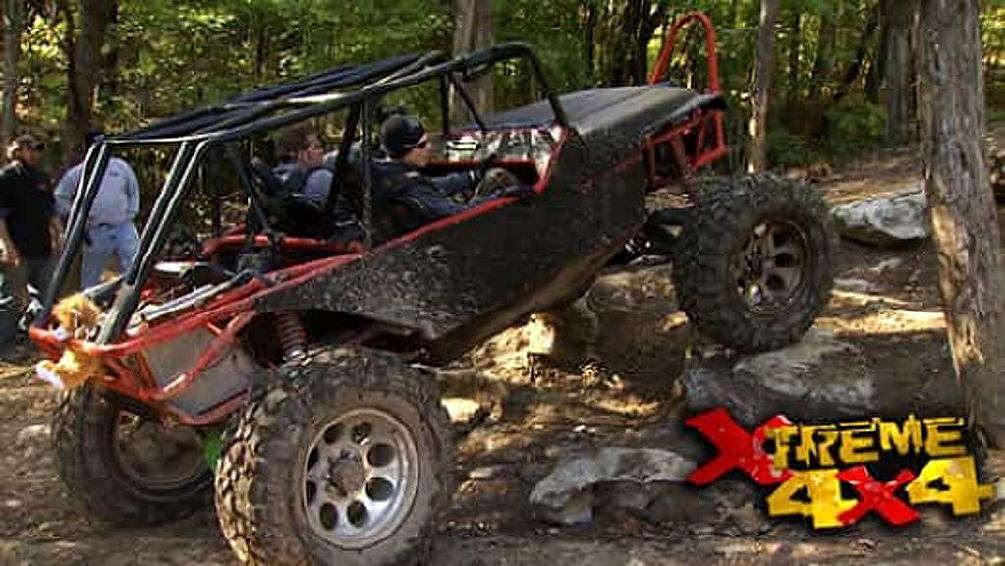
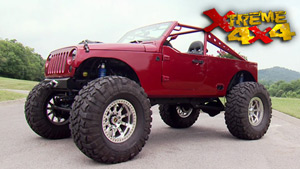
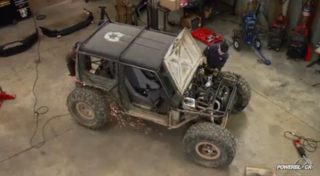
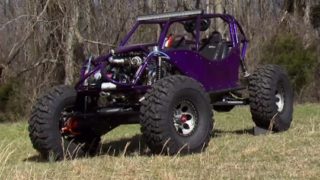
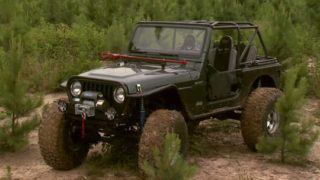
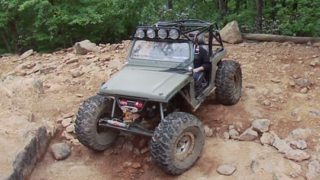
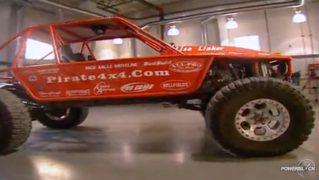
now, I'm sure a lot of you guys recognize the poison spider that's up on the left. We originally built this rig way back during the very first season of Xtreme 4x4.
Well, that was over four years ago and to say that this buggy has had some serious trail time would be an understatement.
We've been wheeling the poison spider whenever we get the chance. It's kind of like our unofficial company car
and just like all company cars, the spider gets beaten within an inch of its life and almost no maintenance is ever performed on it. Well, today that's gonna change
one trend that we see. A lot of nowadays are buggies changing hands. Some guys are selling to build something bigger and better.
Others are moving away from two buggies to build jeeps and other dual purpose rigs.
Either way, a used buggy could be a great deal. But before you hit the trail
you'll wanna spend some time looking it over.
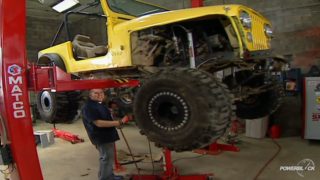
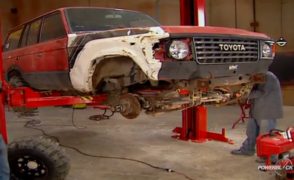
And so that's what we're gonna do here today using our poison spider as an example. We're gonna show you guys some of the maintenance you should do on your trail truck, either between rides or at least once a year or if you've bought a used rig, kind of like our poison spider, how to assess trail damage that's done to it. What you need to fix as well as just basic maintenance before your first time out on the trail,
we're going to start with the front axle joints.
Now, we originally installed CT MS into our shafts, but it's still a good idea to periodically check these for wear about once a season.
If this joint fails on the trail, it often causes both axle shafts in and outer to break.
And the CTM joint uses a bronze bushing instead of needle bearings if we had any signs of where we could rebuild this axle with a new bushing. These ones here are good as new.
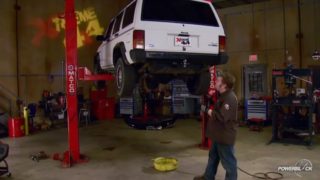
Now, the next thing we want to check on our buggy is all the suspension links. Now, just like most two buggies, our poison spider has a pile of rod ends in both the steering and all the suspension mounting points. Now, before you go on any trail ride, you wanna quickly crawl underneath your buggy and make sure all the jam nuts on these links are tight
if they loosen off on the trail, you can actually bend the shank on that
rod end. That's a very common problem. A way to check to see if it's bent is to simply loosen off all the jam nuts and turn the link by hand. If you see the end of the link moving up and down as you turn it, it means the shank on that rod end is bent, you should replace it right away. Now, if you've bought a used buggy and you don't really know the history of it. It's a good idea to take the link out and inspect it
with the axles supported. We'll remove one link end at a time and check the TEF lawn block to make sure that it's not loose or worn out
with the covers off. We can get a good look at the gears
and we wanna check for cracked or broken teeth on the ring gear
and on an axle like the Dana 60 we can usually get a good look at the pinion as well.
Now, if you want to go even further,
you can also check the backlash and the gear tooth pattern on the gear set.
Now, the term nut and bolted is often used when talking about a race vehicle. What you're doing is going over and checking all the critical fasteners, things like suspension mounts, shock mounts, limit straps and engine mounts, anything that if the fastener failed, the resulting effect could be a catastrophic issue.
Now you're not trying to make it tighter. All you're doing is basically checking to make sure there's no fatigue in the bowl. If this is your own personal buggy, you might wanna do this about once a year.
But if this is a buggy that you just bought used, you should do it right away.
Two wrenches work well for this. And if you find a fatigue or worse broken bolt, be sure to change it right away. Preferably with one of a higher strength rating.
I like to remove any grade five bolts. I find and replace them with grade eights.
We won't just be replacing the fluid. We're gonna be upgrading it as well.
Royal purple, full synthetic gear oil in the axles will help the gear sets last
a new oil filter
and royal purple five W 30 in the engine will help us tap into all the power the LS has to offer
with the trans pan, clean and no clutch material present. We know our automatic is in good shape.
So max A TF will help keep it that way.
Then finally a basic tune up with new plugs and servicing the air raid filter element with their recharge kit.
Now, we're not just going to be talking about maintenance today. You also want to periodically check your rig for obvious signs of trail damage. Now, we wheel the spider all the time. Most recently, we had it out on a trail ride
and the guys from Crawl Magazine caught a pretty serious rollover on film.
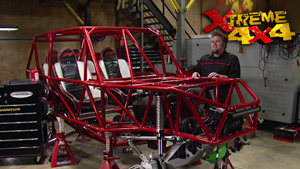
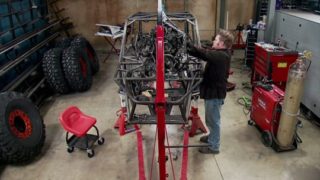
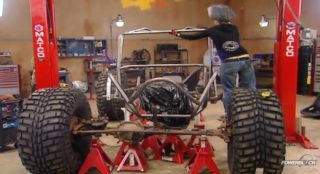
Now, when we got the truck back here at extreme, we noticed that the chassis itself had been tweaked in a way that we must address it. You can have a look that first initial point of contact is the top part of the bend and you can see that that a pillar is leaning way over towards the driver and this one here has gone almost vertical. What that means is the entire top part of this chassis has been twisted over. Now, you can see the initial point of the band right down there at the dash bar. And the,
the problem with that is if we don't fix this problem, it's gonna keep bending. If we roll this truck over again. Once the tube starts to fail, it wants to just keep going. That's how it's designed. There's a couple of ways that we could go ahead and fix this. We could throw a jack in there and try to press the chassis back into shape, throw some gussets in it and hope for the best. But the better way to do it is to go ahead and clip the whole upper section of this chassis off, redesign it and build it from scratch.
It's kind of a convertible.
It is a convertible
rock crawler.
Not safe. No,
but cool. Looking
later on to
go for
the spider hits the trail,
we're back in the extreme shop and working on our poisonous spider rock buggy that has been our unofficial company car for more than four years.
Now, it's seen some pretty serious abuse on the trail.
So we have it in the shop today for some maintenance repairs. Plus we're going to make a few changes to this truck.
See how close to the lens I can get.
Um,
now our Ben Tech program tells us how far we need to rotate the tube in the bender. Now, this tube needs to be turned 80 degrees this way, but it's hard to visualize the center line axis. So how we do that, simply mount a muffler clamp onto the tube
and then when we turn the tube on its center axis, we'll be able to see how far it's going just by reading that angle finder. Once we hit 80 we're ready for the next bend.
Mhm.
Us in Chris. Yes. Sure.
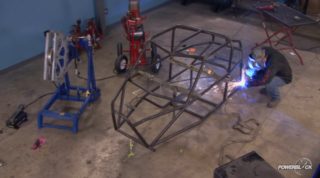
Now, since we're tying the cage into the original chassis, we want to add a slug at the joint to reinforce it in case of a roll over.
Now, we were able to draw the entire top half of the chassis on the computer and then render it to see what it look like.
Now, you can see the difference here. We have these two little windshield bars here to really close up this gap. So the front shouldn't rack all of these points triangulate off that one point into the main bar. Once we get it in here, we'll probably drop in a couple more tubes to add some triangulation, the center hoop. But all in all it might not be as fancy as what was there, but it'll certainly be safe.
Now. So far today, we've shown you some of the key things you need to maintain on a buggy that you've been wheeling for a while. We also showed you how to assess some damage and then repair it. If you bought a used buggy, that's been wheeled pretty hard. Like our poison spider,
there's more to it than that.
When you get a used buggy, you wanna change some stuff, make it your own, even if it's just a coat of paint. And that's one of the reasons why we completely replaced the top half of this chassis.
When we first built this truck over four years ago, there was only room for two seats in the front and that's because of the design of the back half of the cage. So by redesigning and pushing the roof up a little bit higher, we now have room to make the change we wanted to do since we first built it. And that is a back seat.
Now, we called the guys at Mastercraft and how to make this custom bench that fits right in the small part of the back of this chassis.
Now, the nice thing is, is it's a full suspension seat just like our Rubicon seats up front and they were able to match the fabric perfectly with the red Tweed inner as well as the dirt sports cover with the carbon fiber inlay in the end. Now, it is a little tight back here, but you got lots of head room, a little bar to hold on to all in all. It's gonna be a great place to sit to go four wheeling
uh for Chris in
right
now when we had the spider first on the trail, we had the optimum battery strapped to the tubing. Although that did fine, we picked up this battery box from Summit to help protect it a little bit more.
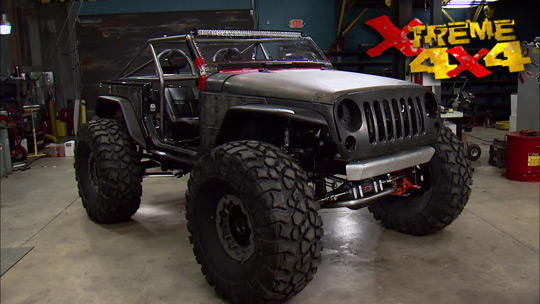
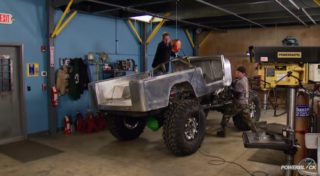
Now, we're not only going to repair the structural damage to the spider today, we're also gonna take care of some cosmetic stuff. We flop this truck basically rode off the steel hood. So we're gonna replace it with a brand new fiberglass one that we got from four Wheler supply.
Now, this is one of their rock crawler hoods that has these integrated high line fenders that if you bolt this onto a stock TJ, we'll give you 5.5 more inches of tire clearance. Now, this is not a stock TJ. But one thing that's been bugging us about this chassis is this fender bar right here has been contacting our tire when the suspension is in full stuff. So we're gonna be able to remove that and get more articulation. Now, I'm Sure. Some of you guys are wondering how we're gonna deal with all new tubing on the top half of this chassis when the bottom half is already painted. Well, it's gonna be a simple two tone with a little bit of truck bed coating.
Yeah,
cool.
That completely changed the look of that truck.
Yeah, it looks good.
Build on a budget Xtreme 4x4 projects that save you time and money.
Now when you're building on a budget, sometimes you have to get creative. We all use a lot of flat plate in our projects and every now and then you need a bent. Well, you got a couple options. You could throw it in a $10,000 scotchman or you could put it in a $5000 metal break or you can use a $2 piece of angle iron and do it by hand.
Now you can usually get away bending eight inch by hand. No problem if you're working in a really thick piece like 3/16 or quarter or a really wide piece, just go ahead and use your Oxyl
torch to heat up the edge before you bend it.
Just make sure you wear gloves.
Now, those of you with the keen, I will realize that our spider is rolling on a new pair of shoes and we did not replace the tires on this buggy because they're worn out on the trail.
Two of them got worn out really quick when the guys at muscle car made a comment about a rock crawler not being able to do a burnout.
Well, they were wrong.
Now, obviously, those types of shenanigans will wear a tire down pretty quick. So we went ahead and replaced all four on the spider with a set of brand new pit bull rockers. Now, these are 39.5 inch taller by 16.5 inches wide and they are a bias ply tire with an alternating tread block design with integrated sing cut into the larger blocks. Now, the sing actually opens up when the tire heats up and that helps with the clean out. Now, these side biters will really tear into the dirt when the tire is aired down, as well as this integrated rim guard will protect our wheel from trail obstacles when we're in the dirt. Now, that's one upgrade that we're doing to the spider. But one other thing that we always wanted to do was put a winch on this front plate. We just never seemed to find the time and now that we've been wheeling this thing more and more having a winch is definitely a good option.
So we went ahead and picked up a Warren nine point five T I thermometric winch. Now, this is a 9500 pound pulling winch. It has 100 and 25 ft of 516 aircraft cable. And the nice thing about the thermometric feature is right on the remote is a small led. If the motor begins to heat up, the led will light up and let you know that you need to let your winch take a little break on those long poles. Now, all we got to do is mount this to the front plate that's already there. Be ready to go wheeling
the winch plate on the front of the spider is built into the front stinger
and once four holes are drilled, the winch simply bolts in place.
Now, since we've already completely changed the look of our spider, we decided this would be a great time to go ahead and add some body panels. Now this will completely cover up the tubing on the side and change the look of the truck completely. I went ahead and made a rough cut on this 0 65 aluminum, held it up against the rig and then just traced it out. And once we have these finished cut, I'll go ahead and spray them with some bed liner to match the hood.
My new co-host,
welcome back to extreme
where today we showed you how basic preventative maintenance on your trail rig pays dividends especially here.
I mean, you want to spend a beautiful day like this behind the wheel, not on your back doing repairs,
which brings us to our spider.
We beat our rig to a pulp over the years.
So
it was time for some improvements.
First, a new set of shoes.
We chose the pit bull rocker. We stepped up to a 39 5 to give us a little bit more ground clearance. It's a full biased tire that really shines when it's off road,
we're gonna air down the tires because the side walls just aren't flexing, they're brand new. So we expect them to be a little bit stiff, but we're gonna air them down just a little bit more. Try to get them to
take some of that bounce out of the rock.
Oops. Too much.
We moved the fuel cell back and completely rebuilt the cage.
You can see the triangulation in the dom tubing
and how intersect points make this way stronger than the original design.
And with more headroom, we added a third seat.
Are you, Danny the plumber?
I'm not a plumber. I'm a cameraman.
You good dude. Here we go.
That other style. We,
well, Danny,
tell him how comfortable the ride was back there.
Oh, it was just like riding in a Cadillac
all in all a good day. Wheeling.
Gorgeous weather. One heck of a lunch. Happy crew is a fed crew
and proof that some simple routine maintenance can keep even our five year old buggy on the trail where it belongs
until we trash it again.
Just leave it here, we got others.
Uh
I'm cool with that.
Show Full Transcript
now, I'm sure a lot of you guys recognize the poison spider that's up on the left. We originally built this rig way back during the very first season of Xtreme 4x4.
Well, that was over four years ago and to say that this buggy has had some serious trail time would be an understatement.
We've been wheeling the poison spider whenever we get the chance. It's kind of like our unofficial company car
and just like all company cars, the spider gets beaten within an inch of its life and almost no maintenance is ever performed on it. Well, today that's gonna change
one trend that we see. A lot of nowadays are buggies changing hands. Some guys are selling to build something bigger and better.
Others are moving away from two buggies to build jeeps and other dual purpose rigs.
Either way, a used buggy could be a great deal. But before you hit the trail
you'll wanna spend some time looking it over.
And so that's what we're gonna do here today using our poison spider as an example. We're gonna show you guys some of the maintenance you should do on your trail truck, either between rides or at least once a year or if you've bought a used rig, kind of like our poison spider, how to assess trail damage that's done to it. What you need to fix as well as just basic maintenance before your first time out on the trail,
we're going to start with the front axle joints.
Now, we originally installed CT MS into our shafts, but it's still a good idea to periodically check these for wear about once a season.
If this joint fails on the trail, it often causes both axle shafts in and outer to break.
And the CTM joint uses a bronze bushing instead of needle bearings if we had any signs of where we could rebuild this axle with a new bushing. These ones here are good as new.
Now, the next thing we want to check on our buggy is all the suspension links. Now, just like most two buggies, our poison spider has a pile of rod ends in both the steering and all the suspension mounting points. Now, before you go on any trail ride, you wanna quickly crawl underneath your buggy and make sure all the jam nuts on these links are tight
if they loosen off on the trail, you can actually bend the shank on that
rod end. That's a very common problem. A way to check to see if it's bent is to simply loosen off all the jam nuts and turn the link by hand. If you see the end of the link moving up and down as you turn it, it means the shank on that rod end is bent, you should replace it right away. Now, if you've bought a used buggy and you don't really know the history of it. It's a good idea to take the link out and inspect it
with the axles supported. We'll remove one link end at a time and check the TEF lawn block to make sure that it's not loose or worn out
with the covers off. We can get a good look at the gears
and we wanna check for cracked or broken teeth on the ring gear
and on an axle like the Dana 60 we can usually get a good look at the pinion as well.
Now, if you want to go even further,
you can also check the backlash and the gear tooth pattern on the gear set.
Now, the term nut and bolted is often used when talking about a race vehicle. What you're doing is going over and checking all the critical fasteners, things like suspension mounts, shock mounts, limit straps and engine mounts, anything that if the fastener failed, the resulting effect could be a catastrophic issue.
Now you're not trying to make it tighter. All you're doing is basically checking to make sure there's no fatigue in the bowl. If this is your own personal buggy, you might wanna do this about once a year.
But if this is a buggy that you just bought used, you should do it right away.
Two wrenches work well for this. And if you find a fatigue or worse broken bolt, be sure to change it right away. Preferably with one of a higher strength rating.
I like to remove any grade five bolts. I find and replace them with grade eights.
We won't just be replacing the fluid. We're gonna be upgrading it as well.
Royal purple, full synthetic gear oil in the axles will help the gear sets last
a new oil filter
and royal purple five W 30 in the engine will help us tap into all the power the LS has to offer
with the trans pan, clean and no clutch material present. We know our automatic is in good shape.
So max A TF will help keep it that way.
Then finally a basic tune up with new plugs and servicing the air raid filter element with their recharge kit.
Now, we're not just going to be talking about maintenance today. You also want to periodically check your rig for obvious signs of trail damage. Now, we wheel the spider all the time. Most recently, we had it out on a trail ride
and the guys from Crawl Magazine caught a pretty serious rollover on film.
Now, when we got the truck back here at extreme, we noticed that the chassis itself had been tweaked in a way that we must address it. You can have a look that first initial point of contact is the top part of the bend and you can see that that a pillar is leaning way over towards the driver and this one here has gone almost vertical. What that means is the entire top part of this chassis has been twisted over. Now, you can see the initial point of the band right down there at the dash bar. And the,
the problem with that is if we don't fix this problem, it's gonna keep bending. If we roll this truck over again. Once the tube starts to fail, it wants to just keep going. That's how it's designed. There's a couple of ways that we could go ahead and fix this. We could throw a jack in there and try to press the chassis back into shape, throw some gussets in it and hope for the best. But the better way to do it is to go ahead and clip the whole upper section of this chassis off, redesign it and build it from scratch.
It's kind of a convertible.
It is a convertible
rock crawler.
Not safe. No,
but cool. Looking
later on to
go for
the spider hits the trail,
we're back in the extreme shop and working on our poisonous spider rock buggy that has been our unofficial company car for more than four years.
Now, it's seen some pretty serious abuse on the trail.
So we have it in the shop today for some maintenance repairs. Plus we're going to make a few changes to this truck.
See how close to the lens I can get.
Um,
now our Ben Tech program tells us how far we need to rotate the tube in the bender. Now, this tube needs to be turned 80 degrees this way, but it's hard to visualize the center line axis. So how we do that, simply mount a muffler clamp onto the tube
and then when we turn the tube on its center axis, we'll be able to see how far it's going just by reading that angle finder. Once we hit 80 we're ready for the next bend.
Mhm.
Us in Chris. Yes. Sure.
Now, since we're tying the cage into the original chassis, we want to add a slug at the joint to reinforce it in case of a roll over.
Now, we were able to draw the entire top half of the chassis on the computer and then render it to see what it look like.
Now, you can see the difference here. We have these two little windshield bars here to really close up this gap. So the front shouldn't rack all of these points triangulate off that one point into the main bar. Once we get it in here, we'll probably drop in a couple more tubes to add some triangulation, the center hoop. But all in all it might not be as fancy as what was there, but it'll certainly be safe.
Now. So far today, we've shown you some of the key things you need to maintain on a buggy that you've been wheeling for a while. We also showed you how to assess some damage and then repair it. If you bought a used buggy, that's been wheeled pretty hard. Like our poison spider,
there's more to it than that.
When you get a used buggy, you wanna change some stuff, make it your own, even if it's just a coat of paint. And that's one of the reasons why we completely replaced the top half of this chassis.
When we first built this truck over four years ago, there was only room for two seats in the front and that's because of the design of the back half of the cage. So by redesigning and pushing the roof up a little bit higher, we now have room to make the change we wanted to do since we first built it. And that is a back seat.
Now, we called the guys at Mastercraft and how to make this custom bench that fits right in the small part of the back of this chassis.
Now, the nice thing is, is it's a full suspension seat just like our Rubicon seats up front and they were able to match the fabric perfectly with the red Tweed inner as well as the dirt sports cover with the carbon fiber inlay in the end. Now, it is a little tight back here, but you got lots of head room, a little bar to hold on to all in all. It's gonna be a great place to sit to go four wheeling
uh for Chris in
right
now when we had the spider first on the trail, we had the optimum battery strapped to the tubing. Although that did fine, we picked up this battery box from Summit to help protect it a little bit more.
Now, we're not only going to repair the structural damage to the spider today, we're also gonna take care of some cosmetic stuff. We flop this truck basically rode off the steel hood. So we're gonna replace it with a brand new fiberglass one that we got from four Wheler supply.
Now, this is one of their rock crawler hoods that has these integrated high line fenders that if you bolt this onto a stock TJ, we'll give you 5.5 more inches of tire clearance. Now, this is not a stock TJ. But one thing that's been bugging us about this chassis is this fender bar right here has been contacting our tire when the suspension is in full stuff. So we're gonna be able to remove that and get more articulation. Now, I'm Sure. Some of you guys are wondering how we're gonna deal with all new tubing on the top half of this chassis when the bottom half is already painted. Well, it's gonna be a simple two tone with a little bit of truck bed coating.
Yeah,
cool.
That completely changed the look of that truck.
Yeah, it looks good.
Build on a budget Xtreme 4x4 projects that save you time and money.
Now when you're building on a budget, sometimes you have to get creative. We all use a lot of flat plate in our projects and every now and then you need a bent. Well, you got a couple options. You could throw it in a $10,000 scotchman or you could put it in a $5000 metal break or you can use a $2 piece of angle iron and do it by hand.
Now you can usually get away bending eight inch by hand. No problem if you're working in a really thick piece like 3/16 or quarter or a really wide piece, just go ahead and use your Oxyl
torch to heat up the edge before you bend it.
Just make sure you wear gloves.
Now, those of you with the keen, I will realize that our spider is rolling on a new pair of shoes and we did not replace the tires on this buggy because they're worn out on the trail.
Two of them got worn out really quick when the guys at muscle car made a comment about a rock crawler not being able to do a burnout.
Well, they were wrong.
Now, obviously, those types of shenanigans will wear a tire down pretty quick. So we went ahead and replaced all four on the spider with a set of brand new pit bull rockers. Now, these are 39.5 inch taller by 16.5 inches wide and they are a bias ply tire with an alternating tread block design with integrated sing cut into the larger blocks. Now, the sing actually opens up when the tire heats up and that helps with the clean out. Now, these side biters will really tear into the dirt when the tire is aired down, as well as this integrated rim guard will protect our wheel from trail obstacles when we're in the dirt. Now, that's one upgrade that we're doing to the spider. But one other thing that we always wanted to do was put a winch on this front plate. We just never seemed to find the time and now that we've been wheeling this thing more and more having a winch is definitely a good option.
So we went ahead and picked up a Warren nine point five T I thermometric winch. Now, this is a 9500 pound pulling winch. It has 100 and 25 ft of 516 aircraft cable. And the nice thing about the thermometric feature is right on the remote is a small led. If the motor begins to heat up, the led will light up and let you know that you need to let your winch take a little break on those long poles. Now, all we got to do is mount this to the front plate that's already there. Be ready to go wheeling
the winch plate on the front of the spider is built into the front stinger
and once four holes are drilled, the winch simply bolts in place.
Now, since we've already completely changed the look of our spider, we decided this would be a great time to go ahead and add some body panels. Now this will completely cover up the tubing on the side and change the look of the truck completely. I went ahead and made a rough cut on this 0 65 aluminum, held it up against the rig and then just traced it out. And once we have these finished cut, I'll go ahead and spray them with some bed liner to match the hood.
My new co-host,
welcome back to extreme
where today we showed you how basic preventative maintenance on your trail rig pays dividends especially here.
I mean, you want to spend a beautiful day like this behind the wheel, not on your back doing repairs,
which brings us to our spider.
We beat our rig to a pulp over the years.
So
it was time for some improvements.
First, a new set of shoes.
We chose the pit bull rocker. We stepped up to a 39 5 to give us a little bit more ground clearance. It's a full biased tire that really shines when it's off road,
we're gonna air down the tires because the side walls just aren't flexing, they're brand new. So we expect them to be a little bit stiff, but we're gonna air them down just a little bit more. Try to get them to
take some of that bounce out of the rock.
Oops. Too much.
We moved the fuel cell back and completely rebuilt the cage.
You can see the triangulation in the dom tubing
and how intersect points make this way stronger than the original design.
And with more headroom, we added a third seat.
Are you, Danny the plumber?
I'm not a plumber. I'm a cameraman.
You good dude. Here we go.
That other style. We,
well, Danny,
tell him how comfortable the ride was back there.
Oh, it was just like riding in a Cadillac
all in all a good day. Wheeling.
Gorgeous weather. One heck of a lunch. Happy crew is a fed crew
and proof that some simple routine maintenance can keep even our five year old buggy on the trail where it belongs
until we trash it again.
Just leave it here, we got others.
Uh
I'm cool with that.
