XOR - Xtreme Off-Road Builds
Want more content like this?
Join the PowerNation Email NewsletterEpisode Transcript
(Narrator)>> The
Ranger is back. To tend the Coyote under the
hood this bad boy is getting a custom crossmember. Plus Jeremy gives the hood
a 50 mile per hour paint job before this land rocket
can see some air on XOR.
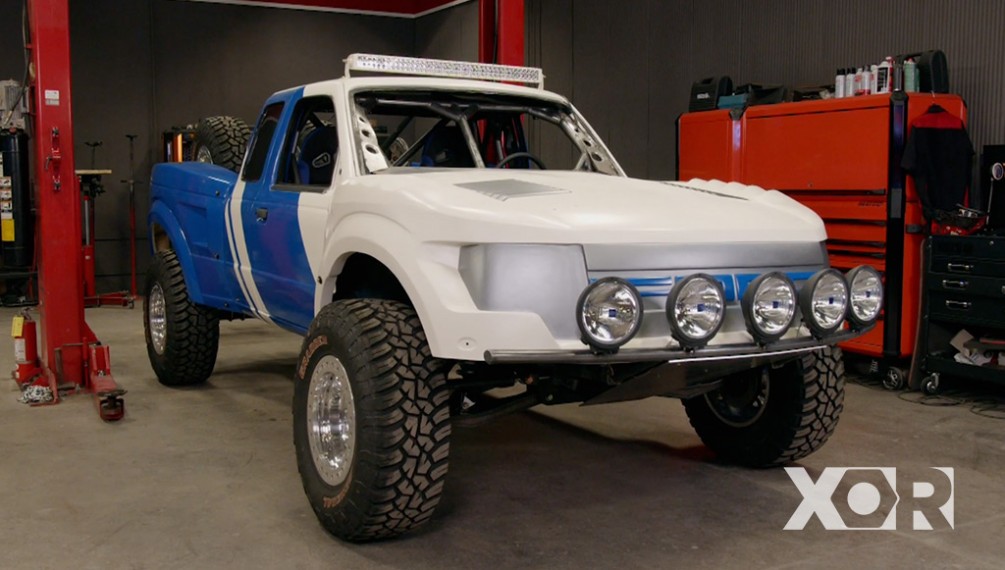
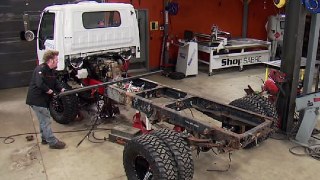
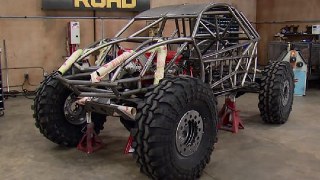
(Jeremy)>> Hey guys welcome to XOR. Well today we're gonna be working on a project that you guys haven't seen in quite some time. Our 2002 Prerunner Ranger is super close to taking it outside and going to have a little bit of fun with it, but before we get there we're gonna go ahead and paint the front clip, or the hood, to match the rest of the truck. We're also gonna be adding a custom light bar cause let's face it. When you guys are running in the dark you can never have enough light. We're also gonna be working on the back of the truck because the rear axle is just sitting in its position. So we're gonna get that in its final resting place, add the driveshaft, checking the travel, and adding a couple of crossmembers. But you guys are probably wondering, why in the world is the cab covered in plastic? Well we're gonna take the whole back of the truck apart, bring this thing outside, and blast the whole deal. That way we're one step closer to final assembly. To get the rear axle out from underneath the truck and still be able to move it around we'll use the fork lift.
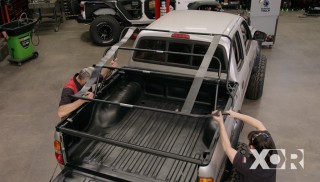
We'll use a lifting strap and slowly unload the suspension. Doing it this way relives the tension on the springs, and once we find the right spot I'll take the bolts out that hold the springs in, and then just raise the truck up and pull out the axle. Voila!
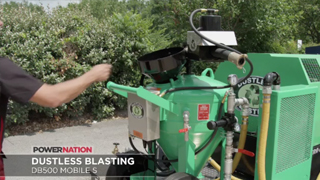
Dustless Blasting is a great tool when you need to remove rust, paint, and years of road grime off your chassis. It uses water with a rust inhibitor and media like sand or crushed glass to clean the surface. With the Ranger sitting on a set of jack stands we'll get right to cleaning our chassis. It strips the chassis down to bare metal and makes it easier for welding. Plus it's prepped, so we can just come back and coat it again later.
Well now I've got this thing all cleaned up. I'm gonna get it back into the shop, get it ready to put the axle back underneath.
With the rear axle back underneath the truck we need to make sure that it's centered from side to side. So what I'm gonna do is set the weight back down on the suspension, pull the wheels and tires off, and then take a measurement from the rotor to the chassis and make sure that it matches on both sides.
Okay so now what I'm gonna do is use a straight edge off of the face of the rotor and pull a measurement from the straight edge to the chassis. Now I know this reads 16 and seven-eighths, and I already measured the other side and that's 16 and three-sixteenths. So I need to bring the chassis over this way or slide the axle underneath to shorten up this measurement and lengthen the other side. So we'll just keep moving this left and right until both the measurements are exactly the same. U-bolts are loose, now let's shift everybody over.
Alright the other side measures 16 and a half and this side, another 16 and a half as well. Now we'll move on to setting the pinion angle. I'll just snug up the U-bolts for now to keep the axle in place.
To set our pinion angle we'll first need to install our custom driveshaft that we got from Tom Woods custom driveshafts. Once that's installed we'll go ahead and cycle the suspension to find the sweet spot of our pinion angle, and once we find that sweet spot we'll go ahead and tack the spring perches onto the axle.
The driveshaft was made to match our upgraded Four-R-70-W transmission and the 13-50 yoke on our rear axle.
(Narrator)>> Up next we talk pinion angle and fab up a custom crossmember that will clear our driveshaft on XOR.
(Jeremy)>> Hey guys welcome back. Now with the driveshaft installed and the rear axle centered underneath the truck it's time to move on to setting the pinion angle. Now I threw a whole bunch of weight in the back of the truck to simulate its true ride height. The next step is to crawl underneath here and start taking some measurements. Now there's two angles we need to note to set our pinion. The first one is the driveshaft and the second one is the actual pinion. Our driveshaft measures in at about 10 degrees and our pinion measures in at exactly zero. Now we're looking for about seven degrees, which is perfect for a leaf spring truck. So what we're gonna do is rotate our pinion up three degrees, subtract that from our 10 degrees, and that will give us our seven. I'll use the floor jack to pick up the front of the pinion to get to our three degrees. And then I'll just go and grab a ratchet and a socket and snug up the U-bolts. [ ratchet clicking] [ welder crackling ]
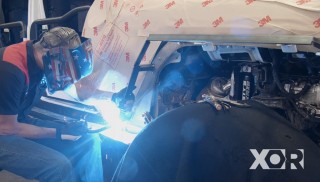
(Jeremy)>> With our axle in its final resting position I'll tack on the spring perches. [ welder crackling ]
(Jeremy)>> With the rear axle welded into place and the driveshaft installed I now know the up and down movement of the driveshaft. Well on the Ranger there was a stock crossmember that I had to cut out of the way because it was going to be in the way. So what I've got to do now is add another crossmember in, and we're gonna come up here towards the back of the transmission and just weld in a whole new one. Now I'm also going to be adding a driveshaft loop because if for some reason this driveshaft falls out I definitely don't want it to be acting like a catapult. So we're gonna take some measurements, grab some tubing, and we'll get started on our crossmember. Let's make our first cut at 32 and seven-eighths. We're gonna make our crossmember out of inch and a half d-o-m tubing. [ metal clanging ]
(Jeremy)>> Now the hardest thing to do when you're underneath your rig is to make sure that your bar is centered. So what I did was pull a mark off of the chassis at 14 inches. That way this thing should be straight. [ welder crackling ]
(Jeremy)>> We talked about putting a driveshaft loop in the Ranger and I already went ahead and made the bend on our Edwards bender, and we're just gonna end up putting this on the crossmember that's in the truck already, but here's the kicker. I can't put this in the notcher because the radius is too close to the end of the piece of pipe. So what I'm gonna do is show you guys how to notch this tubing by using just a cutoff tool. I'll grab my marker and trace a "V" on the end of the tube, flip it over, and do the same thing on the other side. And then I'll just clamp it down to the table. I'll grab a cutoff wheel and make sure to keep it straight up and down following the marks as a guide. [ saw buzzing ]
(Jeremy)>> Then I'll just grab the grinder and shape it to fit our tubing. Okay let's see how this thing fits.
Tight fit, absolutely perfect.
All there's left to do is fire up the welder and I'll make this a permanent part of the Ranger. [ welder crackling ]
(Jeremy)>> In preparations to get the Ranger out on the trails we had to remove all of the glass. Well now it's time to start filling all of those holes back in here in the back. We're gonna grab some tracing paper, set it over the opening, and try to get our final size and our final shape. From there we're gonna take the paper off and we'll go set it on the bench on a piece of Lexan, and we'll cut the Lexan out but we won't re-install it back in the truck because we're gonna use some spray paint and actually coat the back side to make it look like we tinted the glass. And all that work starts with taking some base measurements. That's about 14 wide and about 17 tall. I'm using welding paper because it's thick and it will hold its shape. So 14, and I'll just use my tape as a straight edge.
To do a rough cut on this piece I'm using a nice sharp razor blade.
Now the best part about using this welding paper is that it's got adhesive on the back side that's sticky. So all I've got to do is get it up in here, push around the corners, get my outline, and then I can cut it out and I don't have to use any masking tape.
Now all I've got to do is transfer this onto my piece of Lexan. I cut this out on the band saw and make sure to stay to the inside that way my piece will end up being the same size.
[ saw buzzing ]
(Jeremy)>> Now I'll add some spray paint for some tint. I'm holding the spray paint can about two feet away and just letting the paint fall on the Lexan. That way it gives it just a little tint. With some pre-drilled holes I'm using self-tapping screws to hold the Lexan in place.
Well that actually looks pretty good, and with the spray paint on the back side we gave it just a little bit of tint. Now all I've got to do is pull it back off and get rid of that green tape and this side will be done.
(Narrator)>> Up next we brighten up your day with a 40 inch light bar. Plus a quick paint job next on XOR.
(Jeremy)>> Hey guys, welcome back to the show. To go along with the mess of lights we have on our front stinger we're gonna be adding a light bar. We got this one from Mocha Performance and they sent us a custom one that matches the width of our Ranger, and they even sent us a white one to match the color. Now we can't just go ahead and mount this because our roof line has a bunch of curvature and the brackets, well they're a true 90. So I'm gonna end up take these off, putting them in the vice, and we're just gonna tweak on them just a little bit. From there we'll bring everybody back up top. We'll mark and drill some holes. The very last thing we're gonna do is wire it up and then finally we're gonna light this candle. To keep our brackets from getting all scratched up we're gonna add a little bit of tape.
Then we'll drop them into a vice and use a little bit of thumb power to bend the bracket to match the roof line. This may take a couple of tries but the only true way to test your fit is to put the brackets back on and set the light assembly on the roof.
So that fits perfectly. Now what we're gonna do is make sure that we're centered from left to right and front to back. So I'll pull a measurement from the trim here on the B-pillar. That's 19 exactly. Now I'll just make sure that matches on the other side.
Gotta be about 19, shift him forward to the center. We need to make sure that this one stayed at 19, and it did. Now I'll just mark it. For simplicity sake of drilling we're using Matco Tools' hyper step drill bits. [ drill spinning ]
(Jeremy)>> Now here's a little trick. My fingers can't get to the bolts because the roll cage is in the way. So I'm gonna use a magnet, stack the nut and the washer on it, I should be able to fish it up in here.
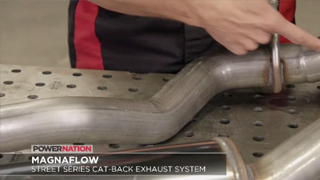
With a quick click of the wiring harness it's as easy as flipping a switch. Man that shined some light on the subject, and it's definitely gonna keep us on course. We all want to hear that rumble coming out from underneath our rigs, and Magnaflow has a complete cat back system that's perfect for our Jeep JL. It delivers maximum performance and has that deep aggressive sound that we're all looking for. It's made of mandrel bent tubing for fast efficient air flow, and their muffler has an all stainless steel construction. They also have their black series mufflers for you guys that are looking for that not so shiny look. Now if you're interested in putting exhaust under your truck or your Jeep why don't you guys take a look at Magnaflow.
It's time to make our Ranger hood match the rest of the truck. We're gonna give this thing a 50 mile an hour paint job, which means in no way, shape, or form is this thing gonna be perfection, but it's gonna look pretty good when we're out thrashing it on the trails. We're gonna be using a couple of different colors. For the headlights we're gonna be using silver. For the Ford letters we're gonna be using blue. Then we'll come back, mask the whole thing off, and paint the hood white, and we're also gonna be doing this in two different ways. For the silver and the white we're gonna be using a spray gun, but for the blue we're just gonna use spray paint. We'll use some silver paint we had laying around and mix it one to one with some reducer, and for our first coat, well we're not looking for complete coverage.
We'll follow that up with a second coat, and then our third coat will give us the silver color we're looking for. You know what I've got a little bit left. So I'll go ahead and spray the louvres. [ spray gun hissing ]
(Narrator)>> Coming up we add the blue and then the white, and a few tips and tricks to make sure they don't mix next on XOR.
(Jeremy)>> Hey guys welcome back to the booth. We already went ahead and sprayed our base silver down and we're getting ready to move on to the next color. I went ahead and masked off some of the letters but we still have the "R" to finish and the other headlight. So we'll go ahead and finish those off and then we'll come back and spray the FORD with the blue. From there we'll go ahead and mask the whole front of this truck off, prep and clean the hood, and then we'll spray whole thing white.
Here's a little tip for you guys. To make our tape less sticky go ahead and put it on my jeans. Pick up a little bit of lint off of that and then it won't stick to the panel so much. For the detailed areas you can use a razor blade or a pair of scissors to cut your tape, and then use smaller pieces for the final shape. Even though this is a 50 mile an hour paint job we still want nice crisp lines. When doing a project like this it's always good to have a bunch of different things. You guys are gonna need some tape, small and large, and it's always a good idea to have some masking paper. That way you can cover the big areas with paper and then use your tape to fill in the rest. We'll finish off the masking paper with some masking tape.
One tiny little piece to finish it off. With the areas masked off where we don't want paint we'll spray our blue color and make these Ford letters pop. In preparations to spray our white I'll grab a tack cloth and clean off the overspray. We'll add one more piece of paper to protect our blue Ford. Then we'll start mixing our color. We'll add eight ounces of white...
...reduce it two to one, and add some hardener. Then it's time to hit the booth. I want to keep the gun six to eight inches away from the panel, and keep it perpendicular to the surface. My gun is setup with a large spray pattern and for good coverage I'll use a 50 percent overlap for each pass.
We'll let our paint flash and then it's time for our second coat.
[ paint gun hissing ]
(Jeremy)>> We'll let that cure overnight, and the next morning we'll peel off our masking.
Thanks for helping me bring the hood down LT. It wasn't heavy but an extra set of hands is always helpful.
(LT)>> Well heck yeah, I'm glad to see how this truck is coming together. I really dig the Raptor front end. You're just about done aren't you?
(Jeremy)>> I've got a couple more things to do to actually make it look like a truck again, and you know with the help that you just gave me I've got an extra seat in the JL. Any interest in coming along on our XOR Adventure Ride?
(LT)>> Well you know what it's been a long time since I've ridden in a Jeep. I'd love to get out there. I only have one condition though. If it breaks I don't want to fix it.
(Jeremy)>> Alright that's fine, that'll work.
(LT)>> Now if you guys have any questions about any of the products that we use on the show be sure to check us out on the web. Thanks for watching Truck Tech and we'll catch you guys next time.
(Jeremy)>> No, you're not in Truck Tech. Don't forget where you are. You're in XOR. So if you guys have any interest in all of the parts we put on the Ranger today why don't you go to Powernation TV dot com and we'll see you next time.
Show Full Transcript
(Jeremy)>> Hey guys welcome to XOR. Well today we're gonna be working on a project that you guys haven't seen in quite some time. Our 2002 Prerunner Ranger is super close to taking it outside and going to have a little bit of fun with it, but before we get there we're gonna go ahead and paint the front clip, or the hood, to match the rest of the truck. We're also gonna be adding a custom light bar cause let's face it. When you guys are running in the dark you can never have enough light. We're also gonna be working on the back of the truck because the rear axle is just sitting in its position. So we're gonna get that in its final resting place, add the driveshaft, checking the travel, and adding a couple of crossmembers. But you guys are probably wondering, why in the world is the cab covered in plastic? Well we're gonna take the whole back of the truck apart, bring this thing outside, and blast the whole deal. That way we're one step closer to final assembly. To get the rear axle out from underneath the truck and still be able to move it around we'll use the fork lift.
We'll use a lifting strap and slowly unload the suspension. Doing it this way relives the tension on the springs, and once we find the right spot I'll take the bolts out that hold the springs in, and then just raise the truck up and pull out the axle. Voila!
Dustless Blasting is a great tool when you need to remove rust, paint, and years of road grime off your chassis. It uses water with a rust inhibitor and media like sand or crushed glass to clean the surface. With the Ranger sitting on a set of jack stands we'll get right to cleaning our chassis. It strips the chassis down to bare metal and makes it easier for welding. Plus it's prepped, so we can just come back and coat it again later.
Well now I've got this thing all cleaned up. I'm gonna get it back into the shop, get it ready to put the axle back underneath.
With the rear axle back underneath the truck we need to make sure that it's centered from side to side. So what I'm gonna do is set the weight back down on the suspension, pull the wheels and tires off, and then take a measurement from the rotor to the chassis and make sure that it matches on both sides.
Okay so now what I'm gonna do is use a straight edge off of the face of the rotor and pull a measurement from the straight edge to the chassis. Now I know this reads 16 and seven-eighths, and I already measured the other side and that's 16 and three-sixteenths. So I need to bring the chassis over this way or slide the axle underneath to shorten up this measurement and lengthen the other side. So we'll just keep moving this left and right until both the measurements are exactly the same. U-bolts are loose, now let's shift everybody over.
Alright the other side measures 16 and a half and this side, another 16 and a half as well. Now we'll move on to setting the pinion angle. I'll just snug up the U-bolts for now to keep the axle in place.
To set our pinion angle we'll first need to install our custom driveshaft that we got from Tom Woods custom driveshafts. Once that's installed we'll go ahead and cycle the suspension to find the sweet spot of our pinion angle, and once we find that sweet spot we'll go ahead and tack the spring perches onto the axle.
The driveshaft was made to match our upgraded Four-R-70-W transmission and the 13-50 yoke on our rear axle.
(Narrator)>> Up next we talk pinion angle and fab up a custom crossmember that will clear our driveshaft on XOR.
(Jeremy)>> Hey guys welcome back. Now with the driveshaft installed and the rear axle centered underneath the truck it's time to move on to setting the pinion angle. Now I threw a whole bunch of weight in the back of the truck to simulate its true ride height. The next step is to crawl underneath here and start taking some measurements. Now there's two angles we need to note to set our pinion. The first one is the driveshaft and the second one is the actual pinion. Our driveshaft measures in at about 10 degrees and our pinion measures in at exactly zero. Now we're looking for about seven degrees, which is perfect for a leaf spring truck. So what we're gonna do is rotate our pinion up three degrees, subtract that from our 10 degrees, and that will give us our seven. I'll use the floor jack to pick up the front of the pinion to get to our three degrees. And then I'll just go and grab a ratchet and a socket and snug up the U-bolts. [ ratchet clicking] [ welder crackling ]
(Jeremy)>> With our axle in its final resting position I'll tack on the spring perches. [ welder crackling ]
(Jeremy)>> With the rear axle welded into place and the driveshaft installed I now know the up and down movement of the driveshaft. Well on the Ranger there was a stock crossmember that I had to cut out of the way because it was going to be in the way. So what I've got to do now is add another crossmember in, and we're gonna come up here towards the back of the transmission and just weld in a whole new one. Now I'm also going to be adding a driveshaft loop because if for some reason this driveshaft falls out I definitely don't want it to be acting like a catapult. So we're gonna take some measurements, grab some tubing, and we'll get started on our crossmember. Let's make our first cut at 32 and seven-eighths. We're gonna make our crossmember out of inch and a half d-o-m tubing. [ metal clanging ]
(Jeremy)>> Now the hardest thing to do when you're underneath your rig is to make sure that your bar is centered. So what I did was pull a mark off of the chassis at 14 inches. That way this thing should be straight. [ welder crackling ]
(Jeremy)>> We talked about putting a driveshaft loop in the Ranger and I already went ahead and made the bend on our Edwards bender, and we're just gonna end up putting this on the crossmember that's in the truck already, but here's the kicker. I can't put this in the notcher because the radius is too close to the end of the piece of pipe. So what I'm gonna do is show you guys how to notch this tubing by using just a cutoff tool. I'll grab my marker and trace a "V" on the end of the tube, flip it over, and do the same thing on the other side. And then I'll just clamp it down to the table. I'll grab a cutoff wheel and make sure to keep it straight up and down following the marks as a guide. [ saw buzzing ]
(Jeremy)>> Then I'll just grab the grinder and shape it to fit our tubing. Okay let's see how this thing fits.
Tight fit, absolutely perfect.
All there's left to do is fire up the welder and I'll make this a permanent part of the Ranger. [ welder crackling ]
(Jeremy)>> In preparations to get the Ranger out on the trails we had to remove all of the glass. Well now it's time to start filling all of those holes back in here in the back. We're gonna grab some tracing paper, set it over the opening, and try to get our final size and our final shape. From there we're gonna take the paper off and we'll go set it on the bench on a piece of Lexan, and we'll cut the Lexan out but we won't re-install it back in the truck because we're gonna use some spray paint and actually coat the back side to make it look like we tinted the glass. And all that work starts with taking some base measurements. That's about 14 wide and about 17 tall. I'm using welding paper because it's thick and it will hold its shape. So 14, and I'll just use my tape as a straight edge.
To do a rough cut on this piece I'm using a nice sharp razor blade.
Now the best part about using this welding paper is that it's got adhesive on the back side that's sticky. So all I've got to do is get it up in here, push around the corners, get my outline, and then I can cut it out and I don't have to use any masking tape.
Now all I've got to do is transfer this onto my piece of Lexan. I cut this out on the band saw and make sure to stay to the inside that way my piece will end up being the same size.
[ saw buzzing ]
(Jeremy)>> Now I'll add some spray paint for some tint. I'm holding the spray paint can about two feet away and just letting the paint fall on the Lexan. That way it gives it just a little tint. With some pre-drilled holes I'm using self-tapping screws to hold the Lexan in place.
Well that actually looks pretty good, and with the spray paint on the back side we gave it just a little bit of tint. Now all I've got to do is pull it back off and get rid of that green tape and this side will be done.
(Narrator)>> Up next we brighten up your day with a 40 inch light bar. Plus a quick paint job next on XOR.
(Jeremy)>> Hey guys, welcome back to the show. To go along with the mess of lights we have on our front stinger we're gonna be adding a light bar. We got this one from Mocha Performance and they sent us a custom one that matches the width of our Ranger, and they even sent us a white one to match the color. Now we can't just go ahead and mount this because our roof line has a bunch of curvature and the brackets, well they're a true 90. So I'm gonna end up take these off, putting them in the vice, and we're just gonna tweak on them just a little bit. From there we'll bring everybody back up top. We'll mark and drill some holes. The very last thing we're gonna do is wire it up and then finally we're gonna light this candle. To keep our brackets from getting all scratched up we're gonna add a little bit of tape.
Then we'll drop them into a vice and use a little bit of thumb power to bend the bracket to match the roof line. This may take a couple of tries but the only true way to test your fit is to put the brackets back on and set the light assembly on the roof.
So that fits perfectly. Now what we're gonna do is make sure that we're centered from left to right and front to back. So I'll pull a measurement from the trim here on the B-pillar. That's 19 exactly. Now I'll just make sure that matches on the other side.
Gotta be about 19, shift him forward to the center. We need to make sure that this one stayed at 19, and it did. Now I'll just mark it. For simplicity sake of drilling we're using Matco Tools' hyper step drill bits. [ drill spinning ]
(Jeremy)>> Now here's a little trick. My fingers can't get to the bolts because the roll cage is in the way. So I'm gonna use a magnet, stack the nut and the washer on it, I should be able to fish it up in here.
With a quick click of the wiring harness it's as easy as flipping a switch. Man that shined some light on the subject, and it's definitely gonna keep us on course. We all want to hear that rumble coming out from underneath our rigs, and Magnaflow has a complete cat back system that's perfect for our Jeep JL. It delivers maximum performance and has that deep aggressive sound that we're all looking for. It's made of mandrel bent tubing for fast efficient air flow, and their muffler has an all stainless steel construction. They also have their black series mufflers for you guys that are looking for that not so shiny look. Now if you're interested in putting exhaust under your truck or your Jeep why don't you guys take a look at Magnaflow.
It's time to make our Ranger hood match the rest of the truck. We're gonna give this thing a 50 mile an hour paint job, which means in no way, shape, or form is this thing gonna be perfection, but it's gonna look pretty good when we're out thrashing it on the trails. We're gonna be using a couple of different colors. For the headlights we're gonna be using silver. For the Ford letters we're gonna be using blue. Then we'll come back, mask the whole thing off, and paint the hood white, and we're also gonna be doing this in two different ways. For the silver and the white we're gonna be using a spray gun, but for the blue we're just gonna use spray paint. We'll use some silver paint we had laying around and mix it one to one with some reducer, and for our first coat, well we're not looking for complete coverage.
We'll follow that up with a second coat, and then our third coat will give us the silver color we're looking for. You know what I've got a little bit left. So I'll go ahead and spray the louvres. [ spray gun hissing ]
(Narrator)>> Coming up we add the blue and then the white, and a few tips and tricks to make sure they don't mix next on XOR.
(Jeremy)>> Hey guys welcome back to the booth. We already went ahead and sprayed our base silver down and we're getting ready to move on to the next color. I went ahead and masked off some of the letters but we still have the "R" to finish and the other headlight. So we'll go ahead and finish those off and then we'll come back and spray the FORD with the blue. From there we'll go ahead and mask the whole front of this truck off, prep and clean the hood, and then we'll spray whole thing white.
Here's a little tip for you guys. To make our tape less sticky go ahead and put it on my jeans. Pick up a little bit of lint off of that and then it won't stick to the panel so much. For the detailed areas you can use a razor blade or a pair of scissors to cut your tape, and then use smaller pieces for the final shape. Even though this is a 50 mile an hour paint job we still want nice crisp lines. When doing a project like this it's always good to have a bunch of different things. You guys are gonna need some tape, small and large, and it's always a good idea to have some masking paper. That way you can cover the big areas with paper and then use your tape to fill in the rest. We'll finish off the masking paper with some masking tape.
One tiny little piece to finish it off. With the areas masked off where we don't want paint we'll spray our blue color and make these Ford letters pop. In preparations to spray our white I'll grab a tack cloth and clean off the overspray. We'll add one more piece of paper to protect our blue Ford. Then we'll start mixing our color. We'll add eight ounces of white...
...reduce it two to one, and add some hardener. Then it's time to hit the booth. I want to keep the gun six to eight inches away from the panel, and keep it perpendicular to the surface. My gun is setup with a large spray pattern and for good coverage I'll use a 50 percent overlap for each pass.
We'll let our paint flash and then it's time for our second coat.
[ paint gun hissing ]
(Jeremy)>> We'll let that cure overnight, and the next morning we'll peel off our masking.
Thanks for helping me bring the hood down LT. It wasn't heavy but an extra set of hands is always helpful.
(LT)>> Well heck yeah, I'm glad to see how this truck is coming together. I really dig the Raptor front end. You're just about done aren't you?
(Jeremy)>> I've got a couple more things to do to actually make it look like a truck again, and you know with the help that you just gave me I've got an extra seat in the JL. Any interest in coming along on our XOR Adventure Ride?
(LT)>> Well you know what it's been a long time since I've ridden in a Jeep. I'd love to get out there. I only have one condition though. If it breaks I don't want to fix it.
(Jeremy)>> Alright that's fine, that'll work.
(LT)>> Now if you guys have any questions about any of the products that we use on the show be sure to check us out on the web. Thanks for watching Truck Tech and we'll catch you guys next time.
(Jeremy)>> No, you're not in Truck Tech. Don't forget where you are. You're in XOR. So if you guys have any interest in all of the parts we put on the Ranger today why don't you go to Powernation TV dot com and we'll see you next time.
