XOR - Xtreme Off-Road Builds
Want more content like this?
Join the PowerNation Email NewsletterParts Used In This Episode
All-Pro Off-Road
Basic Link and Bracket Kit for 95-04 Tacoma
Edwards Ironworkers
55 Ton Ironworker
Matco Tools
MATCO Tools are the Official Tool Supplier to XOR
The Industrial Depot
Tools, Hardware, and Shop Supplies
Episode Transcript
(Narrator)>> Coming up on XOR this axle gets a new purpose in life. Plus our Tacoma gets new gears all around, and Jeremy shows us how to make a handy shop tool. You'll want to see how it's used right now on XOR. ♪ ♪
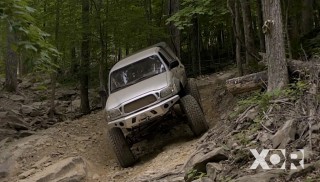
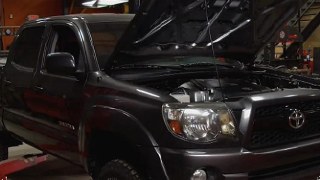
(Jeremy)>> Hey guys, welcome to XOR. Well today's a transition day here in the shop. We're stepping away from our Pre-runner Ranger and moving on to our Toyota Tacoma. Now these things were amazing from the factory and with their small size they make them great for the Jeep and side by side trails, and that's exactly where we're gonna take this one.
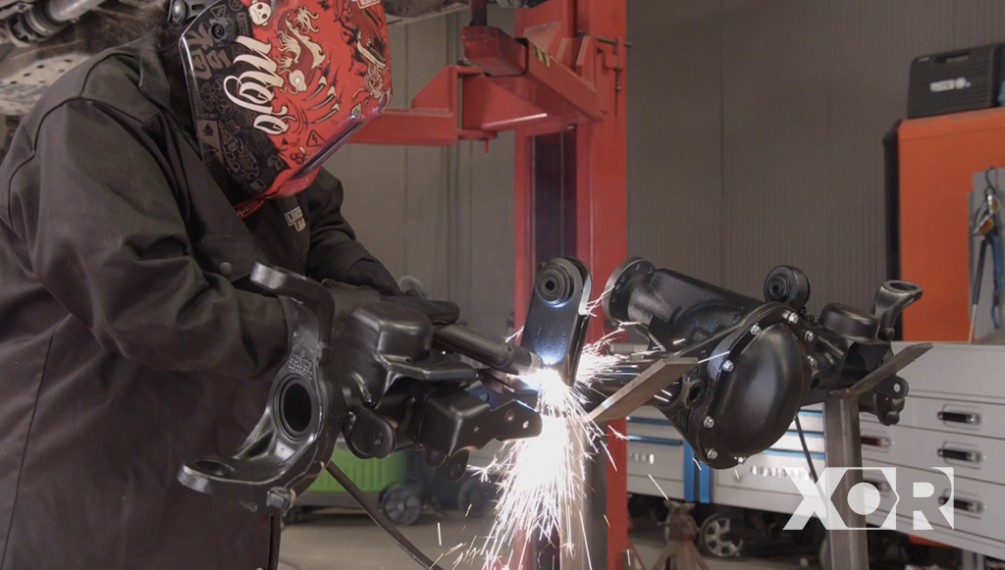
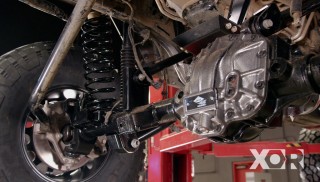
(Eliza)>> Because we wanted to keep close with the original track width of the Tacoma we have decided to go with a Dana 44. This allows us to continue on narrow trails but gives us enough strength up front to push 37's. We use Rock Auto for all of our Driveway Rescue parts because they have everything we need to get the job done. One thing you can order on Rock Auto are axle assemblies, and I think that they have just the thing that we need. This axle is a perfect fit for our Tacoma. It has close to the same track width and has a driver's side drop that we need to run the Tacoma's o-e drivetrain. Now you're wondering why a JK 44 rather than an old Wagoneer 44? Well it's getting harder to find Wagoneers, and with the amount of JK's on the road it's easier and more cost effective. Now this is the 44 that we just picked up. Originally it was intended for a JK Rubicon, but we're gonna get it fitted up with our Tacoma. Now it's time to get this baby cleaned up. I'm using the plasma cutter to make quick work of these brackets. I'm being extra careful not to blast through the housing and not to torch any of the sensors on the pumpkin. Then I'm using a flap disc on our grinder to create a good, level foundation for our new three link bracket.
(Jeremy)>> Now with Eliza working on the front end I'm gonna go ahead and get started here on the back, but we're not replacing this whole thing. Just gonna replace some of the meat and potatoes that are found inside. Plus I'm gonna be doing some suspension work. So instead of working on this underneath the truck I'm just gonna pull everything down. The previous owner of this truck had made some upgrades to the rear suspension. And so there's some parts and pieces that we're gonna have to make disappear for now, like the aftermarket bump stops and the limit straps. And since our Toyota comes with its own E-locker we've got to disconnect the wires for that. Best thing about having a ton of different tools in the shop is that you can use them for a lot of different purposes. Kinda like the transmission jack. Now we use the trans jack to put a little bit of pressure on the differential so I can get the U-bolts free. Right there. With the axle supported we'll remove the U-bolt... ♪ ♪ ...and the spring plates that hold the axle in place. Getting rid of the springs is the last of the old suspension on our Tacoma. ♪ ♪ From here it's a whole bunch of new parts to get this thing sitting pretty. Somebody already did a leaf spring swap to this truck. These are 64 inch Chevy leaf springs that we picked up from Summit Racing dot com, and luckily the brackets are already in place. [ metal clanging ]
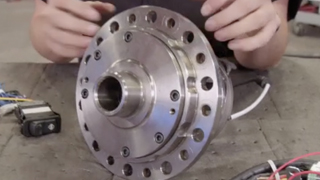
(Eliza)>> If you have an older Dana 44 you have a couple of options when it comes to locking in power to both of your wheels. One of those options is Eaton's E-locker. This is an electromagnetic locker that engages a mechanism to lock both of your axle shafts so that there is equal distribution of horsepower and torque, which means more fun climbing obstacles and less time sitting in the bypass trail. This locker comes in a variety of spline counts and can be used in both front and rear axle assemblies. Now this came in a cool kit that provides everything that you need for the install. Now we got lucky that our axle came in locked from the factory, and all I've got to do is swap out gear sets. We'll start by removing the 10 bolts on the cover, break the seal, and pop the cover off. I'll quickly mark the carrier caps and bolts, unscrew them, and remove them. There we go. Since the 44 is equipped with an electronic locker we'll unclip the harness. Then remove the carrier. Then we'll remove the axle locker sensor, followed by unbolting the yoke and pinion, and I'll tap the pinion free. Next I'm bolting a new ring gear to the carrier, and I'll throw in a matching pinion. Then I'll check the backlash. So we're about 15 thousandths. We're off just a little bit. That means that the carrier is too far away from the pinion. The only way to correct that is to subtract shims from this side and add them to this side so we can move the full carrier over. Now that I'm within seven thousandths of an inch for backlash I can check my pattern. I'll apply yellow paint to a section of the ring gear and give it a full rotation. ♪ ♪ According to this our pinion is too close. Okay so we took a little too much off of this side. So we're gonna go ahead and add some back and subtract some here to get us right where we need to be. These are the ones I need. Okay let's check this one more time. Alright perfect! Now that I know what pinion and carrier shims I need, all that's left to do is yank it out and get it ready for final assembly.
(Narrator)>> Up next, when things get awkward just make a tool. We'll show you how. Stay tuned on XOR.
(Jeremy)>> Man this thing's gonna work great under our Tacoma.
(Eliza)>> It is. With the front axle re-geared it is time to focus on the rear axle, and while the internals may be the same the way that they disassemble and reassemble are completely different.
(Jeremy)>> That's right. Our Dana 44 is a standard style axle or an integral style axle, and that means that the carrier is a major piece of the assembly versus our Toyota Tacoma axle. This is kind of a drop out style axle, and it's got one really unique feature. To work on everything inside you take the whole center section completely out. I'll start by removing the caliper bracket, rotor. Then remove the axle shaft. Next I'll remove the stock E-locker motor. With a little bit of elbow grease it's removed. Now I've just got to flip this lever over so I can get the third member out. Then I'll remove the nuts that hold the carrier onto the housing, and using some pry bars to get the carrier free from the housing the whole thing comes out in one heavy piece. Now there's definitely an upside to being able to remove this entire center section. It makes it way easier to set it up and to work on the internals. Plus you can move it around the bench if you want to. And I'll show you guys a cool little way to make a tool out of a pattern that I already made to make a stand that'll hold it either in the bench vice or on a rolling engine stand, but first I've got to trace some holes. Tracing the pattern onto a piece of quarter inch steel, I'll use a punch to transfer the mounting holes. Using our trusted Lincoln plasma torch I'll cut out the inside first. Then I'll move on to the outside. After hitting the edges with a grinder and a flap wheel to get rid of the burrs I'll head over to the Edwards Iron Working to punch out the mounting hole. I'll cut a piece of pipe that will fit in our engine stand. All that's left is to weld the two pieces together and bolt it on. [ welder crackling ]
(Jeremy)>> Now with these two pieces welded together all I've got to do is put it on our center section and then put the whole thing in our rolling engine stand. So the next step is to simply just bolt this up. ♪ ♪ With it on the stand we'll get right to work. Removing the adjusting nut retainer... [ drill spinning ] ...the bearing caps, and the whole differential. I'll remove the pinion nut and tap off the pinion flange itself. With some hefty love taps the pinion is removed, along with the pinion seal, and one of the two pinion bearings. All we're doing in the rear is a gear change, but I'll replace all the bearings while I'm at it. So to prep I'll remove all the bolts from the ring gear and slowly work it off. Woo! Then it's a trip over to the press to change out the bearings. And then move on to removing the bearings from the pinion. Now we're not reusing the pinion but I do need to re-measure the shim that's under the bearing, and that's about 75 thousandths. Using the same shim I'll press the new bearing on the new pinion. Then I'll press a new bearing on the carrier. So to do that we took the inside of the old bearing and ground it down so it fits loosely on the differential. So we can use this piece to press on the new bearing. ♪ ♪ I'll flip the carrier over and press on the other bearing. Now for the ring gear. I'll torque it down to 71 foot pounds in a cross pattern. Then I'll need to muscle in the two races for the pinion. With the last race going in we can start reassembly. We'll begin with the pinion. Okay so now we'll slide on a mock up bearing, oil slinger, and the pinion flange, and pinion nut. Then we'll just tighten this down until it's just barely snug. ♪ ♪ I'll set the whole assembly back in, and add the bearing caps, and just snug them up slightly. Then I'll adjust the ring gear towards the pinion and check it with a dial indicator. That's about five thousandths, which is too tight. So what I'm gonna do is loosen the nut on this side, which is gonna drive the gear back this direction. Pull it away from the pinion until I get my exact measurement, and then I'll come over and tighten this side up and we should be perfect. With a slight turn, then we'll just recheck it and there we go. Pretty close to eight. Well there you have it. Now I've shown you the major differences between this Toyota rear axle and our Dana 44 front axle. Now all I have to do is paint the teeth and check my pattern just like Eliza did, and the next time you guys see this it'll be all assembled and back in the truck.
(Narrator)>> Got a weak frame? We'll show you how to stiffen up that chassis so it can take the abuse coming up on XOR.
(Eliza)>> Just gotta clean all this up so that we can get those frame plates installed.
(Jeremy)>> Yeah I've got to do the same thing on this side. Well both of our axles are buttoned up and the rear is sitting pretty underneath our Tacoma, and that means it's time to move on to the three link setup.
(Eliza)>> That's right, all of our hard work is about to payoff. We just got this kit in from All Pro Suspension and it comes with all the brackets necessary to complete our solid front axle swap. It even comes with frame plates to make sure that our frame doesn't buckle or crack as our suspension articulates.
(Jeremy)>> That's right. We've got a lot of welding to do, but first we better go back and prep for those frame plates. [ metal grinding ]
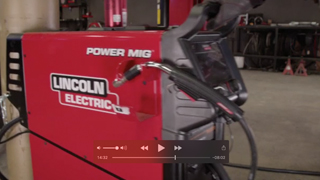
(Jeremy)>> To kick off the build we'll need to get the frame rails nice and clean. So a four inch grinder and an 80 grit flap wheel makes short work of that. We'll hold the plates on with some of my favorite shop tools to get it aligned just right. To make our plates a permanent part of our Tacoma we'll grab our Lincoln Electric Power Mig 260. After a flick of the on switch we'll use their Ready, Set, Weld feature to get started. Just tell the machine your process, wire size, gas, and material thickness. ♪ ♪ Then just pull the trigger. Once you're welding you can make those fine tune adjustments, like cranking up your wire speed when you're welding vertically, or your amperage when you want just a little more penetration. And with its built in memory if you take a break from the project your settings will be stored so you can get right back to work. After we've laid down some beads we'll move on to the mounts that are gonna keep this thing running in a street line. [ welder crackling ]
(Jeremy)>> Ooh, that's hot!
(Eliza)>> We're changing our steering system from a rack and pinion over to a gear box and parallelogram setup, and we're doing that because we needed a beefier setup to accommodate for heavier tires as well as longer suspension travel for our solid axle. And it is easier to visually inspect and repair out on the trail. Now all we've got to do is get this guy up there. All Pro made this easy for us. The gearbox plates already come with the geometry figured and pre-drilled holes for our install. It's as simple as bolting it in. [ drill spinning ]
(Eliza)>> And now the Tacoma is one step closer to being trail ready.
(Narrator)>> Next we'll make room for some much needed linkage under our Tacoma's chassis, coming up on XOR!
(Jeremy)>> We've got our frame plates burned in, and we ditched our rack and pinion steering for a gearbox setup.
(Eliza)>> One of the benefits of having a rack and pinion is that there is hardly any stress on the frame, but we've moved over to a gearbox. So we're gonna go ahead and add this crossmember so that we don't have any buckle or flex in our frame. Our crossmember is tacked in and I will get it finalized once we know all of our modifications are good to go.
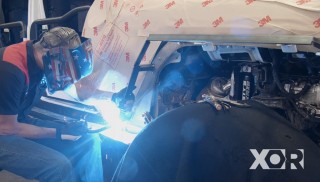
(Jeremy)>> With the front buttoned up and the crossmember in it's time to move towards the back of the truck, and that means getting rid of this crossmember because it's time to move on to the meat and potatoes of this build, and that's the big link brackets. With the transmission and transfer case supported I'll remove the bolts that hold it all in, and they may be a little tough to get out. ♪ ♪ With the help of a pry bar. That's really in there. That hasn't been out in a while. We'll crank up the acetylene torch and start by cutting the mount off the passenger side. Be sure not to cut into the frame while you're doing this, but if you do just make sure you weld that right back up. We were super careful cutting this piece off, and it came off nice and clean. With a little help from camera guy Rob I'll grab the grinder and get to grinding cause we'll need the chassis nice and flat for the new bracket. And with that all done all I've got to do is pull a measurement. ♪ ♪ We'll hold the brackets up on our newly marked line and just tack it into place for right now. [ welder crackling ]
(Jeremy)>> Then I'll move over to the other side. [ welder crackling ]
(Eliza)>> Now that Jeremy's got the brackets mocked up on the truck I'm assembling the lower control arms. Each arm comes with a left and right turn Johnny joint, and that's so that we can adjust for the best off road handling. Now let's get this guy on the truck. These slip in fairly easy, and they just bolt right in. Where leaving the links loose because we will have some adjustments and cycling going on for a proper fitment. Also make sure that you have the correct hardware on your links. You want a very snug fit to prevent any play or ovaling of the bolt holes and your brackets. ♪ ♪
(Jeremy)>> Alright guys, now you've spent a lot of time and money building up your project and you're getting really close to hitting the trails, but with all of your excitement don't overlook the little things. Now when we were underneath our Tacoma we saw a couple of those things that might cause an issue. One of the first things we noticed right away was the radiator. [ mechanical humming ] Now we noticed when we were underneath the truck doing the suspension work that the very first thing that we might come in contact with if we ever got into a sticky situation would be the radiator, but we also noticed that underneath the truck, when we put our big axle underneath here, as that flexes out it may come in contact with the oil pan. So we're gonna get rid of this one and switch it out for something else. Plus it gives me a reason to drain the old oil out of this and put some fresh stuff in it. ♪ ♪ I'll use a 14 millimeter wrench to get the drain plug off. Once the oil's out we'll take the inspection cover off. And next is the oil pan. [ drill spinning ]
(Jeremy)>> We'll have to pry that off. That's kind of stuck up there. ♪ ♪ Now we went to Summit Racing dot com and picked up a kit to do the swap. Their kit includes a rear sump oil pan and a rear pickup tube. Now all we have to do is get all of this back up there. ♪ ♪ Gotta clean this up so I don't have an oil leak. ♪ ♪ [ drill spinning ] ♪ ♪
(Jeremy)>> That takes care of the bottom. Remember how we talked about the radiator in the truck being a little too long and it possibly coming in contact with some stuff when we're on the trail. Well we've got a solution for that as well. This is a radiator out of a two wheel drive Tacoma, and it's just a little bit shorter. Plus it comes with the brackets. So it'll be an easy swap. Now all we have to do is get rid of this one and put the shorter one in place. ♪ ♪ [ drill spinning ]
(Jeremy)>> Out with the old and in with the new. Now as long as I don't bend the fins. ♪ ♪ Well there you have it. Doing this swap we went from the radiator being way down below this big engine crossmember to up between the frame rails nice and safe, and that's gonna give us plenty of clearance, but before I go wash my hands I've got a couple of things I've got to button up. ♪ ♪
(Eliza)>> I'm sure you're wondering why we didn't four link the front end to begin with, and that's because a three link system is way more forgiving when it comes to things like belly clearance, such as your oil pan, steering, and exhaust.
(Jeremy)>> That's right. We made a pretty good dent in the Tacoma so far but there's still a lot of work to be done. If you guys are interested in this project or for any information about the parts we've used on this project you can go to our website at Powernation TV dot com and we'll see you guys next time.
(Eliza)>> Get the brackets on here.
Show Full Transcript
(Jeremy)>> Hey guys, welcome to XOR. Well today's a transition day here in the shop. We're stepping away from our Pre-runner Ranger and moving on to our Toyota Tacoma. Now these things were amazing from the factory and with their small size they make them great for the Jeep and side by side trails, and that's exactly where we're gonna take this one.
(Eliza)>> Because we wanted to keep close with the original track width of the Tacoma we have decided to go with a Dana 44. This allows us to continue on narrow trails but gives us enough strength up front to push 37's. We use Rock Auto for all of our Driveway Rescue parts because they have everything we need to get the job done. One thing you can order on Rock Auto are axle assemblies, and I think that they have just the thing that we need. This axle is a perfect fit for our Tacoma. It has close to the same track width and has a driver's side drop that we need to run the Tacoma's o-e drivetrain. Now you're wondering why a JK 44 rather than an old Wagoneer 44? Well it's getting harder to find Wagoneers, and with the amount of JK's on the road it's easier and more cost effective. Now this is the 44 that we just picked up. Originally it was intended for a JK Rubicon, but we're gonna get it fitted up with our Tacoma. Now it's time to get this baby cleaned up. I'm using the plasma cutter to make quick work of these brackets. I'm being extra careful not to blast through the housing and not to torch any of the sensors on the pumpkin. Then I'm using a flap disc on our grinder to create a good, level foundation for our new three link bracket.
(Jeremy)>> Now with Eliza working on the front end I'm gonna go ahead and get started here on the back, but we're not replacing this whole thing. Just gonna replace some of the meat and potatoes that are found inside. Plus I'm gonna be doing some suspension work. So instead of working on this underneath the truck I'm just gonna pull everything down. The previous owner of this truck had made some upgrades to the rear suspension. And so there's some parts and pieces that we're gonna have to make disappear for now, like the aftermarket bump stops and the limit straps. And since our Toyota comes with its own E-locker we've got to disconnect the wires for that. Best thing about having a ton of different tools in the shop is that you can use them for a lot of different purposes. Kinda like the transmission jack. Now we use the trans jack to put a little bit of pressure on the differential so I can get the U-bolts free. Right there. With the axle supported we'll remove the U-bolt... ♪ ♪ ...and the spring plates that hold the axle in place. Getting rid of the springs is the last of the old suspension on our Tacoma. ♪ ♪ From here it's a whole bunch of new parts to get this thing sitting pretty. Somebody already did a leaf spring swap to this truck. These are 64 inch Chevy leaf springs that we picked up from Summit Racing dot com, and luckily the brackets are already in place. [ metal clanging ]
(Eliza)>> If you have an older Dana 44 you have a couple of options when it comes to locking in power to both of your wheels. One of those options is Eaton's E-locker. This is an electromagnetic locker that engages a mechanism to lock both of your axle shafts so that there is equal distribution of horsepower and torque, which means more fun climbing obstacles and less time sitting in the bypass trail. This locker comes in a variety of spline counts and can be used in both front and rear axle assemblies. Now this came in a cool kit that provides everything that you need for the install. Now we got lucky that our axle came in locked from the factory, and all I've got to do is swap out gear sets. We'll start by removing the 10 bolts on the cover, break the seal, and pop the cover off. I'll quickly mark the carrier caps and bolts, unscrew them, and remove them. There we go. Since the 44 is equipped with an electronic locker we'll unclip the harness. Then remove the carrier. Then we'll remove the axle locker sensor, followed by unbolting the yoke and pinion, and I'll tap the pinion free. Next I'm bolting a new ring gear to the carrier, and I'll throw in a matching pinion. Then I'll check the backlash. So we're about 15 thousandths. We're off just a little bit. That means that the carrier is too far away from the pinion. The only way to correct that is to subtract shims from this side and add them to this side so we can move the full carrier over. Now that I'm within seven thousandths of an inch for backlash I can check my pattern. I'll apply yellow paint to a section of the ring gear and give it a full rotation. ♪ ♪ According to this our pinion is too close. Okay so we took a little too much off of this side. So we're gonna go ahead and add some back and subtract some here to get us right where we need to be. These are the ones I need. Okay let's check this one more time. Alright perfect! Now that I know what pinion and carrier shims I need, all that's left to do is yank it out and get it ready for final assembly.
(Narrator)>> Up next, when things get awkward just make a tool. We'll show you how. Stay tuned on XOR.
(Jeremy)>> Man this thing's gonna work great under our Tacoma.
(Eliza)>> It is. With the front axle re-geared it is time to focus on the rear axle, and while the internals may be the same the way that they disassemble and reassemble are completely different.
(Jeremy)>> That's right. Our Dana 44 is a standard style axle or an integral style axle, and that means that the carrier is a major piece of the assembly versus our Toyota Tacoma axle. This is kind of a drop out style axle, and it's got one really unique feature. To work on everything inside you take the whole center section completely out. I'll start by removing the caliper bracket, rotor. Then remove the axle shaft. Next I'll remove the stock E-locker motor. With a little bit of elbow grease it's removed. Now I've just got to flip this lever over so I can get the third member out. Then I'll remove the nuts that hold the carrier onto the housing, and using some pry bars to get the carrier free from the housing the whole thing comes out in one heavy piece. Now there's definitely an upside to being able to remove this entire center section. It makes it way easier to set it up and to work on the internals. Plus you can move it around the bench if you want to. And I'll show you guys a cool little way to make a tool out of a pattern that I already made to make a stand that'll hold it either in the bench vice or on a rolling engine stand, but first I've got to trace some holes. Tracing the pattern onto a piece of quarter inch steel, I'll use a punch to transfer the mounting holes. Using our trusted Lincoln plasma torch I'll cut out the inside first. Then I'll move on to the outside. After hitting the edges with a grinder and a flap wheel to get rid of the burrs I'll head over to the Edwards Iron Working to punch out the mounting hole. I'll cut a piece of pipe that will fit in our engine stand. All that's left is to weld the two pieces together and bolt it on. [ welder crackling ]
(Jeremy)>> Now with these two pieces welded together all I've got to do is put it on our center section and then put the whole thing in our rolling engine stand. So the next step is to simply just bolt this up. ♪ ♪ With it on the stand we'll get right to work. Removing the adjusting nut retainer... [ drill spinning ] ...the bearing caps, and the whole differential. I'll remove the pinion nut and tap off the pinion flange itself. With some hefty love taps the pinion is removed, along with the pinion seal, and one of the two pinion bearings. All we're doing in the rear is a gear change, but I'll replace all the bearings while I'm at it. So to prep I'll remove all the bolts from the ring gear and slowly work it off. Woo! Then it's a trip over to the press to change out the bearings. And then move on to removing the bearings from the pinion. Now we're not reusing the pinion but I do need to re-measure the shim that's under the bearing, and that's about 75 thousandths. Using the same shim I'll press the new bearing on the new pinion. Then I'll press a new bearing on the carrier. So to do that we took the inside of the old bearing and ground it down so it fits loosely on the differential. So we can use this piece to press on the new bearing. ♪ ♪ I'll flip the carrier over and press on the other bearing. Now for the ring gear. I'll torque it down to 71 foot pounds in a cross pattern. Then I'll need to muscle in the two races for the pinion. With the last race going in we can start reassembly. We'll begin with the pinion. Okay so now we'll slide on a mock up bearing, oil slinger, and the pinion flange, and pinion nut. Then we'll just tighten this down until it's just barely snug. ♪ ♪ I'll set the whole assembly back in, and add the bearing caps, and just snug them up slightly. Then I'll adjust the ring gear towards the pinion and check it with a dial indicator. That's about five thousandths, which is too tight. So what I'm gonna do is loosen the nut on this side, which is gonna drive the gear back this direction. Pull it away from the pinion until I get my exact measurement, and then I'll come over and tighten this side up and we should be perfect. With a slight turn, then we'll just recheck it and there we go. Pretty close to eight. Well there you have it. Now I've shown you the major differences between this Toyota rear axle and our Dana 44 front axle. Now all I have to do is paint the teeth and check my pattern just like Eliza did, and the next time you guys see this it'll be all assembled and back in the truck.
(Narrator)>> Got a weak frame? We'll show you how to stiffen up that chassis so it can take the abuse coming up on XOR.
(Eliza)>> Just gotta clean all this up so that we can get those frame plates installed.
(Jeremy)>> Yeah I've got to do the same thing on this side. Well both of our axles are buttoned up and the rear is sitting pretty underneath our Tacoma, and that means it's time to move on to the three link setup.
(Eliza)>> That's right, all of our hard work is about to payoff. We just got this kit in from All Pro Suspension and it comes with all the brackets necessary to complete our solid front axle swap. It even comes with frame plates to make sure that our frame doesn't buckle or crack as our suspension articulates.
(Jeremy)>> That's right. We've got a lot of welding to do, but first we better go back and prep for those frame plates. [ metal grinding ]
(Jeremy)>> To kick off the build we'll need to get the frame rails nice and clean. So a four inch grinder and an 80 grit flap wheel makes short work of that. We'll hold the plates on with some of my favorite shop tools to get it aligned just right. To make our plates a permanent part of our Tacoma we'll grab our Lincoln Electric Power Mig 260. After a flick of the on switch we'll use their Ready, Set, Weld feature to get started. Just tell the machine your process, wire size, gas, and material thickness. ♪ ♪ Then just pull the trigger. Once you're welding you can make those fine tune adjustments, like cranking up your wire speed when you're welding vertically, or your amperage when you want just a little more penetration. And with its built in memory if you take a break from the project your settings will be stored so you can get right back to work. After we've laid down some beads we'll move on to the mounts that are gonna keep this thing running in a street line. [ welder crackling ]
(Jeremy)>> Ooh, that's hot!
(Eliza)>> We're changing our steering system from a rack and pinion over to a gear box and parallelogram setup, and we're doing that because we needed a beefier setup to accommodate for heavier tires as well as longer suspension travel for our solid axle. And it is easier to visually inspect and repair out on the trail. Now all we've got to do is get this guy up there. All Pro made this easy for us. The gearbox plates already come with the geometry figured and pre-drilled holes for our install. It's as simple as bolting it in. [ drill spinning ]
(Eliza)>> And now the Tacoma is one step closer to being trail ready.
(Narrator)>> Next we'll make room for some much needed linkage under our Tacoma's chassis, coming up on XOR!
(Jeremy)>> We've got our frame plates burned in, and we ditched our rack and pinion steering for a gearbox setup.
(Eliza)>> One of the benefits of having a rack and pinion is that there is hardly any stress on the frame, but we've moved over to a gearbox. So we're gonna go ahead and add this crossmember so that we don't have any buckle or flex in our frame. Our crossmember is tacked in and I will get it finalized once we know all of our modifications are good to go.
(Jeremy)>> With the front buttoned up and the crossmember in it's time to move towards the back of the truck, and that means getting rid of this crossmember because it's time to move on to the meat and potatoes of this build, and that's the big link brackets. With the transmission and transfer case supported I'll remove the bolts that hold it all in, and they may be a little tough to get out. ♪ ♪ With the help of a pry bar. That's really in there. That hasn't been out in a while. We'll crank up the acetylene torch and start by cutting the mount off the passenger side. Be sure not to cut into the frame while you're doing this, but if you do just make sure you weld that right back up. We were super careful cutting this piece off, and it came off nice and clean. With a little help from camera guy Rob I'll grab the grinder and get to grinding cause we'll need the chassis nice and flat for the new bracket. And with that all done all I've got to do is pull a measurement. ♪ ♪ We'll hold the brackets up on our newly marked line and just tack it into place for right now. [ welder crackling ]
(Jeremy)>> Then I'll move over to the other side. [ welder crackling ]
(Eliza)>> Now that Jeremy's got the brackets mocked up on the truck I'm assembling the lower control arms. Each arm comes with a left and right turn Johnny joint, and that's so that we can adjust for the best off road handling. Now let's get this guy on the truck. These slip in fairly easy, and they just bolt right in. Where leaving the links loose because we will have some adjustments and cycling going on for a proper fitment. Also make sure that you have the correct hardware on your links. You want a very snug fit to prevent any play or ovaling of the bolt holes and your brackets. ♪ ♪
(Jeremy)>> Alright guys, now you've spent a lot of time and money building up your project and you're getting really close to hitting the trails, but with all of your excitement don't overlook the little things. Now when we were underneath our Tacoma we saw a couple of those things that might cause an issue. One of the first things we noticed right away was the radiator. [ mechanical humming ] Now we noticed when we were underneath the truck doing the suspension work that the very first thing that we might come in contact with if we ever got into a sticky situation would be the radiator, but we also noticed that underneath the truck, when we put our big axle underneath here, as that flexes out it may come in contact with the oil pan. So we're gonna get rid of this one and switch it out for something else. Plus it gives me a reason to drain the old oil out of this and put some fresh stuff in it. ♪ ♪ I'll use a 14 millimeter wrench to get the drain plug off. Once the oil's out we'll take the inspection cover off. And next is the oil pan. [ drill spinning ]
(Jeremy)>> We'll have to pry that off. That's kind of stuck up there. ♪ ♪ Now we went to Summit Racing dot com and picked up a kit to do the swap. Their kit includes a rear sump oil pan and a rear pickup tube. Now all we have to do is get all of this back up there. ♪ ♪ Gotta clean this up so I don't have an oil leak. ♪ ♪ [ drill spinning ] ♪ ♪
(Jeremy)>> That takes care of the bottom. Remember how we talked about the radiator in the truck being a little too long and it possibly coming in contact with some stuff when we're on the trail. Well we've got a solution for that as well. This is a radiator out of a two wheel drive Tacoma, and it's just a little bit shorter. Plus it comes with the brackets. So it'll be an easy swap. Now all we have to do is get rid of this one and put the shorter one in place. ♪ ♪ [ drill spinning ]
(Jeremy)>> Out with the old and in with the new. Now as long as I don't bend the fins. ♪ ♪ Well there you have it. Doing this swap we went from the radiator being way down below this big engine crossmember to up between the frame rails nice and safe, and that's gonna give us plenty of clearance, but before I go wash my hands I've got a couple of things I've got to button up. ♪ ♪
(Eliza)>> I'm sure you're wondering why we didn't four link the front end to begin with, and that's because a three link system is way more forgiving when it comes to things like belly clearance, such as your oil pan, steering, and exhaust.
(Jeremy)>> That's right. We made a pretty good dent in the Tacoma so far but there's still a lot of work to be done. If you guys are interested in this project or for any information about the parts we've used on this project you can go to our website at Powernation TV dot com and we'll see you guys next time.
(Eliza)>> Get the brackets on here.
